MERCEDES-BENZ C320 WAGON 2002 S203 Owner's Manual
Manufacturer: MERCEDES-BENZ, Model Year: 2002, Model line: C320 WAGON, Model: MERCEDES-BENZ C320 WAGON 2002 S203Pages: 390
Page 301 of 390
298 Malfunction and warning messages
Te ch n i c a l
data Instruments
and controlsOperation DrivingInstrument
cluster displayPractical hints Car care Index
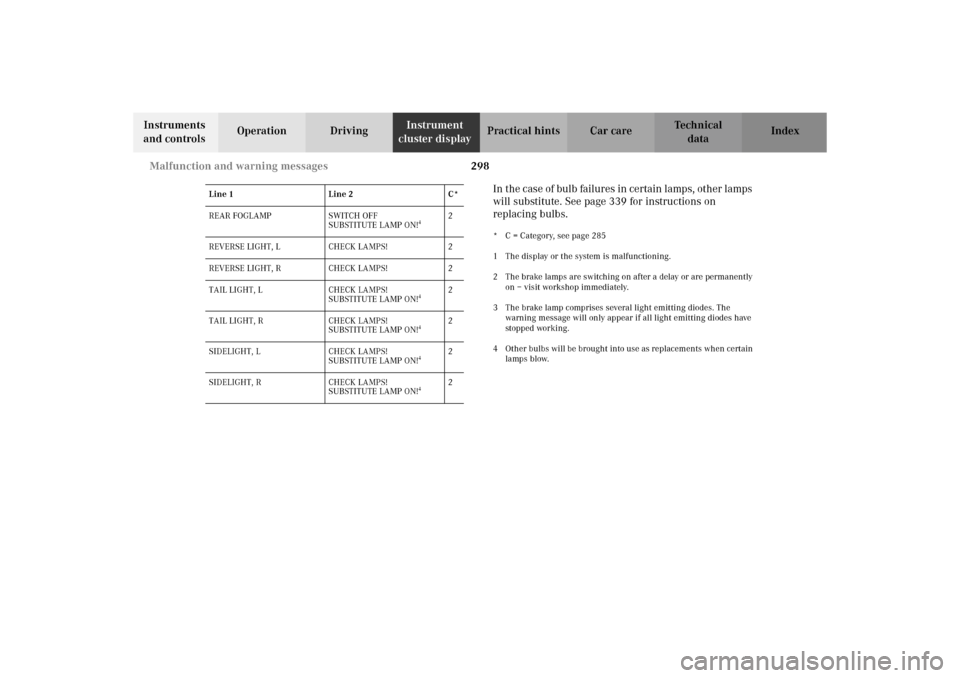
In t he c as e of bulb failur es in ce rtain lamp s, ot her lamps
will substitute. See page 339 for instructions on
replacing bulbs.
* C = Category, see page 285
1 The display or the system is malfunctioning.
2 The brake lamps are switching on after a delay or are permanently
on – visit workshop immediately.
3 The brake lamp comprises several light emitting diodes. The
warning message will only appear if all light emitting diodes have
stopped working.
4 Other bulbs will be brought into use as replacements when certain
lamps blow. REAR FOGLAMP SWITCH OFF
SUBSTITUTE LAMP ON!
4
2
REVERSE LIGHT, L CHECK LAMPS! 2
REVERSE LIGHT, R CHECK LAMPS! 2
TAIL LIGHT, L CHECK LAMPS!
SUBSTITUTE LAMP ON!
4
2
TAIL LIGHT, R CHECK LAMPS!
SUBSTITUTE LAMP ON!
4
2
SIDELIGHT, L CHECK LAMPS!
SUBSTITUTE LAMP ON!
4
2
SIDELIGHT, R CHECK LAMPS!
SUBSTITUTE LAMP ON!
4
2 Line 1 Line 2 C*
S203.book Seite 298 Freitag, 19. Oktober 2001 1:25 13
Page 302 of 390
299 Malfunction and warning messages
Te ch n i c a l
data Instruments
and controlsOperation DrivingInstrument
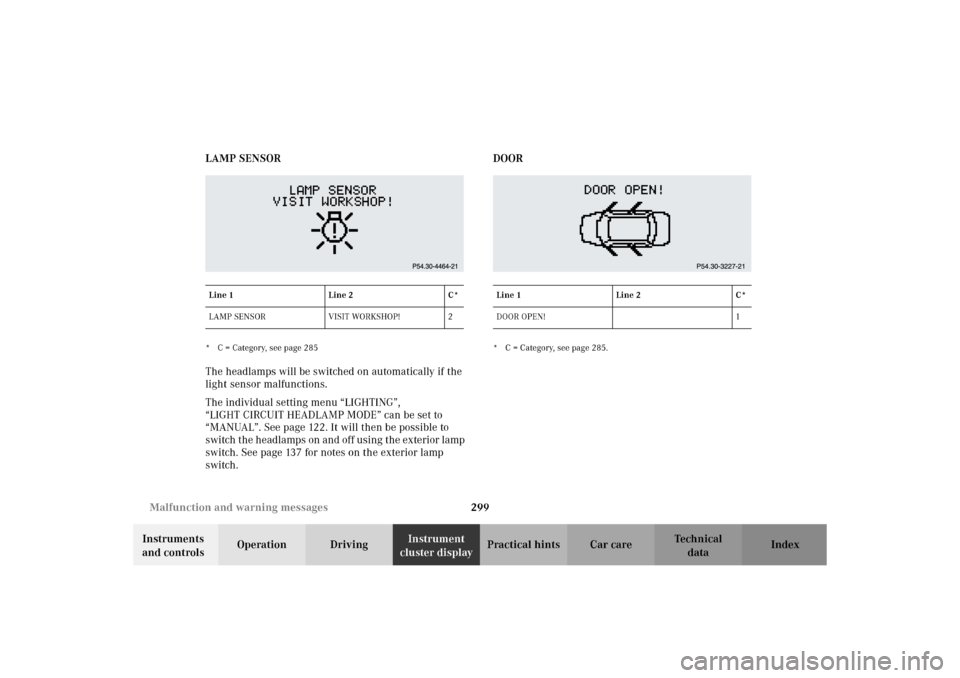
cluster displayPractical hints Car care Index LAMP SENSOR
* C = Category, see page 285The headlamps will be switched on automatically if the
light sensor malfunctions.
The individual setting menu “LIGHTING”,
“LIGHT CIRCUIT HEADLAMP MODE” can be set to
“MANUAL”. See page 122. It will then be possible to
s witch t he he ad lamp s on and of f us ing t he ex te rior lamp
switch. See page 137 for notes on the exterior lamp
switch. DOOR
* C = Category, see page 285. Line 1 Line 2 C*
LAMP SENSOR VISIT WORKSHOP! 2Line 1 Line 2 C*
DOOR OPEN! 1
S203.book Seite 299 Freitag, 19. Oktober 2001 1:25 13
Page 303 of 390
300 Malfunction and warning messages
Te ch n i c a l
data Instruments
and controlsOperation DrivingInstrument
cluster displayPractical hints Car care Index
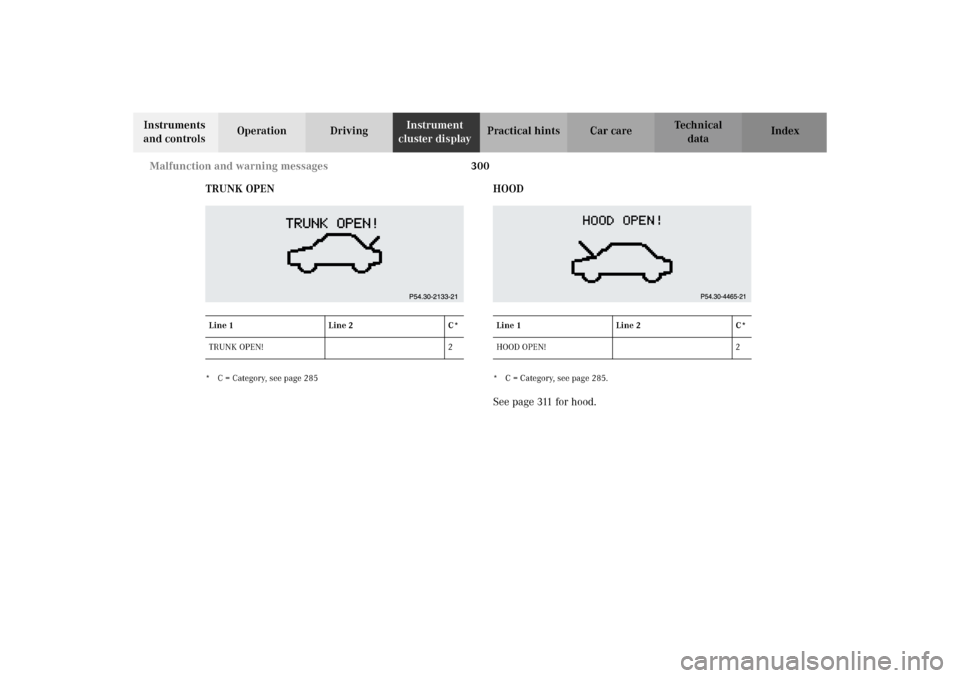
TRUNK OPEN
* C = Category, see page 285
HOOD* C = Category, see page 285.See page 311 for hood.
Line 1 Line 2 C*
TRUNK OPEN! 2
Line 1 Line 2 C*
HOOD OPEN! 2
S203.book Seite 300 Freitag, 19. Oktober 2001 1:25 13
Page 304 of 390
301 Malfunction and warning messages
Te ch n i c a l
data Instruments
and controlsOperation DrivingInstrument
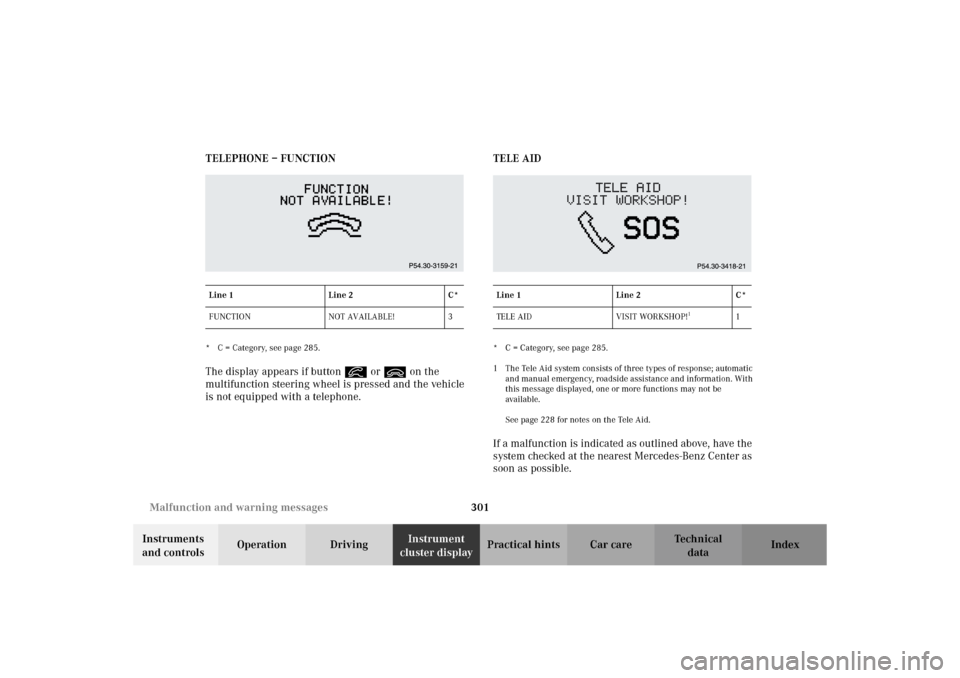
cluster displayPractical hints Car care Index TELEPHONE – FUNCTION
* C = Category, see page 285.The display appears if button í or ì on the
multifunction steering wheel is pressed and the vehicle
is not equipped with a telephone.TELE AID
* C = Category, see page 285.
1 The Tele Aid system consists of three types of response; automatic
and manual emergency, roadside assistance and information. With
this message displayed, one or more functions may not be
available.
See page 228 for notes on the Tele Aid.If a malfunction is indicated as outlined above, have the
system checked at the nearest Mercedes-Benz Center as
soon as possible.
Line 1 Line 2 C*
FUNCTION NOT AVAILABLE! 3
Line 1 Line 2 C*
TE L E A I D V I S I T WO R KS H O P !
1
1
S203.book Seite 301 Freitag, 19. Oktober 2001 1:25 13
Page 305 of 390
302 Malfunction and warning messages
Te ch n i c a l
data Instruments
and controlsOperation DrivingInstrument
cluster displayPractical hints Car care Index
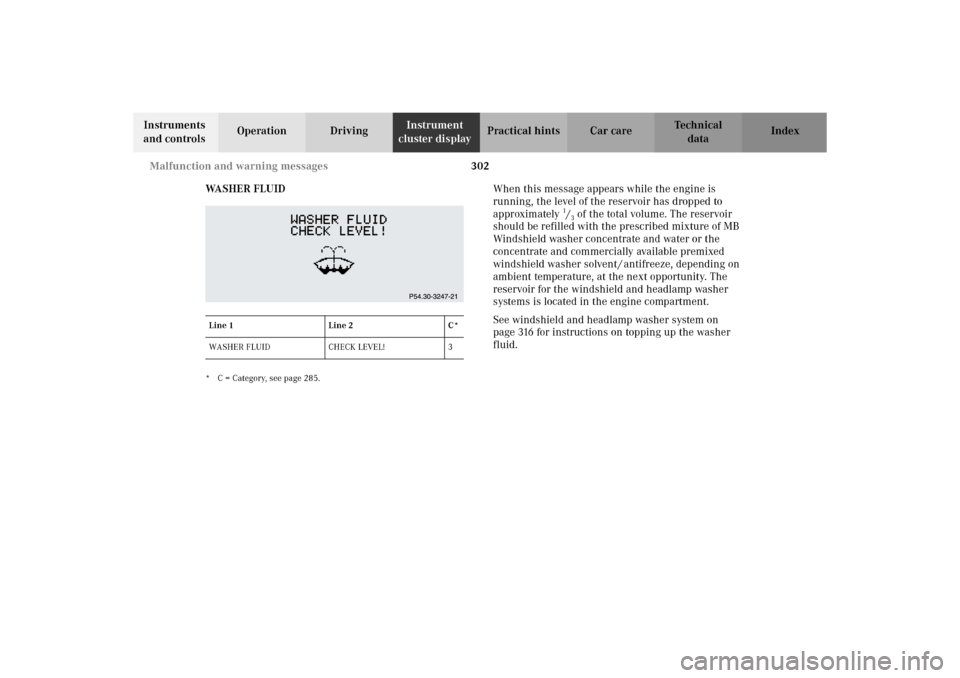
WA S H E R F L U I D
* C = Category, see page 285.
When this message appears while the engine is
running, the level of the reservoir has dropped to
approximately
1/3 of the total volume. The reservoir
should be refilled with the prescribed mixture of MB
Windshield washer concentrate and water or the
concentrate and commercially available premixed
windshield washer solvent / antifreeze, depending on
ambient temperature, at the next opportunity. The
reservoir for the windshield and headlamp washer
systems is located in the engine compartment.
See windshield and headlamp washer system on
page 316 for instructions on topping up the washer
fluid.
Line 1 Line 2 C*
WASHER FLUID CHECK LEVEL! 3
S203.book Seite 302 Freitag, 19. Oktober 2001 1:25 13
Page 306 of 390
303 Malfunction and warning messages
Te ch n i c a l
data Instruments
and controlsOperation DrivingInstrument
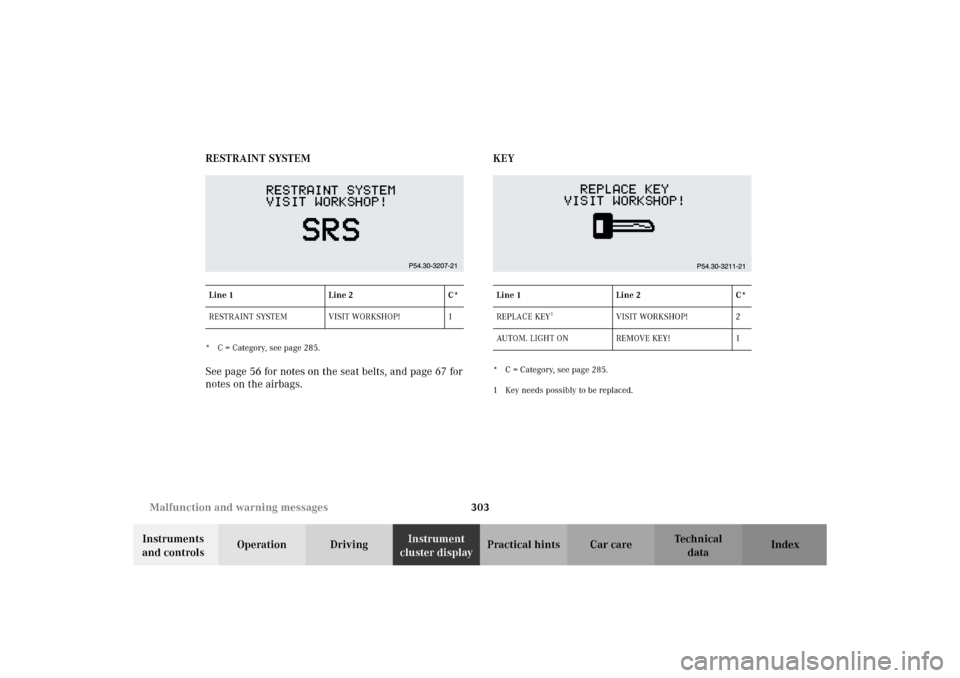
cluster displayPractical hints Car care Index RESTRAINT SYSTEM
* C = Category, see page 285.See page 56 for notes on the seat belts, and page 67 for
notes on the airbags.KEY
* C = Category, see page 285.
1 Key needs possibly to be replaced. Line 1 Line 2 C*
RESTRAINT SYSTEM VISIT WORKSHOP! 1Line 1 Line 2 C*
REPLACE KEY
1
VISIT WORKSHOP! 2
AUTOM. LIGHT ON REMOVE KEY! 1
S203.book Seite 303 Freitag, 19. Oktober 2001 1:25 13
Page 307 of 390
304 Malfunction and warning messages
Te ch n i c a l
data Instruments
and controlsOperation DrivingInstrument
cluster displayPractical hints Car care Index
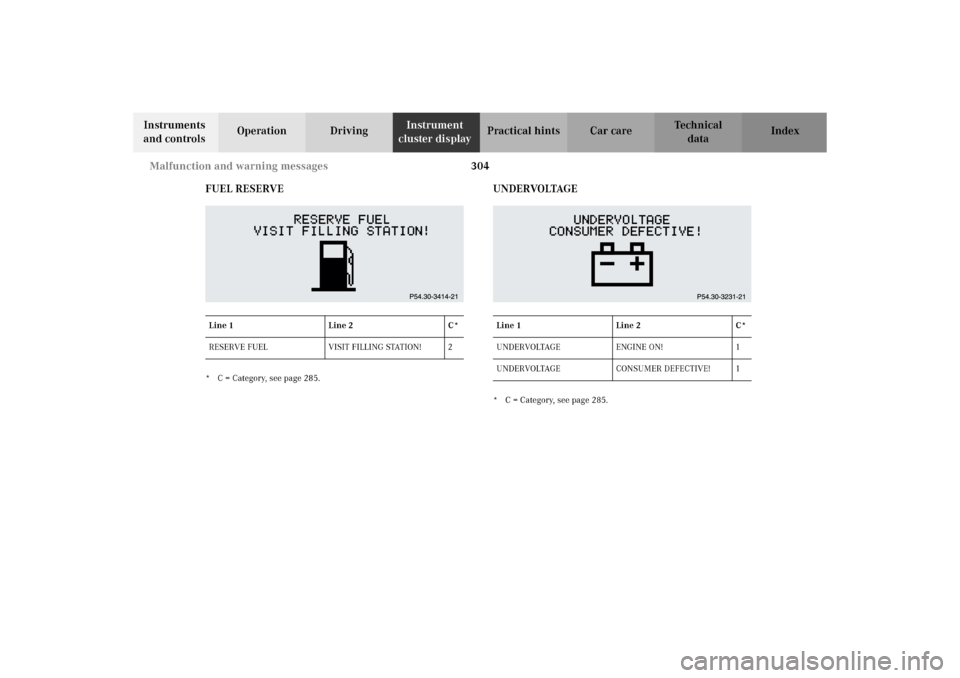
FUEL RESERVE
* C = Category, see page 285.
UNDERVOLTAGE* C = Category, see page 285. Line 1 Line 2 C*
RESERVE FUEL VISIT FILLING STATION! 2Line 1 Line 2 C*
UNDERVOLTAGE ENGINE ON! 1
UNDERVOLTAGE CONSUMER DEFECTIVE! 1
S203.book Seite 304 Freitag, 19. Oktober 2001 1:25 13
Page 308 of 390
305 Contents - Practical hints
Te ch n i c a l
data Instruments
and controlsOperation DrivingInstrument
cluster displayPractical hintsCar care Index
Practical hintsFirst aid kit .....................................306
Stowing things in the vehicle ......307
Fuses ................................................307
Hood ................................................. 311
Adding engine oil .......................... 314
Automatic transmission
fluid level ................................... 315
Coolant level ................................... 315
Adding coolant ........................... 316
Windshield and headlamp
washer system ........................... 316Spare wheel,
storage compartment ................ 318
Vehicle tools .................................... 319
Vehicle jack .................................... 320
Wheels ............................................ 321
Tire replacement ....................... 321
Rotating wheels ......................... 322
Spare wheel .................................... 323
Spare wheel bolts ...................... 323
Changing wheels ........................... 324
Tire inflation pressure ................. 329
Battery ............................................. 330
Jump starting ................................. 332Towing the vehicle .........................335
Transmission selector lever,
manually unlocking ...................338
Exterior lamps ................................339
Replacing bulbs ..........................339
Standby bulb function ...................345
Changing batteries in the
electronic main key ..................346
Synchronizing
remote control ............................348
Emergency engine shut-down .....348
Fuel filler flap, manual release ...349
Replacing wiper blade insert ....... 351
Roof rack .........................................352
S203.book Seite 305 Freitag, 19. Oktober 2001 1:25 13
Page 309 of 390
306 First aid kit
Te ch n i c a l
data Instruments
and controlsOperation DrivingInstrument
cluster displayPractical hintsCar care Index
First aid kit
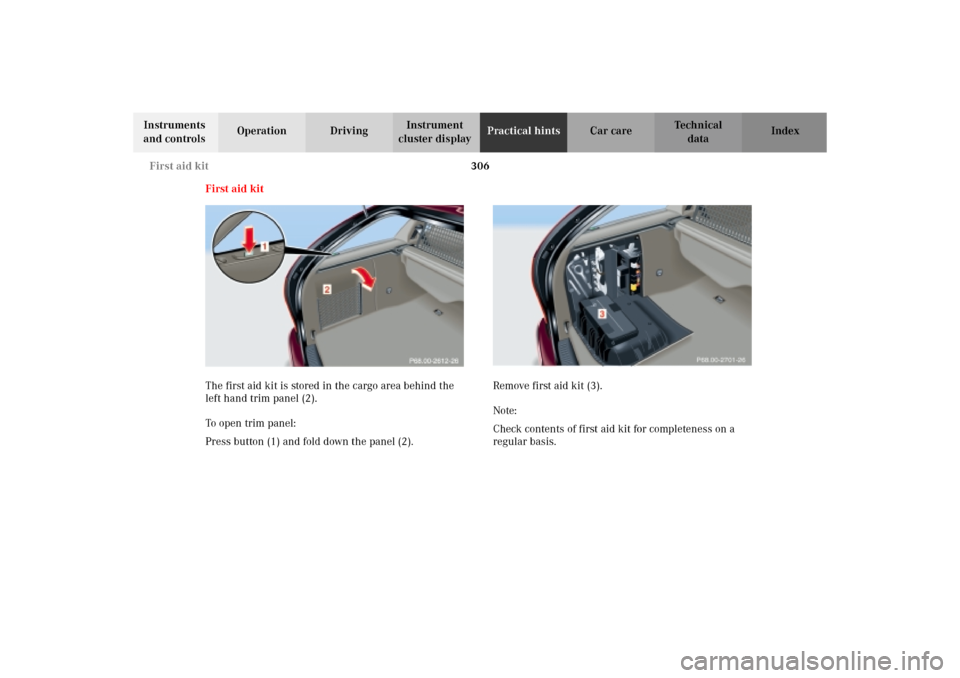
The first aid kit is stored in the cargo area behind the
left hand trim panel (2).
To open trim panel:
Press button (1) and fold down the panel (2).Remove first aid kit (3).
Note:
Check contents of first aid kit for completeness on a
regular basis.
S203.book Seite 306 Freitag, 19. Oktober 2001 1:25 13
Page 310 of 390
307 Fuses
Te ch n i c a l
data Instruments
and controlsOperation DrivingInstrument
cluster displayPractical hintsCar care Index Stowing things in the vehicle Fuses
Most of your vehicle’s electrical components are fused
wit h s afety f us es. Wit h t he exc eption o f t he b rake lights ,
all individual lighting system components are
electronically fused. Before replacing a blown safety
fuse, determine the cause of the short circuit. Always
observe amperage and color of fuse.
The circuit for components is protected by a cycled
circuit breaker interrupted if too much current is being
drawn. The circuit closes automatically after a short
time; the circuit is broken again if the malfunction
reoccurs.
Always use a n ew f use for r eplacem en t. Never attempt to
repair or bridge a blown fuse.
A fuse chart is located in fuse box (1).
Spare fuses and a special fuse puller are stored with the
tool kit, see page 319.
Wa r n i n g !
To help avoid personal injury during a collision or
sudden maneuver, exercise care when stowing
things. Put luggage or cargo in the trunk if
possible. Do not pile luggage or cargo higher than
the seat backs.Always use partition net when transporting cargo.
Partition net cannot secure hard or heavy objects.
S203.book Seite 307 Freitag, 19. Oktober 2001 1:25 13