lock MERCEDES-BENZ CL-Class 2002 C215 Comand Manual
[x] Cancel search | Manufacturer: MERCEDES-BENZ, Model Year: 2002, Model line: CL-Class, Model: MERCEDES-BENZ CL-Class 2002 C215Pages: 251
Page 102 of 251
100 Telephone
AudioTelephoneNavigation
Index Info Services and
system settings Introduction
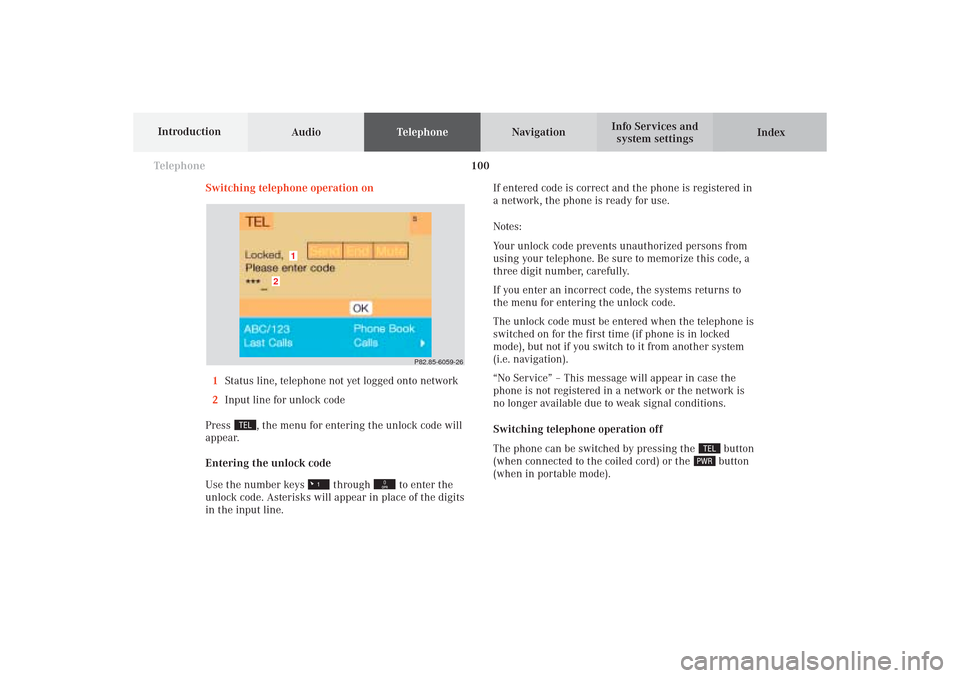
Switching telephone operation on
1Status line, telephone not yet logged onto network
2Input line for unlock code
Press
, the menu for entering the unlock code will
appear.
Entering the unlock code
Use the number keys
through
to enter the
unlock code. Asterisks will appear in place of the digits
in the input line.If entered code is correct and the phone is registered in
a network, the phone is ready for use.
Notes:
Your unlock code prevents unauthorized persons from
using your telephone. Be sure to memorize this code, a
three digit number, carefully.
If you enter an incorrect code, the systems returns to
the menu for entering the unlock code.
The unlock code must be entered when the telephone is
switched on for the first time (if phone is in locked
mode), but not if you switch to it from another system
(i.e. navigation).
“No Service” – This message will appear in case the
phone is not registered in a network or the network is
no longer available due to weak signal conditions.
Switching telephone operation off
The phone can be switched by pressing the
button
(when connected to the coiled cord) or the button
(when in portable mode).
P82.85-6059-26
2
1
08-TELEFON-25-US.pm509.07.2004, 14:20 Uhr 100
Page 111 of 251
Telephone
Telephone109
Introduction
AudioTelephone
Navigation
Index Info Services and
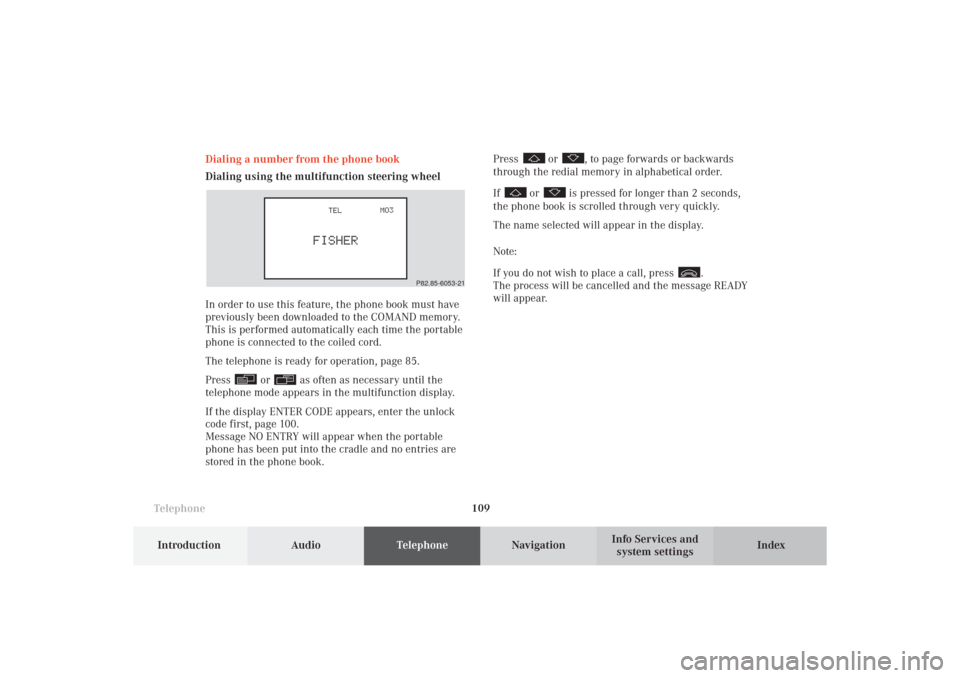
system settings Dialing a number from the phone book
Dialing using the multifunction steering wheel
In order to use this feature, the phone book must have
previously been downloaded to the COMAND memory.
This is performed automatically each time the portable
phone is connected to the coiled cord.
The telephone is ready for operation, page 85.
Press
or
as often as necessary until the
telephone mode appears in the multifunction display.
If the display ENTER CODE appears, enter the unlock
code first, page 100.
Message NO ENTRY will appear when the portable
phone has been put into the cradle and no entries are
stored in the phone book.Press
or
, to page forwards or backwards
through the redial memory in alphabetical order.
If
or
is pressed for longer than 2 seconds,
the phone book is scrolled through very quickly.
The name selected will appear in the display.
Note:
If you do not wish to place a call, press
.
The process will be cancelled and the message READY
will appear.
P82.85-6053-21
08-TELEFON-25-US.pm509.07.2004, 14:21 Uhr 109
Page 138 of 251
136 Telephone
AudioTelephoneNavigation
Index Info Services and
system settings Introduction
Emergency call
Important!
If you enter “1” and press the rotary/pushbutton
,
the number stored in memory location 1 (default is
9-1-1) will be dialed.
Pressing or holding “1” longer than 2 seconds will also
initiate the call.
The 9-1-1 emergency call system is a public service.
Using it without due cause is a criminal offense.
You can make an emergency call to an emergency
rescue station with a mobile communications network.The emergency call will be placed as long as the
corresponding mobile communications network is
available. To do this, switch the telephone on, if you
have not already done so.
It will also be placed, if the unlock code is not entered.
Emergency calls may not be possible with all mobile
phone networks or if certain network services and/or
telephone functions are active. Check with your local
network operating company.
Note:
This function places a call to the local 9-1-1 provider. It
does not initiate a Tele Aid call.
08-TELEFON-25-US.pm509.07.2004, 14:24 Uhr 136
Page 140 of 251
138 Telephone
AudioTelephoneNavigation
Index Info Services and
system settings Introduction
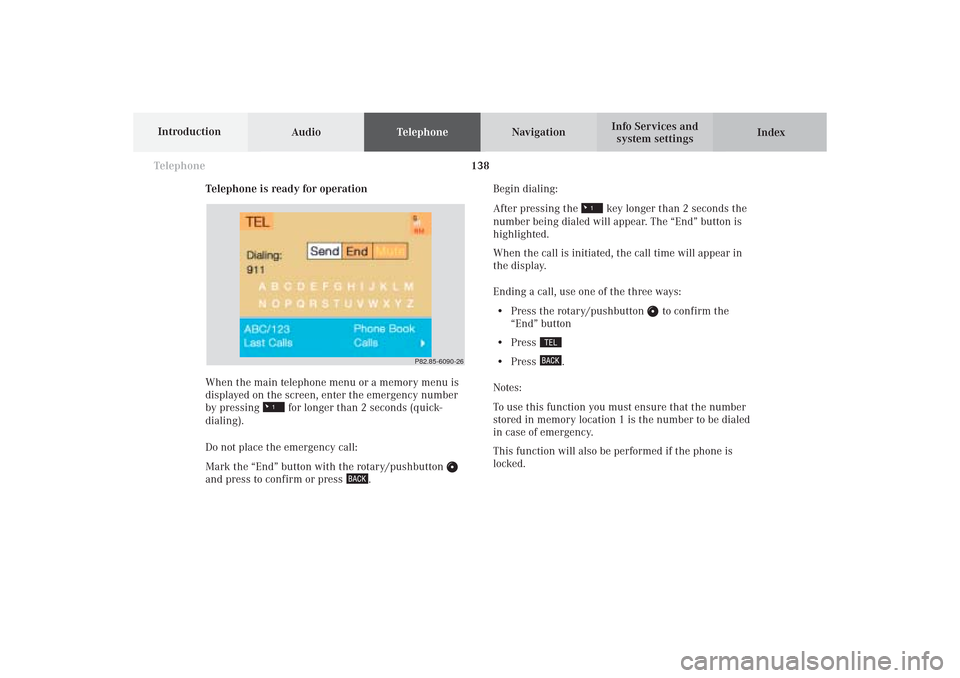
Telephone is ready for operation
When the main telephone menu or a memory menu is
displayed on the screen, enter the emergency number
by pressing for longer than 2 seconds (quick-
dialing).
Do not place the emergency call:
Mark the “End” button with the rotary/pushbutton
and press to confirm or press
.Begin dialing:
After pressing the
key longer than 2 seconds the
number being dialed will appear. The “End” button is
highlighted.
When the call is initiated, the call time will appear in
the display.
Ending a call, use one of the three ways:
• Press the rotary/pushbutton
to confirm the
“End” button
• Press
• Press
.
Notes:
To use this function you must ensure that the number
stored in memory location 1 is the number to be dialed
in case of emergency.
This function will also be performed if the phone is
locked.
P82.85-6090-26
08-TELEFON-25-US.pm509.07.2004, 14:24 Uhr 138
Page 164 of 251
162
Destination input
Audio TelephoneNavigation
Index Info Services and
system settings Introduction
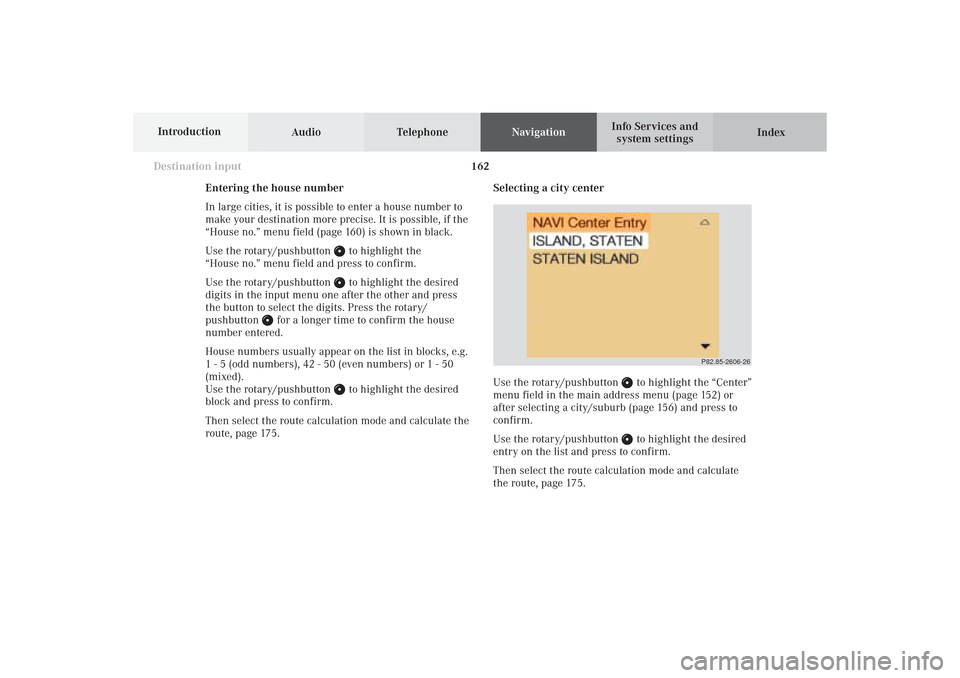
Selecting a city center
Use the rotary/pushbutton
to highlight the “Center”
menu field in the main address menu (page 152) or
after selecting a city/suburb (page 156) and press to
confirm.
Use the rotary/pushbutton to highlight the desired
entry on the list and press to confirm.
Then select the route calculation mode and calculate
the route, page 175.
P82.85-2606-26
Entering the house number
In large cities, it is possible to enter a house number to
make your destination more precise. It is possible, if the
“House no.” menu field (page 160) is shown in black.
Use the rotary/pushbutton
to highlight the
“House no.” menu field and press to confirm.
Use the rotary/pushbutton to highlight the desired
digits in the input menu one after the other and press
the button to select the digits. Press the rotary/
pushbutton
for a longer time to confirm the house
number entered.
House numbers usually appear on the list in blocks, e.g.
1 - 5 (odd numbers), 42 - 50 (even numbers) or 1 - 50
(mixed).
Use the rotary/pushbutton
to highlight the desired
block and press to confirm.
Then select the route calculation mode and calculate the
route, page 175.
09-NAVI1-25-US.pm509.07.2004, 14:26 Uhr 162
Page 204 of 251
Audio TelephoneNavigation
Index Info Services and
system settings Introduction
Route guidance
202
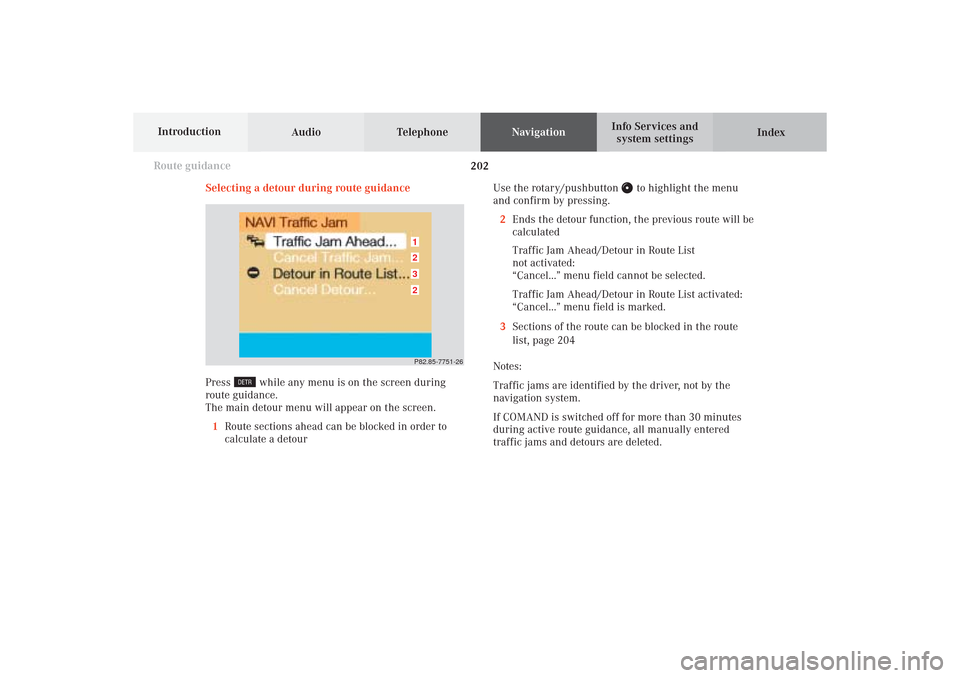
Selecting a detour during route guidance
Press
while any menu is on the screen during
route guidance.
The main detour menu will appear on the screen.
1Route sections ahead can be blocked in order to
calculate a detourUse the rotary/pushbutton
to highlight the menu
and confirm by pressing.
2Ends the detour function, the previous route will be
calculated
Traffic Jam Ahead/Detour in Route List
not activated:
“Cancel...” menu field cannot be selected.
Traffic Jam Ahead/Detour in Route List activated:
“Cancel...” menu field is marked.
3Sections of the route can be blocked in the route
list, page 204
Notes:
Traffic jams are identified by the driver, not by the
navigation system.
If COMAND is switched off for more than 30 minutes
during active route guidance, all manually entered
traffic jams and detours are deleted.
P82.85-7751-263212
10-NAVI2-25-US.pm517.10.2001, 10:43 Uhr 202
Page 205 of 251
203
Route guidance
Introduction
Audio Telephone
Navigation
Index Info Services and
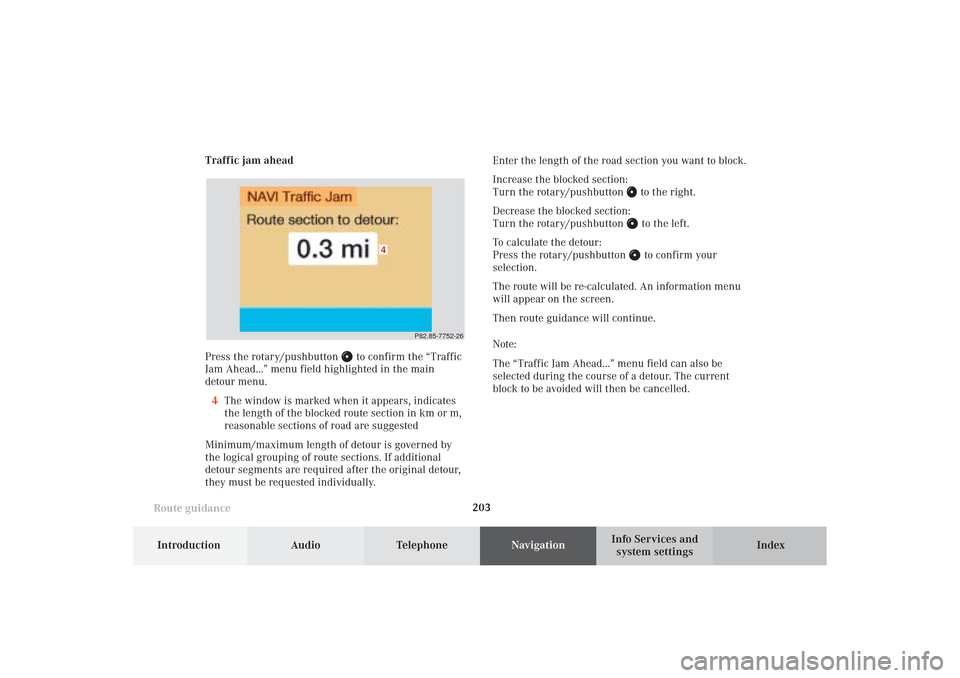
system settings Traffic jam ahead
Press the rotary/pushbutton
to confirm the “Traffic
Jam Ahead...” menu field highlighted in the main
detour menu.
4The window is marked when it appears, indicates
the length of the blocked route section in km or m,
reasonable sections of road are suggested
Minimum/maximum length of detour is governed by
the logical grouping of route sections. If additional
detour segments are required after the original detour,
they must be requested individually.Enter the length of the road section you want to block.
Increase the blocked section:
Turn the rotary/pushbutton
to the right.
Decrease the blocked section:
Turn the rotary/pushbutton to the left.
To calculate the detour:
Press the rotary/pushbutton to confirm your
selection.
The route will be re-calculated. An information menu
will appear on the screen.
Then route guidance will continue.
Note:
The “Traffic Jam Ahead...” menu field can also be
selected during the course of a detour. The current
block to be avoided will then be cancelled.
P82.85-7752-26
4
10-NAVI2-25-US.pm517.10.2001, 10:43 Uhr 203
Page 206 of 251
Audio TelephoneNavigation
Index Info Services and
system settings Introduction
Route guidance
204
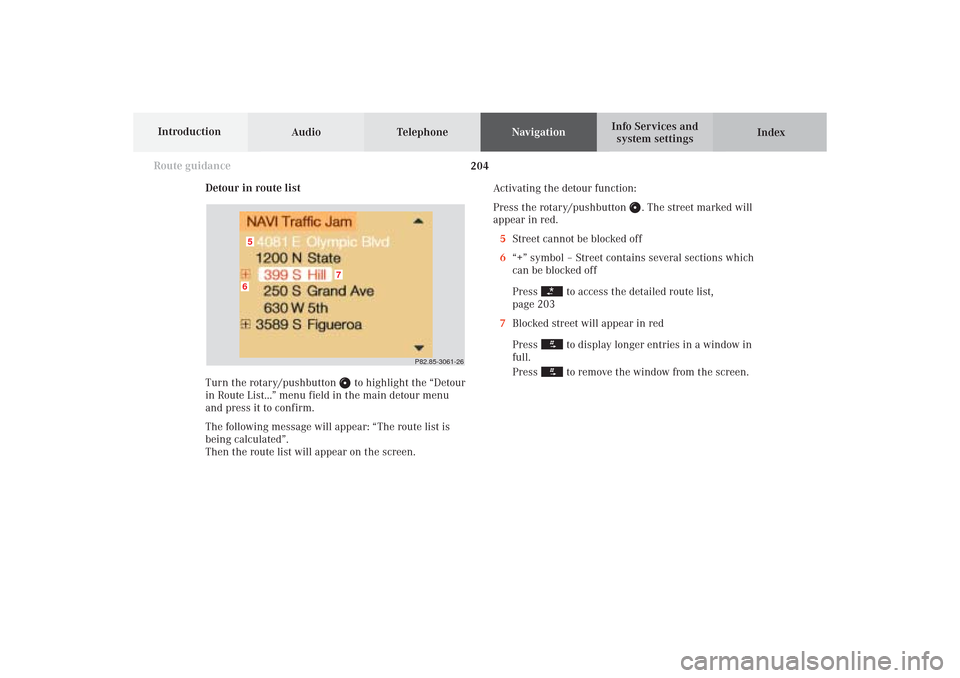
Detour in route list
Turn the rotary/pushbutton
to highlight the “Detour
in Route List...” menu field in the main detour menu
and press it to confirm.
The following message will appear: “The route list is
being calculated”.
Then the route list will appear on the screen.Activating the detour function:
Press the rotary/pushbutton
. The street marked will
appear in red.
5Street cannot be blocked off
6“+” symbol – Street contains several sections which
can be blocked off
Press
to access the detailed route list,
page 203
7Blocked street will appear in red
Press to display longer entries in a window in
full.
Press to remove the window from the screen.
P82.85-3061-26
6
7
5
10-NAVI2-25-US.pm517.10.2001, 10:43 Uhr 204
Page 207 of 251
205
Route guidance
Introduction
Audio Telephone
Navigation
Index Info Services and
system settings
P82.85-3062-26
8
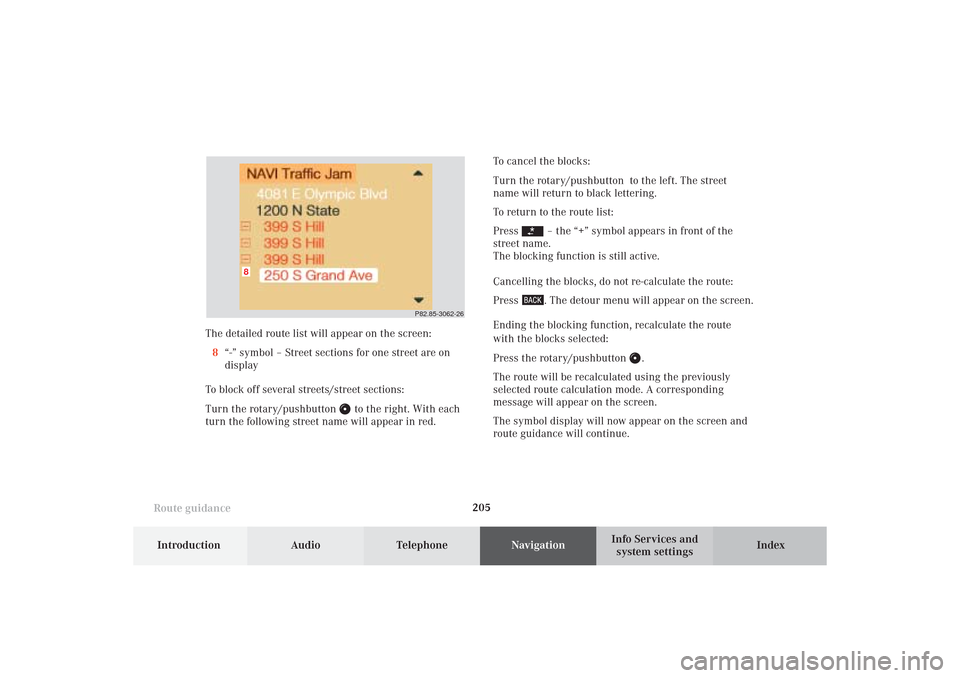
The detailed route list will appear on the screen:
8“-” symbol – Street sections for one street are on
display
To block off several streets/street sections:
Turn the rotary/pushbutton
to the right. With each
turn the following street name will appear in red.To cancel the blocks:
Turn the rotary/pushbutton to the left. The street
name will return to black lettering.
To return to the route list:
Press
– the “+” symbol appears in front of the
street name.
The blocking function is still active.
Cancelling the blocks, do not re-calculate the route:
Press . The detour menu will appear on the screen.
Ending the blocking function, recalculate the route
with the blocks selected:
Press the rotary/pushbutton
.
The route will be recalculated using the previously
selected route calculation mode. A corresponding
message will appear on the screen.
The symbol display will now appear on the screen and
route guidance will continue.
10-NAVI2-25-US.pm517.10.2001, 10:43 Uhr 205
Page 229 of 251
System settings227Introduction
Audio Telephone
Navigation
Index Info Services and
system settings Activating the main system settings menu
Press
in any menu.
The main service menu will appear.
Use the rotary/pushbutton
to highlight the “System
Settings” menu field and press to confirm.
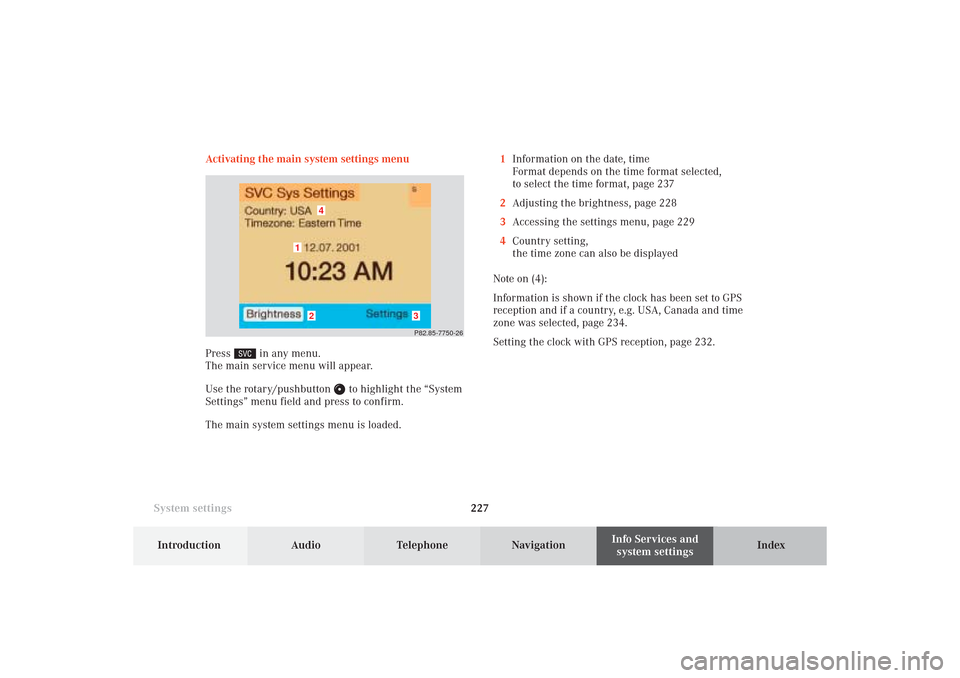
The main system settings menu is loaded.1Information on the date, time
Format depends on the time format selected,
to select the time format, page 237
2Adjusting the brightness, page 228
3Accessing the settings menu, page 229
4Country setting,
the time zone can also be displayed
Note on (4):
Information is shown if the clock has been set to GPS
reception and if a country, e.g. USA, Canada and time
zone was selected, page 234.
Setting the clock with GPS reception, page 232.
P82.85-7750-26
4
3
2
1
12-System-25-US.pm517.10.2001, 11:06 Uhr 227