ECO mode MERCEDES-BENZ CL-Class 2002 C215 Comand Manual
[x] Cancel search | Manufacturer: MERCEDES-BENZ, Model Year: 2002, Model line: CL-Class, Model: MERCEDES-BENZ CL-Class 2002 C215Pages: 251
Page 6 of 251
IntroductionIntroductionTelephoneNavigation
Index AudioInfo Services and
system settings
4Contents
Overview of the
Multifunction displays ................. 95
Quick reference – Telephone ....... 96
Menu overview – Telephone ....... 98
Switching telephone
operation on ................................. 100
Incoming calls .............................. 102
Outgoing calls .............................. 106
Dialing a telephone number ...... 106
Dialing a number from the
phone book ................................... 109
Redial ............................................. 116
Dialing from calls list ................. 120
Speed-dialing (only with
COMAND) ..................................... 121
Quick-dialing (for the first 10
memory locations) ...................... 123
Notebook ....................................... 124
Editing the phone book .............. 125
SMS function ................................ 132
Emergency call ............................ 136
Service numbers ......................... 139 Fast forward / fast backward ....... 69
CD track scan ................................. 70
Entering, altering and
deleting CD names ........................ 71
Selecting playback mode ............. 74
CD playback mute ......................... 76
Error messages .............................. 77
Tips on caring for your CD’s ........ 79
Multifunction steering wheel,
Multifunction display ................... 82
Sound settings .................................. 83
Adjust sound settings ................... 83
TelephoneContents – Telephone ..................... 91
Telephone .......................................... 92
Before you use the telephone ...... 92
Multifunction steering wheel,
Multifunction display ................... 94
NavigationContents - Navigation .................... 142
Notes ................................................ 144
Before you use
the navigation system ................ 144
Navigation ....................................... 146
Quick reference – Navigation .... 146
Switching the navigation
system on ...................................... 148
Changing the Navigation CD ..... 149
Destination entry ........................... 150
Menu overview –
Destination entry ........................ 150
Entering destination address .... 152
Continue destination input ........ 160
Selecting a destination
via the map ................................... 163
Destination entry via
coordinates ................................... 167
Entering points of interest ......... 169
03-EINF-25-US.pm509.07.2004, 13:58 Uhr 4
Page 39 of 251
Introduction
AudioTelephone
Navigation
Index Info Services and
system settings Radio operation
37Enter the frequency with the number keys.
The frequency is entered into the input line beginning
from the right. After 3 seconds at the most, the station
selected will begin to play.
Notes:
Enter in given frequency range.
Frequency ranges:
•
FM 87.9 – 107.9 FM
•
AM 530 – 1710 AM
If you enter a frequency which is not within the given
range, the following message will appear: “Invalid
input”.
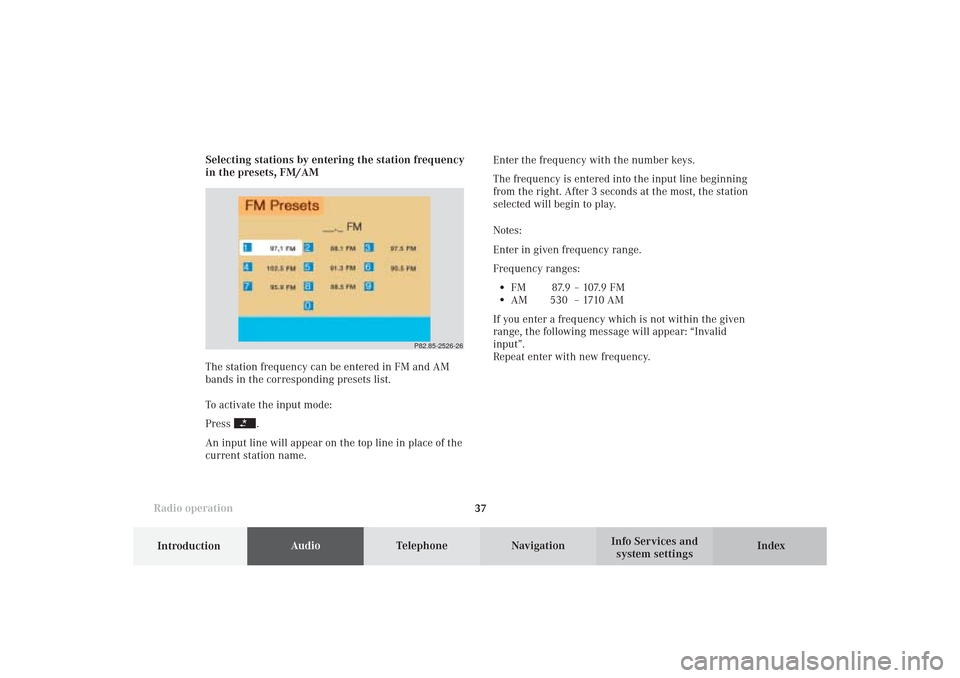
Repeat enter with new frequency. Selecting stations by entering the station frequency
in the presets, FM/AM
The station frequency can be entered in FM and AM
bands in the corresponding presets list.
To activate the input mode:
Press
.
An input line will appear on the top line in place of the
current station name.
P82.85-2526-26
04-RADIO-25-US.pm509.07.2004, 14:02 Uhr 37
Page 85 of 251
83 Sound settings
Introduction
Audio
Telephone
Navigation
Index Info Services and
system settings Adjust sound settings
The COMAND system is equipped with a BOSE
amplifier.
You can set the sound Bass/Treble and the sound-
center (fader and balance) individually or select sound
impressions.
See individual audio mode descriptions for instructions
on this feature.
Adjustments to the sound have a different effect on the
audio and service sources. The predefined sound
modes are available for the
audio sour
ces onl
y.
The audio sources include:
• Radio (FM, AM, WB)
• Tape deck
• CD changer (optional)
The main menu for the sound is activated in the audio
sources through the menu field “Sound”.Service sources include:
• Telephone
• Voice output in navigation
• Voice recognition system
The main menu for the sound is activated in the menu
“NAVI Settings” through the menu field “Sound”.
07-KLANG-25-US.pm509.07.2004, 14:11 Uhr 83
Page 88 of 251
86 Sound settings
AudioTelephone Navigation
Index Info Services and
system settings Introduction
P82.85-2560-26
1
P82.85-2561-26
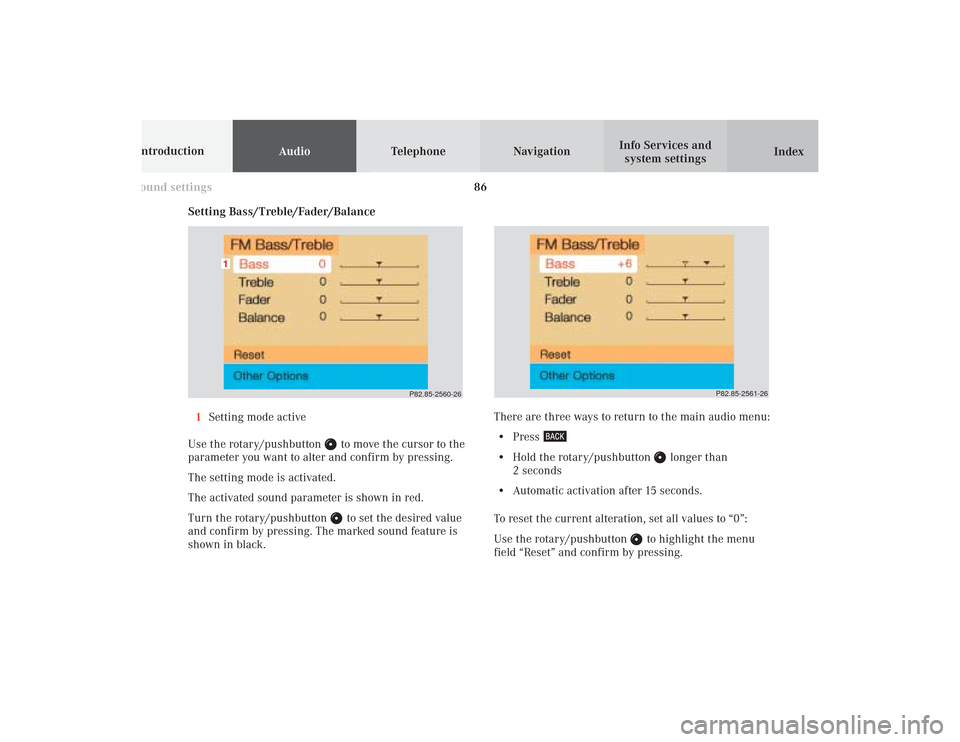
Setting Bass/Treble/Fader/Balance
1Setting mode active
Use the rotary/pushbutton
to move the cursor to the
parameter you want to alter and confirm by pressing.
The setting mode is activated.
The activated sound parameter is shown in red.
Turn the rotary/pushbutton to set the desired value
and confirm by pressing. The marked sound feature is
shown in black.There are three ways to return to the main audio menu:
• Press
• Hold the rotary/pushbutton
longer than
2 seconds
• Automatic activation after 15 seconds.
To reset the current alteration, set all values to “0”:
Use the rotary/pushbutton
to highlight the menu
field “Reset” and confirm by pressing.
07-KLANG-25-US.pm509.07.2004, 14:11 Uhr 86
Page 111 of 251
Telephone
Telephone109
Introduction
AudioTelephone
Navigation
Index Info Services and
system settings Dialing a number from the phone book
Dialing using the multifunction steering wheel
In order to use this feature, the phone book must have
previously been downloaded to the COMAND memory.
This is performed automatically each time the portable
phone is connected to the coiled cord.
The telephone is ready for operation, page 85.
Press
or
as often as necessary until the
telephone mode appears in the multifunction display.
If the display ENTER CODE appears, enter the unlock
code first, page 100.
Message NO ENTRY will appear when the portable
phone has been put into the cradle and no entries are
stored in the phone book.Press
or
, to page forwards or backwards
through the redial memory in alphabetical order.
If
or
is pressed for longer than 2 seconds,
the phone book is scrolled through very quickly.
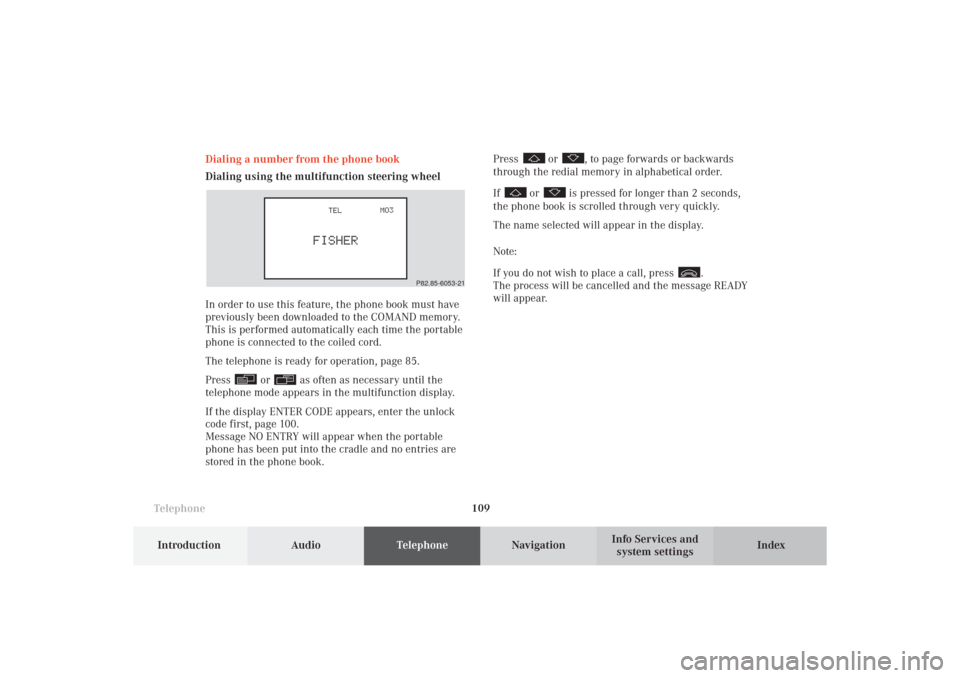
The name selected will appear in the display.
Note:
If you do not wish to place a call, press
.
The process will be cancelled and the message READY
will appear.
P82.85-6053-21
08-TELEFON-25-US.pm509.07.2004, 14:21 Uhr 109
Page 134 of 251
132 Telephone
AudioTelephoneNavigation
Index Info Services and
system settings Introduction
SMS function
This function can be used for receiving, reading and
deleting short text messages
1.
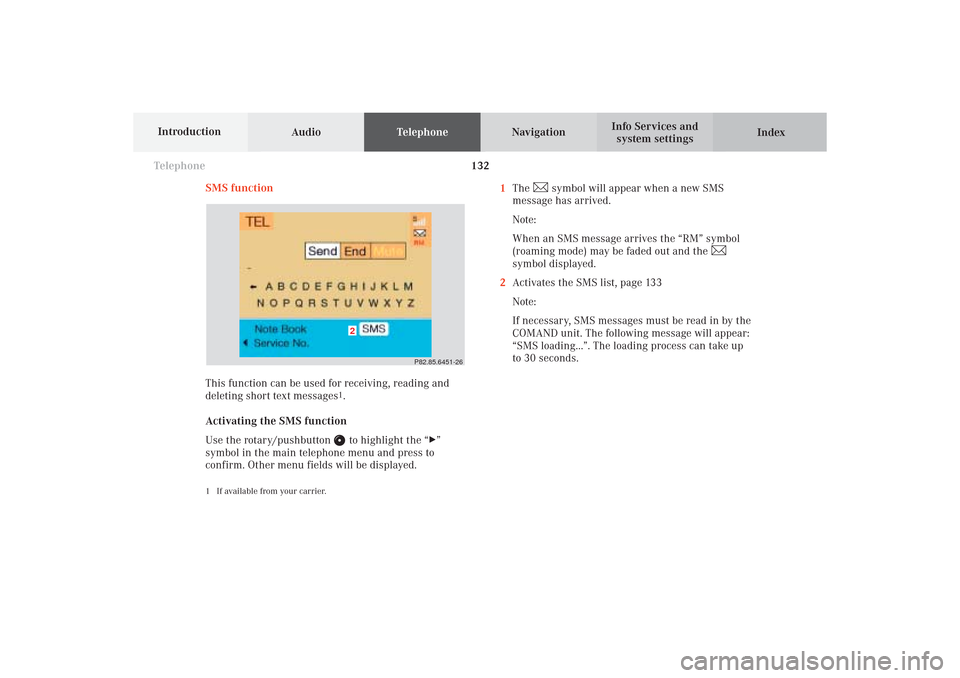
Activating the SMS function
Use the rotary/pushbutton to highlight the “
”
symbol in the main telephone menu and press to
confirm. Other menu fields will be displayed.
1 If available from your carrier.
1The
symbol will appear when a new SMS
message has arrived.
Note:
When an SMS message arrives the “RM” symbol
(roaming mode) may be faded out and the
symbol displayed.
2Activates the SMS list, page 133
Note:
If necessary, SMS messages must be read in by the
COMAND unit. The following message will appear:
“SMS loading...”. The loading process can take up
to 30 seconds.
P82.85.6451-26
2
08-TELEFON-25-US.pm509.07.2004, 14:23 Uhr 132
Page 168 of 251
166
Destination input
Audio TelephoneNavigation
Index Info Services and
system settings Introduction
Altering the map scale
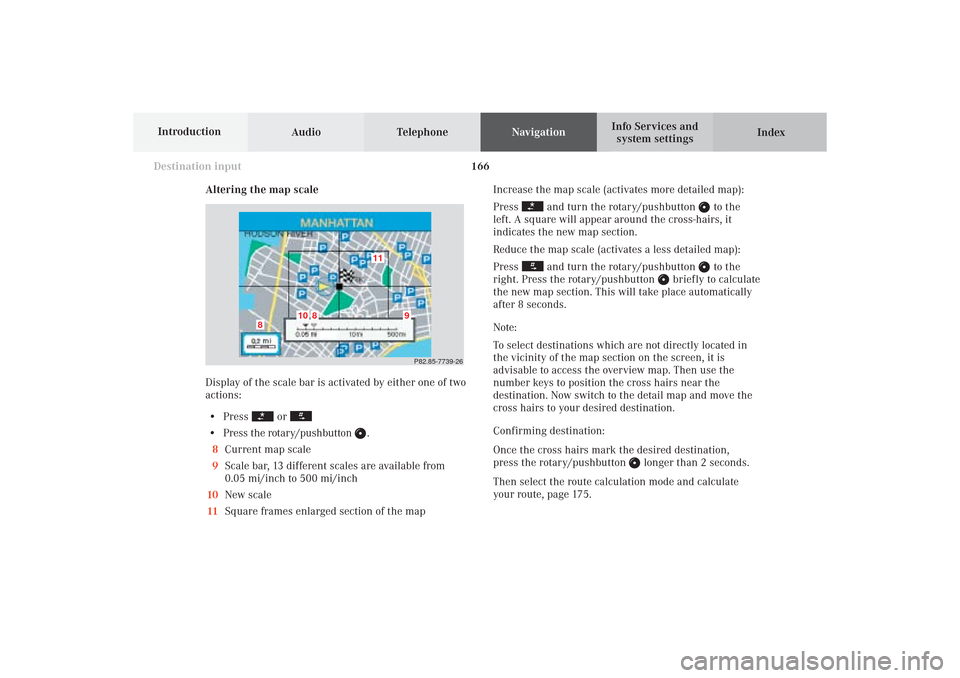
Display of the scale bar is activated by either one of two
actions:
• Press
or
• Press the rotary/pushbutton
.
8Current map scale
9Scale bar, 13 different scales are available from
0.05 mi/inch to 500 mi/inch
10New scale
11Square frames enlarged section of the mapIncrease the map scale (activates more detailed map):
Press
and turn the rotary/pushbutton
to the
left. A square will appear around the cross-hairs, it
indicates the new map section.
Reduce the map scale (activates a less detailed map):
Press
and turn the rotary/pushbutton
to the
right. Press the rotary/pushbutton
briefly to calculate
the new map section. This will take place automatically
after 8 seconds.
Note:
To select destinations which are not directly located in
the vicinity of the map section on the screen, it is
advisable to access the overview map. Then use the
number keys to position the cross hairs near the
destination. Now switch to the detail map and move the
cross hairs to your desired destination.
Confirming destination:
Once the cross hairs mark the desired destination,
press the rotary/pushbutton
longer than 2 seconds.
Then select the route calculation mode and calculate
your route, page 175.
P82.85-7739-26
11
10
8
8
9
09-NAVI1-25-US.pm509.07.2004, 14:27 Uhr 166
Page 175 of 251
173 Destination input
Introduction
Audio
Telephone
Navigation
Index Info Services and
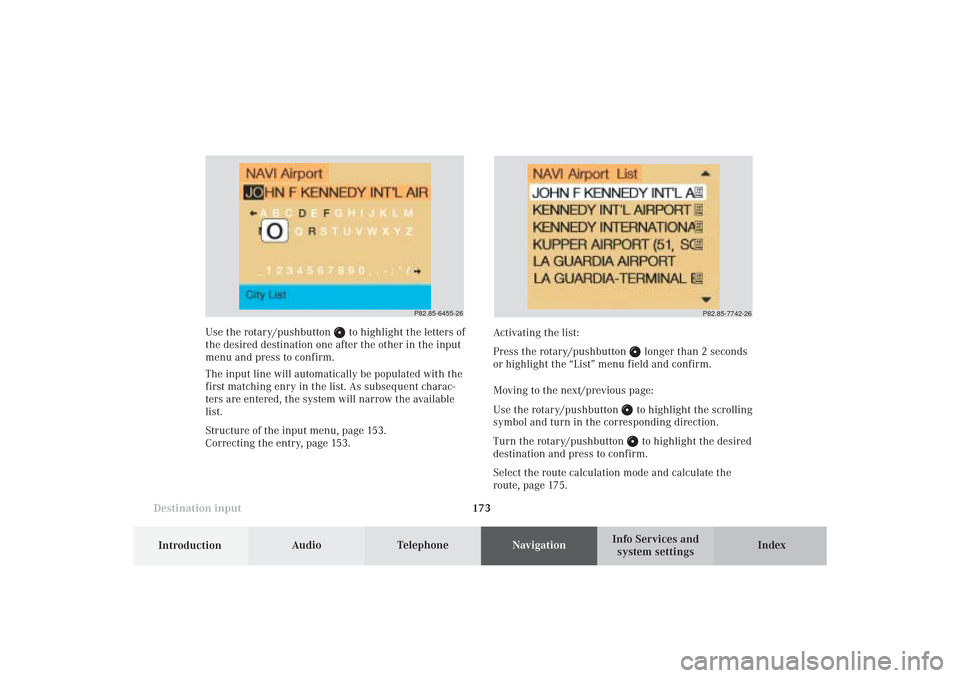
system settings Use the rotary/pushbutton
to highlight the letters of
the desired destination one after the other in the input
menu and press to confirm.
The input line will automatically be populated with the
first matching enry in the list. As subsequent charac-
ters are entered, the system will narrow the available
list.
Structure of the input menu, page 153.
Correcting the entry, page 153.Activating the list:
Press the rotary/pushbutton
longer than 2 seconds
or highlight the “List” menu field and confirm.
Moving to the next/previous page:
Use the rotary/pushbutton to highlight the scrolling
symbol and turn in the corresponding direction.
Turn the rotary/pushbutton to highlight the desired
destination and press to confirm.
Select the route calculation mode and calculate the
route, page 175.
P82.85-6455-26
P82.85-7742-26
09-NAVI1-25-US.pm509.07.2004, 14:28 Uhr 173
Page 188 of 251
Audio TelephoneNavigation
Index Info Services and
system settings Introduction
Route guidance
186
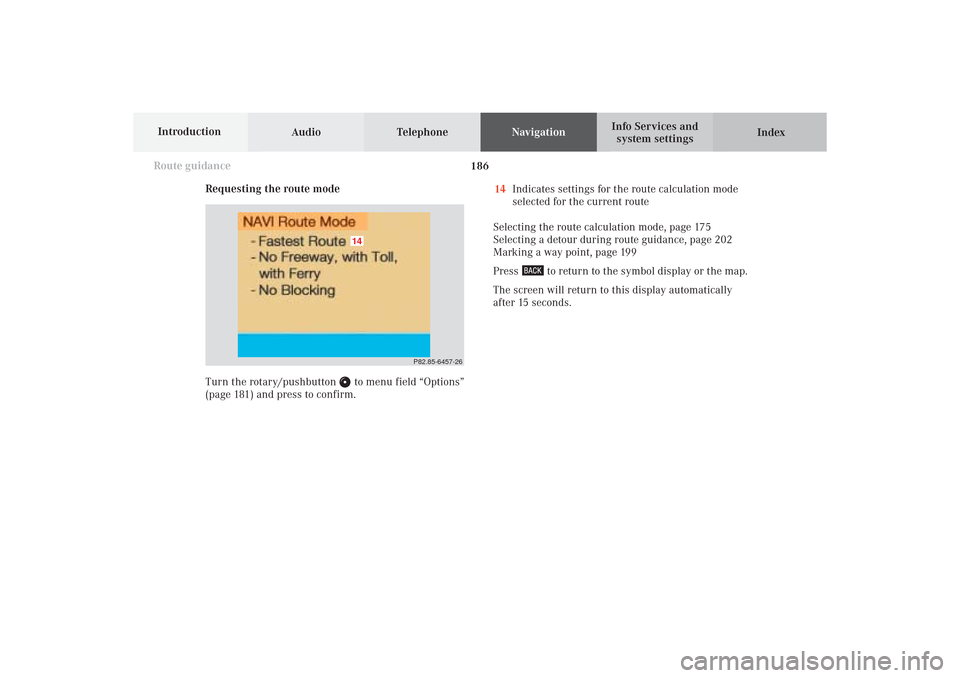
14Indicates settings for the route calculation mode
selected for the current route
Selecting the route calculation mode, page 175
Selecting a detour during route guidance, page 202
Marking a way point, page 199
Press
to return to the symbol display or the map.
The screen will return to this display automatically
after 15 seconds. Requesting the route mode
Turn the rotary/pushbutton
to menu field “Options”
(page 181) and press to confirm.
P82.85-6457-26
14
10-NAVI2-25-US.pm517.10.2001, 10:42 Uhr 186
Page 235 of 251
System settings233Introduction
Audio Telephone
Navigation
Index Info Services and
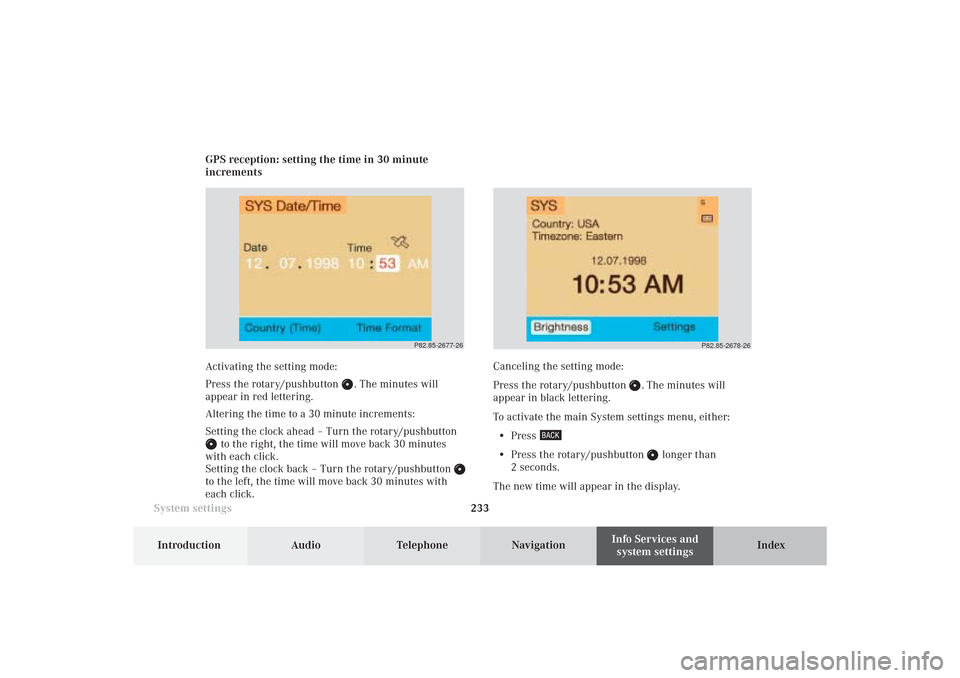
system settings GPS reception: setting the time in 30 minute
increments
Activating the setting mode:
Press the rotary/pushbutton
. The minutes will
appear in red lettering.
Altering the time to a 30 minute increments:
Setting the clock ahead – Turn the rotary/pushbutton
to the right, the time will move back 30 minutes
with each click.
Setting the clock back – Turn the rotary/pushbutton
to the left, the time will move back 30 minutes with
each click.Canceling the setting mode:
Press the rotary/pushbutton
. The minutes will
appear in black lettering.
To activate the main System settings menu, either:
• Press
• Press the rotary/pushbutton
longer than
2 seconds.
The new time will appear in the display.
P82.85-2677-26
P82.85-2678-26
12-System-25-US.pm517.10.2001, 11:06 Uhr 233