start stop button MERCEDES-BENZ CL CLASS 2010 Owner's Guide
[x] Cancel search | Manufacturer: MERCEDES-BENZ, Model Year: 2010, Model line: CL CLASS, Model: MERCEDES-BENZ CL CLASS 2010Pages: 500, PDF Size: 9.32 MB
Page 401 of 500
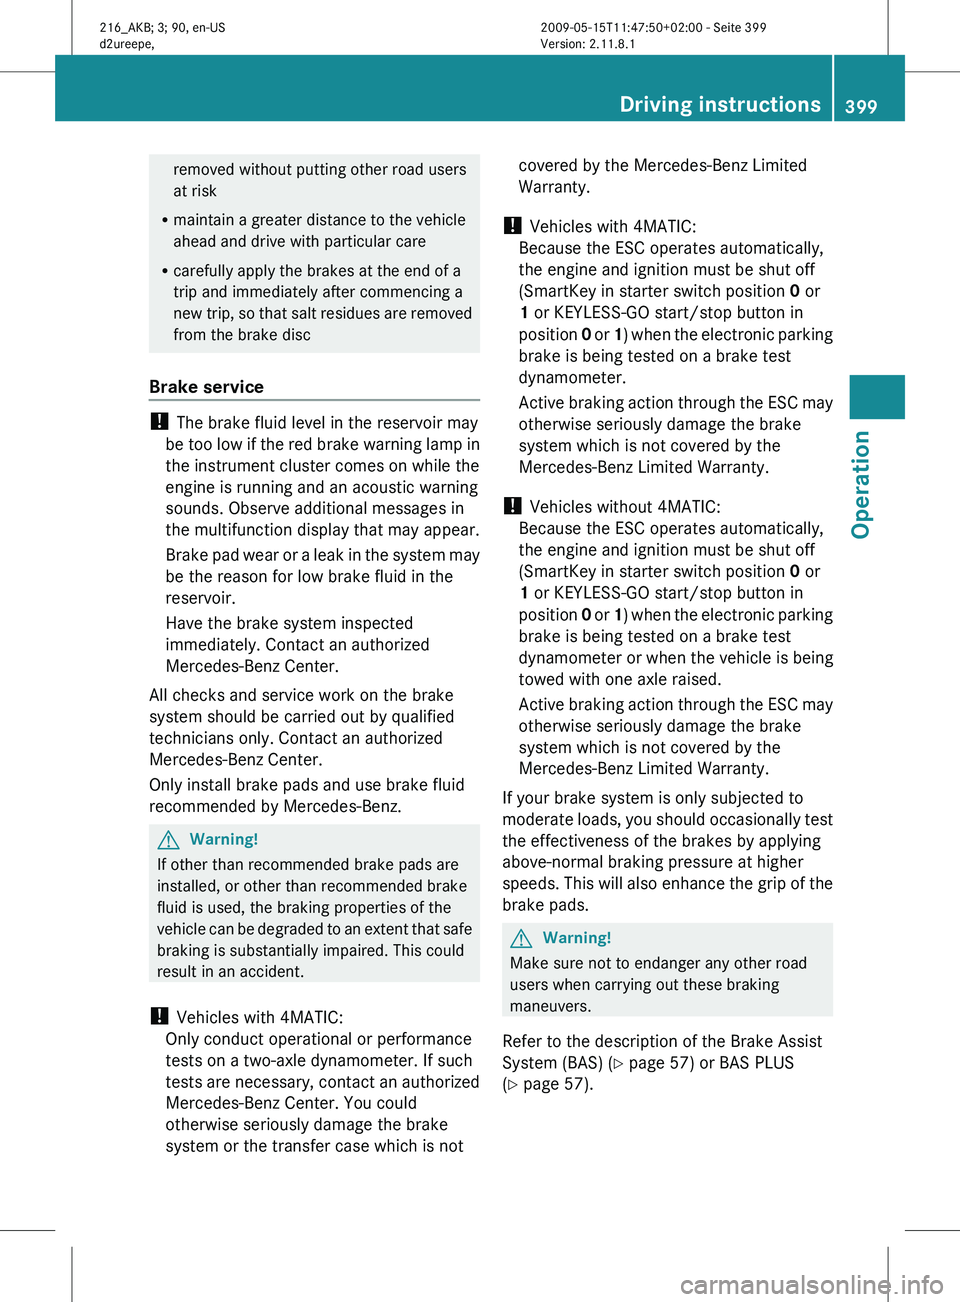
removed without putting other road users
at risk
R maintain a greater distance to the vehicle
ahead and drive with particular care
R carefully apply the brakes at the end of a
trip and immediately after commencing a
new trip,
so that salt residues are removed
from the brake disc
Brake service !
The brake fluid level in the reservoir may
be too
low if the red brake warning lamp in
the instrument cluster comes on while the
engine is running and an acoustic warning
sounds. Observe additional messages in
the multifunction display that may appear.
Brake pad wear or a leak in the system may
be the reason for low brake fluid in the
reservoir.
Have the brake system inspected
immediately. Contact an authorized
Mercedes-Benz Center.
All checks and service work on the brake
system should be carried out by qualified
technicians only. Contact an authorized
Mercedes-Benz Center.
Only install brake pads and use brake fluid
recommended by Mercedes-Benz. G
Warning!
If other than recommended brake pads are
installed, or other than recommended brake
fluid is used, the braking properties of the
vehicle can
be degraded to an extent that safe
braking is substantially impaired. This could
result in an accident.
! Vehicles with 4MATIC:
Only conduct operational or performance
tests on a two-axle dynamometer. If such
tests are necessary, contact an authorized
Mercedes-Benz Center. You could
otherwise seriously damage the brake
system or the transfer case which is not covered by the Mercedes-Benz Limited
Warranty.
! Vehicles with 4MATIC:
Because the ESC operates automatically,
the engine and ignition must be shut off
(SmartKey in starter switch position 0 or
1 or KEYLESS-GO start/stop button in
position 0
or 1
) when the electronic parking
brake is being tested on a brake test
dynamometer.
Active braking action through the ESC may
otherwise seriously damage the brake
system which is not covered by the
Mercedes-Benz Limited Warranty.
! Vehicles without 4MATIC:
Because the ESC operates automatically,
the engine and ignition must be shut off
(SmartKey in starter switch position 0 or
1 or KEYLESS-GO start/stop button in
position 0 or 1) when the electronic parking
brake is being tested on a brake test
dynamometer or when the vehicle is being
towed with one axle raised.
Active braking action through the ESC may
otherwise seriously damage the brake
system which is not covered by the
Mercedes-Benz Limited Warranty.
If your brake system is only subjected to
moderate loads, you should occasionally test
the effectiveness of the brakes by applying
above-normal braking pressure at higher
speeds. This will also enhance the grip of the
brake pads. G
Warning!
Make sure not to endanger any other road
users when carrying out these braking
maneuvers.
Refer to the description of the Brake Assist
System (BAS) ( Y page 57) or BAS PLUS
(Y page 57). Driving instructions
399
Operation
216_AKB; 3; 90, en-US
d2ureepe, Version: 2.11.8.1 2009-05-15T11:47:50+02:00 - Seite 399 Z
Page 410 of 500
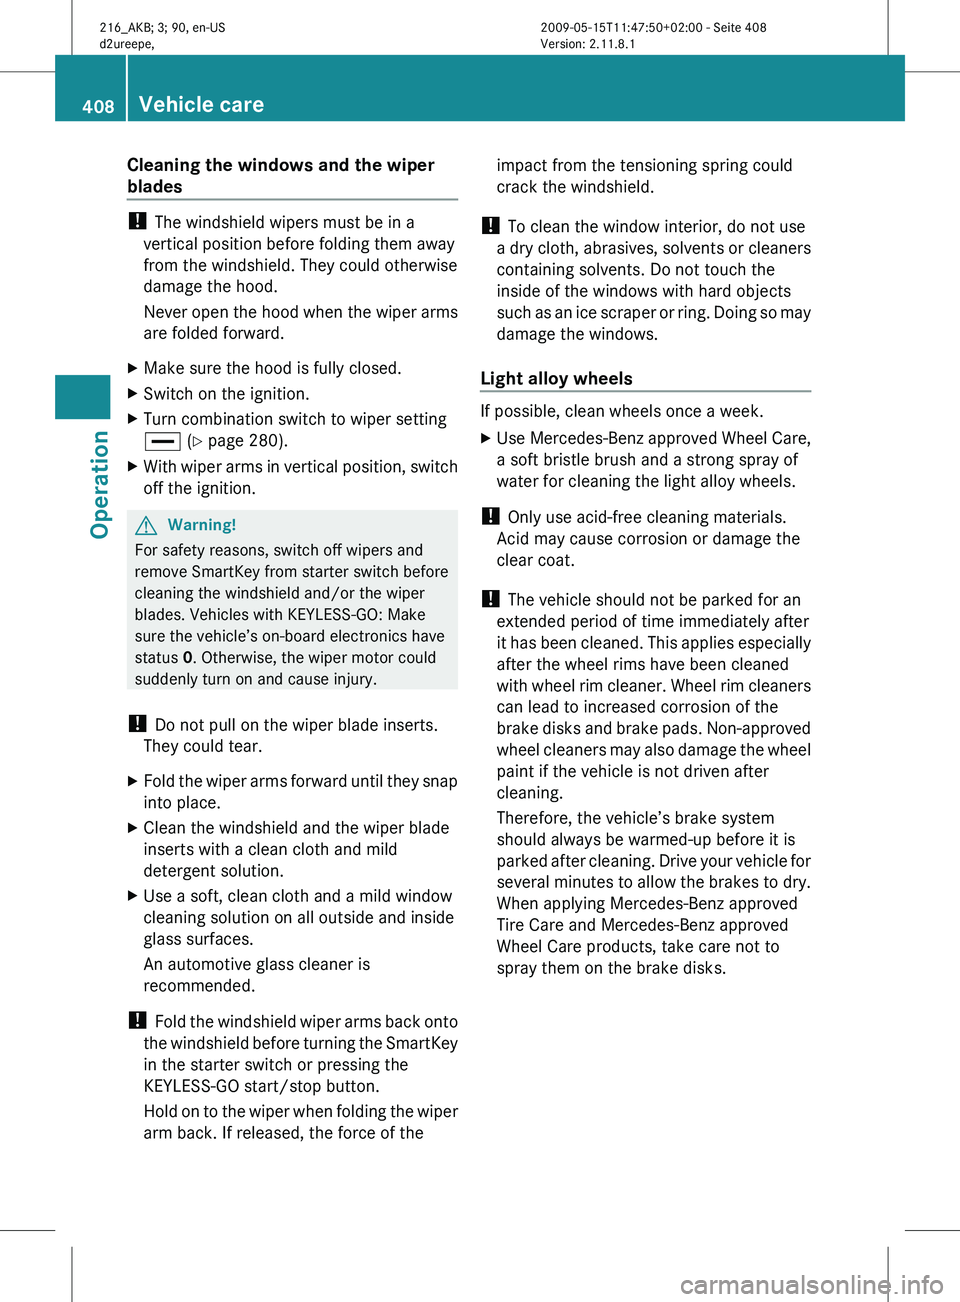
Cleaning the windows and the wiper
blades
!
The windshield wipers must be in a
vertical position before folding them away
from the windshield. They could otherwise
damage the hood.
Never open
the hood when the wiper arms
are folded forward.
X Make sure the hood is fully closed.
X Switch on the ignition.
X Turn combination switch to wiper setting
° (Y page 280).
X With wiper arms in vertical position, switch
off the ignition. G
Warning!
For safety reasons, switch off wipers and
remove SmartKey from starter switch before
cleaning the windshield and/or the wiper
blades. Vehicles with KEYLESS-GO: Make
sure the vehicle’s on-board electronics have
status 0. Otherwise, the wiper motor could
suddenly turn on and cause injury.
! Do not pull on the wiper blade inserts.
They could tear.
X Fold the wiper arms forward until they snap
into place.
X Clean the windshield and the wiper blade
inserts with a clean cloth and mild
detergent solution.
X Use a soft, clean cloth and a mild window
cleaning solution on all outside and inside
glass surfaces.
An automotive glass cleaner is
recommended.
! Fold the
windshield wiper arms back onto
the windshield before turning the SmartKey
in the starter switch or pressing the
KEYLESS-GO start/stop button.
Hold on to the wiper when folding the wiper
arm back. If released, the force of the impact from the tensioning spring could
crack the windshield.
! To clean the window interior, do not use
a dry
cloth, abrasives, solvents or cleaners
containing solvents. Do not touch the
inside of the windows with hard objects
such as an ice scraper or ring. Doing so may
damage the windows.
Light alloy wheels If possible, clean wheels once a week.
X
Use Mercedes-Benz approved Wheel Care,
a soft bristle brush and a strong spray of
water for cleaning the light alloy wheels.
! Only use acid-free cleaning materials.
Acid may cause corrosion or damage the
clear coat.
! The vehicle should not be parked for an
extended period of time immediately after
it has
been cleaned. This applies especially
after the wheel rims have been cleaned
with wheel rim cleaner. Wheel rim cleaners
can lead to increased corrosion of the
brake disks and brake pads. Non-approved
wheel cleaners may also damage the wheel
paint if the vehicle is not driven after
cleaning.
Therefore, the vehicle’s brake system
should always be warmed-up before it is
parked after cleaning. Drive your vehicle for
several minutes to allow the brakes to dry.
When applying Mercedes-Benz approved
Tire Care and Mercedes-Benz approved
Wheel Care products, take care not to
spray them on the brake disks. 408
Vehicle careOperation
216_AKB; 3; 90, en-US
d2ureepe,
Version: 2.11.8.1 2009-05-15T11:47:50+02:00 - Seite 408
Page 442 of 500
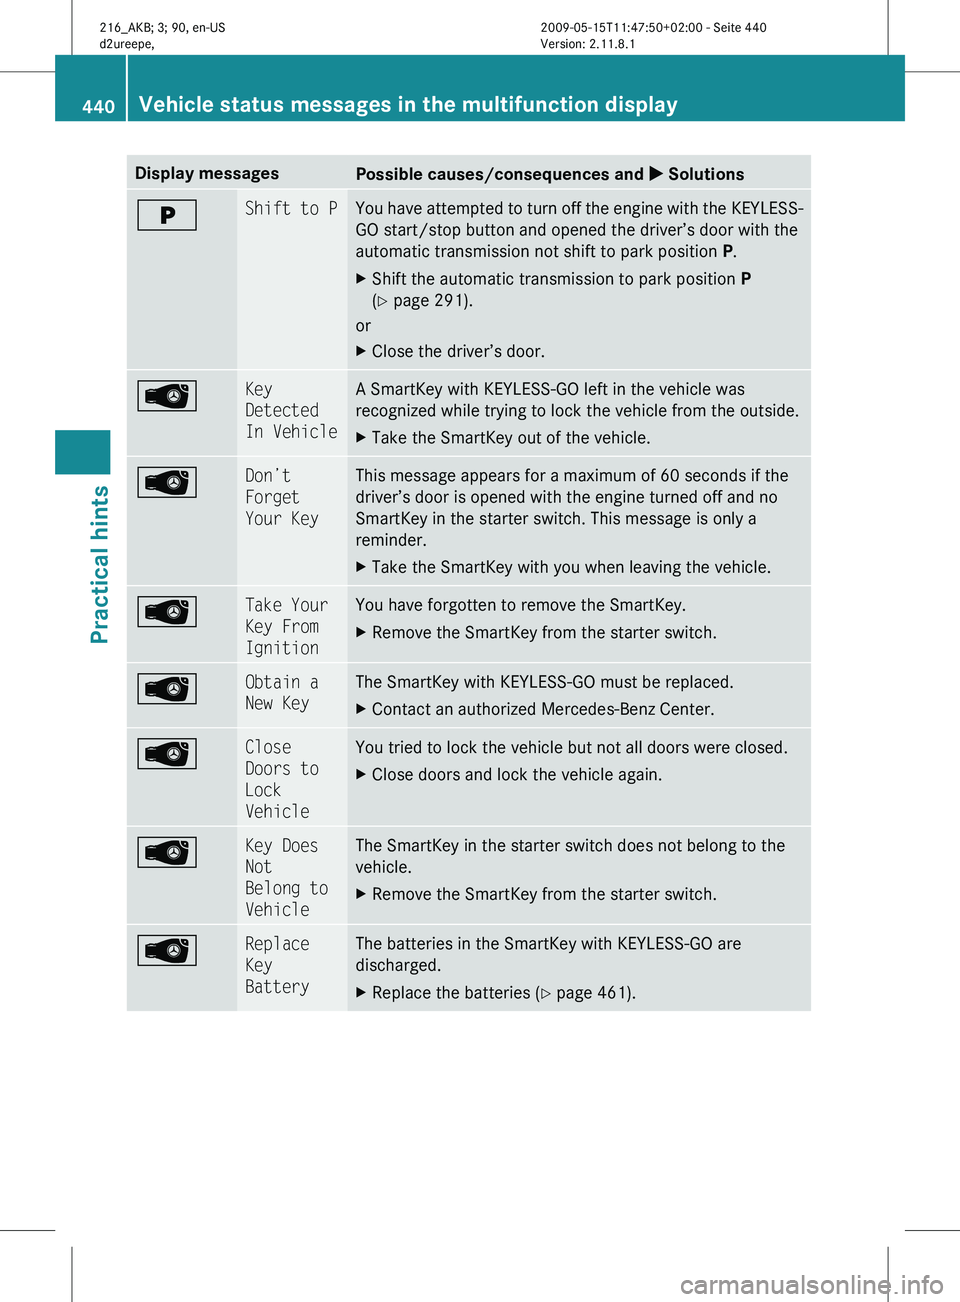
Display messages
Possible causes/consequences and
X SolutionsE Shift to P You have attempted to turn off the engine with the KEYLESS-
GO start/stop button and opened the driver’s door with the
automatic transmission not shift to park position
P.
X Shift the automatic transmission to park position P
(Y page 291).
or
X Close the driver’s door. Â Key
Detected
In Vehicle A SmartKey with KEYLESS-GO left in the vehicle was
recognized while trying to lock the vehicle from the outside.
X
Take the SmartKey out of the vehicle. Â Don’t
Forget
Your Key This message appears for a maximum of 60 seconds if the
driver’s door is opened with the engine turned off and no
SmartKey in the starter switch. This message is only a
reminder.
X
Take the SmartKey with you when leaving the vehicle. Â Take Your
Key From
Ignition You have forgotten to remove the SmartKey.
X
Remove the SmartKey from the starter switch. Â Obtain a
New Key The SmartKey with KEYLESS-GO must be replaced.
X
Contact an authorized Mercedes-Benz Center. Â Close
Doors to
Lock
Vehicle You tried to lock the vehicle but not all doors were closed.
X
Close doors and lock the vehicle again. Â Key Does
Not
Belong to
Vehicle The SmartKey in the starter switch does not belong to the
vehicle.
X
Remove the SmartKey from the starter switch. Â Replace
Key
Battery The batteries in the SmartKey with KEYLESS-GO are
discharged.
X
Replace the batteries ( Y page 461).440
Vehicle status messages in the multifunction displayPractical hints
216_AKB; 3; 90, en-US
d2ureepe,
Version: 2.11.8.1 2009-05-15T11:47:50+02:00 - Seite 440
Page 443 of 500
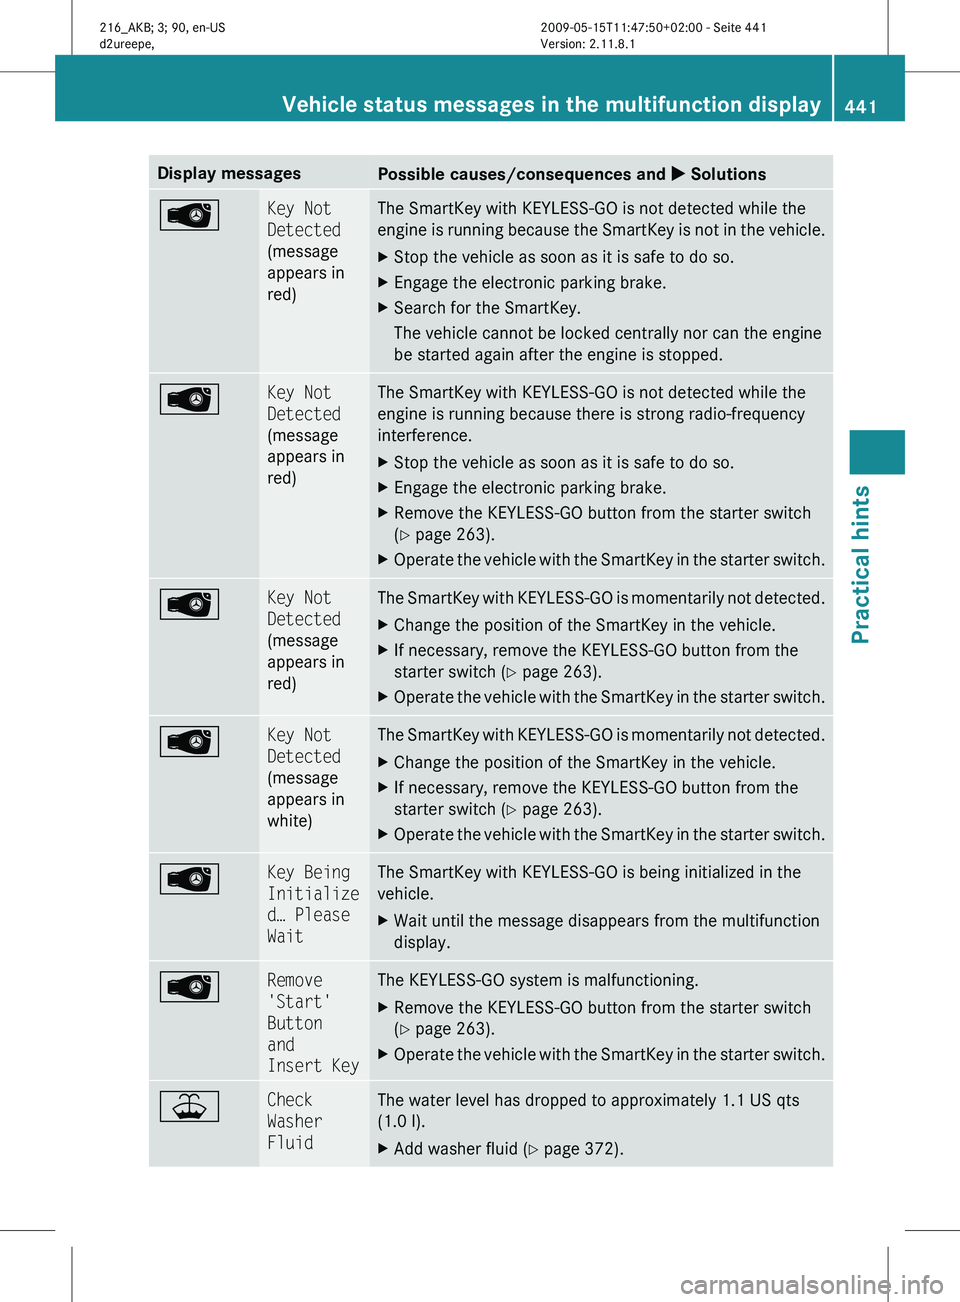
Display messages
Possible causes/consequences and
X Solutions Key Not
Detected
(message
appears in
red) The SmartKey with KEYLESS-GO is not detected while the
engine
is
running because the SmartKey is not in the vehicle.
X Stop the vehicle as soon as it is safe to do so.
X Engage the electronic parking brake.
X Search for the SmartKey.
The vehicle cannot be locked centrally nor can the engine
be started again after the engine is stopped. Â Key Not
Detected
(message
appears in
red) The SmartKey with KEYLESS-GO is not detected while the
engine is running because there is strong radio-frequency
interference.
X
Stop the vehicle as soon as it is safe to do so.
X Engage the electronic parking brake.
X Remove the KEYLESS-GO button from the starter switch
(Y page 263).
X Operate the vehicle with the SmartKey in the starter switch. Â Key Not
Detected
(message
appears in
red) The SmartKey with KEYLESS-GO is momentarily not detected.
X
Change the position of the SmartKey in the vehicle.
X If necessary, remove the KEYLESS-GO button from the
starter switch ( Y page 263).
X Operate the vehicle with the SmartKey in the starter switch. Â Key Not
Detected
(message
appears in
white) The SmartKey with KEYLESS-GO is momentarily not detected.
X
Change the position of the SmartKey in the vehicle.
X If necessary, remove the KEYLESS-GO button from the
starter switch ( Y page 263).
X Operate the vehicle with the SmartKey in the starter switch. Â Key Being
Initialize
d… Please
Wait The SmartKey with KEYLESS-GO is being initialized in the
vehicle.
X
Wait until the message disappears from the multifunction
display. Â Remove
'Start'
Button
and
Insert Key The KEYLESS-GO system is malfunctioning.
X
Remove the KEYLESS-GO button from the starter switch
(Y page 263).
X Operate the vehicle with the SmartKey in the starter switch. ¥ Check
Washer
Fluid The water level has dropped to approximately 1.1 US qts
(1.0 l).
X
Add washer fluid ( Y page 372). Vehicle status messages in the multifunction display
441
Practical hints
216_AKB; 3; 90, en-US
d2ureepe,Version: 2.11.8.1 2009-05-15T11:47:50+02:00 - Seite 441 Z
Page 466 of 500
Replacing bulbs for rear lamps
Tail lamp unit The tail lamps are equipped with HiP bulbs
and LEDs. Have them replaced at an
authorized Mercedes-Benz Center.
Replacing wiper blades
Safety notes
G
Warning!
For safety reasons, switch off the wipers and
remove the SmartKey from the starter switch
(vehicles with KEYLESS-GO: Make sure the
vehicle’s on-board electronics have status 0)
before replacing a wiper blade. Otherwise, the
wiper motor could suddenly turn on and cause
injury. G
Warning!
Wiper blades are components that are subject
to wear and tear. Replace the wiper blades
twice a year, preferably in the spring and fall.
Otherwise the windshield will not be wiped
properly. As a result, you may not be able to
observe surrounding traffic conditions and
could cause an accident.
! To avoid damage to the hood, the wiper
arms should only be folded forward when
in the vertical position.
! Never open the hood when a wiper arm is
folded forward.
Hold on to the wiper when folding a wiper
arm back. If released, the force of the
impact from the tensioning spring could
crack the windshield.
Do not allow a wiper arm to contact the
windshield glass without a wiper blade
inserted.
Mercedes-Benz recommends that you have
this work carried out at an authorized
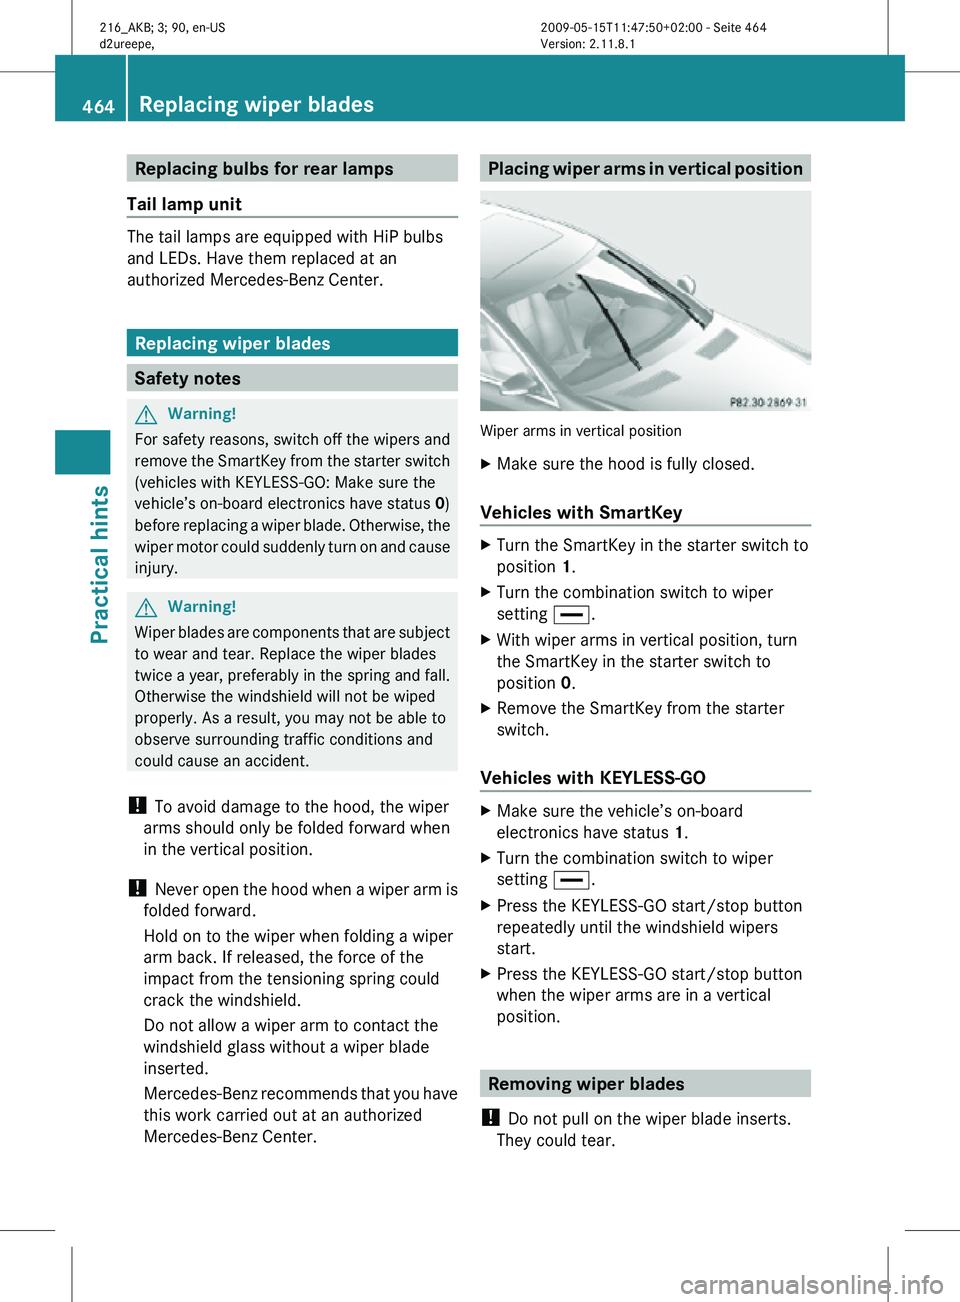
Mercedes-Benz Center. Placing wiper arms in vertical position
Wiper arms in vertical position
X
Make sure the hood is fully closed.
Vehicles with SmartKey X
Turn the SmartKey in the starter switch to
position 1.
X Turn the combination switch to wiper
setting °.
X With wiper arms in vertical position, turn
the SmartKey in the starter switch to
position 0.
X Remove the SmartKey from the starter
switch.
Vehicles with KEYLESS-GO X
Make sure the vehicle’s on-board
electronics have status 1.
X Turn the combination switch to wiper
setting °.
X Press the KEYLESS-GO start/stop button
repeatedly until the windshield wipers
start.
X Press the KEYLESS-GO start/stop button
when the wiper arms are in a vertical
position. Removing wiper blades
! Do not pull on the wiper blade inserts.
They could tear. 464
Replacing wiper bladesPractical hints
216_AKB; 3; 90, en-US
d2ureepe,
Version: 2.11.8.1 2009-05-15T11:47:50+02:00 - Seite 464
Page 467 of 500
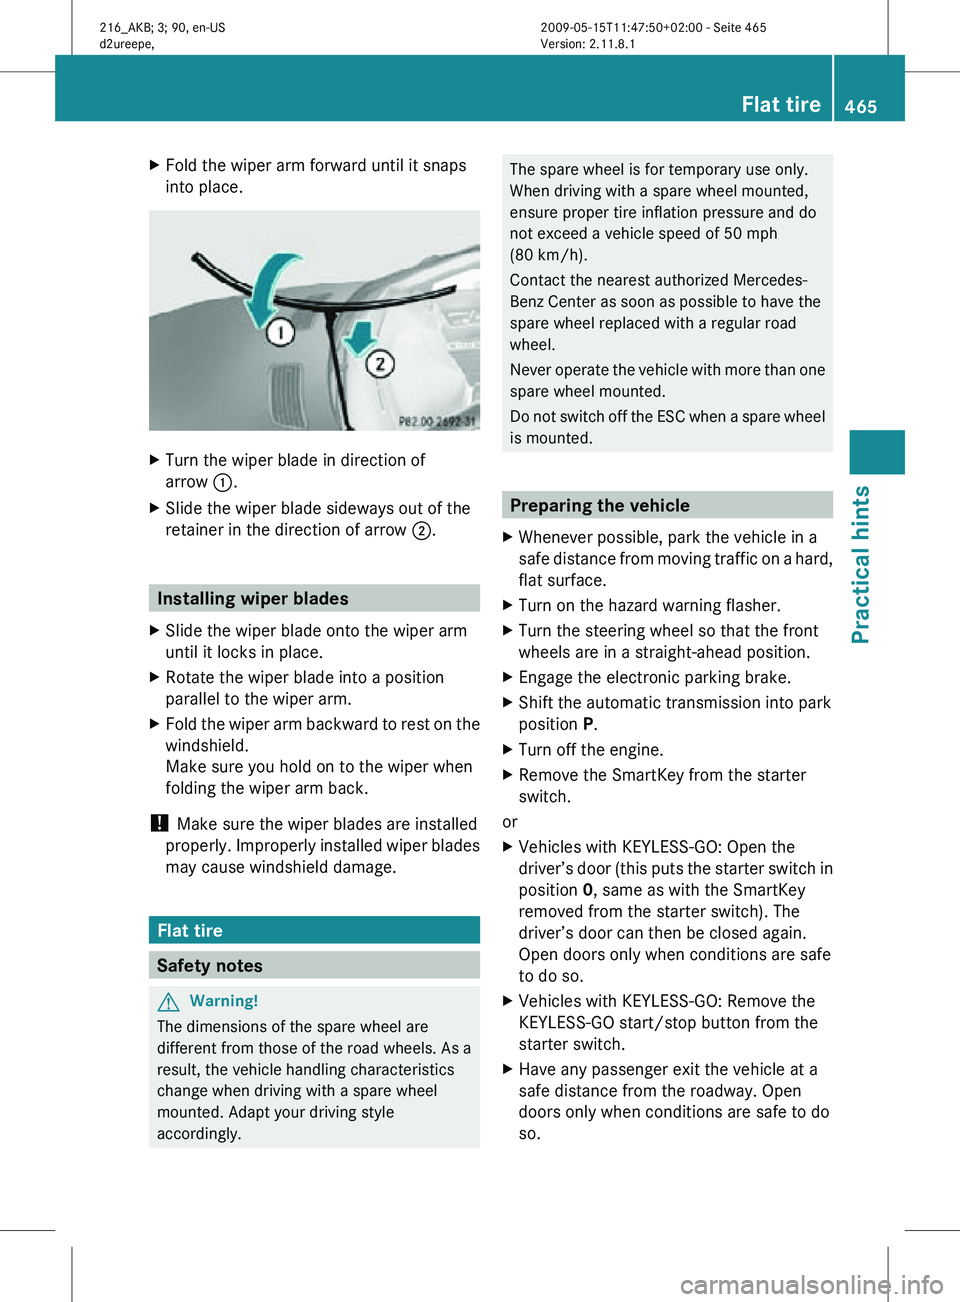
X
Fold the wiper arm forward until it snaps
into place. X
Turn the wiper blade in direction of
arrow :.
X Slide the wiper blade sideways out of the
retainer in the direction of arrow ;. Installing wiper blades
X Slide the wiper blade onto the wiper arm
until it locks in place.
X Rotate the wiper blade into a position
parallel to the wiper arm.
X Fold the wiper arm backward to rest on the
windshield.
Make sure you hold on to the wiper when
folding the wiper arm back.
! Make sure the wiper blades are installed
properly. Improperly installed wiper blades
may cause windshield damage. Flat tire
Safety notes
G
Warning!
The dimensions of the spare wheel are
different from those of the road wheels. As a
result, the vehicle handling characteristics
change when driving with a spare wheel
mounted. Adapt your driving style
accordingly. The spare wheel is for temporary use only.
When driving with a spare wheel mounted,
ensure proper tire inflation pressure and do
not exceed a vehicle speed of 50 mph
(80 km/h).
Contact the nearest authorized Mercedes-
Benz Center as soon as possible to have the
spare wheel replaced with a regular road
wheel.
Never operate the vehicle with more than one
spare wheel mounted.
Do not switch off the ESC when a spare wheel
is mounted.
Preparing the vehicle
X Whenever possible, park the vehicle in a
safe distance from moving traffic on a hard,
flat surface.
X Turn on the hazard warning flasher.
X Turn the steering wheel so that the front
wheels are in a straight-ahead position.
X Engage the electronic parking brake.
X Shift the automatic transmission into park
position P.
X Turn off the engine.
X Remove the SmartKey from the starter
switch.
or
X Vehicles with KEYLESS-GO: Open the
driver’s door (this puts the starter switch in
position 0, same as with the SmartKey
removed from the starter switch). The
driver’s door can then be closed again.
Open doors only when conditions are safe
to do so.
X Vehicles with KEYLESS-GO: Remove the
KEYLESS-GO start/stop button from the
starter switch.
X Have any passenger exit the vehicle at a
safe distance from the roadway. Open
doors only when conditions are safe to do
so. Flat tire
465Practical hints
216_AKB; 3; 90, en-US
d2ureepe, Version: 2.11.8.1 2009-05-15T11:47:50+02:00 - Seite 465 Z
Page 478 of 500

!
Vehicles without 4MATIC:
Because the ESC operates automatically,
the engine and ignition must be shut off
(SmartKey in starter switch position 0 or
1 or KEYLESS-GO start/stop button in
position 0 or 1) when the vehicle is being
towed with one axle raised.
Active braking action through the ESC may
otherwise seriously damage the brake
system which is not covered by the
Mercedes-Benz Limited Warranty.
! Keep in mind that it is important for the
SmartKey to be left in starter switch with
the ignition switched off. As soon as the
SmartKey is removed from the starter
switch the automatic transmission will shift
to park position P. Fuses
Introduction
The electrical fuses in your vehicle serve to
switch off malfunctioning power circuits.
If a fuse is blown, the components and
systems secured by that fuse will stop
operating. G
Warning!
Only use fuses approved by Mercedes-Benz
with the specified amperage for the system in
question and do not attempt to repair or
bridge a blown fuse. Using other than
approved fuses or using repaired or bridged
fuses may cause an overload leading to a fire,
and/or cause damage to electrical
components and/or systems. Have the cause
determined and remedied by an authorized
Mercedes-Benz Center.
! Switch off the vehicle’s internal electrical
functions when you are working on the
fuses.
A blown fuse must be replaced by an
appropriate spare fuse (recognizable by its
color or the fuse rating given on the fuse) of the amperage recommended in the fuse
chart. Any Mercedes-Benz Center will be glad
to advise you on this subject.
i
In case of a blown fuse contact Roadside
Assistance or an authorized Mercedes-
Benz Center.
If a newly inserted fuse blows again, have the
cause determined and rectified by an
authorized Mercedes-Benz Center.
The fuse chart is located in the trunk with the
vehicle tool kit (Y page 412). The fuse chart
explains the fuse allocation and fuse
amperages. Before replacing fuses
X Engage the electronic parking brake.
X Make sure the automatic transmission is in
park position P.
The transmission position indicator in the
multifunction display should be on P.
X Switch off all electrical consumers.
X Turn off the engine. Fuse box in passenger compartment
! Do not use sharp objects such as a
screwdriver to open the fuse box cover in
the dashboard. You could damage the fuse
box cover or the dashboard. Fuse box on driver’s side476
FusesPractical hints
216_AKB; 3; 90, en-US
d2ureepe,
Version: 2.11.8.1 2009-05-15T11:47:50+02:00 - Seite 476