air conditioning MERCEDES-BENZ CL-Class 2011 C216 Owner's Manual
[x] Cancel search | Manufacturer: MERCEDES-BENZ, Model Year: 2011, Model line: CL-Class, Model: MERCEDES-BENZ CL-Class 2011 C216Pages: 480, PDF Size: 19.76 MB
Page 6 of 480
1, 2, 3 ...
12 V socket ........................................ 390
4ETS see ETS/4ETS
4MATIC (permanent four-wheel
drive) .................................................. 306
A
ABC see Active Body Control
ABS (Anti-lock Braking System)
Display message ............................ 350
Function/notes ................................ 61
Warning lamp ................................. 377
Active Blind Spot Assist ................... 320
Activating/deactivating (on-
board computer) ............................ 340
Display message ............................ 366
Active Body Control (ABC) ................ 305
Active Driving Assistance package . 320
Active Lane Keeping Assist .............. 323
Activating/deactivating (on-
board computer) ............................ 340
Display message ............................ 366
Active light function (display
message) ............................................ 358
Active multicontour seat ............ 97, 240
Active partition (USB devices only) Selecting ........................................ 221
Active service system
see Service interval display
ADAPTIVE BRAKE ................................. 65
Adaptive brake lamps ......................... 63
Adaptive Damping System (ADS) ..... 304
Adaptive Highbeam Assist Display message ............................ 359
Switching on/off ........................... 247
Switching on/off (on-board
computer) ...................................... 341
Additional speedometer ................... 341
Address book Calling up ....................................... 188
Connecting a call ........................... 191
Creating an entry ........................... 190
Deleting an entry ........................... 191
Importing contacts ........................187
Introduction ................................... 187
Starting route guidance .................191
Voice tag ....................................... 192
Address book entry
Adopting as a home address .........162
Address entry menu .......................... 139
Air bags Display message ............................ 348
Front air bag (driver, front
passenger) ....................................... 44
Important safety notes ....................42
Knee bag .......................................... 44
Safety guidelines ............................. 41
Side impact air bag ..........................45
Window curtain air bag ....................46
Air-conditioning system
see Climate control
Air dehumidification
Activating/deactivating with
cooling ........................................... 258
Air distribution
Setting ........................................... 259
Setting (COMAND) .........................235
Airflow
Setting ........................................... 260
AIRMATIC ........................................... 304
AIRMATIC (display message) ............ 364
Air nozzles see Air vents .................................. 262
Air pressure
see Tire pressure
Air-recirculation mode
Activating/deactivating .................261
Air vent
Stowage compartment ..................263
Air vents ............................................. 262
Glove box ....................................... 263
Important safety information .........262
Rear ............................................... 263
Setting the center air vents ...........262
Setting the side air vents ...............262
Alarm system
see ATA
Alertness Assistant
see ATTENTION ASSIST
Alternative route ............................... 1564Index
Page 19 of 480
Releasing ......................................... 54
Safety guidelines ............................. 41
Special seat belt retractor ...............58
Warning lamp ................................. 376
Warning lamp (function) ................... 54
Seat heating
Indicator lamp (Malfunction) ............98
Seats
Adjusting (electrically) .....................94
Adjusting lumbar support ................97
Adjusting the head restraint ............95
Cleaning the cover .........................416
Correct driver's seat position ........... 92
Important safety notes ....................93
Multicontour seat ............................ 97
Storing settings (memory
function) ........................................ 102
Switching seat heating on/off .........97
Switching the seat ventilation on/
off .................................................... 98
Seat ventilation
Indicator lamp (Malfunction) ............98
Sensors (cleaning instructions) ....... 414
Service indicator see Service interval display
Service interval display .................... 409
Displaying a service message (on-
board computer) ............................ 410
Service menu (on-board computer) . 340
Service products Brake fluid ..................................... 472
Capacities ...................................... 469
Coolant (engine) ............................ 473
Engine oil ....................................... 471
Fuel ................................................ 470
Important safety notes ..................468
Notes ............................................. 468
Refrigerant (air-conditioning
system) .......................................... 472
Washer fluid ................................... 473
Settings
On-board computer .......................341
Setting the air distribution
COMAND ....................................... 235
Shift ranges ....................................... 278
Showing the distance display (on-
board computer) ............................... 339
Side impact air bag ............................. 45Side marker lamp (display
message) ............................................ 358
Side windows Convenience closing feature ............86
Convenience opening feature ..........86
Important safety information ...........85
Opening/closing .............................. 86
Resetting ......................................... 87
Troubleshooting ............................... 88
Skipping back
CD/DVD mode .............................. 209
Skipping forwards
CD/DVD mode .............................. 209
Sliding sunroof
Important safety information ...........88
Opening/closing .............................. 89
Resetting ......................................... 90
Troubleshooting ............................... 90
SmartKey
Changing the battery .......................76
Changing the programming .............75
Checking the battery .......................76
Convenience closing feature ............86
Convenience opening feature ..........86
Display message ............................ 373
Important safety notes ....................72
Malfunction ...................................... 77
Starting the engine ........................269
Snow chains ...................................... 440
Socket ................................................ 390
Dashboard ..................................... 391
Trunk ............................................. 391
SOS
see mbrace
Sound
Switching on/off ........................... 124
Sound Mode ....................................... 127
Sound settings .................................. 125
Spare wheel Notes/data .................................... 464
Storage location ............................ 420
see Emergency spare wheel Index17
Page 113 of 480
COMAND display
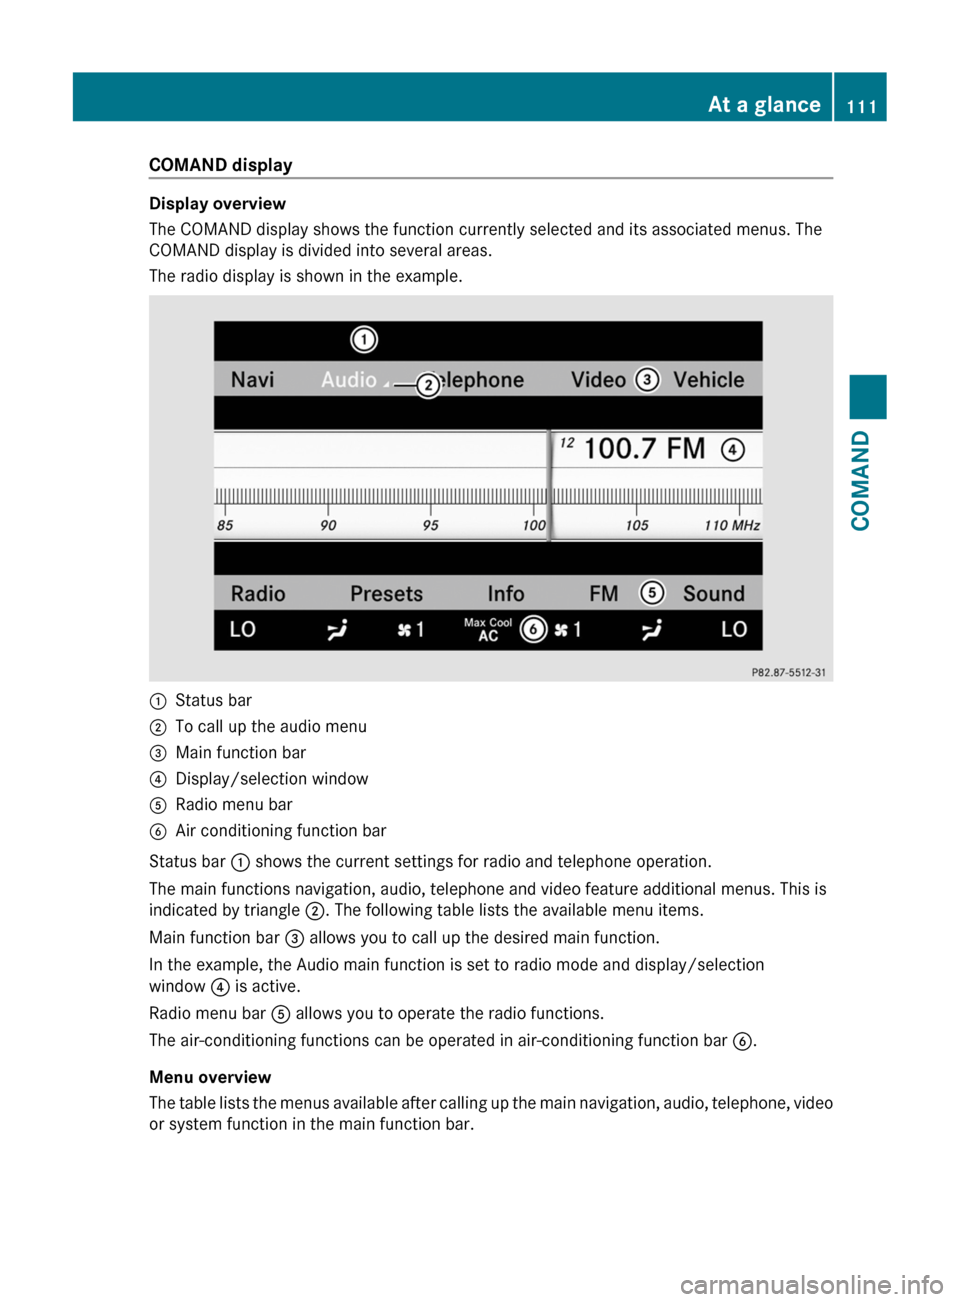
Display overview
The COMAND display shows the function currently selected and its associated menus. The
COMAND display is divided into several areas.
The radio display is shown in the example.
:Status bar;To call up the audio menu=Main function bar?Display/selection windowARadio menu barBAir conditioning function bar
Status bar : shows the current settings for radio and telephone operation.
The main functions navigation, audio, telephone and video feature additional menus. This is
indicated by triangle ;. The following table lists the available menu items.
Main function bar = allows you to call up the desired main function.
In the example, the Audio main function is set to radio mode and display/selection
window ? is active.
Radio menu bar A allows you to operate the radio functions.
The air-conditioning functions can be operated in air-conditioning function bar B.
Menu overview
The table lists the menus available after calling up the main navigation, audio, telephone, video
or system function in the main function bar.
At a glance111COMANDZ
Page 236 of 480
turning cVd the COMAND controller and
press W to confirm.
The main area is active.
XSelect the Automatic locking function
by sliding XVY or turning cVd the
COMAND controller and press W to
confirm.
Activating/deactivating the trunk lid
opening height restriction
XTo activate/deactivate the trunk lid
opening height restriction: select
Vehicle in the main function bar by sliding
XVY and turning cVd the COMAND
controller and press W to confirm.
The main area is active.
XSelect the trunk lid opening height
restriction function by sliding XVY or
turning cVd the COMAND controller and
press W to confirm.
Automatic climate control
Introduction to automatic climate
control
You can operate the automatic climate
control using COMAND or the buttons on the
upper section of the center console
(Y page 257).
Several special automatic climate control
functions can only be adjusted using
COMAND.
You can access the automatic climate control
menu via the air conditioning function bar.
To do so, make certain that the key is in
position 2 in the ignition lock.
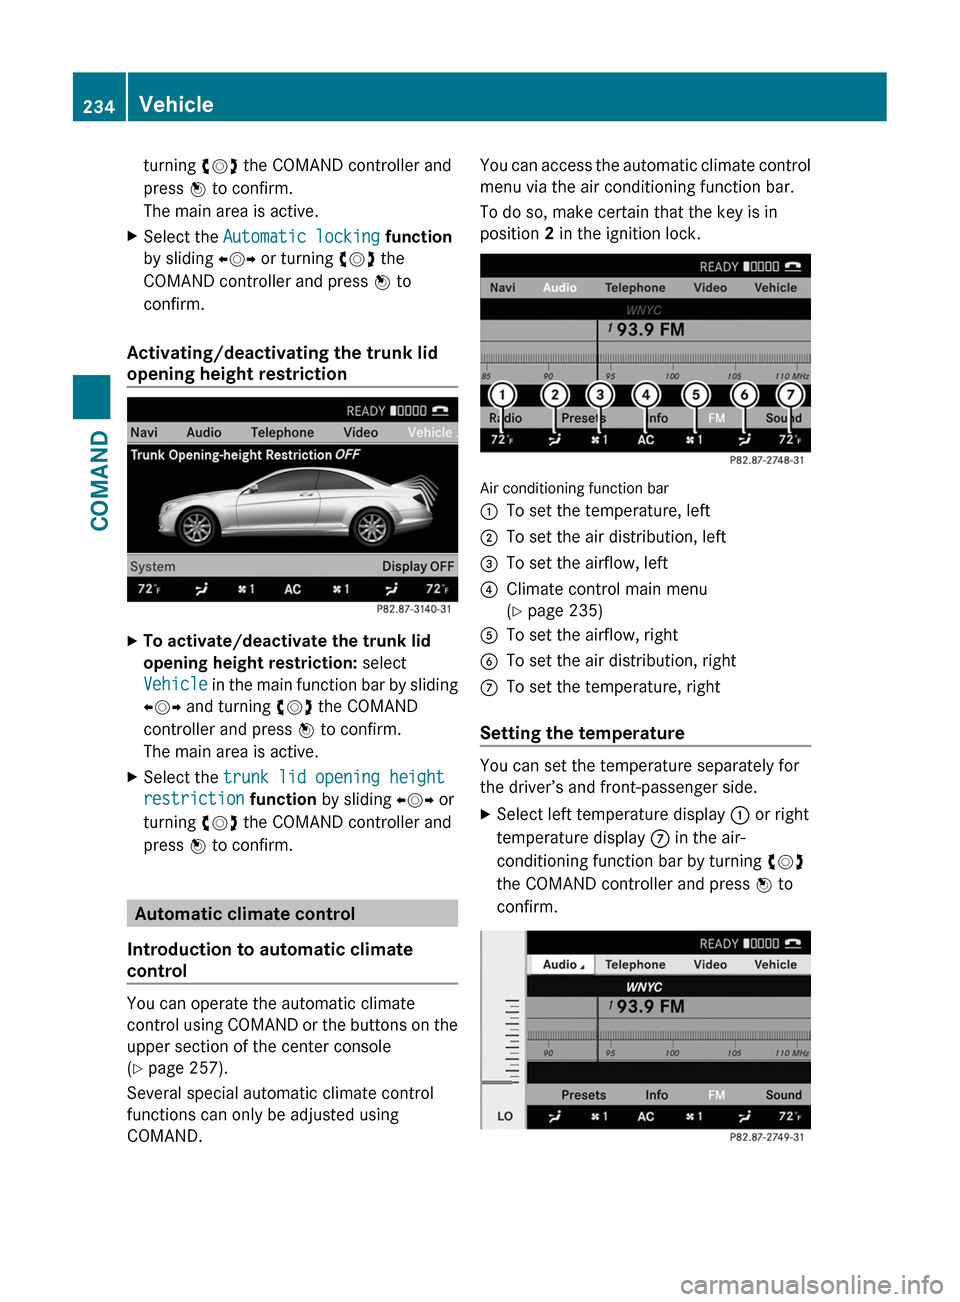
Air conditioning function bar
:To set the temperature, left;To set the air distribution, left=To set the airflow, left?Climate control main menu
(Y page 235)
ATo set the airflow, rightBTo set the air distribution, rightCTo set the temperature, right
Setting the temperature
You can set the temperature separately for
the driver’s and front-passenger side.
XSelect left temperature display : or right
temperature display C in the air-
conditioning function bar by turning cVd
the COMAND controller and press W to
confirm.
234VehicleCOMAND
Page 237 of 480
XTo adjust the temperature: slide ZVÆ or
turn cVd the COMAND controller.
XTo confirm the selection: press W the
COMAND controller.
Setting the air distribution
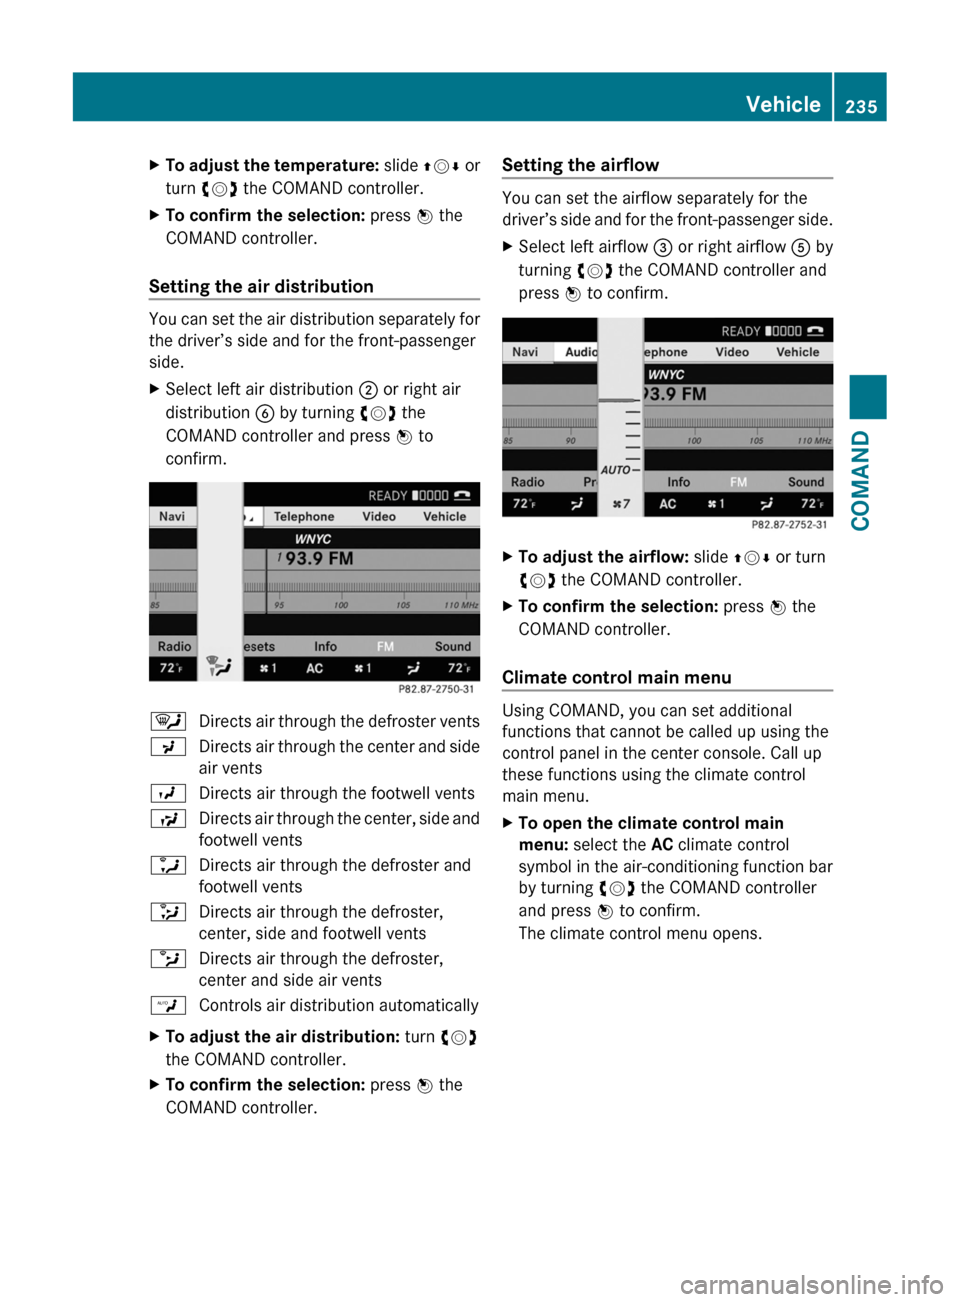
You can set the air distribution separately for
the driver’s side and for the front-passenger
side.
XSelect left air distribution ; or right air
distribution B by turning cVd the
COMAND controller and press W to
confirm.
¯Directs air through the defroster ventsPDirects air through the center and side
air vents
ODirects air through the footwell ventsSDirects air through the center, side and
footwell vents
aDirects air through the defroster and
footwell vents
_Directs air through the defroster,
center, side and footwell vents
bDirects air through the defroster,
center and side air vents
WControls air distribution automaticallyXTo adjust the air distribution: turn cVd
the COMAND controller.
XTo confirm the selection: press W the
COMAND controller.
Setting the airflow
You can set the airflow separately for the
driver’s side and for the front-passenger side.
XSelect left airflow = or right airflow A by
turning cVd the COMAND controller and
press W to confirm.
XTo adjust the airflow: slide ZVÆ or turn
cVd the COMAND controller.
XTo confirm the selection: press W the
COMAND controller.
Climate control main menu
Using COMAND, you can set additional
functions that cannot be called up using the
control panel in the center console. Call up
these functions using the climate control
main menu.
XTo open the climate control main
menu: select the AC climate control
symbol in the air-conditioning function bar
by turning cVd the COMAND controller
and press W to confirm.
The climate control menu opens.
Vehicle235COMANDZ
Page 238 of 480
Climate control main menu
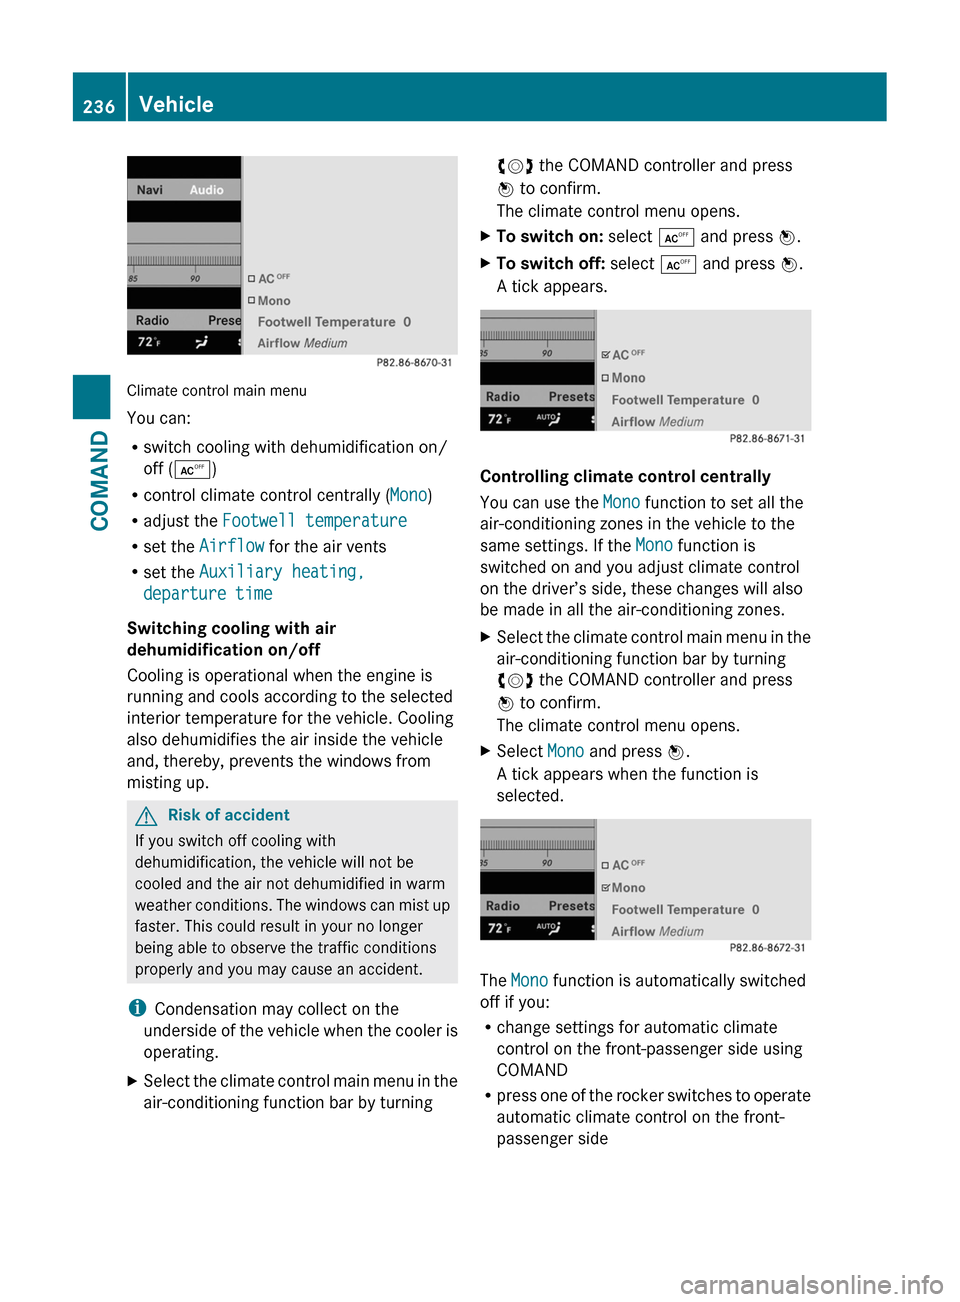
You can:
Rswitch cooling with dehumidification on/
off (Æ)
Rcontrol climate control centrally (Mono)
Radjust the Footwell temperature
Rset the Airflow for the air vents
Rset the Auxiliary heating,
departure time
Switching cooling with air
dehumidification on/off
Cooling is operational when the engine is
running and cools according to the selected
interior temperature for the vehicle. Cooling
also dehumidifies the air inside the vehicle
and, thereby, prevents the windows from
misting up.
GRisk of accident
If you switch off cooling with
dehumidification, the vehicle will not be
cooled and the air not dehumidified in warm
weather conditions. The windows can mist up
faster. This could result in your no longer
being able to observe the traffic conditions
properly and you may cause an accident.
iCondensation may collect on the
underside of the vehicle when the cooler is
operating.
XSelect the climate control main menu in the
air-conditioning function bar by turning
cVd the COMAND controller and press
W to confirm.
The climate control menu opens.
XTo switch on: select Æ and press W.XTo switch off: select Æ and press W.
A tick appears.
Controlling climate control centrally
You can use the Mono function to set all the
air-conditioning zones in the vehicle to the
same settings. If the Mono function is
switched on and you adjust climate control
on the driver’s side, these changes will also
be made in all the air-conditioning zones.
XSelect the climate control main menu in the
air-conditioning function bar by turning
cVd the COMAND controller and press
W to confirm.
The climate control menu opens.
XSelect Mono and press W.
A tick appears when the function is
selected.
The Mono function is automatically switched
off if you:
Rchange settings for automatic climate
control on the front-passenger side using
COMAND
Rpress one of the rocker switches to operate
automatic climate control on the front-
passenger side
236VehicleCOMAND
Page 239 of 480
Adjusting the footwell temperature
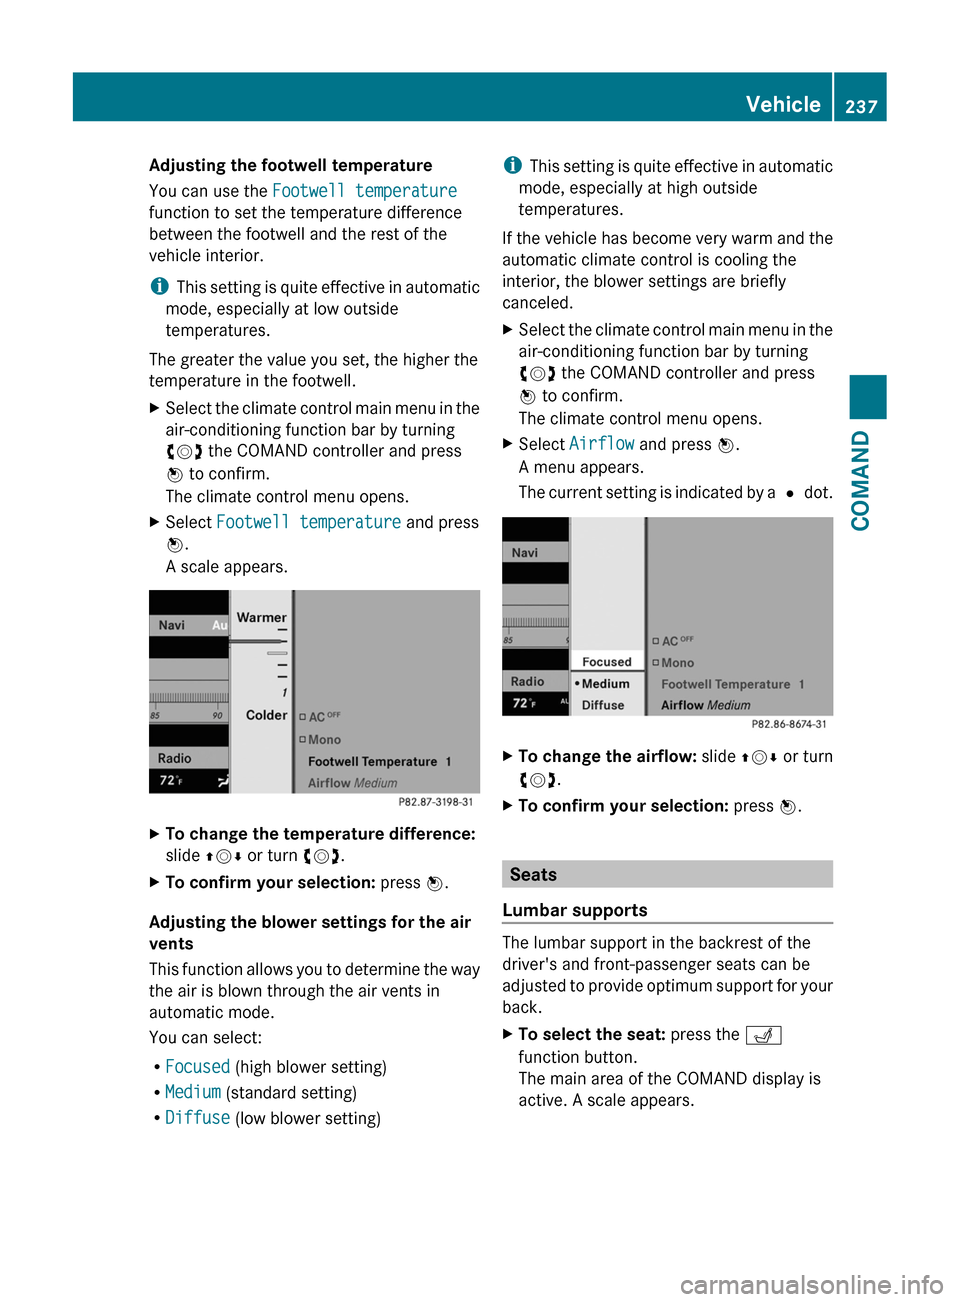
You can use the Footwell temperature
function to set the temperature difference
between the footwell and the rest of the
vehicle interior.
iThis setting is quite effective in automatic
mode, especially at low outside
temperatures.
The greater the value you set, the higher the
temperature in the footwell.
XSelect the climate control main menu in the
air-conditioning function bar by turning
cVd the COMAND controller and press
W to confirm.
The climate control menu opens.
XSelect Footwell temperature and press
W.
A scale appears.
XTo change the temperature difference:
slide ZVÆ or turn cVd.
XTo confirm your selection: press W.
Adjusting the blower settings for the air
vents
This function allows you to determine the way
the air is blown through the air vents in
automatic mode.
You can select:
RFocused (high blower setting)
RMedium (standard setting)
RDiffuse (low blower setting)
iThis setting is quite effective in automatic
mode, especially at high outside
temperatures.
If the vehicle has become very warm and the
automatic climate control is cooling the
interior, the blower settings are briefly
canceled.
XSelect the climate control main menu in the
air-conditioning function bar by turning
cVd the COMAND controller and press
W to confirm.
The climate control menu opens.
XSelect Airflow and press W.
A menu appears.
The current setting is indicated by a # dot.
XTo change the airflow: slide ZVÆ or turn
cVd.
XTo confirm your selection: press W.
Seats
Lumbar supports
The lumbar support in the backrest of the
driver's and front-passenger seats can be
adjusted to provide optimum support for your
back.
XTo select the seat: press the T
function button.
The main area of the COMAND display is
active. A scale appears.
Vehicle237COMANDZ
Page 258 of 480
Vehicle equipment
i This manual describes all the standard
and optional equipment of your vehicle
which was available at the time of
purchase. Country-specific differences are
possible. Bear in mind that your vehicle
may not feature all functions described
here. This also refers to safety-related
systems and functions.
Overview of climate control systems
Important safety notes
GWarning
Severe conditions (e.g. strong air pollution)
may require replacement of the filter before
its scheduled replacement interval. A clogged
filter will reduce the air volume to the interior
and the windows could fog up, impairing
visibility and endangering you and others.
Have a clogged filter replaced as soon as
possible at an authorized Mercedes-Benz
Center.
GWarning
Follow the recommended settings for heating
and cooling given on the following pages.
Otherwise, the windows could fog up,
impairing visibility and endangering you and
others.
Automatic climate control regulates the
temperature and the humidity in the vehicle
interior and filters undesirable substances
from the air.
Automatic climate control is only operational
when the engine is running 15
. Optimum
operation is only achieved when you drive
with the side windows and tilt/sliding sunroof
closed.
Some functions of automatic climate control
can also be set via COMAND ( Y page 234).
i
Ventilate the vehicle for a brief period
during warm weather, e.g. using the
convenience opening feature ( Y page 86).
This will speed up the cooling process and
the desired vehicle interior temperature
will be reached more quickly.
i The integrated filter can remove most
particles of dust and removes pollen
completely. A clogged filter reduces the
amount of air supplied to the vehicle
interior. For this reason, you should always
observe the interval for replacing the filter,
which is specified in the Service Booklet.
As it depends on environmental conditions,
e.g. heavy air pollution, the interval may be
shorter than stated in the Service Booklet.
i It is possible that the interior blower may
be activated automatically 40 minutes after
the SmartKey is removed. The vehicle is
then ventilated for 30 minutes to dry the
air-conditioning system.15 The "residual heat" function can only be switched on/off if the ignition is switched off.256Overview of climate control systemsClimate control
Page 263 of 480
Rear window defroster
Activating/deactivatingGWarning
Any accumulation of snow and ice should be
removed from the rear window before driving.
Visibility could otherwise be impaired,
endangering you and others.
The rear window heating has a high current
draw. You should therefore switch it off as
soon as the window is clear as it only switches
off automatically after several minutes.
If the battery voltage is too low, the rear
window heating may switch off.
XTurn the SmartKey to position 2 in the
ignition lock.XPress the ¤ rocker switch up or down.
The indicator lamp in the ¤ rocker
switch lights up or goes out.
Problems with the rear window heating
The rear window heating has deactivated
itself prematurely or cannot be activated.
XSwitch off any consumers that are not
required, e.g. reading lamps or interior
lighting.
When the battery is sufficiently charged,
the rear window heating is activated again
automatically.
Activating/deactivating air-
recirculation mode
You can deactivate the flow of fresh air if
unpleasant odors are entering the vehicle
from outside. The air already inside the
vehicle will then be recirculated.
GWarning
Fogged windows impair visibility,
endangering you and others. If the windows
begin to fog on the inside, switching off the
air recirculation mode immediately should
clear interior window fogging. If interior
window fogging persists, make sure the air
conditioning is activated, or press the ¬
button.XTurn the SmartKey to position 2 in the
ignition lock.XTo activate: press the g rocker switch
up or down.
The indicator lamp in the g rocker
switch lights up.
i Air-recirculation mode is activated
automatically at high outside
temperatures. The indicator lamp in the
g rocker switch is not lit when
automatic air-recirculation mode is
activated.
Outside air is added after about 30
minutes.
X To deactivate: press the g rocker
switch up or down.
The indicator lamp in the g rocker
switch goes out.
i Air-recirculation mode switches off
automatically:
R after approximately five minutes if
outside temperatures are under about
41 ‡ (5 †)
R after approximately five minutes if
cooling with air dehumidification is
deactivated
R after approximately 30 minutes if outside
temperatures are over about
41 ‡ (5 †)
Switching the residual heat on/off
It is possible to make use of the residual heat
of the engine to continue heating the
stationary vehicle for up to 30 minutes after
the engine has been switched off. The heating
time depends on the temperature that has
been set.
i The blower will run at a low speed
regardless of the airflow setting.
Operating the control systems261Climate controlZ
Page 273 of 480
Automatic engine switch-off
The ECO start/stop function switches the
engine off automatically if the vehicle is
braked to a standstill and the brake remains
depressed with the transmission in position
D or N.
i You can still activate HOLD when the
vehicle is stationary, even if the engine has
been switched off automatically. It is then
not necessary to continue applying the
brakes during the automatic stop phase.
When you depress the accelerator pedal,
the engine starts automatically and the
braking effect of the HOLD function is
deactivated. Depress the accelerator pedal
carefully, as the engine must be started
first.
The engine is only switched off if:
R the outside temperature is within the range
which is suitable for the system.
R the engine is at normal operating
temperature.
R the set temperature for the vehicle interior
has been reached.
R the battery is sufficiently charged.
R the system detects that the windshield is
not fogged up when the air-conditioning
system is switched on.
R the hood is closed.
R no engine relevant diagnostics are active.
R the driver's door is closed and the seat belt
is fastened.
Automatic engine start
The engine is started automatically if you:
R release the brake pedal when HOLD is not
activated and the transmission is in
position D or N
R shift the transmission to position R
R depress the accelerator pedal
Rswitch off the ECO start/stop function or
switch to drive program S or M
R unfasten your seat belt or open the driver's
door
The engine is also started automatically if:
R the vehicle starts to roll.
R the brake system requires this.
R the system detects moisture on the
windshield when the air-conditioning
system is switched on.
R the temperature in the vehicle interior
deviates from the set range.
R the battery's condition of charge is too low.
Deactivating/activating the ECO start/
stop function
General notes
You can activate and deactivate the ECO
start/stop function using COMAND
( Y page 230).
i You can also use the programmable
button ( Y page 109) to activate and
deactivate the ECO start/stop function if
you have assigned this function to the
button.
Deactivating
XDeactivate the ECO start/stop function
using COMAND ( Y page 230):
The ECO symbol goes out and the Stop/
Start deactivated display message is
shown in the multifunction display.
i If drive program S or M has been selected,
the ECO start/stop function is always
deactivated.
Activating
XActivate the ECO start/stop function using
COMAND ( Y page 230).
The ECO symbol and the Stop/Start
active display message is shown in the
multifunction display.Driving271Driving and parkingZ