reset sun roof MERCEDES-BENZ CL-Class 2011 C216 Owner's Manual
[x] Cancel search | Manufacturer: MERCEDES-BENZ, Model Year: 2011, Model line: CL-Class, Model: MERCEDES-BENZ CL-Class 2011 C216Pages: 480, PDF Size: 19.76 MB
Page 18 of 480
Rear compartmentSetting the air vents ......................263
Rear fog lamp (display message) ..... 357
Rear view camera .............................. 314
Rear view camera (cleaning
instructions) ...................................... 414
Rear-view mirror Dipping (automatic) .......................101
Rear window blind ............................ 389
see Rear window roller sunblind
Rear window heating
Malfunction .................................... 261
Switching on/off ........................... 261
Redials ................................................ 184
Refueling ............................................ 281
Remote control .................................. 115
Programming (garage door
opener) .......................................... 398
Reporting
Malfunctions relevant to safety ........ 26
Reserve (fuel tank)
see Fuel
Reserve fuel
Display message ............................ 362
Warning lamp ................................. 380
Reset .................................................. 135
Residual heat Switching on/off ........................... 261
Restraint systems
see SRS
Reversing lamp (display message) .. 358
Roadside Assistance (breakdown) .... 24
Roller sunblind Rear window .................................. 389
Rear window (COMAND) ................230
Roof lining and carpets (cleaning
guidelines) ......................................... 417
Route Calculating ..................................... 141
Estimated time of arrival ................156
Route overview .............................. 157
see Route guidance (on-board
computer)
Route calculation
Starting .......................................... 141
Route guidance .................................. 151
Cancel ........................................... 154Continue ........................................ 154
Continuing ..................................... 154
Destination reached ......................155
Lane recommendations .................153
Off-road ......................................... 158
Traffic reports ................................ 159
Route guidance (on-board
computer) .......................................... 333
Route options Setting ........................................... 137
Route overview .................................. 157
Route type Setting ........................................... 137
S
Safety Children in the vehicle .....................56
Child restraint systems ....................56
Occupant Classification System
(OCS) ............................................... 46
Overview of occupant safety
systems ........................................... 40
Safety notes
Audio CD/DVD and MP3 mode .....204
Operating safety ....................106, 237
Using the telephone ....................... 178
Video DVD mode ........................... 223
Safety systems
see Driving safety systems
SatRadio ............................................. 200
Displaying information ...................204
Registering .................................... 201
Selecting a category ......................202
Switching to ................................... 201
SD memory card
Loading .......................................... 205
Seat
Active multicontour seat .......... 97, 240
Selecting (COMAND) .....................238
Seat belts
Automatic comfort-fit feature ..........55
Belt force limiters ............................ 55
Cleaning ......................................... 416
Correct usage .................................. 52
Emergency Tensioning Devices ........ 55
Fastening ......................................... 53
Important safety guidelines .............51
16Index
Page 19 of 480
Releasing ......................................... 54
Safety guidelines ............................. 41
Special seat belt retractor ...............58
Warning lamp ................................. 376
Warning lamp (function) ................... 54
Seat heating
Indicator lamp (Malfunction) ............98
Seats
Adjusting (electrically) .....................94
Adjusting lumbar support ................97
Adjusting the head restraint ............95
Cleaning the cover .........................416
Correct driver's seat position ........... 92
Important safety notes ....................93
Multicontour seat ............................ 97
Storing settings (memory
function) ........................................ 102
Switching seat heating on/off .........97
Switching the seat ventilation on/
off .................................................... 98
Seat ventilation
Indicator lamp (Malfunction) ............98
Sensors (cleaning instructions) ....... 414
Service indicator see Service interval display
Service interval display .................... 409
Displaying a service message (on-
board computer) ............................ 410
Service menu (on-board computer) . 340
Service products Brake fluid ..................................... 472
Capacities ...................................... 469
Coolant (engine) ............................ 473
Engine oil ....................................... 471
Fuel ................................................ 470
Important safety notes ..................468
Notes ............................................. 468
Refrigerant (air-conditioning
system) .......................................... 472
Washer fluid ................................... 473
Settings
On-board computer .......................341
Setting the air distribution
COMAND ....................................... 235
Shift ranges ....................................... 278
Showing the distance display (on-
board computer) ............................... 339
Side impact air bag ............................. 45Side marker lamp (display
message) ............................................ 358
Side windows Convenience closing feature ............86
Convenience opening feature ..........86
Important safety information ...........85
Opening/closing .............................. 86
Resetting ......................................... 87
Troubleshooting ............................... 88
Skipping back
CD/DVD mode .............................. 209
Skipping forwards
CD/DVD mode .............................. 209
Sliding sunroof
Important safety information ...........88
Opening/closing .............................. 89
Resetting ......................................... 90
Troubleshooting ............................... 90
SmartKey
Changing the battery .......................76
Changing the programming .............75
Checking the battery .......................76
Convenience closing feature ............86
Convenience opening feature ..........86
Display message ............................ 373
Important safety notes ....................72
Malfunction ...................................... 77
Starting the engine ........................269
Snow chains ...................................... 440
Socket ................................................ 390
Dashboard ..................................... 391
Trunk ............................................. 391
SOS
see mbrace
Sound
Switching on/off ........................... 124
Sound Mode ....................................... 127
Sound settings .................................. 125
Spare wheel Notes/data .................................... 464
Storage location ............................ 420
see Emergency spare wheel Index17
Page 53 of 480
PRE-SAFE®
systemGWarning
The PRE-SAFE ®
system reduces the impact of
an accident on vehicle occupants, as long as
their seat belts have been fastened correctly.
Although your vehicle is equipped with a PRE-
SAFE ®
system, the possibility of injury in the
event of an accident cannot be ruled out. You
should therefore always drive carefully and
adapt your driving style to the prevailing road,
weather and traffic conditions.
PRE-SAFE ®
takes pre-emptive measures to
protect occupants in certain hazardous
situations.
PRE-SAFE ®
intervenes:
R in emergency braking situations, e.g. if BAS
is activated or, in vehicles with DISTRONIC
PLUS, where BAS PLUS intervenes
powerfully
R in critical driving situations, e.g. when
physical limits are exceeded and the
vehicle understeers or oversteers severely
or when having to swerve to avoid an
obstacle at a speed
PRE-SAFE ®
takes the following measures
depending on the hazardous situation
detected:
R the front-passenger seat is adjusted if it is
in an unfavorable position.
R it increases the air pressure in the side
bolsters of the seat cushion and seat
backrest of the active multicontour seats in
the front.
R if the vehicle skids, the side windows and
sliding sunroof are closed so that only a
small gap remains.
If the sliding sunroof or a side window is
obstructed when closing, the closing
procedure is stopped. The obstructed sliding
sunroof or side window then opens again
slightly.
If the hazardous situation passes without
resulting in an accident, all settings made by
PRE-SAFE ®
can be reversed. The air pressure
in the side bolsters on the active multicontour
seat is reduced again.
If the seat belts are not released:XMove the backrest back slightly, but only
when the vehicle is stationary.
The belt pretensioning is reduced and the
locking mechanism is released.GWarning
Make sure that nobody can become trapped
as you adjust the seat.
! Make sure that there are no objects in the
footwell or behind the seats when resetting
the seats. There is a risk that the seats
and/or the objects could be damaged.
Seat belts
Important safety notes
The use of infant or child restraint systems is
required by law in all 50 states, the District of
Columbia, the U.S. territories and all
Canadian provinces.
Even where this is not the case, all vehicle
occupants should have their seat belts
fastened when the vehicle is in motion.
i See "Children in the vehicle"
( Y page 56) for more information on
infants and children traveling with you in
the vehicle and restraints for infants and
children.
GWarning!
Always fasten your seat belt before driving off.
Always make sure all of your passengers are
properly restrained. You and your passengers
should always wear seat belts.
Failure to wear and properly fasten and
position your seat belt greatly increases your
risk of injuries and their likely severity in an
accident.
If you are ever in an accident, your injuries can
be considerably more severe without your
Occupant safety51SafetyZ
Page 89 of 480
closing procedure, press and hold the
& button.
Vehicles with KEYLESS-GO:
RRelease the sensor surface on the outside
door handle to stop the closing procedure.
RImmediately pull on the same outside door
handle and hold firmly. The door windows
and the sliding sunroof will open for as long
as the door handle is held but the door is
not opened.
Using the SmartKey
iThe SmartKey must be close to the
driver's door handle.
XPoint the tip of the SmartKey at the driver's
door handle.
XLock the vehicle by pressing the &
button.
XPress and hold the & button until the
side windows and the sliding sunroof are
fully closed.
XMake sure that all the side windows and the
sliding sunroof are closed.
XTo interrupt the convenience closing:
release the & button.
With KEYLESS-GO
The KEYLESS-GO key must be outside the
vehicle but must not be further than 3 ft (1 m)
from a door.
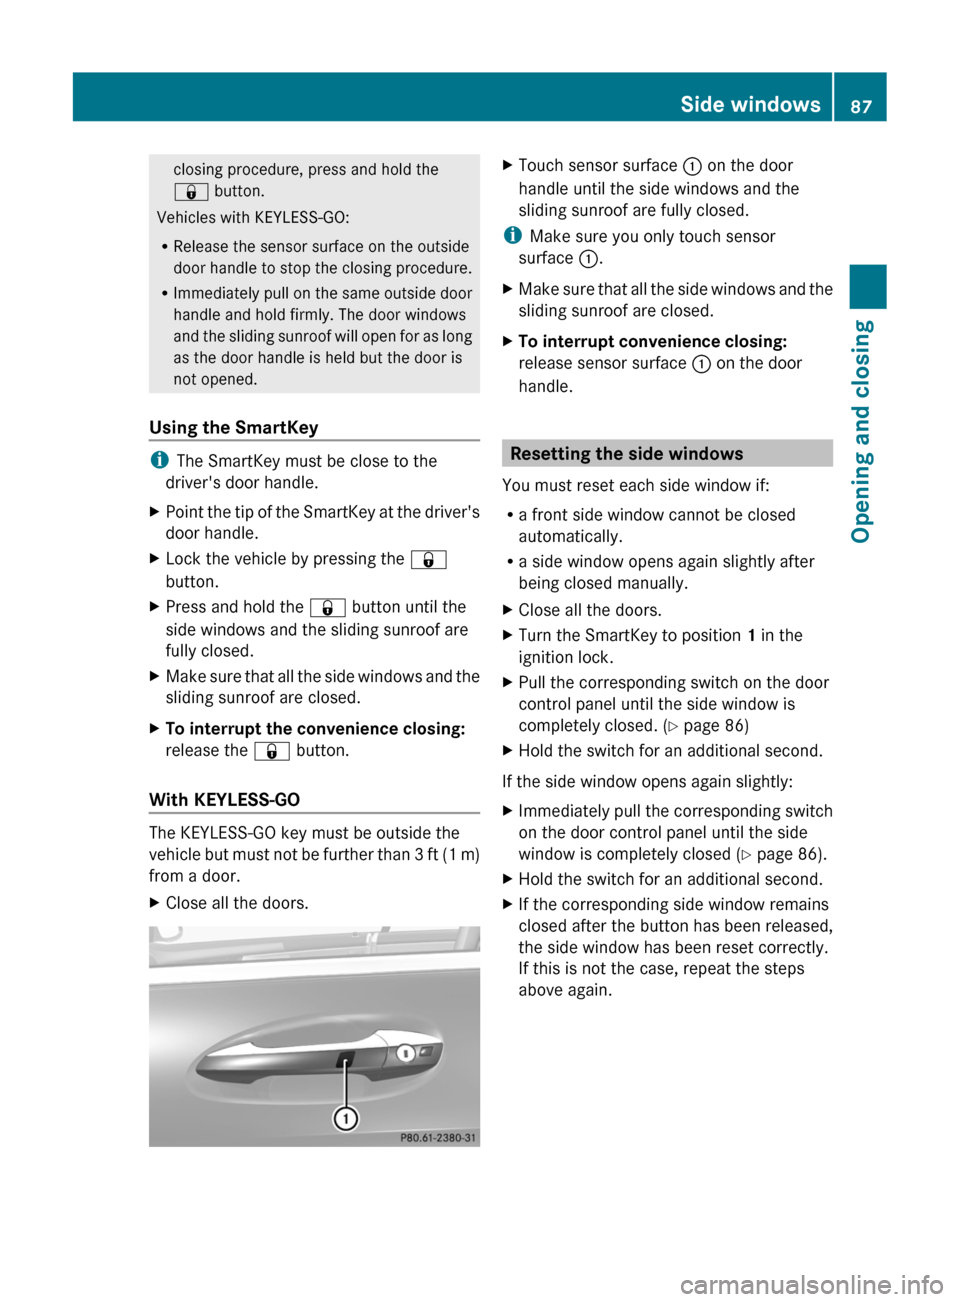
XClose all the doors.XTouch sensor surface : on the door
handle until the side windows and the
sliding sunroof are fully closed.
iMake sure you only touch sensor
surface :.
XMake sure that all the side windows and the
sliding sunroof are closed.
XTo interrupt convenience closing:
release sensor surface : on the door
handle.
Resetting the side windows
You must reset each side window if:
Ra front side window cannot be closed
automatically.
Ra side window opens again slightly after
being closed manually.
XClose all the doors.XTurn the SmartKey to position 1 in the
ignition lock.
XPull the corresponding switch on the door
control panel until the side window is
completely closed. (Y page 86)
XHold the switch for an additional second.
If the side window opens again slightly:
XImmediately pull the corresponding switch
on the door control panel until the side
window is completely closed (Y page 86).
XHold the switch for an additional second.XIf the corresponding side window remains
closed after the button has been released,
the side window has been reset correctly.
If this is not the case, repeat the steps
above again.
Side windows87Opening and closingZ
Page 92 of 480
corresponding direction. You can stop
automatic operation by pressing again.
Automatic raising is only available when the
sliding sunroof is closed.
Automatic opening is only available when
the sliding sunroof is not raised.
You can open or close the sun protection
cover by hand when the sliding sunroof is
raised or closed.
Resetting
Reset the sliding sunroof if it does not open
smoothly.
! If the sliding sunroof cannot be closed
fully or reset, consult a qualified specialist
workshop.
XTurn the SmartKey to position 2 in the
ignition lock.XRaise the sliding sunroof fully at the rear
( Y page 89).XKeep the 3 switch pressed for another
second.XMake sure that the sliding sunroof can be
opened or closed fully again when operated
automatically ( Y page 89).XIf the sliding sunroof can be raised fully at
the rear, it has been reset correctly. If this
is not the case, repeat the steps above
again.
Problems with the sliding sunroof
Problem: the sunroof cannot be closed
and you cannot see the cause.
GWarning
You could be severely or even fatally injured
when closing the sliding sunroof with
increased closing force or if the anti-
entrapment feature is deactivated. Make sure
that nobody can become trapped when
closing the sliding sunroof.
If the sliding sunroof is obstructed during
closing and reopens again slightly:XImmediately after the sliding sunroof
blocks, pull the 3 switch in the
overhead control panel down to the point
of resistance and hold it until the sliding
sunroof is closed.
The sliding sunroof is closed with increased
force.
If the sliding sunroof is obstructed again
during closing and reopens again slightly:
XImmediately after the sliding sunroof
blocks, pull the 3 switch in the
overhead control panel down to the point
of resistance and hold it until the sliding
sunroof is closed.
The sliding sunroof is closed without the
anti-entrapment feature.GWarning!
Pressing and holding the sliding sunroof
switch to close the sliding sunroof
immediately after it had been blocked two
times will cause the sliding sunroof to close
without the anti-entrapment feature for as
long as you hold the switch.
90Sliding sunroofOpening and closing