turn signal MERCEDES-BENZ CL-Class 2014 C217 Owner's Guide
[x] Cancel search | Manufacturer: MERCEDES-BENZ, Model Year: 2014, Model line: CL-Class, Model: MERCEDES-BENZ CL-Class 2014 C217Pages: 494, PDF Size: 13.55 MB
Page 333 of 494
the
mph display uni
tis selected, the
assistance range begins at 40 mph. G
WARNING
Active Lane Keeping Assist does not keep
your vehicle in its lane. It is only an aid and
may detect the lane markings on the road
incorrectly or not at all.
The system may be impaired or may not
function if:
R several or no lane markings for a single lane
are present.
R there is poor visibility, e.g. due to
insufficient illumination of the road, or due
to snow, rain, fog or spray.
R there is glare, e.g. from oncoming traffic,
the sun, or reflection from other vehicles.
R the windshield is dirty, fogged up or
covered, for instance by a sticker, in the
vicinity of the camera.
R the lane markings are worn away, dark or
covered up, e.g. by dirt or snow.
R the distance to the vehicle in front is too
small and the lane markings thus cannot be
detected.
R the lane markings on the road are unclear,
e.g. near roadworks.
R the lane markings change quickly, e.g.
lanes branch off, cross one another or
merge.
R the road is narrow and winding.
Active Lane Keeping Assist cannot detect
road and traffic conditions. It is not a
substitute for attentive driving. You are
responsible for the vehicle's speed, braking in
good time, and steering correctly. Always
adapty our driving style to suit the prevailing
road and weather conditions. Always pay
attention to traffic conditions and your
surroundings. Otherwise, you may fail to
recognize dangers in time, cause an accident
and injure yourself and others. Warning vibration in the steering wheel
A warning may be given if a front wheel
passes over a lane marking. It will warn you
by means of intermittent vibration in the
steering wheel for up to 1.5 seconds.
In order that you are warned only when
necessary and in good time if you cross the
lane marking, the system recognizes certain
conditions and warns you accordingly.
The warning vibration occurs earlier if:
R
you approach the outer lane marking on a
bend.
R the road has very wide lanes, e.g. a
freeway.
R the system recognizes solid lane markings.
The warning vibration occurs later if:
R the road has narrow lanes.
R you cut the corner on a bend.
No warning vibration occurs if:
R you clearly and actively steer, brake or
accelerate.
R you cut the corner on a sharp bend.
R a driving safety system intervenes, e.g.
ABS, BAS or ESP ®
.
R you switch on the turn signals. In this event,
the warnings are suppressed for a certain
period of time.
Lane-correcting brake application
If you leave your lane under certain
circumstances the vehicle will brake briefly
on one side. This is meant to assist you in
bringing the vehicle back to the original lane.
This function is available in the range between
40 mph and 120 mph (60 km/h and
200 km/h).
A lane-correcting brake application can only
be made after driving over a solid,
recognizable lane marking. Before this, a
warning must be given by means of
intermittentv ibration in the steering wheel.
In addition, a lane with lane markings on both
sides must be recognized. The brake Driving systems
331Driving and parking Z
Page 334 of 494
applicatio
nalso slightly reduces vehicle
speed.
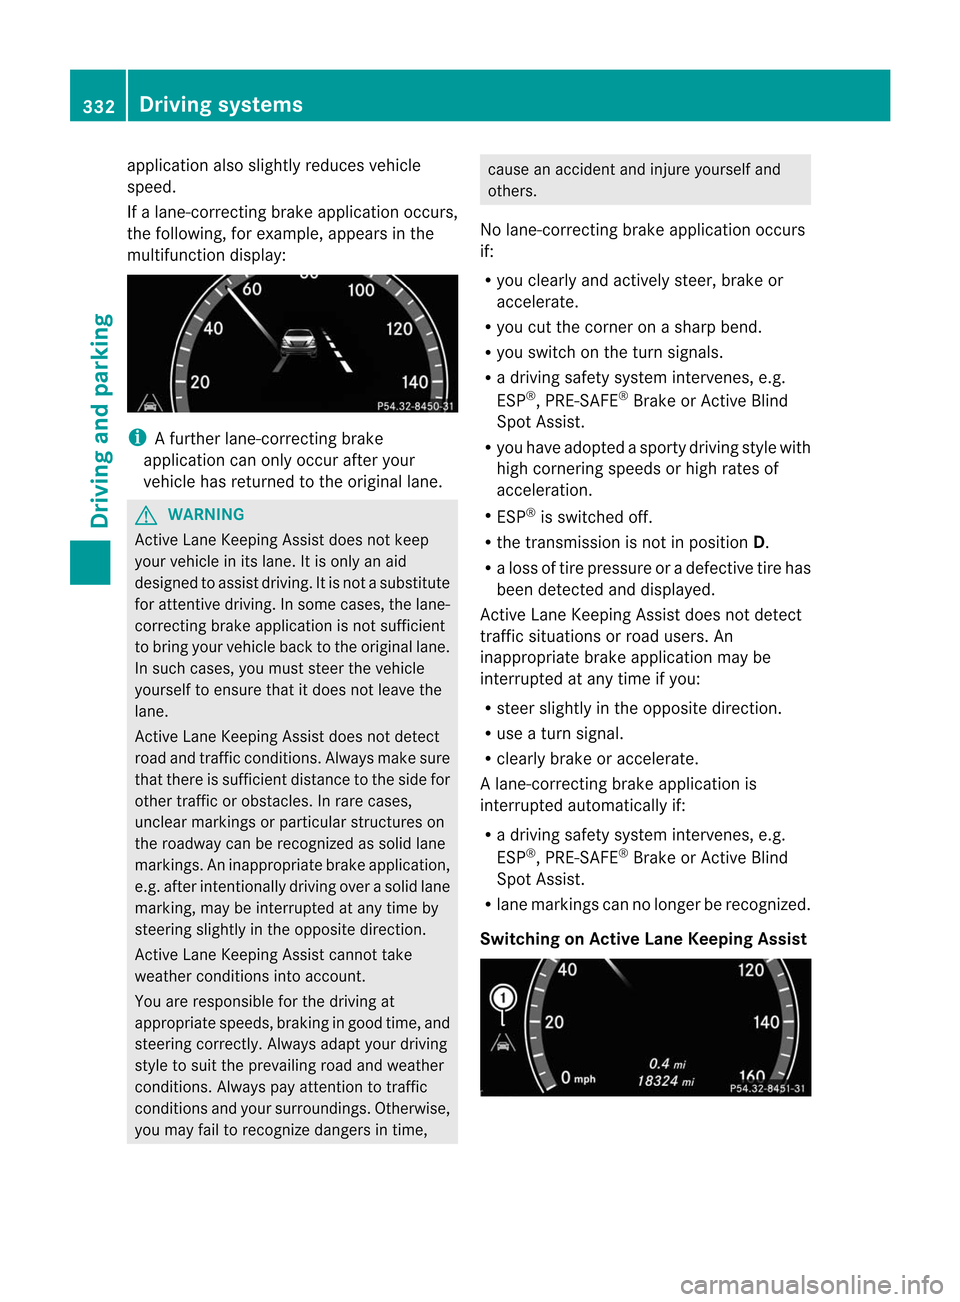
If a lane-correcting brake application occurs,
the following, for example, appears in the
multifunction display: i
A further lane-correcting brake
application can only occur after your
vehicle has returned to the original lane. G
WARNING
Active Lane Keeping Assist does not keep
your vehicle in its lane. It is only an aid
designed to assist driving. It is not a substitute
for attentive driving. In some cases, the lane-
correcting brake application is not sufficient
to bring your vehicle back to the original lane.
In such cases, you must steer the vehicle
yourself to ensure that it does not leave the
lane.
Active Lane Keeping Assist does not detect
road and traffic conditions. Always make sure
that there is sufficien tdistance to the side for
other traffic or obstacles. In rare cases,
unclear markings or particular structures on
the roadway can be recognized as solid lane
markings .Aninappropriate brake application,
e.g .after intentionally driving over a solid lane
marking, may be interrupted at any time by
steering slightly in the opposite direction.
Active Lane Keeping Assist cannot take
weather conditions into account.
You are responsible for the driving at
appropriate speeds, braking in good time, and
steering correctly .Always adapt your driving
style to suit the prevailing road and weather
conditions. Always pay attention to traffic
conditions and your surroundings. Otherwise,
you may fail to recognize dangers in time, cause an accident and injure yourself and
others.
No lane-correcting brak eapplication occurs
if:
R you clearly and actively steer, brake or
accelerate.
R you cut the corner on a sharp bend.
R you switch on the turn signals.
R a driving safety system intervenes, e.g.
ESP ®
, PRE-SAFE ®
Brake or Active Blind
Spot Assist.
R you have adopted a sporty driving style with
high cornering speeds or high rates of
acceleration.
R ESP ®
is switched off.
R the transmission is not in position D.
R a loss of tire pressure or a defective tire has
been detected and displayed.
Active Lane Keeping Assist does not detect
traffic situations or road users. An
inappropriate brake application may be
interrupted at any time if you:
R steer slightly in the opposite direction.
R use a turn signal.
R clearly brake or accelerate.
Al ane-correcting brake applicatio nis
interrupted automatically if:
R a driving safety system intervenes, e.g.
ESP ®
, PRE-SAFE ®
Brake or Active Blind
Spot Assist.
R lane markings can no longer be recognized.
Switching on Active Lane Keeping Assist 332
Driving systemsDriving and parking
Page 369 of 494
Display messages Possible causes/consequences and
M Solutions
lamp remains lit or goes out depends on how OCS classifies the
occupant.
If the conditions are no
tfulfilled, the system is no toperating
correctly.
X Visit a qualified specialist workshop immediately. G
WARNING
If the 42 indicator lamp remains off even after performing the above corrective
steps, do not have any children twelve years old and under and other small individuals use the
front-passenger seat until the system has been repaired. Lights
i Display messages about LEDs:
This display message will only appear if all LEDs have failed. Display messages Possible causes/consequences and
M Solutions
b
Check Left
Cornering
Light or
Check Right Cornering
Light The left or right-hand cornering light is defective.
X
Check whether you are permitted to change the bulb yourself
(Y page 256).
or
X Visit a qualified specialist workshop. b
Check Left Low
Beam or
Check Right
Low Beam The left or right-hand low-beam headlamp is defective.
X
Check whether you are permitted to change the bulb yourself
(Y page 256).
or
X Visit a qualified specialist workshop. b
Check Rear Left
Turn
Signal or
Check Rear Right Turn
Signal The rear left-hand or rear right-hand turn signal is defective.
X
Check whether you are permitted to change the bulb yourself
(Y page 256).
or
X Visit a qualified specialist workshop. Display messages
367On-board computer and displays Z
Page 370 of 494
Display messages Possible causes/consequences and
M Solutions
b
Check Front Left
Turn
Signal or
Check Front Right Turn
Signal The front left-hand or front right-hand turn signal is defective.
X
Chec kwhether you are permitted to change the bulb yourself
(Y page 256).
or
X Visit a qualified specialist workshop. b
Check Left Mirror
Turn
Signal or
Check Right Mirror Turn
Signal The turn signal in the left-hand or right-hand exterior mirror is
defective.
X
Check whether you are permitted to change the bulb yourself
(Y page 256).
or
X Visit a qualified specialist workshop. b
Check
Center Brake
Lamp The high-mounted brake lamp is faulty.
X
Check whether you are permitted to change the bulb yourself
(Y page 256).
or
X Visit a qualified specialist workshop. b
Check Left Tail
and Brake
Lamp or
Check Right
Tail and Brake Lamp The left or right-hand tail lamp/brake lamp is defective.
X
Check whether you are permitted to change the bulb yourself
(Y page 256).
or
X Visit a qualified specialist workshop. b
Check Left High
Beam or
Check Right
High Beam The left or right-hand high beam is defective.
X
Check whether you are permitted to change the bulb yourself
(Y page 256).
or
X Visit a qualified specialist workshop. b
Check
Left License
Plate Lamp or
Check Right License
Plate Lamp The left or right-hand license plate lamp is defective.
X
Check whether you are permitted to change the bulb yourself
(Y page 256).
or
X Visit a qualified specialist workshop. 368
Display messagesOn-board computer and displays
Page 418 of 494
i
Usually, you now have 30seconds to
initiate the next step.
X Press previously programmed button ;,
= or? of the integrated garage door
opener until the door closes.
The rolling code synchronization is then
complete.
Notes on programming the remote
control
Canadian radio frequency laws require a
"break" (or interruption) of the transmission
signals after broadcasting for a few seconds.
Therefore, these signals may not last long
enough for the integrated garage door
opener. The signal is not recognized during
programming. Comparable with Canadian
law, some U.S. garage door openers also
feature a "break".
Proceed as follows:
R if you live in Canada
R if you have difficulties programming the
garage door opener (regardless of where
you live) when using the programming
steps
X Press and hold one of buttons ;to? on
the integrated garage door opener.
After a short time, indicator lamp :lights
up yellow.
X Release the button.
Indicator lamp :flashes yellow.
X Press button Bof garage door remote
control Afor two seconds, then release it
for two seconds.
X Press button Bagainf or two seconds.
X Repeat this sequence on button Bof
remote control Auntil indicator lamp :
lights up green.
If indicator lamp :turns red, repeat the
process.
X Continue with the other programming
steps (see above). Problems when programming
If you are experiencing problems
programming the integrated garage door
opener on the rear-view mirror, take note of
the following instructions:
R
Check the transmitter frequency of garage
door drive remote control A.This can
usually be found on the back of the remote
control.
The integrated garage door opener is
compatible with devices that have units
which operate in the frequency range of
280to 433MHz.
R Replace the batteries in garage door
remote control A.This increases the
likelihood that garage door remote control
A will transmit a stronga nd precise signal
to the integrated garage door opene rinthe
rear-view mirror.
R When programming, hold remote control
A at varying distances and angles from the
button that you are programming. Try
various angles at a distance between 2and
12 inches (5to 30 cm) or at the same angle
but at varying distances.
R If another remote control for the same
garage door drive is available, repeat the
same programming steps with this remote
control. Before performing these steps,
make sure that new batteries have been
installed in garage door drive remote
control A.
R Note that some remote controls only
transmit for a limited amount of time (the
indicator lamp on the remote control goes
out). Press button Bon remote control
A again before transmission ends.
R Align the antenna cable of the garage door
opener unit. This can improve signal
reception/transmission.
Opening/closing the garage door After it has been programmed, the integrated
garage door opener performs the function of
the garage door system remote control.416
FeaturesStowage and features
Page 419 of 494
Please also read the operating instructions
for the garage door system.
X Turn the SmartKey to position 2in the
ignition lock.
X Press button ;,=or? which you have
programmed to operate the garage door.
Garage door system with a fixed code:
indicator lamp :lights up green.
Garage door system with a rolling code:
indicator lamp :flashes green.
i The transmitter will transmit a signal as
long as the button is pressed. The
transmission is halted after a maximum of
ten seconds and indicator lamp :lights
up yellow. Press button ;,=or? again
if necessary.
Clearing the memory of the integrated
garage door opener on the rear-view
mirror X
Turn the SmartKey to position 2in the
ignition lock.
X Press buttons ;and ?.
The indicator lamp lights up yellow.
X Press and hold buttons ;and ?until the
indicator lamp turns green.
i Make sure that you clear the memory of
the integrated garage door opener before
selling the vehicle. Floormat on the driver's side
G
WARNING
Whenever you are using a floormat, make sure
there is enough clearance and that the
floormat is securely fastened.
The floormat should always be securely
fastened using the fastening equipment.
Before driving off, check that the floormat is
securely in place and adjust it if necessary. A
loose floormat could slip and hinder proper
functioning of the pedals. Do not place several floormats on top of each
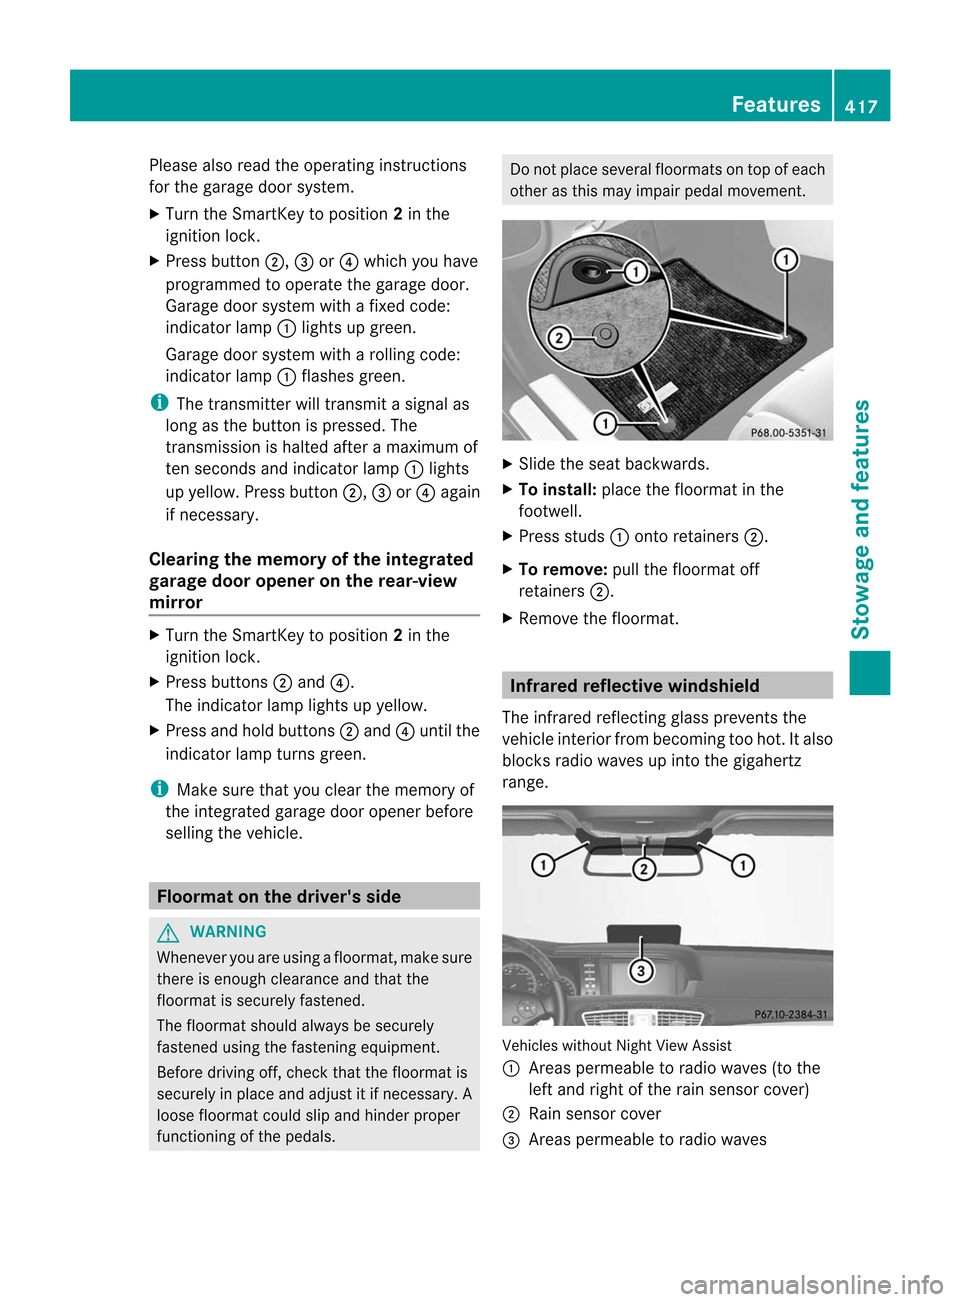
other as this may impair pedal movement.
X
Slide the seat backwards.
X To install: place the floormat in the
footwell.
X Press studs :onto retainers ;.
X To remove: pull the floormat off
retainers ;.
X Remove the floormat. Infrared reflective windshield
The infrared reflecting glass prevents the
vehicle interior from becoming too hot. It also
blocks radio waves up into the gigahertz
range. Vehicles without Night View Assist
:
Areas permeable to radio waves (to the
left and right of the rain sensor cover)
; Rain sensor cover
= Areas permeable to radio waves Features
417Stowage and features Z
Page 433 of 494
Cleaning the mirror turn signals
!
Only use cleaning agents or cleaning
cloths that are suitable for plastic lenses.
Unsuitable cleaning agents or cleaning
cloths could scratch or damage the plastic
lenses of the mirror tur nsignals.
X Clean the plastic lenses of the mirror turn
signals using a wet sponge and a mild
cleaning agent, e.g. Mercedes-Ben zcar
shampoo. Cleaning cloths may be used as
well.
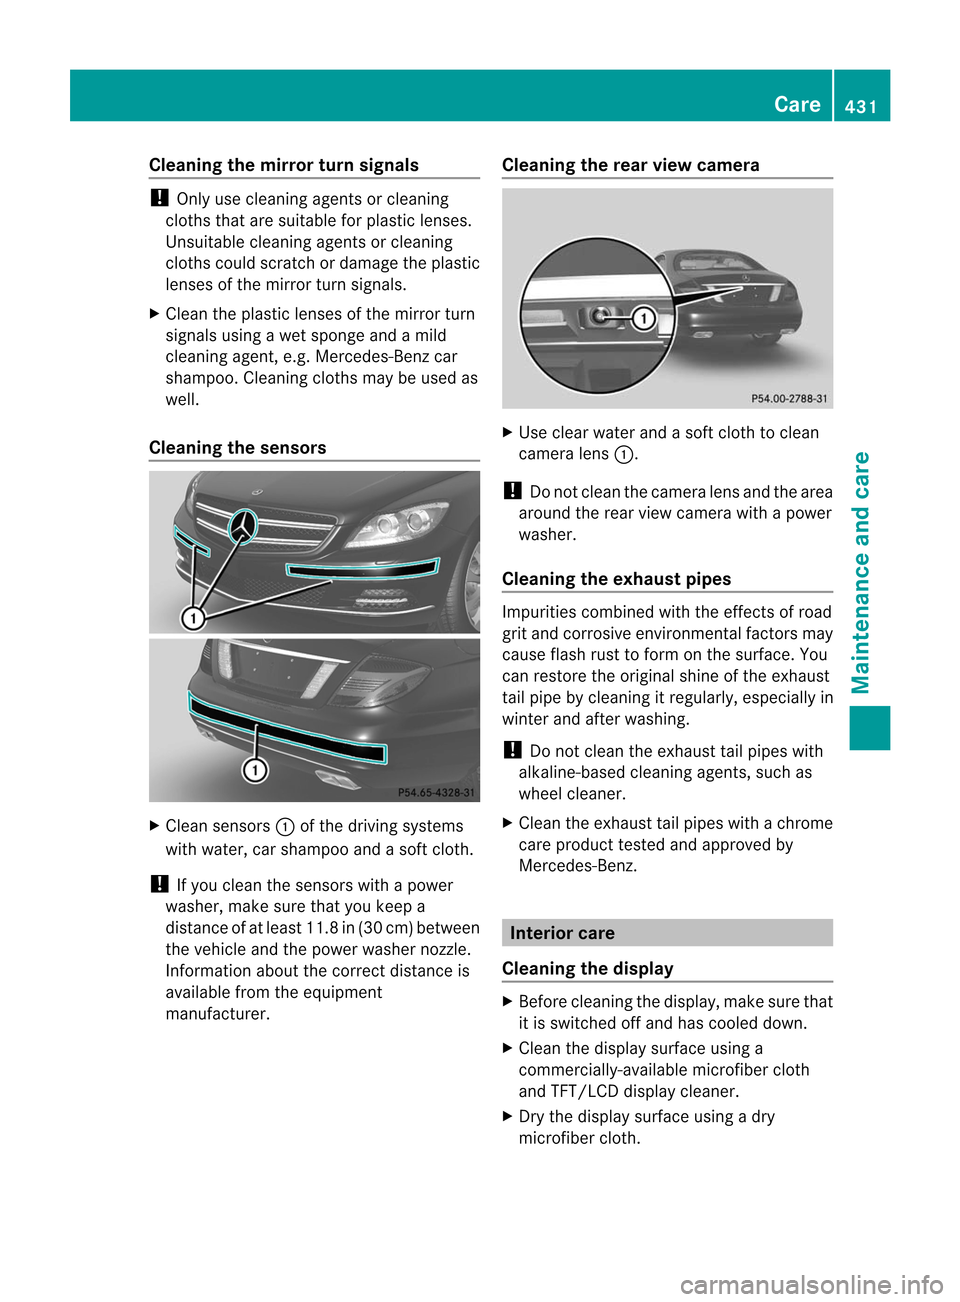
Cleaning the sensors X
Clean sensors :of the driving systems
with water, car shampoo and a sof tcloth.
! If you clean the sensors with a power
washer, make sure that you keep a
distance of at least 11. 8in(30 cm) between
the vehicle and the power washer nozzle.
Information about the correct distance is
available from the equipment
manufacturer. Cleaning the rear view camera X
Use clea rwate rand a sof tcloth to clean
camera lens :.
! Do not clean the camera lens and the area
around the rear view camera with a power
washer.
Cleaning the exhaust pipes Impurities combined with the effects of road
grit and corrosive environmental factors may
cause flash rust to form on the surface. You
can restore the original shine of the exhaust
tail pipe by cleaning it regularly, especially in
winter and after washing.
!
Do not clean the exhaust tail pipes with
alkaline-based cleaning agents, such as
wheel cleaner.
X Clean the exhaust tail pipes with a chrome
care produc ttested and approved by
Mercedes-Benz. Interior care
Cleaning the display X
Before cleaning the display, make sure that
it is switched off and has cooled down.
X Clean the display surface using a
commercially-available microfiber cloth
and TFT/LCD display cleaner.
X Dry the display surface using a dry
microfiber cloth. Care
431Maintenance and care Z
Page 450 of 494
X
Press the mark on cover :inwards in the
direction of the arrow.
X Take cover :off the opening.
X Screw the towing eye in clockwise to the
stop and tighten it.
Removing the towing eye X
Loosen the towing eye and unscrew it.
X Attach cover :to the bumper and press
until it engages.
X Place the towing eye in the vehicle tool kit. Towing the vehicle with the rear axle
raised
Only possible on vehicles without
4MATIC.
When towing your vehicle with the rear axle
raised, it is importan tthat you observe the
safety instructions (Y page 446).
! The ignition must be switched off if you
are towing the vehicle with the rear axle
raised. Intervention by ESP ®
could
otherwise damage the brake system.
X Switch on the hazard warning lamps
(Y page 253).
X Turn the SmartKey to position 0in the
ignition lock and remove the SmartKey
from the ignition lock.
X When leaving the vehicle, take the
SmartKey or the KEYLESS-GO key with you. Towing
avehicle with both axles on
the ground
When having your vehicle towed, observe the
important safety notes (Y page 446).G
WARNING
The power assistance for the steering and the
brake force booster do not work when the
engine is not running. You will then need
much more effort to brake and steer the vehicle
.Adapt your style of driving
accordingly.
The automatic transmission automatically
shifts to position Pwhen you open the driver's
or front-passenger door or when you remove
the SmartKey from the ignition lock. In order
to ensure that the automatic transmission
stays in position Nwhen towing the vehicle,
you must observe the following points:
X Make sure that the vehicle is stationary and
the SmartKey in the ignition lock is in
position 0.
X Turn the SmartKey to position 2in the
ignition lock.
On vehicles with KEYLESS-GO, use the key
instead of the Start/Stop button
(Y page 273).
X Depress and hold the brake pedal.
X Shift the automatic transmission to
position N.
X Release the brake pedal.
X Release the electric parking brake.
X Switch on the hazard warning lamps
(Y page 253).
X Leave the SmartKey in position 2in the
ignition lock.
i When towing with the hazard warning
lamps switched on, use the combination
switch as usual to signal a change of
direction. In this case, only the turn signals
for the desired direction flash. When the
combination switch is reset, the hazard
warning lamps start flashing again. Transporting the vehicle
The towing eye can be used to pull the vehicle
onto a trailer or transporter for transporting
purposes.
X Turn the SmartKey to position 2in the
ignition lock.
X Shift the automatic transmission to
position N. 448
Towing and tow-startingBreakdown assistance