service indicator MERCEDES-BENZ CL-Class 2014 C217 Owner's Manual
[x] Cancel search | Manufacturer: MERCEDES-BENZ, Model Year: 2014, Model line: CL-Class, Model: MERCEDES-BENZ CL-Class 2014 C217Pages: 494, PDF Size: 13.55 MB
Page 6 of 494
1, 2, 3 ...
12 Vsocket
see Sockets
4ETS
see ETS/4ETS (Electronic
Tractio nSystem)
4MATIC (permanent four-wheel
drive) .................................................. 311A
ABC see Active Body Control (ABC)
ABS (Anti-lock Braking System)
Display message ............................ 353
Function/notes ................................ 65
Important safety notes ....................65
Warning lamp ................................. 391
Activating/deactivating cooling
with air dehumidification .................264
Activating/deactivating Night
View Assist Plus
Without spotlight function .............325
With spotlight function ................... 323
Active Blin dSpot Assist
Activating/deactivating (on-
board computer) ............................ 348
Display message ............................ 379
Function/informatio n.................... 327
Active Body Control (ABC)
Display message ............................ 377
Function/notes ............................. 310
Active Driving Assistance package .327
Active Lane Keeping Assist Activating/deactivating (on-
board computer) ............................ 349
Display message ............................ 378
Function/informatio n.................... 330
Active multicontour seat ..........101, 245
Active service syste mPLUS
see ASSYS TPLUS service interval
display
ADAPTIVE BRAKE .................................68
Adaptive Damping System (ADS) .....3 09 Adaptive Highbeam Assist
Display message ............................ 370
Function/notes ............................. 254
Switching on/off (on-board
computer) ...................................... 350
Additional speedometer ...................350
Additives (engine oil) ........................487
Address Entering (example )......................... 141
see Addres sbook
Address book
Calling up ....................................... 193
Connecting acall........................... 196
Creating an entry ........................... 194
Deleting an entry ........................... 195
Entering characters .......................125
Entry as ahome address ...............166
Importing contacts ........................192
Introduction ................................... 191
Starting route guidance .................196
Voice tag ....................................... 197
Airb ags
Display message ............................ 364
Front air bag (driver, front
passenger )....................................... 48
Important safety notes ....................46
Knee bag .......................................... 48
PASSENGER AIR BAG OFF
indicator lamp .................................. 50
Safety guidelines ............................. 45
Side impact airb ag.......................... 49
Windo wcurtain air bag .................... 50
Air-conditioning system
see Climate control
Aird istribution
Settin g........................................... 265
Setting (COMAND) .........................240
Airflow
Setting ........................................... 265
Setting (COMAND) .........................241
AIRMATIC
Display message ............................ 376
Function/notes ............................. 309
Air pressure
see Tire pressure
Airv ents
Glove box ....................................... 269
Important safet ynotes .................. 2684
Index
Page 19 of 494
Operating system
see On-board computer
Outside lighting
Delayed switch-off (COMAND) .......237
Outside temperature display ...........337
Overhead control panel ......................40
Override feature Rea rside windows ........................... 64
Own address (navigation)
see Home address P
Pain tcode number ............................ 482
Paintwork (cleaning instructions) ...429
Panic alarm .......................................... 64
Parcel net ........................................... 402
Parking ............................................... 289
Important safety notes ..................289
Parking brake ................................ 290
Position of exterior mirror, front-
passenger side ............................... 105
Rea rview camera .......................... 319
see PARKTRONIC
Parking aid
Parking Guidance ........................... 315
see Exterior mirrors
see PARKTRONIC
Parking brake
Display message ............................ 357
Electric parking brake ....................290
Parking Guidance
Display message ............................ 379
Important safety notes ..................315
Parking position
Exterior mirrors (COMAND) ...........236
PARKTRONIC
Deactivating/activating .................314
Driving system ............................... 312
Function/notes ............................. 312
Important safety notes ..................312
Problem (malfunction) ...................315
Range of the sensors .....................312
Warning displa y............................. 313
PASSENGE RAIR BAG OFF
Problems (malfunction) .................. 364
PASSENGER AIR BAG OFF indicator
lamp ...................................................... 50 Pause function
Audio mode (CD, DVD, MP3) .........211
Video DVD ..................................... 231
Pedals ................................................ .292
Permanent four-wheel drive see 4MATIC (permanent four-
wheel drive)
Phone book
Calling up ....................................... 193
Creating an entry ........................... 194
Deleting an entry ........................... 195
Entering characters .......................125
Introduction ................................... 191
Picture settings (TV, video) ..............228
Plastic trim (cleaning instructions) .432
Playback options Audio mode (CD, DVD, MP3) .........216
POI (navigation)
Entering ......................................... 150
Entering a point of interest using
the map ......................................... 153
List ................................................. 151
ZAGAT ®
surve yservice .................. 152
Point of interest (navigation)
Assigning a category ..................... .151
Power closing feature .........................83
Power washers .................................. 428
Power windows see Side windows
PRE-SAFE ®
(anticipatory occupant
protection) Display message ............................ 361
Operation ........................................ .55
PRE-SAFE ®
Brake
Activating/deactivating .................348
Display message ............................ 362
Function/notes ................................ 68
Warning lamp ................................. 397
Previous destinations (navigation) ..169
Product information ............................26
Programmable button ....................... 113
Program selector button ..................282
Pulling away (automatic
transmission) ..................................... 275
PULSE see Massag efunction (PULSE) Index
17
Page 73 of 494
i
If the alarm stays on for more than
30 seconds, the mbrace (USA only) or TELE
AID (Canada only) emergency call system
initiates a call to the Customer Assistance
Center automatically. The emergency call
system initiates the call provided that:
R you have subscribed to the mbrace/
TELE AID service.
R the mbrace/TELE AID service has been
activated properly.
R the required mobile phone, powers upply
and GPS are available. X
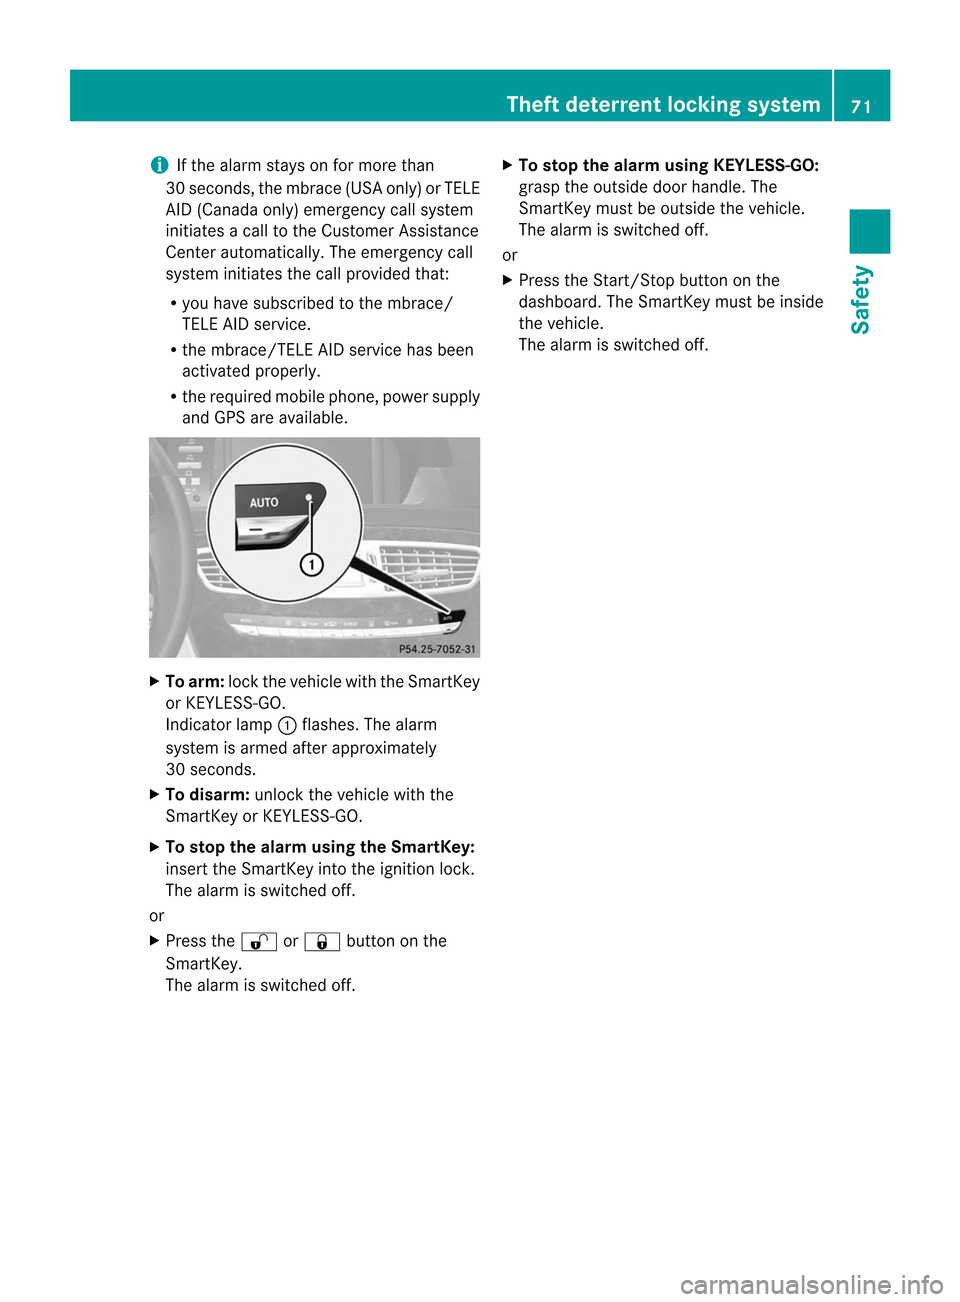
To arm: lockthe vehicle with the SmartKey
or KEYLESS-GO.
Indicator lamp :flashes. The alarm
system is armed after approximately
30 seconds.
X To disarm: unlock the vehicle with the
SmartKey or KEYLESS-GO.
X To stop the alarm using the SmartKey:
insert the SmartKey into the ignition lock.
The alarm is switched off.
or
X Press the %or& button on the
SmartKey.
The alarm is switched off. X
To stop the alarm using KEYLESS-GO:
grasp the outside door handle. The
SmartKey must be outside the vehicle.
The alarm is switched off.
or
X Press the Start/Stop button on the
dashboard. The SmartKey must be inside
the vehicle.
The alarm is switched off. Theft deterrent locking system
71Safety Z
Page 211 of 494
CD/audio DVD and MP3 mode
Important safety notes G
WARNING
COMAND is classified as a Class 1laser
product .You must not open the casing. If you
open the casing, or if the casing is faulty or
damaged, there is a risk of exposure to
invisible laser radiation. This may damage
your eyes, or those of others.
COMAND does not contain any parts that can
be serviced by the user. For safety reasons,
all maintenance work must be carried out by
qualified aftersales technicians. G
WARNING
Only when the vehicle is stationary should
you:
R load a disc
R eject a disc
There is a risk of being distracted from the
road and traffic conditions if this is done while
the vehicle is in motion.
Inserting/ejecting CDs/DVDs DVD changer
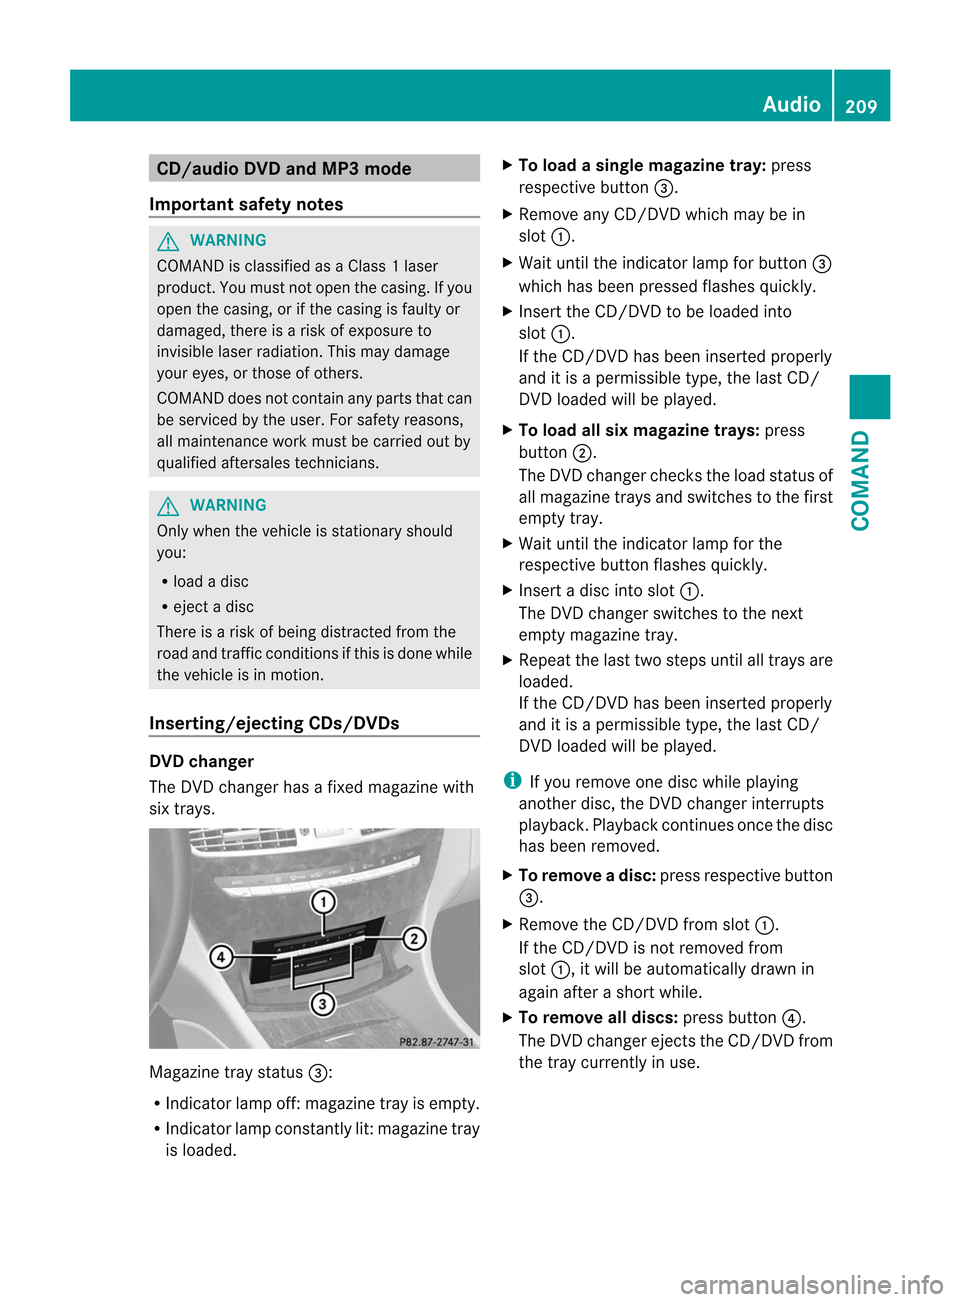
The DVD changer has a fixed magazine with
six trays. Magazine tray status
=:
R Indicator lamp off: magazine tray is empty.
R Indicator lamp constantly lit: magazine tray
is loaded. X
To load a single magazine tray: press
respective button =.
X Remove any CD/DVD which may be in
slot :.
X Wait until the indicator lamp for button =
which has been pressed flashes quickly.
X Insert the CD/DVD to be loaded into
slot :.
If the CD/DVD has been inserted properly
and it is a permissible type, the last CD/
DVD loaded will be played.
X To load all six magazine trays: press
button ;.
The DVD changer checks the load status of
all magazine trays and switches to the first
empty tray.
X Wait until the indicator lamp for the
respective button flashes quickly.
X Insert a disc into slot :.
The DVD changer switches to the next
empty magazine tray.
X Repeat the last two steps until all trays are
loaded.
If the CD/DVD has been inserted properly
and it is a permissible type, the last CD/
DVD loaded will be played.
i If you remove one disc while playing
another disc, the DVD changer interrupts
playback. Playback continues once the disc
has been removed.
X To remove adisc: press respective button
=.
X Remove the CD/DVD from slot :.
If the CD/DVD is not removed from
slot :, it will be automatically drawn in
again afte rashort while.
X To remove all discs: press button?.
The DVD changer ejects the CD/DVD from
the tray currently in use. Audio
209COMAND Z
Page 258 of 494
Interior lighting control
Important notes In order to preven
tthe vehicle's battery from
discharging, the interior lighting functions are
automatically deactivated after some time
except for when the SmartKey is in position
2 in the ignition lock.
Automatic interior lighting control X
To switch on/off: press the|button.
The OFF indicator lamp shows whether the
automatic interior lighting control is
deactivated (indicator lamp on) or
activated (indicator lamp off).
The interior lighting automatically switches
on if you:
R unlock the vehicle
R open a door
R remove the SmartKey from the ignition lock
The interior light is activated for a short while
when the SmartKey is removed from the
ignition lock. You can activate this delayed
switch-off using COMAND (Y page 237).
Manual interior lighting control X
To switch the front interior lighting on/
off: press the cbutton.
X To switch the rear interior lighting on/
off: press the ubutton.
X To switch the reading lamps on/off:
press the pbutton. Replacing bulbs
Important safety notes
Xenon bulbs G
DANGER
Xenon bulbs carry a high voltage. You could
get an electric shock and be seriously or even
fatally injured if you touch the electric contacts on Xenon bulbs. Therefore, never
remove the cover from Xenon bulbs.
Do not change the Xenon bulbs yourself, but
have them replaced at a qualified workshop.
If your vehicle is equipped with Xenon bulbs,
you can recognize this by the following: the
cone of light from the Xenon bulbs moves
from the top to the bottom and back again
when you start the engine. For this to be
observed, the lights must be switched on
before starting the engine.
Bulbs and lamps are an important aspect of
vehicle safety. You must therefore make sure
that these function correctly at all times.
Have the headlamp setting checked regularly.
Other bulbs There are bulbs other than the Xenon bulbs
that you cannot replace. Replace only the
bulbs listed (Y
page 257). Have the bulbs that
you cannot replace yourself changed at a
qualified specialist workshop.
If you require assistance changing bulbs,
consult a qualified specialist workshop.
Do not touch the glass tube of new bulbs with
your bare hands. Even minor contamination
can burn into the glass surface and reduce
the service life of the bulbs. Always use a lint-
free cloth or only touch the base of the bulb
when installing.
Only use bulbs of the correct type.
If the new bulb still does not light up, consult
a qualified specialist workshop.
Bulbs and lamps are an important aspect of
vehicle safety. You must therefore make sure
that these function correctly at all times.
Have the headlamp setting checked regularly. G
WARNING
Bulbs and lamps can become very hot. For
this reason, allow them to cool down before
changing them. Otherwise, you could burn
yourself when you touch them. 256
Replacing bulbsLights and windshield wipers
Page 410 of 494
To adjust the volume during an mbrace call,
proceed as follows:
X
Press the WorX button on the
multifunction steering wheel.
or
X Use the Hvolume controller of
COMAND (Y page 113).
You can find further information and a
description of all available features under
"Owners Online" at http://
www.mbusa.com 17
.
System self-test After you have switched on the ignition, the
system carries out a self-diagnosis.
Am
alfunction in the system has been
detected if one of the following occurs:
R the indicator lamp in th eSOS button does
not come on during the system self-test.
R the indicator lamp in the ºRoadside
Assistance button does not light up during
self-diagnosis of the system.
R the indicator lamp in the EMB-Info call
button does not light up during self-
diagnosis of the system.
R the indicator lamp in one or more of the
following buttons continues to light up red
after the system self-diagnosis:
-SOS button
- the º Roadside Assistance call
button
- the E MB Info call button
R the Tele Aid Inoperative or
Tele Aid
Not Activated message appears in the
multifunction display after the system self-
diagnosis.
If a malfunction is indicated as outlined
above, the system may not operate as
expected. In the event of an emergency,
assistance must be summoned by other
means. Have the system checked at the nearest
authorized Mercedes-Benz Center or contact
the following service hotlines:
R
USA: Mercedes-Benz Customer Assistance
Center at
1-800-FOR-MERCedes (1-800-367-6372)
or 1-888-990-9007
R Canada: Customer Service at
1-888-923-8367
Emergency call Important safety notes
!
You must have a license agreement to
activate the mbrace service. Ensure that
your system is activated and ready for use,
and press the EMB Info call button to
register. If one of these steps is not carried
out, it may not be possible to activate the
system.
If you have questions aboutt he activation,
contact one of the following telephone
hotlines:
R USA: Mercedes-Ben zCustomer
Assistance Cente rat
1-800-FOR-MERCedes
(1-800-367-6372) or 1-888-990-9007
R Canada: Customer Service at
1-888-923-8367
An emergency call is dialed automatically if
an airb ag or Emergency Tensioning Device is
triggered.
i You canno tend an automatically
triggered emergency call yourself.
An emergency call can also be initiated
manually.
As soo nas the emergency call has been
initiated, the indicator lamp in the SOS button
flashes. The Connecting Call message
appears on the multifunction display.
Emergency Call Activated is shown in the
COMAND display. The audio system is muted.
17 USA only. 408
FeaturesStowage and features
Page 412 of 494
X
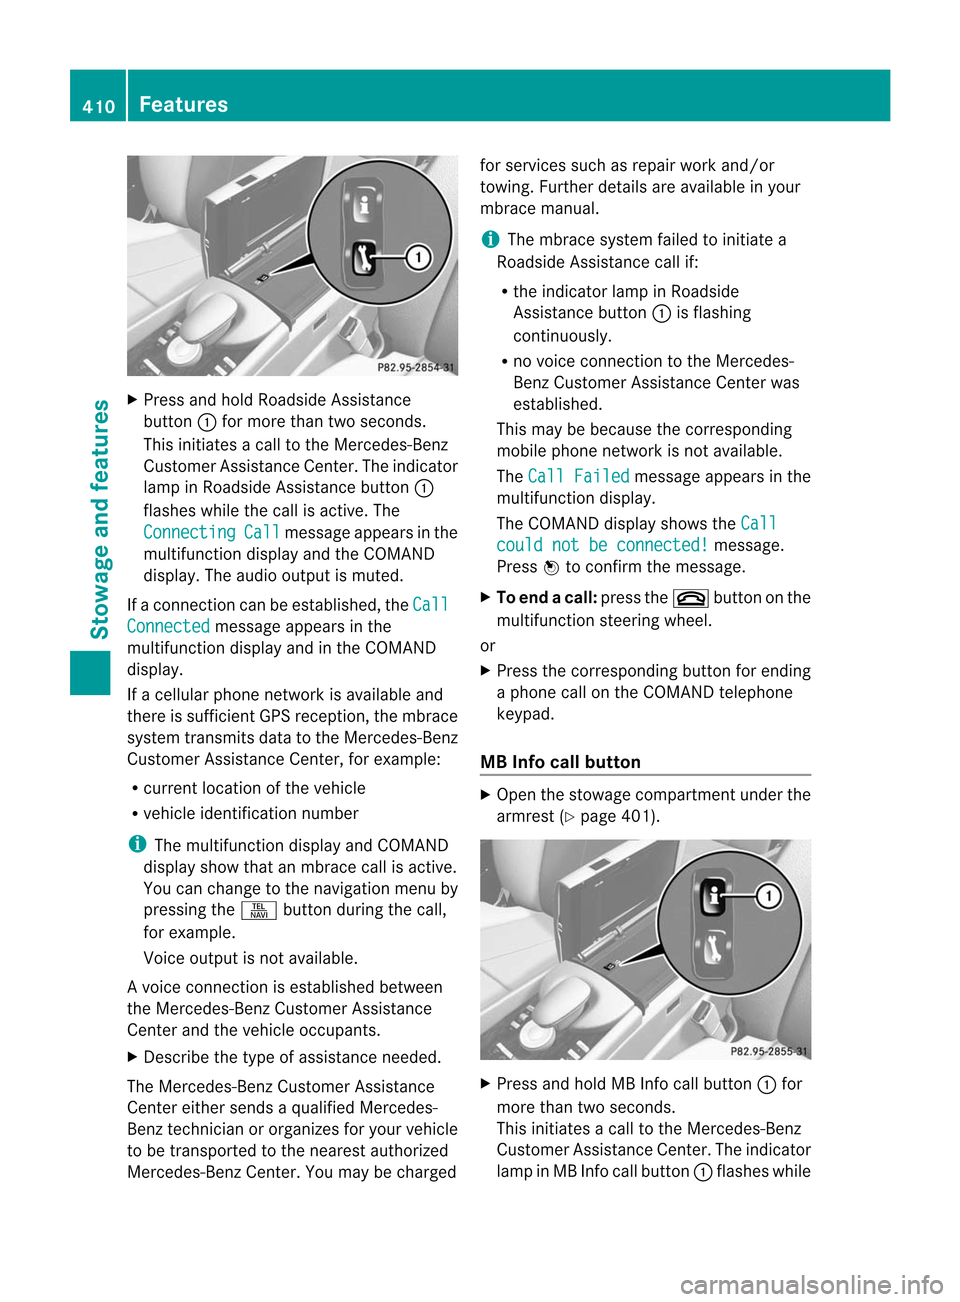
Press and hold Roadside Assistance
button :for more than two seconds.
This initiates a call to the Mercedes-Benz
Customer Assistance Center. The indicator
lamp in Roadside Assistance button :
flashes while the call is active. The
Connecting Call message appears in the
multifunction display and the COMAND
display. The audio output is muted.
If a connection can be established, the CallConnected message appears in the
multifunction display and in the COMAND
display.
If a cellular phone network is available and
there is sufficient GPS reception, the mbrace
system transmits data to the Mercedes-Benz
Customer Assistance Center, for example:
R current location of the vehicle
R vehicle identification number
i The multifunction display and COMAND
display show that an mbrace call is active.
You can change to the navigation menu by
pressing the Sbutton during the call,
for example.
Voice output is not available.
Av oice connection is established between
the Mercedes-Benz Customer Assistance
Center and the vehicle occupants.
X Describe the type of assistance needed.
The Mercedes-Benz Customer Assistance
Center either sends a qualified Mercedes-
Benz technician or organizes for your vehicle
to be transported to the nearest authorized
Mercedes-Benz Center. You may be charged for services such as repair work and/or
towing. Further details are available in your
mbrace manual.
i
The mbrace system failed to initiate a
Roadside Assistance call if:
R the indicator lamp in Roadside
Assistance button :is flashing
continuously.
R no voice connection to the Mercedes-
Benz Customer Assistance Center was
established.
This may be because the corresponding
mobile phone network is not available.
The Call Failed message appears in the
multifunction display.
The COMAND display shows the Call could not be connected! message.
Press Wto confirm the message.
X To end acall: press the ~button on the
multifunctio nsteering wheel.
or
X Press the corresponding button for ending
a phone call on the COMAND telephone
keypad.
MB Info call button X
Open the stowage compartment under the
armrest (Y page 401). X
Press and hold MB Info call button :for
more tha ntwo seconds.
This initiates a call to the Mercedes-Benz
Customer Assistance Center. The indicator
lamp in MB Info call button :flashes while 410
FeaturesStowage and features
Page 413 of 494
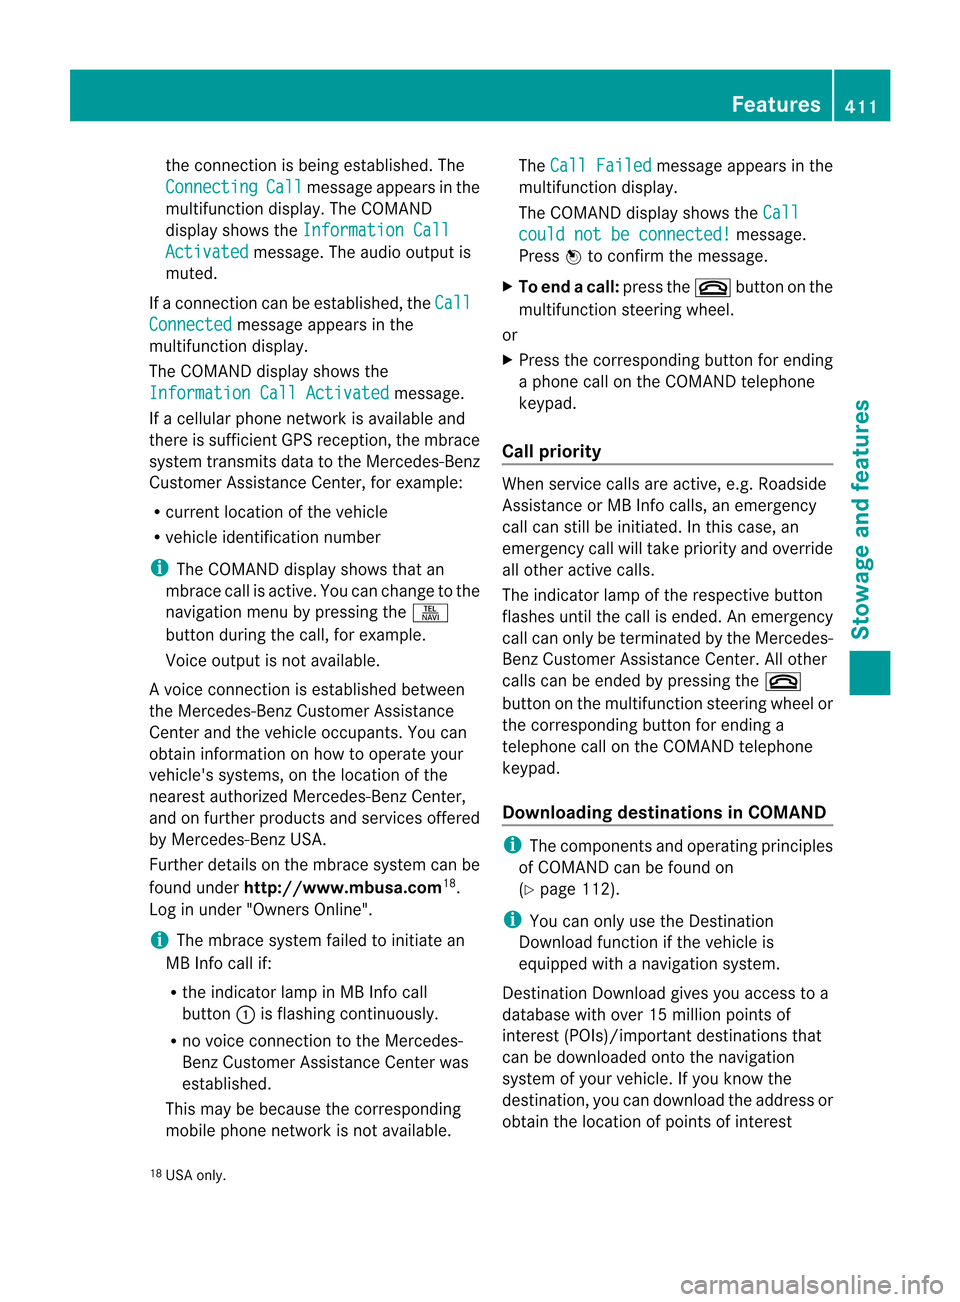
the connectio
nis being established.T he
Connecting Call message appears in the
multifunction display. The COMAND
display shows the Information Call Activated message. The audio output is
muted.
If a connection can be established, the CallConnected message appears in the
multifunction display.
The COMAND display shows the
Information Call Activated message.
If a cellularp hone network is available and
there is sufficient GPS reception, the mbrace
system transmits data to the Mercedes-Benz
Customer Assistance Center, for example:
R current location of the vehicle
R vehicle identification number
i The COMAND display shows that an
mbrace call is active. You can change to the
navigation menu by pressing the S
button during the call, for example.
Voice output is not available.
Av oice connection is established between
the Mercedes-Benz Customer Assistance
Center and the vehicle occupants. You can
obtain information on how to operate your
vehicle's systems, on the location of the
nearest authorized Mercedes-Benz Center,
and on further products and services offered
by Mercedes-Benz USA.
Further details on the mbrace system can be
found under http://www.mbusa.com 18
.
Log in under "Owners Online".
i The mbrace system failed to initiate an
MB Info call if:
R the indicator lamp in MB Info call
button :is flashing continuously.
R no voice connection to the Mercedes-
Benz Customer Assistance Center was
established.
This may be because the corresponding
mobile phone network is not available. The
Call Failed message appears in the
multifunction display.
The COMAND display shows the Call could not be connected! message.
Press Wto confirm the message.
X To end acall: press the ~button on the
multifunctio nsteering wheel.
or
X Press the corresponding button for ending
a phone call on the COMAND telephone
keypad.
Call priority When service calls are active, e.g
.Roadside
Assistance or MB Info calls, an emergency
call can still be initiated. In this case, an
emergency call will take priority and override
all other active calls.
The indicator lamp of the respective button
flashes until the call is ended. An emergency
call can only be terminated by the Mercedes-
Benz Customer Assistance Center. All other
calls can be ended by pressing the ~
button on the multifunction steering wheel or
the corresponding button for ending a
telephone call on the COMAND telephone
keypad.
Downloading destinations in COMAND i
The components and operating principles
of COMAND can be found on
(Y page 112).
i You can only use the Destination
Download function if the vehicle is
equipped with a navigation system.
Destination Download gives you access to a
database with over 15 million points of
interes t(POIs)/important destinations that
can be downloaded onto the navigation
system of your vehicle. If you know the
destination, you can download the address or
obtain the location of points of interest
18 USA only. Features
411Stowage and features Z
Page 415 of 494
sent. If you own multiple Mercedes-Benz
vehicles with mbrace and activated mbrace
accounts:
Each destination address sent can be
accessed by every vehicle which is
connected with the relevant e-mail
address.
Vehicle remote opening You can use the vehicle remote opening if you
have unintentionally locked your vehicle and
a replacement SmartKey is not available. The
vehicle can be opened by the Mercedes-Benz
Customer Assistance Center.
The vehicle can be opened remotely up to four
days after the ignition was last switched off.
X Contact the following service hotlines:
R
USA: Mercedes-Benz Customer
Assistance Center at
1-800-FOR-MERCedes
(1-800-367-6372) or 1-888-990-9007
R Canada: Customer Service at
1-888-923-8367
You will be asked for your password.
X Return to your vehicle at the time agreed
upon with the Mercedes-Benz Customer
Assistance Center.
X Pull on the trunk lid handle for at least
20 seconds until the indicator lamp in the
SOS button (Y page 408) flashes.
The Connecting Call message appears in
the multifunction display.
USA only: alternatively, the vehicle can be
opened via:
R the Internet, under the "Owners Online"
section
R the telephone application (e.g. iPhone ®
)
i Vehicle remote opening is only possible if
the corresponding mobile phone network
is accessible.
The SOS button flashes and the
Connecting Call message appears in the
multifunction display to confirm that the command for vehicle remote unlocking has
been received.
If the trunk lid handle is pulled for longer
than 20 seconds before authorization has
been received, you must wait for
15 minutes. Only then can you pull the
trunk lid handle once again.
Vehicle remote closing The remote closing feature can be used when
you have forgotten to lock the vehicle and you
are no longer nearby. The vehicle can then be
locked by the Mercedes-Benz Customer
Assistance Center.
The vehicle can be locked remotely up to four
days after the ignition was last switched off.
X
Contact the following service hotlines:
R
USA: Mercedes-Benz Customer
Assistance Center at
1-800-FOR-MERCedes
(1-800-367-6372) or 1-888-990-9007
R Canada: Customer Service at
1-888-923-8367
You will be asked for your PIN.
The next time you are in your vehicle and
switch on the ignition, the Tele Aid Doors
Locked Remotely message appears in the
multifunction display.
USA only: alternatively, the vehicle can be
locked via:
R the Internet, under the "Owners Online"
section
R the telephone application (e.g. iPhone ®
)
i The vehicle remote closing feature is
available when the relevant mobile phone
network is available and data connection is
possible.
Automatic vehicled ata retrieval for the
service due date You
rvehicle comes with a function which
improves the servicing of the vehicle
considerably. Shortly before the service due
date, mbrace sends important vehicle Features
413Stowage and features Z
Page 445 of 494
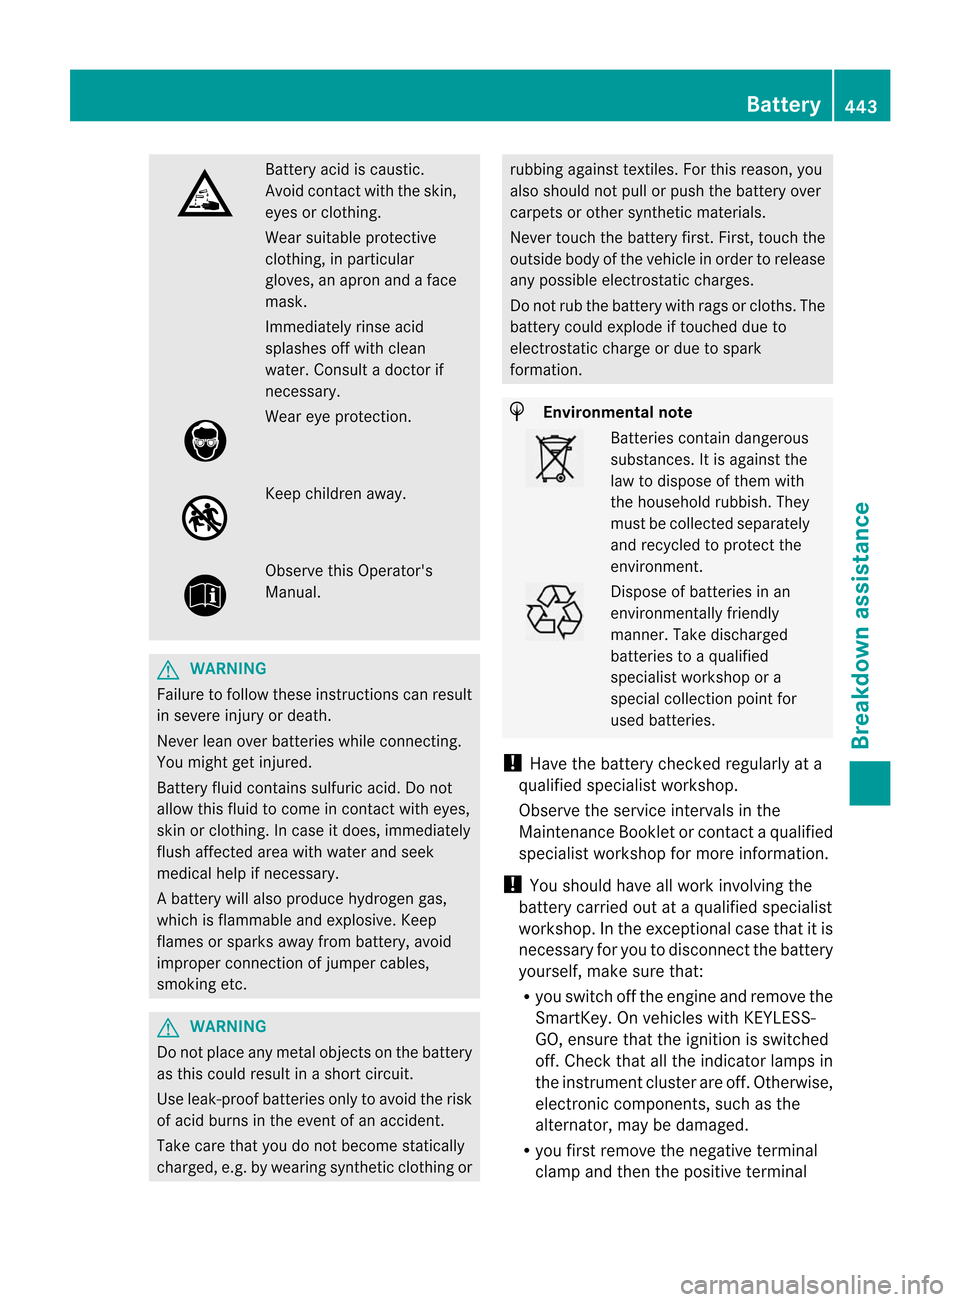
Battery acid is caustic.
Avoid contact with the skin,
eyes or clothing.
Wea
rsuitable protective
clothing, in particular
gloves, an apro nand a face
mask.
Immediately rinse acid
splashes off with clean
water. Consult a doctor if
necessary. Wear eye protection.
Keep children away.
Observe this Operator's
Manual.
G
WARNING
Failure to follow these instructions can result
in severe injury or death.
Never lean ove rbatteries while connecting.
You migh tget injured.
Battery fluid contains sulfuric acid. Do not
allow this fluid to come in contact with eyes,
skin or clothing. In case it does, immediately
flush affected area with water and seek
medical help if necessary.
Ab attery will also produce hydrogen gas,
which is flammable and explosive. Keep
flames or sparks away from battery, avoid
improper connection of jumper cables,
smoking etc. G
WARNING
Do no tplace any metal objects on the battery
as this could result in a shor tcircuit.
Use leak-proof batteries only to avoid the risk
of acid burns in the event of an accident.
Take care that you do not become statically
charged, e.g. by wearin gsynthetic clothing or rubbing against textiles
.For this reason, you
also should not pull or push the battery over
carpets or other synthetic materials.
Never touch the battery first. First, touch the
outside body of the vehicle in order to release
any possible electrostatic charges.
Do not rub the battery with rags or cloths. The
battery could explode if touched due to
electrostatic charge or due to spark
formation. H
Environmental note Batteries contain dangerous
substances. It is against the
law to dispose of them with
the household rubbish. They
must be collected separately
and recycled to protect the
environment.
Dispose of batteries in an
environmentally friendly
manner
.Take discharged
batteries to a qualified
specialist workshop or a
special collectio npoint for
used batteries.
! Have the battery checked regularly at a
qualified specialist workshop.
Observe the service intervals in the
Maintenance Booklet or contact a qualified
specialist workshop for more information.
! You should have all work involving the
battery carried out at aqualified specialist
workshop. In the exceptional case that it is
necessary for you to disconnect the battery
yourself, make sure that:
R you switch off the engine and remove the
SmartKey. On vehicles with KEYLESS-
GO, ensure that the ignition is switched
off .C heck that all the indicator lamps in
the instrumentc luster are off.Otherwise,
electroni ccomponents, such as the
alternator, may be damaged.
R you first remove the negative terminal
clamp and then the positive terminal Battery
443Breakdown assistance Z