ECO mode MERCEDES-BENZ CLA-Class 2014 C117 Comand Manual
[x] Cancel search | Manufacturer: MERCEDES-BENZ, Model Year: 2014, Model line: CLA-Class, Model: MERCEDES-BENZ CLA-Class 2014 C117Pages: 270, PDF Size: 5.82 MB
Page 90 of 270
COMAND may give differing navigation com-
mands if the actual street/traffic situation
does not correspond with the digital map's
data. For example, if the road layout or the
direction of a one-way street has been
changed.
For this reason, you must always observe
road and traffic rules and regulations during
your journey. Road and traffic rules and reg-
ulations always have priority over the sys-
tem's driving recommendations.
Route guidance begins once a route has been calculated (Y page 69).
COMAND guides you to your destination by
means of navigation announcements in the
form of audible navigation announcements
and route guidance displays.
The route guidance displays can be seen if the
display is switched to navigation mode.
If you do not follow the navigation announce- ments or if you leave the calculated route,
COMAND automatically calculates a new
route to the destination.
If the digital map contains the corresponding
information, the following applies:
R during route guidance, COMAND tries to
avoid roads with restricted access. Those
roads, for example, that are closed to
through-traffic.
R roads that have time restrictions (e.g.
closed on Sundays and public holidays) are considered for route guidance on days
when they are open. For this purpose, the
relevant times must be correctly stored in
the database. Displays during route guidance
Change of direction Changes of direction have three phases:
R preparation phase
R announcement phase
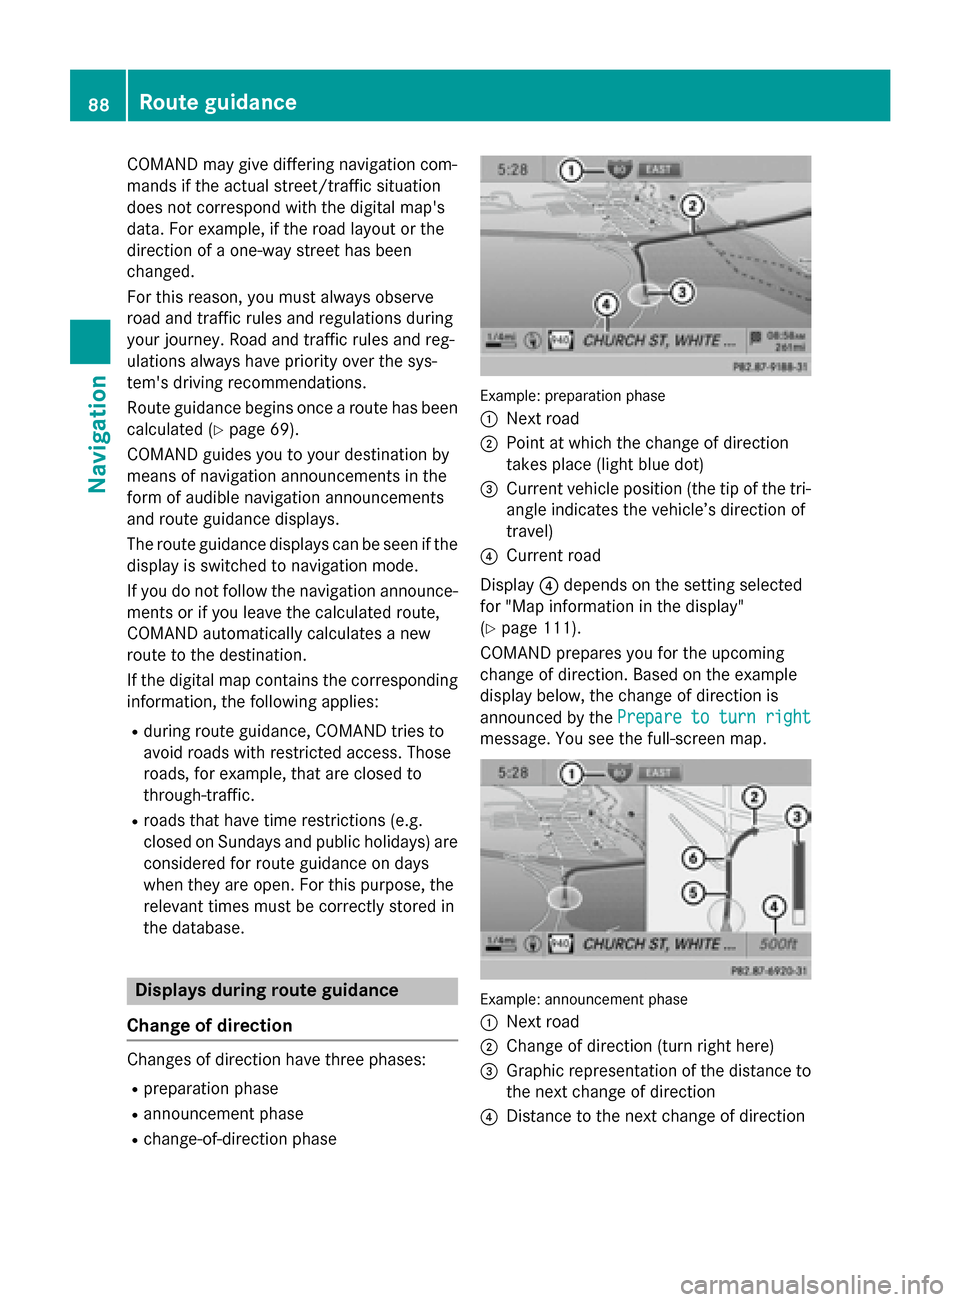
R change-of-direction phase Example: preparation phase
0043
Next road
0044 Point at which the change of direction
takes place (light blue dot)
0087 Current vehicle position (the tip of the tri-
angle indicates the vehicle’s direction of
travel)
0085 Current road
Display 0085depends on the setting selected
for "Map information in the display"
(Y page 111).
COMAND prepares you for the upcoming
change of direction. Based on the example
display below, the change of direction is
announced by the Prepare to turn right Prepare to turn right
message. You see the full-screen map. Example: announcement phase
0043
Next road
0044 Change of direction (turn right here)
0087 Graphic representation of the distance to
the next change of direction
0085 Distance to the next change of direction 88
Route guidanceNavigation
Page 92 of 270

0085
Graphic representation of the distance to
the next change of direction
0083 Distance to the next change of direction
0084 Possible lane (light blue)
006B Recommended lane (dark blue)
006C Lane not recommended (gray)
006D Current vehicle position, the tip of the tri-
angle indicating the vehicle’s direction of
travel
On multi-lane roads, COMAND can display
lane recommendations for the next change of direction. The corresponding data must be
available in the digital map.
COMAND displays lane recommendation 006B
based on the next two changes of direction.
The number of lanes applies to the point at
which the next change of direction is
required.
i The multifunction display also shows lane
recommendations.
Only the recommended lanes are displayed here, see the separate vehicle Operator's
Manual. Display and description of lane recom-
mendations Lane Day
mode Night
mode
Recommended lane
In this lane, you will
be able to complete
the next two
changes of direction
without changing
lanes. Dark
blue Light
blue
Possible lane
In this lane, you will
only be able to com-
plete the next
change of direction
without changing
lanes. Light
blue Dark
blue
Lane not recom-
mended
In this lane, you will
not be able to com-
plete the next
change of direction
without changing
lanes. Light
brown or
light gray Gray
i
The colors used in the lane recommenda-
tion display vary depending on whether day
or night mode is switched on. 90
Route guidanceNavigation
Page 95 of 270
X
Select Route
Routein the navigation system
menu bar by turning 00790052007Athe COMAND
controller and press 0098to confirm.
X Select Detour
Detour and press 0098to confirm.
X To block a section of the route: select
Longer
Longer orShorter
Shorter repeatedly and press
0098 to confirm until the desired section has
been selected.
i The total length of the section that can be
blocked is defined by the digital map. The
menu items are available accordingly.
X To start route calculation: selectStart
Start
and press 0098to confirm.
X To delete the blocked section: select
Delete Delete while the message is shown and
press 0098to confirm.
COMAND calculates the route without the
block.
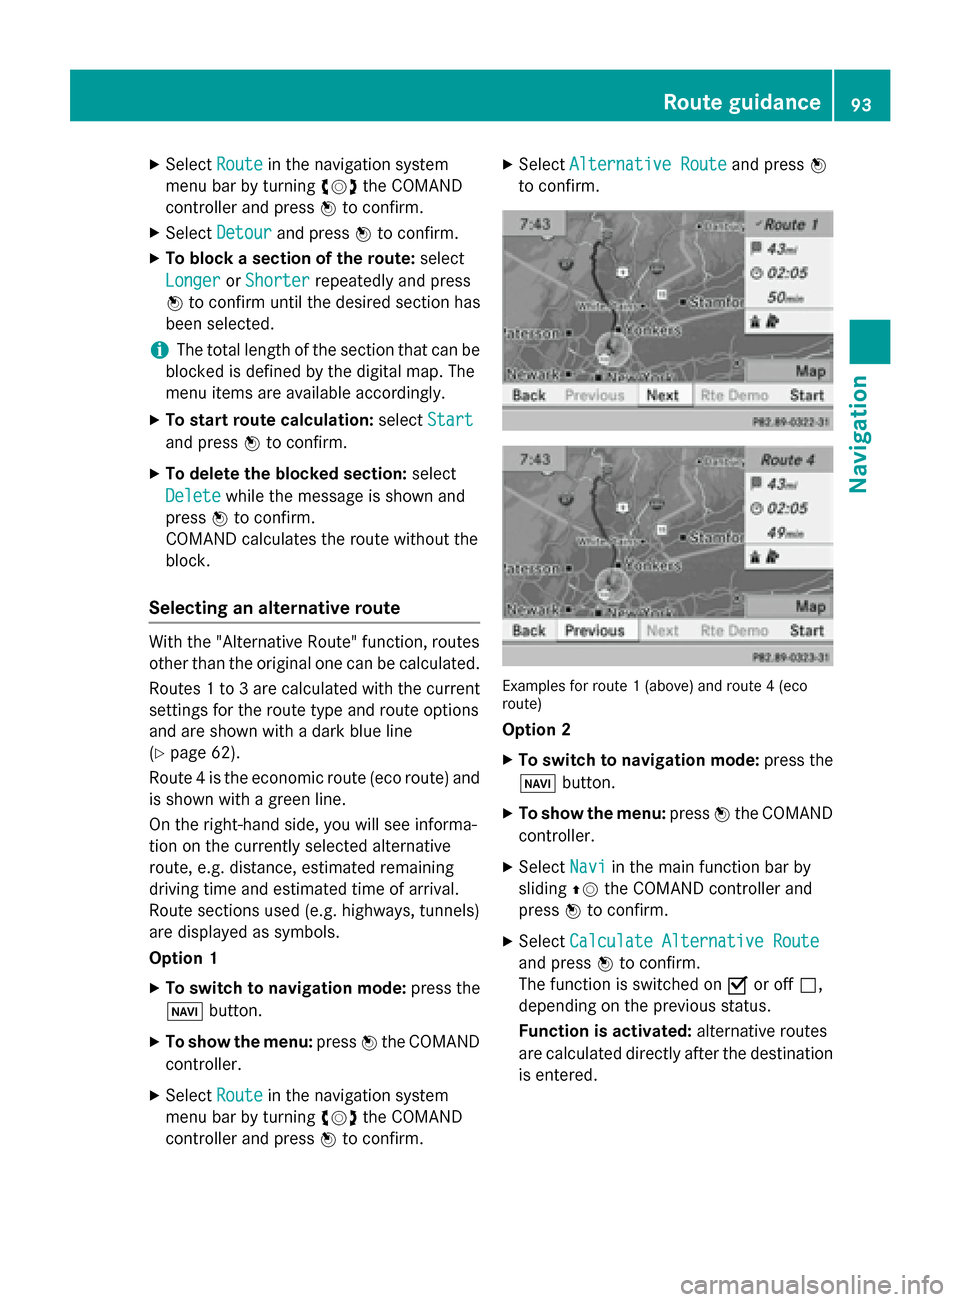
Selecting an alternative route With the "Alternative Route" function, routes
other than the original one can be calculated.
Routes 1 to 3 are calculated with the current
settings for the route type and route options
and are shown with a dark blue line
(Y page 62).
Route 4 is the economic route (eco route) and
is shown with a green line.
On the right-hand side, you will see informa-
tion on the currently selected alternative
route, e.g. distance, estimated remaining
driving time and estimated time of arrival.
Route sections used (e.g. highways, tunnels)
are displayed as symbols.
Option 1
X To switch to navigation mode: press the
00BE button.
X To show the menu: press0098the COMAND
controller.
X Select Route Routein the navigation system
menu bar by turning 00790052007Athe COMAND
controller and press 0098to confirm. X
Select Alternative Route Alternative Route and press0098
to confirm. Examples for route 1 (above) and route 4 (eco
route)
Option 2
X To switch to navigation mode: press the
00BE button.
X To show the menu: press0098the COMAND
controller.
X Select Navi Naviin the main function bar by
sliding 00970052the COMAND controller and
press 0098to confirm.
X Select Calculate Alternative Route Calculate Alternative Route
and press 0098to confirm.
The function is switched on 0073or off 0053,
depending on the previous status.
Function is activated: alternative routes
are calculated directly after the destination
is entered. Route guidance
93Navigation Z
Page 97 of 270
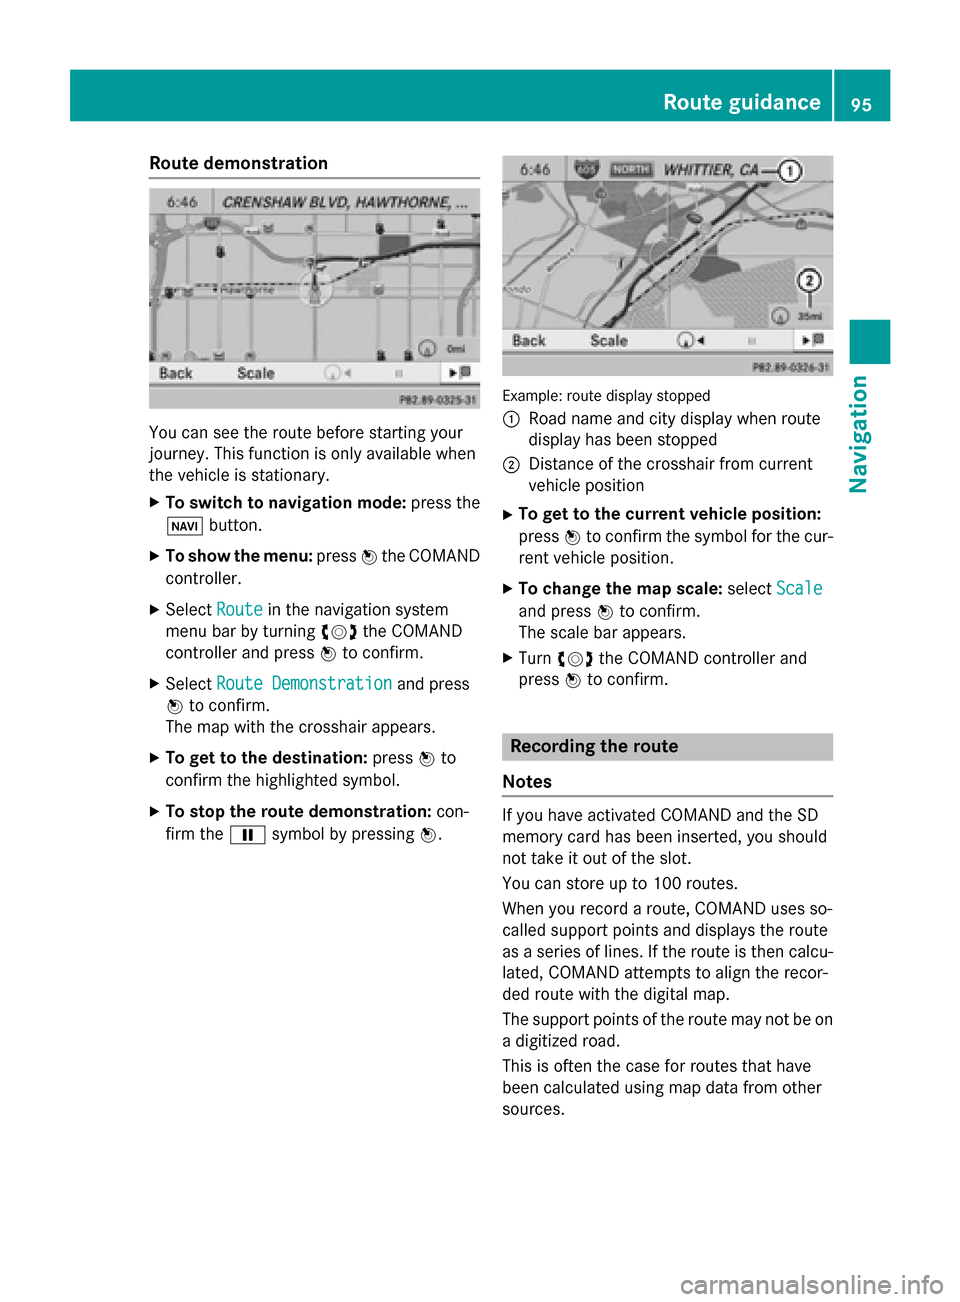
Route demonstration
You can see the route before starting your
journey. This function is only available when
the vehicle is stationary.
X To switch to navigation mode: press the
00BE button.
X To show the menu: press0098the COMAND
controller.
X Select Route Routein the navigation system
menu bar by turning 00790052007Athe COMAND
controller and press 0098to confirm.
X Select Route Demonstration
Route Demonstration and press
0098 to confirm.
The map with the crosshair appears.
X To get to the destination: press0098to
confirm the highlighted symbol.
X To stop the route demonstration: con-
firm the 00CFsymbol by pressing 0098. Example: route display stopped
0043
Road name and city display when route
display has been stopped
0044 Distance of the crosshair from current
vehicle position
X To get to the current vehicle position:
press 0098to confirm the symbol for the cur-
rent vehicle position.
X To change the map scale: selectScale Scale
and press 0098to confirm.
The scale bar appears.
X Turn 00790052007A the COMAND controller and
press 0098to confirm. Recording the route
Notes If you have activated COMAND and the SD
memory card has been inserted, you should
not take it out of the slot.
You can store up to 100 routes.
When you record a route, COMAND uses so-
called support points and displays the route
as a series of lines. If the route is then calcu-
lated, COMAND attempts to align the recor-
ded route with the digital map.
The support points of the route may not be on
a digitized road.
This is often the case for routes that have
been calculated using map data from other
sources. Route guidance
95Navigation Z
Page 98 of 270
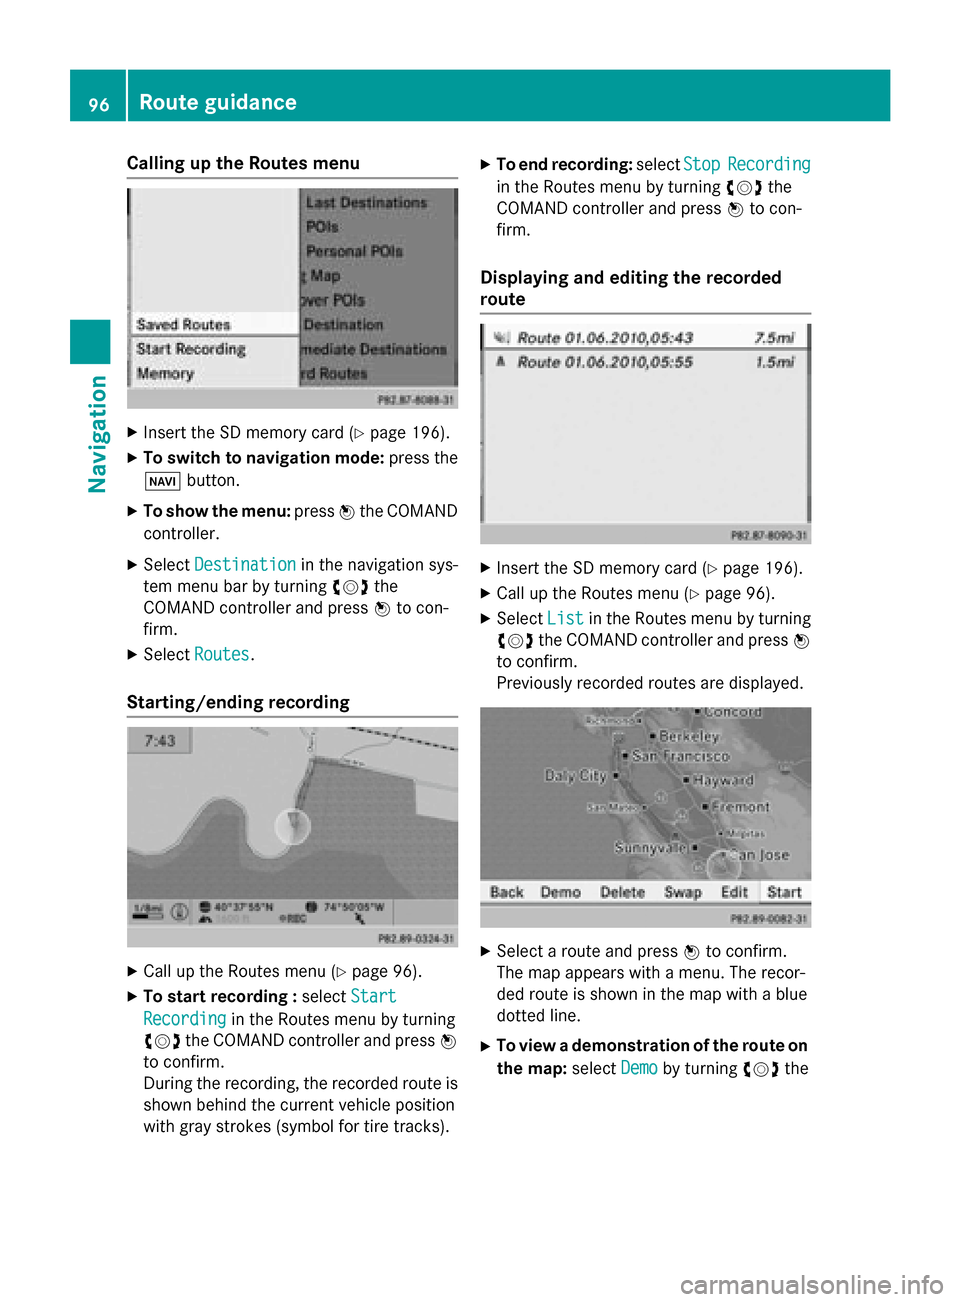
Calling up the Routes menu
X
Insert the SD memory card (Y page 196).
X To switch to navigation mode: press the
00BE button.
X To show the menu: press0098the COMAND
controller.
X Select Destination
Destination in the navigation sys-
tem menu bar by turning 00790052007Athe
COMAND controller and press 0098to con-
firm.
X Select Routes
Routes .
Starting/ending recording X
Call up the Routes menu (Y page 96).
X To start recording : selectStart
Start
Recording
Recording in the Routes menu by turning
00790052007A the COMAND controller and press 0098
to confirm.
During the recording, the recorded route is
shown behind the current vehicle position
with gray strokes (symbol for tire tracks). X
To end recording: selectStop StopRecording Recording
in the Routes menu by turning 00790052007Athe
COMAND controller and press 0098to con-
firm.
Displaying and editing the recorded
route X
Insert the SD memory card (Y page 196).
X Call up the Routes menu (Y page 96).
X Select List Listin the Routes menu by turning
00790052007A the COMAND controller and press 0098
to confirm.
Previously recorded routes are displayed. X
Select a route and press 0098to confirm.
The map appears with a menu. The recor-
ded route is shown in the map with a blue
dotted line.
X To view a demonstration of the route on
the map: selectDemo
Demo by turning 00790052007Athe 96
Route guidanceNavigation
Page 120 of 270
Country-specific information
You can call up information on the traffic con-
ditions in the country you are currently driving
in via the COMAND Internet and online func-
tion.
The availability of information is country-
dependent. Information can include maxi-
mum speeds, driving with low-beam head-
lamps or legal alcohol limits, for example.
X To switch to navigation mode: press the
00BE button.
X To show the menu: press0098the COMAND
controller.
X Select Position Position in the navigation system
menu bar by sliding 00520064and turning 00790052007A
the COMAND controller and press 0098to
confirm.
X Select Country Information
Country Information and press
0098 to confirm.
When the connection has been made, the
available country information appears.
X To return to navigation: press the0038
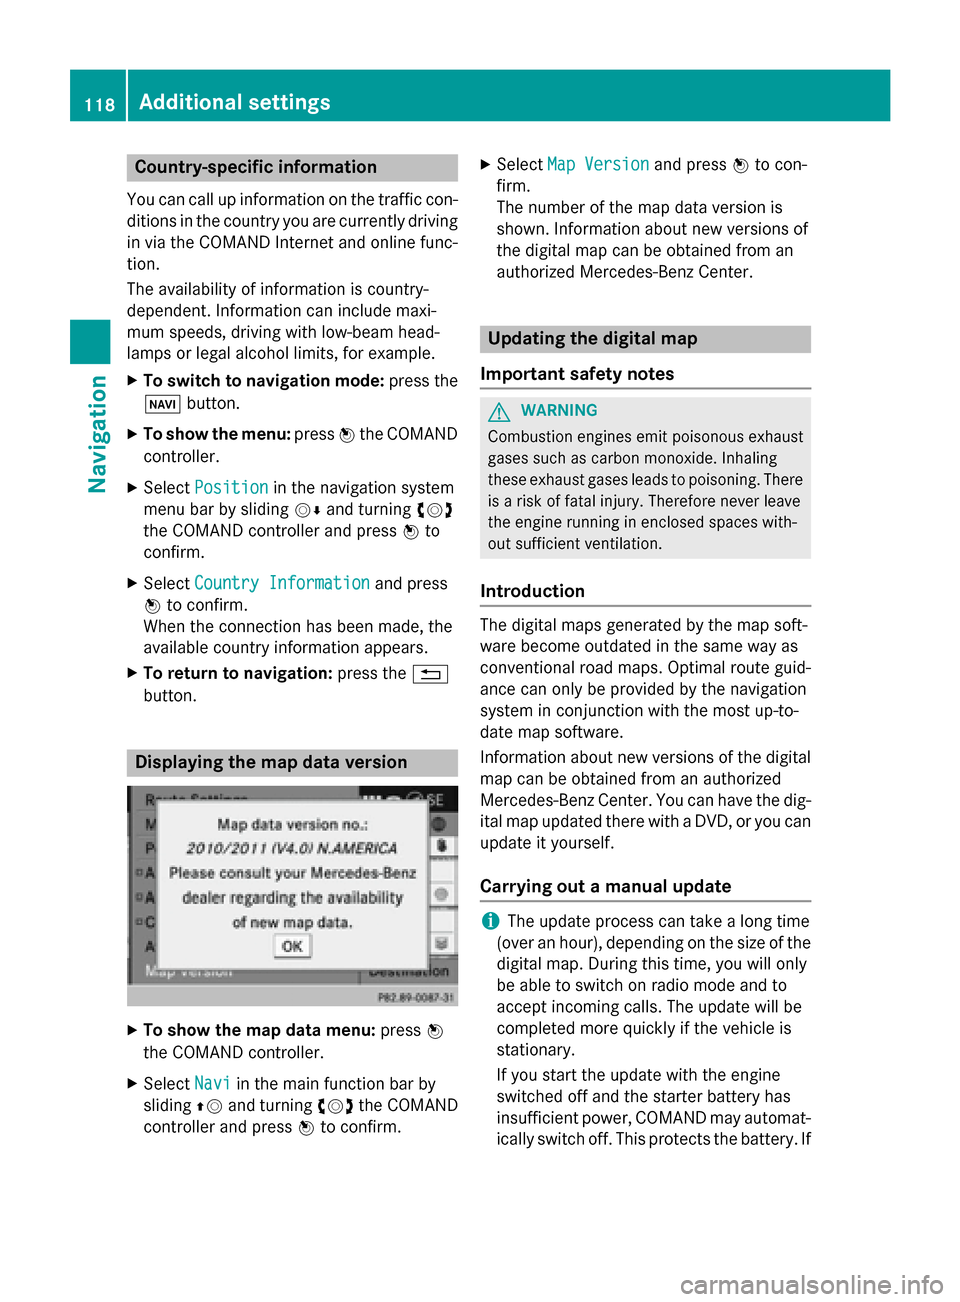
button. Displaying the map data version
X
To show the map data menu: press0098
the COMAND controller.
X Select Navi
Navi in the main function bar by
sliding 00970052and turning 00790052007Athe COMAND
controller and press 0098to confirm. X
Select Map Version Map Version and press0098to con-
firm.
The number of the map data version is
shown. Information about new versions of
the digital map can be obtained from an
authorized Mercedes-Benz Center. Updating the digital map
Important safety notes G
WARNING
Combustion engines emit poisonous exhaust
gases such as carbon monoxide. Inhaling
these exhaust gases leads to poisoning. There is a risk of fatal injury. Therefore never leave
the engine running in enclosed spaces with-
out sufficient ventilation.
Introduction The digital maps generated by the map soft-
ware become outdated in the same way as
conventional road maps. Optimal route guid-
ance can only be provided by the navigation
system in conjunction with the most up-to-
date map software.
Information about new versions of the digital
map can be obtained from an authorized
Mercedes-Benz Center. You can have the dig-
ital map updated there with a DVD, or you can update it yourself.
Carrying out a manual update i
The update process can take a long time
(over an hour), depending on the size of the digital map. During this time, you will only
be able to switch on radio mode and to
accept incoming calls. The update will be
completed more quickly if the vehicle is
stationary.
If you start the update with the engine
switched off and the starter battery has
insufficient power, COMAND may automat-
ically switch off. This protects the battery. If 118
Additional settingsNavigation
Page 126 of 270

Your COMAND equipment
These operating instructions describe all the
standard and optional equipment for your
COMAND system, as available at the time of
going to print. Country-specific differences
are possible. Please note that your
COMAND system may not be equipped with
all the features described. General notes
Important safety notes
G
WARNING
If you operate mobile communication equip-
ment while driving, you will be distracted from traffic conditions. You could also lose controlof the vehicle. There is a risk of an accident.
Only operate this equipment when the vehicleis stationary.
If you make a call on your mobile phone while
driving, always use hands-free mode. Only
use the mobile phone when road, weather
and traffic conditions permit. Some jurisdic-
tions prohibit the driver from using a mobile
phone while driving a vehicle.
Bear in mind that at a speed of only 30 mph
(approximately 50 km/h), the vehicle covers
a distance of 44 feet (approximately 14 m)
per second.
Excessive levels of electromagnetic radiation
may cause damage to your health and the
health of others.
There is scientific discussion surrounding the possible health risks posed by electromag-
netic fields. You can reduce this risk by using
an exterior antenna.
Therefore, only use mobile communication
equipment if it is connected to the exterior
antenna of the vehicle. Introduction
COMAND provides telephony via the Blue-
tooth ®
interface.
When connecting Bluetooth ®
-capable mobile
phones with PBAP (Phone BookAccess
Profile), the contacts are automatically down- loaded to COMAND.
With a suitable mobile phone, you can use the
hands-free system and receive vCards via the
Bluetooth ®
interface.
You can use the text message function
(receiving and reading) if the mobile phone
supports the MAP (Message AccessProfile)
Bluetooth ®
profile.
You can obtain more detailed information
about suitable mobile phones and about con-
necting Bluetooth ®
-capable mobile phones to
COMAND on the Internet at
http://www.mbusa-mobile.com . Or call
the Mercedes-Benz Customer Assistance
center at
1-800-FOR-MERCedes(1-800-367-6372 )for
the USA or at 1-800-387-0100 for Canada. Call disconnection while the vehicle is
in motion
A call may be disconnected if:
R there is insufficient network coverage in
certain areas.
R you move from one transmitter/receiver
area (cell) into another and no channels are
free.
R you use a SIM card which is not compatible
with the network available. Operating options
You can operate the telephone by:
R using the COMAND controller:
turn 00790052007A
slide 009500520096 or009700520064 124
General notesTelephone
Page 201 of 270
Positions in the media list
Single DVD drive, position 1: readable data
media are audio CDs, MP3 CDs or MP3
DVDs and video DVDs Memory card, position 2
MUSIC REGISTER, position 3
USB storage device, position 4
Media Interface, position 5
Bluetooth
®
audio: position 6 i
If a disc cannot be read, an entry appears
next to the corresponding magazine tray.
i If you select a video DVD, the system
switches to video DVD mode (Y page 226).
Selecting a track using the number key- pad X
When the display/selection window is
active, press a number key, e.g. 0084.
The medium at the corresponding position
in the media list is loaded and then played. Selecting a track
Selecting by skipping to a track X
To skip forwards or back to a track: turn
00790052007A the COMAND controller when the dis-
play/selection window is active.
or
X Press the 0048or0049 button.
The skip forward function skips to the next track.
The skip back function skips to the begin-
ning of the current track if the track has
been playing for more than 8 seconds. If the
track has been playing for less than
8 seconds, it skips to the start of the pre-
vious track. If the
Random Tracks
Random Tracks orRandom Folder Random Folder
playback option has been selected, the
track order is random.
Selecting a track using the number key- pad X
Press the 0056key on the number keypad.
A numerical entry field appears. The num-
ber of positions offered corresponds to the
number of tracks on the CD. Only numbers that correspond to a track number on the
CD can be entered.
X Enter the desired track number using the
number keys.
The track plays after the last possible num-
ber is entered.
i Pressing and holding a number key for
more than 2 seconds completes the entry,
and the corresponding track is played.
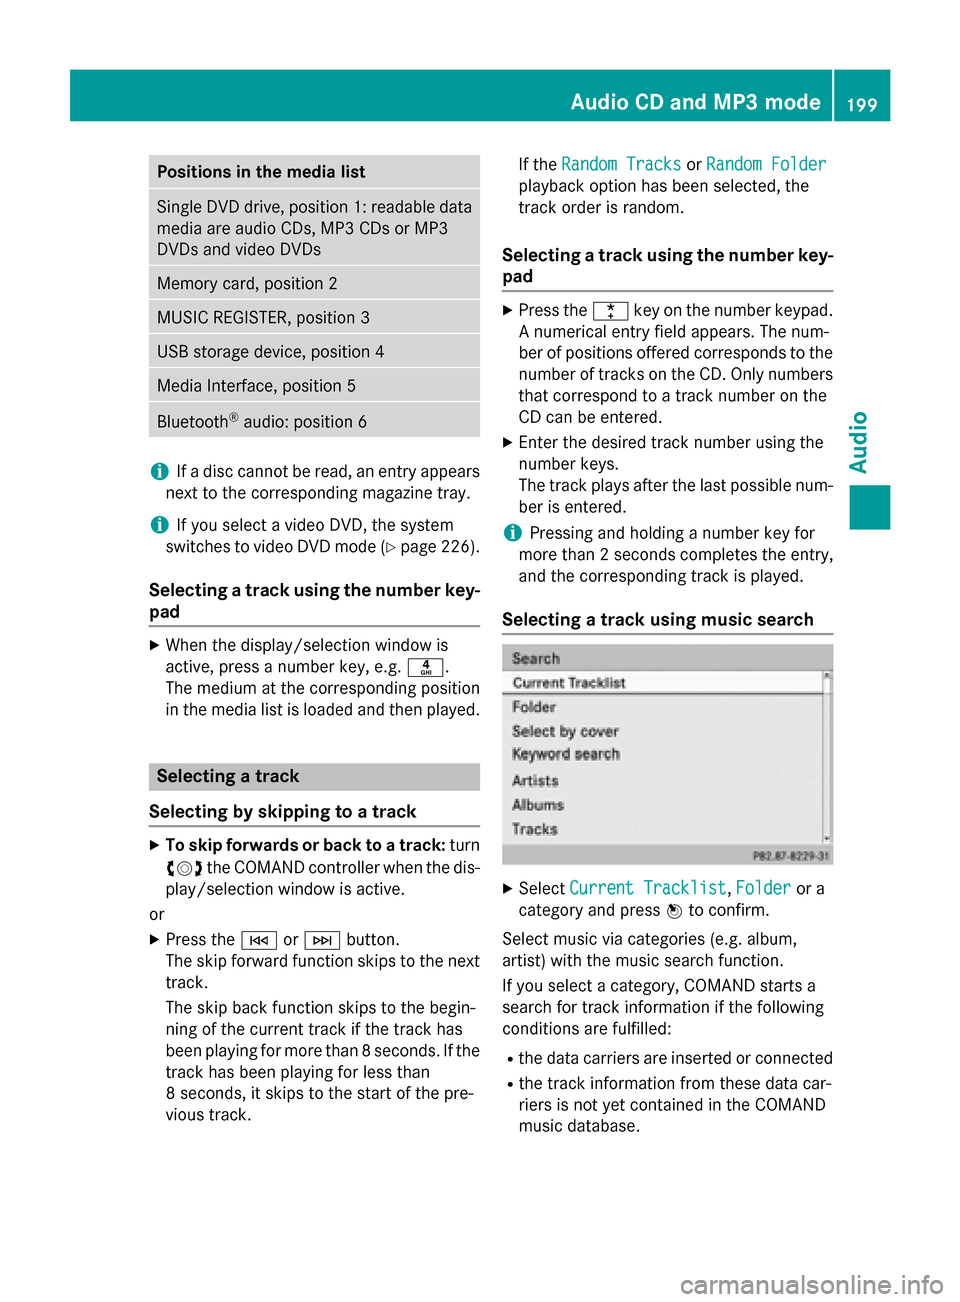
Selecting a track using music search X
Select Current Tracklist Current Tracklist, Folder
Folderor a
category and press 0098to confirm.
Select music via categories (e.g. album,
artist) with the music search function.
If you select a category, COMAND starts a
search for track information if the following
conditions are fulfilled: R the data carriers are inserted or connected
R the track information from these data car-
riers is not yet contained in the COMAND
music database. Audio CD and MP3 mode
199Audio Z
Page 202 of 270
COMAND imports track information from the
following data carriers:
R Disc (CD/MP3)
R Memory card
R MUSIC REGISTER
R USB storage device
The Track information is complete
Track information is complete
message appears once the search is comple-
ted. COMAND stores the music data in its
own database. You can now select the avail-
able music data within the desired category.
You will find further information on searching
for music in the "Music search" section
(Y page 204).
X In audio CD or MP3 mode, select Search
Search by
sliding 00520064and turning 00790052007Athe COMAND
controller and then press 0098to confirm.
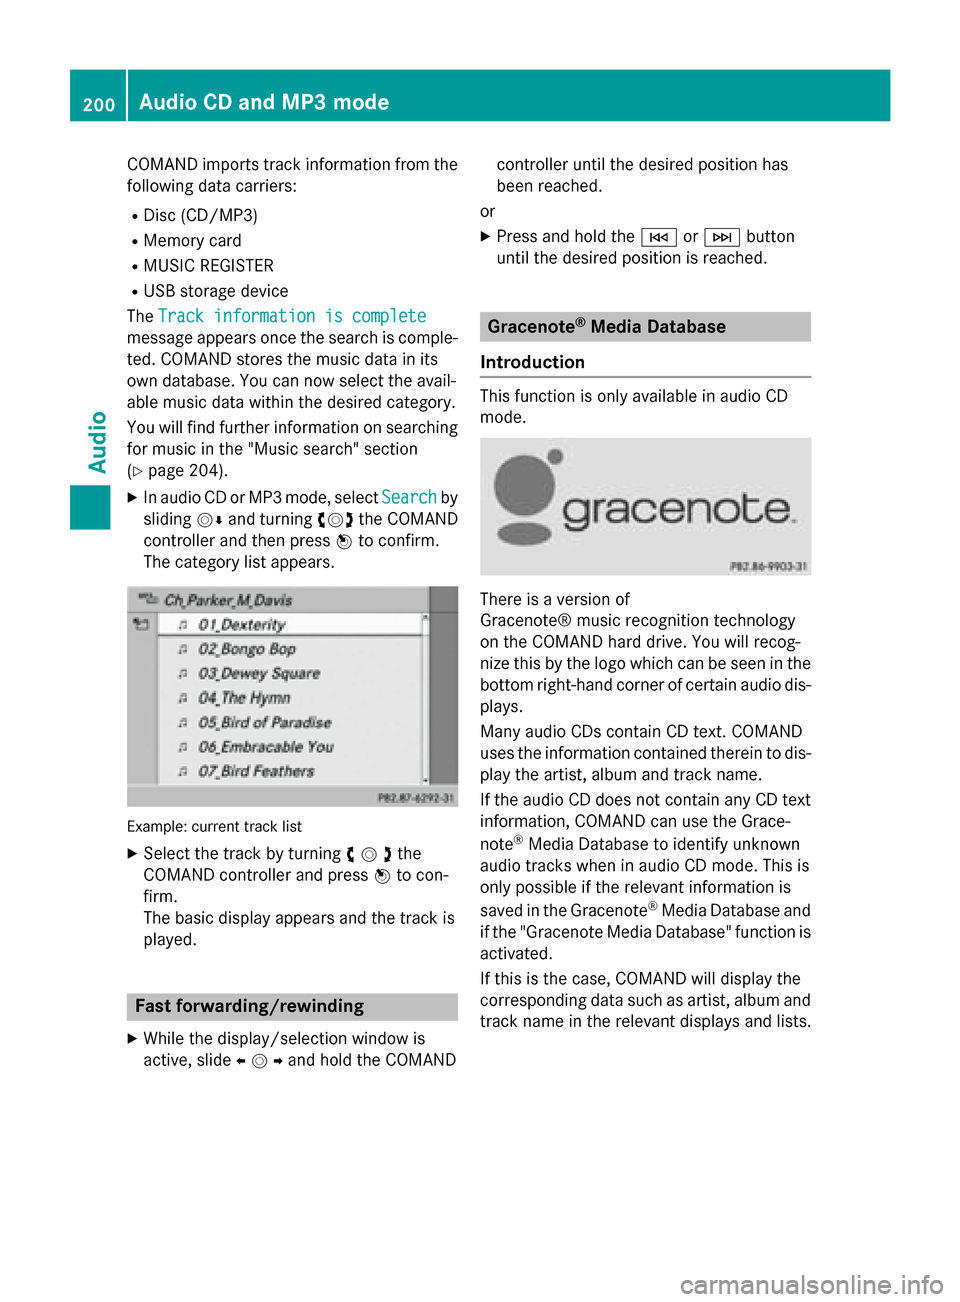
The category list appears. Example: current track list
X Select the track by turning 00790052007Athe
COMAND controller and press 0098to con-
firm.
The basic display appears and the track is
played. Fast forwarding/rewinding
X While the display/selection window is
active, slide 009500520096and hold the COMAND controller until the desired position has
been reached.
or
X Press and hold the 0048or0049 button
until the desired position is reached. Gracenote
®
Media Database
Introduction This function is only available in audio CD
mode.
There is a version of
Gracenote® music recognition technology
on the COMAND hard drive. You will recog-
nize this by the logo which can be seen in the
bottom right-hand corner of certain audio dis-plays.
Many audio CDs contain CD text. COMAND
uses the information contained therein to dis-
play the artist, album and track name.
If the audio CD does not contain any CD text
information, COMAND can use the Grace-
note ®
Media Database to identify unknown
audio tracks when in audio CD mode. This is
only possible if the relevant information is
saved in the Gracenote ®
Media Database and
if the "Gracenote Media Database" function is
activated.
If this is the case, COMAND will display the
corresponding data such as artist, album and
track name in the relevant displays and lists. 200
Audio CD and MP3 modeAudio
Page 203 of 270
Selecting Gracenote
®
data to be dis-
played X
Switch on CD mode (Y page 197).
X Select CD
CDby sliding 00520064and turning 00790052007A
the COMAND controller and press 0098to
confirm.
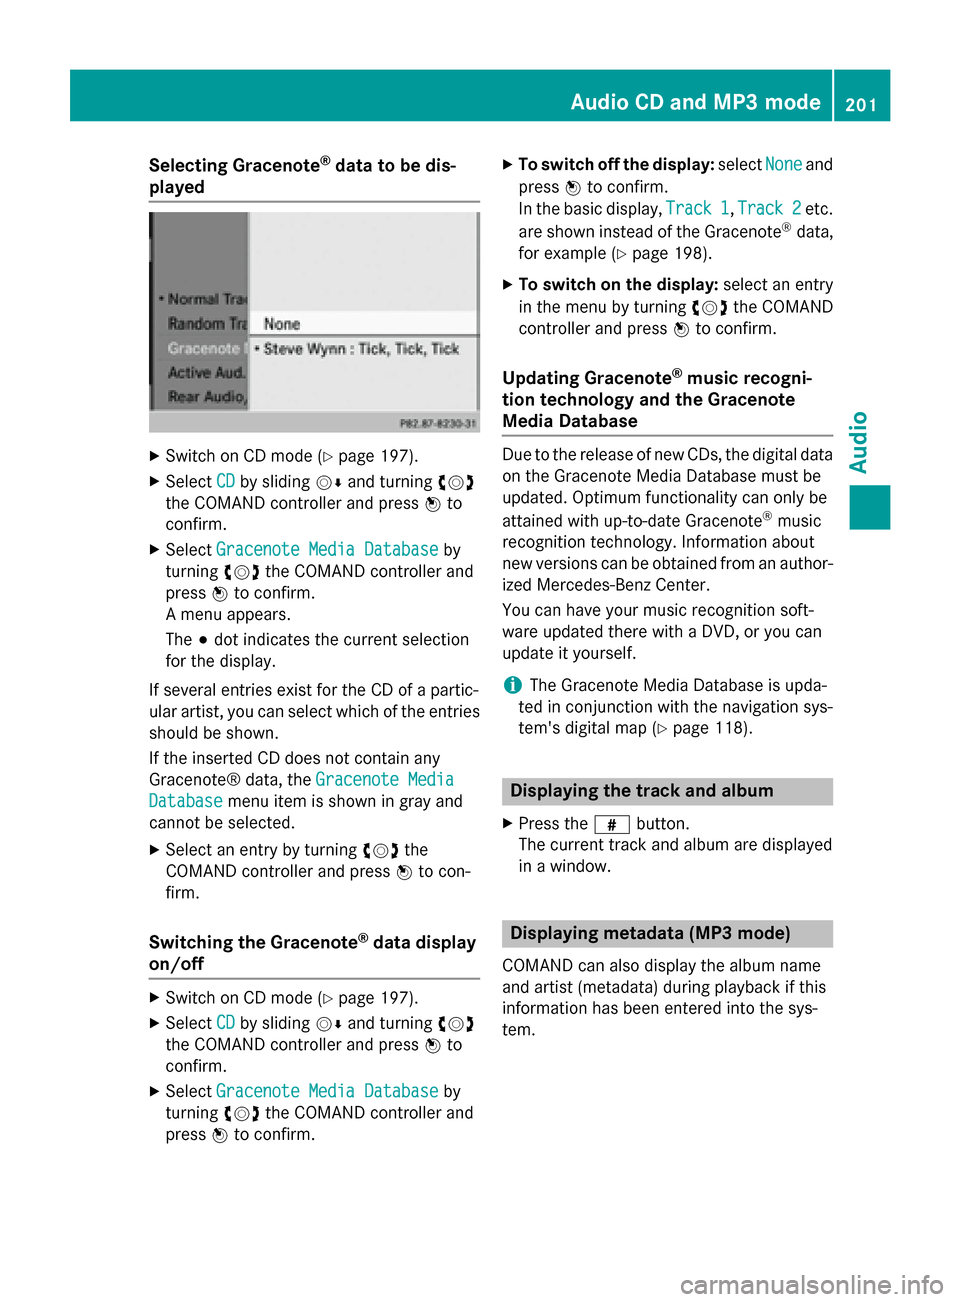
X Select Gracenote Media Database
Gracenote Media Database by
turning 00790052007Athe COMAND controller and
press 0098to confirm.
A menu appears.
The 003Bdot indicates the current selection
for the display.
If several entries exist for the CD of a partic-
ular artist, you can select which of the entries
should be shown.
If the inserted CD does not contain any
Gracenote® data, the Gracenote Media
Gracenote Media
Database
Database menu item is shown in gray and
cannot be selected.
X Select an entry by turning 00790052007Athe
COMAND controller and press 0098to con-
firm.
Switching the Gracenote ®
data display
on/off X
Switch on CD mode (Y page 197).
X Select CD CDby sliding 00520064and turning 00790052007A
the COMAND controller and press 0098to
confirm.
X Select Gracenote Media Database
Gracenote Media Database by
turning 00790052007Athe COMAND controller and
press 0098to confirm. X
To switch off the display: selectNone Noneand
press 0098to confirm.
In the basic display, Track 1 Track 1,Track 2
Track 2etc.
are shown instead of the Gracenote ®
data,
for example (Y page 198).
X To switch on the display: select an entry
in the menu by turning 00790052007Athe COMAND
controller and press 0098to confirm.
Updating Gracenote ®
music recogni-
tion technology and the Gracenote
Media Database Due to the release of new CDs, the digital data
on the Gracenote Media Database must be
updated. Optimum functionality can only be
attained with up-to-date Gracenote ®
music
recognition technology. Information about
new versions can be obtained from an author-
ized Mercedes-Benz Center.
You can have your music recognition soft-
ware updated there with a DVD, or you can
update it yourself.
i The Gracenote Media Database is upda-
ted in conjunction with the navigation sys-
tem's digital map (Y page 118). Displaying the track and album
X Press the 0090button.
The current track and album are displayed
in a window. Displaying metadata (MP3 mode)
COMAND can also display the album name
and artist (metadata) during playback if this
information has been entered into the sys-
tem. Audio CD and MP3 mode
201Audio Z