reset MERCEDES-BENZ CLA-Class 2014 C117 Comand Manual
[x] Cancel search | Manufacturer: MERCEDES-BENZ, Model Year: 2014, Model line: CLA-Class, Model: MERCEDES-BENZ CLA-Class 2014 C117Pages: 270, PDF Size: 5.82 MB
Page 57 of 270
X
Turn 00790052007A or slide 009700520064the COMAND con-
troller and press 0098to confirm.
The massage function runs for approx-
imately 15 to 25 minutes, depending on the
setting.
X To exit the menu: press the003Dback
button.
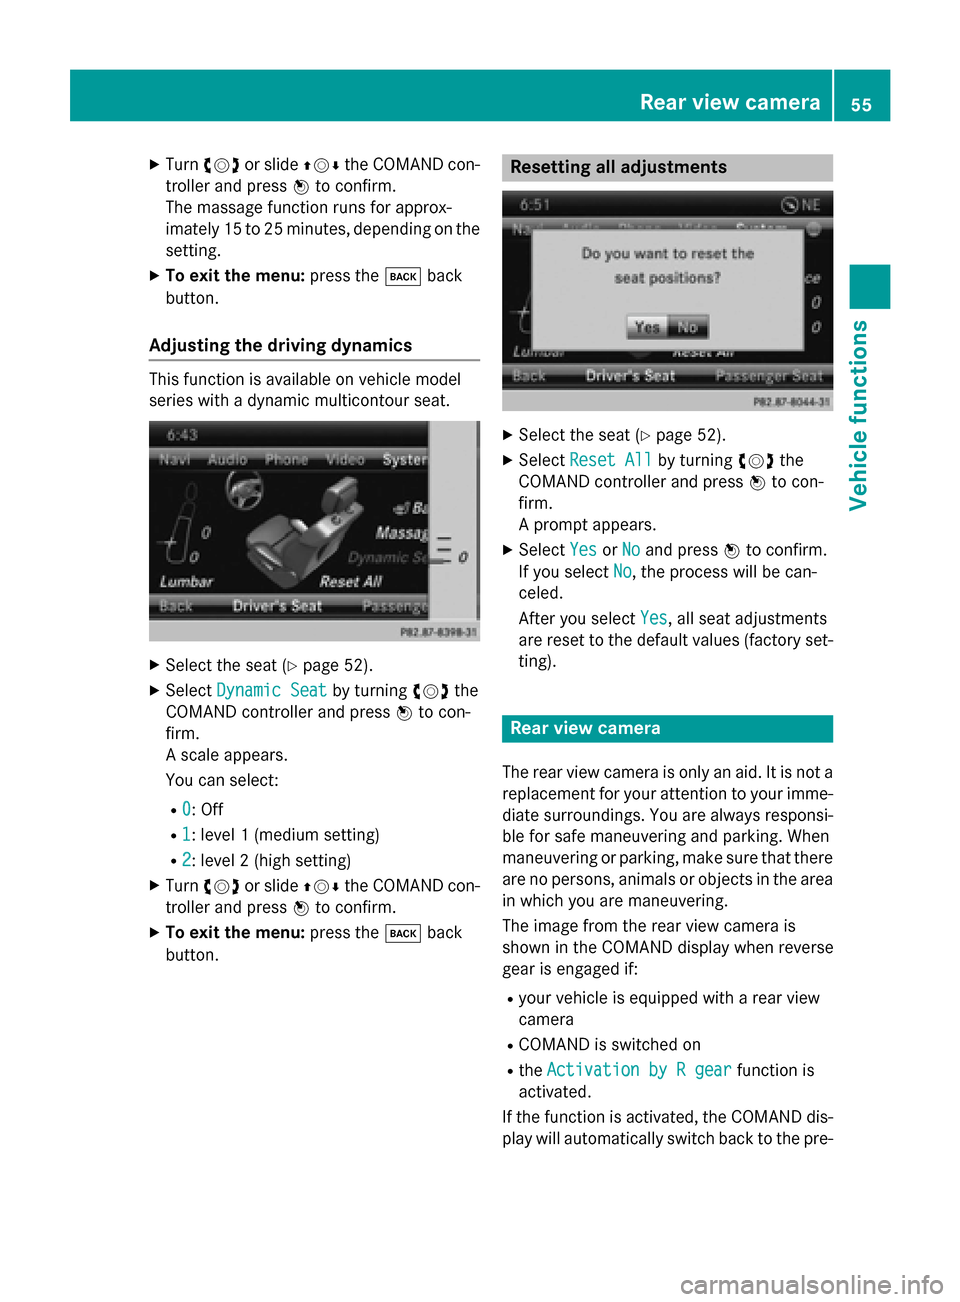
Adjusting the driving dynamics This function is available on vehicle model
series with a dynamic multicontour seat. X
Select the seat (Y page 52).
X Select Dynamic Seat Dynamic Seat by turning00790052007Athe
COMAND controller and press 0098to con-
firm.
A scale appears.
You can select:
R 0 0: Off
R 1
1: level 1 (medium setting)
R 2
2: level 2 (high setting)
X Turn 00790052007A or slide 009700520064the COMAND con-
troller and press 0098to confirm.
X To exit the menu: press the003Dback
button. Resetting all adjustments
X
Select the seat (Y page 52).
X Select Reset All
Reset All by turning00790052007Athe
COMAND controller and press 0098to con-
firm.
A prompt appears.
X Select Yes YesorNo
No and press 0098to confirm.
If you select No
No, the process will be can-
celed.
After you select Yes Yes, all seat adjustments
are reset to the default values (factory set-
ting). Rear view camera
The rear view camera is only an aid. It is not a replacement for your attention to your imme-
diate surroundings. You are always responsi- ble for safe maneuvering and parking. When
maneuvering or parking, make sure that thereare no persons, animals or objects in the area
in which you are maneuvering.
The image from the rear view camera is
shown in the COMAND display when reverse
gear is engaged if:
R your vehicle is equipped with a rear view
camera
R COMAND is switched on
R the Activation by R gear
Activation by R gear function is
activated.
If the function is activated, the COMAND dis- play will automatically switch back to the pre- Rear view camera
55Vehicle functions
Page 77 of 270

X
To display the details: selectDetails
Details by
turning 00790052007Athe COMAND controller and
press 0098to confirm.
X To make a call: selectCall
Callwith the
COMAND controller and press 0098to con-
firm. COMAND switches to telephone
mode (Y page 132).
i This menu item is available if the way
point has a telephone number and if a
mobile phone is connected to COMAND
(Y page 126).
X To call up the map: selectMap Mapwith the
COMAND controller and press 0098to con-
firm.
X You can move the map and select the des-
tination.
X To store the way point in the destina-
tion memory: selectPresets
Presets with the
COMAND controller and press 0098to con-
firm (Y page 105). Way point menu with two way point entries
Editing way points Way points can be:
R changed
R changed in sequence in the way point menu
R deleted
To change the sequence, at least one way
point and the destination must be entered. X
Select a way point in the way point menu by
turning 00790052007Athe COMAND controller and
press 0098to confirm.
A menu appears. X
To change a way point: selectEdit
Editfrom
the menu and press 0098to confirm.
X Change the address, e.g. the city and
street, and confirm with OK OK.
The way point menu appears and displays
the modified way point. You can change the sequence of the way
points and the destination. Destination entry
75Navigation Z
Page 135 of 270
X
To make a call: select°in the character
bar and press 0098to confirm.
or
X Press the 0061button on COMAND or on
the multifunction steering wheel.
Redialing X
Call up the telephone basic menu
(Y page 131).
X Select °in the character bar and press 0098
to confirm.
or
X If the telephone basic menu is displayed,
press the 0061button on COMAND.
In both cases, the calls dialed list appears.
The most recently dialed number is at the
top.
X To select a call: turn00790052007A the COMAND
controller.
X To connect the call: press0098the
COMAND controller.
Using the call list or COMAND phone
book X
Open a call list and select an entry
(Y page 140).
or
X Call up the COMAND phone book and
select an entry (Y page 137).
X To make a call: press0098the COMAND
controller or the 0061button.
Making a call via speed dial The speed dial list contains stored entries
from the phone book (Y page 142).
Option 1:
X Hold down one of the number keys for lon-
ger than two seconds.
The telephone basic menu displays the
selected entry. This initiates dialing. Option 2:
X Call up the telephone basic menu
(Y page 131).
X Select Call
Call Lists Lists by sliding 00520064and turn-
ing 00790052007A the COMAND controller and press
0098 to confirm.
A menu appears.
X Select Speed
Speed Dial
DialPreset
Preset List
Listby turn-
ing 00790052007A the COMAND controller and press
0098 to confirm.
The speed dial list appears.
X Select preset and press 0098to confirm.
The telephone basic menu displays the
selected entry. This initiates dialing. Functions available during a call
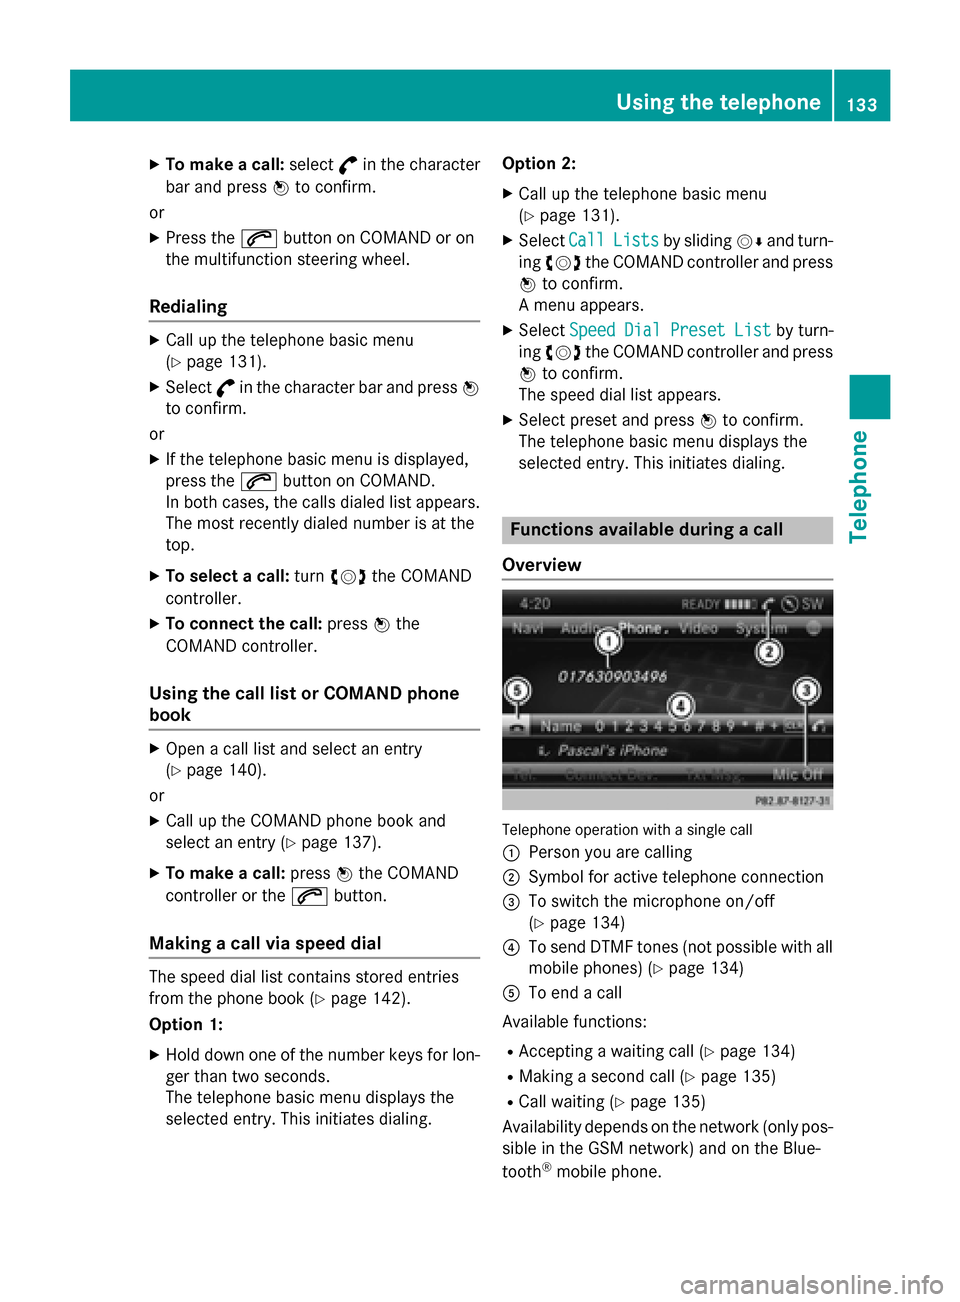
Overview Telephone operation with a single call
0043 Person you are calling
0044 Symbol for active telephone connection
0087 To switch the microphone on/off
(Ypage 134)
0085 To send DTMF tones (not possible with all
mobile phones) (Y page 134)
0083 To end a call
Available functions:
R Accepting a waiting call (Y page 134)
R Making a second call (Y page 135)
R Call waiting (Y page 135)
Availability depends on the network (only pos-
sible in the GSM network) and on the Blue-
tooth ®
mobile phone. Using the telephone
133Telephone Z
Page 144 of 270
i
Save
Save
is shown in gray if the selected list
entry has already been saved.
X Select Add Phone No.
Add Phone No. and press0098to
confirm.
X Select a category for the number, e.g. Home
Home,
and press 0098to confirm.
X Select a category for the phone, e.g.
Mobile
Mobile, and press 0098to confirm.
X Select Save
Save.
The search menu for address book entries
appears.
X Search for the desired entry (Y page 137).
X Press 0098when you have finished searching.
COMAND stores the data if there are fewer
than five numbers assigned to the entry you
are searching for in the selected number
category.
You will see a message to this effect.
If five numbers are stored for the entry you are searching for, a prompt will appear ask- ing whether you wish to overwrite one of
the existing numbers.
X Select Yes
Yes orNo No and press 0098to confirm.
If you select Yes Yes, a selection list with the
five existing numbers is displayed.
If you select No
No, the process will be can-
celed.
X Select the number to be overwritten in the
list by turning 00790052007Athe COMAND controller
and press 0098to confirm.
COMAND overwrites the selected number
with the new data. Deleting call lists
If you are using a Bluetooth ®
phone that does
not support the PBAP Bluetooth ®
profile, the
call lists are generated and managed by
COMAND. You can delete these call lists in
COMAND.
If you download call lists from a Bluetooth ®
phone that supports the PBAP Bluetooth ®
profile, you cannot delete them from
COMAND. X
Select Call Lists
Call Lists in the telephone basic
menu by turning 00790052007Athe COMAND con-
troller and press 0098to confirm.
X Select Delete Call Lists Delete Call Lists and press0098
to confirm.
A prompt appears asking whether you wish to delete all call lists.
X Select Yes YesorNo
No and press 0098to confirm.
If you select Yes
Yes, the call lists are deleted.
If you select No
No, the process will be can-
celed.
i If you delete these call lists from the
mobile phone (see the separate mobile
phone operating instructions), COMAND
updates the call list display the next time it connects. Using the speed dial list
Storing an entry
You can assign ten speed dial presets (0 – 9) to the speed dial list. There are two options
available for this purpose.
Option 1:
X Search for a phone book entry in the phone
book (Y page 137).
X If an entry has several phone numbers,
select the desired number by turning 00790052007A
the COMAND controller.
X Select the list symbol to the right of the
entry by sliding 00520096the COMAND control-
ler and press 0098to confirm.
A menu appears.
X Select Speed Dial Speed Dial by turning00790052007Athe
COMAND controller and press 0098to con-
firm.
A menu appears. 142
Using the speed dial listTelephone
Page 145 of 270

Speed dial menu
X Select Assign Speed Dial Preset
Assign Speed Dial Preset and
press 0098to confirm.
The speed dial list appears. The selected
phone book entry is listed as the first entry. The next available speed dial preset is high-
lighted. X
Select the speed dial preset by turning
00790052007A the COMAND controller and press 0098
to confirm.
The phone book entry is saved in the speed
dial preset.
Option 2 X Call up the telephone basic menu
(Y page 131).
X Select Call CallLists
Lists by sliding 00520064and turn-
ing 00790052007A the COMAND controller and press
0098 to confirm.
X Select Speed Dial Preset List
Speed Dial Preset List and
press 0098to confirm.
The speed dial list appears. X
Select the list symbol to the right of the
entry by sliding 00520096the COMAND control-
ler and press 0098to confirm.
X Select Assign Speed Dial Preset
Assign Speed Dial Preset and
press 0098to confirm.
The speed dial list appears. The selected
phone book entry is listed as the first entry. The next available speed dial preset is high-
lighted. X
Select the speed dial preset by turning
00790052007A the COMAND controller and press 0098
to confirm.
The phone book entry is saved in the speed
dial preset. Making a call via speed dial
The speed dial list contains stored phone
book entries (Y page 142).
Option 1:
X Hold down one of the number keys for lon-
ger than two seconds.
The telephone basic menu displays the
selected entry. This initiates dialing.
Option 2: X Call up the telephone basic menu
(Y page 131).
X Select Call CallLists
Lists by sliding 00520064and turn-
ing 00790052007A the COMAND controller and press
0098 to confirm.
The speed dial list appears. Using the speed dial list
143Telephone Z
Page 146 of 270
X
Select Speed
Speed Dial
DialPreset
Preset List
Listby turn-
ing 00790052007A the COMAND controller and press
0098 to confirm.
The speed dial list appears.
X Select preset and press 0098to confirm.
The telephone basic menu displays the
selected entry. This initiates dialing. Deleting a speed dial number
X To delete a speed dial number: select
Delete Speed Dial Preset
Delete Speed Dial Preset in the
"Speed dial" menu by turning 00790052007Athe
COMAND controller and press 0098to con-
firm.
The speed dial number is deleted.
X To delete all speed dial numbers: select
Delete All Speed Dial Presets
Delete All Speed Dial Presets in the
"Speed dial" menu by turning 00790052007Athe
COMAND controller and press 0098to con-
firm.
You will be asked whether you want to con- tinue.
X Select Yes
Yes orNo No and press 0098to confirm.
If you select Yes
Yes, all speed dial presets will
be deleted from the speed dial list.
If you select No
No, the process will be can-
celed. Text messages
Information and requirements
In order to be able to use the text message
function, the mobile phone has to support the
MAP Bluetooth ®
profile (Message Access
Profile).
If the above conditions are met, new incoming
text messages appear in the COMAND text
message inbox. The 008Fsymbol appears in
the status bar. The symbol disappears once
you have read the text message. The ú
mail symbol is displayed if the text message
memory is full. The symbol is no longer dis- played once you delete at least one text mes-
sage.
i COMAND may not load all of the most
recent text messages:
This may occur in exceptional cases, for
example when using certain mobile
phones/brackets and if the mobile phone
inbox holds a large number of text mes-
sages. Displaying the text message inbox
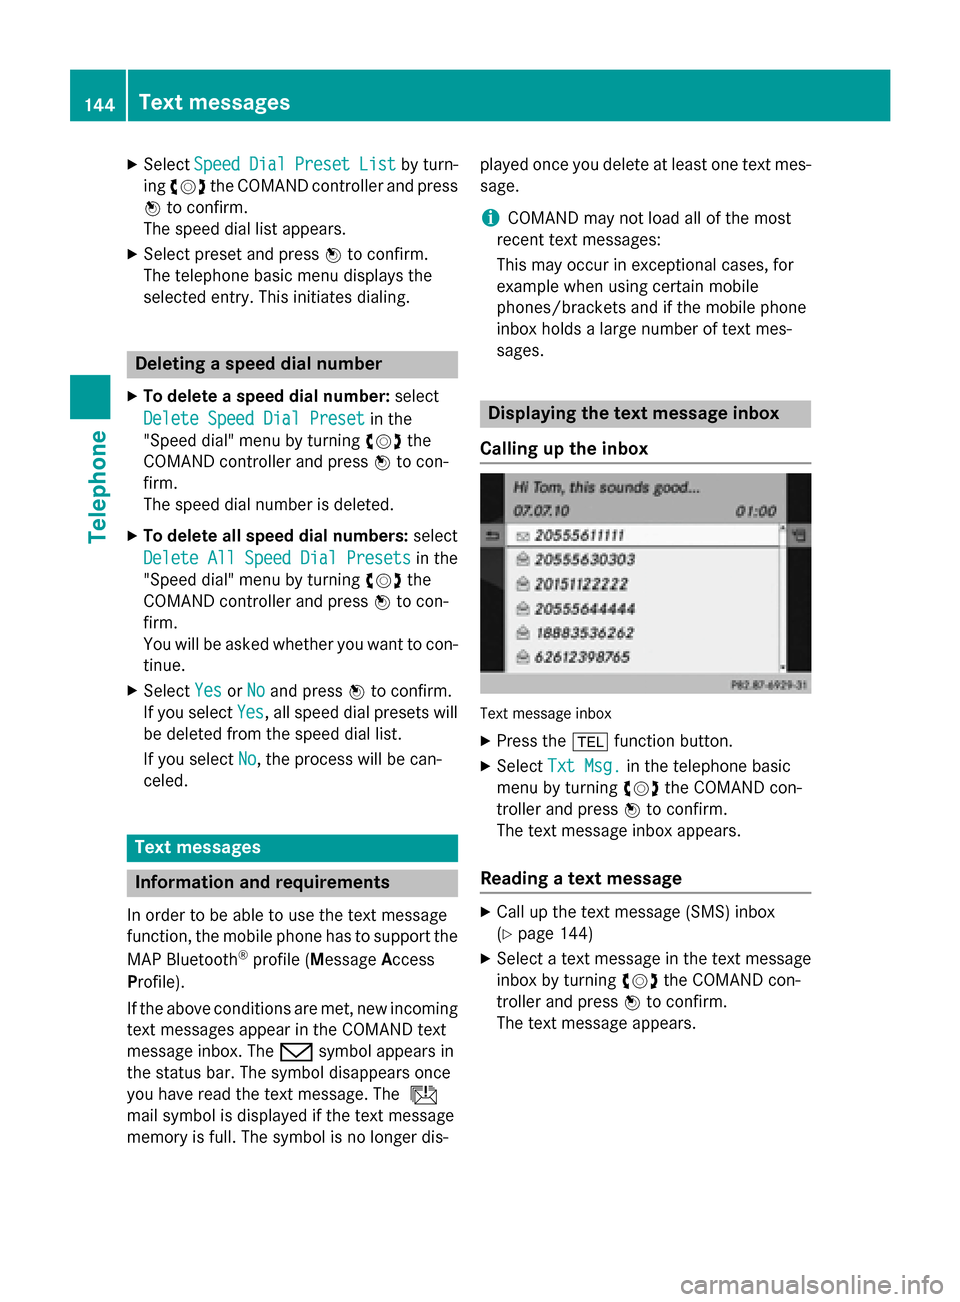
Calling up the inbox Text message inbox
X
Press the 002Bfunction button.
X Select Txt Msg. Txt Msg. in the telephone basic
menu by turning 00790052007Athe COMAND con-
troller and press 0098to confirm.
The text message inbox appears.
Reading a text message X
Call up the text message (SMS) inbox
(Y page 144)
X Select a text message in the text message
inbox by turning 00790052007Athe COMAND con-
troller and press 0098to confirm.
The text message appears. 144
Text messagesTelephone
Page 149 of 270
You can use these entries to make telephone
calls and for navigation.
i Number of contacts in the address
book: the address book can store a total of
4000 contacts.
1500 entries each are reserved in the
address book for:
R contacts from the mobile phone
R contacts that you create in COMAND or
import from other sources
The remaining 1,000 entries are assigned
by COMAND as necessary.
i Display of mobile phone contacts:
con-
tacts downloaded from the mobile phone
remain in the address book even if you dis-
connect the mobile phone from COMAND.
Contacts that have previously been availa-
ble can be displayed as soon as the mobile
phone is reconnected. COMAND down-
loads the contacts again so that any new
contacts that have been added to the
mobile phone can be displayed.
As soon as you connect a new mobile
phone to COMAND all the contacts from
the previous mobile phone are replaced by those from the new phone's address book.
Address book entries remain stored when
the mobile phone is disconnected. For this reason, delete your personal data using the
reset function before selling your vehicle,
for example (Y page 47). Calling up the address book
Using the function button:
X Press the 002Bfunction button.
You see either the telephone basic menu or
the address book, depending on which was
last active.
X If the telephone basic menu is displayed,
press the 002Bfunction button again. Using the telephone basic menu:
X When the telephone basic menu is dis-
played, select Tel
Tel by sliding 00520097the
COMAND controller and press 0098to con-
firm.
X Select Address Book Address Book from the menu and
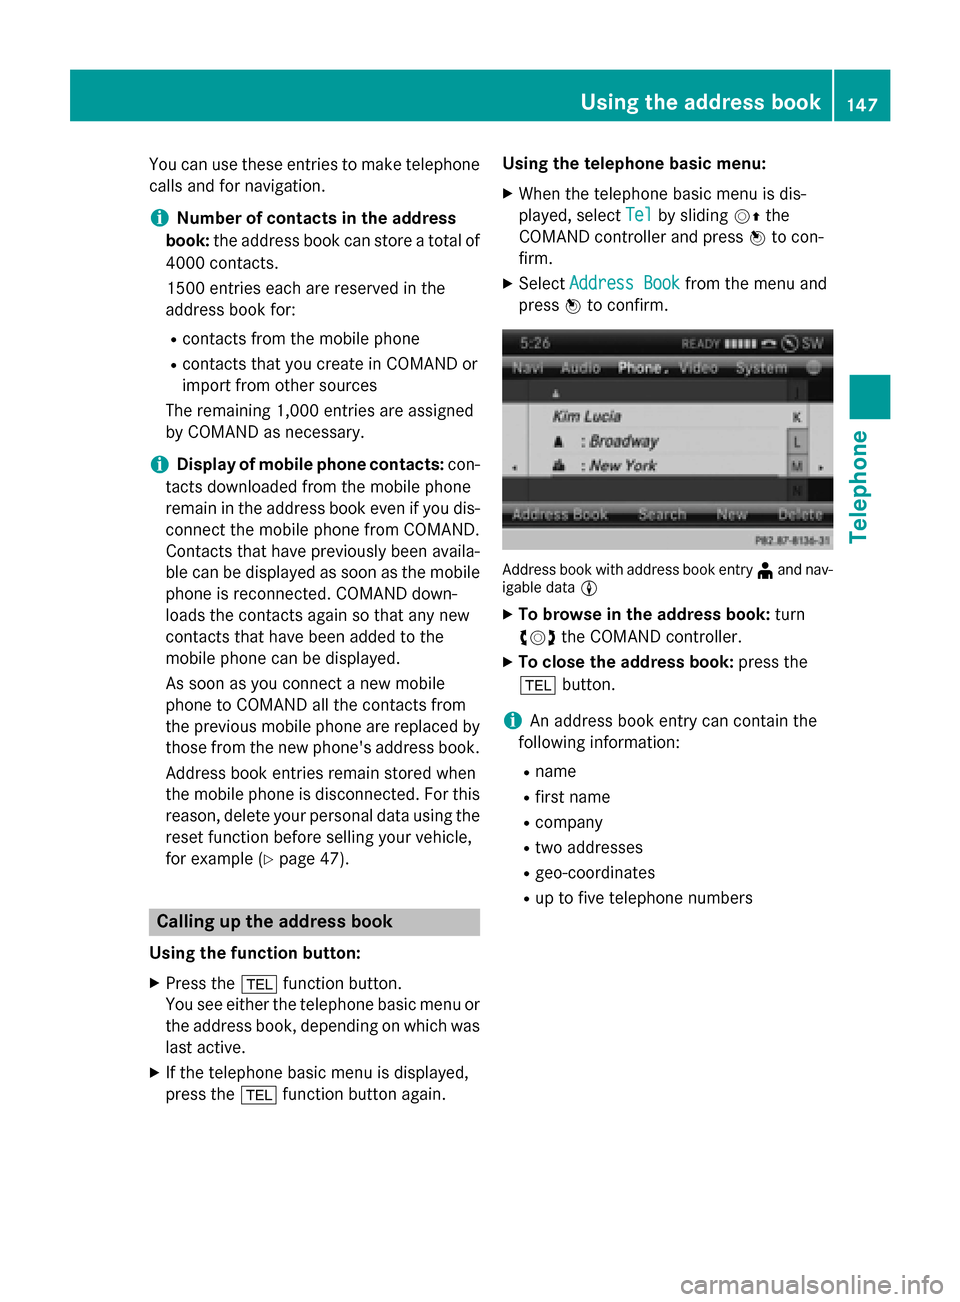
press 0098to confirm. Address book with address book entry
¥and nav-
igable data 0048
X To browse in the address book: turn
00790052007A the COMAND controller.
X To close the address book: press the
002B button.
i An address book entry can contain the
following information:
R name
R first name
R company
R two addresses
R geo-coordinates
R up to five telephone numbers Using the address book
147Telephone Z
Page 152 of 270
Changing the category of a telephone
number data field X
Display details for an address book entry
(Y page 149).
X Select the telephone number data field.
X Select the list symbol to the right of the
entry by sliding 00520096the COMAND control-
ler and press 0098to confirm.
X Select Change Category Change Category and press0098to
confirm.
X Select a number category, e.g. Home
Home.
X Select a telephone category, e.g. Mobile
Mobile.
X If desired, select Preferred
Preferred and press0098
to confirm.
Depending on the previous status, switch
the option on 0073or off 0053. The phone num-
ber is displayed as the first number in the
phone book and can be dialed immediately.
X Select Save
Save and press 0098to confirm.
The new category is stored. Calling a number stored in an entry
Prerequisites The mobile phone must be connected via the
Bluetooth ®
Interface (Y page 126).
Dialing a number X
Display details for an address book entry
(Y page 149).
X Select the phone number data field by turn-
ing 00790052007A the COMAND controller.
X Press 0098the COMAND controller to con-
firm.
or X Select the list symbol to the right of the
data field by sliding 00520096the COMAND con-
troller.
X Press 0098the COMAND controller to con-
firm.
X Select Call
Call and press 0098to confirm.
The phone makes the call. The display
switches to telephone mode. Storing the phone number as a speed
dial number
X Display details for an address book entry
(Y page 149).
X Select the phone number data field by turn-
ing 00790052007A the COMAND controller.
X Select the list symbol to the right of the
data field by sliding 00520096the COMAND con-
troller and press 0098to confirm.
X Select Speed Dial Speed Dial and press0098to con-
firm.
You can now store the number in one of the ten speed dial presets (Y page 142). Starting route guidance to an entry
Address book entry with navigable data This function is available as soon as you have
stored a destination in the destination mem-
ory (Y page 104).
X Search for an address book entry with the
0048 symbol and select it from the list
(Y page 148).
X Display details for an address book entry
(Y page 149).
X Select the address data field by turning
00790052007A the COMAND controller and press 0098
to confirm.
Route guidance begins.
or X Select the list symbol to the right of the
entry by sliding 00520096the COMAND control-
ler and press 0098to confirm.
X Select Navigate
Navigate and press0098to confirm.
Route guidance begins.
Address book entry without navigable
data Route guidance can also be started for an
address book entry without the
0048symbol. If
the address data or designations do not
match the digital map, COMAND prompts you
to re-enter the address. 150
Using the address bookTelephone
Page 162 of 270
distracted from the traffic conditions,
cause an accident and injure yourself and
others. Selecting/setting Internet access
data
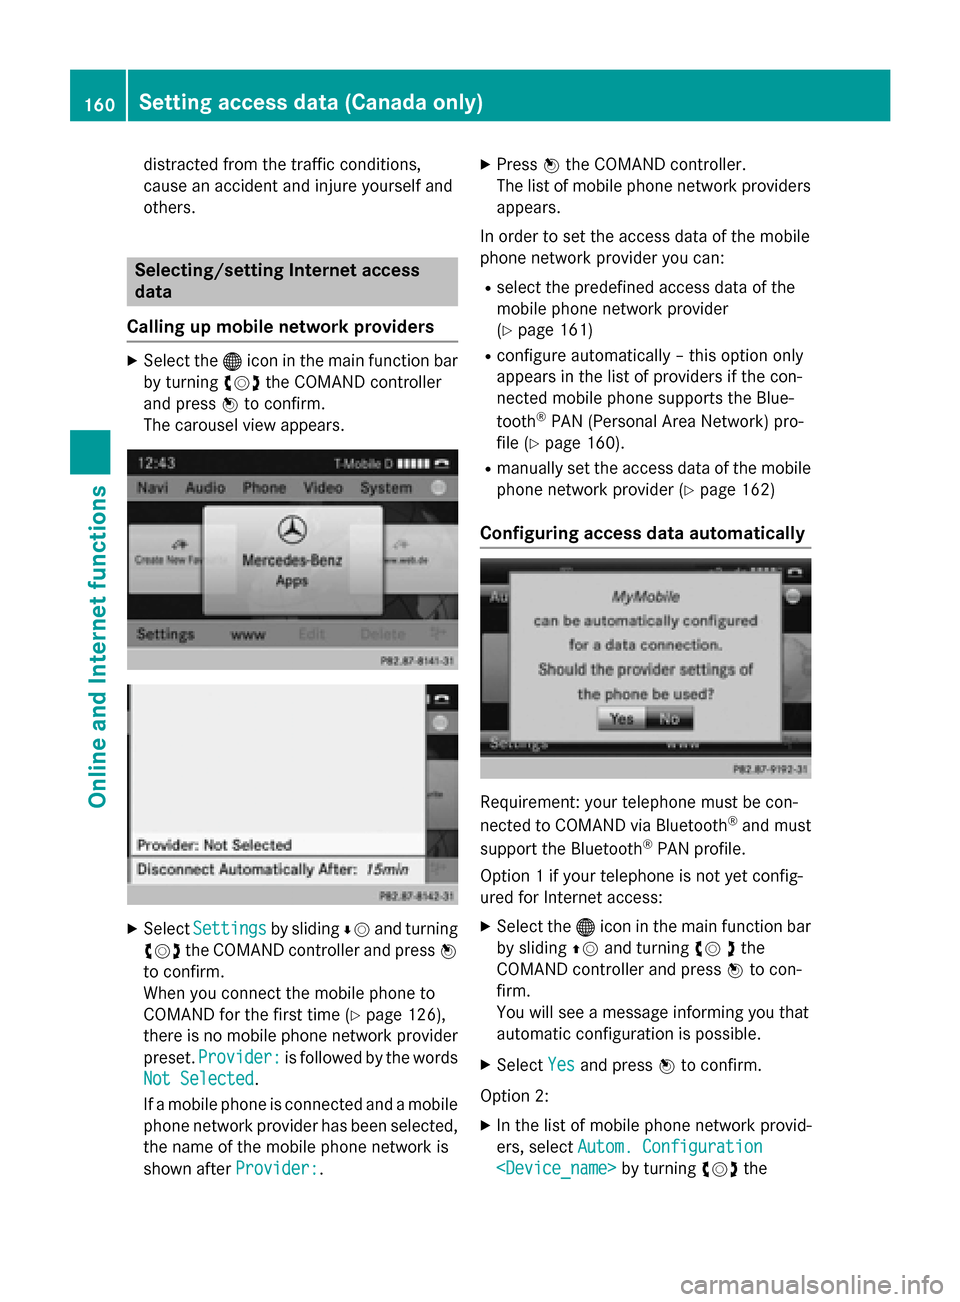
Calling up mobile network providers X
Select the 00A7icon in the main function bar
by turning 00790052007Athe COMAND controller
and press 0098to confirm.
The carousel view appears. X
Select Settings Settings by sliding00640052and turning
00790052007A the COMAND controller and press 0098
to confirm.
When you connect the mobile phone to
COMAND for the first time (Y page 126),
there is no mobile phone network provider
preset. Provider:
Provider: is followed by the words
Not Selected Not Selected.
If a mobile phone is connected and a mobile phone network provider has been selected,
the name of the mobile phone network is
shown after Provider:
Provider:. X
Press 0098the COMAND controller.
The list of mobile phone network providers
appears.
In order to set the access data of the mobile
phone network provider you can: R select the predefined access data of the
mobile phone network provider
(Y page 161)
R configure automatically – this option only
appears in the list of providers if the con-
nected mobile phone supports the Blue-
tooth ®
PAN (Personal Area Network) pro-
file (Y page 160).
R manually set the access data of the mobile
phone network provider (Y page 162)
Configuring access data automatically Requirement: your telephone must be con-
nected to COMAND via Bluetooth
®
and must
support the Bluetooth ®
PAN profile.
Option 1 if your telephone is not yet config-
ured for Internet access:
X Select the 00A7icon in the main function bar
by sliding 00970052and turning 00790052the
COMAND controller and press 0098to con-
firm.
You will see a message informing you that
automatic configuration is possible.
X Select Yes Yesand press 0098to confirm.
Option 2: X In the list of mobile phone network provid-
ers, select Autom. Configuration Autom. Configuration
Setting access data (Canada only)Online and Internet functions
Page 163 of 270
COMAND controller and press
0098to con-
firm (Y page 160).
The configuration data is transferred from
the mobile phone. If the configuration is
successful, a 0036dot appears in front of
Autom. configuration
Autom. configuration
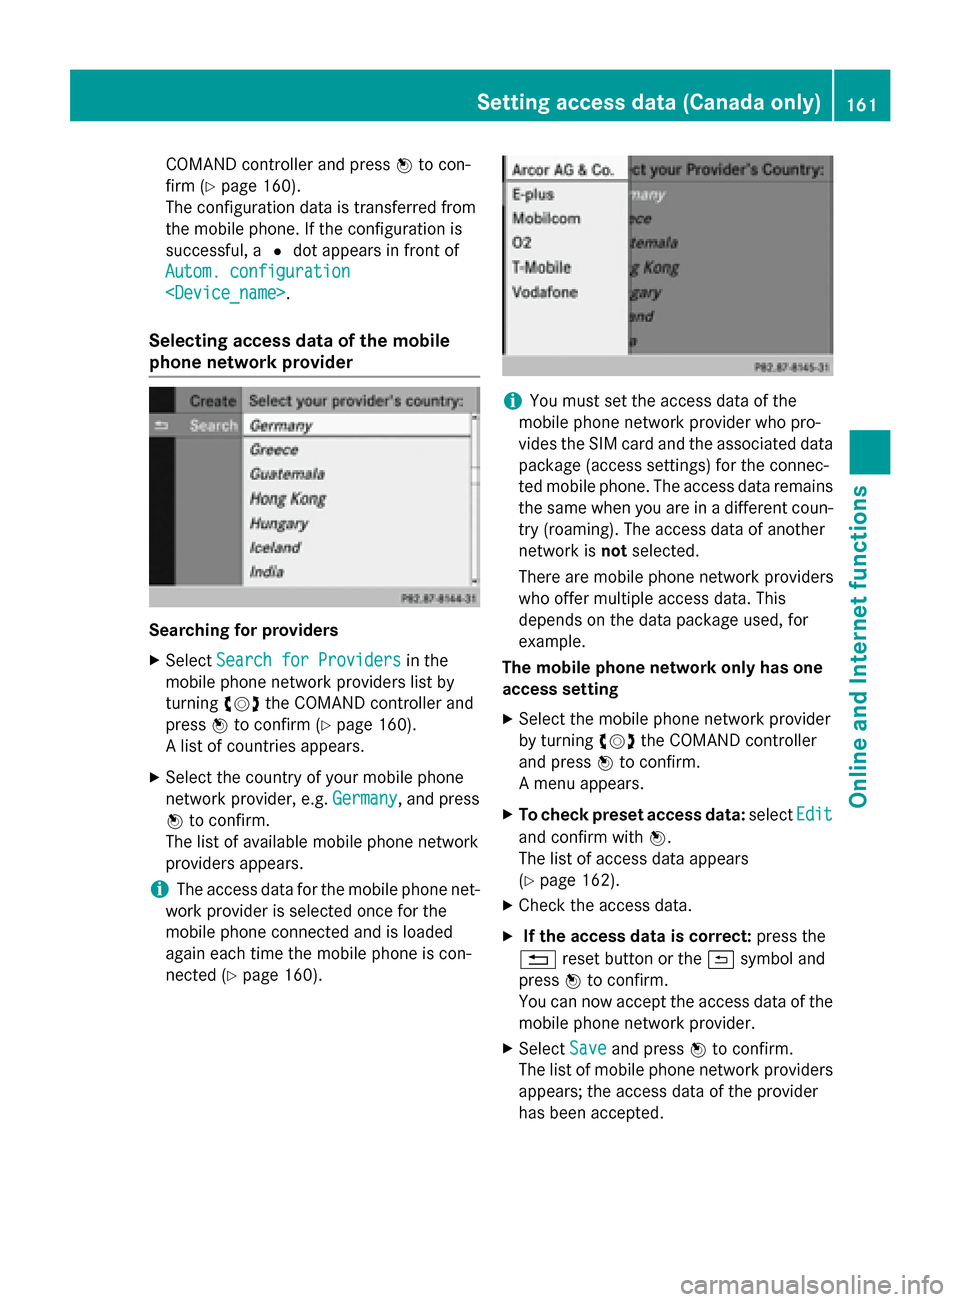
Selecting access data of the mobile
phone network provider Searching for providers
X Select Search for Providers
Search for Providers in the
mobile phone network providers list by
turning 00790052007Athe COMAND controller and
press 0098to confirm (Y page 160).
A list of countries appears.
X Select the country of your mobile phone
network provider, e.g. Germany
Germany, and press
0098 to confirm.
The list of available mobile phone network
providers appears.
i The access data for the mobile phone net-
work provider is selected once for the
mobile phone connected and is loaded
again each time the mobile phone is con-
nected (Y page 160). i
You must set the access data of the
mobile phone network provider who pro-
vides the SIM card and the associated data package (access settings) for the connec-
ted mobile phone. The access data remains the same when you are in a different coun-
try (roaming). The access data of another
network is notselected.
There are mobile phone network providers
who offer multiple access data. This
depends on the data package used, for
example.
The mobile phone network only has one
access setting
X Select the mobile phone network provider
by turning 00790052007Athe COMAND controller
and press 0098to confirm.
A menu appears.
X To check preset access data: selectEdit Edit
and confirm with 0098.
The list of access data appears
(Y page 162).
X Check the access data.
X If the access data is correct: press the
0038 reset button or the 0039symbol and
press 0098to confirm.
You can now accept the access data of the
mobile phone network provider.
X Select Save
Save and press 0098to confirm.
The list of mobile phone network providers
appears; the access data of the provider
has been accepted. Setting access data (Canada only)
161Online and Internet functions Z