door lock MERCEDES-BENZ CLA-Class 2014 C117 Owner's Guide
[x] Cancel search | Manufacturer: MERCEDES-BENZ, Model Year: 2014, Model line: CLA-Class, Model: MERCEDES-BENZ CLA-Class 2014 C117Pages: 358, PDF Size: 6.6 MB
Page 211 of 358
around the vehicle are displayed in orange
in the multifunction display.
X Press the 0076button to save the setting.
Deactivating delayed switch-off of the exte-
rior lighting temporarily:
X Before leaving the vehicle, turn the Smart-
Key to position 0in the ignition lock.
X Turn the SmartKey to position 2in the igni-
tion lock.
The exterior lighting delayed switch-off is
deactivated.
Delayed switch-off of the exterior lighting is
reactivated the next time you start the
engine.
i Depending on your vehicle's equipment,
when the surround lighting and delayed
switch-off exterior lighting are on, the fol-
lowing light up:
R Parking lamps
R Front fog lamps
R Low-beam headlamps
R Daytime running lamps
R Side marker lamps
R Surround lighting in the exterior mirrors
Activating/deactivating the interior light-
ing delayed switch-off
If you activate the Interior Lighting
Interior Lighting
Delay
Delay function, the interior lighting remains
on for 20 seconds after you remove the key
from the ignition lock.
X Press the 0059or0065 button on the steer-
ing wheel to select the Sett Settmenu.
X Press the 0064or0063 button to select the
Light
Light submenu.
X Press 0076to confirm.
X Press the 0064or0063 button to select the
Interior Lighting Delay
Interior Lighting Delay function.
If the Interior
Interior Lighting
LightingDelay
Delayfunction
has been switched on, the vehicle interior is
displayed in orange in the multifunction
display.
X Press the 0076button to save the setting. Vehicle Activating/deactivating the automatic
door locking mechanism
X Press the 0059or0065 button on the steer-
ing wheel to select the Sett Settmenu.
X Press the 0064or0063 button to select the
Vehicle
Vehicle submenu.
X Press 0076to confirm.
X Press the 0064or0063 button to select the
Automatic Door Lock
Automatic Door Lock function.
When the Automatic
Automatic Door
DoorLock
Lockfunction
is activated, the vehicle doors are displayed in orange in the multifunction display.
X Press the 0076button to save the setting.
If you activate the Automatic Door Lock
Automatic Door Lock
function, the vehicle is centrally locked above
a speed of approximately 9 mph (15 km/h).
For further information on the automatic lock- ing feature, see (Y page 83).
Activating/deactivating the acoustic
locking verification signal
If you switch on the Acoustic AcousticLock
Lockfunction,
an acoustic signal sounds when you lock the
vehicle.
X Press the 0059or0065 button on the steer-
ing wheel to select the Sett
Sett menu.
X Press the 0064or0063 button to select the
Vehicle Vehicle submenu.
X Press 0076to confirm.
X Press the 0064or0063 button to select the
Acoustic Lock
Acoustic Lock function.
If the Acoustic
Acoustic Lock
Lockfunction is activated,
the 0037 symbol in the multifunction dis-
play lights up orange.
X Press the 0076button to save the setting.
Activating/deactivating the radar sensor
system X Press the 0059or0065 button on the steer-
ing wheel to select the Sett Settmenu.
X Press the 0064or0063 button to select the
Vehicle
Vehicle submenu.
X Press 0076to confirm. Menus and submenus
209On-board computer and displays Z
Page 212 of 358
X
Press the 0063or0064 button to select
Radar Sensor (See Oper. Manual):
Radar Sensor (See Oper. Manual):.
You will see the selected setting: Enabled
Enabled
or Disabled
Disabled.
X Press the 0076button to save the setting.
If the radar sensor system is switched off,
Blind Spot Assist is deactivated (Y page 191).
Convenience Switching the fold-in mirrors when lock-
ing feature on/off
This function is only available on vehicles with
the memory function (Y page 105).
When you activate the Auto. Auto.Mirror
Mirror Fold‐
Fold‐
ing ing function, the exterior mirrors are folded
in when the vehicle is locked.
If you unlock the vehicle and then open a
door, the exterior mirrors fold out again.
If you have switched on the Auto. Mirror Auto. Mirror
Folding
Folding function and you fold in the exterior
mirrors using the button on the door
(Y page 103), they will not fold out automat-
ically. The exterior mirrors can then only be
folded out using the button on the door.
X Press the 0059or0065 button on the steer-
ing wheel to select the Sett
Sett menu.
X Press the 0064or0063 button to select the
Convenience Convenience submenu.
X Press 0076to confirm.
X Press the 0064or0063 button to select the
Auto. Mirror Folding
Auto. Mirror Folding function.
If the Auto. Mirror Folding
Auto. Mirror Folding function is
activated, the vehicle's exterior mirror is
displayed in orange in the multifunction
display.
X Press the 0076button to save the setting.
Restoring the factory settings X
Press the 0059or0065 button on the steer-
ing wheel to select the Sett Settmenu.
X Press the 0064or0063 button to select the
Factory Setting
Factory Setting submenu. X
Press 0076to confirm.
The Reset All Settings? Reset All Settings? message
appears.
X Press the 0064or0063 button to select No No
or Yes
Yes.
X Press 0076to confirm the selection.
If you have selected Yes
Yes, the multifunction
display shows a confirmation message.
For safety reasons, the Daytime Running
Daytime Running
Lamps
Lamps function in the Light
Lightsubmenu is only
reset if the vehicle is stationary. AMG menu in AMG vehicles
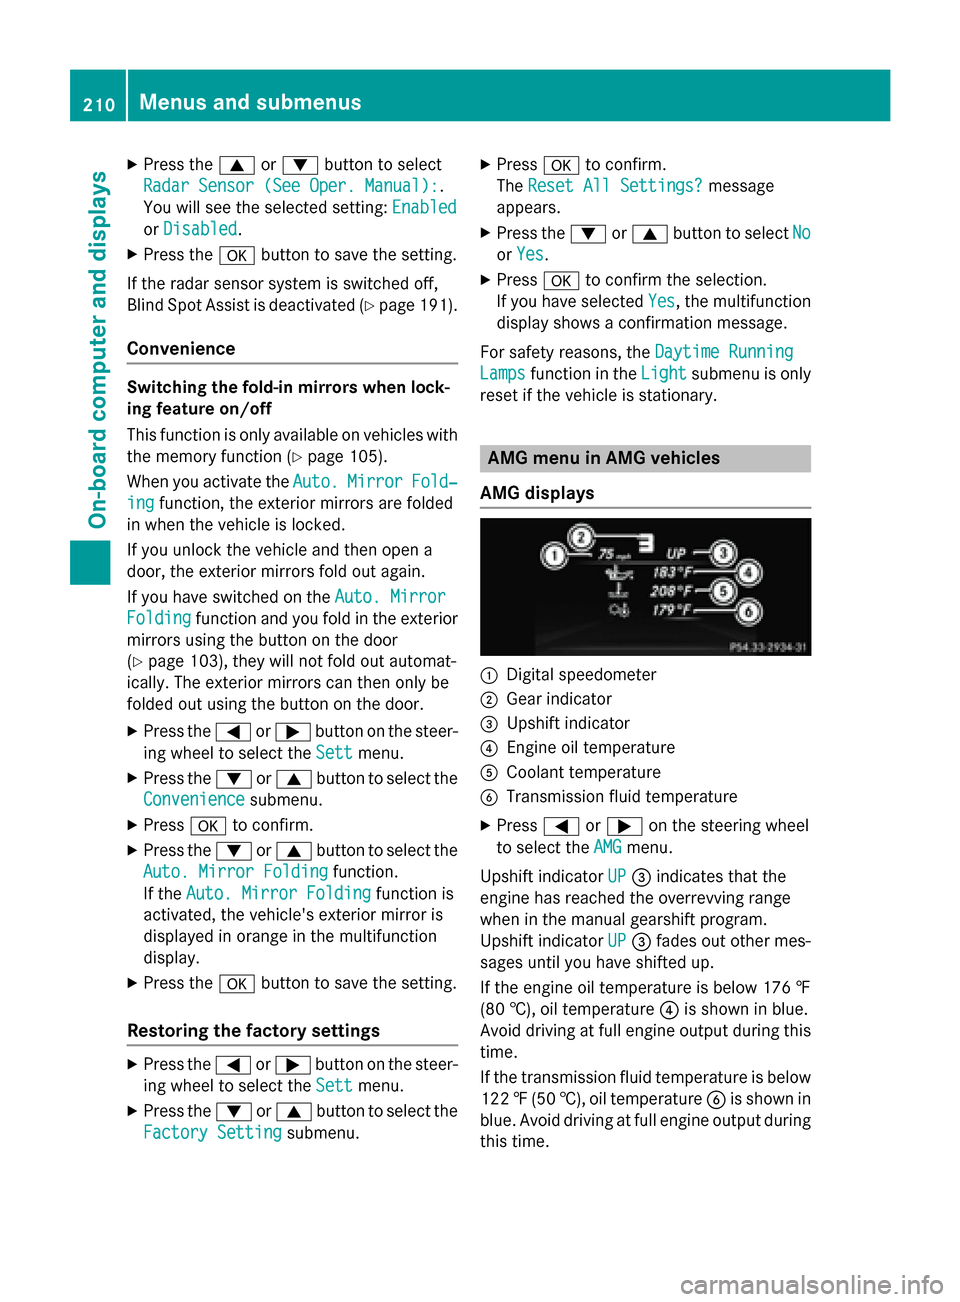
AMG displays 0043
Digital speedometer
0044 Gear indicator
0087 Upshift indicator
0085 Engine oil temperature
0083 Coolant temperature
0084 Transmission fluid temperature
X Press 0059or0065 on the steering wheel
to select the AMG
AMG menu.
Upshift indicator UP
UP0087 indicates that the
engine has reached the overrevving range
when in the manual gearshift program.
Upshift indicator UP UP0087 fades out other mes-
sages until you have shifted up.
If the engine oil temperature is below 176 ‡
(80 †), oil temperature 0085is shown in blue.
Avoid driving at full engine output during this time.
If the transmission fluid temperature is below
122 ‡(50 †), oil temperature 0084is shown in
blue. Avoid driving at full engine output during
this time. 210
Menus and submenusOn-board computer and displays
Page 241 of 358
Vehicle
Display messages
Possible causes/consequences and
0050
0050Solutions Auxiliary Battery
Auxiliary Battery
Malfunction Malfunction The auxiliary battery for the automatic transmission is no longer
being charged.
X Visit a qualified specialist workshop at the next opportunity.
X Until then, set the automatic transmission to position Pbefore
you switch off the engine.
X Before leaving the vehicle, apply the electric parking brake. Depress Brake to
Depress Brake to
Start Engine Start Engine You have attempted to start the engine with the transmission in
position
Nwithout depressing the brake pedal.
X Depress the brake pedal. To To
Deselect
Deselect P
Por
or N,
N,
Depress Brake and
Depress Brake and
Start Engine Start Engine You have attempted to shift the transmission to position
Ror D
without starting the engine.
X Start the engine.
X Depress the brake pedal.
i It is only possible to shift the transmission from position
Pto
the desired position if you depress the brake pedal. Only then
can the parking lock be deactivated. If you do not depress the
brake pedal, you can move the DIRECT SELECT lever but the
parking lock remains engaged.
i At transmission fluid temperatures below
00F84‡( 00F820 †) you can
only shift out of position Pinto another transmission position
when the engine is running. Apply Brake to Apply Brake to
Shift from 'P' Shift from 'P' You have attempted to move the transmission selector lever to
position
R,Nor Dwithout depressing the brake pedal.
X Depress the brake pedal. Transmission Not Transmission Not
in P in P
Risk of Vehicle Risk of Vehicle
Rolling Away Rolling Away The driver's door is open and the transmission is in position
R,Nor
D.
A warning tone also sounds. X Shift the transmission to position P.
X Secure the vehicle against rolling away (Y page 157). Display messages
239On-board computer and displays Z
Page 243 of 358
Display messages
Possible causes/consequences and
0050
0050Solutions Trans.
Trans.
Oil
OilOverhea‐
Overhea‐
ted Drive on with
ted Drive on with
Care Care AMG vehicles: the transmission oil has overheated.
Manual drive program
Mand the temporarily active manual drive
program are no longer available. The engine power output is
reduced.
X Allow the vehicle to cool down. 4matic Currently 4matic Currently
Unavailable Unavailable 4MATIC (permanent all-wheel drive) has overheated. The vehicle is
only driven by the front wheels.
X Drive on.
The airflow cools 4MATIC more quickly.
When the display message goes out, 4MATIC is available again
and the vehicle is driven by all four wheels. 4matic Inoperative 4matic Inoperative 4MATIC is malfunctioning. The vehicle is only driven by the front
wheels.
X Visit a qualified specialist workshop. 0084 The trunk lid is open.
X Close the trunk lid. 0083 The hood is open.
G WARNING
The open hood may block your view when the vehicle is in motion.
There is a risk of an accident.
X Pull over and stop the vehicle safely as soon as possible, paying
attention to road and traffic conditions.
X Apply the electric parking brake.
X Close the hood. 0051 At least one door is open. A warning tone also sounds.
X Close all the doors. Display
messages
241On-board computer and displays Z
Page 245 of 358
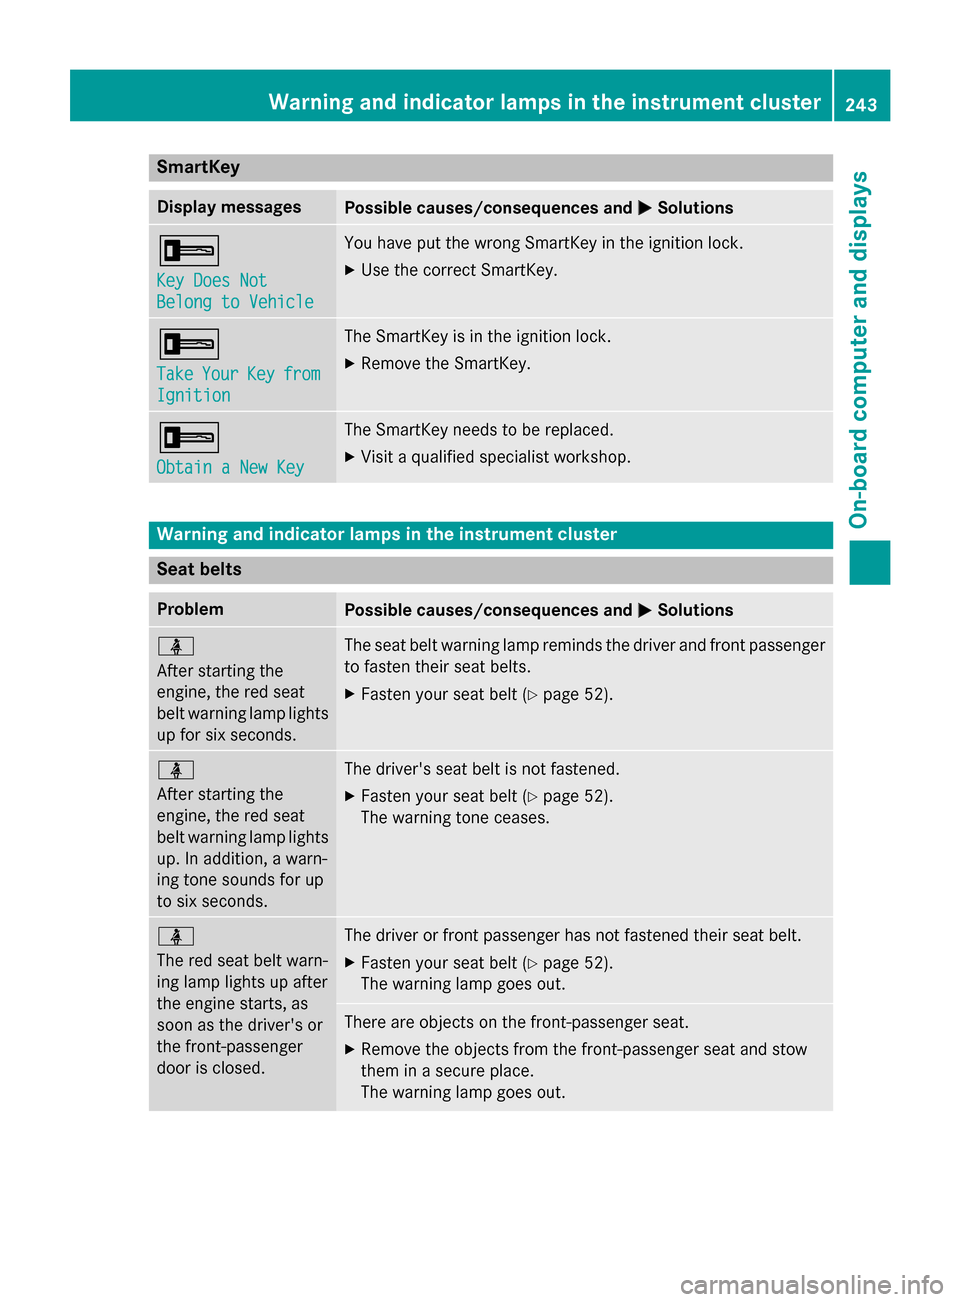
SmartKey
Display messages
Possible causes/consequences and
0050
0050Solutions 0039
Key Does Not Key Does Not
Belong to Vehicle Belong to Vehicle You have put the wrong SmartKey in the ignition lock.
X Use the correct SmartKey. 0039
Take Take
Your
YourKey
Keyfrom
from
Ignition
Ignition The SmartKey is in the ignition lock.
X Remove the SmartKey. 0039
Obtain a New Key Obtain a New Key The SmartKey needs to be replaced.
X Visit a qualified specialist workshop. Warning and indicator lamps in the instrument cluster
Seat belts
Problem
Possible causes/consequences and
0050
0050Solutions 00E9
After starting the
engine, the red seat
belt warning lamp lights
up for six seconds. The seat belt warning lamp reminds the driver and front passenger
to fasten their seat belts.
X Fasten your seat belt (Y page 52).00E9
After starting the
engine, the red seat
belt warning lamp lights
up. In addition, a warn-
ing tone sounds for up
to six seconds. The driver's seat belt is not fastened.
X Fasten your seat belt (Y page 52).
The warning tone ceases. 00E9
The red seat belt warn-
ing lamp lights up after
the engine starts, as
soon as the driver's or
the front-passenger
door is closed.
The driver or front passenger has not fastened their seat belt.
X Fasten your seat belt (Y page 52).
The warning lamp goes out. There are objects on the front-passenger seat.
X Remove the objects from the front-passenger seat and stow
them in a secure place.
The warning lamp goes out. Warning and indicator lamps in the instrument cluster
243On-board computer and displays Z
Page 258 of 358
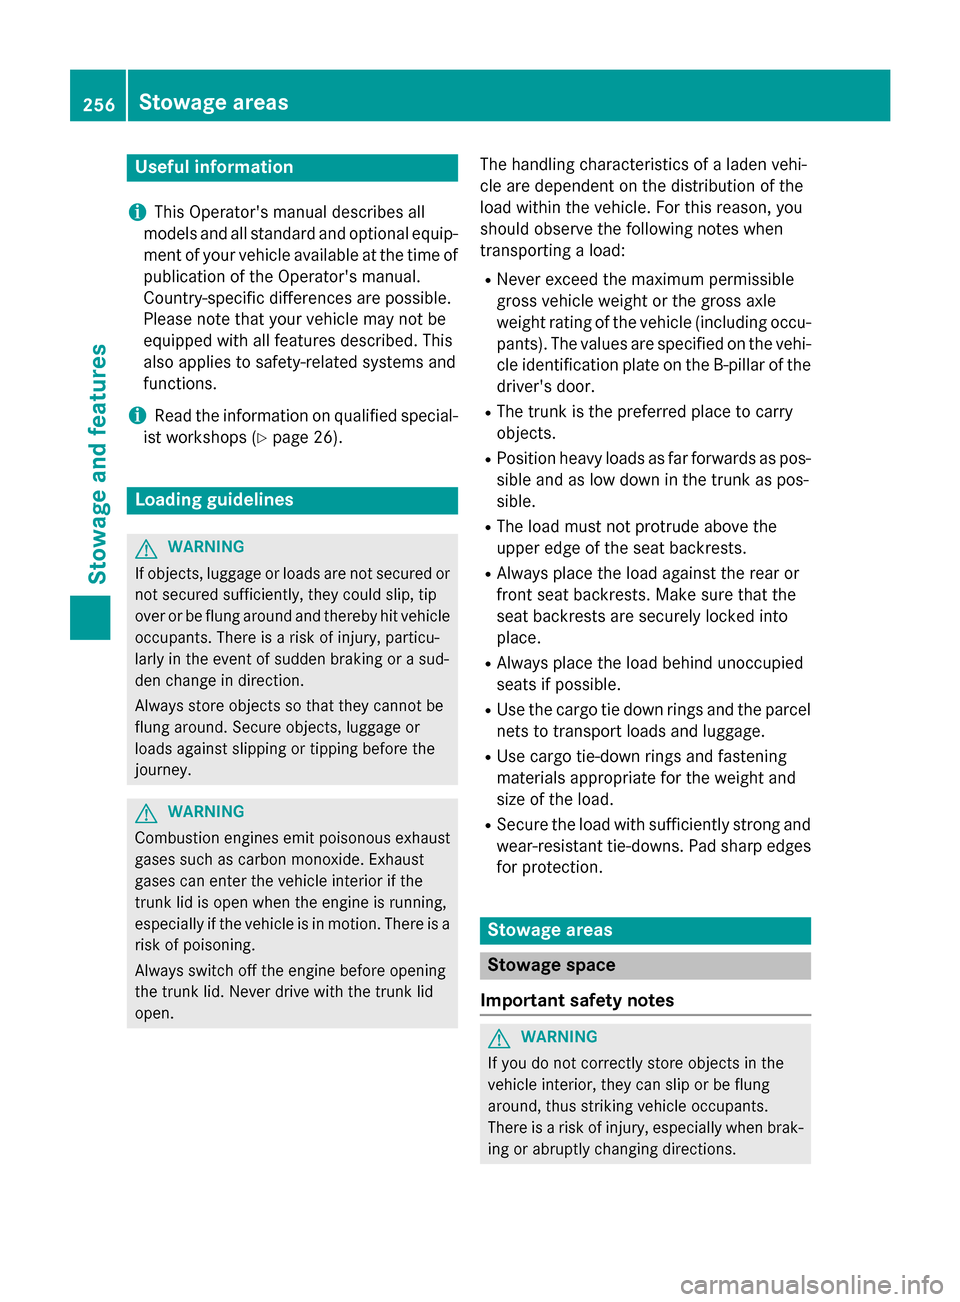
Useful information
i This Operator's manual describes all
models and all standard and optional equip- ment of your vehicle available at the time of
publication of the Operator's manual.
Country-specific differences are possible.
Please note that your vehicle may not be
equipped with all features described. This
also applies to safety-related systems and
functions.
i Read the information on qualified special-
ist workshops (Y page 26). Loading guidelines
G
WARNING
If objects, luggage or loads are not secured or not secured sufficiently, they could slip, tip
over or be flung around and thereby hit vehicle
occupants. There is a risk of injury, particu-
larly in the event of sudden braking or a sud-
den change in direction.
Always store objects so that they cannot be
flung around. Secure objects, luggage or
loads against slipping or tipping before the
journey. G
WARNING
Combustion engines emit poisonous exhaust
gases such as carbon monoxide. Exhaust
gases can enter the vehicle interior if the
trunk lid is open when the engine is running,
especially if the vehicle is in motion. There is a risk of poisoning.
Always switch off the engine before opening
the trunk lid. Never drive with the trunk lid
open. The handling characteristics of a laden vehi-
cle are dependent on the distribution of the
load within the vehicle. For this reason, you
should observe the following notes when
transporting a load:
R Never exceed the maximum permissible
gross vehicle weight or the gross axle
weight rating of the vehicle (including occu- pants). The values are specified on the vehi-
cle identification plate on the B-pillar of the
driver's door.
R The trunk is the preferred place to carry
objects.
R Position heavy loads as far forwards as pos-
sible and as low down in the trunk as pos-
sible.
R The load must not protrude above the
upper edge of the seat backrests.
R Always place the load against the rear or
front seat backrests. Make sure that the
seat backrests are securely locked into
place.
R Always place the load behind unoccupied
seats if possible.
R Use the cargo tie down rings and the parcel
nets to transport loads and luggage.
R Use cargo tie-down rings and fastening
materials appropriate for the weight and
size of the load.
R Secure the load with sufficiently strong and
wear-resistant tie-downs. Pad sharp edges
for protection. Stowage areas
Stowage space
Important safety notes G
WARNING
If you do not correctly store objects in the
vehicle interior, they can slip or be flung
around, thus striking vehicle occupants.
There is a risk of injury, especially when brak- ing or abruptly changing directions. 256
Stowage areasStowage and features
Page 274 of 358
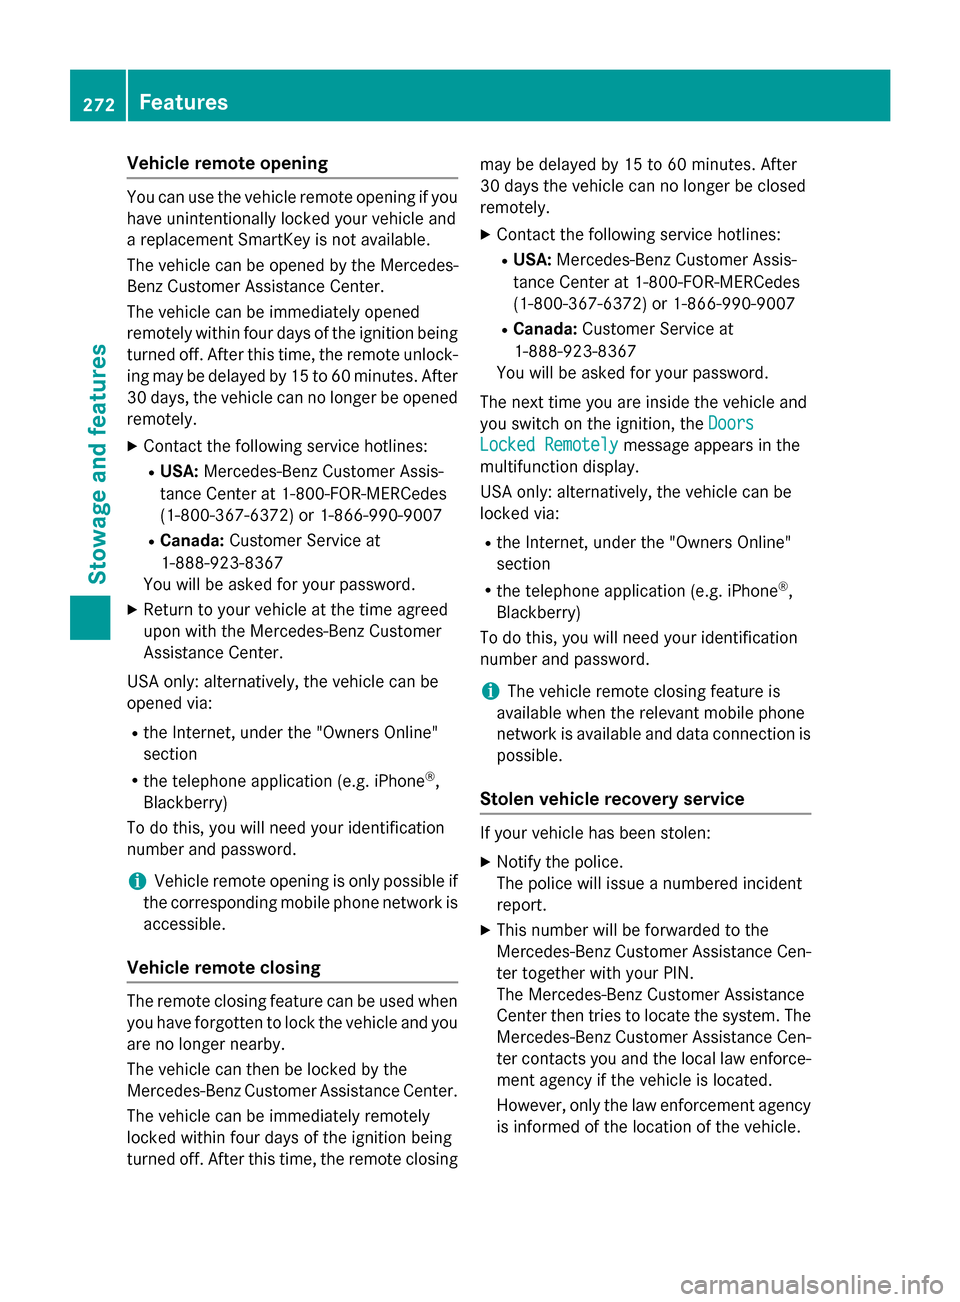
Vehicle remote opening
You can use the vehicle remote opening if you
have unintentionally locked your vehicle and
a replacement SmartKey is not available.
The vehicle can be opened by the Mercedes-
Benz Customer Assistance Center.
The vehicle can be immediately opened
remotely within four days of the ignition being
turned off. After this time, the remote unlock- ing may be delayed by 15 to 60 minutes. After
30 days, the vehicle can no longer be opened remotely.
X Contact the following service hotlines:
R USA: Mercedes-Benz Customer Assis-
tance Center at 1-800-FOR-MERCedes
(1-800-367-6372) or 1-866-990-9007
R Canada: Customer Service at
1-888-923-8367
You will be asked for your password.
X Return to your vehicle at the time agreed
upon with the Mercedes-Benz Customer
Assistance Center.
USA only: alternatively, the vehicle can be
opened via:
R the Internet, under the "Owners Online"
section
R the telephone application (e.g. iPhone ®
,
Blackberry)
To do this, you will need your identification
number and password.
i Vehicle remote opening is only possible if
the corresponding mobile phone network is
accessible.
Vehicle remote closing The remote closing feature can be used when
you have forgotten to lock the vehicle and you
are no longer nearby.
The vehicle can then be locked by the
Mercedes-Benz Customer Assistance Center.
The vehicle can be immediately remotely
locked within four days of the ignition being
turned off. After this time, the remote closing may be delayed by 15 to 60 minutes. After
30 days the vehicle can no longer be closed
remotely.
X Contact the following service hotlines:
R USA: Mercedes-Benz Customer Assis-
tance Center at 1-800-FOR-MERCedes
(1-800-367-6372) or 1-866-990-9007
R Canada: Customer Service at
1-888-923-8367
You will be asked for your password.
The next time you are inside the vehicle and
you switch on the ignition, the Doors
Doors
Locked Remotely Locked Remotely message appears in the
multifunction display.
USA only: alternatively, the vehicle can be
locked via:
R the Internet, under the "Owners Online"
section
R the telephone application (e.g. iPhone ®
,
Blackberry)
To do this, you will need your identification
number and password.
i The vehicle remote closing feature is
available when the relevant mobile phone
network is available and data connection is
possible.
Stolen vehicle recovery service If your vehicle has been stolen:
X Notify the police.
The police will issue a numbered incident
report.
X This number will be forwarded to the
Mercedes-Benz Customer Assistance Cen-
ter together with your PIN.
The Mercedes-Benz Customer Assistance
Center then tries to locate the system. The Mercedes-Benz Customer Assistance Cen-ter contacts you and the local law enforce-
ment agency if the vehicle is located.
However, only the law enforcement agency is informed of the location of the vehicle. 272
FeaturesSto
wage an d features
Page 277 of 358
control. Please also read the operating
instructions for the garage door system.
When programing a garage door opener, park the vehicle outside the garage. Do not run the
engine while programing.
Certain garage door drives are incompatible
with the integrated garage door opener. If you have difficulty programing the integrated
garage door opener, contact an authorized
Mercedes-Benz Center.
Alternatively, you can call the following tele-
phone assistance services:
R USA: Mercedes-Benz Customer Assistance
Center at 1-800-FOR-MERCedes
R Canada: Customer Service at
1-800-387-0100
R HomeLink ®
hotline 1-800-355-3515 (free
of charge)
More information on HomeLink ®
and/or
compatible products is also available online
at http://www.homelink.com.
Notes on the declaration of conformity
(Y page 25).
USA: FCC ID: CB2HMIHL4
Canada: IC: 279B-HMIHL4
Important safety notes G
WARNING
When you operate or program the garage door with the integrated garage door opener, per-
sons in the range of movement of the garage
door can become trapped or struck by the
garage door. There is a risk of injury.
When using the integrated garage door
opener, always make sure that nobody is
within the range of movement of the garage
door. G
WARNING
Combustion engines emit poisonous exhaust
gases such as carbon monoxide. Inhaling
these exhaust gases leads to poisoning. There is a risk of fatal injury. Therefore never leave the engine running in enclosed spaces with-
out sufficient ventilation.
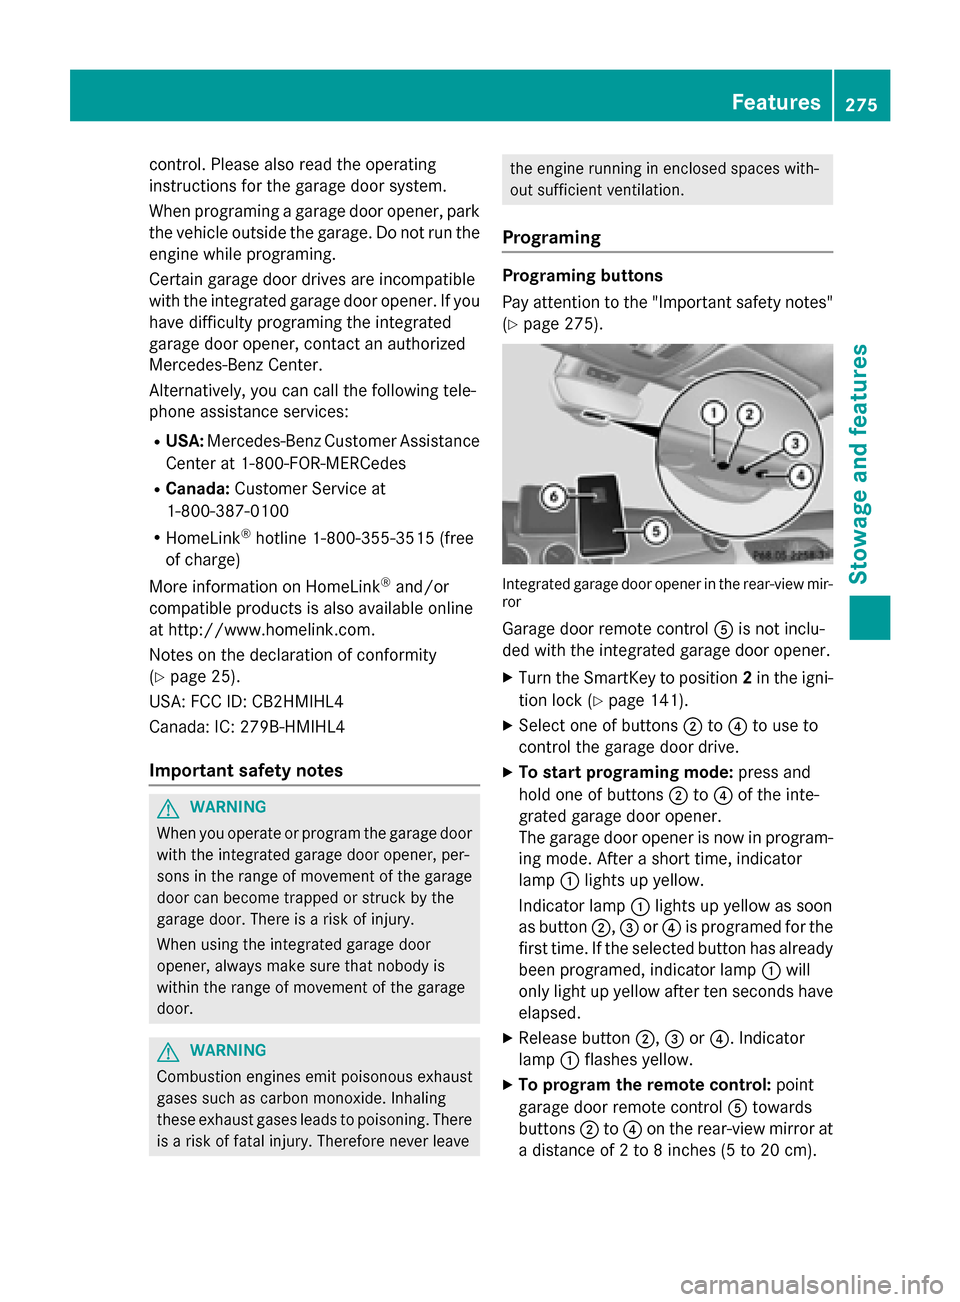
Programing Programing buttons
Pay attention to the "Important safety notes"
(Y page 275). Integrated garage door opener in the rear-view mir-
ror
Garage door remote control 0083is not inclu-
ded with the integrated garage door opener.
X Turn the SmartKey to position 2in the igni-
tion lock (Y page 141).
X Select one of buttons 0044to0085 to use to
control the garage door drive.
X To start programing mode: press and
hold one of buttons 0044to0085 of the inte-
grated garage door opener.
The garage door opener is now in program-
ing mode. After a short time, indicator
lamp 0043lights up yellow.
Indicator lamp 0043lights up yellow as soon
as button 0044,0087or0085 is programed for the
first time. If the selected button has already
been programed, indicator lamp 0043will
only light up yellow after ten seconds have elapsed.
X Release button 0044,0087or0085. Indicator
lamp 0043flashes yellow.
X To program the remote control: point
garage door remote control 0083towards
buttons 0044to0085 on the rear-view mirror at
a distance of 2 to 8 inches (5 to 20 cm). Features
275Stowage and features Z
Page 278 of 358
X
Press and hold button 0084on remote control
0083 until indicator lamp 0043lights up green.
When indicator lamp 0043lights up green:
programing is finished.
When indicator lamp 0043flashes green: pro-
graming was successful. The next step is to
synchronize the rolling code.
X Release button 0084on remote control 0083for
the garage door drive system.
If indicator lamp 0043lights up red: repeat the
programing procedure for the correspond-
ing button on the rear-view mirror. When
doing so, vary the distance between remote control 0083and the rear-view mirror.
The required distance between remote
control 0083and the integrated garage door
opener depends on the garage door drive
system. Several attempts might be neces-
sary. You should test every position for at
least 25 seconds before trying another
position.
Synchronizing the rolling code
Pay attention to the "Important safety notes"
(Y page 275).
If the garage door system uses a rolling code, you will also have to synchronize the garage
door system with the integrated garage door
opener in the rear-view mirror. To do this you
will need to use the programing button on the
door drive control panel. The programing but- ton may be placed at different locations
depending on the manufacturer. It is usually
located on the door drive unit on the garage
ceiling.
Familiarize yourself with the garage door
drive operating instructions, e.g. under "Pro-
graming of additional remote controls",
before carrying out the following steps.
Your vehicle must be within reach of the
garage door or exterior gate drive. Make sure
that neither your vehicle nor any persons/
objects are present within the sweep of the
door or gate. X
Turn the SmartKey to position 2in the igni-
tion lock (Y page 141).
X Get out of the vehicle.
X Press the programing button on the door
drive unit.
Usually, you now have 30 seconds to ini-
tiate the next step.
X Get into the vehicle.
X Press previously programed button 0044,0087
or 0085 of the integrated garage door opener
until the door closes.
The rolling code synchronization is then
complete.
Notes on programing the remote control
Canadian radio frequency laws require a
"break" (or interruption) of the transmission
signals after broadcasting for a few seconds.
Therefore, these signals may not last long
enough for the integrated garage door
opener. The signal is not recognized during
programing. Comparable with Canadian law,
some U.S. garage door openers also feature a
"break".
Proceed as follows:
R if you live in Canada
R if you have difficulties programing the
garage door opener (regardless of where
you live) when using the programing steps
X Press and hold one of buttons 0044to0085 on
the integrated garage door opener.
After a short time, indicator lamp 0043lights
up yellow.
X Release the button.
Indicator lamp 0043flashes yellow.
X Press button 0084of garage door remote
control 0083for two seconds, then release it
for two seconds.
X Press button 0084again for two seconds.
X Repeat this sequence on button 0084of
remote control 0083until indicator lamp 0043
lights up green.
When indicator lamp 0043lights up green:
programing is finished. 276
FeaturesStowage and features
Page 279 of 358
When indicator lamp
0043flashes green: pro-
graming was successful. The next step is to
synchronize the rolling code.
X Release button 0084of remote control 0083of
the garage door drive.
If indicator lamp 0043blinks red: repeat the
programing process for the corresponding
button on the rear-view mirror. When doing
so, vary the distance between remote con- trol 0083and the rear-view mirror.
The required distance between remote
control 0083and the integrated garage door
opener depends on the garage door drive
system. Several attempts might be neces-
sary. You should test every position for at
least 25 seconds before trying another
position.
Problems when programing
If you are experiencing problems programing
the integrated garage door opener on the
rear-view mirror, take note of the following
instructions:
R Check the transmitter frequency used by
garage door drive remote control 0083and
whether it is supported. The transmitter
frequency can usually be found on the back
of the garage door drive remote control.
The integrated garage door opener is com-
patible with devices that have units which
operate in the frequency range of 280 to
433 MHz.
R Replace the batteries in garage door
remote control 0083. This increases the like-
lihood that garage door remote control 0083
will transmit a strong and precise signal to
the integrated garage door opener in the
rear-view mirror.
R When programing, hold remote control 0083
at varying distances and angles from the
button that you are programing. Try various
angles at a distance between 2and
12 inches (5to 30 cm) or at the same angle
but at varying distances.
R If another remote control for the same
garage door drive is available, repeat the same programing steps with this remote
control. Before performing these steps,
make sure that new batteries have been
installed in garage door drive remote con-
trol
0083.
R Note that some remote controls only trans-
mit for a limited amount of time (the indi-
cator lamp on the remote control goes out).
Press button 0084on remote control 0083again
before transmission ends.
R Align the antenna cable of the garage door
opener unit. This can improve signal recep-tion/transmission.
Opening/closing the garage door After it has been programed, the integrated
garage door opener performs the function of
the garage door system remote control.
Please also read the operating instructions
for the garage door system.
X Turn the SmartKey to position 2in the igni-
tion lock (Y page 141).
X Press button 0044,0087or0085 which you have
programed to operate the garage door.
Garage door system with a fixed code: indi-
cator lamp 0043lights up green.
Garage door system with a rolling code:
indicator lamp 0043flashes green.
The transmitter will transmit a signal as long
as the button is pressed. The transmission is halted after a maximum of ten seconds and
indicator lamp 0043lights up yellow. Press but-
ton 0044, 0087or0085 again if necessary.
Clearing the memory Make sure that you clear the memory of the
integrated garage door opener before selling
the vehicle. Features
277Stowage and features Z