check oil MERCEDES-BENZ CLA-Class 2014 C117 Owner's Manual
[x] Cancel search | Manufacturer: MERCEDES-BENZ, Model Year: 2014, Model line: CLA-Class, Model: MERCEDES-BENZ CLA-Class 2014 C117Pages: 358, PDF Size: 6.6 MB
Page 11 of 358
Rear view camera .......................... 186
Speed Limit Assist ........................
.190
Driving tips
Automatic transmission ................. 149
Brakes .......................................... .162
Break-in period .............................. 140
Checking brake lining thickness .... 164
DISTRONIC PLUS ........................... 174
Downhill gradient ........................... 162
Drinking and driving ....................... 161
Driving abroad ............................... 108
Driving in winter ............................ .165
Driving on flooded roads ................ 165
Driving on wet roads ..................... .165
Exhaust check ............................... 161
Fuel ................................................ 161
General .......................................... 160
Hydroplaning ................................. 165
Icy road surfaces ........................... 165
Limited braking efficiency on sal-
ted roads ....................................... 163
Snow chains .................................. 317
Symmetrical low bea m.................. 108
Wet road surface ........................... 163
DVD audio (on-board computer) ...... 202
DVD video (on-board computer) ...... 203E
EASY-VARIO-PLUS system Cargo compartment enlargement .. 259
EBD (electronic brake force distri-
bution) Display message ............................ 216
Function/note s................................ 71
ECO display
Function/note s............................. 161
On-board computer ....................... 200
ECO start/stop function
Automatic engine start .................. 144
Automatic engine switch-off .......... 143
Deactivating/activating ................. 144
General information ....................... 143
Important safety notes .................. 143
Introduction ................................... 143
Electronic Stability Program
see ESP ®
(Electronic Stability Program) Emergency release
Driver's door .................................... 83
Trunk ............................................... 86
Vehicle ............................................. 83
Emergency Tensioning Devices
Activation ......................................... 41
Function ........................................... 55
Safety guideline s............................. 42
Emissions control
Service and warranty information .... 22
Engine
Check Engine warning lamp ........... 251
Display message ............................ 230
ECO start/stop function ................ 143
Engine number ............................... 347
Irregular running ............................ 145
Jump-starting ................................. 305
Starting problems .......................... 145
Starting the engine with the
SmartKey ....................................... 142
Switching off .................................. 158
Tow-starting (vehicle) ..................... 310
Engine electronics
Problem (malfunction) ................... 145
Engine jump starting
see Jump starting (engine)
Engine oil
Adding ........................................... 284
Additives ........................................ 350
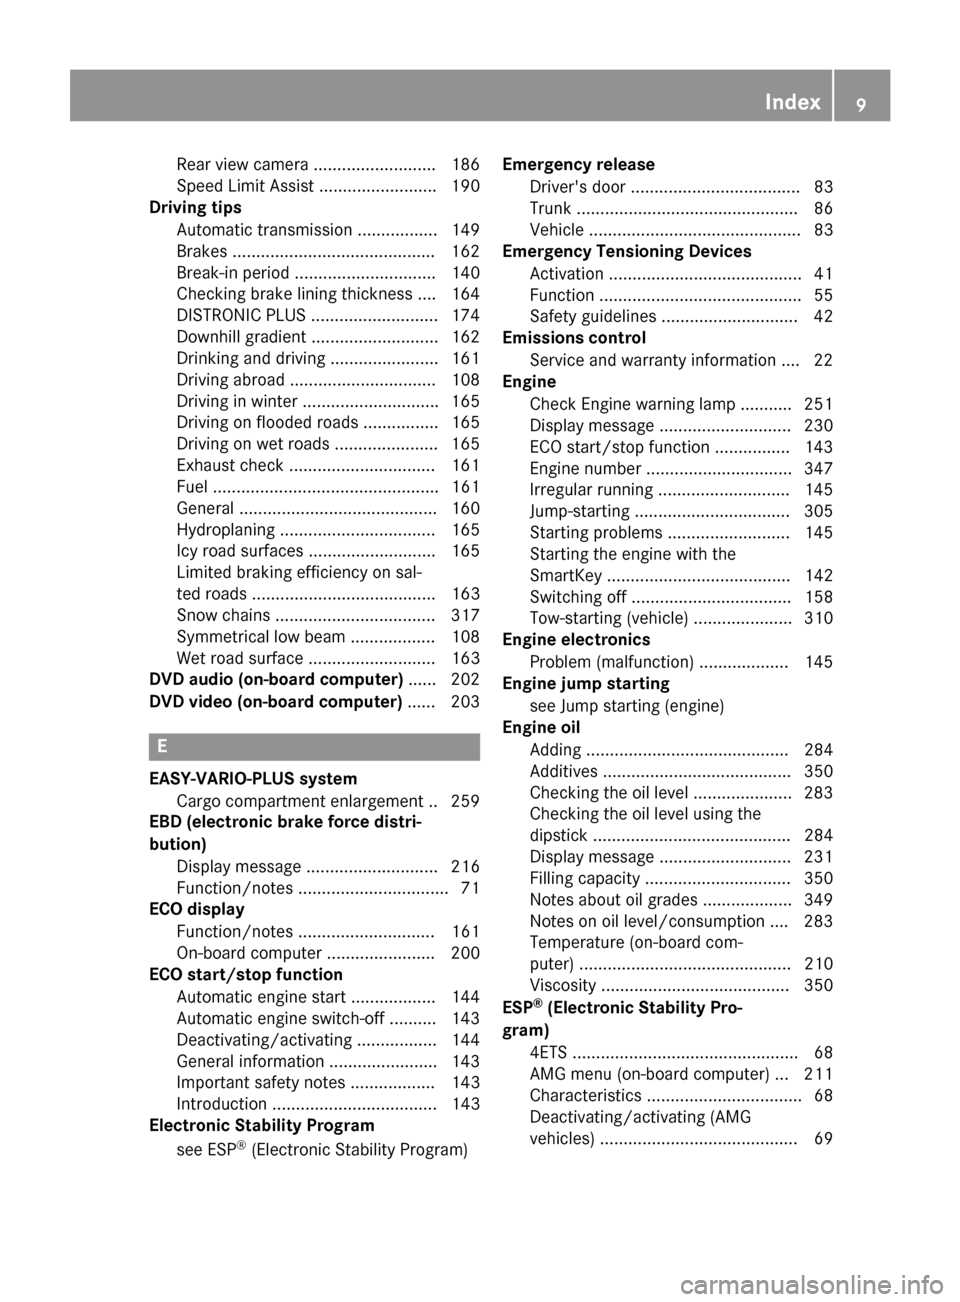
Checking the oil level ..................... 283
Checking the oil level using the
dipstick .......................................... 284
Display message ............................ 231
Filling capacity ............................... 350
Notes about oil grade s................... 349
Notes on oil level/consumption .... 283
Temperature (on-board com-
puter) ............................................. 210
Viscosity ........................................ 350
ESP ®
(Electronic Stability Pro-
gram) 4ETS ................................................ 68
AMG menu (on-board computer) ... 211
Characteristics ................................. 68
Deactivating/activating (AMG
vehicles) .......................................... 69 Index
9
Page 18 of 358
Storing settings (memory func-
tion) ............................................... 105
Switching seat heating on/of f....... 101
Sensors (cleaning instructions) ....... 291
Service menu (on-board com-
puter) .................................................. 207
Service products Brake fluid ..................................... 350
Coolant (engine) ............................ 351
Engine oil ....................................... 349
Fuel ................................................ 348
Important safety notes .................. 347
Refrigerant (air-conditioning sys-
tem) ............................................... 352
Washer fluid ................................... 352
Settings
Factory (on-board computer) ......... 210
On-board computer ....................... 207
Setting the air distribution ............... 132
Setting the airflow ............................ 132
SETUP (on-board computer) ............. 211
Side impact air bag ............................. 46
Side marker lamp (display mes-
sage) ................................................... 228
Side windows Cleaning ......................................... 290
Convenience closing feature ............ 88
Convenience opening feature .......... 88
Important safety information ........... 86
Opening/closing .............................. 87
Problem (malfunction) ..................... 90
Resetting ......................................... 88
Sliding sunroof
see Panorama roof with power
tilt/sliding panel
SmartKey
Changing the battery ....................... 78
Changing the programming ............. 77
Checking the battery ....................... 78
Convenience closing feature ............ 88
Convenience opening feature .......... 88
Display message ............................ 243
Door central locking/unlocking ....... 76
Important safety notes .................... 76
Loss ................................................. 80
Mechanical key ................................ 77
Positions (ignition lock) ................. 141 Problem (malfunction) ..................... 80
Starting the engine ........................ 142
SmartKey positions (ignition lock) .. 141
Snow chains ...................................... 317
Sockets Center console .............................. 265
Points to observe before use ......... 265
Rear compartment ......................... 266
Trunk ............................................. 266
Specialist workshop ............................ 26
Special seat belt retractor .................. 59
Speed, controlling see Cruise control
Speed Limit Assist
Activating/deactivating the warn-ing function .................................... 205
Display message ............................ 232
Display message in the multifunc-
tion display .................................... 191
Function/note s............................. 190
Important safety notes .................. 190
Speedometer
Activating/deactivating the addi-
tional speedometer ........................ 207
Digital ............................................ 200
In the Instrument cluster ................. 31
Segments ...................................... 197
Selecting the unit of measure-
ment .............................................. 207
see Instrument cluster
SPORT handling mode
Activating/deactivating (AMG
vehicles) .......................................... 69
Warning lamp ................................. 248
SRS (Supplemental Restraint Sys-
tem) Display message ............................ 222
Introduction ..................................... 40
Warning lamp ................................. 250
Warning lamp (function) ................... 41
Standing lamps
Display message ............................ 228
Switching on/of f........................... 110
Start/stop function
see ECO start/stop function
Starting (engine) ................................ 141
STEER CONTROL .................................. 7116
Index
Page 157 of 358
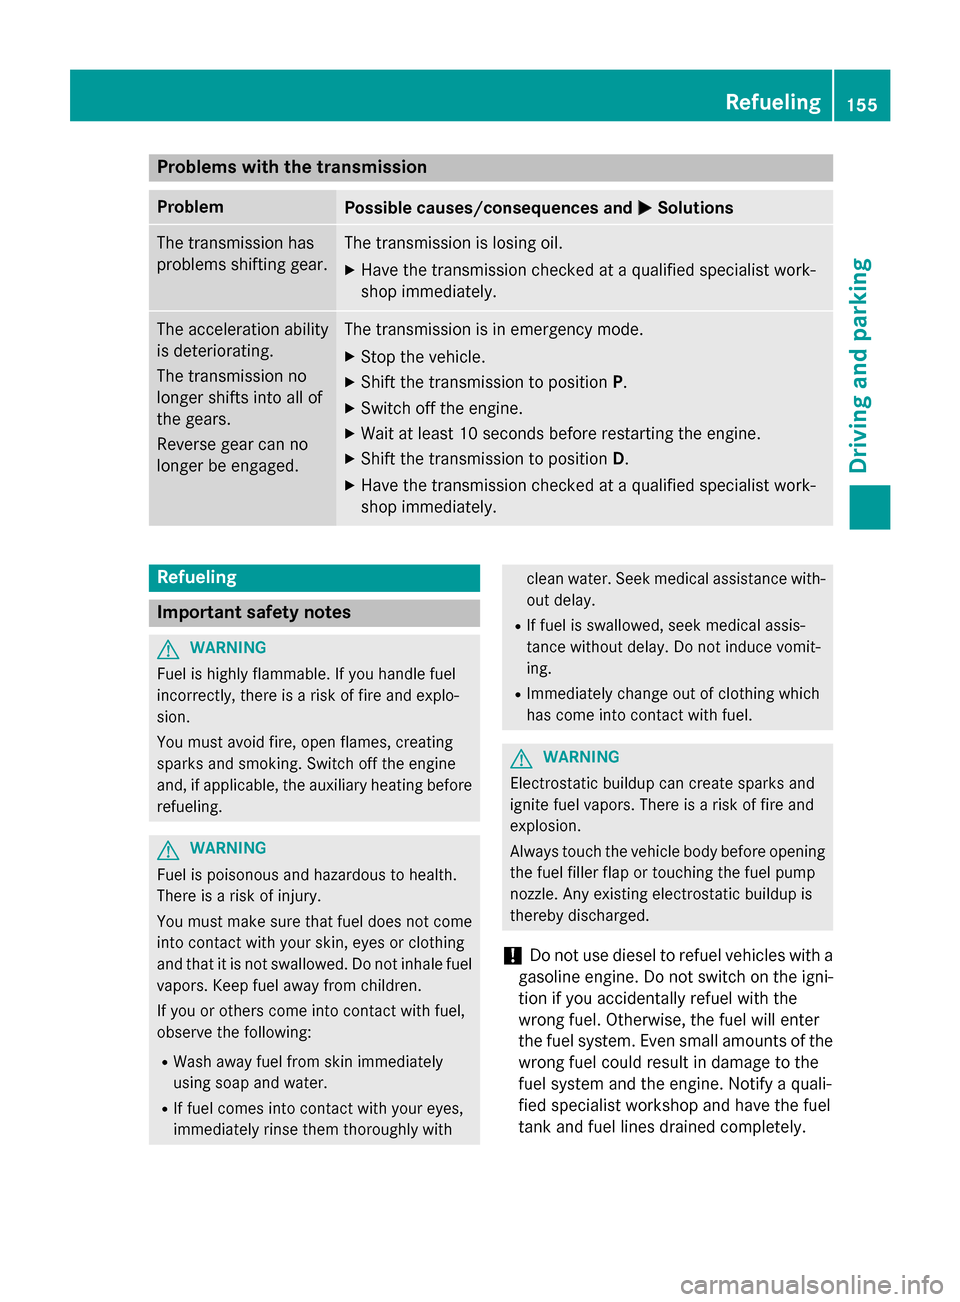
Problems with the transmission
Problem
Possible causes/consequences and
0050
0050Solutions The transmission has
problems shifting gear. The transmission is losing oil.
X Have the transmission checked at a qualified specialist work-
shop immediately. The acceleration ability
is deteriorating.
The transmission no
longer shifts into all of
the gears.
Reverse gear can no
longer be engaged. The transmission is in emergency mode.
X Stop the vehicle.
X Shift the transmission to position P.
X Switch off the engine.
X Wait at least 10 seconds before restarting the engine.
X Shift the transmission to position D.
X Have the transmission checked at a qualified specialist work-
shop immediately. Refueling
Important safety notes
G
WARNING
Fuel is highly flammable. If you handle fuel
incorrectly, there is a risk of fire and explo-
sion.
You must avoid fire, open flames, creating
sparks and smoking. Switch off the engine
and, if applicable, the auxiliary heating before refueling. G
WARNING
Fuel is poisonous and hazardous to health.
There is a risk of injury.
You must make sure that fuel does not come into contact with your skin, eyes or clothing
and that it is not swallowed. Do not inhale fuel
vapors. Keep fuel away from children.
If you or others come into contact with fuel,
observe the following:
R Wash away fuel from skin immediately
using soap and water.
R If fuel comes into contact with your eyes,
immediately rinse them thoroughly with clean water. Seek medical assistance with-
out delay.
R If fuel is swallowed, seek medical assis-
tance without delay. Do not induce vomit-
ing.
R Immediately change out of clothing which
has come into contact with fuel. G
WARNING
Electrostatic buildup can create sparks and
ignite fuel vapors. There is a risk of fire and
explosion.
Always touch the vehicle body before opening the fuel filler flap or touching the fuel pump
nozzle. Any existing electrostatic buildup is
thereby discharged.
! Do not use diesel to refuel vehicles with a
gasoline engine. Do not switch on the igni- tion if you accidentally refuel with the
wrong fuel. Otherwise, the fuel will enter
the fuel system. Even small amounts of the
wrong fuel could result in damage to the
fuel system and the engine. Notify a quali-
fied specialist workshop and have the fuel
tank and fuel lines drained completely. Refueling
155Driving and parking Z
Page 233 of 358
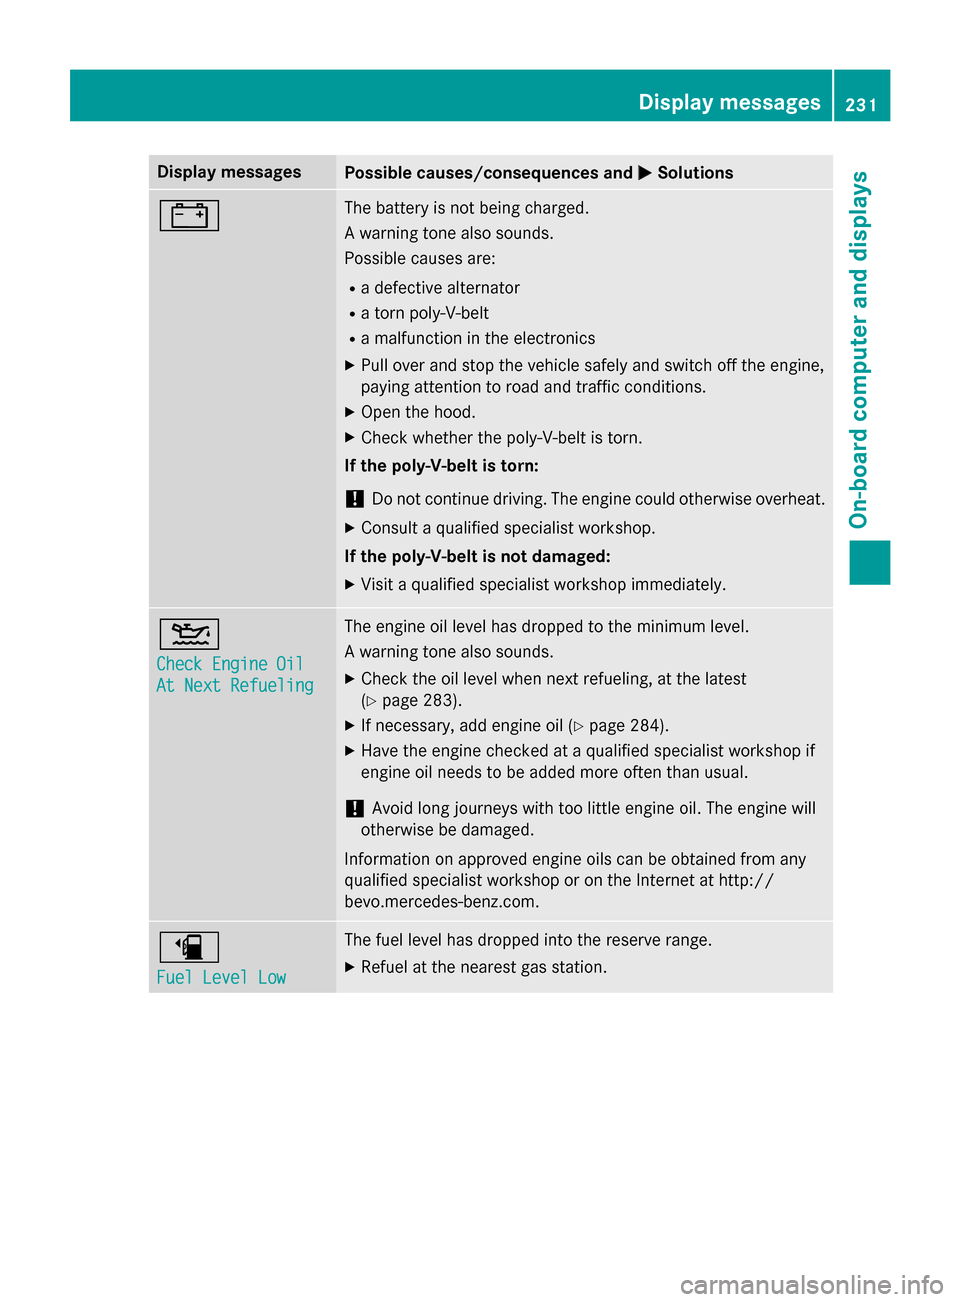
Display messages
Possible causes/consequences and
0050
0050Solutions 003D The battery is not being charged.
A warning tone also sounds.
Possible causes are:
R a defective alternator
R a torn poly-V-belt
R a malfunction in the electronics
X Pull over and stop the vehicle safely and switch off the engine,
paying attention to road and traffic conditions.
X Open the hood.
X Check whether the poly-V-belt is torn.
If the poly-V-belt is torn:
! Do not continue driving. The engine could otherwise overheat.
X Consult a qualified specialist workshop.
If the poly-V-belt is not damaged:
X Visit a qualified specialist workshop immediately. 00B2
Check Engine Oil Check Engine Oil
At Next Refueling At Next Refueling The engine oil level has dropped to the minimum level.
A warning tone also sounds.
X Check the oil level when next refueling, at the latest
(Y page 283).
X If necessary, add engine oil (Y page 284).
X Have the engine checked at a qualified specialist workshop if
engine oil needs to be added more often than usual.
! Avoid long journeys with too little engine oil. The engine will
otherwise be damaged.
Information on approved engine oils can be obtained from any
qualified specialist workshop or on the Internet at http://
bevo.mercedes-benz.co m.00D4
Fuel Level Low Fuel Level Low The fuel level has dropped into the reserve range.
X Refuel at the nearest gas station. Display messages
231On-board computer and displays Z
Page 275 of 358
i
If the anti-theft alarm system is activated
for longer than 30 seconds, the Mercedes-
Benz Customer Assistance Center is auto-
matically notified.
Vehicle remote malfunction diagnosis With the vehicle remote malfunction diagno-
sis (Vehicle Health Check), the Customer
Assistance center can provide improved sup- port for problems with your vehicle. During anexisting call, vehicle data is transferred to the
Customer Assistance center. The customer
service representative can use the received
data to decide what kind of assistance is
required. You are then, for example, guided to the nearest authorized Mercedes-Benz Cen-
ter or a recovery vehicle is called.
If vehicle data needs to be transferred during
an MB Info call or a Roadside Assistance call, this is initiated by the Customer Assistance
center. You will see the Roadside Assis‐
Roadside Assis‐
tance Connected tance Connected message in the COMAND
display. If the vehicle remote malfunction
diagnosis can be started, the Request for
Request for
vehicle diagnosis received. Start
vehicle diagnosis received. Start
vehicle diagnosis?
vehicle diagnosis? message appears in
the display.
X Confirm the message with Yes
Yes.
X When the Vehicle Diagnosis Please
Vehicle Diagnosis Please
start ignition
start ignition message appears, turn
the SmartKey to position 2in the ignition
lock (Y page 141).
X When the Please
Please follow
followthe
theinstruc‐
instruc‐
tions received by phone and move
tions received by phone and move
your vehicle to a safe position. your vehicle to a safe position.
message appears, follow the customer ser-
vice representative's instructions.
The message in the display disappears.
If you select Cancel Cancel, the vehicle remote
malfunction diagnosis is canceled com-
pletely.
The vehicle operating state check begins.
You will see the Vehicle diagnosis Vehicle diagnosis
activated.
activated. message. When the diagnosis is completed, the
Send Send
vehicle diagnostics data//(Voice vehicle diagnostics data//(Voice
connection may be//interrupted dur‐ connection may be//interrupted dur‐
ing ing data
data transfer)
transfer) message appears. The
vehicle data can now be sent to the Customer Assistance center.
X Press OK
OKto confirm the message.
The voice connection with the Customer
Assistance center is terminated.
You will see the Vehicle Diagnosis: Vehicle Diagnosis:
Transferring data... Transferring data... message.
The vehicle data is sent to the Customer
Assistance center.
Depending on what the customer service rep-
resentative agreed with you, the voice con-
nection is re-established after the transfer is
complete. If necessary, you will be contacted at a later time by another means, e.g. by e-
mail or phone.
Further functions of the vehicle remote mal-
function diagnosis include, for example:
R transfer of service data to the Customer
Assistance center. If a service is overdue,
the COMAND display shows a message
about various special offers at your work-
shop.
R monthly status information e-mail on oil
level, air pressure, maintenance, brakes,
etc. If applicable, you will receive informa-
tion on special offers in the e-mail.
USA only: this information can also be
called up under "Owners Online" at http://
www.mbusa.com.
Information on Roadside Assistance
(Y page 23).
Downloading routes Downloading routes allows you to transfer
and save predefined routes in the navigation
system. To do this, an SD memory card must
be inserted into the COMAND system. If no
SD memory card is inserted, you must insert
the card into the card slot on the COMAND
system before saving. Features
273Stowage and features Z
Page 285 of 358
!
Make sure that the windshield wipers are
not folded away from the windshield. You
could otherwise damage the windshield
wipers or the hood. X
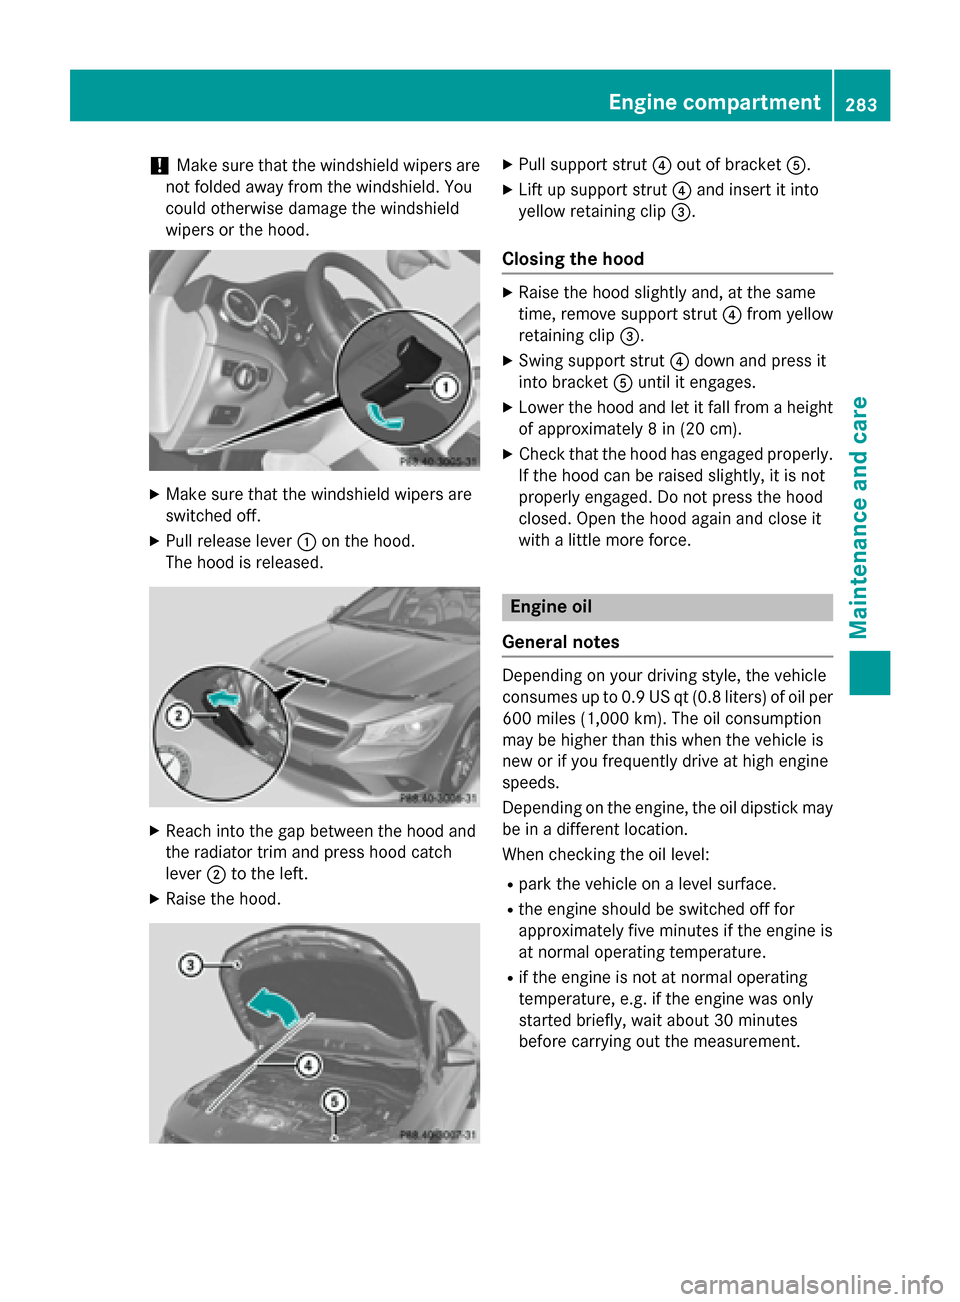
Make sure that the windshield wipers are
switched off.
X Pull release lever 0043on the hood.
The hood is released. X
Reach into the gap between the hood and
the radiator trim and press hood catch
lever 0044to the left.
X Raise the hood. X
Pull support strut 0085out of bracket 0083.
X Lift up support strut 0085and insert it into
yellow retaining clip 0087.
Closing the hood X
Raise the hood slightly and, at the same
time, remove support strut 0085from yellow
retaining clip 0087.
X Swing support strut 0085down and press it
into bracket 0083until it engages.
X Lower the hood and let it fall from a height
of approximately 8 in (20 cm).
X Check that the hood has engaged properly.
If the hood can be raised slightly, it is not
properly engaged. Do not press the hood
closed. Open the hood again and close it
with a little more force. Engine oil
General notes Depending on your driving style, the vehicle
consumes up to 0.9 US qt (0.8 liters) of oil per 600 miles (1,000 km). The oil consumption
may be higher than this when the vehicle is
new or if you frequently drive at high engine
speeds.
Depending on the engine, the oil dipstick may be in a different location.
When checking the oil level:
R park the vehicle on a level surface.
R the engine should be switched off for
approximately five minutes if the engine is
at normal operating temperature.
R if the engine is not at normal operating
temperature, e.g. if the engine was only
started briefly, wait about 30 minutes
before carrying out the measurement. Engine compartment
283Maintenance and care Z
Page 286 of 358
Checking the oil level using the oil dip-
stick G
WARNING
Certain components in the engine compart-
ment, such as the engine, radiator and parts
of the exhaust system, can become very hot.
Working in the engine compartment poses a
risk of injury.
Where possible, let the engine cool down and touch only the components described in the
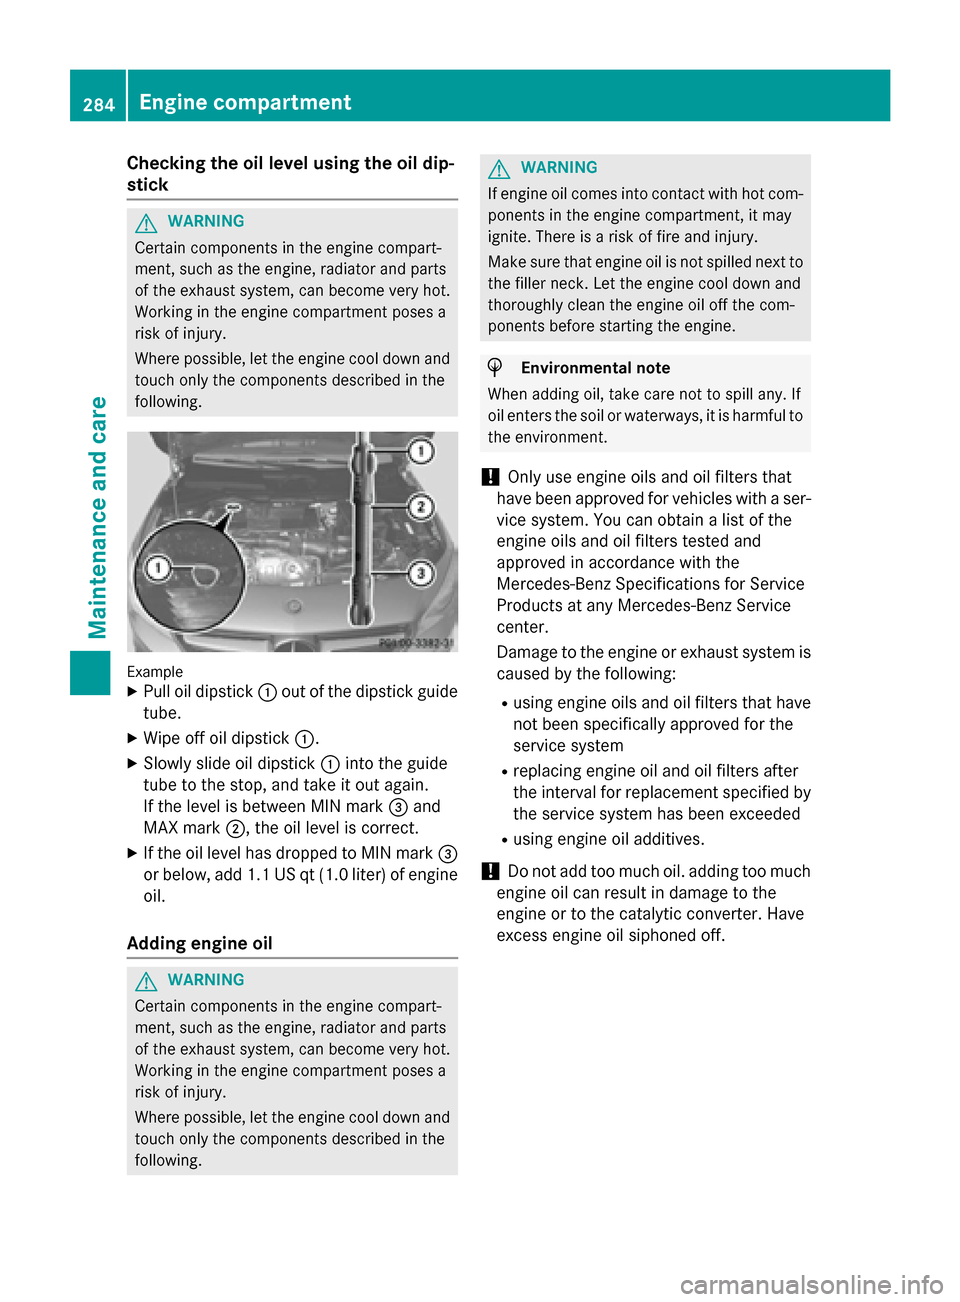
following. Example
X Pull oil dipstick 0043out of the dipstick guide
tube.
X Wipe off oil dipstick 0043.
X Slowly slide oil dipstick 0043into the guide
tube to the stop, and take it out again.
If the level is between MIN mark 0087and
MAX mark 0044, the oil level is correct.
X If the oil level has dropped to MIN mark 0087
or below, add 1.1 US qt (1.0 liter) of engine oil.
Adding engine oil G
WARNING
Certain components in the engine compart-
ment, such as the engine, radiator and parts
of the exhaust system, can become very hot.
Working in the engine compartment poses a
risk of injury.
Where possible, let the engine cool down and touch only the components described in the
following. G
WARNING
If engine oil comes into contact with hot com- ponents in the engine compartment, it may
ignite. There is a risk of fire and injury.
Make sure that engine oil is not spilled next to
the filler neck. Let the engine cool down and
thoroughly clean the engine oil off the com-
ponents before starting the engine. H
Environmental note
When adding oil, take care not to spill any. If
oil enters the soil or waterways, it is harmful to the environment.
! Only use engine oils and oil filters that
have been approved for vehicles with a ser-
vice system. You can obtain a list of the
engine oils and oil filters tested and
approved in accordance with the
Mercedes-Benz Specifications for Service
Products at any Mercedes-Benz Service
center.
Damage to the engine or exhaust system is caused by the following:
R using engine oils and oil filters that have
not been specifically approved for the
service system
R replacing engine oil and oil filters after
the interval for replacement specified by
the service system has been exceeded
R using engine oil additives.
! Do not add too much oil. adding too much
engine oil can result in damage to the
engine or to the catalytic converter. Have
excess engine oil siphoned off. 284
Engine compartmentMaintenance and care
Page 287 of 358
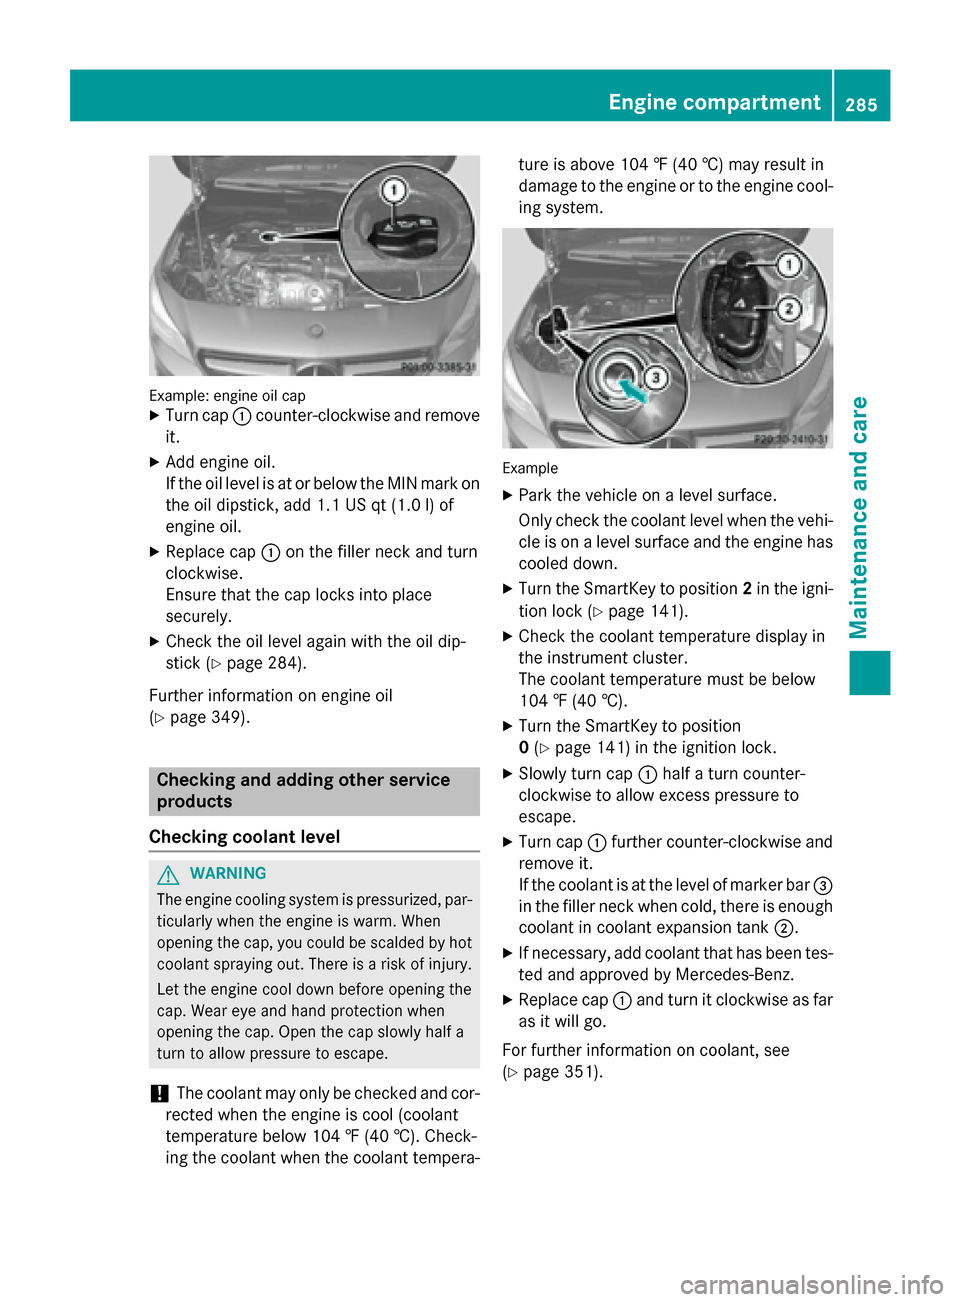
Example: engine oil cap
X Turn cap 0043counter-clockwise and remove
it.
X Add engine oil.
If the oil level is at or below the MIN mark on
the oil dipstick, add 1.1 US qt (1.0 l)of
engine oil.
X Replace cap 0043on the filler neck and turn
clockwise.
Ensure that the cap locks into place
securely.
X Check the oil level again with the oil dip-
stick (Y page 284).
Further information on engine oil
(Y page 349). Checking and adding other service
products
Checking coolant level G
WARNING
The engine cooling system is pressurized, par- ticularly when the engine is warm. When
opening the cap, you could be scalded by hotcoolant spraying out. There is a risk of injury.
Let the engine cool down before opening the
cap. Wear eye and hand protection when
opening the cap. Open the cap slowly half a
turn to allow pressure to escape.
! The coolant may only be checked and cor-
rected when the engine is cool (coolant
temperature below 104 ‡ (40 †). Check-
ing the coolant when the coolant tempera- ture is above 104 ‡ (40 †) may result in
damage to the engine or to the engine cool-
ing system. Example
X Park the vehicle on a level surface.
Only check the coolant level when the vehi-
cle is on a level surface and the engine has
cooled down.
X Turn the SmartKey to position 2in the igni-
tion lock (Y page 141).
X Check the coolant temperature display in
the instrument cluster.
The coolant temperature must be below
104 ‡ (40 †).
X Turn the SmartKey to position
0 (Y page 141) in the ignition lock.
X Slowly turn cap 0043half a turn counter-
clockwise to allow excess pressure to
escape.
X Turn cap 0043further counter-clockwise and
remove it.
If the coolant is at the level of marker bar 0087
in the filler neck when cold, there is enough coolant in coolant expansion tank 0044.
X If necessary, add coolant that has been tes-
ted and approved by Mercedes-Benz.
X Replace cap 0043and turn it clockwise as far
as it will go.
For further information on coolant, see
(Y page 351). Engine compartment
285Maintenance and care Z
Page 289 of 358
Hiding a service message
X
Press the 0076or0038 button on the steer-
ing wheel.
Displaying service messages X
Switch on the ignition.
X Press the 0059or0065 button to select the
Serv.
Serv. menu.
X Press the 0063or0064 button to select the
ASSYST PLUS
ASSYST PLUS submenu and confirm by
pressing the 0076button.
The service due date appears in the multi-
function display.
Information about Service Resetting the ASSYST PLUS service inter-
val display
! If the ASSYST PLUS service interval dis-
play has been inadvertently reset, this set-
ting can be corrected at a qualified special-
ist workshop.
Have service work carried out as described in the Maintenance Booklet. This may oth-
erwise lead to increased wear and damage
to the major assemblies or the vehicle.
A qualified specialist workshop, e.g. an
authorized Mercedes-Benz Center, will reset
the ASSYST PLUS service interval display
after the service work has been carried out.
You can also obtain further information on
maintenance work, for example.
Special service requirements
The specified maintenance interval takes only
the normal operation of the vehicle into
account. Under arduous operating conditions
or increased load on the vehicle, mainte-
nance work must be carried out more fre-
quently, for example:
R regular city driving with frequent intermedi-
ate stops
R if the vehicle is primarily used to travel
short distances R
use in mountainous terrain or on poor road
surfaces
R if the engine is often left idling for long peri-
ods
Under these or similar conditions, have, for
example, the air filter, engine oil and oil filter
replaced or changed more frequently. Under
arduous operating conditions, the tires must
be checked more often. Further information
can be obtained at a qualified specialist work- shop, e.g. an authorized Mercedes-Benz Cen-
ter.
Driving abroad
An extensive Mercedes-Benz Service network is also available in other countries. You can
obtain further information from any author-
ized Mercedes-Benz Center. Care
General notes
H
Environmental note
Dispose of empty packaging and cleaning
cloths in an environmentally responsible man-
ner.
! For cleaning your vehicle, do not use any
of the following:
R dry, rough or hard cloths
R abrasive cleaning agents
R solvents
R cleaning agents containing solvents
Do not scrub.
Do not touch the surfaces or protective
films with hard objects, e.g. a ring or ice
scraper. You could otherwise scratch or
damage the surfaces and protective film.
! Do not park the vehicle for an extended
period straight after cleaning it, particularly after having cleaned the wheels with wheel
cleaner. Wheel cleaners could cause
increased corrosion of the brake discs and
brake pads/linings. For this reason, you Care
287Maintenance and care Z
Page 302 of 358
If a tire pressure of 200 kPa (2.0 bar/29 psi)
is not achieved after a maximum of ten
minutes, see (Y page 300).
i If tire sealant leaks out, allow it to dry. It
can then be removed like a layer of film.
If your clothes are soiled with tire sealant,
have them cleaned with perchloroethylene at a dry cleaner as soon as possible.
Tire pressure not reached If a tire pressure of 200 kPa (2.0 bar/29 psi)
has not been achieved after ten minutes:
X Switch off the tire inflation compressor.
X Unscrew the filler hose from the valve of
the faulty tire.
X Very slowly drive forwards or back up
approximately 30 ft (10 m).
X Pump up the tire again.
After a maximum of ten minutes, the tire
pressure must be at least 200 kPa (2.0 bar/
29 psi). G
WARNING
If the required tire pressure is not reached
after the specified time, the tire is too badly
damaged. The tire sealant cannot repair the
tire in this instance. Damaged tires and a tire pressure that is too low can significantly
impair the vehicle's braking and driving char-
acteristics. There is a risk of accident.
Do not continue driving. Contact a qualified
specialist workshop.
Tire pressure reached G
WARNING
A tire temporarily sealed with tire sealant
impairs the driving characteristics and is not
suitable for higher speeds. There is a risk of
accident.
You should therefore adapt your driving style
accordingly and drive carefully. Do not exceed the specified maximum speed with a tire that
has been repaired using tire sealant. !
After use, excess tire sealant may run out
of the filler hose. This could cause stains.
Therefore, place the filler hose in the plastic
bag that contained the TIREFIT kit. H
Environmental note
Have the used tire sealant bottle disposed of
professionally, e.g. at a qualified specialist
workshop.
If a tire pressure of 200 kPa (2.0 bar/29 psi)
has been achieved after ten minutes:
X Switch off the tire inflation compressor.
X Unscrew the filler hose from the valve of
the faulty tire.
X Stow the tire sealant bottle and the tire
inflation compressor.
X Pull away immediately.
The maximum speed for a tire sealed with tire sealant is 50 mph (80 km/h). The upper part
of the TIREFIT sticker must be affixed to the
instrument cluster in the driver's field of
vision.
X Stop after driving for approximately ten
minutes and check the tire pressure with
the tire inflation compressor.
The tire pressure must now be at least
130 kPa (1.3 bar/19 psi). G
WARNING
If the required tire pressure is not reached
after driving for a short period, the tire is too
badly damaged. The tire sealant cannot repair the tire in this instance. Damaged tires and a
tire pressure that is too low can significantly
impair the vehicle's braking and driving char-
acteristics. There is a risk of accident.
Do not continue driving. Contact a qualified
specialist workshop.
i In cases such as the one mentioned
above, contact an authorized Mercedes-
Benz Center. Or call 1-800-FOR-MERCedes
(in the USA) or 1-800-387-0100 (in Can-
ada). 300
Flat tireBreakdown assistance