key MERCEDES-BENZ CLA-Class 2015 C117 User Guide
[x] Cancel search | Manufacturer: MERCEDES-BENZ, Model Year: 2015, Model line: CLA-Class, Model: MERCEDES-BENZ CLA-Class 2015 C117Pages: 362, PDF Size: 6.93 MB
Page 21 of 362
Transporting ..................................3
14
Unlocking (in an emergency) ........... 83
Unlocking (SmartKey) ..................... .74
Vehicle data ................................... 359
Vehicle data
Roof load (maximum) .....................3 59
Trunk load (maximum) ................... 359
Vehicle dimensions ........................... 359
Vehicle emergency locking ................ 83
Vehicle identification number
see VIN
Vehicle identification plate .............. 352
Vehicle tool kit .................................. 300
Ventilation
Setting the vents ........................... 136
Video
Operating the DVD ......................... 207
VIN ...................................................... 352 W
Warning and indicator lamps ABS ................................................ 250
Brakes .......................................... .249
Check Engine ................................. 256
Coolant .......................................... 256
Distance warning ........................... 258
ESP ®
.............................................. 252
ESP ®
OFF ....................................... 253
LIM (DISTRONIC PLUS) .................. 173
Overview .......................................... 32
PASSENGER AIR BAG OFF .............. .41
Reserve fuel .................................. .256
Restraint system ............................ 255
Seat belt ........................................ 247
SPORT handling mode ................... 253
Tire pressure monitor .................... 259
Warranty .............................................. 21
Washer fluid
Display message ............................ 245
Wheel and tire combination
see Tires
Wheel bolt tightening torque ........... 345
Wheel chock ...................................... 342
Wheels
Changing a wheel .......................... 341
Checking ........................................ 319
Cleaning ......................................... 294 General notes ................................ 345
Important safety notes .................. 318
Information on driving .................... 318
Interchanging/changing ................ 341
Mounting a new wheel ................... 344
Removing a wheel .......................... 344
Storing .......................................... .341
Tightening torque ........................... 345
Wheel size/tire size ....................... 345
Window curtain air bag
Display message ............................ 226
Operation ......................................... 48
Windows
see Side windows
Windshield
Defrosting ...................................... 133
Windshield washer system
Adding washer fluid ....................... 290
Notes ............................................. 358
Windshield wipers
Display message ............................ 245
Problem (malfunction) ................... 122
Replacing the wiper blades ............ 121
Switching on/off ........................... 120
Winter driving
Slippery road surfaces ................... 168
Snow chains .................................. 321
Winter operation
General notes ................................ 320
Winter tires
M+S tires ....................................... 320
Wiper blades
Cleaning ......................................... 295
Important safety notes .................. 121
Replacing (windshield )................... 121
Wooden trim (cleaning instruc-
tions) .................................................. 297 Z
ZONE function Switching on/of f........................... 132 Index
19
Page 42 of 362
Useful information
i This Operator's Manual describes all
models and all standard and optional equip- ment of your vehicle available at the time of
publication of the Operator's Manual.
Country-specific differences are possible.
Please note that your vehicle may not be
equipped with all features described. This
also applies to safety-related systems and
functions.
i Read the information on qualified special-
ist workshops (Y page 24). Panic alarm
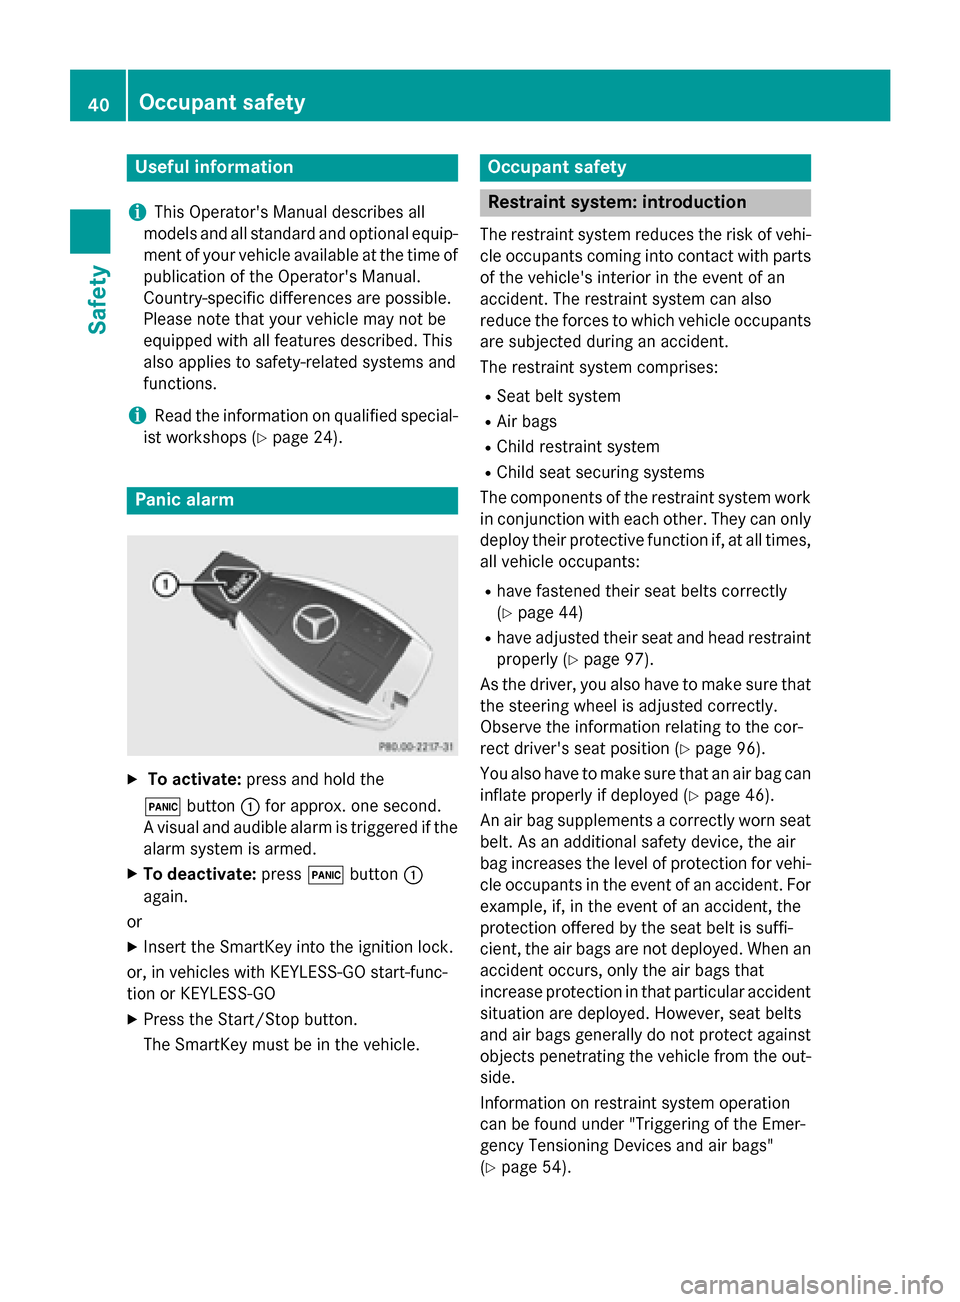
X
To activate: press and hold the
! button :for approx. one second.
A visual and audible alarm is triggered if the alarm system is armed.
X To deactivate: press!button :
again.
or
X Insert the SmartKey into the ignition lock.
or, in vehicles with KEYLESS-GO start-func-
tion or KEYLESS ‑GO
X Press the Start/Stop button.
The SmartKey must be in the vehicle. Occupant safety
Restraint system: introduction
The restraint system reduces the risk of vehi-
cle occupants coming into contact with parts of the vehicle's interior in the event of an
accident. The restraint system can also
reduce the forces to which vehicle occupants
are subjected during an accident.
The restraint system comprises:
R Seat belt system
R Air bags
R Child restraint system
R Child seat securing systems
The components of the restraint system work
in conjunction with each other. They can only deploy their protective function if, at all times,
all vehicle occupants:
R have fastened their seat belts correctly
(Y page 44)
R have adjusted their seat and head restraint
properly (Y page 97).
As the driver, you also have to make sure that
the steering wheel is adjusted correctly.
Observe the information relating to the cor-
rect driver's seat position (Y page 96).
You also have to make sure that an air bag can inflate properly if deployed (Y page 46).
An air bag supplements a correctly worn seat
belt. As an additional safety device, the air
bag increases the level of protection for vehi-
cle occupants in the event of an accident. For example, if, in the event of an accident, the
protection offered by the seat belt is suffi-
cient, the air bags are not deployed. When an
accident occurs, only the air bags that
increase protection in that particular accident
situation are deployed. However, seat belts
and air bags generally do not protect against objects penetrating the vehicle from the out-
side.
Information on restraint system operation
can be found under "Triggering of the Emer-
gency Tensioning Devices and air bags"
(Y page 54). 40
Occupant safetySafety
Page 46 of 362
accident. This poses an increased risk of
injury or even fatal injury.
Only use the standard three-point seat belt.
Never modify the seat belt system.
Proper use of the seat belts Observe the safety notes on the seat belt
(Y page 42).
All vehicle occupants must be wearing the
seat belt correctly before beginning the jour-
ney. Also make sure that all vehicle occu-
pants are always wearing the seat belt cor-
rectly while the vehicle is in motion.
When fastening the seat belt, always make
sure that:
R the seat belt tongue is only inserted to the
belt buckle belonging to that seat.
R the seat belt is tight across your body.
Avoid wearing bulky clothing, e.g. a winter
coat.
R the seat belt is not twisted.
Only then can the forces which occur be
distributed over the area of the belt.
R the shoulder section of the belt is always
routed across the center of your shoulder.
The shoulder section of the belt must not
come into contact with your neck or be
routed under your arm. Where possible,
adjust the seat belt to the appropriate
height.
R the lap belt passes tightly and as low down
as possible across your lap.
The lap belt must always be routed across
your hip joints and not across your abdo-
men. This applies particularly to pregnant
women. If necessary, push the lap belt
down to your hip joint and pull it tight using the shoulder section of the belt.
R the seat belt is not routed across sharp,
pointed or fragile objects.
If you have such items located on or in your
clothing, e.g. pens, keys or eyeglasses,
store these in a suitable place. R
only one person is using a seat belt at a
time.
Infants and children must never travel sit-
ting on the lap of a vehicle occupant. In the
event of an accident, they could be crushed between the vehicle occupant and seat
belt.
R objects are never secured with a seat belt if
the seat belt is also being used by one of the
vehicle's occupants.
Seat belts are only intended to secure and
restrain vehicle occupants. Always observe
the "Loading guidelines" for securing objects,
luggage or loads (Y page 262).
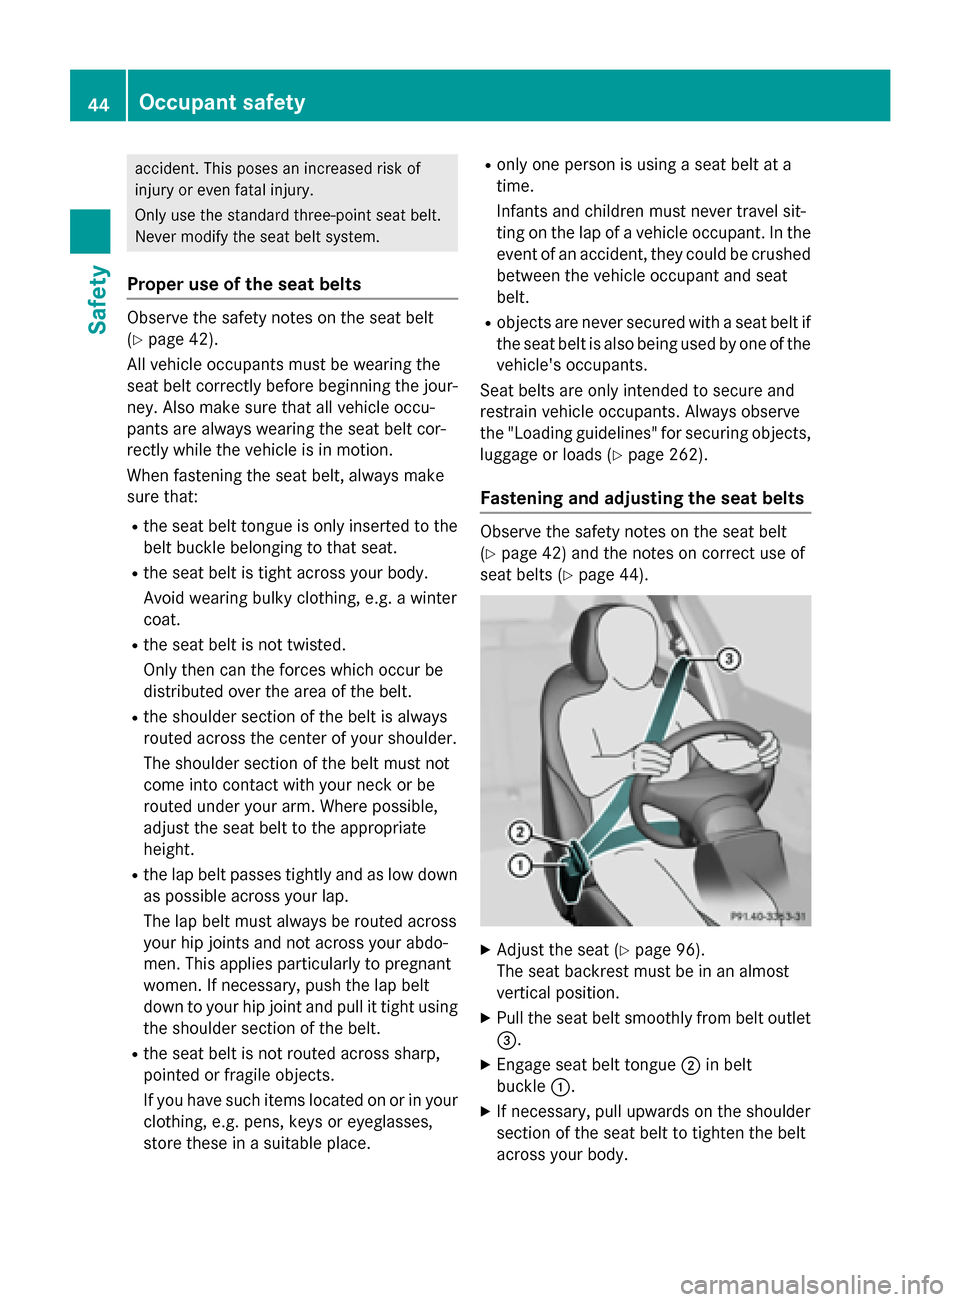
Fastening and adjusting the seat belts Observe the safety notes on the seat belt
(Y
page 42) and the notes on correct use of
seat belts (Y page 44). X
Adjust the seat (Y page 96).
The seat backrest must be in an almost
vertical position.
X Pull the seat belt smoothly from belt outlet
=.
X Engage seat belt tongue ;in belt
buckle :.
X If necessary, pull upwards on the shoulder
section of the seat belt to tighten the belt
across your body. 44
Occupant safetySafety
Page 51 of 362
However, it does not protect the chest or
arms.
In the event of a side impact, the window cur-
tain air bag is deployed on the side on which
the impact occurs.
If the system determines that they can offer
additional protection to that provided by the
seat belt, a window curtain air bag may be
deployed in other accident situations
(Y page 54). Occupant Classification System
(OCS)
Introduction The Occupant Classification System (OCS)
categorizes the person in the front-passenger
seat. Depending on that result, the front-
passenger front air bag and front-passenger
knee bag are either enabled or deactivated.
The system does not deactivate:
R the side impact air bag
R the window curtain air bag
R the Emergency Tensioning Devices
Prerequisites To be classified correctly, the front passenger
must sit:
R with the seat belt fastened correctly
R in an almost upright position with their
back against the seat backrest
R with their feet resting on the floor, if possi-
ble
If the front passenger does not observe these
conditions, OCS may produce a false classi-
fication, e.g. because the front passenger:
R transfers their weight by supporting them-
selves on a vehicle armrest
R sits in such a way that their weight is raised
from the seat cushion
If it is absolutely necessary to install a child
restraint system on the front-passenger seat,
be sure to observe the correct positioning of the child restraint system. Never place
objects under or behind the child restraint
system, e.g. cushions. The entire base of the
child restraint system must always rest on the
seat cushion of the front-passenger seat. The
backrest of the forward-facing child restraint system must lie as flat as possible against the
backrest of the front-passenger seat.
The child restraint system must not touch the
roof or be subjected to a load by the head
restraint. Adjust the angle of the seat back-
rest and the head restraint position accord-
ingly.
Only then can OCS be guaranteed to function correctly. Always observe the child restraint
system manufacturer's installation instruc-
tions.
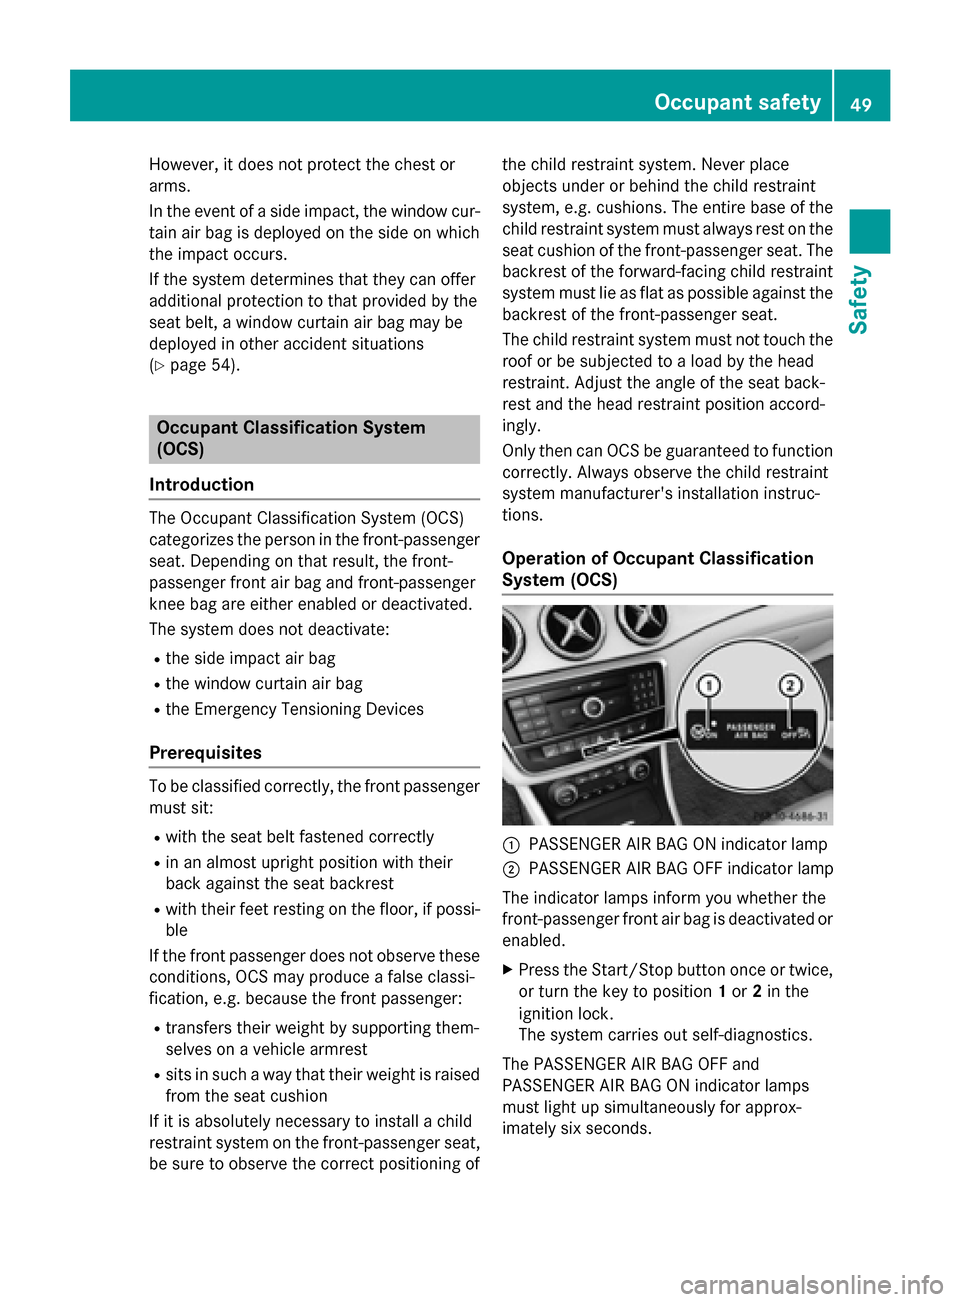
Operation of Occupant Classification
System (OCS) :
PASSENGER AIR BAG ON indicator lamp
; PASSENGER AIR BAG OFF indicator lamp
The indicator lamps inform you whether the
front-passenger front air bag is deactivated or
enabled.
X Press the Start/Stop button once or twice,
or turn the key to position 1or 2in the
ignition lock.
The system carries out self-diagnostics.
The PASSENGER AIR BAG OFF and
PASSENGER AIR BAG ON indicator lamps
must light up simultaneously for approx-
imately six second s. Occu
pant safety
49Safety Z
Page 58 of 362
How the air bag system works is deter-
mined by the severity of the accident detec- ted, especially the vehicle deceleration or
acceleration and the apparent type of acci-dent:
R frontal collision
R side impact
R rollover Automatic measures after an acci-
dent
Immediately after an accident, the following
measures are implemented, depending on
the type and severity of the impact:
R the hazard warning lamps are activated
R the emergency lighting is activated
R the vehicle doors are unlocked
R the front side windows are lowered
R the engine is switched off and the fuel sup-
ply is cut off
R vehicles with mbrace: automatic emer-
gency call Children in the vehicle
Important safety notes
Accident statistics show that children
secured in the rear seats are safer than chil-
dren secured in the front-passenger seat. For this reason, Mercedes-Benz strongly advises
that you install a child restraint system on a
rear seat. Children are generally better pro-
tected there.
If a child younger than 12 years and under 5 ft
(1.50 m) in height is traveling in the vehicle:
R always secure the child in a child restraint
system suitable for Mercedes-Benz vehi-
cles. The child restraint system must be
appropriate to the age, weight and size of
the child
R be sure to observe the instructions and
safety notes in this section in addition to the child restraint system manufacturer's
installation instructions
R be sure to observe the instructions and
safety notes on the "Occupant classifica-
tion system (OCS)" (Y page 49) G
WARNING
If you leave children unsupervised in the vehi- cle, they could set it in motion by, for example:
R release the parking brake.
R shift the automatic transmission out of the
parking position P.
R start the engine.
In addition, they may operate vehicle equip-
ment and become trapped. There is a risk of
an accident and injury.
When leaving the vehicle, always take the
SmartKey with you and lock the vehicle. Never
leave children unsupervised in the vehicle. G
WARNING
If persons, particularly children are subjected to prolonged exposure to extreme heat or
cold, there is a risk of injury, possibly even
fatal. Never leave children unattended in the
vehicle. G
WARNING
If the child restraint system is subjected to
direct sunlight, parts may get very hot. Chil-
dren may burn themselves on these parts,
particularly on the metal parts of the child
restraint system. There is a risk of injury.
If you leave the vehicle, taking the child with
you, always ensure that the child restraint
system is not exposed to direct sunlight. Pro- tect it with a blanket, for example. If the childrestraint system has been exposed to direct
sunlight, let it cool down before securing the
child in it. Never leave children unattended in the vehicle.
Always ensure that all vehicle occupants have
their seat belts fastened correctly and are sit- ting properly. Particular attention must be
paid to children. 56
Children in the vehicleSafety
Page 63 of 362
Rearward-facing child restraint system
If it is absolutely necessary to install a rear-
ward-facing child restraint system on the
front-passenger seat, always make sure that
the front-passenger front air bag is deactiva-
ted. Only if the PASSENGER AIR BAG OFF
indicator lamp is permanently lit (Y page 41)
is the front-passenger front air bag deactiva-
ted.
Always observe the child restraint system
manufacturer's installation and operating
instructions.
Forward-facing child restraint system If it is absolutely necessary to install a
forward-facing child restraint system on the
front-passenger seat, always move the front-
passenger seat as far back as possible. The
entire base of the child restraint system must
always rest on the seat cushion of the front-
passenger seat. The backrest of the child
restraint system must lie as flat as possible
against the backrest of the front-passenger
seat. The child restraint system must not
touch the roof or be subjected to a load by the
head restraint. Adjust the angle of the seat
backrest and the head restraint position
accordingly. Always make sure that the shoul- der belt strap is correctly routed from the
vehicle belt outlet to the shoulder belt guide
on the child restraint system. The shoulder
belt strap must be routed forwards and down- wards from the vehicle belt outlet. If neces-
sary, adjust the vehicle belt outlet and the
front-passenger seat accordingly.
Always observe the child restraint system
manufacturer's installation and operating
instructions. Child-proof locks
Important safety notes G
WARNING
If children are traveling in the vehicle, they
could:
R open doors, thus endangering other people
or road users
R exit the vehicle and be caught by oncoming
traffic
R operate vehicle equipment and become
trapped
There is a risk of an accident and injury.
Always activate the child-proof locks and
override feature if children are traveling in the vehicle. When leaving the vehicle, always take
the key with you and lock the vehicle. Never
leave children unattended in the vehicle.
Override feature for: R the rear doors (Y page 62)
R the rear side windows (Y page 62) G
WARNING
If you leave children unsupervised in the vehi- cle, they could set it in motion by, for example:
R release the parking brake.
R shift the automatic transmission out of the
parking position P.
R start the engine.
In addition, they may operate vehicle equip-
ment and become trapped. There is a risk of
an accident and injury.
When leaving the vehicle, always take the
SmartKey with you and lock the vehicle. Never
leave children unsupervised in the vehicle. G
WARNING
If persons, particularly children are subjected to prolonged exposure to extreme heat or
cold, there is a risk of injury, possibly even
fatal. Never leave children unattended in the
vehicle. Children in the vehicle
61Safety Z
Page 73 of 362
This steering assistance is provided in partic-
ular if:
R both right wheels or both left wheels are on
a wet or slippery road surface when you
brake.
R the vehicle starts to skid.
Important safety notes i
Observe the "Important safety notes" sec-
tion (Y page 63).
No steering assistance is provided from
STEER CONTROL, if:
R ESP ®
is malfunctioning.
R the lighting is faulty.
If ESP ®
is malfunctioning, you will be assisted
further by the electrical power steering. Protection against theft
Immobilizer
The immobilizer prevents your vehicle from
being started without the correct SmartKey.
X To activate with the SmartKey: remove
the SmartKey from the ignition lock.
X To activate with KEYLESS-GO start-
function or KEYLESS-GO: switch the igni-
tion off and open the driver's door.
X To deactivate: switch on the ignition.
When leaving the vehicle, always take the
SmartKey with you and lock the vehicle. Any-
one can start the engine if a valid SmartKey
has been left inside the vehicle.
i The immobilizer is always deactivated
when you start the engine.
In the event that the engine cannot be star- ted (yet the vehicle's battery is charged),
the system is not operational. Contact an
authorized Mercedes-Benz Center or call
1-800-FOR-MERCedes (in the USA) or
1-800-387-0100 (in Canada). ATA (anti-theft alarm system)
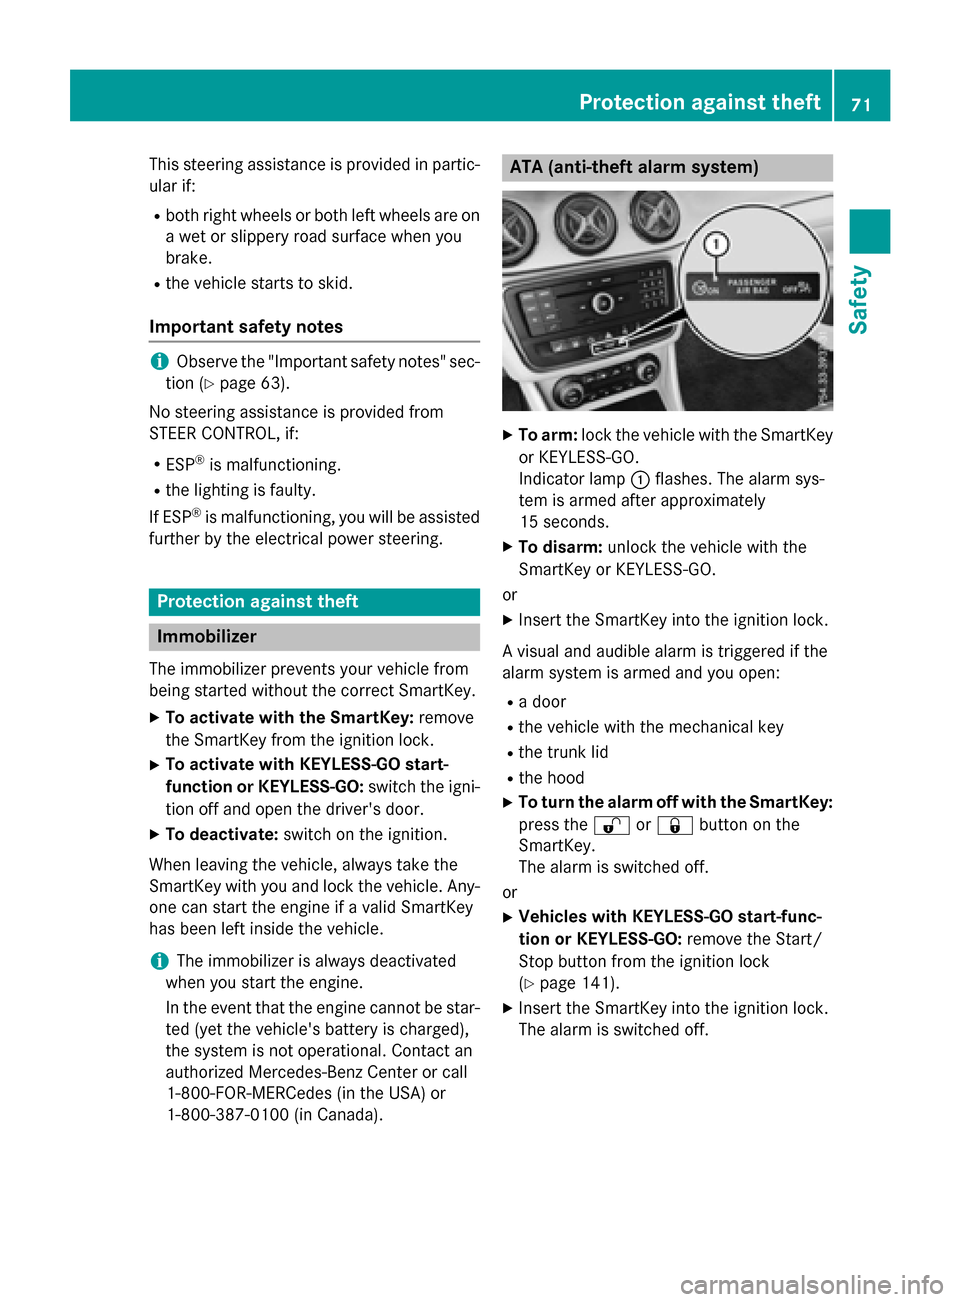
X
To arm: lock the vehicle with the SmartKey
or KEYLESS-GO.
Indicator lamp :flashes. The alarm sys-
tem is armed after approximately
15 seconds.
X To disarm: unlock the vehicle with the
SmartKey or KEYLESS-GO.
or X Insert the SmartKey into the ignition lock.
A visual and audible alarm is triggered if the
alarm system is armed and you open:
R a door
R the vehicle with the mechanical key
R the trunk lid
R the hood
X To turn the alarm off with the SmartKey:
press the %or& button on the
SmartKey.
The alarm is switched off.
or
X Vehicles with KEYLESS-GO start-func-
tion or KEYLESS-GO: remove the Start/
Stop button from the ignition lock
(Y page 141).
X Insert the SmartKey into the ignition lock.
The alarm is switched off. Protection against theft
71Safety Z
Page 74 of 362
X
To stop the alarm using KEYLESS-GO:
grasp the outside door handle. The Smart-
Key must be outside the vehicle.
The alarm is switched off.
or X Press the Start/Stop button on the dash-
board. The SmartKey must be inside the
vehicle.
The alarm is switched off.
The alarm is not switched off, even if you
close the open door that triggered it, for
example.
i If the alarm continues for more than
30 seconds, the mbrace emergency call
system automatically notifies the Cus-
tomer Assistance Center. This is done
either by text message or data connection.
The emergency call system sends the mes- sage or data provided that:
R you have subscribed to the mbrace ser-
vice.
R the mbrace service has been activated
properly.
R the necessary mobile phone network is
available. 72
Protection against theftSafety
Page 75 of 362
Useful information
..............................74
SmartKey ............................................. 74
Doors .................................................... 81
Trunk .................................................... 83
Side windows ...................................... 86
Panorama roof with power tilt/
sliding panel ........................................ 90 73Opening and closing
Page 76 of 362
Useful information
i This Operator's Manual describes all
models and all standard and optional equip- ment of your vehicle available at the time of
publication of the Operator's Manual.
Country-specific differences are possible.
Please note that your vehicle may not be
equipped with all features described. This
also applies to safety-related systems and
functions.
i Read the information on qualified special-
ist workshops (Y page 24). SmartKey
Important safety notes
G
WARNING
If children are left unsupervised in the vehicle, they could:
R open the doors, thus endangering other
people or road users.
R get out and disrupt traffic.
R operate the vehicle's equipment.
Additionally, children could set the vehicle in
motion if, for example, they:
R release the parking brake.
R shifting the automatic transmission out of
park position P
R Start the engine.
There is a risk of an accident and injury.
When leaving the vehicle, always take the
SmartKey with you and lock the vehicle. Never
leave children or animals unattended in the
vehicle. Always keep the SmartKey out of
reach of children. G
WARNING
If you attach heavy or large objects to the
SmartKey, the SmartKey could be uninten-
tionally turned in the ignition lock. This could
cause the engine to be switched off. There is a risk of an accident. Do not attach any heavy or large objects to the
SmartKey. Remove any bulky key rings before
inserting the SmartKey into the ignition lock.
! Keep the SmartKey away from strong
magnetic fields. Otherwise, the remote
control function could be affected.
Strong magnetic fields can occur in the
vicinity of powerful electrical installations.
Do not keep the SmartKey: R with electronic devices, e.g. a mobile
phone or another SmartKey.
R with metallic objects, e.g. coins or metal
foil.
R inside metallic objects, e.g. a metal case.
Vehicles with KEYLESS-GO start function: do not keep the SmartKey in the cargo com-
partment. Otherwise, the SmartKey may not
be detected, e.g. when starting the engine
using the Start/Stop button. SmartKey functions
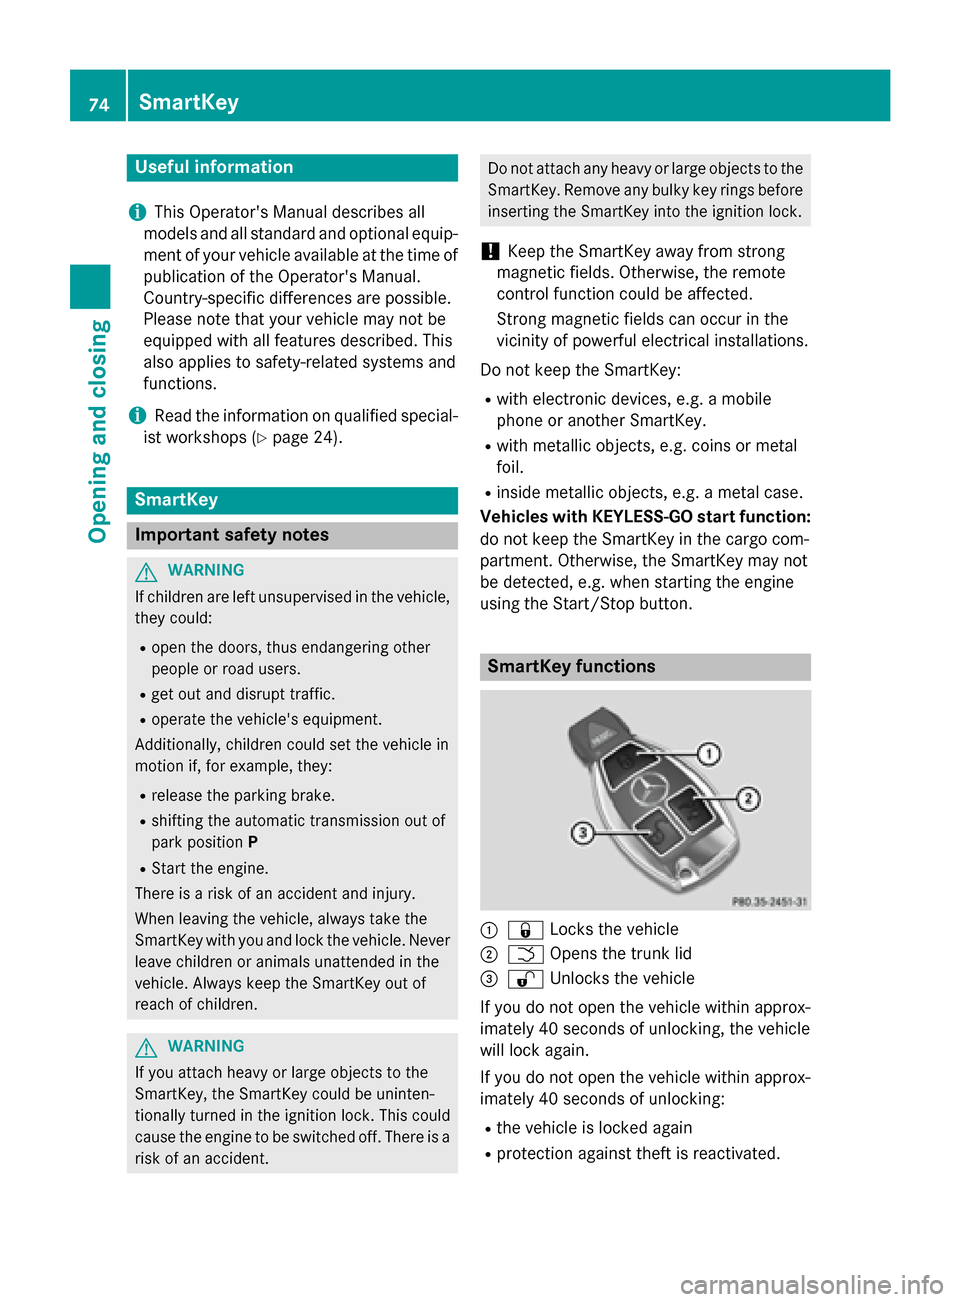
:
& Locks the vehicle
; F Opens the trunk lid
= % Unlocks the vehicle
If you do not open the vehicle within approx-
imately 40 seconds of unlocking, the vehicle
will lock again.
If you do not open the vehicle within approx-
imately 40 seconds of unlocking:
R the vehicle is locked again
R protection against theft is reactivated. 74
SmartKeyOpening and closing