display MERCEDES-BENZ CLA-Class 2016 C117 Comand Manual
[x] Cancel search | Manufacturer: MERCEDES-BENZ, Model Year: 2016, Model line: CLA-Class, Model: MERCEDES-BENZ CLA-Class 2016 C117Pages: 246, PDF Size: 6.73 MB
Page 172 of 246
Activating/deactivating the station
presets display
You can use this function to changeto th e
station preset sdisplay.
Activating
XIn radi omode: slide 6thecontroller .
XTo select Preset:tur nand press th econ-
troller .
XTo select StationPresetView:On:tur n
and press th econtroller .
The station preset display appears.
XTo switch between th estore dstations: tur n
th econtroller .
Deactivating
XIn radi omode: slide 6thecontroller .
XTo select Preset:tur nand press th econ-
troller .
XTo select StationPreset View: Off:
tur nand press th econtroller .
A vie wof th elast waveban dyou listened to
appears.
Saving/deleting a station
Storing curren tstations
XIn radi omode: slide 6thecontroller .
The radi omen ubar appears.
XTo select Preset:tur nand press th econ-
troller .
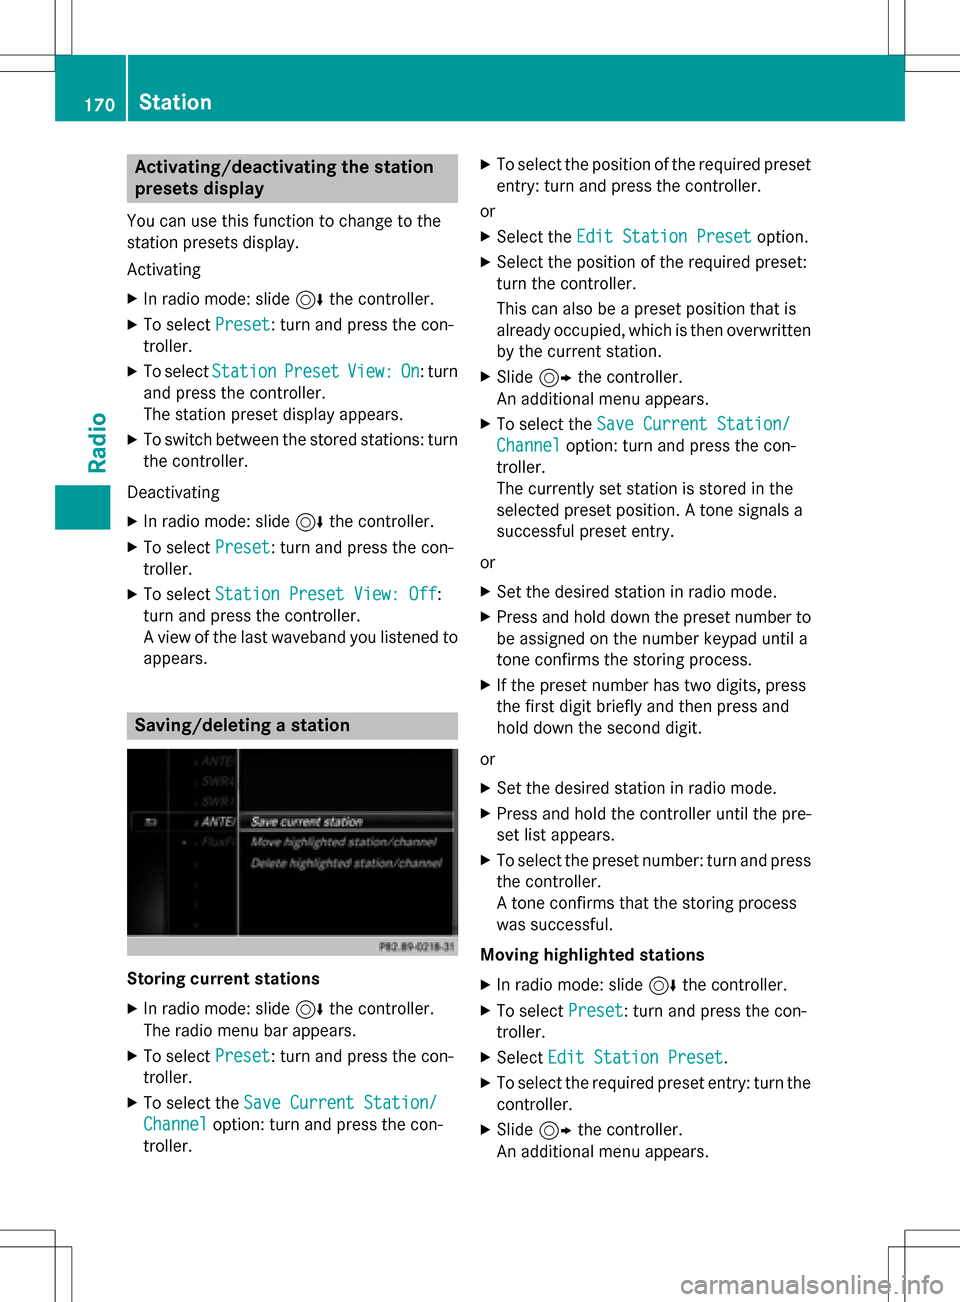
XTo select th eSav eCurren tStation/
Channe loption:tur nand press th econ-
troller .
XTo select th eposition of th erequire dpreset
entry: tur nand press th econtroller .
or
XSelec tth eEdi tStatio nPresetoption .
XSelectth eposition of th erequire dpre set:
tur nth econtroller .
This can also be apre set position that is
already occupied, whic his then overwritte n
by th ecurren tstation .
XSlide9thecontroller .
An additional men uappears.
XTo select th eSav eCurren tStation/
Channe loption:tur nand pre ssthecon-
troller .
The currentl yset station is storedin th e
selected preset position . Atone signals a
succe ssful pre setentry.
or
XSe tth edesired station in radi omode.
XPress and hold down th epre set number to
be assigned on th enumber keypad until a
tone confirm sth e storing proce ss.
XIf thepreset number has two digit s,pre ss
th efir st digit briefly and then pre ssand
hold down th e seconddigit .
or
XSe tth edesired station in radi omode.
XPre ssand hold th econtroller until th epre -
set list appears.
XTo select th epreset number :tur nand pre ss
th econtroller .
A tone confirm sthat th e storing proce ss
was succe ssful.
Moving highlighted stations
XIn radi omode: slide 6thecontroller .
XTo select Preset:tur nand press th econ-
troller .
XSelectEdi tStatio nPreset.
XTo select th erequire dpre set entry: tur nth e
controller .
XSlide9thecontroller .
An additional men uappears.
170Station
Radio
Page 173 of 246
XTo select theMove Highlighted Sta‐
tion/Channeloption: turn and press the
controller.
The list of stored stations appears again.
XTo move the highlighted station to the new position: turn the controller and press to
confirm.
Deleting highlighted stations
XIn radio mode: slide 6the controller.
XTo select Preset: turn and press the con-
troller.
XSelect Edit Station Preset.
XTo select the required preset entry: turn the
controller.
XSlide9the controller.
XTo select the Delete Highlighted Sta‐
tion/Channeloption in the additional
menu: turn and press the controller.
or
XPress the $button.
A prompt appears.
XTo select Yes: turn and press the controller.
The highlighted station is deleted.
or
XTo select No: press the controller.
The process is canceled.
iFrequencies are already stored in
COMAND. There are 100 preset positions
available.
Tagging music tracks
This function allows you to transfer the music
track currently playing to an Apple®device
and then purchase it in the iTunes store®.
XIn radio mode: slide 6the controller.
XTo select Options: turn and press the con-
troller.
XSelect Tag This Track.
A message appears in COMAND about stor-
ing the track information.
Displaying the artist and track
XIn radio mode: slide 6the controller.
XTo select Options: turn and press the con-
troller.
XWith Oorª in front of Show Station
Informationyou can determine whether
the station name should be displayed.
If the function is active, the artist and track
will also be displayed in the main display
field.
Calling up sound settings
XIn radio mode: slide 6the controller.
The radio menu bar appears.
XTo select à: turn and press the control-
ler.
The sound menu appears (
Ypage 208).
Displaying information
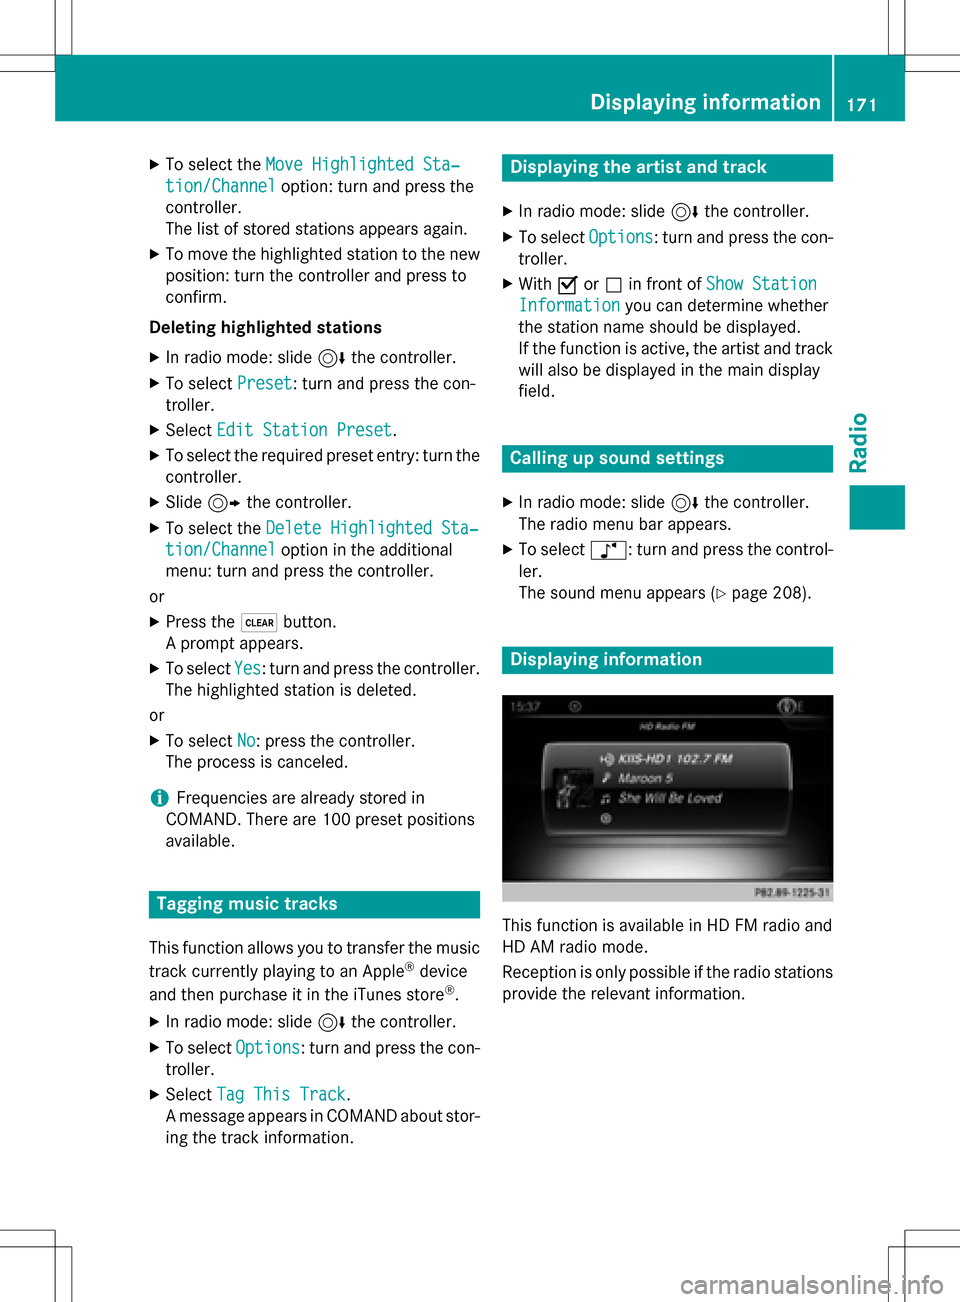
This function is available in HD FM radio and
HD AM radio mode.
Reception is only possible if the radio stations
provide the relevant information.
Displaying information171
Radio
Page 174 of 246
XTo selectInformationin the radio menu
bar: turn and press the controller.
Information on the currently received pro-
gram is displayed.
If available, you will see:
Rthe track that is currently being played
Rthe artist of the track that is currently being
played
Rthe album name
Rthe channel abbreviation
Rthe logo of the station or Artist Experience®
Back to radio display:
XTo select Information: slide6and
press the controller.
or
XPress the %button.
Satellite radio
General notes
The satellite radio mode requires satellite
radio equipment and registration with a sat-
ellite radio provider.
Note that the categories and channels shown
in the illustrations depend on the program
content offered by the provider. The illustra-
tions and descriptions in these operating
instructions may therefore differ from the
channels and categories offered by the pro-
vider.
Satellite radio mode may be temporarily
unavailable or interrupted for a variety of rea-
sons. These include environmental or topo-
graphical conditions as well as other factors
beyond the control of Mercedes-Benz USA,
LLC. This means operation may not be possi-
ble in certain areas.
These include:
Rtunnels
Rparking garages
Rlocations inside or next to buildings
Rlocations in the vicinity of other structures SIRIUS XM Satellite Radio offers more than
140 digital-quality radio channels providing
100% commercial-free music, sports, news
and entertainment.
SIRIUS XM Satellite Radio employs a fleet of
high-performance satellites to broadcast
around the clock throughout the USA and
Canada.
The satellite radio program is available for a
monthly fee. Details are available from the
SIRIUS XM Service Center and at
http://www.siriusxm.com
(USA) or
http://www.siriusxm.ca (Canada).
Your new Mercedes-Benz vehicle comes with
SIRIUS XM Satellite Radio pre-installed at the factory. This service is free for a six-month
trial period. About a month before the trial
period ends, information will be provided on
how to extend this subscription. An acoustic
signal sounds and a message is shown,
describing how the subscription can be
extended.
Registering satellite radio
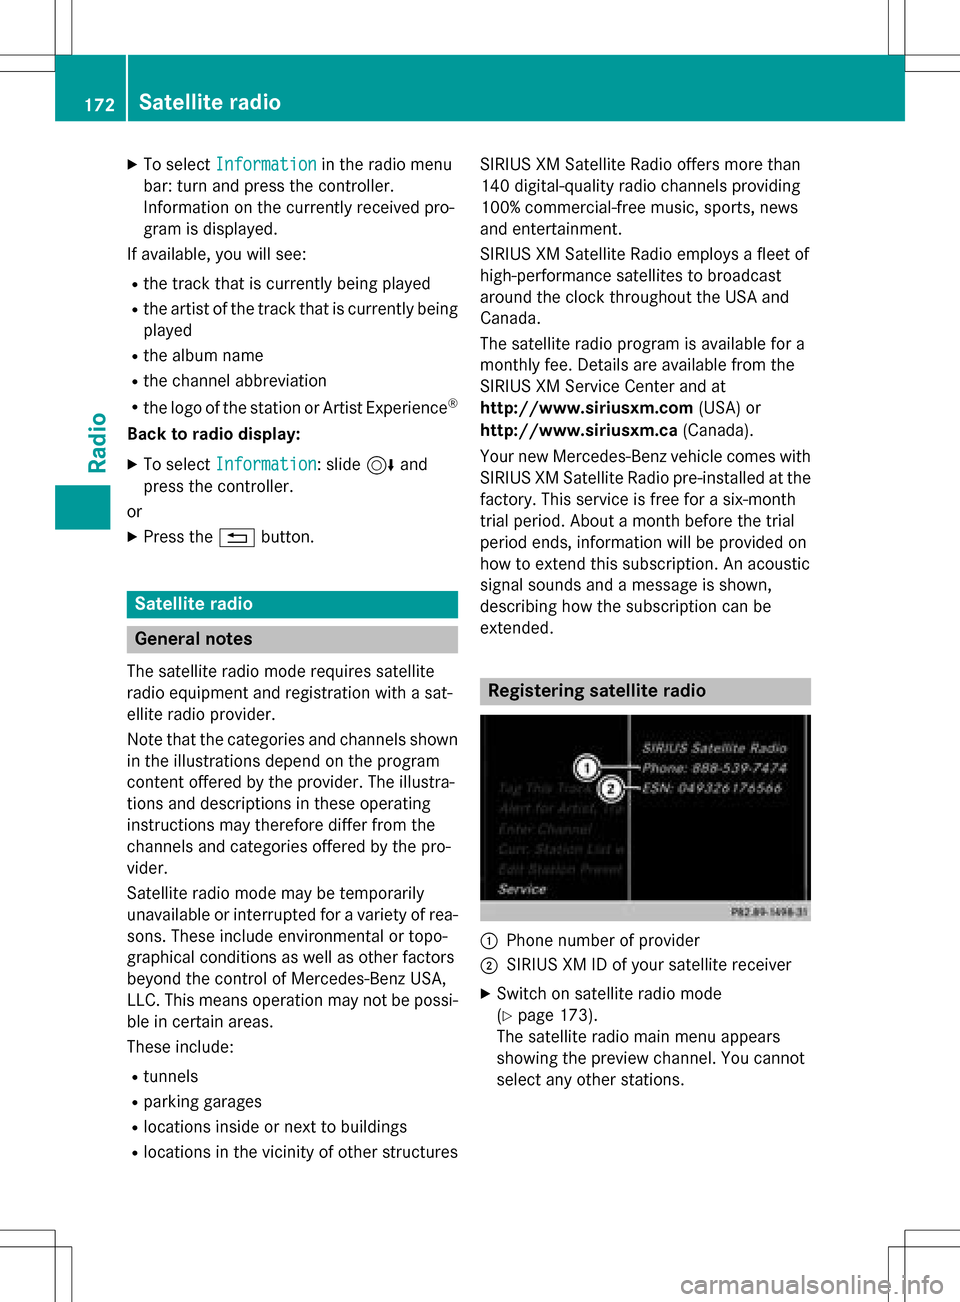
:Phone number of provider
;SIRIUS XM ID of your satellite receiver
XSwitch on satellite radio mode
(
Ypage 173).
The satellite radio main menu appears
showing the preview channel. You cannot
select any other stations.
172Satellite radio
Radio
Page 175 of 246
XTo selectOptionsin the radio menu bar:
turn and press the controller.
XTo select Service: turn and press the con-
troller.
The service information screen appears.
Once the telephone connection has been
established:
XFollow the instructions of the service staff.
The activation process may take up to
ten minutes. If the activation is completed
successfully, the Updating Channels...
message appears in the display, followed
by the satellite radio main menu.
iYou can also have the satellite service
activated online. To do so, visit the SIRIUS
XM Radio website at
http://www.siriusxm.com (USA) or
http://www.siriusxm.ca (Canada).
iIf registration is not included when pur-
chasing the system, your credit card details
will be required to activate your account.
If the satellite receiver is not installed cor-
rectly, the Device Unavailable
message
will appear.
Switching to satellite radio
XTo show the main function bar: slide 5
the controller.
XTo select Radio: turn and press the con-
troller.
The radio display appears. You will hear the
last station played on the last waveband
selected.
XTo select Radioin radio mode: slide 5
and press the controller.
The menu with the available radio modes
appears.
XTo select Sat Radio: turn and press the
controller.
The No Service
message appears if there is
no signal.
Satellite radio overview
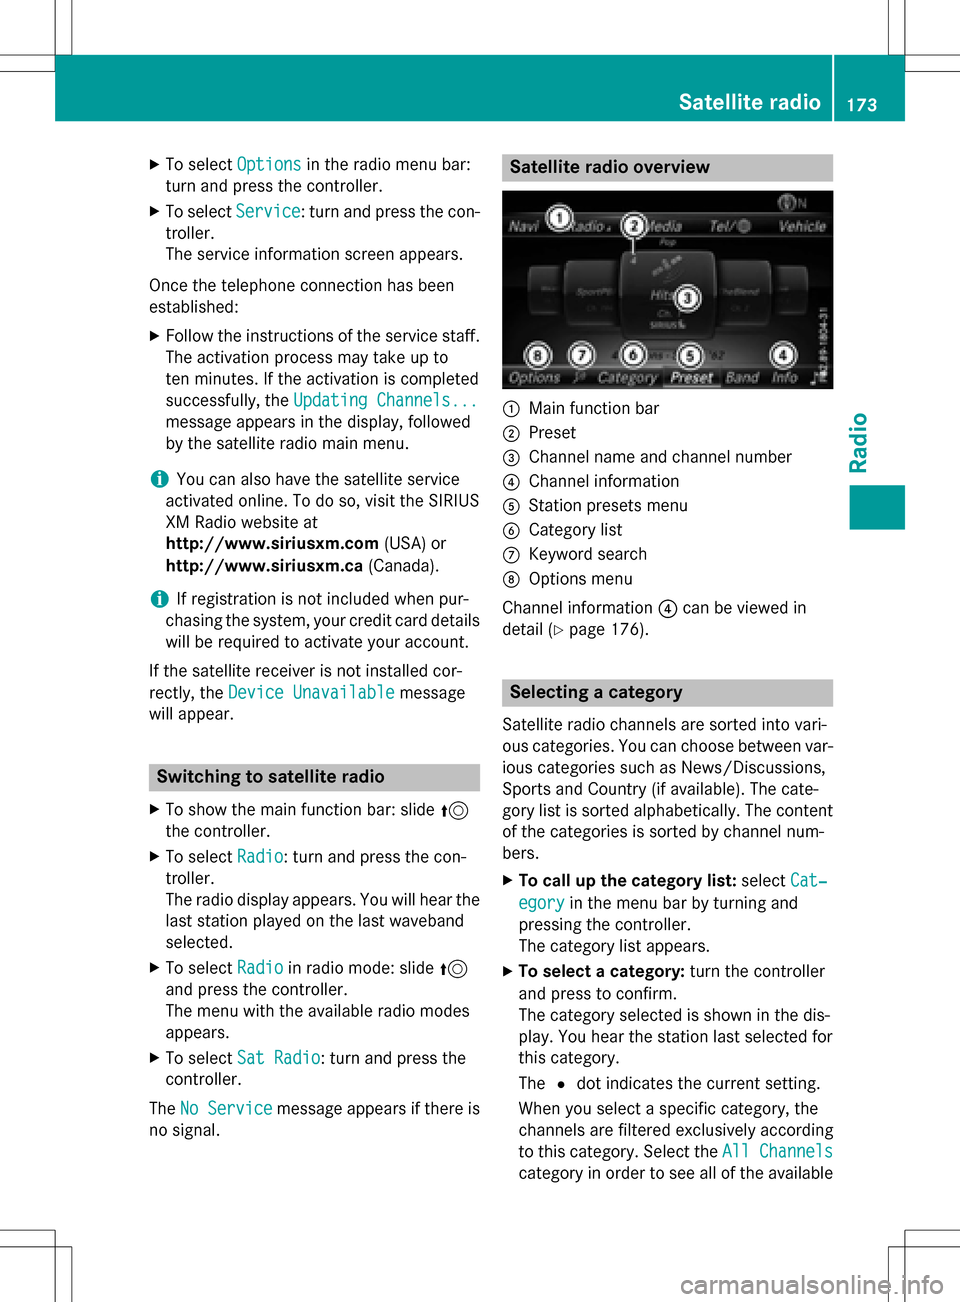
:Main function bar
;Preset
=Channel name and channel number
?Channel information
AStation presets menu
BCategory list
CKeyword search
DOptions menu
Channel information ?can be viewed in
detail (
Ypage 176).
Selecting a category
Satellite radio channels are sorted into vari-
ous categories. You can choose between var-
ious categories such as News/Discussions,
Sports and Country (if available). The cate-
gory list is sorted alphabetically. The content
of the categories is sorted by channel num-
bers.
XTo call up the category list: selectCat‐
egoryin the menu bar by turning and
pressing the controller.
The category list appears.
XTo select a category: turn the controller
and press to confirm.
The category selected is shown in the dis-
play. You hear the station last selected for
this category.
The #dot indicates the current setting.
When you select a specific category, the
channels are filtered exclusively according
to this category. Select the All Channels
category in order to see all of the available
Satellite radio173
Radio
Page 176 of 246
channels. Only this category enables you to
browse all available stations.
Selecting a channel
Changing channels
XWhen the display/selection window in the
satellite radio display is selected, slide
1 or turn the controller.
COMAND switches to the next available
channel.
Entering channel numbers directly
XTo select Optionsin the radio menu bar:
turn and press the controller.
The satellite radio menu appears.
XTo select Enter Channel: turn and press
the controller.
An input menu appears.
XEnter the frequency of the desired station
in the entry field.
or
XPress the gkey on the number keypad.
An input menu appears.
XEnter the frequency of the desired station
in the entry field.
XFor the channel number, press the corre-
sponding number keys on the control panel
one after the other.
XPress the zkey on the number keypad.
COMAND sets the selected channel.
iYou can only select currently permitted
digits.
Selecting a channel via the satellite
radio station list
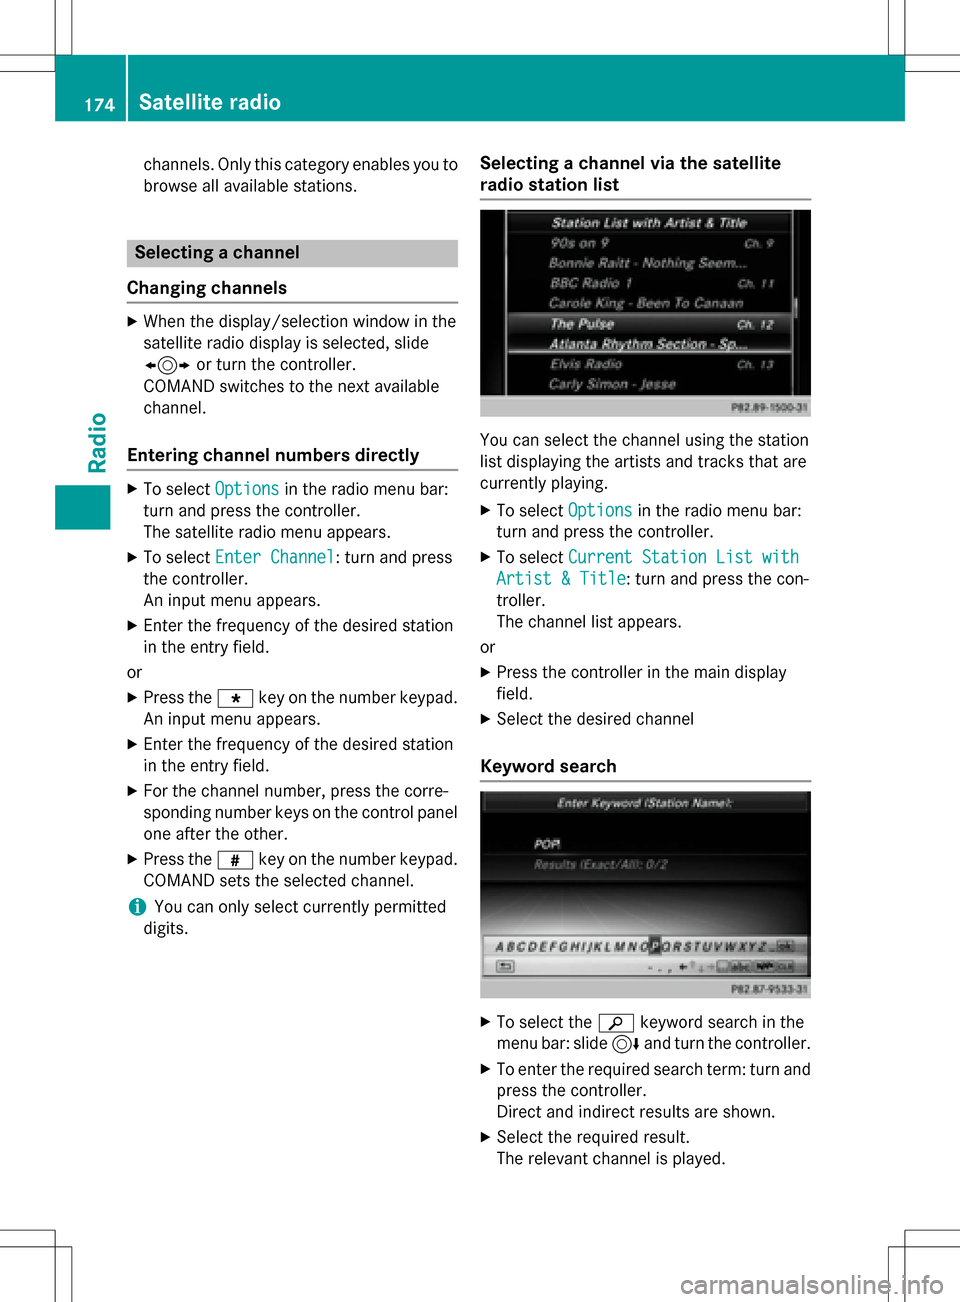
You can select the channel using the station
list displaying the artists and tracks that are
currently playing.
XTo select Optionsin the radio menu bar:
turn and press the controller.
XTo select Current Station List with
Artist & Title: turn and press the con-
troller.
The channel list appears.
or
XPress the controller in the main display
field.
XSelect the desired channel
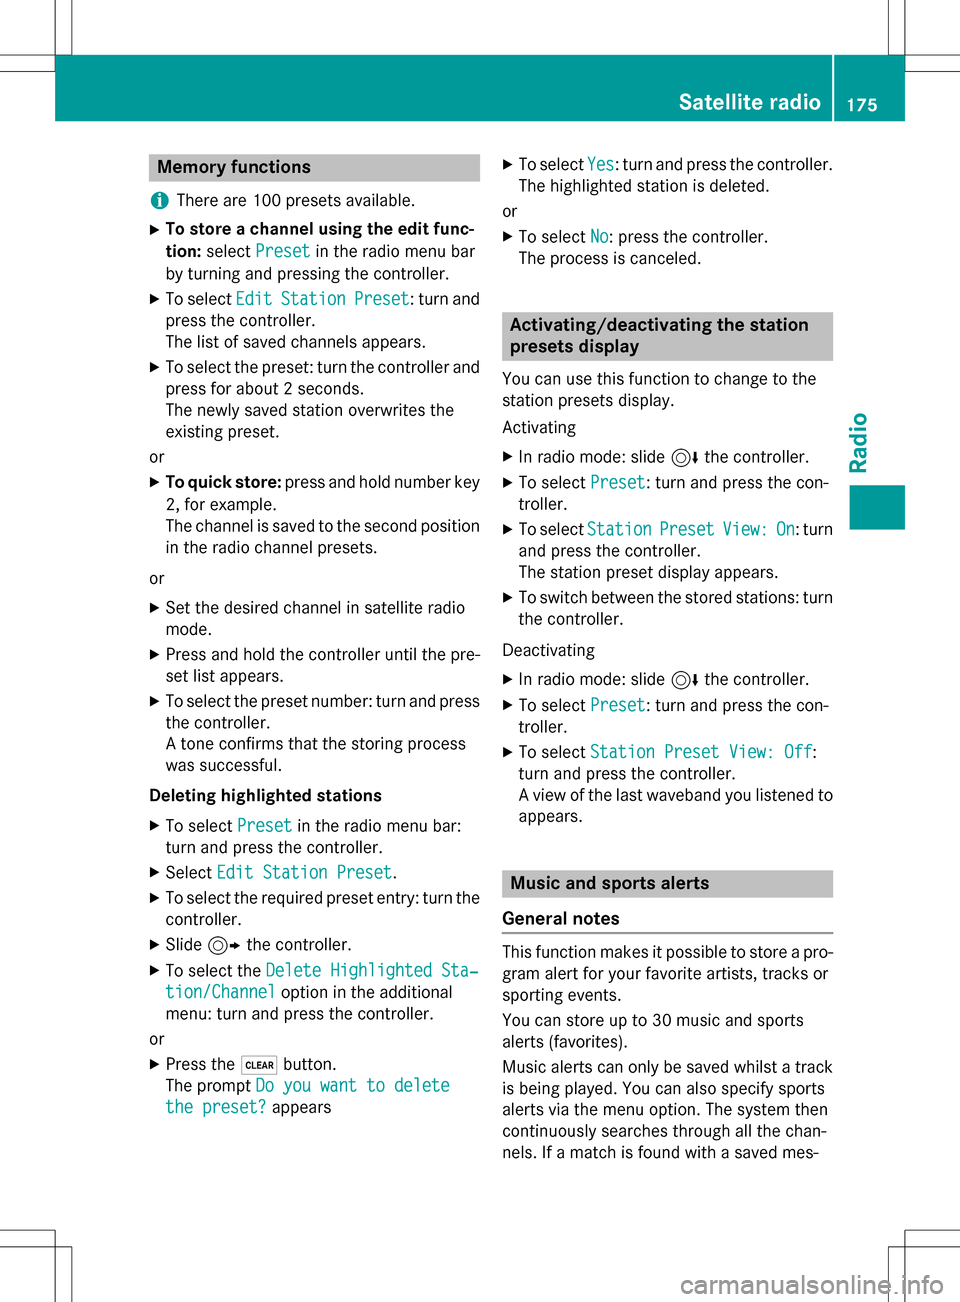
Keyword search
XTo select the èkeyword search in the
menu bar: slide 6and turn the controller.
XTo enter the required search term: turn and
press the controller.
Direct and indirect results are shown.
XSelect the required result.
The relevant channel is played.
174Satellite radio
Radio
Page 177 of 246
Memory functions
i
There are 100 presets available.
XTo store a channel using the edit func-
tion: select Preset
in the radio menu bar
by turning and pressing the controller.
XTo select EditStationPreset: turn and
press the controller.
The list of saved channels appears.
XTo select the preset: turn the controller and
press for about 2 seconds.
The newly saved station overwrites the
existing preset.
or
XTo quick store: press and hold number key
2, for example.
The channel is saved to the second position
in the radio channel presets.
or
XSet the desired channel in satellite radio
mode.
XPress and hold the controller until the pre-
set list appears.
XTo select the preset number: turn and press
the controller.
A tone confirms that the storing process
was successful.
Deleting highlighted stations
XTo select Presetin the radio menu bar:
turn and press the controller.
XSelect Edit Station Preset.
XTo select the required preset entry: turn the
controller.
XSlide9the controller.
XTo select the Delete Highlighted Sta‐
tion/Channeloption in the additional
menu: turn and press the controller.
or
XPress the $button.
The prompt Do you want to delete
the preset?appears
XTo selectYes: turn and press the controller.
The highlighted station is deleted.
or
XTo select No: press the controller.
The process is canceled.
Activating/deactivating the station
presets display
You can use this function to change to the
station presets display.
Activating
XIn radio mode: slide 6the controller.
XTo select Preset: turn and press the con-
troller.
XTo select StationPresetView:On: turn
and press the controller.
The station preset display appears.
XTo switch between the stored stations: turn
the controller.
Deactivating
XIn radio mode: slide 6the controller.
XTo select Preset: turn and press the con-
troller.
XTo select Station Preset View: Off:
turn and press the controller.
A view of the last waveband you listened to
appears.
Music and sports alerts
General notes
This function makes it possible to store a pro-
gram alert for your favorite artists, tracks or
sporting events.
You can store up to 30 music and sports
alerts (favorites).
Music alerts can only be saved whilst a track
is being played. You can also specify sports
alerts via the menu option. The system then
continuously searches through all the chan-
nels. If a match is found with a saved mes-
Satellite radio175
Radio
Page 178 of 246
sage, you will be informed. A window appears
with the respective information.
Setting a music alert
XTo selectOptionsin the radio menu bar:
turn and press the controller.
XTo select Alert for Artist, Track &
SportsEvent: turn and press the control-
ler.
A menu appears.
XSelect Add New Alert.
A window with a prompt appears.
XSelect ArtistorTrack.
The alert is set for the current artist or
track.
Setting a sports alert
XTo select Optionsin the menu bar: turn
and press the controller.
XTo select Alert for Artist, Track &
SportsEvent: turn and press the control-
ler.
A menu appears.
XSelect Manage Sports Alerts.
A menu appears.
XSelect Select New Alerts.
A menu appears.
XSelect the desired team from a league, e.g.
college, NBA, NHL, NFL or MLB.
The alert function for the sports team is
added.
A window with music and sport alerts
appears
XTo select Change ToorIgnore: turn and
press the controller.
If you select Change To
, the channel is
changed and the favorite artist or track is
played.
If you select Ignore
, the current channel
will continue playing.
Editing music and sports alerts
XSelect Edit Alert.
A list of set sports alerts appears.
XSelect Manage Music Alerts.
A list of set artists and tracks (artist)
appears.
Switching music and sport alerts on/off
XWith Oorª in front of ActivateMusic
Alertsyou can determine whether music
alerts should be switched on or off.
XWith Oorª in front of Activate
Sports Alertsyou can determine
whether sport alerts should be switched on
or off.
Tagging music tracks
This function allows you to transfer the music
track currently playing to an Apple®device
and then purchase it in the iTunes store®.
XTo select Optionsin the radio menu bar:
turn and press the controller.
XTo select TagThisTrack: turn and press
the controller.
A message about saving this music track on
the Apple
®device appears.
Displaying information
176Satellite radio
Radio
Page 179 of 246
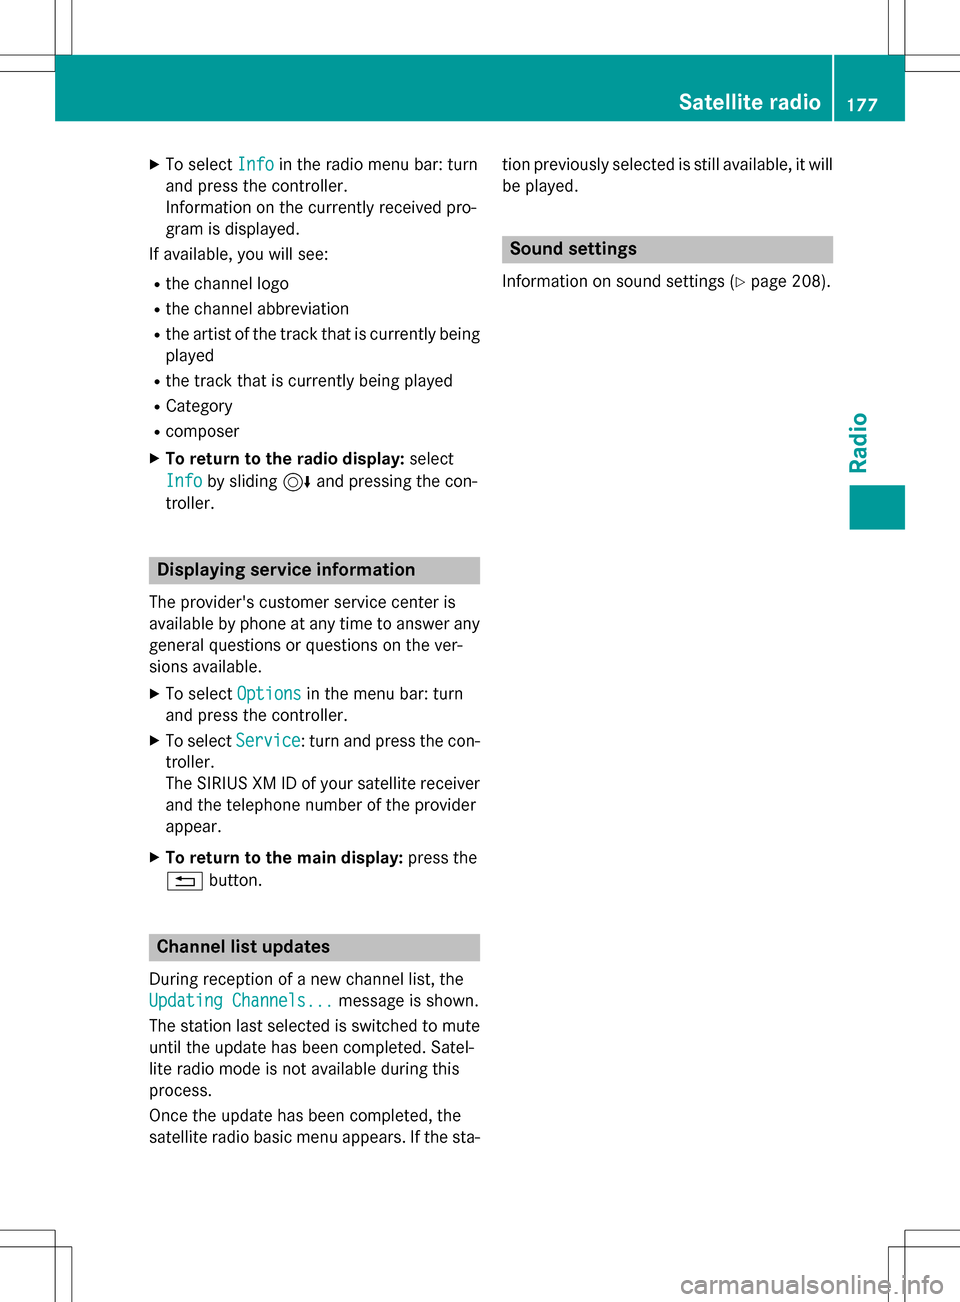
XTo selectInfoin the radio menu bar: turn
and press the controller.
Information on the currently received pro-
gram is displayed.
If available, you will see:
Rthe channel logo
Rthe channel abbreviation
Rthe artist of the track that is currently being
played
Rthe track that is currently being played
RCategory
Rcomposer
XTo return to the radio display: select
Info
by sliding 6and pressing the con-
troller.
Displaying service information
The provider's customer service center is
available by phone at any time to answer any
general questions or questions on the ver-
sions available.
XTo select Optionsin the menu bar: turn
and press the controller.
XTo select Service: turn and press the con-
troller.
The SIRIUS XM ID of your satellite receiver and the telephone number of the provider
appear.
XTo return to the main display: press the
% button.
Channel list updates
During reception of a new channel list, the
Updating Channels...
message is shown.
The station last selected is switched to mute
until the update has been completed. Satel-
lite radio mode is not available during this
process.
Once the update has been completed, the
satellite radio basic menu appears. If the sta- tion previously selected is still available, it will
be played.
Sound settings
Information on sound settings (Ypage 208).
Satellite radio177
Radio
Page 182 of 246
Your COMANDequipment
These operatin ginstruction sdescribe all th e
standar dan doptional equipmen tof your
COMAN Dsystem, as available at th etime of
going to print .Country-specifi cdifference s
are possible. Bear in min dthat your vehicle
may no tfeature all function sdescribed here.
Thi salso applies to safety-relevan tsystems
an dfunctions.
Read th einformation on qualified specialis t
workshop sin th evehicle Operator's Manual.
Activating medi amode
General notes
There are severa lways to activat emedia
source susin gCOMAND.
The relevant section sof th eOperator's Man -
ual describe th esimples tway to activat e a
media source .
Thi ssection describes all option sfo ractivat -
in g media sources.
Button activation
XPress th eÕ button.
The last media source you hav eset is dis -
played.
XPress th eÕ buttonagain .
The men uappears wit hth eavailable media
sources.
XTo selec tmedia sources: turn th econtroller
until th edesire dmedia source is in th ecen-
ter. Press th econtroller .
Dependin gon th evehicle equipment, th e
followin gmedia source swill be available :
RDisc
RMemory Car d
RMedia Interface 1
RMedia Interface2
RBluetooth Audio
If playable music files are found ,they will be
playe dby COMAND.
Switching on automatically
Whe nan external media source is connected,
CD an dSD memor ycar dfunction sare auto-
matically switched on by COMAND. Whe n
usin gUS Bdevices, switch to th eappropriat e
Media Interface 1or Media Interface 2basi c
display.
External media sources:
RApple®devices (e.g. iPhon e®)
RUSBdevices (e.g. US Bstick, MP3 player)
RCD
RDV Dvideo
RSD cards
Rvia devices connecte dby Bluetoot h®
If playable music files are found ,they will be
playe dby COMAND.
iIfamedia function is already switched on
in COMAND, this will be interrupted an dth e
basi cdisplay of th enewly connecte d
devic ewill appear (except when usin gwit h
USB/iPo d
®).
If another function ,suc has navigation ,is
operating, th ebasi cdisplay will no tchange.
Only th emusic from th enewly connecte d
media source will play (except when usin g
wit hUSB/iPo d
®).
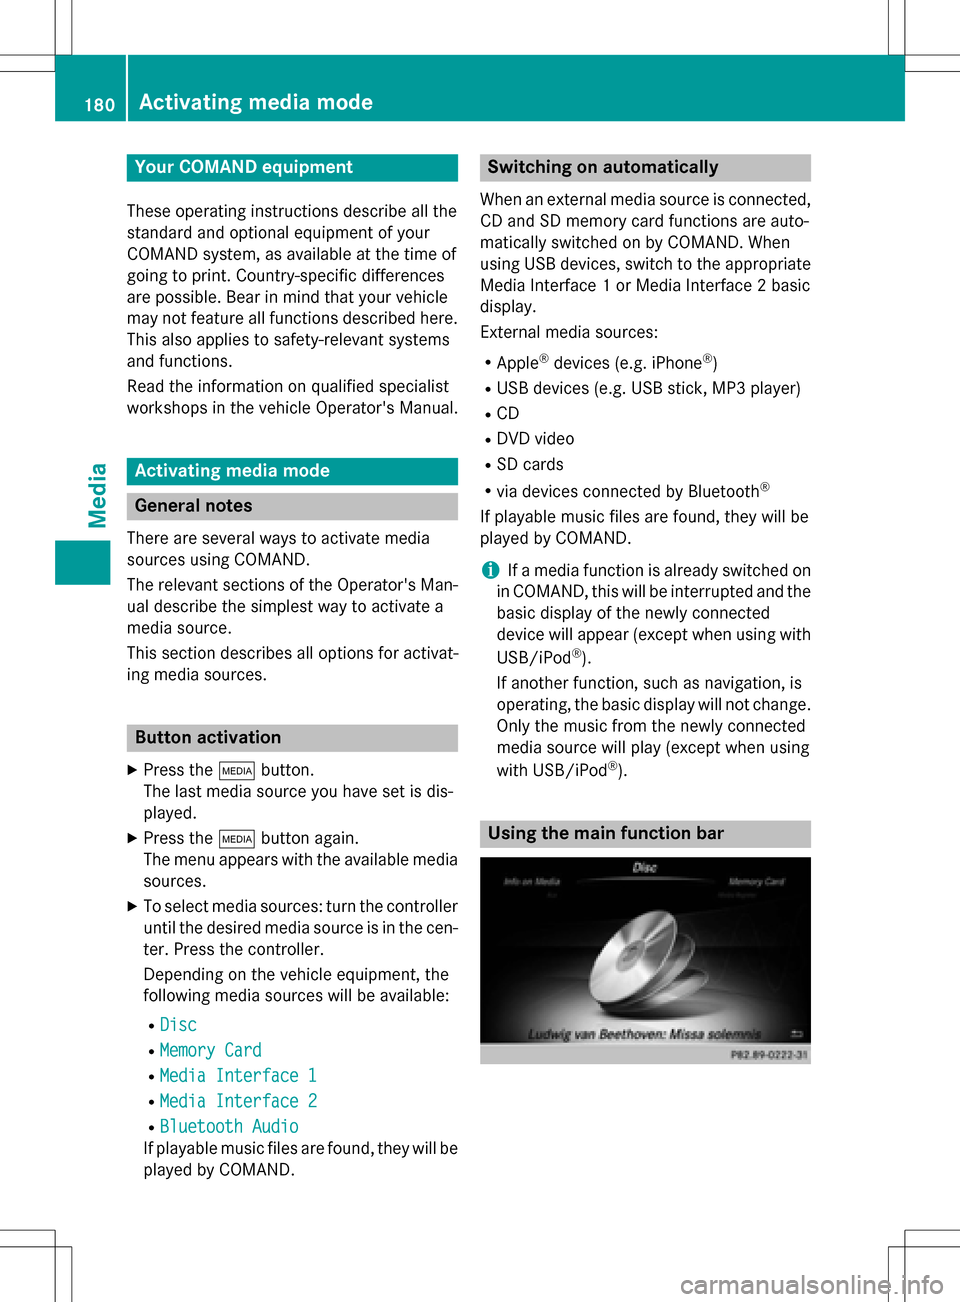
Usingth emain function ba r
180Activating media mode
Media
Page 183 of 246
XTo display the main function bar: slide5
the controller.
XTo select Media: turn and press the con-
troller.
The last media source you have set is dis-
played.
XTo select Mediain media mode: slide 5
and press the controller.
The menu appears with the available media
sources.
XTo select the media source: turn the con-
troller and press to confirm.
If the media source contains music or video
files, these will be played. The correspond-
ing basic menu will be shown.
Using the number keypad
XTo select a media source: press the corre-
sponding number key.
If the media source contains music or video
files, these will be played. The correspond-
ing basic menu will be shown.
XTo enter the track number: press the g
button.
A menu appears.
XTo enter and confirm the number of the
track using the number keypad: press the
controller.
Use the sbutton to show the track infor-
mation for the track that is currently play-
ing.
The track is played.
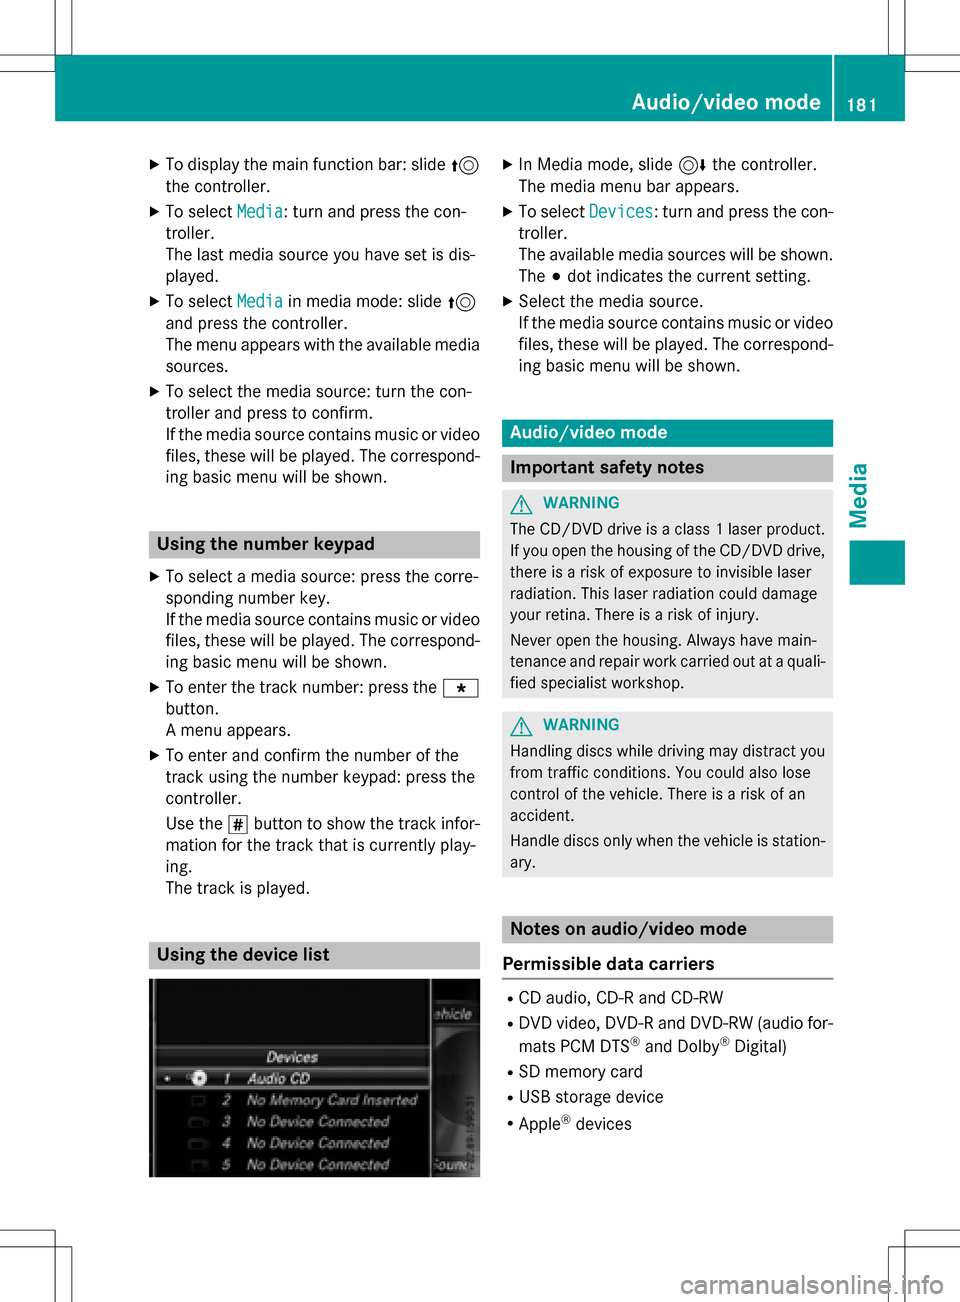
Using the device list
XIn Media mode, slide 6the controller.
The media menu bar appears.
XTo select Devices: turn and press the con-
troller.
The available media sources will be shown.
The #dot indicates the current setting.
XSelect the media source.
If the media source contains music or video
files, these will be played. The correspond-
ing basic menu will be shown.
Audio/video mode
Important safety notes
GWARNING
The CD/DVD drive is a class 1 laser product.
If you open the housing of the CD/DVD drive,
there is a risk of exposure to invisible laser
radiation. This laser radiation could damage
your retina. There is a risk of injury.
Never open the housing. Always have main-
tenance and repair work carried out at a quali- fied specialist workshop.
GWARNING
Handling discs while driving may distract you from traffic conditions. You could also lose
control of the vehicle. There is a risk of an
accident.
Handle discs only when the vehicle is station-
ary.
Notes on audio/video mode
Permissible data carriers
RCD audio, CD-R and CD-RW
RDVD video, DVD-R and DVD-RW (audio for-
mats PCM DTS®and Dolby®Digital)
RSD memory card
RUSB storage device
RApple®devices
Audio/video mode181
Media
Z