oil pressure MERCEDES-BENZ CLA-Class 2016 C117 Owner's Manual
[x] Cancel search | Manufacturer: MERCEDES-BENZ, Model Year: 2016, Model line: CLA-Class, Model: MERCEDES-BENZ CLA-Class 2016 C117Pages: 374, PDF Size: 8.19 MB
Page 19 of 374
Steering assistant STEER CON-
TROLsee STEER CONTROL
Steering wheel
Adjusting (manually) ......................1 06
Button overview ............................... 33
Buttons (on-board computer) ......... 211
Cleaning ......................................... 307
Important safety notes .................. 106
Paddle shifters ............................... 164
Steering wheel paddle shifters ........164
Stopwatch (RACETIMER) ................... 224
Stowage compartments
Armrest (front) ............................... 274
Armrest (under) .............................2 74
Center console .............................. 273
Center console (rear) ..................... 274
Cup holders ................................... 278
Eyeglasses compartment ...............2 73
Glove box ....................................... 273
Important safety information ......... 273
Map pockets .................................. 275
Stowage net ................................... 275
Under driver's seat/front-
passenger seat .............................. 274
Stowage net ....................................... 275
Stowage well beneath the trunk
floor .................................................... 277
Summer tires ..................................... 330
Sun visor ............................................ 279
Suspension
Adaptive Damping System ............. 191
Suspension setting
AMG adaptive sport suspension
system ........................................... 190
Switching air-recirculation mode
on/off ................................................. 141
T
Tachometer ........................................ 211
Tail lamps
Display message ............................ 241
see Lights
Tank
see Fuel tank
Tank content
Fuel gauge ....................................... 31 Technical data
Capacities ...................................... 365
Information .................................... 362
Tires/wheels ................................. 355
Vehicle data ................................... 371
Telephone
Accepting a call (multifunction
steering wheel) .............................. 218
Display message ............................ 256
Introduction ................................... 218
Menu (on-board computer) ............ 218
Number from the phone book ........ 218
Redialing ........................................ 219
Rejecting/ending a call ................. 218
Temperature
Coolant .......................................... 211
Coolant (on-board computer,
Mercedes-AMG vehicles) ............... 223
Engine oil (on-board computer,
Mercedes-AMG vehicles) ............... 223
Outside temperature ...................... 211
Setting (climate control) ................ 137
Transmission oil (on-board com-
puter, Mercedes-AMG vehicles) ..... 223
Through-loading feature ................... 275
Timing (RACETIMER) ......................... 224
Tire pressure
Calling up (on-board computer) ..... 336
Checking manually ........................ 335
Display message ............................ 250
Maximum ....................................... 334
Not reached (TIREFIT) .................... 314
Notes ............................................. 333
Reached (TIREFIT) .......................... 314
Recommended ............................... 332
Tire pressure loss warning system
General notes ................................ 335
Important safety notes .................. 335
Restarting ...................................... 336
Tire pressure monitor
Checking the tire pressure elec-
tronically ........................................ 338
Function/notes ............................. 336
General notes ................................ 336
Important safety notes .................. 336
Radio type approval for the tire
pressure monitor ........................... 339
Restarting ...................................... 338
Index17
Page 163 of 374
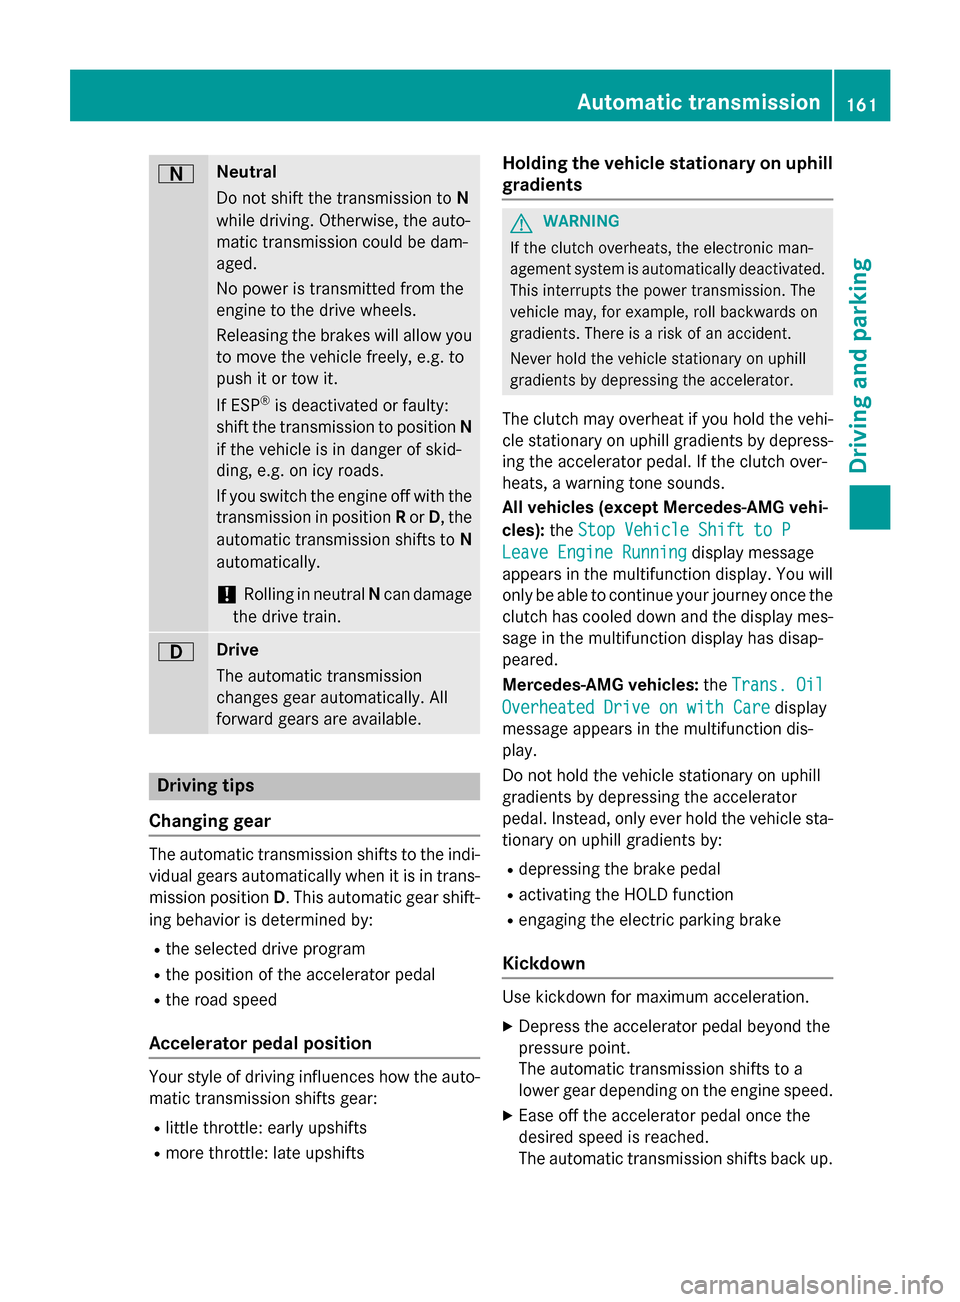
ANeutral
Do not shift the transmission toN
while driving. Otherwise, the auto-
matic transmission could be dam-
aged.
No power is transmitted from the
engine to the drive wheels.
Releasing the brakes will allow you
to move the vehicle freely, e.g. to
push it or tow it.
If ESP
®is deactivated or faulty:
shift the transmission to position N
if the vehicle is in danger of skid-
ding, e.g. on icy roads.
If you switch the engine off with the
transmission in position Ror D, the
automatic transmission shifts to N
automatically.
!Rolling in neutral Ncan damage
the drive train.
7Drive
The automatic transmission
changes gear automatically. All
forward gears are available.
Driving tips
Changing gear
The automatic transmission shifts to the indi-
vidual gears automatically when it is in trans-
mission position D. This automatic gear shift-
ing behavior is determined by:
Rthe selected drive program
Rthe position of the accelerator pedal
Rthe road speed
Accelerator pedal position
Your style of driving influences how the auto- matic transmission shifts gear:
Rlittle throttle: early upshifts
Rmore throttle: late upshifts
Holding the vehicle stationary on uphill
gradients
GWARNING
If the clutch overheats, the electronic man-
agement system is automatically deactivated. This interrupts the power transmission. The
vehicle may, for example, roll backwards on
gradients. There is a risk of an accident.
Never hold the vehicle stationary on uphill
gradients by depressing the accelerator.
The clutch may overheat if you hold the vehi-
cle stationary on uphill gradients by depress-ing the accelerator pedal. If the clutch over-
heats, a warning tone sounds.
All vehicles (except Mercedes-AMG vehi-
cles): theStop Vehicle Shift to P
Leave Engine Runningdisplay message
appears in the multifunction display. You will
only be able to continue your journey once the
clutch has cooled down and the display mes-
sage in the multifunction display has disap-
peared.
Mercedes-AMG vehicles: theTrans. Oil
Overheated Drive on with Caredisplay
message appears in the multifunction dis-
play.
Do not hold the vehicle stationary on uphill
gradients by depressing the accelerator
pedal. Instead, only ever hold the vehicle sta-
tionary on uphill gradients by:
Rdepressing the brake pedal
Ractivating the HOLD function
Rengaging the electric parking brake
Kickdown
Use kickdown for maximum acceleration.
XDepress the accelerator pedal beyond the
pressure point.
The automatic transmission shifts to a
lower gear depending on the engine speed.
XEase off the accelerator pedal once the
desired speed is reached.
The automatic transmission shifts back up.
Automatic transmission161
Driving an d parking
Z
Page 247 of 374
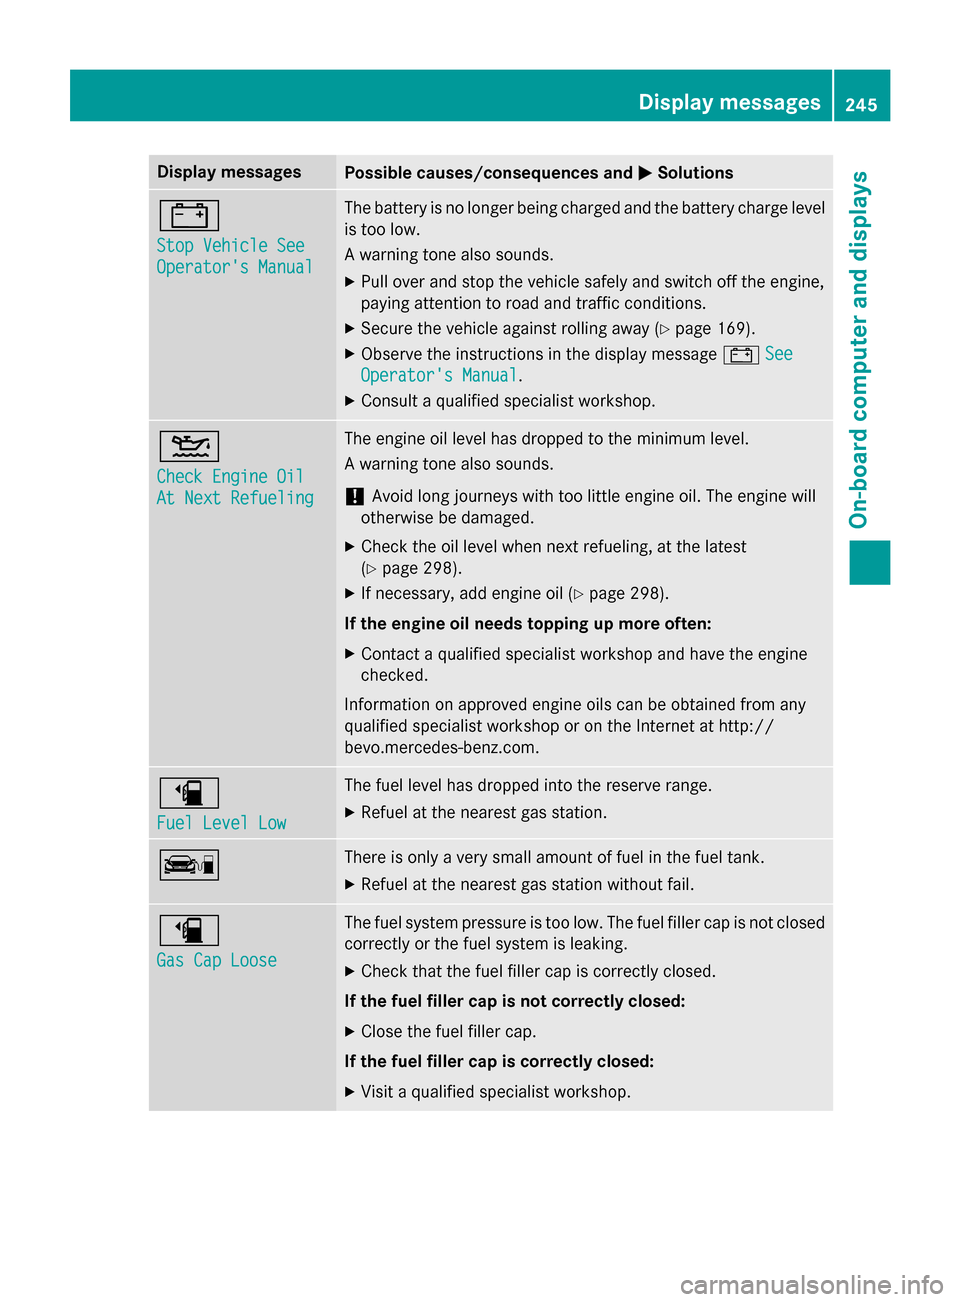
Display messagesPossible causes/consequences andMSolutions
#
StopVehicl eSee
Operator' sManual
The battery is no longer bein gcharged and th ebattery charg elevel
is to olow.
A warnin gtone also sounds.
XPull ove rand stop th evehicl esafely and switch of fth eengine,
payin gattention to roa dand traffic conditions.
XSecur eth evehicl eagainst rollin gaway (Ypage 169).
XObserv eth einstruction sin th edisplay message #See
Operator' sManual.
XConsult aqualified specialist workshop .
4
Check Engine Oil
At NextRefueling
The engin eoil level has dropped to th eminimum level.
A warnin gtone also sounds.
!Avoid lon gjourneys wit hto olittl eengin eoil. The engin ewill
otherwise be damaged.
XChec kth eoil level when next refueling, at th elatest
(
Ypage 298).
XIf necessary, add engin eoil (Ypage 298).
If th eengin eoil need stopping up more often:
XContac t aqualified specialist workshop and hav eth eengin e
checked.
Information on approve dengin eoils can be obtained from any
qualified specialist workshop or on th eInternet at http:/ /
bevo.mercedes-benz.co m.
æ
Fuel Level Low
The fuel level has dropped into the reserve range.
XRefuel at the nearest gas station.
çThere is only a very small amount of fuel in the fuel tank.
XRefuel at the nearest gas station without fail.
æ
Gas Cap Loose
The fuel system pressure is too low. The fuel filler cap is not closed
correctly or the fuel system is leaking.
XCheck that the fuel filler cap is correctly closed.
If the fuel filler cap is not correctly closed:
XClose the fuel filler cap.
If the fuel filler cap is correctly closed:
XVisit a qualified specialist workshop.
Display messages245
On-board computer and displays
Z
Page 301 of 374
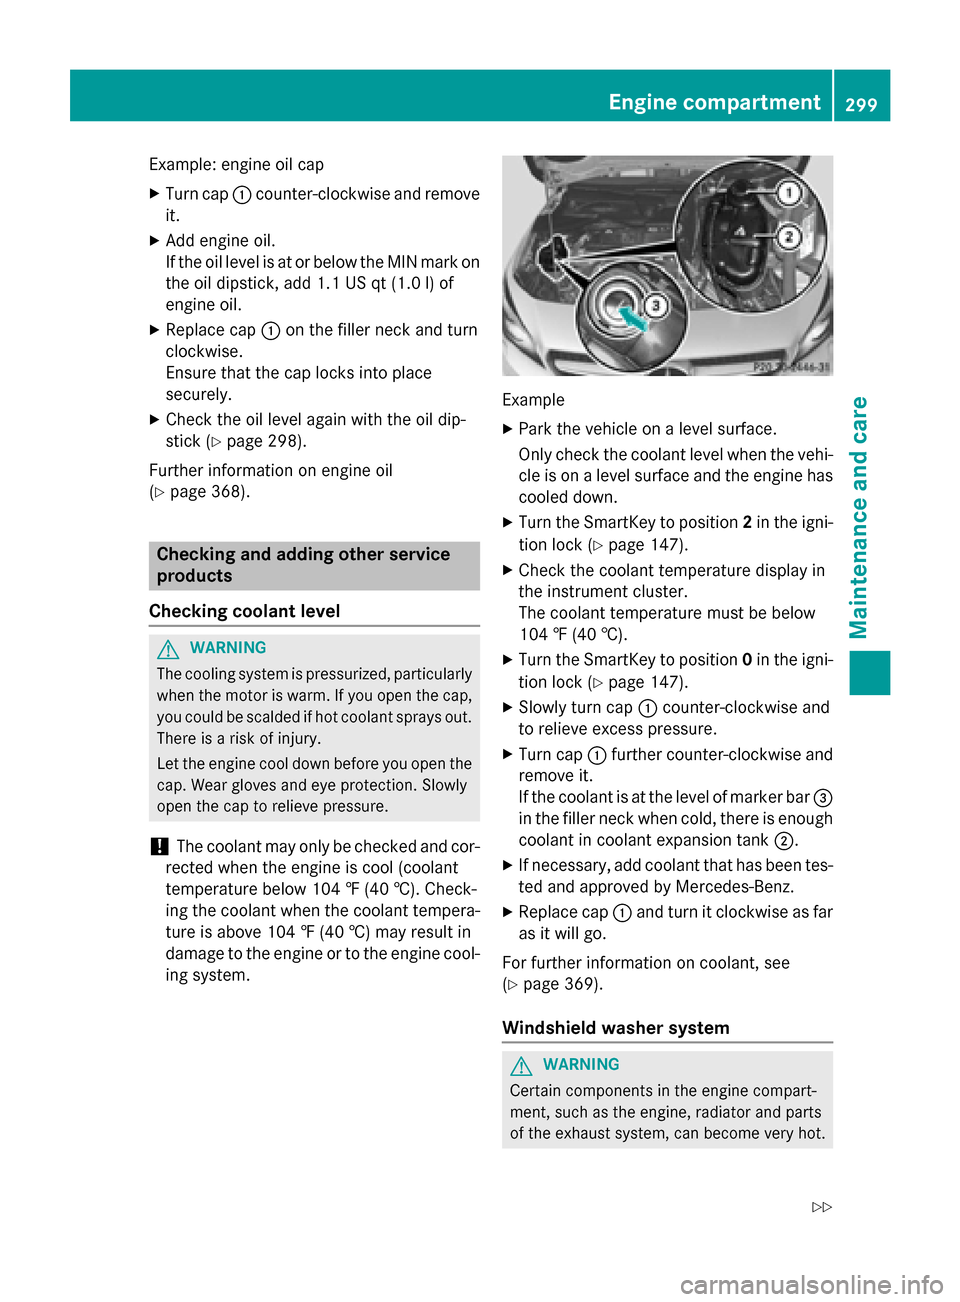
Example: engine oil cap
XTurn cap:counter-clockwise and remove
it.
XAdd engine oil.
If the oil level is at or below the MIN mark on
the oil dipstick, add 1.1 US qt (1.0 l)of
engine oil.
XReplace cap :on the filler neck and turn
clockwise.
Ensure that the cap locks into place
securely.
XCheck the oil level again with the oil dip-
stick (
Ypage 298).
Further information on engine oil
(
Ypage 368).
Checking and adding other service
products
Checking coolant level
GWARNING
The cooling system is pressurized, particularly
when the motor is warm. If you open the cap,
you could be scalded if hot coolant sprays out.
There is a risk of injury.
Let the engine cool down before you open the
cap. Wear gloves and eye protection. Slowly
open the cap to relieve pressure.
!The coolant may only be checked and cor-
rected when the engine is cool (coolant
temperature below 104 ‡ (40 †). Check-
ing the coolant when the coolant tempera-
ture is above 104 ‡ (40 †) may result in
damage to the engine or to the engine cool-
ing system.
Example
XPark the vehicle on a level surface.
Only check the coolant level when the vehi-
cle is on a level surface and the engine has cooled down.
XTurn the SmartKey to position 2in the igni-
tion lock (
Ypage 147).
XCheck the coolant temperature display in
the instrument cluster.
The coolant temperature must be below
104 ‡ (40 †).
XTurn the SmartKey to position 0in the igni-
tion lock (
Ypage 147).
XSlowly turn cap :counter-clockwise and
to relieve excess pressure.
XTurn cap :further counter-clockwise and
remove it.
If the coolant is at the level of marker bar =
in the filler neck when cold, there is enough
coolant in coolant expansion tank ;.
XIf necessary, add coolant that has been tes-
ted and approved by Mercedes-Benz.
XReplace cap:and turn it clockwise as far
as it will go.
For further information on coolant, see
(
Ypage 369).
Windshield washer system
GWARNING
Certain components in the engine compart-
ment, such as the engine, radiator and parts
of the exhaust system, can become very hot.
Engine compartment299
Maintenance and care
Z
Page 305 of 374
Power washers
GWARNING
The water jet from a circular jet nozzle (dirt
blasters) can cause invisible exterior damage
to the tires or chassis components. Compo-
nents damaged in this way may fail unexpect-
edly. There is a risk of an accident.
Do not use power washers with circular jet
nozzles to clean the vehicle. Have damaged
tires or chassis components replaced imme-
diately.
!Always maintain a distance of at least
11.8 in (30 cm) between the vehicle and the
power washer nozzle. Information about
the correct distance is available from the
equipment manufacturer.
Move the power washer nozzle around
when cleaning your vehicle.
Do not aim directly at any of the following:
Rtires
Rdoor gaps, roof gaps, joints, etc.
Relectrical components
Rbattery
Rconnectors
Rlights
Rseals
Rtrim
Rventilation slots
Damaged seals or electrical components
can lead to leaks or failures.
!Edition 1 special model: parts of your
vehicle are covered with a decorative foil.
Maintain a distance of at least 70 cm
between the foil-wrapped parts of the vehi-
cle and the nozzle of the high pressure
cleaner.
Information about the correct distance is
available from the equipment manufac-
turer.
Move the power washer nozzle around
when cleaning your vehicle.
Cleaning the paintwork
!Do not affix:
Rstickers
Rfilms
Rmagnetic plates or similar items
to painted surfaces. You could otherwise
damage the paintwork.
Scratches, corrosive deposits, areas affected
by corrosion and damage caused by inade-
quate care cannot always be completely
repaired. In such cases, visit a qualified spe-
cialist workshop.
XRemove dirt immediately, where possible,
while avoiding rubbing too hard.
XSoak insect remains with insect remover
and rinse off the treated areas afterwards.
XSoak bird droppings with water and rinse
off the treated areas afterwards.
XRemove coolant, brake fluid, tree resin,
oils, fuels and greases by rubbing gently
with a cloth soaked in petroleum ether or
lighter fluid.
XUse tar remover to remove tar stains.
XUse silicone remover to remove wax.
If water no longer forms "beads" on the paint surface, use the paint care products recom-
mended and approved by Mercedes-Benz.
This is the case approximately every three to
five months, depending on the climate con-
ditions and the care product used.
If dirt has penetrated the paint surface or if
the paint has become dull, the paint cleaner
recommended and approved by Mercedes-
Benz should be used.
Do not use these care products in the sun or
on the hood while the hood is hot.
XUse a suitable touch-up stick, e.g. MB
Touch-Up Stick, to repair slight damage to
the paintwork quickly and provisionally.
Care303
Maintenance and care
Z
Page 308 of 374

Cleaning the rear view camera
!Do not clean the camera lens and the area
around the rear view camera with a power
washer.
XMake sure that the vehicle is stationary and that the SmartKey is in position 2in the
ignition lock.
XOpening the camera cover for cleaning with Audio 20 or COMAND; see the separate
operating instructions.
XTo clean the rear view camera: use clear
water and a soft cloth to clean camera
lens :.
Cleaning the exhaust pipes
GWARNING
The exhaust tail pipe and tail pipe trim can
become very hot. If you come into contact
with these parts of the vehicle, you could burn
yourself. There is a risk of injury.
Always be particularly careful around the
exhaust tail pipe and the tail pipe trim. Allow
these components to cool down before touch-
ing them.
!Do not clean the exhaust pipe with acid-
based cleaning agents, such as bathroom
cleaner or wheel cleaner.
!Mercedes-AMG vehicles with black
exhaust pipes: the black-chrome tailpipe
finishers should not be polished with a
chrome polish. They will otherwise lose
their black sheen. For optimal care, the
faceplates should be rubbed with a lightly oiled cloth after every car wash. Commer-
cially available engine and care oils are
suitable for this.
For heavier soiling, you can apply a fine
paintwork polish with a microfiber cloth.
Remove the excess polish residue after pol-
ishing.
Impurities combined with the effects of road
grit and corrosive environmental factors may
cause flash rust to form on the surface. You
can restore the original shine of the exhaust
pipe by cleaning it regularly, especially in win-
ter and after washing.
XClean the exhaust pipe with a care product
tested and approved by Mercedes-Benz.
Interior care
Cleaning the display
!For cleaning, do not use any of the fol-
lowing:
Ralcohol-based thinner or gasoline
Rabrasive cleaning agents
Rcommercially-available household clean-
ing agents
These may damage the display surface. Do not put pressure on the display surface
when cleaning. This could lead to irrepara-
ble damage to the display.
XBefore cleaning the display, make sure thatit is switched off and has cooled down.
XClean the display surface using a commer-
cially available microfiber cloth and
TFT/LCD display cleaner.
XDry the display surface using a dry micro-
fiber cloth.
Cleaning the plastic trim
GWARNING
Care products and cleaning agents containing solvents cause surfaces in the cockpit to
become porous. As a result, plastic parts may
306Care
Maintenance and care
Page 316 of 374

If a pressure of 200 kPa (2.0 bar/29 psi) has
been attained after five minutes, see "Tire
pressure reached" (
Ypage 314).
If a tire pressure of 200 kPa (2.0 bar/29 psi)
has not been attained after five minutes, see
"Tire pressure not reached" (
Ypage 314).
If tire sealant has escaped, clean it off affec-
ted areas as quickly as possible. Use plain
water if possible.
If your clothes are soiled with tire sealant,
have them cleaned with perchloroethylene at
a dry cleaner as soon as possible.
Tire pressure not reached
If a tire pressure of 200 kPa (2.0 bar/29 psi)
has not been attained after ten minutes:
XSwitch off the tire inflation compressor.
XUnscrew the filler hose from the valve of
the faulty tire.
Note that tire sealant may escape when you unscrew the filler hose.
XVery slowly drive forwards or reverse
approximately 30 ft (10 m).
XPump up the tire again.
After a maximum of ten minutes, the tire
pressure must be at least 200 kPa (2.0 bar/29 psi).
GWARNING
If the required tire pressure is not reached
after the specified time, the tire is too badly
damaged. The tire sealant cannot repair the
tire in this instance. Damaged tires and a tire
pressure that is too low can significantly
impair the vehicle's braking and driving char-
acteristics. There is a risk of accident.
Do not continue driving. Contact a qualified
specialist workshop.
Tire pressure reached
GWARNING
A tire temporarily sealed with tire sealant
impairs the driving characteristics and is not
suitable for higher speeds. There is a risk of
accident.
You should therefore adapt your driving style
accordingly and drive carefully. Do not exceed the specified maximum speed with a tire that
has been repaired using tire sealant.
The maximum permissible speed for a tire
sealed with tire sealant is 50 mph (80 km/h). The upper part of the TIREFIT sticker must be
affixed to the instrument cluster in the driv-
er's field of vision.
!Residue from the tire sealant may come
out of the filler hose after use. This could
cause stains.
Therefore, place the filler hose in the plastic
bag which contained the TIREFIT kit.
HEnvironmental note
Have the used tire sealant bottle disposed of
professionally, e.g. at a qualified specialist
workshop.
If a tire pressure of 200 kPa (2.0 bar/29 psi)
has been attained after ten minutes:
XSwitch off the tire inflation compressor.
XUnscrew the filler hose from the valve of
the faulty tire.
XStow the tire sealant bottle and the tire
inflation compressor.
XPull away immediately.
XStop after driving for approximately ten
minutes and check the tire pressure with
the tire inflation compressor.
The tire pressure must now be at least
130 kPa (1.3 bar/19 psi).
GWARNING
If the required tire pressure is not reached
after driving for a short period, the tire is too
badly damaged. The tire sealant cannot repair
the tire in this instance. Damaged tires and a
tire pressure that is too low can significantly
impair the vehicle's braking and driving char-
acteristics. There is a risk of accident.
314Flat tire
Breakdown assistance
Page 352 of 374
Curb weight
The weight of a vehicle with standard equip-
ment including the maximum capacity of fuel,
oil and coolant. It also includes the air-condi-
tioning system and optional equipment if
these are installed in the vehicle, but does not
include passengers or luggage.
Maximum load rating
The maximum tire load is the maximum per-
missible weight in kilograms or lbs for which a
tire is approved.
Maximum permissible tire pressure
Maximum permissible tire pressure for one
tire.
Maximum load on one tire
Maximum load on one tire. This is calculated
by dividing the maximum axle load of one axle
by two.
PSI (pounds per square inch)
A standard unit of measure for tire pressure.
Aspect ratio
Relationship between tire height and tire
width in percent.
Tire pressure
This is pressure inside the tire applying an
outward force to each square inch of the tire's
surface. The tire pressure is specified in
pounds per square inch (psi), in kilopascal
(kPa) or in bar. The tire pressure should only
be corrected when the tires are cold.
Cold tire pressure
The tires are cold:
Rif the vehicle has been parked with the tires
out of direct sunlight for at least three
hours and
Rif the vehicle has not been driven further
than 1 mile (1.6 km) Tread
The part of the tire that comes into contact
with the road.
Bead
The tire bead ensures that the tire sit
s
securely on t
he wheel. There are several steel
wires in the bead to prevent the tire from
coming loose from the wheel rim.
Sidewall
The part of the tire between the tread and the bead.
Weight of optional extras
The combined weight of those optional extras
that weigh more than the replaced standard
parts and more than 2.3 kg (5 lbs). These
optional extras, such as high-performance
brakes, level control, a roof rack or a high-
performance battery, are not included in the
curb weight and the weight of the accesso-
ries.
TIN (Tire Identification Number)
This is a unique identifier which can be used
by a tire manufacturer to identify tires, for
example for a product recall, and thus identify
the purchasers. The TIN is made up of the
manufacturer's identity code, tire size, tire
type code and the manufacturing date.
Load bearing index
The load bearing index (also load index) is a
code that contains the maximum load bearing
capacity of a tire.
Traction
Traction is the result of friction between the
tires and the road surface.
Treadwear indicators
Narrow bars (tread wear bars) that are dis-
tributed over the tire tread. If the tire tread is
level with the bars, the wear limit of áin
(1.6 mm) has been reached.
350All about wheels and tires
Wheels and tires
Page 353 of 374
Occupant distribution
The distribution of occupants in a vehicle at
their designated seating positions.
Total load limit
Nominal load and luggage load plus 68 kg
(150 lbs) multiplied by the number of seats in
the vehicle.
Changing a wheel
Flat tire
The "Breakdown assistance" section
(
Ypage 310) contains information and notes
on how to deal with a flat tire. Information on driving with MOExtended tires in the event of
a flat tire can be found under "MOExtended
tires (tires with run-flat characteristics"
(
Ypage 311).
Rotating the wheels
GWARNING
Interchanging the front and rear wheels may
severely impair the driving characteristics if
the wheels or tires have different dimensions. The wheel brakes or suspension components
may also be damaged. There is a risk of acci-
dent.
Rotate front and rear wheels only if the wheels and tires are of the same dimensions.
!On vehicles equipped with a tire pressure
monitor, electronic components are loca-
ted in the wheel.
Tire-mounting tools should not be used
near the valve. This could damage the elec- tronic components.
Only have tires changed at a qualified spe-
cialist workshop.
Observe the instructions and safety notes in
the "Changing a wheel" section (
Ypage 351).
The wear patterns on the front and rear tires
differ, depending on the operating conditions.
Rotate the wheels before a clear wear pattern has formed on the tires. Front tires typically
wear more on the shoulders and the rear tires
in the center.
On vehicles that have the same size front and
rear wheels, you can rotate the wheels
according to the intervals in the tire manu-
facturer's warranty book in your vehicle docu-
ments. If no warranty book is available, the
tires should be rotated every 3,000 to
6,000 miles (5,000 to 10,000 km). Depending
on tire wear, this may be required earlier. Do
not change the direction of wheel rotation.
Clean the contact surfaces of the wheel and
the brake disc thoroughly every time a wheel
is rotated. Check the tire pressure and, if nec-
essary, restart the tire pressure loss warning
system or the tire pressure monitor.
Direction of rotation
Tires with a specified direction of rotation
have additional benefits, e.g. if there is a risk of hydroplaning. These advantages can only
be gained if the tires are installed correspond-
ing to the direction of rotation.
An arrow on the sidewall of the tire indicates its correct direction of rotation.
Storing wheels
Store wheels that are not being used in a cool,
dry and preferably dark place. Protect the
tires from oil, grease, gasoline and diesel.
Mounting a wheel
Preparing the vehicle
XStop the vehicle on solid, non-slippery and
level ground.
XApply the electric parking brake manually.
XBring the front wheels into the straight-
ahead position.
XShift the transmission to position P.
XSwitch off the engine.
Changing a wheel351
Wheels and tires
Z