navigation MERCEDES-BENZ CLA-Class 2017 C117 Comand Manual
[x] Cancel search | Manufacturer: MERCEDES-BENZ, Model Year: 2017, Model line: CLA-Class, Model: MERCEDES-BENZ CLA-Class 2017 C117Pages: 202, PDF Size: 6.35 MB
Page 109 of 202
creates an address book entry that includes the
complete navigable address data.
XCall up the address book (Ypage 106).
XTo switch to the menu bar: slide6the con-
troller.
XTo select New: turn and press the controller.
The surname and first name input lines are
displayed.
XEnter characters using the controller
(Ypage 29 )or the number keypad, for exam-
ple.
XTo save the surname and first name: select
b.
The details for the contact are displayed.
XTo add a desired entry (e.g. Add E-MailAddress): turn and press the controller.
Depending on the type of entry, the corre-
sponding input menu appears.
XEnter characters using the controller
(Ypage 29) or the number keypad, for exam-
ple.
XTo finish and save an entry: select b.
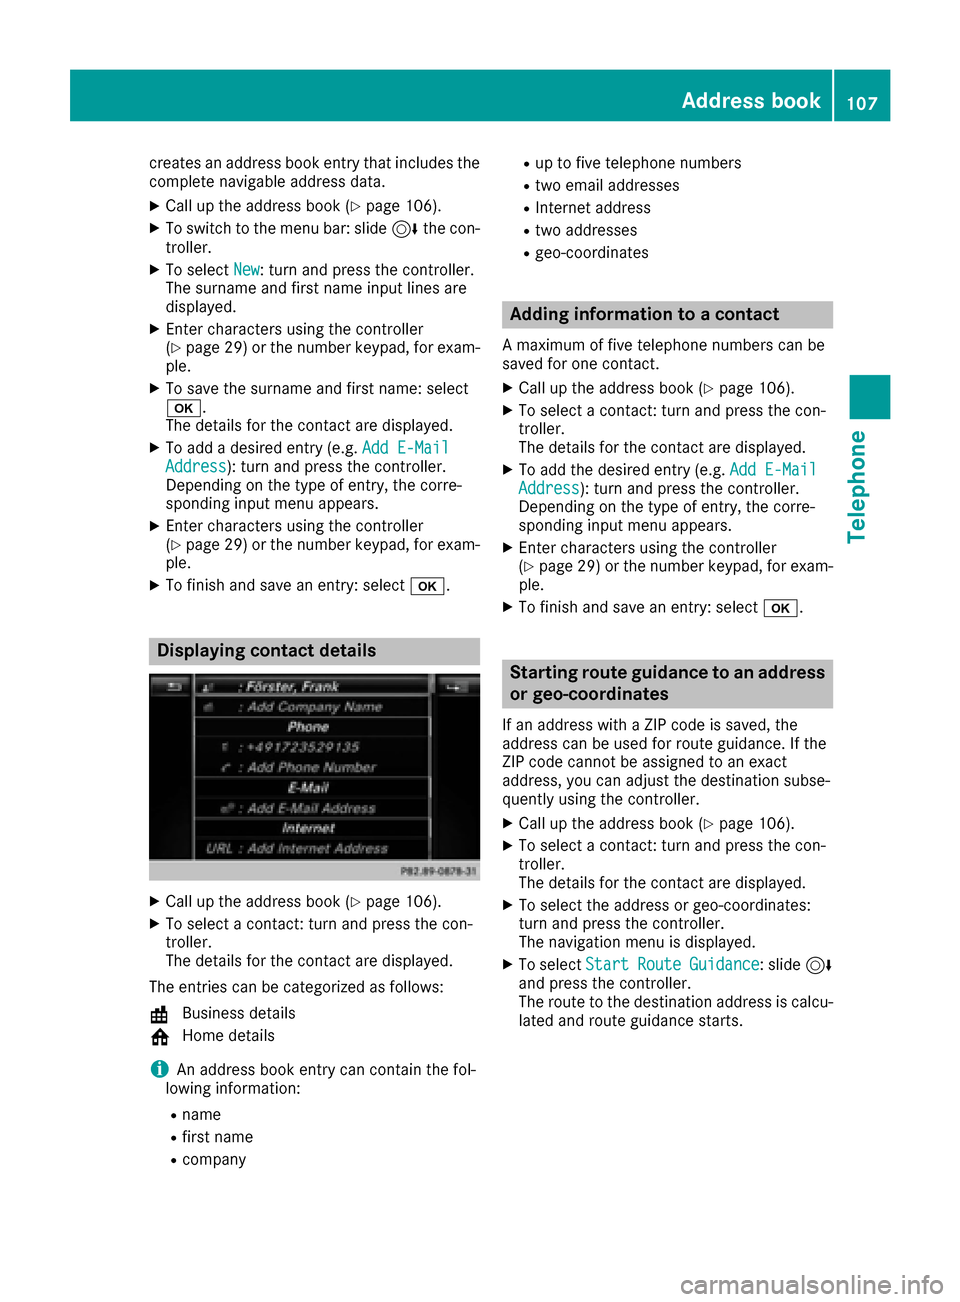
Displaying contact details
XCall up the address book (Ypage 106).
XTo select a contact: turn and press the con-
troller.
The details for the contact are displayed.
The entries can be categorized as follows:
\ Business details
6 Home details
iAn address book entry can contain the fol-
lowing information:
Rname
Rfirst name
Rcompany
Rup to five telephone numbers
Rtwo email addresses
RInternet address
Rtwo addresses
Rgeo-coordinates
Adding information to a contact
A maximum of five telephone numbers can be
saved for one contact.
XCall up the address book (Ypage 106).
XTo select a contact: turn and press the con-
troller.
The details for the contact are displayed.
XTo add the desired entry (e.g. Add E-MailAddress): turn and press the controller.
Depending on the type of entry, the corre-
sponding input menu appears.
XEnter characters using the controller
(Ypage 29) or the number keypad, for exam-
ple.
XTo finish and save an entry: select b.
Starting route guidance to an address
or geo-coordinates
If an address with a ZIP code is saved, the
address can be used for route guidance. If the
ZIP code cannot be assigned to an exact
address, you can adjust the destination subse-
quently using the controller.
XCall up the address book (Ypage 106).
XTo select a contact: turn and press the con-
troller.
The details for the contact are displayed.
XTo select the address or geo-coordinates:
turn and press the controller.
The navigation menu is displayed.
XTo selectStartRouteGuidance: slide6
and press the controller.
The route to the destination address is calcu-
lated and route guidance starts.
Address book107
Telephone
Z
Page 113 of 202
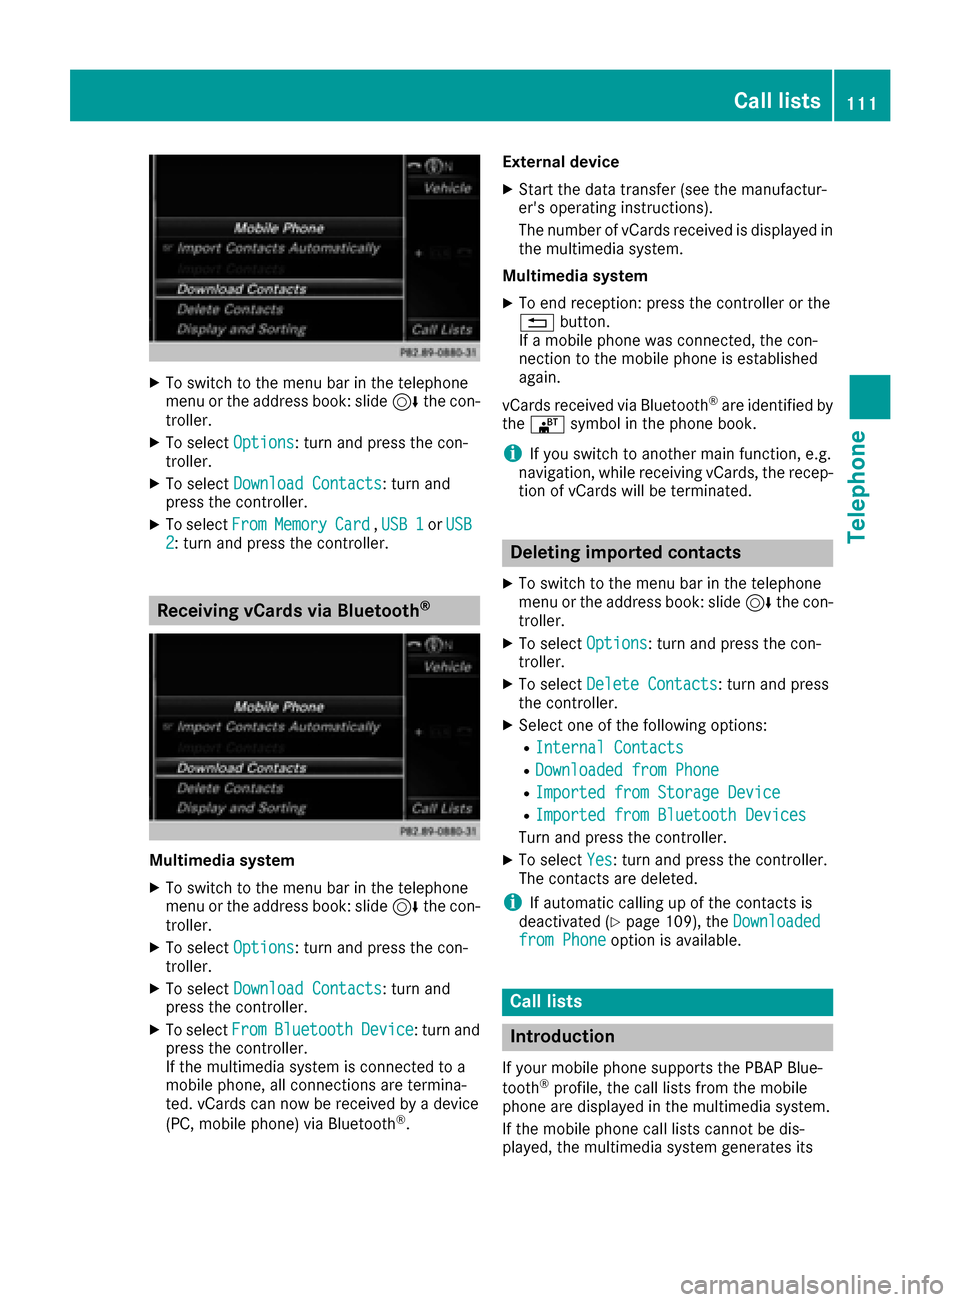
XTo switch to the menu bar in the telephone
menu or the address book: slide6the con-
troller.
XTo select Options: turn and press the con-
troller.
XTo select Download Contacts: turn and
press the controller.
XTo select FromMemoryCard,USB 1or USB2: turn and press the controller.
Receiving vCards via Bluetooth®
Multimedia system
XTo switch to the menu bar in the telephone
menu or the address book: slide 6the con-
troller.
XTo select Options: turn and press the con-
troller.
XTo select Download Contacts: turn and
press the controller.
XTo select FromBluetoothDevice: turn and
press the controller.
If the multimedia system is connected to a
mobile phone, all connections are termina-
ted. vCards can now be received by a device
(PC, mobile phone) via Bluetooth
®. External device
XStart the data transfer (see the manufactur-
er's operating instructions).
The number of vCards received is displayed in
the multimedia system.
Multimedia system
XTo end reception: press the controller or the
% button.
If a mobile phone was connected, the con-
nection to the mobile phone is established
again.
vCards received via Bluetooth
®are identified by
the ® symbol in the phone book.
iIf you switch to another main function, e.g.
navigation, while receiving vCards, the recep-
tion of vCards will be terminated.
Deleting imported contacts
XTo switch to the menu bar in the telephone
menu or the address book: slide 6the con-
troller.
XTo select Options: turn and press the con-
troller.
XTo select Delete Contacts: turn and press
the controller.
XSelect one of the following options:
RInternal Contacts
RDownloaded from Phone
RImported from Storage Device
RImported from Bluetooth Devices
Turn and press the controller.
XTo select Yes: turn and press the controller.
The contacts are deleted.
iIf automatic calling up of the contacts is
deactivated (Ypage 109), the Downloadedfrom Phoneoption is available.
Call lists
Introduction
If your mobile phone supports the PBAP Blue-
tooth®profile, the call lists from the mobile
phone are displayed in the multimedia system.
If the mobile phone call lists cannot be dis-
played, the multimedia system generates its
Call lists111
Telephone
Z
Page 123 of 202
Calling up text messages or e-mails in
the message menu
XTo call up the telephone menu: press the
%button.
XTo switch to the menu bar: slide 6the con-
troller.
XTo select 1: turn and press the controller.
The message menu is displayed.
XTo switch to the menu bar: slide 6the con-
troller.
XTo select New: turn and press the controller.
XTo selectText MessageorE-Mail: turn and
press the controller.
The input menu for the message is displayed.
Calling up and using the dictation
function
XSelect the omicrophone.
The app for the dictation function is loaded.
If there was no prior Internet connection, a
connection is now established.
XTo start the dictation function: press the
controller.
XSay your message.
The dictation ends automatically after you
have finished speaking.
After the spoken message has been pro-
cessed, it is shown as text on the display.
XTo select words: turn and press the control-
ler.
XIn the correction menu, you can:
Radjust capitalization of words (if supported
by the character set)
Radd words
Rdelete words
Rreplace the dictated message with a new
one
XTo exit the menu: selectDone.
Send message
The dictated text is displayed in the message
input window.
XEnter the telephone number or e-mail address
into the addressee line.
XTo send the message: select OK.
Apple CarPlay™
Introduction
iPhone®functions can be used via the multime-
dia system using Apple CarPlay™. Apple Car-
Play™ can be operated using the controller or
Siri
®voice-operated control system. Whether
selected buttons are supported in the vehicle
depends on the iOS version of the mobile phone
and the apps available. You will find an overview
of the multimedia system's control panel and
available buttons here (
Ypage 18).
To activate voice-operated control, press and
hold the óbutton on the multifunction steer-
ing wheel (
Ypage 101). Apple CarPlay™ is only
available for Apple®mobile phones (see the
manufacturer's operating instructions). The
availability of Apple CarPlay™ may vary by coun- try.
During Apple CarPlay™ use, various multimedia
system functions, such as navigation, are not
available.
The provider is responsible for its application
and related services and content.
Requirements
RApple CarPlay™ is available from the iPhone®
5. Mercedes-Benz recommends that you use
the latest operating system on the iPhone®.
RYou require a connector cable for the
iPhone®.
RThe full range of functions for Apple CarPlay™
is only possible when the Apple CarPlay™-
capable mobile phone is connected to the
Internet.
Connecting the iPhone®with the mul-
timedia system
In order to be able to use Apple CarPlay™, a
connection must be established between the
iPhone
®and the multimedia system.
XConnect the iPhone®via a connection cable
to the USB port ç.
The first time you connect an Apple CarPlay™-
capable mobile phone to the multimedia sys-
tem or switch between Apple CarPlay™-capa-
ble mobile phones, a prompt appears asking
Apple CarPlay™121
Telephone
Z
Page 124 of 202
whether you want future activation to be auto-
matic or manual.
Activating Apple CarPlay™
Automatic activation
XTo selectAuto: press the controller.
Apple CarPlay™ will start automatically each
time a connection has been established
between the iPhone
®and the multimedia sys-
tem.
Manual activation
XTo call up the telephone menu: press the
% button.
XTo show the main function bar: slide 5the
controller.
XTo select Tel/®: turn and press the control-
ler.
XSelect Apple CarPlay.
Apple CarPlay™ starts.
iDepending on the operating status, not all of
the steps may be necessary. A message to
start Apple CarPlay™ appears on the display.
Confirm this.
Changing the activation type
You can change the activation type when the
phone is no longer connected to the multimedia
system.
XTo call up the telephone menu: press the
% button.
XTo display the main function bar: slide 5the
controller.
XTo select Tel/®: turn and press the control-
ler.
XSelect Apple CarPlay.
XTo show the menu bar: slide 6the control-
ler.
XSelect Options.
XDeactivate ªor activate OStart AppleCarPlay Automatically.
Ending Apple CarPlay™ mode
XRemove the connection cable from the USB
port ç.
The No Apple CarPlay Device Connec‐
ted Please ensure that your deviceisconnectedtothecorrectUSBport.message appears.
Transmitted vehicle data
When using Android CarPlay™, specific vehicle
data are transmitted to the mobile phone. This
makes it possible to use selected mobile phone
services efficiently. The mobile phone does not
have active access to vehicle data.
System information
RVehicle model
RVehicle year of manufacture
RMultimedia system software version
These data are transmitted in order to optimize
communication between the vehicle and mobile
phone.
A random vehicle code is generated for this pur-
pose and in order to assign multiple vehicles to
the mobile phone.
This code is not related to the vehicle identifi-
cation number (VIN) and is deleted if the multi-
media system is reset (
Ypage 43).
Driving status data
RGear position engaged
RDifference between parked, stationary,
coasting and driving
RInstrument cluster day/night mode
These data are transmitted in order to adapt the
content displayed to the driving situation.
Position data
RGPS coordinates
RSpeed
RCompass direction
RAcceleration direction
RGyroscopic effects
These data are transmitted only when naviga-
tion is active in order to improve navigation (e.g.
when driving through a tunnel).
If you do not wish to have your vehicle data
transmitted, you can deactivate automatic start-
ing of Android CarPlay™ (
Ypage 122) and
122Apple CarPlay™
Telephone
Page 125 of 202
briefly terminate the mobile phone's USB con-
nection to the vehicle.
Android Auto™
Introduction
Functions on mobile phones with the Android™
operating system can be used with Android
Auto™:
RAndroid Auto™-capable apps from the mobile
phone are shown in the multimedia system.
RAudio content from the mobile phone is
played back in the multimedia system.
Only one mobile phone at a time can be con-
nected to the multimedia system via Android
Auto™.
Various multimedia system functions such as
the navigation system are not available while
using Android Auto™.
The availability of Android Auto™ and Android
Auto™ apps may vary by country.
The provider is responsible for its application
and related services and content.
Connecting a mobile phone via
Android Auto™
Requirements:
RFor safety reasons, the first time Android
Auto™ is activated on the multimedia system,
the vehicle must be stationary.
RThe mobile phone supports Android Auto™
from Android™ 5.0.
RThe Android Auto™ app is installed on the
mobile phone.
RIn order to use the telephone functions, a
mobile phone needs to be connected with the
multimedia system via Bluetooth
®.
RThe full range of functions for Android Auto™
is only possible with an Internet connection.
RThe mobile phone is connected to the USB
port ç on the multimedia system via a USB
cable.
The multimedia system automatically estab-
lishes a connection to the mobile phone via
Bluetooth
®. If this is unsuccessful, an error mes-
sage will appear. In this case, you should con-
nect the mobile phone manually via Bluetooth
®
(Ypage 93). Starting Android Auto™
Multimedia system
XTo call up the telephone menu: press the
%
button.
XTo show the main function bar: slide 5the
controller.
XTo select Tel/®: turn and press the control-
ler.
XTo select Android Auto: turn and press the
controller.
You see a message informing you that no
Android Auto™ device is connected.
Mobile phone
XConnect the mobile phone to the USB port
ç in the center console.
When activated manually a message appears
on the display of the multimedia system when
Android Auto™ is started.
XTo confirm the message: press the controller.
The Android Auto™ app is shown in the mul-
timedia system display.
Setting up automatic connection
XTo call up the telephone menu: press the
% button.
XTo display the main function bar: slide 5the
controller.
XTo select Tel/®: turn and press the control-
ler.
XTo select Android Auto: turn and press the
controller.
XTo switch to the menu bar: slide 6the con-
troller.
XTo select Options: turn and press the con-
troller.
XTo select Start Android Auto Automati‐cally: turn and press the controller.
XAllow automatic connection O.
Android Auto™ starts automatically as soon
as the mobile phone is connected to the USB
port ç of the multimedia system.
Calling up the sound settings for
Android Auto™
If Android Auto™ is active, you can change the
sound settings in the radio menu.
Android Auto™123
Telephone
Z
Page 126 of 202
XTo call up the radio menu: press the$
button.
XTo show the main function bar: slide 5the
controller.
XTo select Radio: turn and press the controller.
XTo switch to the menu bar: slide 6the con-
troller.
XTo select à: turn and press the controller.
Change the sound settings.
Activating the voice control system
for Android Auto™
If Android Auto™ is active, you can start the
mobile phone's voice control system.
XPress and hold the ?button on the multi-
function steering wheel.
Depending on the mobile phone a tone
sounds.
Ending Android Auto™
XTerminate the USB connection between the
mobile phone and the multimedia system.
The No
AndroidAutoDeviceConnectedPlease ensure that your device isconnected to the correct USB port.message appears in the multifunction display
Transmitted vehicle data
When using Android Auto™, specific vehicle
data are transmitted to the mobile phone. This
makes it possible to use selected mobile phone
services efficiently. The mobile phone does not
have active access to vehicle data.
System information
RVehicle model
RVehicle year of manufacture
RMultimedia system software version
These data are transmitted in order to optimize
communication between the vehicle and mobile
phone.
A random vehicle code is generated for this pur-
pose and in order to assign multiple vehicles to
the mobile phone.
This code is not related to the vehicle identifi-
cation number (VIN) and is deleted if the multi-
media system is reset (
Ypage 43). Driving status data
RGear position engaged
RDifference between parked, stationary,
coasting and driving
RInstrument cluster day/night mode
These data are transmitted in order to adapt the
content displayed to the driving situation.
Position data
RGPS coordinates
RSpeed
RCompass direction
RAcceleration direction
RGyroscopic effects
These data are transmitted only when naviga-
tion is active in order to improve navigation (e.g.
when driving through a tunnel).
If you do not wish to have your vehicle data
transmitted, you can deactivate automatic start-
ing of Android Auto™ (
Ypage 123) and briefly
terminate the mobile phone's USB connection
to the vehicle.
124Android Auto™
Telephone
Page 149 of 202
Selecting an active partition
XSelect a USB storage device (Ypage 144).
XTo selectOptionsin the media menu bar:
turn and press the controller.
XSelect Select Active Partition.
Notes on copyright
Audio/video files that you create or reproduce
yourself for playback are generally subject to
copyright protection.
In many countries, reproductions, even for pri-
vate use, are not permitted without the prior
consent of the copyright holder.
Make sure that you know about the applicable
copyright regulations and that you comply with
these.
Notes on CDs/DVDs
!Do not affix stickers or labels to the discs.
They could peel off and damage the drive.
The drive is designed to receive EN 60908 standard discs. Therefore, you can
only use discs with a maximum thickness of
1.3 mm.
If you insert thicker discs, e.g. those that con-
tain data on both sides (DVD on one side and
audio data on the other), they cannot be ejec-
ted and can damage the drive.
Do not use discs with an 8 cm diameter, even
when using an adapter. Only use round discs
with a 12 cm diameter.
Discs with copy protection are not compatible
with the audio CD standard and therefore may
not be able to be played.
Playback problems may occur when playing
copied discs.
There may be playback problems if you play CDs
that you have copied yourself with a storage
capacity of more than 700 MB.
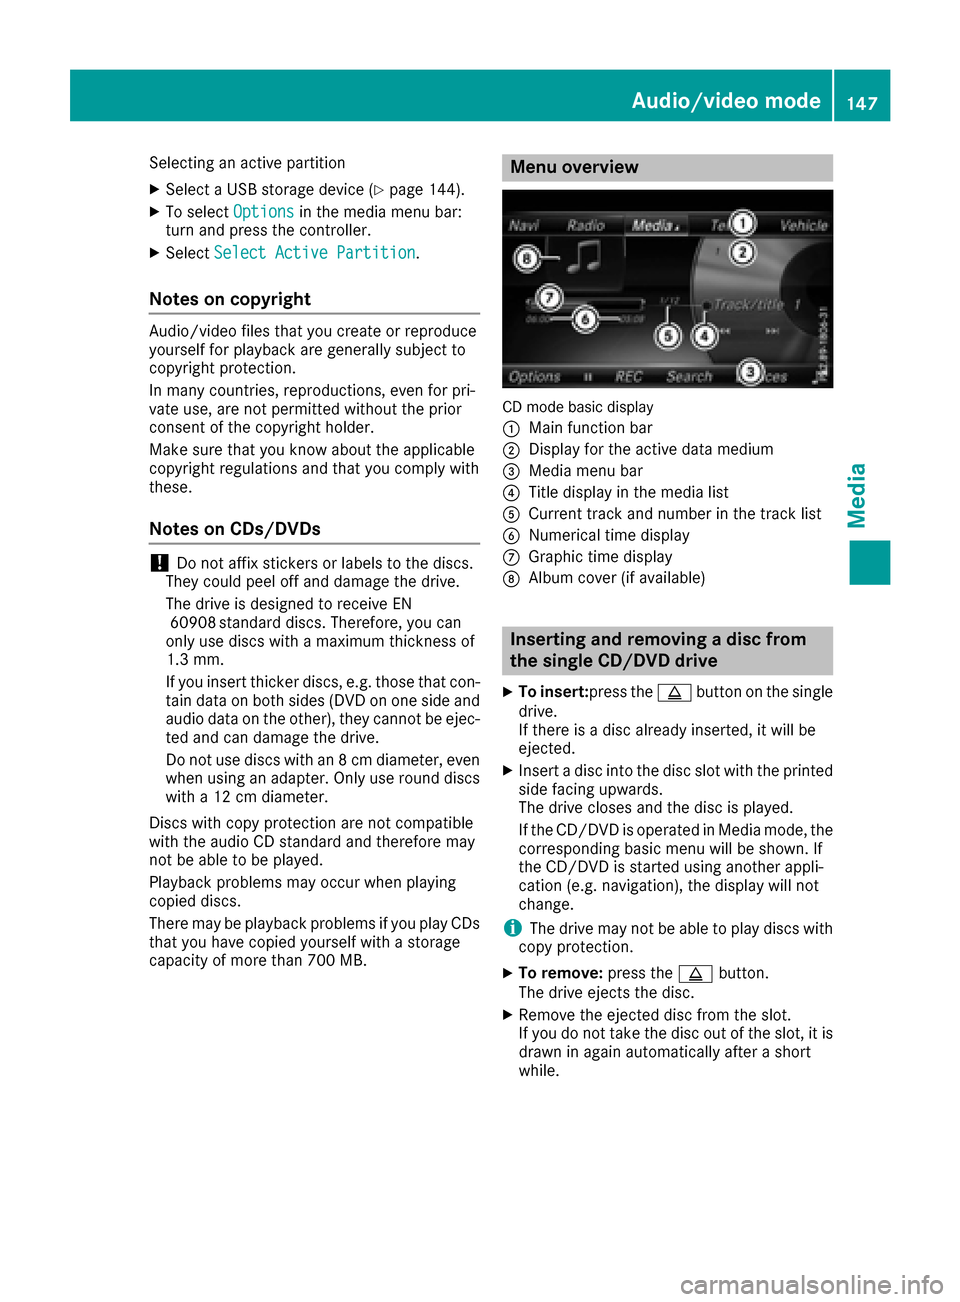
Menu overview
CD mode basic display
:
Main function bar
;Display for the active data medium
=Media menu bar
?Title display in the media list
ACurrent track and number in the track list
BNumerical time display
CGraphic time display
DAlbum cover (if available)
Inserting and removing a disc from
the single CD/DVD drive
XTo insert:press the þbutton on the single
drive.
If there is a disc already inserted, it will be
ejected.
XInsert a disc into the disc slot with the printed
side facing upwards.
The drive closes and the disc is played.
If the CD/DVD is operated in Media mode, the
corresponding basic menu will be shown. If
the CD/DVD is started using another appli-
cation (e.g. navigation), the display will not
change.
iThe drive may not be able to play discs with
copy protection.
XTo remove: press theþbutton.
The drive ejects the disc.
XRemove the ejected disc from the slot.
If you do not take the disc out of the slot, it is drawn in again automatically after a short
while.
Audio/video mode147
Media
Z
Page 194 of 202
Fast forwarding/rewinding
XPress and hold theE orF buttonon
th eremot econtrol until th edesired position
has been reached.
You see th econtrol menu.
Pause function
XTo show th emenu: press th e9 butto non
th eremot econtrol .
XTo pause playback: selectËand press
th e9 butto nto confirm .
The Ë display changes to Ì.
XTo continueplayback: selectÌand
press th e9 butto nto confirm .
The men uis hidden .
Stop function
XTo show th emenu: press th e9 butto non
th eremot econtrol .
XTo interrup tplayback: selectÉand
press th e9 butto nto confirm .
The Ë display changes to Ì.The vide o
imag eis hidden .
XTo continu eplayback: selectÌand
press th e9 butto nto confirm .
Playbac kcontinue sfrom th epoin twher eit
was interrupted. The men uis hidden .
XTo stop playback: while playbackis inter-
rupted, select Éagain and press th e9
butto nto confirm .
Playbac kstops and return sto th ebeginning
of th eDVD. Ì is highlighted.
XTo restart playback: selectÌand press
th e9 butto nto confirm .
Playbac kstart sfrom th ebeginning of th e
DVD.
Selecting a scene/chapter
Skipping forwards/backwards
XPress th e= or; buttonon th eremot e
control .
or
XPress th eE orF button.
The navigation men u (Ypage 191) appears
for approximately eigh tseconds.
Selecting a scene/chapter directly
The example sillustrat ehow to select scen eor
chapter 5.
XOptio n1: while th efilm is playing, press th e
h buttonon th eremot econtrol .
XPressabutton, suc has ¿.
XOptio n2: press th e9 butto non th eremot e
control .
XSelectDVD-Videoand press th e9 butto nto
confirm .
XSelectDVDFunctionsand press th e9 but -
to nto confirm .
XSelectScene Selectionand press th e9
butto nto confirm .
XSelectth e¿ digit usin gth e9 or:
butto nand press th e9 butto nto confirm .
In bot hcases, playbac kwill begi nfrom th e5t h
scen eor chapter after abrie fpause .
Selecting a film/track
XOption1: press th e9 butto non th eremot e
control .
XSelectDVD-Videoand press th e9 butto nto
confirm .
XSelectDVDFunctionsand press th e9 but -
to nto confirm .
XSelectTitle Selectionand press th e9
butto nto confirm .
XPress the9 butto nto select th elist .
XSelec t afilm or atitle.
XOptio n2: to select film 2, for example, press
th e· buttonon th eremot econtrol .
Afte r abrie fpause ,th esecon dfilm is played.
192Video DVD mode
Rear Seat Entertainment System