tire type MERCEDES-BENZ CLA-Class 2017 C117 Owner's Manual
[x] Cancel search | Manufacturer: MERCEDES-BENZ, Model Year: 2017, Model line: CLA-Class, Model: MERCEDES-BENZ CLA-Class 2017 C117Pages: 318, PDF Size: 8.02 MB
Page 14 of 318
Readinglamp ................................ .102
iPod®
see also Digital Operator's Man-
ual ..................................................2 27
J
Jack
Storage location ............................ 266
Using ............................................. 303
Jump starting (engine) ......................273
K
Key positions
Start/Stop button .......................... 121
KEYLESS-GO
Convenience closing feature ............ 82
Deactivation ..................................... 70
Locking ............................................ 70
Unlocking ......................................... 70
Kickdown
Driving tips ....................................1 33
Manual gearshifting ....................... 137
Knee bag .............................................. 45
L
Lamps
see Warning and indicator lamps
Lane Keeping Assist
Activating/deactivating (on-
board computer) ............................ 183
Display message ............................ 205
Function/information .................... 172
Lane Tracking package ..................... 171
Lap time (RACETIMER) ...................... 186
LATCH-type (ISOFIX) child seat
anchors ................................................ 56
License plate lamp (display mes-
sage) ................................................... 200
Light function, active
Display message ............................ 201
Light sensor (display message) ....... 201
Lights
Adaptive Highbeam Assist ............. 101
Automatic headlamp mode .............. 99
Fogged up headlamps .................... 102
Hazard warning lamps ................... 101 High beam flasher .......................... 100
High-beam headlamps ................... 100
Light switch ..................................... 99
Low-beam headlamps .................... 100
Parking lamps ................................ 100
Rear fog lamp ................................ 100
Setting exterior lighting ................... 99
Standing lamps .............................. 100
Switching the daytime running
lamps on/off (on-board com-
puter) ............................................. 184
Turn signals ................................... 100
Loading guidelines ............................ 233
Locking
see Central locking
Locking (doors)
Automatic ........................................ 76
Emergency locking ........................... 76
From inside (central locking but-
ton) .................................................. 75
Locking centrally
see Central locking
Locking verification signal (on-
board computer) ............................... 185
Low-beam headlamps
Display message ............................ 199
Replacing bulbs ............................. 104
Switching on/off ........................... 100
Lumbar support
Adjusting the 4-way lumbar sup-
port .................................................. 92
M
M+S tires ............................................ 284
Malfunction message
see Display messages
Matte finish (cleaning instruc-
tions) .................................................. 261
mbrace
Call priority .................................... 245
Display message ............................ 194
Downloading destinations
(COMAND) ..................................... 245
Downloading routes ....................... 248
Emergency call .............................. 243
General notes ................................ 242
Geo fencing ................................... 248
12Index
Page 21 of 318
General notes ................................ 289
Important safety notes .................. 290
Radio type approval for the tire
pressure monitor ...........................292
Restarting ...................................... 291
Warning lamp ................................. 226
Warning message .......................... 291
TIREFIT kit .......................................... 268
Important safety notes .................. 268
Storage location ............................ 266
Tire pressure not reached .............. 269
Tire pressure reached .................... 270
Tires
Aspect ratio (definition) ................. 301
Average weight of the vehicle
occupants (definition) .................... 299
Bar (definition) ............................... 299
Changing a wheel .......................... 301
Characteristics .............................. 299
Checking ........................................ 282
Curb weight (definition) ................. 300
Definition of terms ......................... 299
Direction of rotation ...................... 302
Display message ............................ 209
Distribution of the vehicle occu-
pants (definition) ............................ 301
DOT (Department of Transporta-
tion) (definition) ............................. 299
DOT, Tire Identification Number
(TIN) ............................................... 299
GAWR (Gross Axle Weight Rating)
(definition) ..................................... 300
General notes ................................ 306
GVW (Gross Vehicle Weight) (def-
inition) ........................................... 300
GVWR (Gross Vehicle Weight Rat-
ing) (definition) .............................. 300
Important safety notes .................. 282
Increased vehicle weight due to
optional equipment (definition) ...... 300
Information on driving .................... 282
Kilopascal (kPa) (definiti on) ........... 300
La
beling (overview) ........................ 296
Load bearing index (definition) ...... 301
Load index ..................................... 298
Load index (definition) ................... 300
M+S tires ....................................... 284 Maximum load on a tire (defini-
tion) ............................................... 300
Maximum loaded vehicle weight
(definition) ..................................... 300
Maximum permissible tire pres-
sure (definition) ............................. 300
Maximum tire load ......................... 298
Maximum tire load (definition) ....... 300
MOExtended tires .......................... 284
Optional equipment weight (defi-
nition) ............................................ 301
PSI (pounds per square inch) (def-
inition) ........................................... 301
Replacing ....................................... 301
Service life ..................................... 283
Sidewall (definition) ....................... 301
Speed rating (definition) ................ 300
Storing ........................................... 302
Structure and characteristics
(definition) ..................................... 299
Summer tires ................................. 284
Temperature .................................. 296
TIN (Tire Identification Number)
(definition) ..................................... 301
Tire bead (definition) ...................... 301
Tire pressure (definition) ................ 301
Tire pressures (recommended) ...... 300
Tire size (data) ............................... 306
Tire size designation, load-bearing
capacity, speed rating .................... 296
Tire tread ....................................... 283
Tire tread (definition) ..................... 301
Total load limit (definition) ............. 301
Traction ......................................... 295
Traction (definition) ....................... 301
Tread wear ..................................... 295
Uniform Tire Quality Grading
Standards ...................................... 295
Uniform Tire Quality Grading
Standards (definition) .................... 300
Wear indicator (definition) ............. 301
Wheel rim (definition) .................... 300
see Fla
t ti
re
Top Tether ............................................ 56
Tow-starting
Emergency engine starting ............ 279
Important safety notes .................. 276
Installing the towing eye ................ 277
Index19
Page 23 of 318
Vehicle dimensions........................... 314
Vehicle emergency locking ................ 76
Vehicle identification number
see VIN
Vehicle identification plate .............. 308
Vehicle tool kit .................................. 266
Ventilation
Setting the vents ........................... 119
Video
Operating the DVD ......................... 180
see also Digital Operator's Man-
ual .................................................. 227
VIN
Seat ............................................... 309
Type plate ...................................... 308
W
Warning and indicator lampsABS ................................................ 218
Active Brake Assist ........................ 225
Brakes ........................................... 217
Check Engine ................................. 222
Coolant .......................................... 223
Distance warning ........................... 225
ESP
®.............................................. 219
ESP®OFF ....................................... 220
Fuel tank ........................................ 222
Overview .......................................... 32
PASSENGER AIR BAG ...................... 40
Reserve fuel ................................... 222
Restraint system ............................ 222
Seat belt ........................................ 216
SPORT handling mode ................... 220
Tire pressure monitor .................... 226
Warranty .............................................. 24
Washer fluid
Display message ............................ 214
Weather display (COMAND)
see also Digital Operator's Man-
ual .................................................. 227
Wheel and tire combinations
Tires ............................................... 306
Wheel bolt tightening torque ........... 305
Wheel chock ...................................... 302
Wheels
Changing a wheel .......................... 301
Checking ........................................ 282 Cleaning ......................................... 261
Important safety notes .................. 282
Information on driving .................... 282
Interchanging/changing ................ 301
Mounting a new wheel ................... 304
Removing a wheel .......................... 304
Storing ........................................... 302
Tightening torque ........................... 305
Wheel size/tire size ....................... 306
Window curtain air bag
Display message ............................ 196
Operation ......................................... 46
Windows
see Side windows
Windshield
Defrosting ...................................... 116
Windshield washer system
Adding washer fluid ....................... 257
Important safety notes .................. 313
Windshield wipers
Display message ............................ 214
Problem (malfunction) ................... 108
Replacing the wiper blades ............ 107
Switching on/off ........................... 106
Winter driving
Slippery road surfaces ................... 147
Snow chains .................................. 285
Winter operation
General notes ................................ 284
Winter tires
M+S tires ....................................... 284
Wiper blades
Cleaning ......................................... 262
Imp
ortant safety notes .................. 107
Wooden trim (cleaning instruc-
tions) .................................................. 264
Workshop
see Qualified specialist workshop
Z
ZONE functionSwitching on/off ........................... 116
Index21
Page 140 of 318
You must make sure that fuel does not comeinto contact with your skin, eyes or clothing
and that it is not swallowed. Do not inhale fuel
vapors. Keep fuel away from children.
If you or others come into contact with fuel,
observe the following:
RWash away fuel from skin immediately
using soap and water.
RIf fuel comes into contact with your eyes,
immediately rinse them thoroughly with
clean water. Seek medical assistance with-
out delay.
RIf fuel is swallowed, seek medical assis-
tance without delay. Do not induce vomit-
ing.
RImmediately change out of clothing which
has come into contact with fuel.
GWARNING
Electrostatic buildup can create sparks and
ignite fuel vapors. There is a risk of fire and
explosion.
Always touch the vehicle body before opening
the fuel filler flap or touching the fuel pump
nozzle. Any existing electrostatic buildup is
thereby discharged.
!Do not use diesel to refuel vehicles with a
gasoline engine. Do not switch on the ignition
if you accidentally refuel with the wrong fuel.
Otherwise, the fuel will enter the fuel system. Even small amounts of the wrong fuel could
result in damage to the fuel system and the
engine. Notify a qualified specialist workshop
and have the fuel tank and fuel lines drained
completely.
!Overfilling the fuel tank could damage the
fuel system.
!Take care not to spill any fuel on painted
surfaces. You could otherwise damage the
paintwork.
!Use a filter when adding fuel from a fuel can.
The fuel lines and/or the fuel injection system
could otherwise be blocked by particles from
the fuel can. Do not get into the vehicle again during the refu-
eling process. Otherwise, electrostatic charge
could build up again.
If you overfill the fuel tank, fuel could spray out
when the fuel pump nozzle is removed.
For further information on fuel and fuel quality
(
Ypage 309).
Refueling
General information
Pay attention to the important safety notes
(Ypage 137).
The fuel filler flap is unlocked/locked automat-
ically when you unlock/lock the vehicle with the
SmartKey.
The position of the fuel filler cap is displayed
æ in the instrument cluster. The arrow on the
filling pump indicates the side of the vehicle.
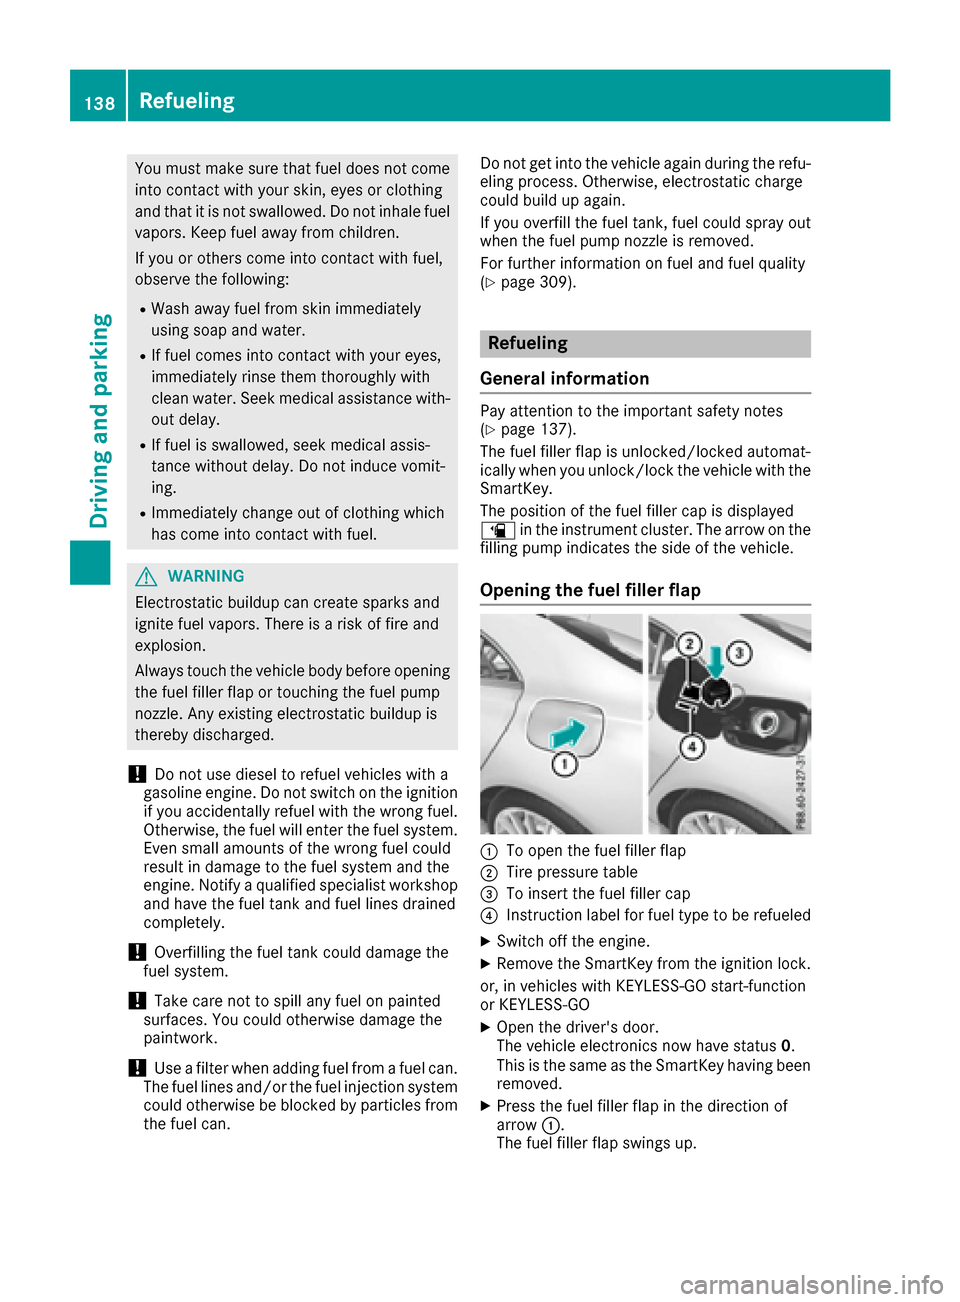
Opening the fuel filler flap
:To open the fuel filler flap
;Tire pressure table
=To insert the fuel filler cap
?Instruction label for fuel type to be refueled
XSwitch off the engine.
XRemove the SmartKey from the ignition lock.
or, in vehicles with KEYLESS-GO start-function
or KEYLESS‑ GO
XOpen the driver's door.
The vehicle electronics now have status 0.
This is the same as the SmartKey having been
removed.
XPress the fuel filler flap in the direction of
arrow :.
The fuel filler flap swings up.
138Refueling
Driving and parking
Page 147 of 318
In addition to driving style, the actual consump-
tion is affected by other factors, such as:
RLoad
RTire pressure
RCold start
RChoice of route
RActive electrical consumers
These factors are not included in the ECO dis-
play.
An economical driving style specially requires
driving at moderate engine speeds.
Achieving a higher value in the categories
"Acceleration" and "Constant":
Robserve the gearshift recommendations.
Rdrive the vehicle in drive program Cor E
(vehicles with a DYNAMIC SELECT button).
On long journeys at a constant speed, e.g. on the
highway, only the outer area for "constant" will
change.
The ECO display summarizes the driving style
from the start of the journey to its completion.
Therefore, there are more marked changes in
the outer areas at the start of a journey. On lon- ger journeys, there are fewer changes. For more
marked changes, perform a manual rest
(
Ypage 178).
For more information on the ECO display, see
(
Ypage 177).
Braking
Important safety notes
GWARNING
If you shift down on a slippery road surface in an attempt to increase the engine's braking
effect, the drive wheels could lose their grip.
There is an increased danger of skidding and
accidents.
Do not shift down for additional engine brak-
ing on a slippery road surface.
Downhill gradients
!On long and steep gradients, you must
reduce the load on the brakes by shifting to a
lower gear in good time. This allows you to
take advantage of engine braking. For this you
must first activate manual gearshifting. This helps you to avoid overheating the brakes and
wearing them out excessively.
When you take advantage of engine braking, it
is possible that a drive wheel will not rotate for
some time, e.g. on a slippery road surface.
This could cause damage to the drive train.
This type of damage is not covered by the
Mercedes-Benz warranty.
Briefly depressing the accelerator pedal on
downhill gradients while the manual drive pro-
gram Mis temporarily activated: the automatic
transmission may switch to the last active auto-
matic drive program Eor S. The automatic trans-
mission may shift to a higher gear. This can
reduce the engine's braking effect.
Heavy and light loads
GWARNING
If you rest your foot on the brake pedal while
driving, the braking system can overheat. This increases the stopping distance and can even
cause the braking system to fail. There is a
risk of an accident.
Never use the brake pedal as a footrest. Never
depress the brake pedal and the accelerator
pedal at the same time.
!Depressing the brake pedal constantly
results in excessive and premature wear to
the brake pads.
If the brakes have been subjected to a heavy
load, do not stop the vehicle immediately. Drive
on for a short while. This allows the airflow to
cool the brakes more quickly.
Wet roads
If you have driven for a long time in heavy rain
without braking, there may be a delayed reac-
tion from the brakes when braking for the first
time. This may also occur after the vehicle has
been washed or driven through deep water.
You have to depress the brake pedal more
firmly. Maintain a greater distance from the
vehicle in front.
After driving on a wet road or having the vehicle
washed, brake firmly while paying attention to
the traffic conditions. This will warm up the
brake discs, thereby drying them more quickly
and protecting them against corrosion.
Driving tips145
Driving and parking
Z
Page 228 of 318
Tires
Warning/
indicator
lampNSignal type
Possible causes/consequences and M
Solutions
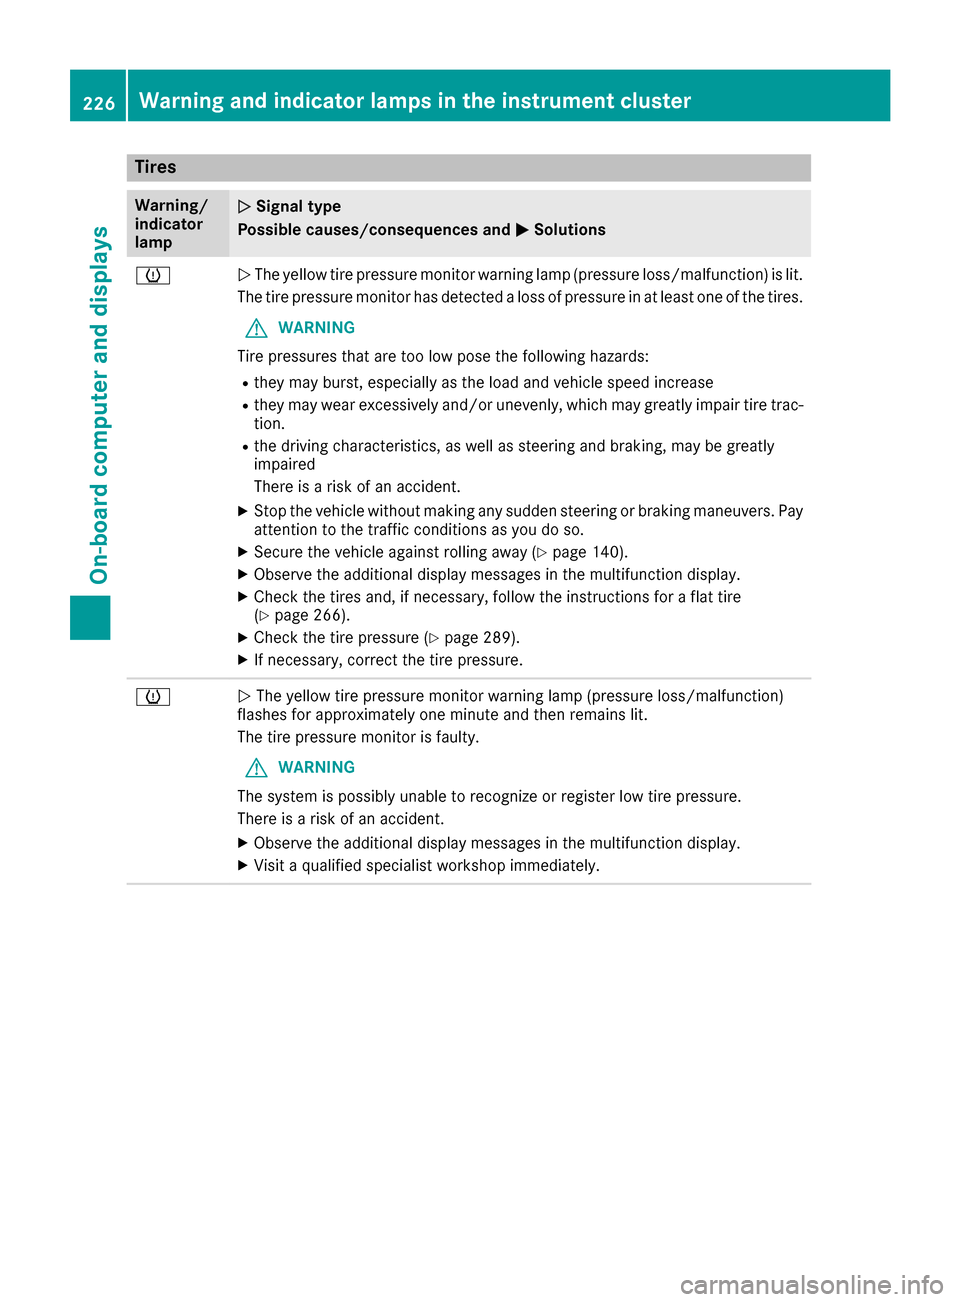
hNThe yellow tire pressure monitor warning lamp (pressure loss/malfunction) is lit.
The tire pressure monitor has detected a loss of pressure in at least one of the tires.
GWARNING
Tire pressures that are too low pose the following hazards:
Rthey may burst, especially as the load and vehicle speed increase
Rthey may wear excessively and/or unevenly, which may greatly impair tire trac-
tion.
Rthe driving characteristics, as well as steering and braking, may be greatly
impaired
There is a risk of an accident.
XStop the vehicle without making any sudden steering or braking maneuvers. Pay
attention to the traffic conditions as you do so.
XSecure the vehicle against rolling away (Ypage 140).
XObserve the additional display messages in the multifunction display.
XCheck the tires and, if necessary, follow the instructions for a flat tire
(Ypage 266).
XCheck the tire pressure (Ypage 289).
XIf necessary, correct the tire pressure.
hN The yellow tire pressure monitor warning lamp (pressure loss/malfunction)
flashes for approximately one minute and then remains lit.
The tire pressure monitor is faulty.
GWARNING
The system is possibly unable to recognize or register low tire pressure.
There is a risk of an accident.
XObserve the additional display messages in the multifunction display.
XVisit a qualified specialist workshop immediately.
226Warning and indicator lamps in the instrument cluster
On-board computer and displays
Page 266 of 318
XWipe the plastic trim with a damp, lint-free
cloth, e.g. a microfiber cloth.
XHeavy soiling:use care and cleaning prod-
ucts recommended and approved by
Mercedes-Benz.
The surface may change color temporarily.
Wait until the surface is dry again.
Cleaning the steering wheel and gear or
selector lever
XThoroughly wipe with a damp cloth or use
leather care agents that have been recom-
mended and approved by Mercedes-Benz.
Cleaning genuine wood and trim ele-
ments
!Do not use solvent-based cleaning agents
such as tar remover, wheel cleaners, polishes
or waxes. There is otherwise a risk of damag- ing the surface.
!Do not use chrome polish on trim pieces.
The trim pieces have a chrome look but are
mostly made of anodized aluminum and can
lose their shine if chrome polish is used. Use
a damp, lint-free cloth instead when cleaning
the trim pieces.
If the chrome-plated trim pieces are very
dirty, you can use a chrome polish. If you are
unsure as to whether the trim pieces are
chrome-plated or not, consult an authorized
Mercedes-Benz Center.
XWipe the wooden trim and trim pieces with a
damp, lint-free cloth, e.g. a microfiber cloth.
XHeavy soiling: use care and cleaning prod-
ucts recommended and approved by
Mercedes-Benz.
Cleaning the seat covers
General notes
!Do not use a microfiber cloth to clean covers
made out of real leather, artificial leather or
DINAMICA. If used often, these can damage
the cover.
Note that regular care is essential to ensure that
the appearance and comfort of the covers is
retained over time.
Genuine leather seat covers
!To retain the natural appearance of the
leather, observe the following cleaning
instructions:
RClean genuine leather covers carefully with a damp cloth and then wipe the covers
down with a dry cloth.
RMake sure that the leather does not
become soaked. It may otherwise become
rough and cracked.
ROnly use leather care agents that have
been tested and approved by Mercedes-
Benz. You can obtain these from a qualified
specialist workshop.
Leather is a natural product.
It exhibits natural surface characteristics, for
example:
Rdifferences in the texture
Rmarks caused by growth and injury
Rslight nuances of color
These are characteristics of leather and not
material defects.
Seat covers of other materials
!Observe the following when cleaning:
Rclean artificial leather covers with a cloth
moistened with a solution containing 1%
detergent (e.g. dish washing liquid).
Rclean cloth covers with a microfiber cloth
moistened with a solution containing 1%
detergent (e.g. dish washing liquid). Rub
carefully and always wipe entire seat sec-
tions to avoid leaving visible lines. Leave
the seat to dry afterwards. Cleaning results
depend on the type of dirt and how long it
has been there.
Rclean DINAMICA covers with a damp cloth.
Make sure that you wipe entire seat sec-
tions to avoid leaving visible lines.
Cleaning the seat belts
GWARNING
Seat belts can become severely weakened if
bleached or dyed. This could cause the seat
belts to tear or fail, for instance, in the event of an accident. This poses an increased risk of
injury or fatal injury.
Never bleach or dye the seat belts.
264Care
Maintenance and care
Page 269 of 318
XMake sure that the engine cannot be started
via your smartphone (Ypage 122).
XMake sure that the passengers are not endan-
gered as they do so. Make sure that no one is
near the danger area while a wheel is being
changed. Anyone who is not directly assisting
in the wheel change should, for example,
stand behind the barrier.
XGet out of the vehicle. Pay attention to traffic
conditions when doing so.
XClose the driver's door.
MOExtended tires (tires with run-flat
properties)
General notes
With MOExtended tires (tires with run flat char-
acteristics), you can continue to drive your vehi-
cle even if there is a total loss of pressure in one
or more tires. The affected tire must not show
any clearly visible damage.
You can recognize MOExtended tires by the
MOExtended marking which appears on the
sidewall of the tire. You will find this marking
next to the tire size designation, the load-bear-
ing capacity and the speed index (
Ypage 296).
MOExtended tires may be used only in conjunc-
tion with an activated tire pressure loss warning
system (Canada only) or tire pressure monitor
(USA only).
If a pressure loss warning message appears
in the multifunction display:
Robserve the instructions in the display mes-
sages (Ypage 209).
Rcheck the tire for damage.
Rif driving on, observe the following notes.
The driving distance possible in run-flat mode is
approximately 50 miles (80 km) when the vehi-
cle is partially laden. When the vehicle is fully
laden it is approximately 19 miles (30 km).
In addition to the vehicle load, the driving dis-
tance possible depends upon:
RVehicle speed
RRoad condition
ROutside temperature
The driving distance possible in run-flat mode
may be reduced by extreme driving conditions
or maneuvers, or it can be increased through a
moderate style of driving. The driving distance possible in run-flat mode is
counted from the moment the tire pressure loss
warning appears in the multifunction display.
You must not exceed a maximum speed of
50 mph (80 km/h).
When replacing one or all tires, please observe
the following specifications for your vehicle's
tires:
Rsize
Rtype and
Rthe "MOExtended" marking
If a tire has gone flat and cannot be replaced
with a MOExtended tire, a standard tire may be
used as a temporary measure. Make sure that
you use the proper size and type (summer or
winter tire).
Vehicles equipped with MOExtended tires are
not equipped with a TIREFIT kit at the factory. It
is therefore recommended that you additionally
equip your vehicle with a TIREFIT kit if you mount tires that do not feature run-flat properties, e.g.
winter tires. A TIREFIT kit may be obtained from a qualified specialist workshop.
Important safety notes
GWARNING
When driving in emergency mode, the driving
characteristics deteriorate, e.g. when corner-
ing, accelerating quickly and when braking.
There is a risk of an accident.
Do not exceed the stated maximum speed.
Avoid abrupt steering and driving maneuvers,
and driving over obstacles (curbs, potholes,
off-road). This applies in particular to a laden
vehicle.
Stop driving in emergency mode if:
Ryou hear banging noises.
Rthe vehicle starts to shake.
Ryou see smoke and smell rubber.
RESP®is intervening constantly.
Rthere are tears in the sidewalls of the tire.
After driving in emergency mode, have the
wheel rims checked at a qualified specialist
workshop with regard to their further use. The
defective tire must be replaced in every case.
Flat tire267
Breakdown assistance
Z
Page 278 of 318
iJumper cables and further information regarding jump-starting can be obtained at any qualified
specialist workshop.
Towing and tow-starting
Important safety notes
GWARNING
Functions relevant to safety are restricted or
no longer available if:
Rthe engine is not running.
Rthe brake system or the power steering is
malfunctioning.
Rthere is a malfunction in the voltage supply or the vehicle's electrical system.
If your vehicle is being towed, much more
force may be necessary to steer or brake.
There is a risk of an accident.
In such cases, use a tow bar. Before towing,
make sure that the steering moves freely.
GWARNING
You can no longer steer the vehicle if the
steering wheel lock has been engaged. There
is a risk of an accident.
Always switch off the ignition when towing the
vehicle with a tow cable or a tow bar.
GWARNING
When towing or tow-starting another vehicle
and its weight is greater than the permissible
gross weight of your vehicle, the:
Rthe towing eye could detach itself
Rthe vehicle/trailer combination could roll-
over.
There is a risk of an accident.
When towing or tow-starting another vehicle,
its weight should not be greater than the per- missible gross weight of your vehicle.
Details on the permissible gross vehicle weight
of your vehicle can be found on the vehicle iden-
tification plate (
Ypage 308).
!When Active Brake Assist, Distance Pilot
DISTRONIC or the HOLD function is activated, the vehicle brakes automatically in certain
situations.
To avoid damage to the vehicle, deactivate
these systems in the following or similar sit-
uations:
Rwhen towing the vehicle
Rin the car wash
!Make sure that the electric parking brake is
released. If the electric parking brake is faulty,
visit a qualified specialist workshop.
!Only secure the tow rope or tow bar at the
towing eyes. Otherwise, the vehicle could be
damaged.
!Do not use the towing eyes for recovery pur-
poses as this could damage the vehicle. If in
doubt, recover the vehicle with a crane.
!When towing, pull away slowly and
smoothly. If the tractive power is too high, the
vehicles could be damaged.
!The vehicle can be towed a maximum of
3
0 miles (50km). The towing speed of 30 mph
(50km/h) must not be exceeded.
If the vehicle has to be towed more than
30 miles (50km), the front axle must be raised
or the entire vehicle raised and transported.
!Do not tow with sling-type equipment. This
could damage the vehicle.
!When towing vehicles with KEYLESS-GO,
use the key instead of the Start/Stop button.
Otherwise, the automatic transmission may
shift to position Pwhen the driver's or front-
passenger door are opened, which could lead
to damage to the transmission.
!Vehicles with automatic transmission must
not be started by tow-starting. This could oth-
erwise damage the transmission.
It is better to have the vehicle transported than
to have it towed away.
If the vehicle can no longer be driven because of
an accident or breakdown, you have the follow-
ing options:
Rtransporting the vehicle
276Towing and tow-starting
Breakdown assistance
Page 285 of 318
Check wheels and tires for damage at least once
a month. Check wheels and tires afterdriving
off-road or on rough roads. Damaged wheels
can cause a loss of tire pressure. Pay particular
attention to damage such as:
Rcuts inthe tires
Rpunctures inthe tires
Rtears inthe tires
Rbulges on tires
Rdeformation or severe corrosion on wheels
Regularly check the tire tread depth and the
condition of the tread across the whole width of
the tire (
Ypage 283). Ifnecessary, turn the
front wheels to full lock inorder to inspect the
inner sideof the tire surface.
All wheels must have a valve cap to protect the valve against dirtand moisture. Do not mount
anything onto the valve other than the standard
valve cap or other valve caps approved by
Mercedes-Benz for your veh icle. Do not use any
other valve caps or systems, e.g. tire pressure
monitoring systems.
Regularly check the pressure of all the tires par-
ticularly prior to long tr ips.Adjust the tire pres-
sure as necessary (
Ypage 285).
The service lifeof tires depends, among other
things, on the foll owing factors:
RDrivin g style
RTire pressure
RDistance covered
Notes on tire tread
GWAR NING
In suff icient tire tread willreduce tire traction.
The tire isno longer abletodissipat e water.
This means that on wet road surfaces, the risk
of hydroplaning increases, inparticular where
speed isnot adapted to suit the driving con-
dit ions. There isa risk of acc ident.
If the tire pressure istoo high or too low,tires
may exhibit different leve lsof wear at differ-
ent locations on the tire tread. Thus, you
should regularly check the tread depth and
the condition of the tread across the entire
widt h of all tires.
Minimum tire tread depth for:
RSummer tires: âin(3 mm)
RM+S tires: ãin(4 mm)
For safety reasons, replace the tires before
the legally prescribe d limit for the minimum
tire tread depth is reached.
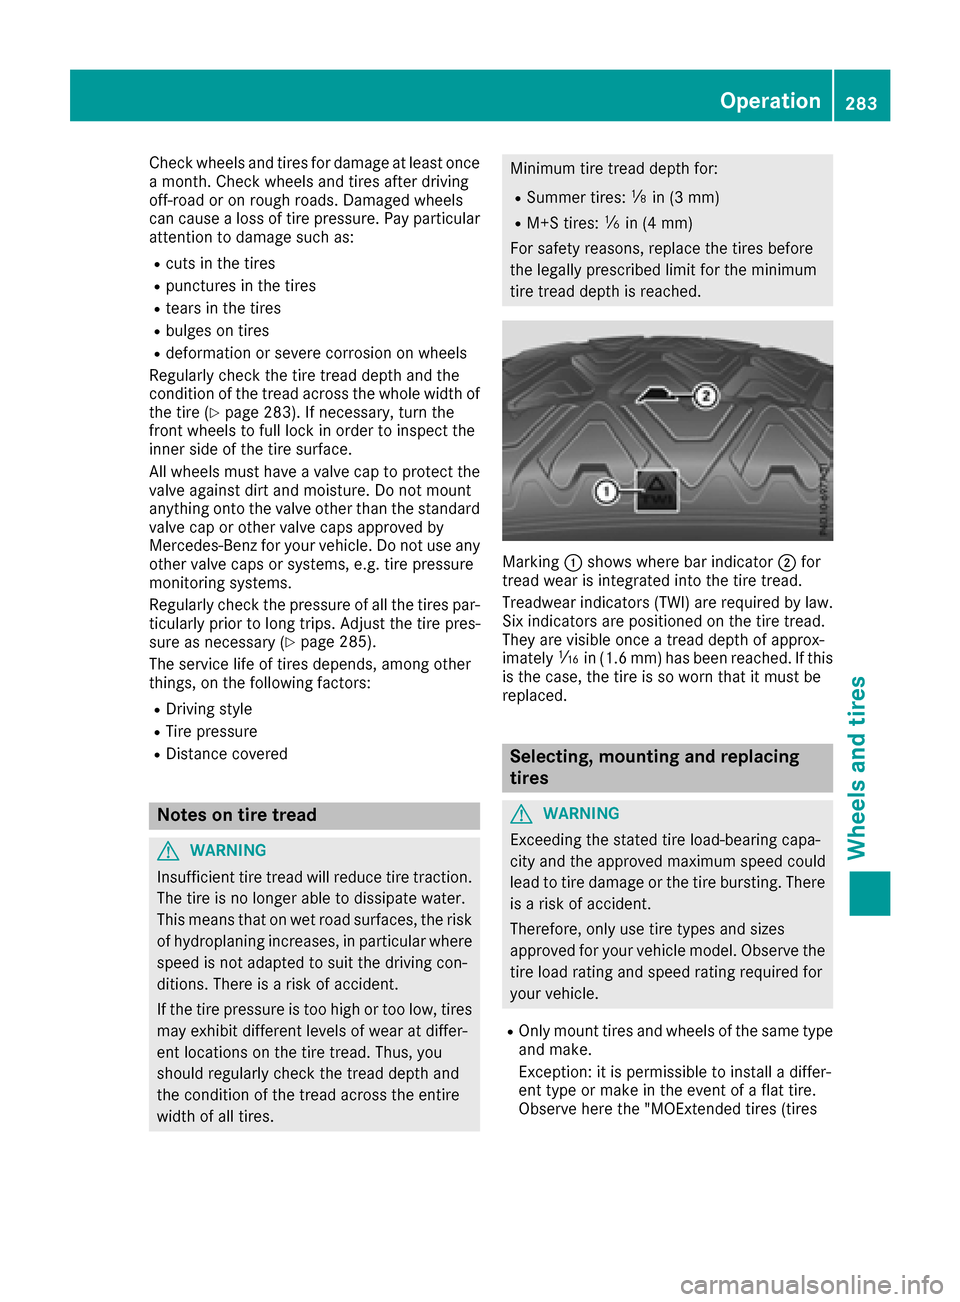
Marking :shows where bar indicator ;for
tread wear isintegrated into the tire tread.
Treadwear indicators (TWI) are required by law.
Six indicators are positioned on the tire tread.
They are vis ibleonce a tread depth of approx-
imately áin (1.6 mm) has been reached. If this
is the case, the tire isso worn that it must be
replace d.
Selecting, mounting and replacing
tires
GWARNING
Exceeding the stated tire load-bearing capa-
city and the approved maximum speed could
lead to tire damage or the tire bursting. There is a risk of accident.
Therefore, only use tire types and sizes
approved for your vehicle model. Observe the
tire load rating and speed rating required for
your vehicle.
ROnly mount tires and wheels of the same type
and make.
Exception: it is permissible to install a differ-
ent type or make inthe event of a flat tire.
Observe here the "MOExtended tires (tires
Operation283
Wheels and tires
Z