brake light MERCEDES-BENZ CLA COUPE 2013 Owner's Manual
[x] Cancel search | Manufacturer: MERCEDES-BENZ, Model Year: 2013, Model line: CLA COUPE, Model: MERCEDES-BENZ CLA COUPE 2013Pages: 373, PDF Size: 11.47 MB
Page 116 of 373
Combination switch
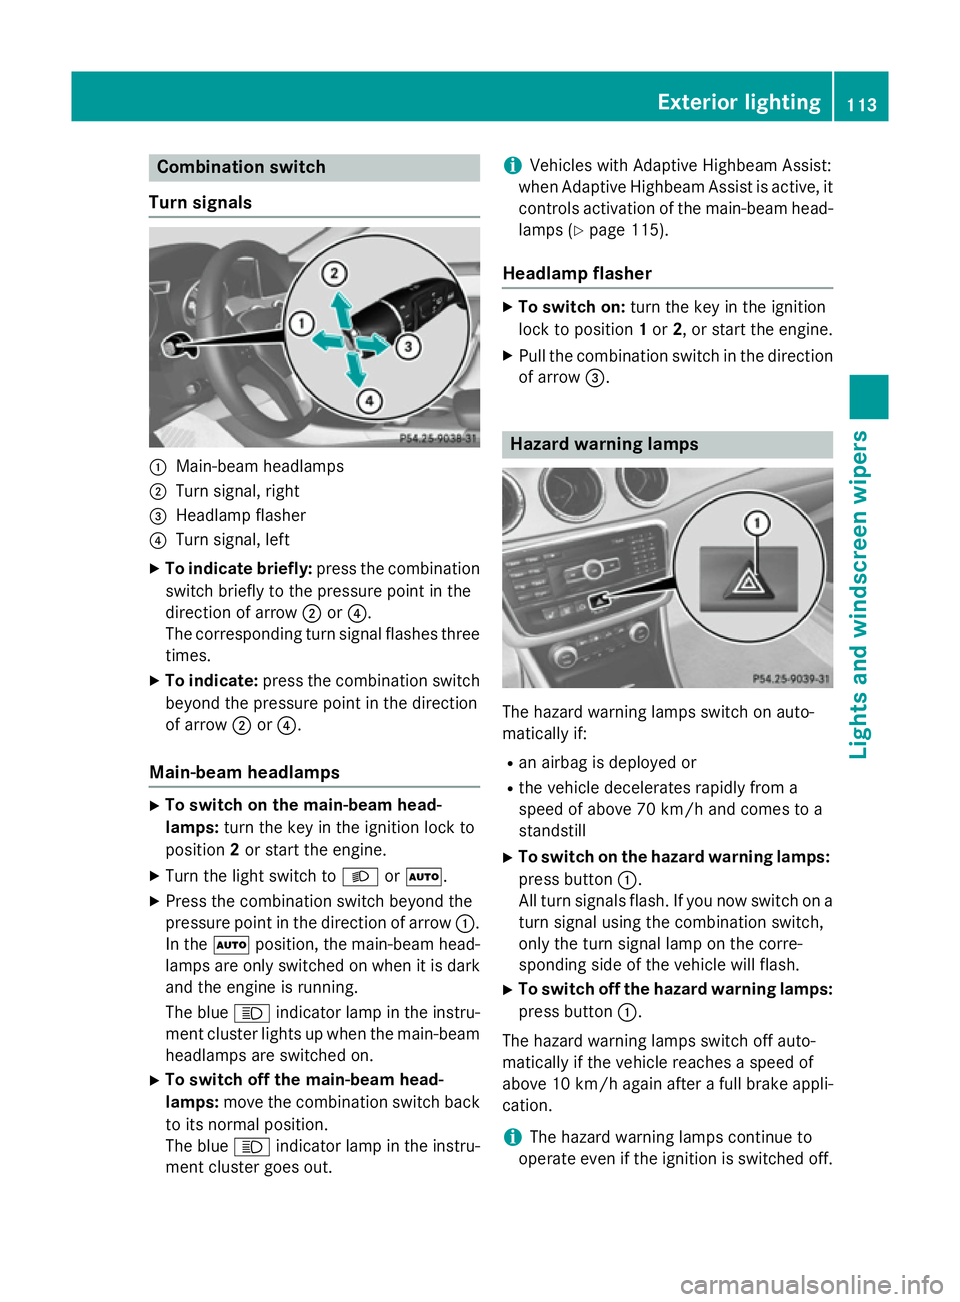
Turn signals :
Main-beam headlamps
; Turn signal, right
= Headlamp flasher
? Turn signal, left
X To indicate briefly: press the combination
switch briefly to the pressure point in the
direction of arrow ;or?.
The corresponding turn signal flashes three
times.
X To indicate: press the combination switch
beyond the pressure point in the direction
of arrow ;or?.
Main-beam headlamps X
To switch on the main-beam head-
lamps: turn the key in the ignition lock to
position 2or start the engine.
X Turn the light switch to LorÃ.
X Press the combination switch beyond the
pressure point in the direction of arrow :.
In the Ãposition, the main-beam head-
lamps are only switched on when it is dark
and the engine is running.
The blue Kindicator lamp in the instru-
ment cluster lights up when the main-beam headlamps are switched on.
X To switch off the main-beam head-
lamps: move the combination switch back
to its normal position.
The blue Kindicator lamp in the instru-
ment cluster goes out. i
Vehicles with Adaptive Highbeam Assist:
when Adaptive Highbeam Assist is active, it controls activation of the main-beam head-lamps (Y page 115).
Headlamp flasher X
To switch on: turn the key in the ignition
lock to position 1or 2, or start the engine.
X Pull the combination switch in the direction
of arrow =. Hazard warning lamps
The hazard warning lamps switch on auto-
matically if:
R
an airbag is deployed or
R the vehicle decelerates rapidly from a
speed of above 70 km/h and comes to a
standstill
X To switch on the hazard warning lamps:
press button :.
All turn signals flash. If you now switch on a turn signal using the combination switch,
only the turn signal lamp on the corre-
sponding side of the vehicle will flash.
X To switch off the hazard warning lamps:
press button :.
The hazard warning lamps switch off auto-
matically if the vehicle reaches a speed of
above 10 km/h again after a full brake appli- cation.
i The hazard warning lamps continue to
operate even if the ignition is switched off. Exterior lighting
113Lights and windscreen wipers Z
Page 122 of 373
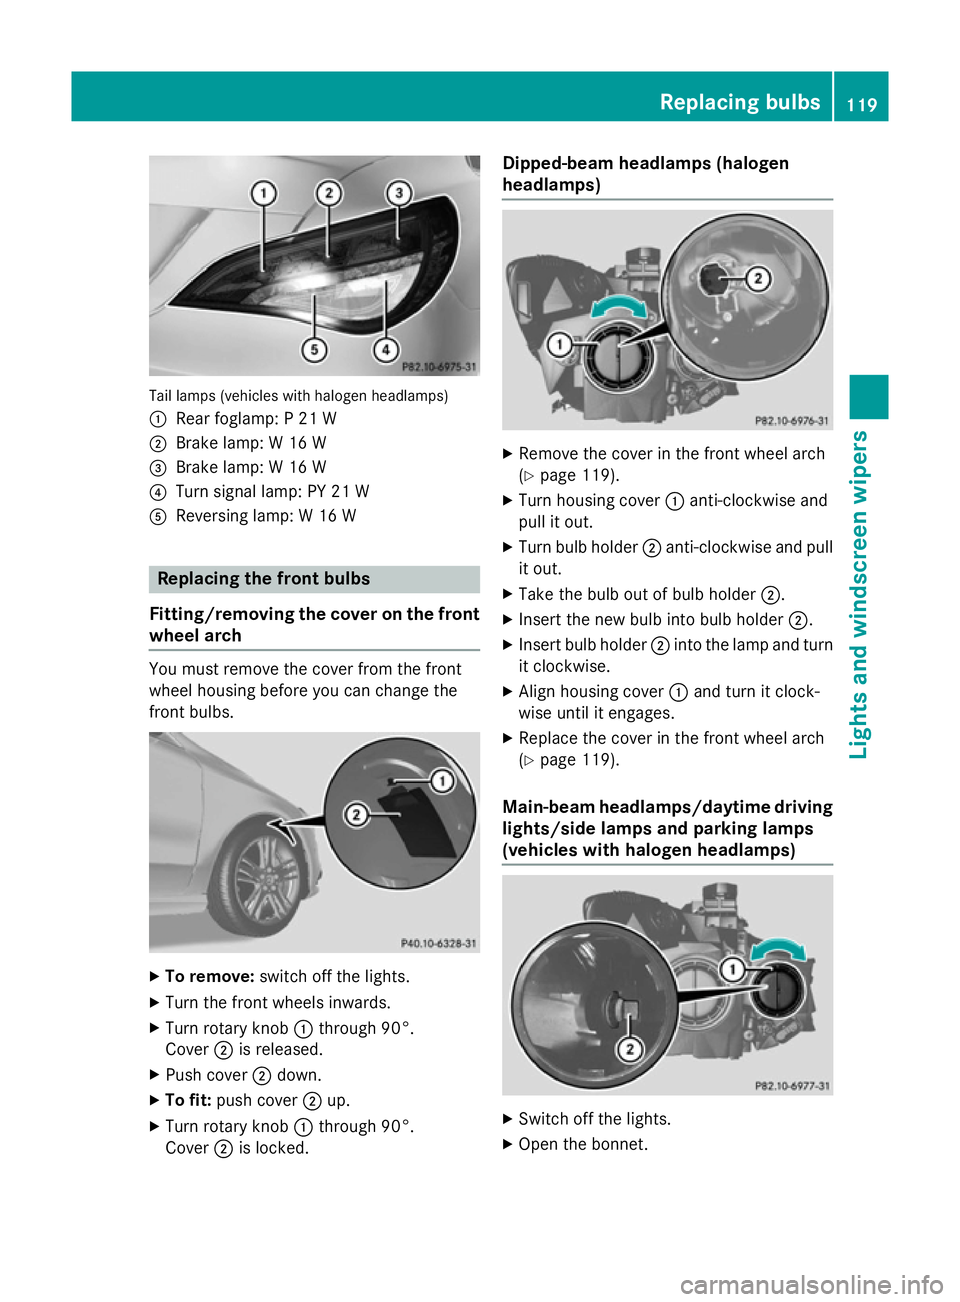
Tail lamps (vehicles with halogen headlamps)
: Rear foglamp: P 21 W
; Brake lamp: W 16 W
= Brake lamp: W 16 W
? Turn signal lamp: PY 21 W
A Reversing lamp: W 16 W Replacing the front bulbs
Fitting/removing the cover on the front wheel arch You must remove the cover from the front
wheel housing before you can change the
front bulbs. X
To remove: switch off the lights.
X Turn the front wheels inwards.
X Turn rotary knob :through 90°.
Cover ;is released.
X Push cover ;down.
X To fit: push cover ;up.
X Turn rotary knob :through 90°.
Cover ;is locked. Dipped-beam headlamps (halogen
headlamps) X
Remove the cover in the front wheel arch
(Y page 119).
X Turn housing cover :anti-clockwise and
pull it out.
X Turn bulb holder ;anti-clockwise and pull
it out.
X Take the bulb out of bulb holder ;.
X Insert the new bulb into bulb holder ;.
X Insert bulb holder ;into the lamp and turn
it clockwise.
X Align housing cover :and turn it clock-
wise until it engages.
X Replace the cover in the front wheel arch
(Y page 119).
Main-beam headlamps/daytime driving lights/side lamps and parking lamps
(vehicles with halogen headlamps) X
Switch off the lights.
X Open the bonnet. Replacing bulbs
119Lights and windscreen wipers Z
Page 124 of 373
X
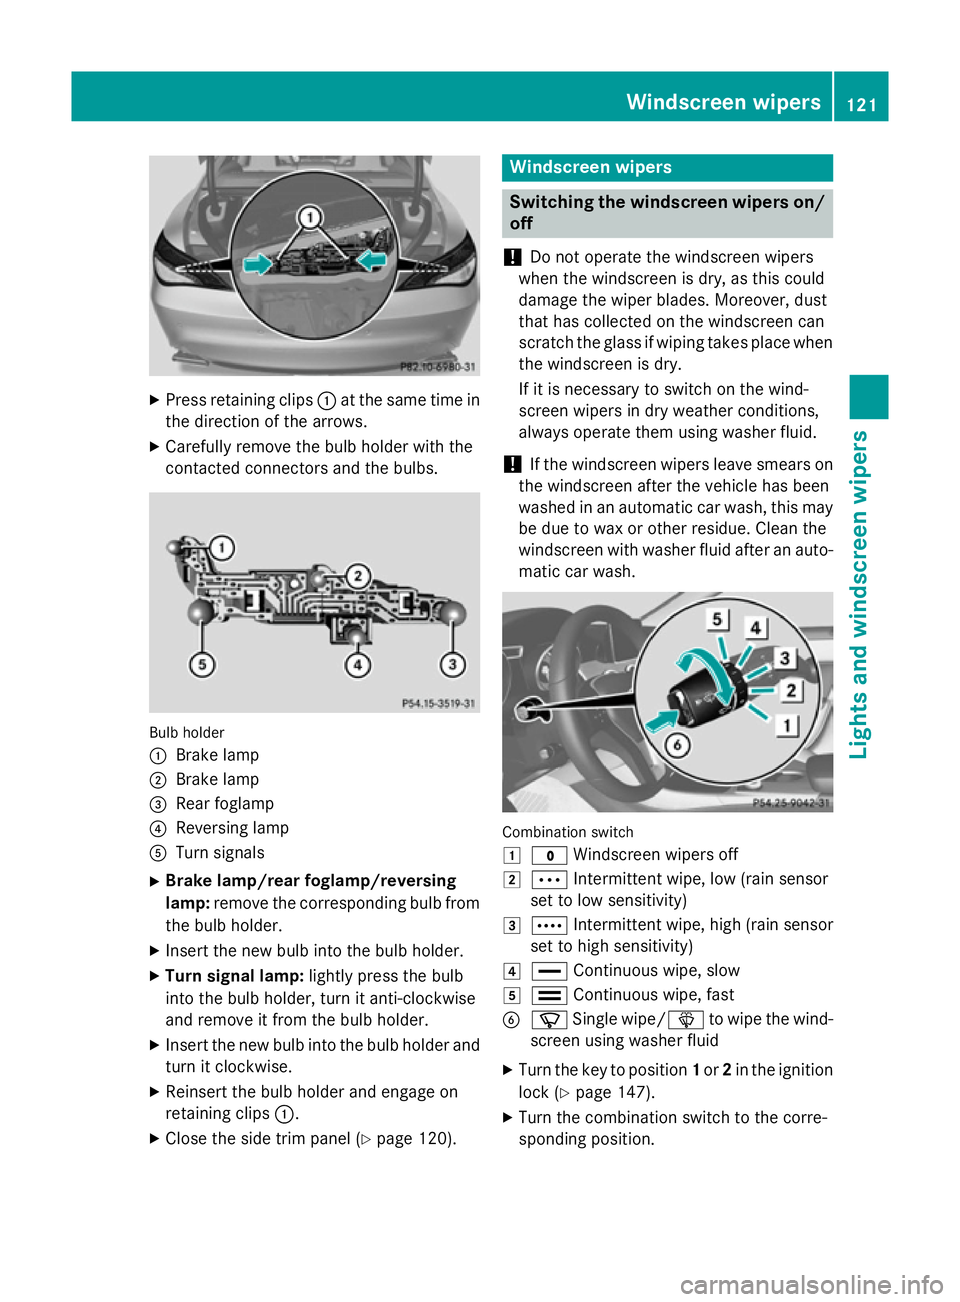
Press retaining clips :at the same time in
the direction of the arrows.
X Carefully remove the bulb holder with the
contacted connectors and the bulbs. Bulb holder
:
Brake lamp
; Brake lamp
= Rear foglamp
? Reversing lamp
A Turn signals
X Brake lamp/rear foglamp/reversing
lamp: remove the corresponding bulb from
the bulb holder.
X Insert the new bulb into the bulb holder.
X Turn signal lamp: lightly press the bulb
into the bulb holder, turn it anti-clockwise
and remove it from the bulb holder.
X Insert the new bulb into the bulb holder and
turn it clockwise.
X Reinsert the bulb holder and engage on
retaining clips :.
X Close the side trim panel (Y page 120). Windscreen wipers
Switching the windscreen wipers on/
off
! Do not operate the windscreen wipers
when the windscreen is dry, as this could
damage the wiper blades. Moreover, dust
that has collected on the windscreen can
scratch the glass if wiping takes place when the windscreen is dry.
If it is necessary to switch on the wind-
screen wipers in dry weather conditions,
always operate them using washer fluid.
! If the windscreen wipers leave smears on
the windscreen after the vehicle has been
washed in an automatic car wash, this may
be due to wax or other residue. Clean the
windscreen with washer fluid after an auto- matic car wash. Combination switch
1
$ Windscreen wipers off
2 Ä Intermittent wipe, low (rain sensor
set to low sensitivity)
3 Å Intermittent wipe, high (rain sensor
set to high sensitivity)
4 ° Continuous wipe, slow
5 ¯ Continuous wipe, fast
B í Single wipe/ îto wipe the wind-
screen using washer fluid
X Turn the key to position 1or 2in the ignition
lock (Y page 147).
X Turn the combination switch to the corre-
sponding position. Windscreen wipers
121Lights and windscreen wipers Z
Page 151 of 373
Carry out regular checks to make sure that
there are no flammable foreign materials in
the engine compartment or in the exhaust
system.
! Do not depress the accelerator when
starting the engine.
i Vehicles with a petrol engine:
the
engine runs at a higher engine speed during the cold start procedure so that the cata-
lytic converter can reach operating tem-
perature more quickly. The sound of the
engine may change as a result.
Manual transmission X
Depress the brake pedal and keep it
depressed.
X Depress the clutch pedal fully.
X Shift to neutral N.
i You can only start the engine when the
clutch pedal is fully depressed.
Automatic transmission X
Shift the transmission to position P.
Transmission position display Pis shown in
the multifunction display.
i When the transmission is in position
N,
you can also start the engine with the brake pedal depressed.
Starting procedure X
To start a petrol engine: turn the key to
position 3in the ignition lock (Y page 147)
and release it as soon as the engine is run-
ning.
X To start a diesel engine: turn the key to
position 2(Y page 147) in the ignition lock.
The % preglow indicator lamp in the
instrument cluster lights up.
X When the %preglow indicator lamp
goes out, turn the key to position
3 (Y page 147) and release it as soon as the
engine is running. i
You can start the engine without preglow
if the engine is warm. Pulling away
Manual transmission !
Change gear in good time and avoid spin-
ning the wheels. Otherwise, you could dam- age the vehicle.
X Depress the brake pedal and keep it
depressed.
X Depress the clutch pedal fully.
X Shift to either first gear or reverse gear R.
X Release the electric parking brake
(Y page 168).
X Release the brake pedal.
X Slowly release the clutch pedal and gently
depress the accelerator pedal.
i Follow the shift recommendations in the
multifunction display for an economical
driving style (Y page 155).
i The vehicle locks centrally once you have
pulled away. The locking knobs in the doors
drop down.
You can open the doors from the inside at
any time.
You can also deactivate the automatic lock- ing feature (Y page 229).
Automatic transmission i
It is only possible to shift the transmission
from position Pto the desired position if
you depress the brake pedal. Only then can
the parking lock be deactivated. If you do
not depress the brake pedal, the DIRECT
SELECT lever can still be moved but the
parking lock remains engaged.
i At transmission fluid temperatures below
Ò20 †, you can only shift out of position P
into another transmission position when
the engine is running. 148
DrivingDriving and parking
Page 154 of 373
X
Brake the vehicle.
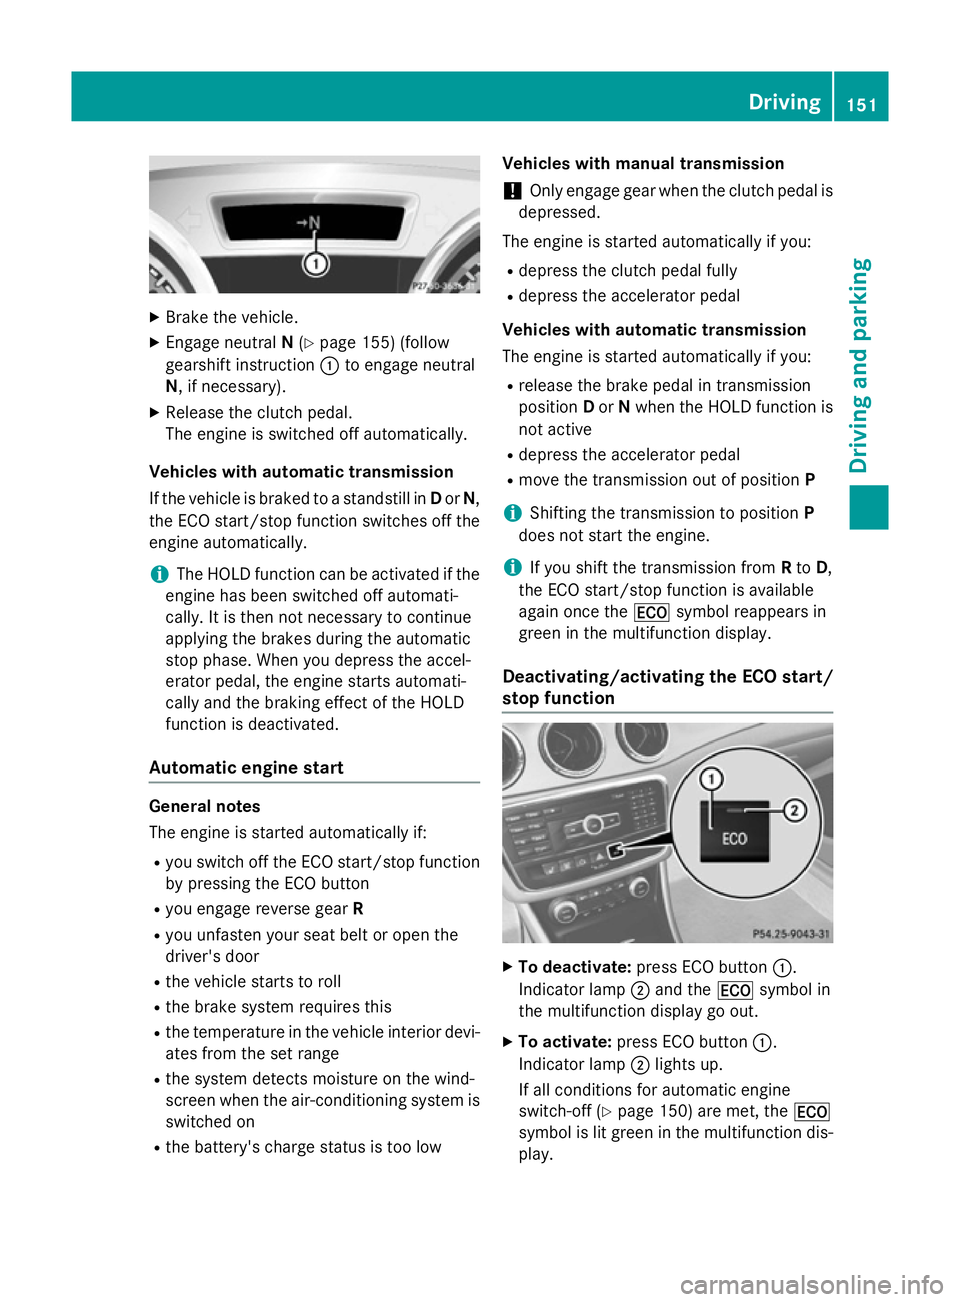
X Engage neutral N(Y page 155) (follow
gearshift instruction :to engage neutral
N, if necessary).
X Release the clutch pedal.
The engine is switched off automatically.
Vehicles with automatic transmission
If the vehicle is braked to a standstill in Dor N,
the ECO start/stop function switches off the engine automatically.
i The HOLD function can be activated if the
engine has been switched off automati-
cally. It is then not necessary to continue
applying the brakes during the automatic
stop phase. When you depress the accel-
erator pedal, the engine starts automati-
cally and the braking effect of the HOLD
function is deactivated.
Automatic engine start General notes
The engine is started automatically if:
R you switch off the ECO start/stop function
by pressing the ECO button
R you engage reverse gear R
R you unfasten your seat belt or open the
driver's door
R the vehicle starts to roll
R the brake system requires this
R the temperature in the vehicle interior devi-
ates from the set range
R the system detects moisture on the wind-
screen when the air-conditioning system is
switched on
R the battery's charge status is too low Vehicles with manual transmission
! Only engage gear when the clutch pedal is
depressed.
The engine is started automatically if you: R depress the clutch pedal fully
R depress the accelerator pedal
Vehicles with automatic transmission
The engine is started automatically if you: R release the brake pedal in transmission
position Dor Nwhen the HOLD function is
not active
R depress the accelerator pedal
R move the transmission out of position P
i Shifting the transmission to position
P
does not start the engine.
i If you shift the transmission from
Rto D,
the ECO start/stop function is available
again once the ¤symbol reappears in
green in the multifunction display.
Deactivating/activating the ECO start/
stop function X
To deactivate: press ECO button :.
Indicator lamp ;and the ¤symbol in
the multifunction display go out.
X To activate: press ECO button :.
Indicator lamp ;lights up.
If all conditions for automatic engine
switch-off (Y page 150) are met, the ¤
symbol is lit green in the multifunction dis-
play. Driving
151Driving and parking Z
Page 157 of 373
Problem
Possible causes/consequences and
M
MSolutions Vehicles with a petrol
engine:
the engine is not run-
ning smoothly and is
misfiring. There is a malfunction in the engine electronics or in a mechanical
component of the engine management system.
X Only depress the accelerator pedal slightly.
Otherwise, non-combusted fuel may get into the catalytic con-
verter and damage it.
X Have the cause rectified immediately at a qualified specialist
workshop. The coolant tempera-
ture display is showing
more than 120 †. The
coolant warning lamp
may also be on and a
warning tone may
sound. The coolant level is too low. The coolant is too hot and the engine
is no longer being cooled sufficiently.
X Stop as soon as possible and allow the engine and the coolant to
cool down.
X Check the coolant level (Y page 294). Observe the warning
notes as you do so and top up the coolant if necessary. If the coolant level is correct, the engine radiator fan may be faulty.
The coolant is too hot and the engine is no longer being cooled
sufficiently.
X If the coolant temperature is below 120 †, you can continue
driving to the nearest qualified specialist workshop.
X Avoid heavy loads on the engine as you do so, e.g. driving in
mountainous terrain and stop-start traffic. Manual transmission
Gear lever
! Only engage gear when the clutch pedal is
depressed.
! When shifting to
5thand 6thgear, you
must press the shift lever to the right. Oth- erwise, you could shift unintentionally into
3rd or4th gear and damage the engine or
transmission.
If you shift down at too high a speed (trans-
mission braking), this can cause the engine
to overrev, leading to engine damage.
Do not use the clutch bite point to keep the vehicle stationary on uphill gradients.
There is otherwise a risk of damaging the
clutch.
! On long and steep downhill gradients,
especially if the vehicle is laden or towing a trailer, you must shift into gear
1, 2or3in
good time. This uses the engine's braking
effect. This relieves the load on the brake
system and prevents the brakes from over-
heating and wearing too quickly. Gear lever
k
Reverse gear
1 to6
Forward gears 154
Manual transmissionDriving and parking
Page 171 of 373
AMG vehicles:
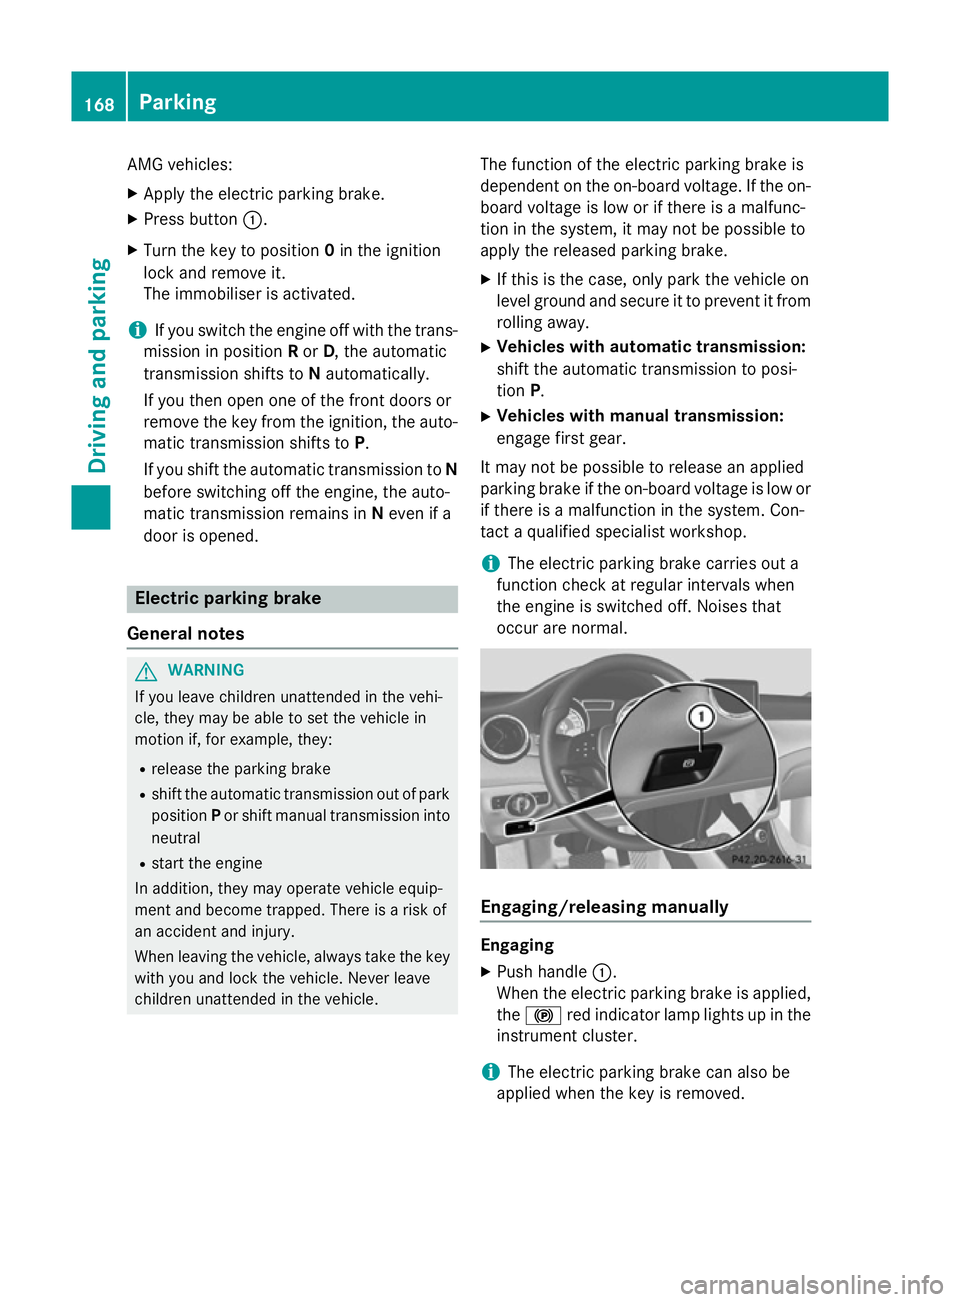
X Apply the electric parking brake.
X Press button :.
X Turn the key to position 0in the ignition
lock and remove it.
The immobiliser is activated.
i If you switch the engine off with the trans-
mission in position Ror D, the automatic
transmission shifts to Nautomatically.
If you then open one of the front doors or
remove the key from the ignition, the auto-
matic transmission shifts to P.
If you shift the automatic transmission to N
before switching off the engine, the auto-
matic transmission remains in Neven if a
door is opened. Electric parking brake
General notes G
WARNING
If you leave children unattended in the vehi-
cle, they may be able to set the vehicle in
motion if, for example, they:
R release the parking brake
R shift the automatic transmission out of park
position Por shift manual transmission into
neutral
R start the engine
In addition, they may operate vehicle equip-
ment and become trapped. There is a risk of
an accident and injury.
When leaving the vehicle, always take the key with you and lock the vehicle. Never leave
children unattended in the vehicle. The function of the electric parking brake is
dependent on the on-board voltage. If the on-
board voltage is low or if there is a malfunc-
tion in the system, it may not be possible to
apply the released parking brake.
X If this is the case, only park the vehicle on
level ground and secure it to prevent it from
rolling away.
X Vehicles with automatic transmission:
shift the automatic transmission to posi-
tion P.
X Vehicles with manual transmission:
engage first gear.
It may not be possible to release an applied
parking brake if the on-board voltage is low or if there is a malfunction in the system. Con-
tact a qualified specialist workshop.
i The electric parking brake carries out a
function check at regular intervals when
the engine is switched off. Noises that
occur are normal. Engaging/releasing manually
Engaging
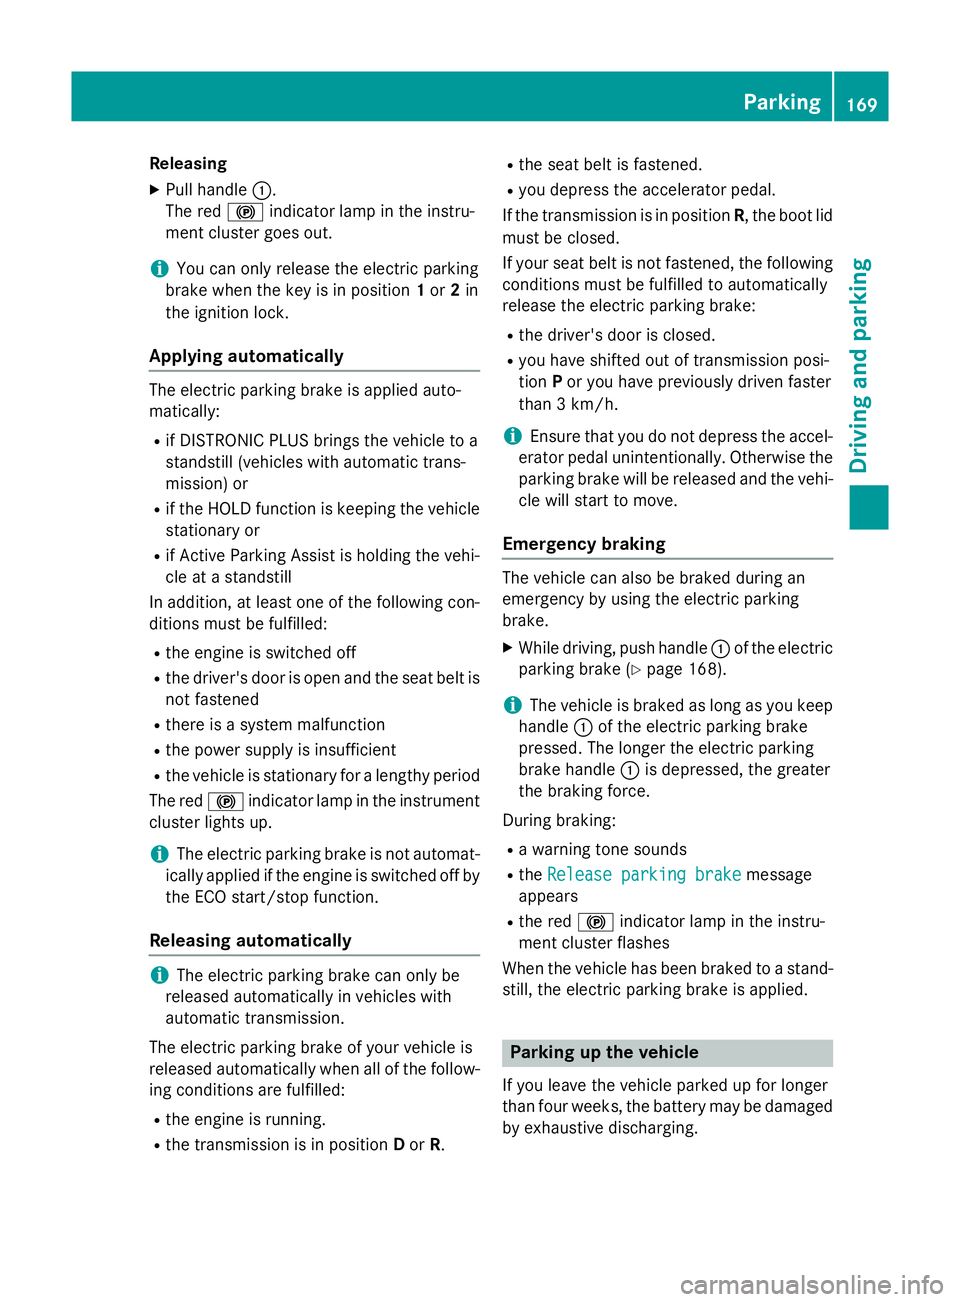
X Push handle :.
When the electric parking brake is applied, the ! red indicator lamp lights up in the
instrument cluster.
i The electric parking brake can also be
applied when the key is removed. 168
ParkingDriving an
d parking
Page 172 of 373
Releasing
X Pull handle :.
The red !indicator lamp in the instru-
ment cluster goes out.
i You can only release the electric parking
brake when the key is in position 1or 2in
the ignition lock.
Applying automatically The electric parking brake is applied auto-
matically:
R if DISTRONIC PLUS brings the vehicle to a
standstill (vehicles with automatic trans-
mission) or
R if the HOLD function is keeping the vehicle
stationary or
R if Active Parking Assist is holding the vehi-
cle at a standstill
In addition, at least one of the following con-
ditions must be fulfilled:
R the engine is switched off
R the driver's door is open and the seat belt is
not fastened
R there is a system malfunction
R the power supply is insufficient
R the vehicle is stationary for a lengthy period
The red !indicator lamp in the instrument
cluster lights up.
i The electric parking brake is not automat-
ically applied if the engine is switched off by
the ECO start/stop function.
Releasing automatically i
The electric parking brake can only be
released automatically in vehicles with
automatic transmission.
The electric parking brake of your vehicle is
released automatically when all of the follow- ing conditions are fulfilled:
R the engine is running.
R the transmission is in position Dor R. R
the seat belt is fastened.
R you depress the accelerator pedal.
If the transmission is in position R, the boot lid
must be closed.
If your seat belt is not fastened, the following conditions must be fulfilled to automatically
release the electric parking brake:
R the driver's door is closed.
R you have shifted out of transmission posi-
tion Por you have previously driven faster
than 3 km/h.
i Ensure that you do not depress the accel-
erator pedal unintentionally. Otherwise the
parking brake will be released and the vehi-
cle will start to move.
Emergency braking The vehicle can also be braked during an
emergency by using the electric parking
brake.
X While driving, push handle :of the electric
parking brake (Y page 168).
i The vehicle is braked as long as you keep
handle :of the electric parking brake
pressed. The longer the electric parking
brake handle :is depressed, the greater
the braking force.
During braking:
R a warning tone sounds
R the Release parking brake Release parking brake message
appears
R the red !indicator lamp in the instru-
ment cluster flashes
When the vehicle has been braked to a stand- still, the electric parking brake is applied. Parking up the vehicle
If you leave the vehicle parked up for longer
than four weeks, the battery may be damaged by exhaustive discharging. Parking
169Driving and parking Z
Page 174 of 373
R
observe the gearshift recommendation.
R drive the vehicle in drive program E(vehi-
cles with automatic transmission).
i On long journeys at a constant speed, e.g.
on the motorway, only the bar for Constant
Constant
will change.
i The ECO display summarises the driving
characteristics from the start of the journey
to its completion. Therefore, there are
dynamic changes in the bars at the start of a journey. During a prolonged driving time,these changes are smaller. For more
dynamic changes, perform a manual reset.
For further information on the ECO display,
see (Y page 218). Braking
Important safety notes G
WARNING
If you shift down on a slippery road surface in an attempt to increase the engine's braking
effect, the drive wheels could lose their grip.
This increases the risk of skidding and having
an accident.
Do not shift down for additional engine brak-
ing on a slippery road surface.
Downhill gradients Change into a lower gear in good time on long
and steep downhill gradients. Take particular note of this when driving a laden vehicle and
when towing a trailer. For vehicles with auto-
matic transmission, you need to have selec-
ted manual drive program M(Y page 160).
i This also applies if you have activated
cruise control, SPEEDTRONIC or DIS-
TRONIC PLUS.
This will use the braking effect of the engine, so less braking will be required to maintain
vehicle speed. This relieves the load on the
brake system and prevents the brakes from
overheating and wearing too quickly. i
Briefly depressing the accelerator pedal
on downhill gradients while the manual
drive program Mis temporarily activated
(vehicles with automatic transmission): the automatic transmission may switch back to
the last active automatic drive program Eor
S. The automatic transmission may shift to a higher gear. This can reduce the engine's
braking effect.
Heavy and light loads G
WARNING
The braking system can overheat if you leave your foot on the brake pedal while driving.
This increases the braking distance and could
even cause the braking system to fail. There is
a risk of an accident.
Never use the brake pedal as a footrest. Do
not simultaneously depress both the brake
pedal and the accelerator pedal while driving.
! Depressing the brake pedal constantly
results in excessive and premature wear to
the brake pads.
If heavy demands are made on the brakes, do not park the vehicle immediately. Drive on for
a short while. This allows the airflow to cool
the brakes more quickly.
If the brakes have been used only moderately,
you should occasionally test their effective-
ness. To do this, brake more firmly from a
higher speed, paying attention to traffic con-
ditions. This improves the grip of the brakes.
Wet road surfaces If you have driven for a long time in heavy rain
without braking, there may be a delayed reac-
tion from the brakes when braking for the first time. This may also occur after a car wash orafter driving through deep water.
You have to depress the brake pedal more
firmly. Maintain a greater distance from the
vehicle in front.
After driving on a wet road or having the vehi-
cle washed, brake firmly while paying atten- Driving tips
171Driving and parking Z
Page 178 of 373
accelerates or brakes. If you do not know
what the stored speed is, the vehicle may
accelerate or brake unexpectedly. There is a
risk of an accident.
Take the traffic conditions into account
before calling up the stored speed. If you do
not know what the stored speed is, store the
desired speed again.
X Briefly pull the cruise control lever towards
you =.
X Remove your foot from the accelerator
pedal.
The first time cruise control is activated, it
stores the current speed or regulates the
speed of the vehicle to the previously
stored speed.
Setting a speed Keep in mind that it may take a brief moment
until the vehicle has accelerated or braked to the set speed.
X Press the cruise control lever up :for a
higher speed or down ?for a lower speed.
X Keep the cruise control lever pressed until
the desired speed is reached.
X Release the cruise control lever.
The new speed is stored.
X To adjust the set speed in 1 km/h incre-
ments: briefly press the cruise control
lever up :or down ?to the pressure
point.
The last stored speed increases or decrea-
ses in 1 km/h increments.
X To adjust the set speed in 10 km/h
increments: press the cruise control lever
briefly up :or down ?beyond the pres-
sure point.
The last stored speed increases or decrea- ses in 10 km/h increments.
i Cruise control is not deactivated if you
depress the accelerator pedal. For exam-
ple, if you accelerate briefly to overtake,
cruise control adjusts the vehicle's speed to the last speed stored after you have fin-
ished overtaking.
Deactivating cruise control There are several ways to deactivate cruise
control:
X Briefly press the cruise control lever for-
wards B.
or
X Brake.
or X Briefly press the cruise control lever in the
direction of arrow A.
Variable SPEEDTRONIC is selected. LIM
indicator lamp ;in the cruise control lever
lights up.
Cruise control is automatically deactivated if: R the vehicle is secured with the electric
parking brake
R you are driving at less than 30 km/h
R ESP ®
intervenes or you deactivate ESP ®
R while driving a vehicle with manual trans-
mission, you shift into neutral or depress
the clutch pedal for longer than six seconds
R on vehicles with manual transmission, you
shift to a gear that is too high, and as a
result the engine speed is too low
R on vehicles with automatic transmission,
you shift into position Nwhile driving
If cruise control is deactivated, you will hear a
warning tone. You will see the Cruise con‐
Cruise con‐
trol off trol off message in the multifunction dis-
play for approximately five seconds.
i The last speed stored is cleared when you
switch off the engine. SPEEDTRONIC
General notes SPEEDTRONIC brakes automatically so that
you do not exceed the set speed. You must
select a lower gear in good time on long and Driving systems
175Driving and parking Z