oil level MERCEDES-BENZ CLA COUPE 2018 Owner's Manual
[x] Cancel search | Manufacturer: MERCEDES-BENZ, Model Year: 2018, Model line: CLA COUPE, Model: MERCEDES-BENZ CLA COUPE 2018Pages: 326, PDF Size: 5.59 MB
Page 12 of 326
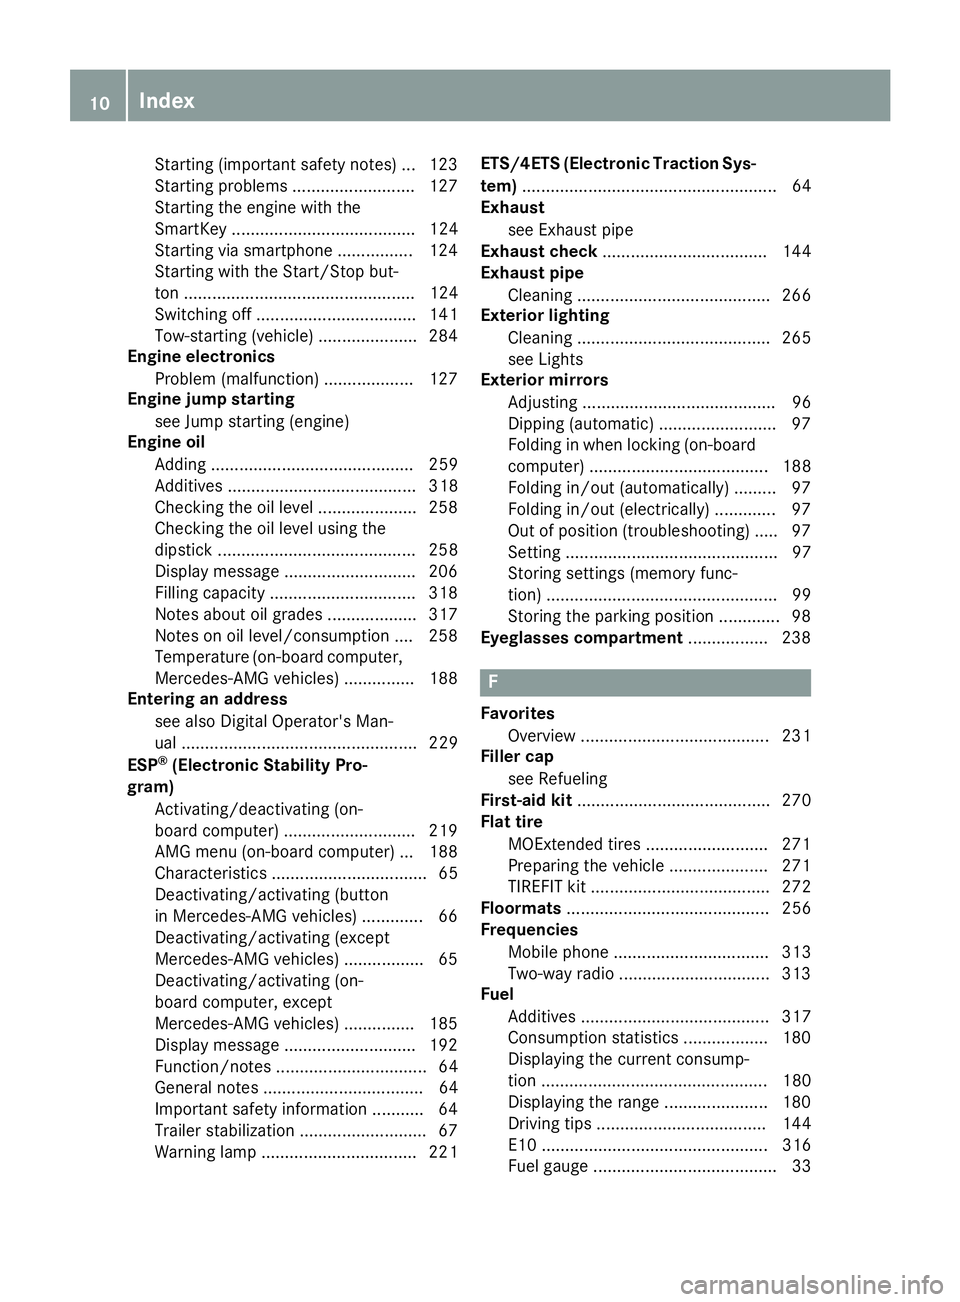
Starting (important safety notes)... 123
Starting problems .......................... 127
Starting the engine with the
SmartKey ....................................... 124
Starting via smartphone ................ 124
Starting with the Start/Sto pbut-
ton ................................................. 124
Switching off .................................. 141
Tow-starting (vehicle )..................... 284
Engine electronics
Problem (malfunction) ................... 127
Engine jump starting
see Jump starting (engine)
Engine oil
Adding ........................................... 259
Additives ........................................ 318
Checking the oill evel ..................... 258
Checking the oill evel using the
dipstick .......................................... 258
Displa ymessage ............................ 206
Filling capacity ............................... 318
Notesa boutoilgrade s................... 317
Notesono illevel/consumption .... 258
Temperature (on-board computer,
Mercedes-AMGv ehicles) ............... 188
Entering an address
see also Digital Operator's Man-
ual.................................................. 229
ESP
®(ElectronicS tability Pro-
gram)
Activating/deactivating (on-
board computer) ............................ 219
AMG menu (on-board computer) ... 188
Characteristics ................................. 65
Deactivating/activating (button
in Mercedes-AMGv ehicles) ............. 66
Deactivating/activating (except
Mercedes‑ AMG vehicles) ................. 65
Deactivating/activating (on-
board computer, except
Mercedes-AMGv ehicles) ............... 185
Displa ymessage ............................ 192
Function/note s................................ 64
Generaln otes .................................. 64
Important safety information ........... 64
Trailer stabilization ........................... 67
Warning lamp ................................. 221 ETS/4ETS (ElectronicT
raction Sys-
tem) ...................................................... 64
Exhaust
see Exhaus tpipe
Exhaustc heck................................... 144
Exhaustp ipe
Cleaning ......................................... 266
Ex terio
r lighting
Cleaning ......................................... 265
see Lights
Exterior mirrors
Adjusting ......................................... 96
Dipping (automatic) ......................... 97
Folding in when locking (on-board
computer) ...................................... 188
Folding in/out (automatically )......... 97
Folding in/out (electrically) ............. 97
Outofp osition (troubleshooting )..... 97
Setting ............................................. 97
Storing settings (memory func-
tion) ................................................. 99
Storing the parking position ............. 98
Eyeglassesc ompartment ................. 238
F
Favorites
Overview ........................................ 231
Filler cap
see Refueling
First-aidk it......................................... 270
Flat tire
MOExtended tire s.......................... 271
Preparing the vehicl e..................... 271
TIREFIT kit ...................................... 272
Floormats ........................................... 256
Frequencies
Mobil ephone ................................. 313
Two-way radio ................................ 313
Fuel
Additives ........................................ 317
Consumption statistics .................. 180
Displaying the current consump-
tion ................................................ 180
Displaying the rang e...................... 180
Driving tip s.................................... 144
E10 ................................................ 316
Fue lgauge ....................................... 33
10Index
Page 208 of 326
Display messagesPossible causes/consequences andMSolutions
#
See Operator'sMan‐ual
The battery is no tbein gcharged.
Aw arning tone also sounds.
Possibl ecauses are:
Rad efective alternato r
Ratornp oly-V-belt
Ram alfunction in th eelectronics
!Do no tcontinue driving. The engin ecould otherwise overheat.
XPull ove rand stop th evehicl esafely and switch off th eengine, pay-
ing attention to roa dand traffic conditions.
XSecur ethe vehicl eagainst rollin gaway (Ypage 141).
XConsult aqualified specialist workshop .
#
StopVehicl eSeeOperator' sManual
The battery is no longer bein gcharged and th econditi on of charg eis
to ol ow.
Aw arning tone also sounds.
XPull ove rand stop th evehicl esafely and switch off th eengine, pay-
ing attention to roa dand traffic conditions.
XSecur ethe vehicl eagainst rollin gaway (Ypage 141).
XObserv ethe instruction sinthedisplay message #See Oper‐ator's Manual.
XConsult aqualified specialist workshop .
4
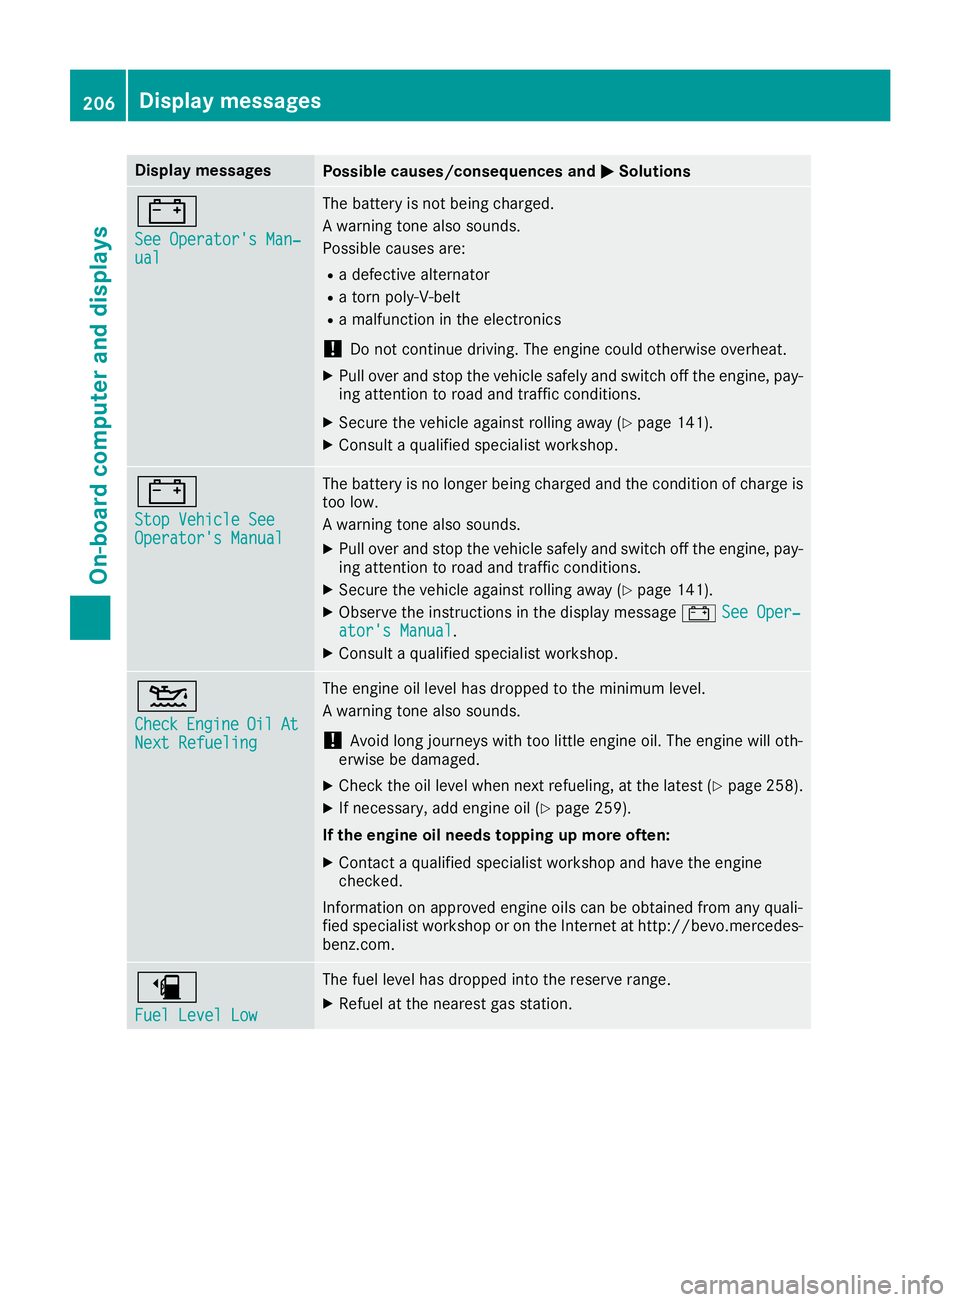
CheckEngineOilAtNextRefueling
The engin eoil level has dropped to th eminimum level.
Aw arning tone also sounds.
!Avoid lon gjou rneys wit htoo littl eengineo il. The engin ewill oth-
erwise be damaged.
XChec kthe oil level when next refueling, at th elatest (Ypage 258).
XIf necessary, add engin eoil(Ypage 259).
If th eengin eoil need stoppin gupm oreo ften:
XContac taqualified specialist workshop and hav ethe engin e
checked.
Information on approve dengineo ils can be obtained from any quali-
fie ds pecialist workshop or on th eInterne tath ttp:// bevo.mercedes -
benz.com.
æ
Fue lLevel Low
The fuel level has dropped int othe reserv erange.
XRefue lattheneares tgas station .
206Display messages
On-boardc omputer andd isplays
Page 260 of 326
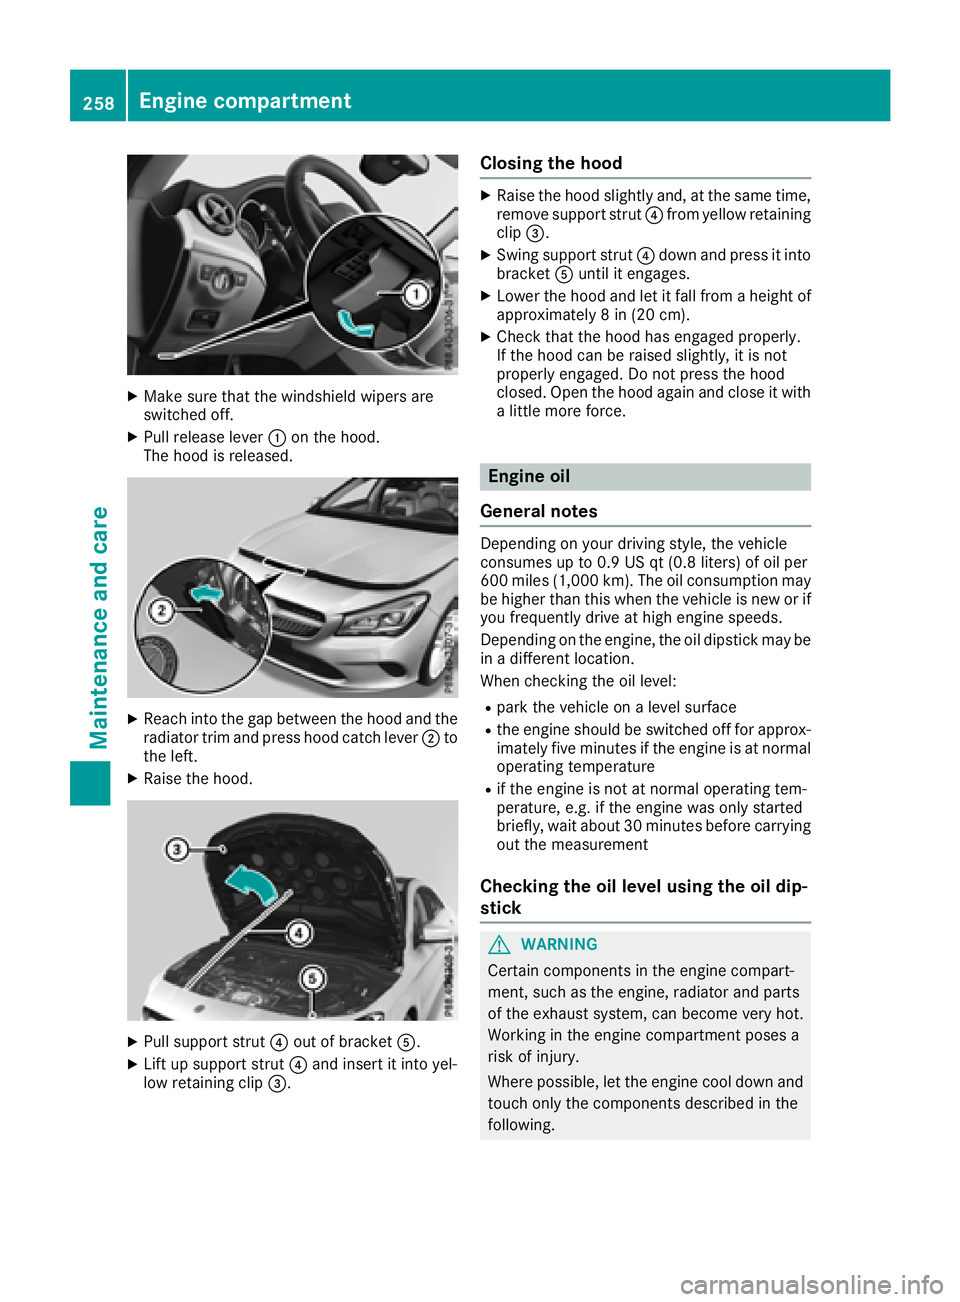
XMake sure that the windshield wipers are
switched off.
XPull release lever:on the hood.
The hood is released.
XReach into the gap between the hood and the radiator trim and press hood catch lever ;to
the left.
XRaise the hood.
XPull support strut ?out of bracket A.
XLift up support strut ?and insert it into yel-
low retaining clip =.
Closing the hood
XRaise the hood slightly and, at the same time,
remove support strut ?from yellow retaining
clip =.
XSwing support strut ?down and press it into
bracket Auntil it engages.
XLower the hood and let it fall from aheight of
approximately 8in(20 cm).
XCheck that the hood has engaged properly.
If the hood can be raised slightly, it is not
properly engaged. Do not press the hood
closed. Open the hood again and close it with
alittle more force.
Engine oil
General notes
Depending on your driving style, the vehicle
consumes up to 0.9 US qt (0.8 liters) of oil per
600 miles (1,000 km). The oil consumption may
be higher than this when the vehicle is new or if
you frequently drive at high engine speeds.
Depending on the engine, the oil dipstick may be
in ad ifferent location.
When checking the oil level:
Rpark the vehicle on alevel surface
Rthe engine should be switched off for approx-
imately five minutes if the engine is at normal
operating temperature
Rif the engine is not at normal operating tem-
perature, e.g. if the engine was only started
briefly, wait about 30 minutes before carrying
out the measurement
Checking the oil level using the oil dip-
stick
GWARNING
Certain components in the engine compart-
ment, such as the engine, radiator and parts
of the exhaust system, can become very hot.
Working in the engine compartmentp oses a
risk of injury.
Where possible, let the engine cool down and touch only the components described in the
following.
258Engine compartment
Maintenance and care
Page 261 of 326
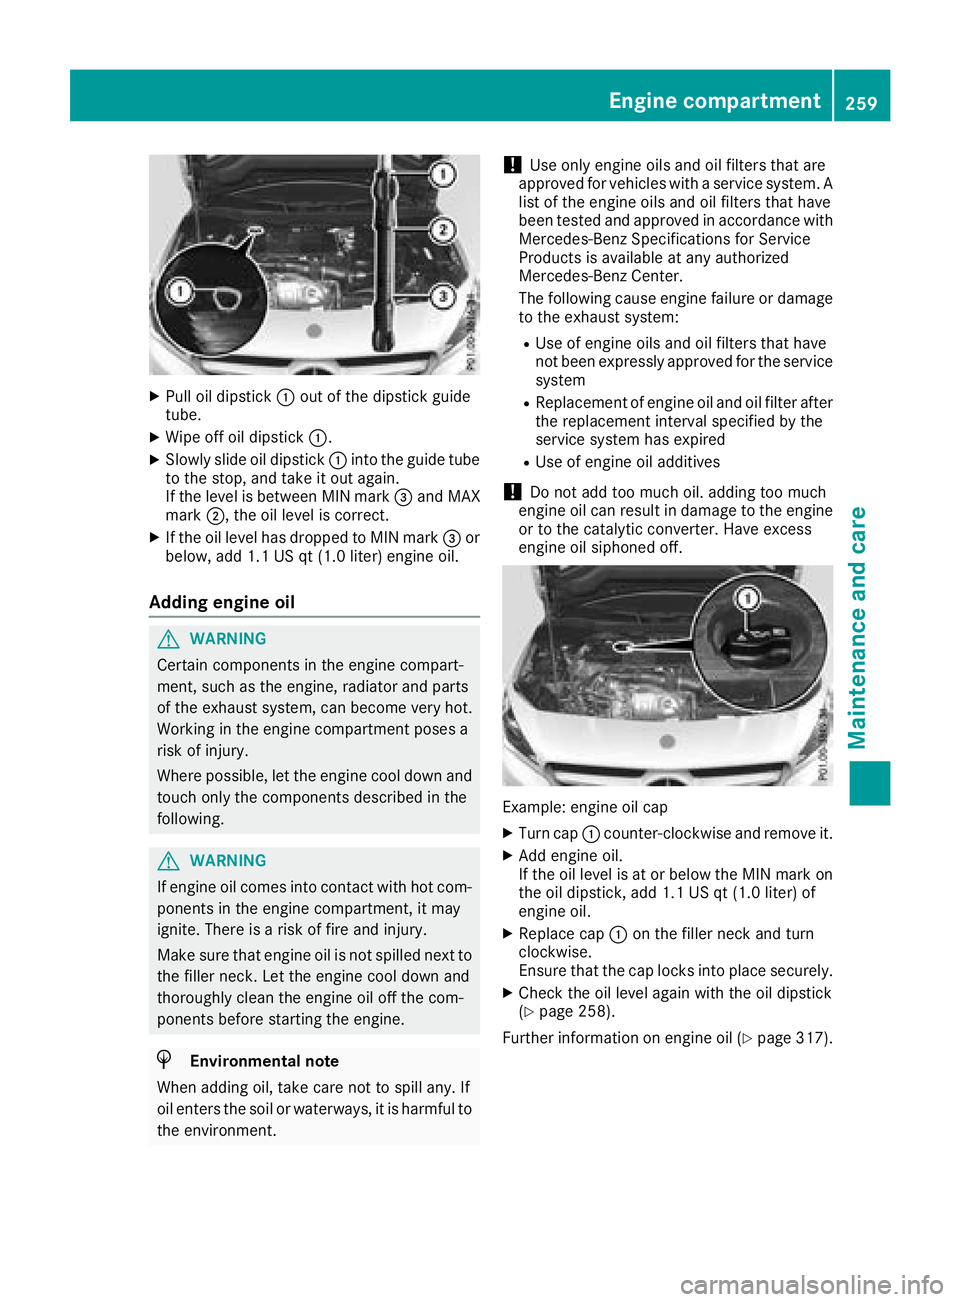
XPull oil dipstick:out of the dipstick guide
tube.
XWipe off oil dipstick :.
XSlowly slide oil dipstick :into the guide tube
to the stop, and take it out again.
If the level is between MIN mark =and MAX
mark ;,the oil level is correct.
XIf the oil level has dropped to MIN mark =or
below, add 1.1 US qt (1.0 liter) engine oil.
Adding engine oil
GWARNING
Certain components in the engine compart-
ment ,such as the engine, radiator and parts
of the exhaust system, can become very hot.
Workingint he engine compartment poses a
risk of injury.
Where possible, let the engine cool down and touch only the components described in the
following.
GWARNING
If engine oil comes into contact with hot com- ponentsint he engine compartment ,itmay
ignite. There is arisk of fire and injury.
Make sure that engine oil is not spilled next to
the filler neck.L et the engine cool down and
thoroughly clean the engine oil off the com-
ponentsb efore starting the engine.
HEnvironmenta lnote
When adding oil, take care not to spill any. If
oil enter sthe soil or waterways, it is harmful to
the environment.
!Use only engine oils and oil filters that are
approved for vehicles with aservice system. A
list of the engine oils and oil filters that have
been tested and approved in accordancew ith
Mercedes-Benz Specifications for Service
Products is availableata ny authorized
Mercedes-Benz Center.
The following cause engine failure or damage
to the exhaust system:
RUse of engine oils and oil filters that have
not been expressly approved for the service
system
RReplacement of engine oil and oil filter after
the replacement interval specified by the
service system has expired
RUse of engine oil additives
!Do not add too much oil. adding too much
engine oil can result in damage to the engine
or to the catalytic converter. Have excess
engine oil siphoned off.
Example: engine oil cap
XTurn cap :counter-clockwise and remove it.
XAdd engine oil.
If the oil level is at or below the MIN mark on
the oil dipstick ,add 1.1 US qt (1.0 liter) of
engine oil.
XReplace cap :on the filler neck and turn
clockwise.
Ensure that the cap locks into place securely.
XCheck the oil level again with the oil dipstick
(Ypage 258).
Further information on engine oil (
Ypage 317).
Engine compartment259
Maintenance and care
Z
Page 263 of 326
ASSYSTPLUS
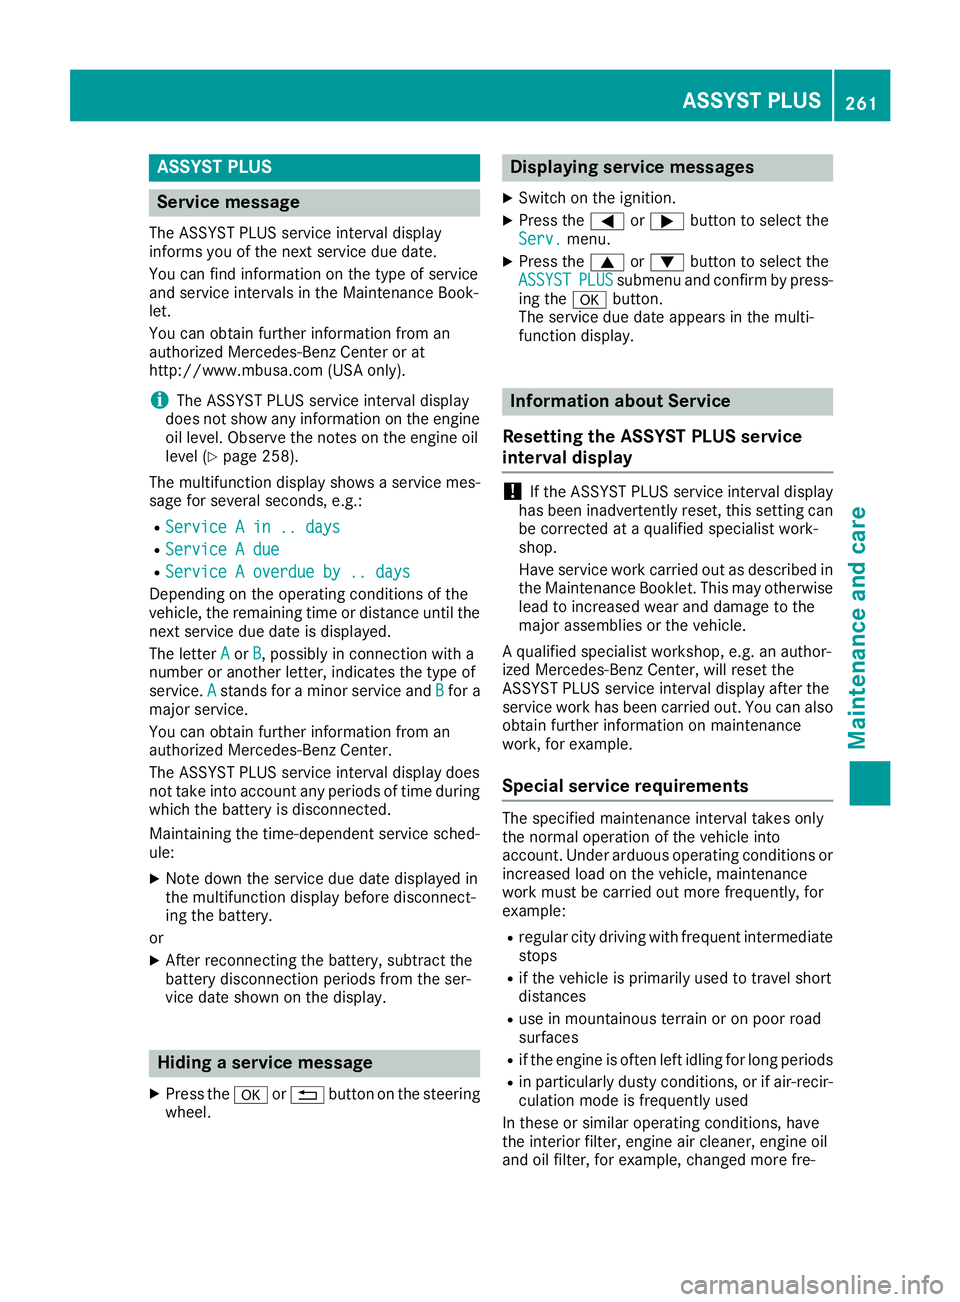
Service message
The ASSYS TPLUSs ervic einterval display
inform syou of th enexts ervic edue date.
You can fin dinformation on th etypeofs ervice
and servic eintervals in th eMaintenance Book -
let .
You can obtain further information from an
authorize dMercedes-Benz Cente rorat
http://www.mbusa.co m(USAo nly).
iThe ASSYS TPLUSs ervic einterval display
does no tsho wa ny information on th eengine
oil level. Observ ethe note sont heengin eoil
level (
Ypage 258).
The multifunction display shows aservic emes-
sage for several seconds, e.g. :
RServiceAin..d ays
RServic eAdue
RServic eAoverdueby..d ays
Dependin gontheoperating condition softhe
vehicle, th eremaining time or distanc euntil th e
next servic edue dat eisdisplayed.
The lette rA
or B,possibl yinconnectio nwitha
number or another letter, indicates th etypeo f
service. A
standsfor am inor servic eand Bfor a
major service.
You can obtain further information from an
authorize dMercedes-Benz Center.
The ASSYS TPLUSs ervic einterval display does
no ttak eintoa ccoun tany periods of time during
whic hthe battery is disconnected.
Maintainin gthe time-dependen tservic esched-
ule:
XNot edown th eservic edue dat edisplayed in
th em ultifunction display before disconnect -
ing th ebattery.
or
XAfte rreconnecting th ebattery, subtrac tthe
battery disconnection periods from th eser-
vic ed ates hown on th edisplay.
Hiding aservice message
XPress th ea or% buttononthesteering
wheel.
Displaying service messages
XSwitc hont heignition .
XPress th e= or; buttontos elect th e
Serv.menu.
XPress th e9 or: buttontos elect th e
ASSYSTPLU Ssubmen uand confirm by press-
ing th ea button.
The servic edue dat eappear sinthemulti-
function display.
Infor mation abou tService
Resetting th eASSYSTP LUS service
interval display
!If th eASSYSTP LUSs ervic einterval display
has been inadvertentl yreset ,thiss etting can
be correcte dataqualified specialist work-
shop.
Hav eservic eworkc arrie dout as described in
th eM aintenance Booklet .This may otherwise
lead to increased wear and damag etothe
major assemblies or th evehicle.
Aq ualified specialist workshop ,e.g.ana uthor-
ized Mercedes-Benz Center, will reset th e
ASSYS TPLUSs ervic einterval display after th e
servic eworkh as been carrie dout.Y ou can also
obtain further information on maintenance
work, for example.
Special service requirements
The specifie dmaintenance interval takes only
th en orma loperation of th evehicl einto
account. Under arduous operating condition sor
increased load on th evehicle, maintenance
wor km ustbec arriedout mor efrequently, for
example:
Rregular cit ydrivin gwithf requen tintermediat e
stops
Rif th evehicl eisp rimarily used to travel short
distances
Ruse in mountainous terrain or on poor road
surfaces
Rif th eengineiso ften lef tidlin gfor lon gperiods
Rin particularly dust yconditi ons, or if air-recir-
culation mod eisfrequentl yused
In these or similar operating conditions, hav e
th ei nterior filter, engin eair cleaner, engin eoil
and oil filter, for example, changed mor efre-
ASSYST PLUS261
Maintenance and care
Z
Page 310 of 326
Tire-mounting tools should not be used near
the valve. This could damage the electronic
components.
Only have tires changed ataqualified spe-
cialist workshop.
Observe the instructions and safety notes in the
"Changing awheel" section (
Ypage 307).
The wear pattern sonthe front and rear tires
differ, depending on the operating conditions.
Rotate the wheels before aclear wear pattern
has formed on the tires. Frontt ires typically
wear more on the shoulders and the rear tires in
the center.
On vehicles that have the same size front and
rear wheels, you can rotat ethe wheels accord-
ing to the intervals in the tire manufacturer's
warranty book in your vehicle documents. If no
warranty book is available, the tires should be
rotated every 3,000 to 6,000 miles (5,000 to
10,000k m).D ependin gontire wear, this may
be required earlier. Do not change the direction
of wheel rotation.
Clean the contact surfaces of the wheel and the brake disc thoroughly every time awheel is rota-
ted. Check the tire pressure and, if necessary,
restart the tire pressure loss warning system
(Canada only) or the tire pressure monitor (USA
only).
Direction of rotation
Tires with aspecified direction of rotation have
additional benefits ,e.g. if there is arisk of hydro-
planing. These advantages can only be gained if
the tires are installed corresponding to the
direction of rotation.
An arrow on the sidewall of the tire indicates its
correctd irection of rotation.
Storing wheels
Storewheels that are not being used in acool,
dry and preferably dark place. Protectt he tires
from oil, grease, gasoline and diesel.
Mounting awheel
Preparing the vehicle
XStop the vehicle on solid, non-slippery and
level ground.
XApply the electric parking brake manually.
XBring the front wheels into the straight-ahead position.
XShift the transmission to position j.
XSwitch off the engine.
XVehicles without KEYLESS-GO:remove the
SmartKey from the ignition lock.
XVehicles with KEYLESS-GO start-function
or KEYLESS-GO: open the driver's door.
The vehicle electronics are now in position
u.T his is the same as “key removed”.
XVehicles with KEYLESS-GO start-function
or KEYLESS-GO: remove the Start/Stop but-
ton from the ignition lock (
Ypage 122).
XMake sure that the engine cannot be started
via your smartphon e(Ypage 83).
XIf included in the vehicle equipment, remove
the tire-change tool kit from the vehicle.
XSafeguard the vehicle against rolling away
(Ypage 141).
iApart from certain country-specific varia-
tions, the vehicles are not equipped with a
tire-change tool kit. Some tools for changing a
wheel are specific to the vehicle. For more
information on which tools are required to
perform awheel change on your vehicle, con-
sult aqualified specialist workshop.
Necessary tire-changing tools can include, for
example:
RJack
RWheel chock
RLug wrench
308Changing awheel
Wheels and tires
Page 321 of 326
The antifreeze concentrate/corrosion inhibitor
concentration in the engine cooling system
should:
Rbe at least 50%. This will protectthe engine
cooling system against freezin gdown to
approximately -35 ‡(-37 †)
Rnot exceed 55% (antifreez eprotection down
to -49 ‡[-45 †]) .Otherwise ,hea tw ill no tbe
dissipated as effectively
Mercedes-Ben zrecommends acoolan torc or-
rosio ninh ibitor/antifreez econcentrat ein
accordance wit h
MB Specification sfor Servic eProducts 310. 1.
iWhen the vehicle is first delivered, it is filled
with acoolant mixture that ensures adequate
antifreeze and anti-corrosion protection.
iThe coolant is checked with every mainte-
nanc einterval at aqualified specialist work-
shop.
Filling capacities
ModelCapacity
Mercedes ‑AMG
vehiclesApprox .12.6USq t
(11.9l )
Allo ther modelsApprox. 8.2 US qt
(7.8 l)
Windshield washe rsystem
Important safety notes
GWARNING
Windshieldw asher concentrate coul dignite if
it comes into contact with hot engine compo-
nents or the exhaust system .There is arisk of
fire and injury.
Make sure that no windshield washer con-
centrate is spilled next to the filler neck.
!Only MB SummerFi tand MB WinterFit
washer flui dshould be mixed together. The
sprayn ozzles may otherwise become
blocked.
Do not use distille dorde-ionized water. Other-
wise, the levels ensor may giveafals ereading. When handling washer fluid, observe the impor-
tant safety notes on service products
(
Ypag
e315).
At temperatures above freezing:
XFill the washer flui dreservoir with amixture of
water and windshield washer fluid, e.g. MB
SummerFit.
Add 1part MB SummerFi tto100 parts water.
At temperatures below freezing:
XFill the washer flui dreservoir with amixture of
water and washer fluid, e.g. MB WinterFit.
For the correct mixing ratio refer to the infor-
mation on the antifreeze reservoir.
iAdd windshield washer fluid, e.g. MB Sum-
merFit or MB WinterFit, to the washer flui dall
yea rround.
Climate control system refrigerant
Important safety notes
The climate control system of you rvehicleisf il-
led with refrigerant R ‑134a.
The instruction label regarding the refrigerant
type use dcan be found on the left, on the under-
side of the hood.
!Only the refrigerant R ‑134a and the PAG oil
approved by Mercedes-Benz may be used.
The approved PAG oil may not be mixed with
any other PAG oil that is not approved for
R-134a refrigerant. Otherwise, the climate
control system may be damaged.
Service work, such as refilling with refrigerant or
replacing component parts, may only be carried
out by aqualified specialist workshop. All appli-
cabl eregulations, as wellasS AE standard J639,
must be adhered to.
Always have work on the climate control system
carrie dout at aqualified specialist workshop.
Service products and filling capacities319
Technical data
Z