oil temperature MERCEDES-BENZ CLA COUPE 2018 Owner's Manual
[x] Cancel search | Manufacturer: MERCEDES-BENZ, Model Year: 2018, Model line: CLA COUPE, Model: MERCEDES-BENZ CLA COUPE 2018Pages: 326, PDF Size: 5.59 MB
Page 7 of 326
Information aboutService .............261
Resetting the service intervald is-
play. ............................................... 261
Service message ............................ 261
Specials ervice requirements ......... 261
ATA (Anti-Theft Alarm system)
Activating/deactivating ................... 68
Function ...........................................6 8
Switching off the alarm .................... 68
ATTENTIO NASSIS T
Activating/deactivating ................. 185
Displa ymessage ............................ 207
Function/note s............................. 171
Audi omenu( on-board computer) .... 182
Audi osystem
see separate operating instructions
Authorized Mercedes-Benz Center
see Qualifie dspecialist workshop
Authorized workshop
see Qualifie dspecialist workshop
AUTO lights
Displa ymessage ............................ 204
see Lights
Automatic car was h(care) ............... 262
Automatic engine start (ECO start/
stopf unction) .................................... 126
Automatic engine switch-off (ECO
start/stopf unction).......................... 126
Automatic headlamp mode .............. 100
Automatic transmission
Accelerator peda lposition ............. 133
Changing gea r............................... 133
DIREC TSELECT lever ..................... 130
Drive program. ............................... 134
Drive programd isplay .................... 130
Driving tip s.................................... 133
DYNAMIC SELECT button (all vehi-
cle se xcept Mercedes-AMGv ehi-
cles) ............................................... 128
DYNAMIC SELECT controller
(Mercedes-AMGv ehicles) .............. 129
Emergency running mode. ............. 138
Engaging drive position .................. 132
Engaging neutral ............................ 131
Engaging park position
(Mercedes-AMGv ehicles) .............. 132 Engaging park position automati-
cally ............................................... 131
Engaging reverse gea
r................... 131
Engaging the park position ............ 130 Holding the ve
hiclestationary on
uphill gradients .............................. 134
Kickdown. ...................................... 134
Manua lshifting .............................. 136
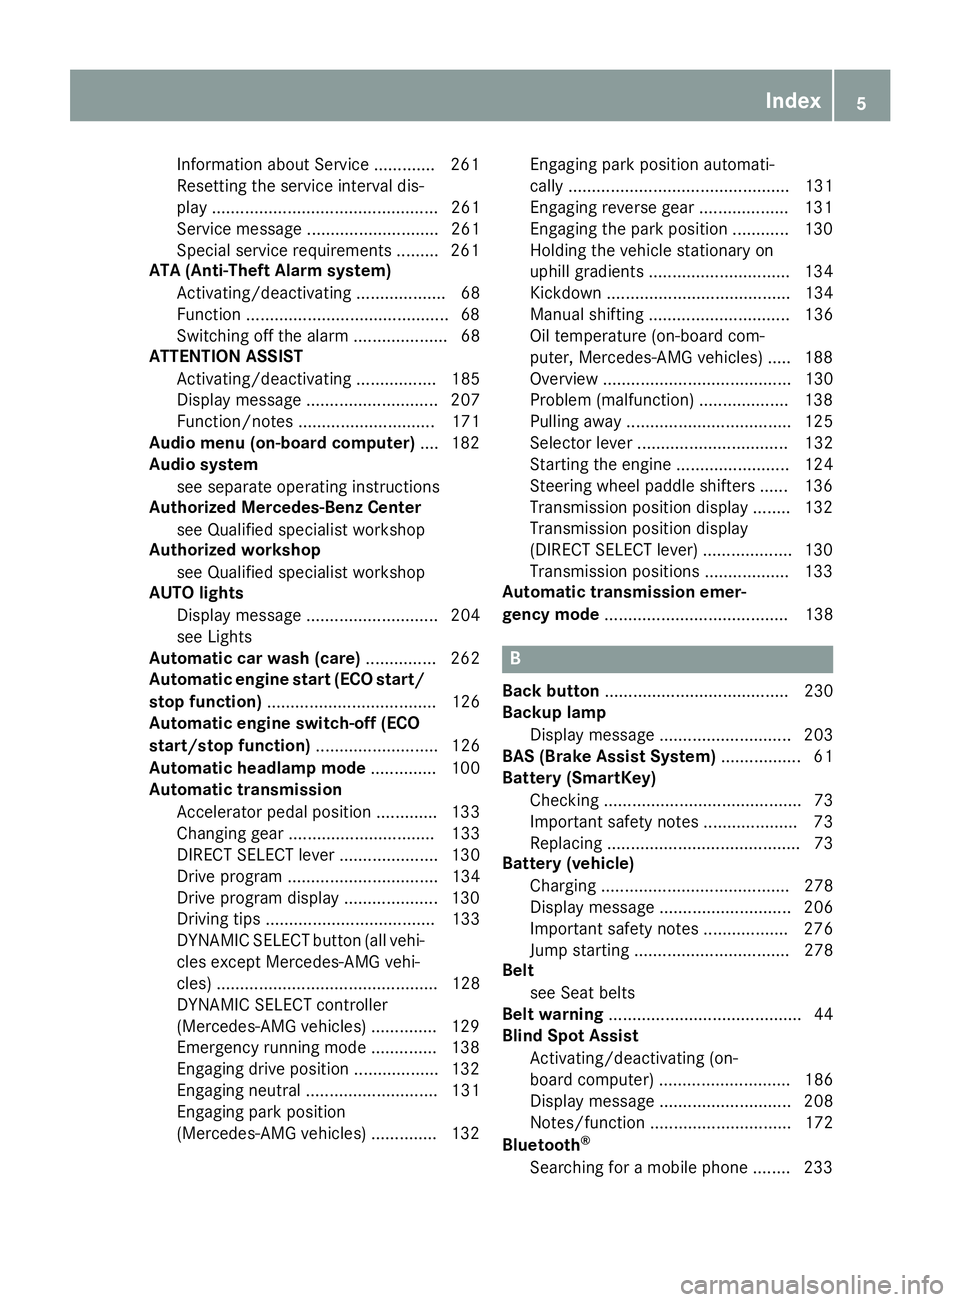
Oil temperature (on-board com-
puter, Mercedes-AMGv ehicles) ..... 188
Overview ........................................ 130
Problem (malfunction) ................... 138
Pulling away ................................... 125
Selector lever ................................ 132
Starting the engine ........................ 124
Steering wheelp addleshifters ...... 136
Transmission position display ........ 132
Transmission position display
(DIRECT SELECT lever) ................... 130
Transmission positions .................. 133
Automatic transmissio nemer-
gencym ode....................................... 138
B
Back button ....................................... 230
Backup lamp
Displa ymessage ............................ 203
BAS (Brake Assist System) ................. 61
Battery (SmartKey)
Checking .......................................... 73
Important safety notes .................... 73
Replacing ......................................... 73
Battery (vehicle)
Charging ........................................ 278
Displa ymessage ............................ 206
Important safety notes .................. 276
Jump starting ................................. 278
Belt
see Seatb elts
Bel twarning ......................................... 44
Blind SpotA ssist
Activating/deactivating (on-
board computer) ............................ 186
Displa ymessage ............................ 208
Notes/function .............................. 172
Bluetooth
®
Searching for amobilephone ........ 233
Index5
Page 12 of 326
Starting (important safety notes)... 123
Starting problems .......................... 127
Starting the engine with the
SmartKey ....................................... 124
Starting via smartphone ................ 124
Starting with the Start/Sto pbut-
ton ................................................. 124
Switching off .................................. 141
Tow-starting (vehicle )..................... 284
Engine electronics
Problem (malfunction) ................... 127
Engine jump starting
see Jump starting (engine)
Engine oil
Adding ........................................... 259
Additives ........................................ 318
Checking the oill evel ..................... 258
Checking the oill evel using the
dipstick .......................................... 258
Displa ymessage ............................ 206
Filling capacity ............................... 318
Notesa boutoilgrade s................... 317
Notesono illevel/consumption .... 258
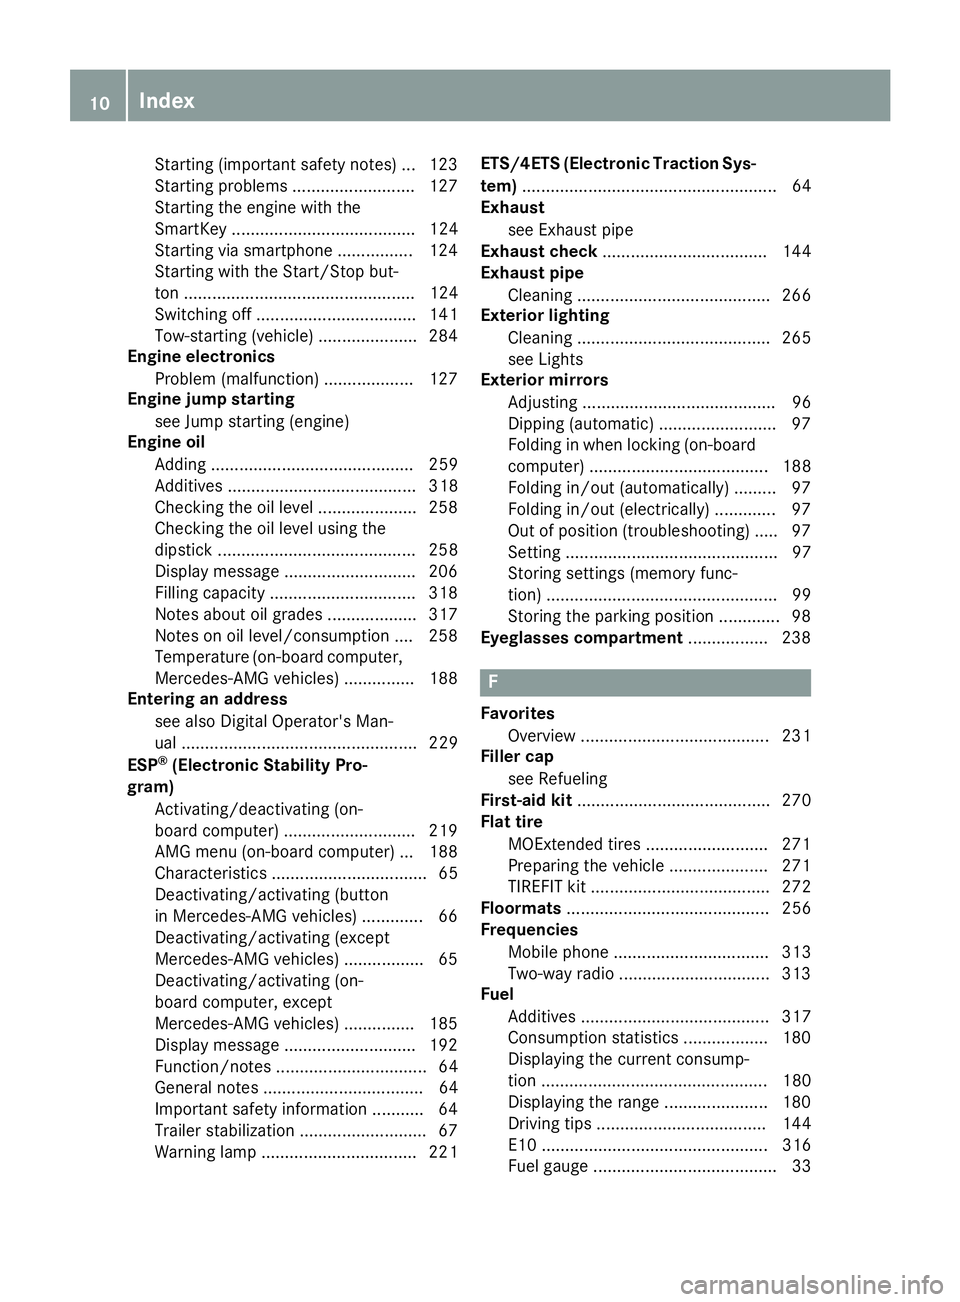
Temperature (on-board computer,
Mercedes-AMGv ehicles) ............... 188
Entering an address
see also Digital Operator's Man-
ual.................................................. 229
ESP
®(ElectronicS tability Pro-
gram)
Activating/deactivating (on-
board computer) ............................ 219
AMG menu (on-board computer) ... 188
Characteristics ................................. 65
Deactivating/activating (button
in Mercedes-AMGv ehicles) ............. 66
Deactivating/activating (except
Mercedes‑ AMG vehicles) ................. 65
Deactivating/activating (on-
board computer, except
Mercedes-AMGv ehicles) ............... 185
Displa ymessage ............................ 192
Function/note s................................ 64
Generaln otes .................................. 64
Important safety information ........... 64
Trailer stabilization ........................... 67
Warning lamp ................................. 221 ETS/4ETS (ElectronicT
raction Sys-
tem) ...................................................... 64
Exhaust
see Exhaus tpipe
Exhaustc heck................................... 144
Exhaustp ipe
Cleaning ......................................... 266
Ex terio
r lighting
Cleaning ......................................... 265
see Lights
Exterior mirrors
Adjusting ......................................... 96
Dipping (automatic) ......................... 97
Folding in when locking (on-board
computer) ...................................... 188
Folding in/out (automatically )......... 97
Folding in/out (electrically) ............. 97
Outofp osition (troubleshooting )..... 97
Setting ............................................. 97
Storing settings (memory func-
tion) ................................................. 99
Storing the parking position ............. 98
Eyeglassesc ompartment ................. 238
F
Favorites
Overview ........................................ 231
Filler cap
see Refueling
First-aidk it......................................... 270
Flat tire
MOExtended tire s.......................... 271
Preparing the vehicl e..................... 271
TIREFIT kit ...................................... 272
Floormats ........................................... 256
Frequencies
Mobil ephone ................................. 313
Two-way radio ................................ 313
Fuel
Additives ........................................ 317
Consumption statistics .................. 180
Displaying the current consump-
tion ................................................ 180
Displaying the rang e...................... 180
Driving tip s.................................... 144
E10 ................................................ 316
Fue lgauge ....................................... 33
10Index
Page 20 of 326
Start-off assistActivating ....................................... 158
Important safety notes .................. 158
Start/Stop button
Removing ....................................... 123
Starting the engine ........................ 124
Start/stop function
see ECO start/stop function
Starting (engine) ................................ 123
STEER CONTROL ..................................6 8
Steering
Display message ............................2 16
Steering assistant STEE RCON-
TROL
see STEER CONTROL
Steering wheel
Adjusting (manually). ....................... 95
Butto noverview ............................... 34
Buttons (on-board computer) ......... 177
Cleaning ......................................... 267
Important safety notes .................... 95
Paddle shifters ............................... 136
Steering whee lpaddle shifters ........ 136
Stopwatch (RACETIMER) ................... 189
Stowag ecom partments
Armrest (front) ............................... 238
Armrest (under )............................. 239
Center console .............................. 238
Center console (rear) ..................... 239
Cu ph olders ................................... 242
Eyeglasses compartment ............... 238
Glove box ....................................... 238
Important safety information ......... 237
Mapp ockets .................................. 239
Stowag enet ................................... 239
Stowag enet....................................... 239
Stowag ewellb enea th the trunk
floor .................................................... 241
Summert ires..................................... 289
Sun visor ............................................ 243
Suspension setting
AMG adaptive sport suspension
system ........................................... 159
Switchin gair-recirculatio nmode
on/off ................................................. 119
Switchin gonmediam ode
Via the device list .......................... 235T
Tachometer ........................................ 176
Tail lamps
Displa ymessage ............................ 203
see Lights
Tank
see Fue ltank
Tank content
Fuelgauge ....................................... 33
Technical data
Capacities ...................................... 315
Information .................................... 313
Tires/wheels ................................. 312
Vehicl edata. .................................. 320
Telephone
Accepting acall( multifunction
steering wheel) .............................. 184
Authorizing amobilephone (con-
necting) ......................................... 233
Authorizing amobil ephone via the
device manager (connecting) ......... 234
Connecting amobilephone
(device manager )........................... 234
Connecting amobilephone (gen-
erali nformation) ............................ 233
Displa ymessage ............................ 216
Introduction ................................... 183
Menu (on-board computer) ............ 183
Numbe rfrom the phone boo k........ 184
Redialing ........................................ 184
Rejecting/ending acall. ................ 184
see also Digital Operator's Man-
ua l.................................................. 229
Temperature
Coolant .......................................... 177
Coolant (on-board computer,
Mercedes-AMGv ehicles) ............... 188
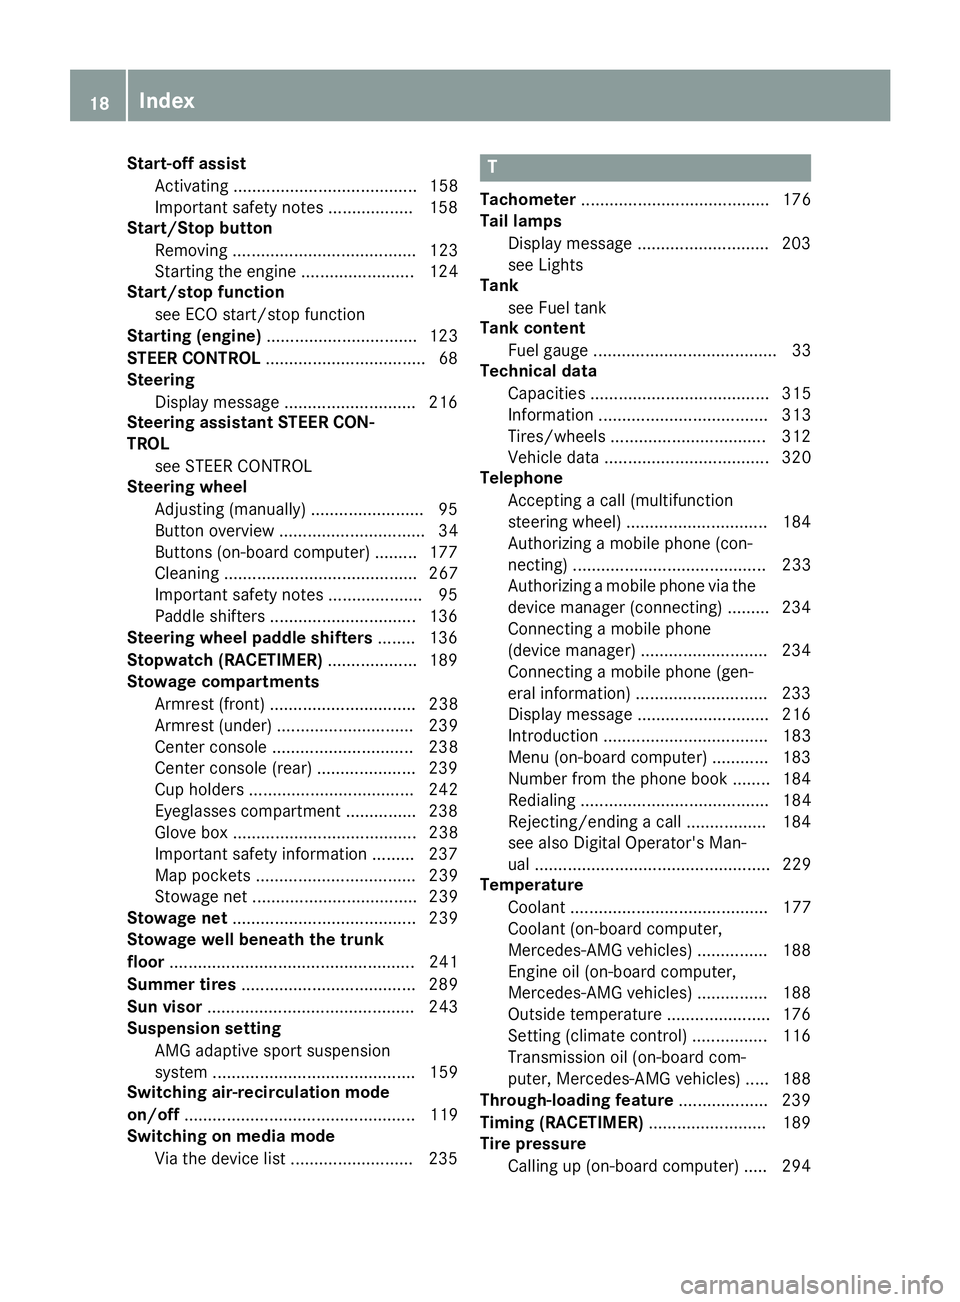
Engine oil( on-board computer,
Mercedes-AMGv ehicles) ............... 188
Outsid etemperature ...................... 176
Setting (climate control )................ 116
Transmission oil( on-board com-
puter, Mercedes-AMGv ehicles) ..... 188
Through-loadin gfeature ................... 239
Timing (RACETIMER) ......................... 189
Tire pressure
Calling up (on-board computer) ..... 294
18Index
Page 190 of 326
Comfort
Switching thefold-in mirror swhen lock-
ing feature on/off
This function is only available in Canada.
This function is only available when th evehicle is
equipped witht heelectrical fold-in function.
When you activat ethe Auto.
MirrorFoldingfunction,t heexterior mirror sare folded in when
th ev ehicle is locked. If you unlock th evehicle
and then open th edriver'sorf ront-passenger
door,t heexterior mirror sfold out again.
If you have switched on the Auto. Mirror
Foldingfunction and you fold in theexteri or
mirror susingt hebutto nont hedoor
(
Ypage 97), they will no tfold out automatically.
The exterior mirror scan then only be folded out
usingt hebutto nont hedoor.
XPress the =or; buttononthesteering
wheel to selectt heSett.menu.
XPress the :or9 buttontos electt he
Conveniencesubmenu.
XPress ato confirm.
XPress the :or9 buttontos electt he
Auto. Mirror Foldingfunction.
If the Auto. Mirror Foldingfunction is
switched on,t hemultifunction display shows
th ee xteri or mirror in orange.
XPress the abuttontos ave th esetting.
Restoring th efactor ysettings
XPress the =or; buttononthesteering
wheel to selectt heSett.menu.
XPress the :or9 buttontos electt he
FactoryS ettingsubmenu.
XPressato confirm.
The Reset All Settings?function
appears.
XPress the :or9 buttontos elect Noor
Yes.
XPress the abuttontoc onfirmtheselec-
tion.
If you have selected Yes
,the multifunction
display shows aconfirmation message.
For safety reasons, the DaytimeRunning
Lightsfunction in the Lightsubmenuisonly
reset if th evehicle is stationary.
AMG men u(Mercedes-AM Gvehicles)
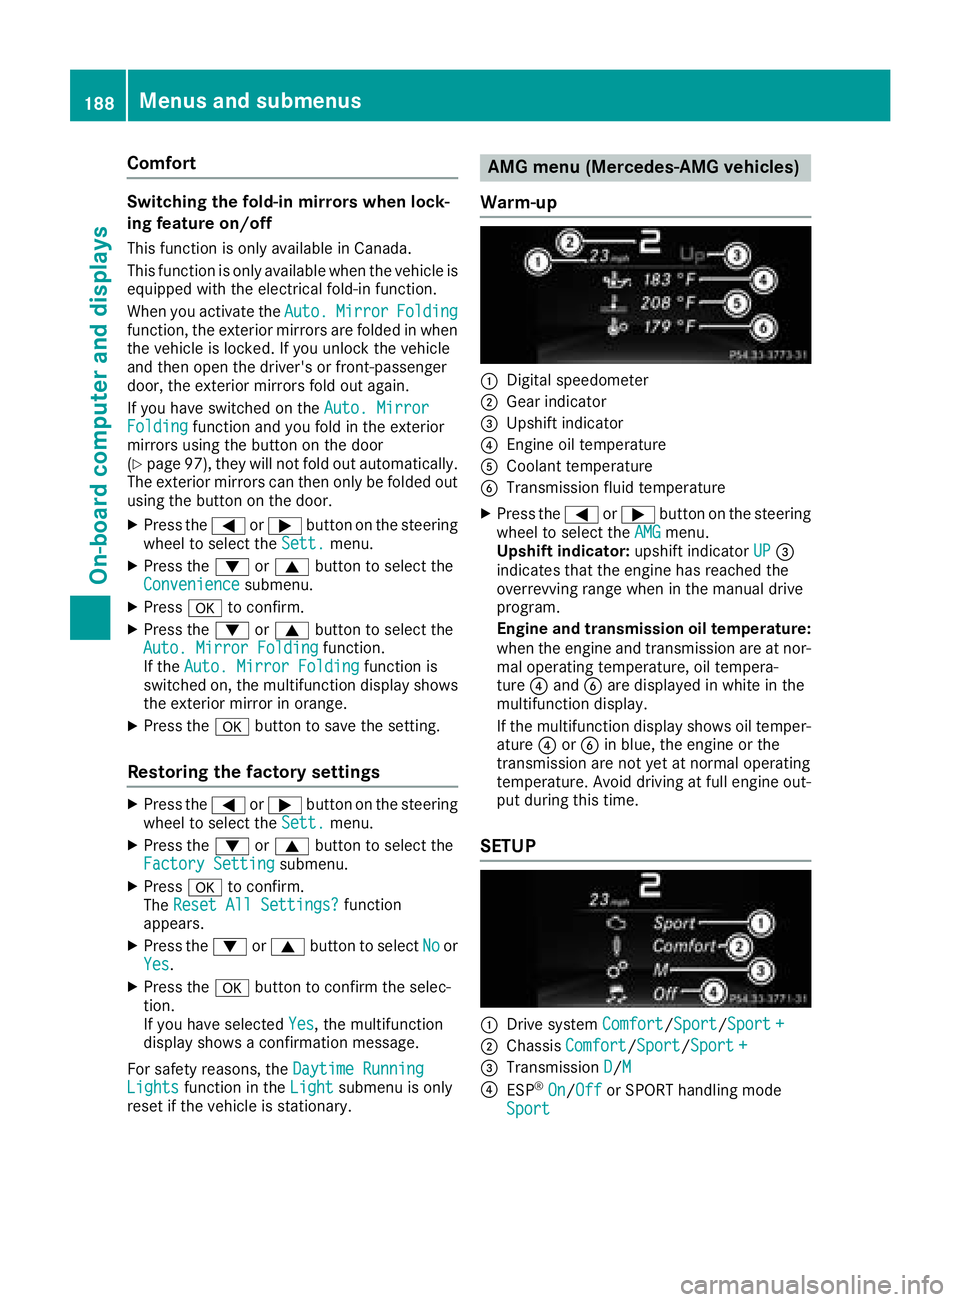
Warm-up
:Digital speedometer
;Gear indicator
=Upshift indicator
?Engineo il temperature
ACoolantt emperature
BTransmissionf luid temperature
XPress the=or; buttononthesteering
wheel to select the AMGmenu.
Upshif tindicator: upshift indicator UP=
indicates that th eengineh as reached the
overrevving range when in th emanual drive
program.
Engine and transmission oil temperature:
when th eenginea nd transmission are at nor-
mal operatin gtem perature, oil tempera-
ture ?and Bare displayed in whiteint he
multifunction display.
If th emultifunction display shows oil temper-
ature ?orB in blue, th eengineort he
transmission are no tyet at normal operating
temperature. Avoid driving at full engineo ut-
put durin gthist ime.
SETUP
:Drive system Comfort/Sport/Sport +
;Chassis Comfort/Sport/Sport +
=Transmission D/M
?ESP®On/Offor SPORT handlingm ode
Sport
188Menusa nd submenus
On-boardc omputer and displays
Page 260 of 326
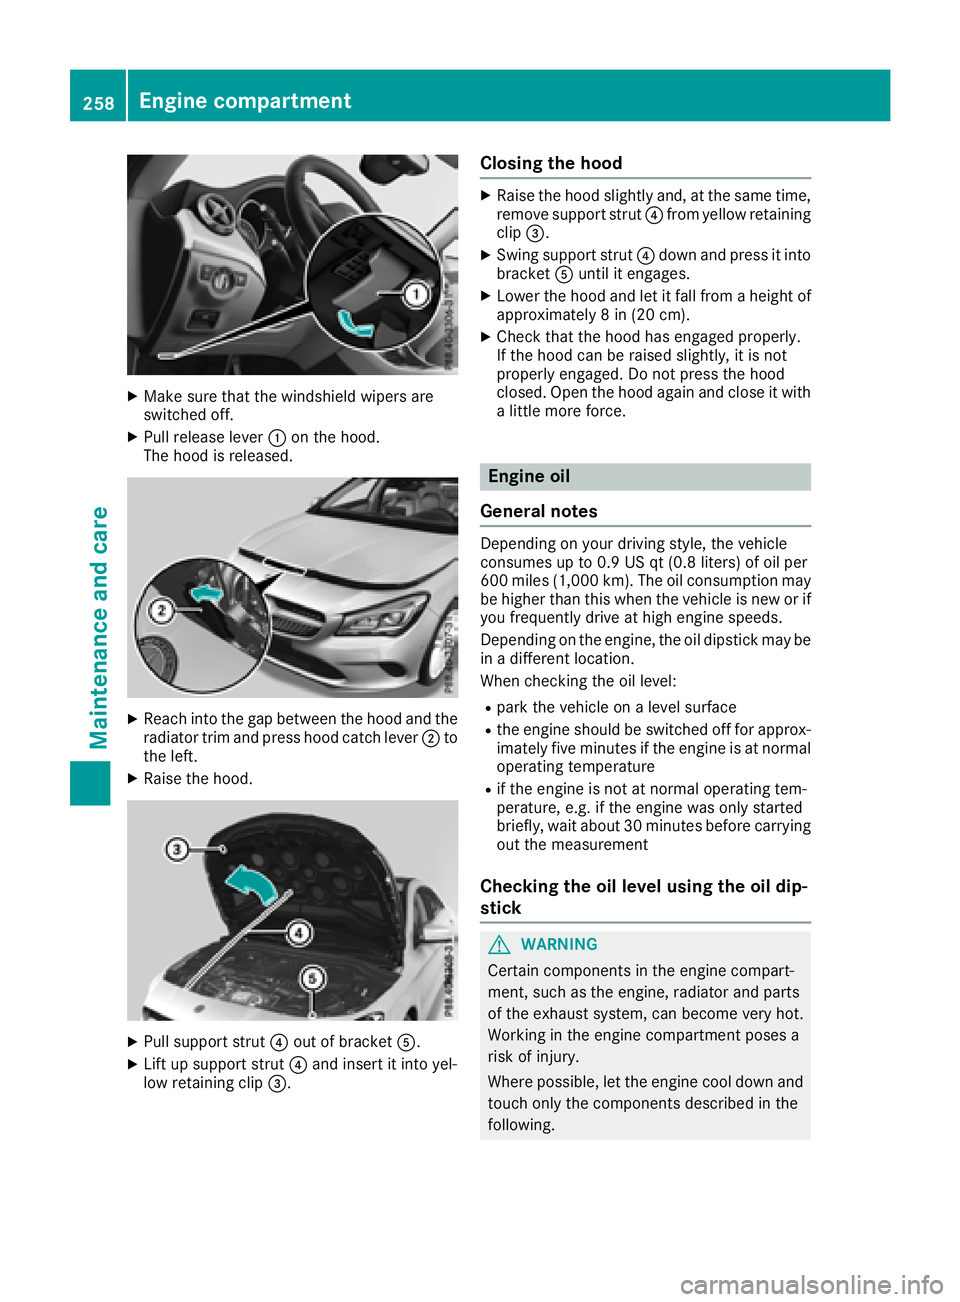
XMake sure that the windshield wipers are
switched off.
XPull release lever:on the hood.
The hood is released.
XReach into the gap between the hood and the radiator trim and press hood catch lever ;to
the left.
XRaise the hood.
XPull support strut ?out of bracket A.
XLift up support strut ?and insert it into yel-
low retaining clip =.
Closing the hood
XRaise the hood slightly and, at the same time,
remove support strut ?from yellow retaining
clip =.
XSwing support strut ?down and press it into
bracket Auntil it engages.
XLower the hood and let it fall from aheight of
approximately 8in(20 cm).
XCheck that the hood has engaged properly.
If the hood can be raised slightly, it is not
properly engaged. Do not press the hood
closed. Open the hood again and close it with
alittle more force.
Engine oil
General notes
Depending on your driving style, the vehicle
consumes up to 0.9 US qt (0.8 liters) of oil per
600 miles (1,000 km). The oil consumption may
be higher than this when the vehicle is new or if
you frequently drive at high engine speeds.
Depending on the engine, the oil dipstick may be
in ad ifferent location.
When checking the oil level:
Rpark the vehicle on alevel surface
Rthe engine should be switched off for approx-
imately five minutes if the engine is at normal
operating temperature
Rif the engine is not at normal operating tem-
perature, e.g. if the engine was only started
briefly, wait about 30 minutes before carrying
out the measurement
Checking the oil level using the oil dip-
stick
GWARNING
Certain components in the engine compart-
ment, such as the engine, radiator and parts
of the exhaust system, can become very hot.
Working in the engine compartmentp oses a
risk of injury.
Where possible, let the engine cool down and touch only the components described in the
following.
258Engine compartment
Maintenance and care
Page 271 of 326
Where willIfind...?
Reflective safety jacket
Removing/replacing the reflective
safety jacket
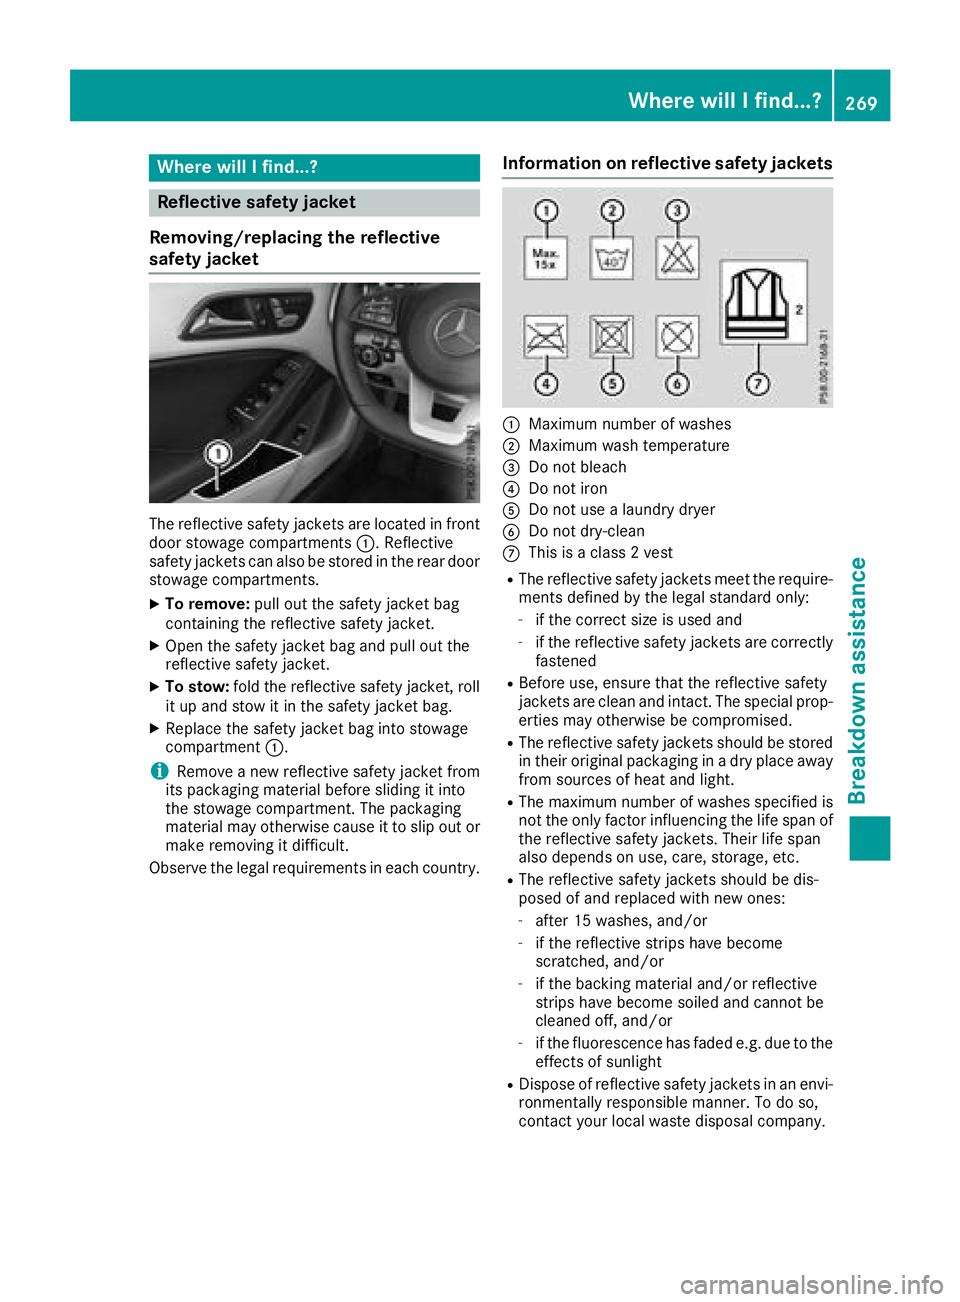
The reflective safety jackets are located in front
door stowage compartments :.Reflective
safety jackets can als obestored in the rear door
stowage compartments.
XTo remove: pullout the safety jacket bag
containing the reflective safety jacket.
XOpen the safety jacket bag and pul lout the
reflective safety jacket.
XTo stow: fold the reflective safety jacket, roll
it up and stow it in the safety jacket bag.
XReplace the safety jacket bag into stowage
compartment :.
iRemoveanew reflective safety jacket from
its packaging material before sliding it into
the stowage compartment. The packaging
material may otherwise caus eittoslipout or
make removing it difficult.
Observe the legalr equirements in each country.
Information on reflective safety jackets
:Maximum numberofwashes
;Maximum wash temperature
=Do not bleach
?Do not iron
ADo not use alaundry dryer
BDo not dry-clean
CThis is aclass2v est
RThe reflective safety jackets meet the require-
ments defined by the legals tandard only:
-if the correct size is usedand
-if the reflective safety jackets are correctly
fastened
RBefore use ,ensure that the reflective safety
jackets are cleana nd intact. The special prop-
erties may otherwise be compromised.
RThe reflective safety jackets should be stored
in their original packaging in adry place away
from sources of heata nd light.
RThe maximumnumbe rofwashes specified is
not the only factor influencing the life spano f
the reflective safety jackets. Theirl ife span
als od epends on use ,care, storage ,etc.
RThe reflective safety jackets should be dis-
posedofa nd replaced with new ones:
-after 15 washes, and/or
-if the reflective strips have become
scratched,and/or
-if the backing material and/or reflective
strips have become soiled and cannot be
cleaned off, and/or
-if the fluorescence has fade de.g. due to the
effects of sunlight
RDisposeofr eflective safety jackets in an envi-
ronmentall yresponsiblem anner. To do so,
contact you rlocalw aste disposal company.
Where will Ifind...?269
Breakdown assistance
Page 308 of 326
Uniform TireQualityG rading Standards
Aunifor mstandard to grade the quality of tires
with regards to tread quality, tire traction and
temperature characteristics. The quality grad-
ing assessmentism ade by the manufacturer
following specification sfrom the U.S .govern-
ment .The ratings are molded int othe sidewall of
the tire.
Recommended tir epressures
The recommended tire pressure applies to the
tires mounted at the factory.
The Tire and Loading Information placard con-
tains the recommended tire pressures for cold
tires on afully loaded vehicle and for the maxi-
mum permissible vehicle speed.
The tire pressure table contains the recommen-
ded pressures for cold tires for various operat-
ing conditions, i.e. differingl oad and speed con-
ditions.
Increased vehicle weight due to optional
equipment
The combined weight of all standard and
optional equipment available for the vehicle,
regardless of whether it is actually installed on
the vehicle or not.
Rim
This is the part of the wheel on which the tire is
mounted.
GAWR (Gross Axle Weight Rating)
The GAWR is the maximum gross axle weight
rating. The actual load on an axle must never
exceed the gross axle weight rating. The gross
axle weight ratin gcan be found on the vehicle
identification plate on the B-pillar on the driver's
side.
Speed rating
The speed ratin gispart of the tire identification.
It specifies the speed range for which the tire is
approved.
GVW (Gross Vehicle Weight)
The gross vehicle weight includes the weight of
the vehicle includin gfuel, tools, the spare wheel,
accessories installed, occupants, luggage and
the drawbar noseweight ,ifapplicable. The gross
vehicle weight must not exceed the gross vehi-
cle weight ratin gGVWR as specified on the vehi-
cle identification plate on the B-pillar on the
driver'ss ide.
GVWR(Gross Vehicle Weight Rating)
The GVWR is the maximum permissible gross
weight of afully loaded vehicle (the weight of the
vehicle includin gall accessories, occupants,
fuel, luggage and the drawbar n
oseweight
,if
applicable). The gross vehicle weight ratin gis
specified on the vehicle identification plate on
the B-pillar on the driver'ss ide.
Maximum loaded vehicle weight
The maximum weight is the sum of:
Rthe curb weight of the vehicle
Rthe weight of the accessories
Rthe load limit
Rthe weight of the factory installed optional
equipment
Kilopascal (kPa)
Metric unit for tire pressure. 6.9 kPa corre-
sponds to1psi. Another unit for tire pressure is
bar. 100 kilopascals (kPa) are the equivalent of
1b ar.
Load index
In addition to the load-bearin gindex ,the load
index may also be imprinted on the sidewall of
the tire. This specifies the load-bearin gcapacity
more precisely.
Curb weight
The weight of avehicle with standard equipment
includin gthe maximum capacityoff uel, oil and
coolant .Italso includes the air-conditionin gsys-
tem and optional equipment if these are instal-
led in the vehicle, but does not include passen-
gers or luggage.
Maximum load rating
The maximum tire load is the maximum permis-
sible weight in kilogram sorlbs for which atire is
approved.
Maximum permissible tir epressure
Maximum permissible tire pressure for one tire.
Maximum load on one tire
Maximum load on one tire. This is calculated by
dividing the maximum axle load of one axle by
two.
306All about wheels and tires
Wheels and tires
Page 320 of 326
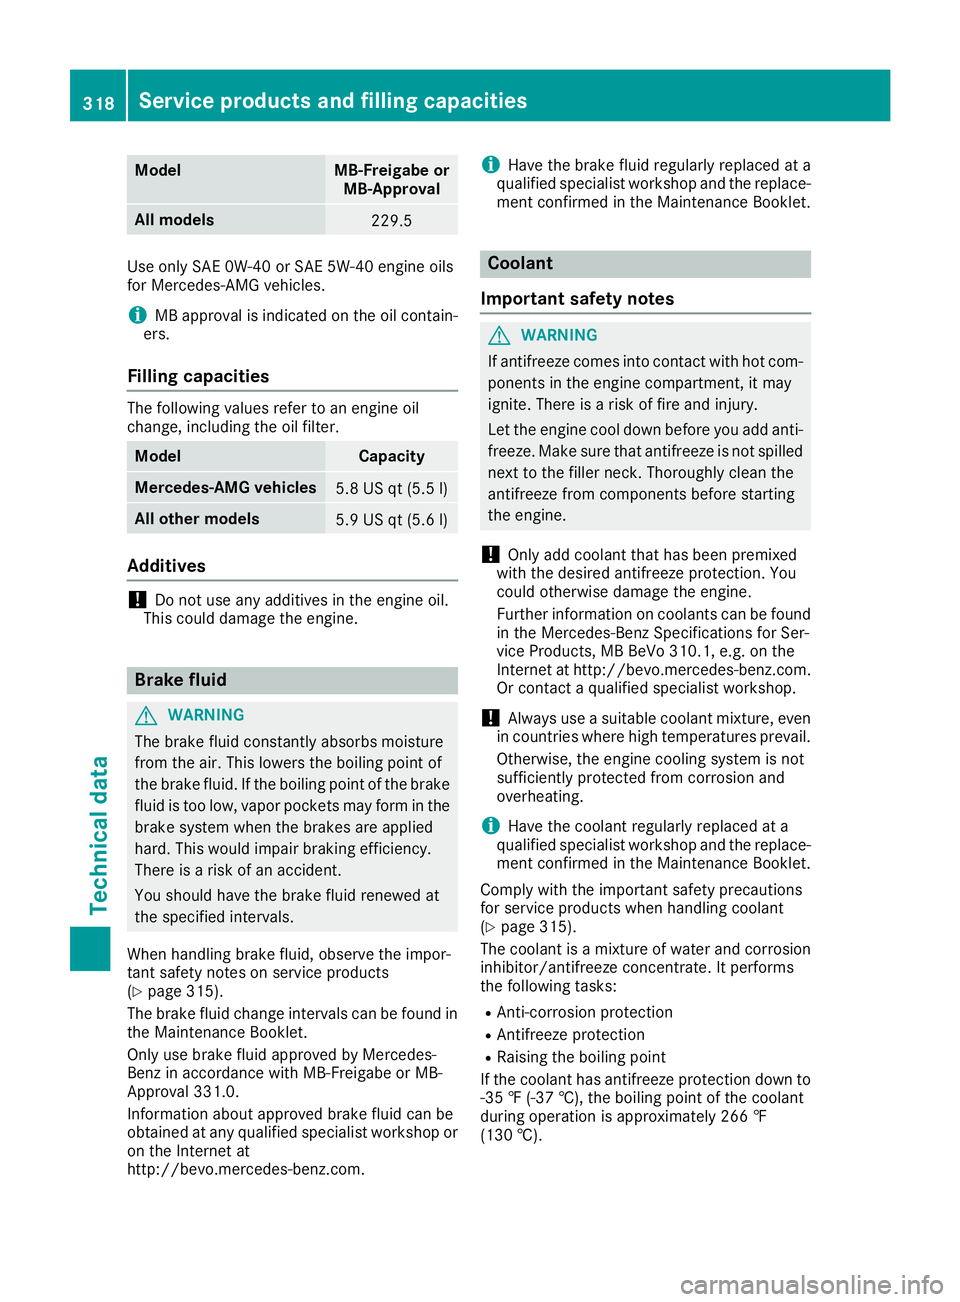
ModelMB-Freigabe orMB-Approval
All models229.5
Use only SAE 0W-40 or SAE 5W-40 engine oils
for Mercedes-AMG vehicles.
iMB approval is indicated on the oil contain-
ers.
Fillingc apacities
The following values refer to an engine oil
change, including the oil filter.
ModelCapacity
Mercedes‑AM Gvehicles5.8 US qt (5.5 l)
All other models5.9 US qt (5.6 l)
Additives
!Do not use any additives in the engine oil.
This could damage the engine.
Brake fluid
GWARNING
The brake flui dconstantly absorbs moisture
from the air. This lowers the boiling point of
the brake fluid. If the boiling point of the brake
flui dist oo low,v aporpockets may form in the
brake system when the brakes are applied
hard. This would impair braking efficiency.
There is arisk of an accident.
You should have the brake flui dreneweda t
the specified intervals.
When handling brake fluid, observe the impor-
tant safety notes on service products
(
Ypag e315).
The brake flui dchange interval scan be found in
the Maintenance Booklet.
Only use brake flui dapproved by Mercedes-
Benz in accordance with MB-Freigabe or MB-
Approval3 31.0.
Information about approved brake flui dcan be
obtained at any qualified specialist workshop or
on the Internet at
http://bevo.mercedes-benz.com.
iHave the brake flui dregularl yreplaced at a
qualified specialist workshop and the replace-
ment confirmed in the Maintenance Booklet.
Coolant
Important safety notes
GWARNING
If antifreeze comes into contact with hot com- ponents in the engine compartment, it may
ignite. There is arisk of fire and injury.
Let the engine cool down before you add anti-
freeze. Make sure that antifreeze is not spilled
next to the filler neck. Thoroughly cleant he
antifreeze from components before starting
the engine.
!Only add coolant that has been premixed
with the desired antifreeze protection. You
coul dotherwise damage the engine.
Further information on coolants can be found
in the Mercedes-Benz Specifications for Ser-
vice Products, MB BeVo 310.1, e.g. on the
Internet at http://bevo.mercedes-benz.com.
Or contact aqualified specialist workshop.
!Always use asuitable coolant mixture, even
in countries where high temperatures prevail.
Otherwise, the engine cooling system is not
sufficiently protected from corrosiona nd
overheating.
iHave the coolant regularl yreplaced at a
qualified specialist workshop and the replace-
ment confirmed in the Maintenance Booklet.
Comply with the important safety precautions
for service products when handling coolant
(
Ypag e315).
The coolant is amixture of water and corrosion
inhibitor/antifreeze concentrate. It performs
the following tasks:
RAnti-corrosion protection
RAntifreeze protection
RRaising the boiling point
If the coolant has antifreeze protection down to -35 ‡(-37 †), the boiling point of the coolant
during operation is approximatel y266 ‡
(130 †).
318Servicep roducts and filling capacities
Technical data
Page 321 of 326
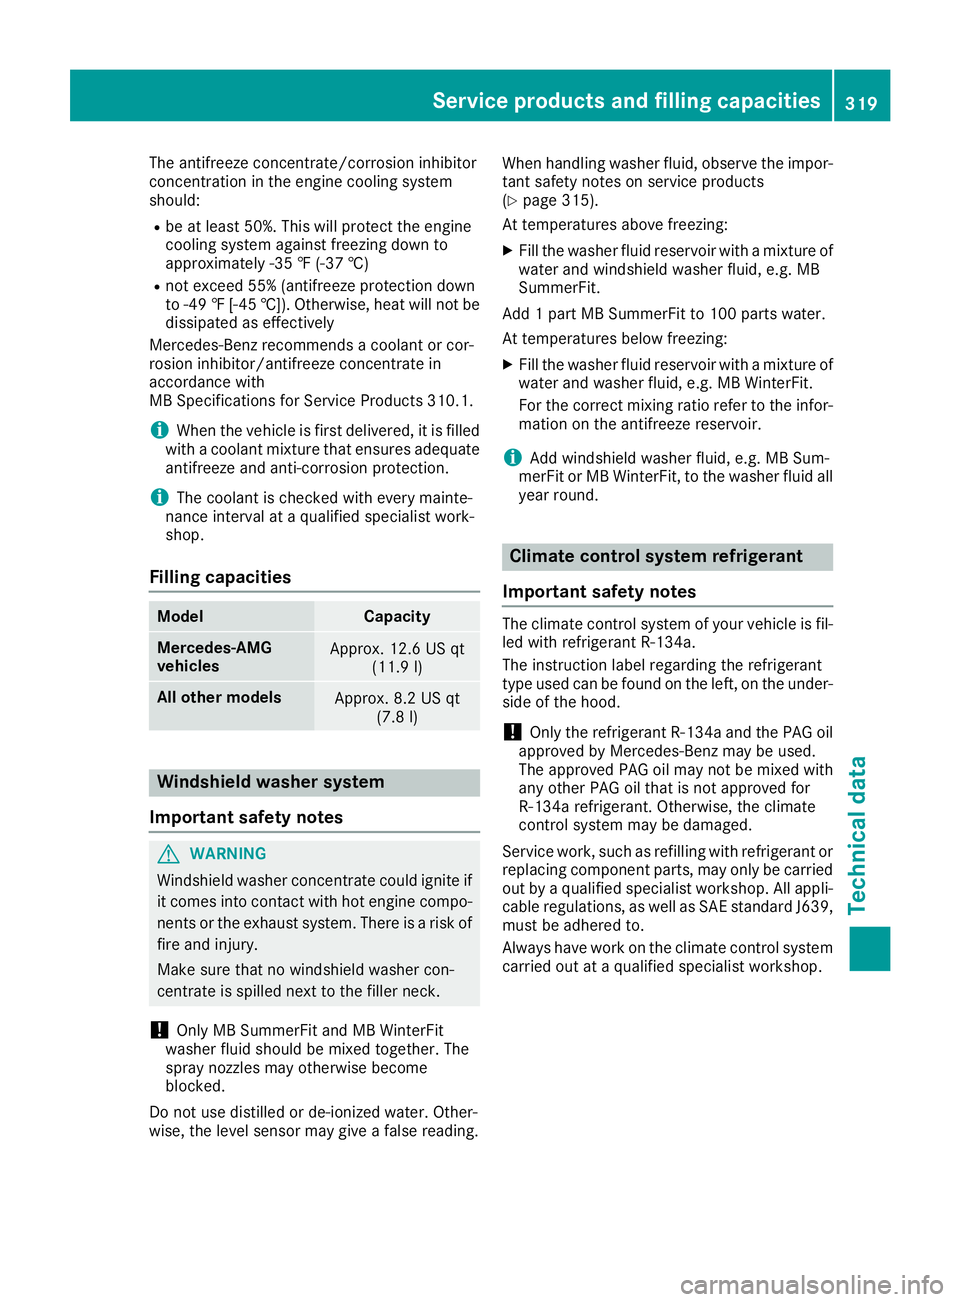
The antifreeze concentrate/corrosion inhibitor
concentration in the engine cooling system
should:
Rbe at least 50%. This will protectthe engine
cooling system against freezin gdown to
approximately -35 ‡(-37 †)
Rnot exceed 55% (antifreez eprotection down
to -49 ‡[-45 †]) .Otherwise ,hea tw ill no tbe
dissipated as effectively
Mercedes-Ben zrecommends acoolan torc or-
rosio ninh ibitor/antifreez econcentrat ein
accordance wit h
MB Specification sfor Servic eProducts 310. 1.
iWhen the vehicle is first delivered, it is filled
with acoolant mixture that ensures adequate
antifreeze and anti-corrosion protection.
iThe coolant is checked with every mainte-
nanc einterval at aqualified specialist work-
shop.
Filling capacities
ModelCapacity
Mercedes ‑AMG
vehiclesApprox .12.6USq t
(11.9l )
Allo ther modelsApprox. 8.2 US qt
(7.8 l)
Windshield washe rsystem
Important safety notes
GWARNING
Windshieldw asher concentrate coul dignite if
it comes into contact with hot engine compo-
nents or the exhaust system .There is arisk of
fire and injury.
Make sure that no windshield washer con-
centrate is spilled next to the filler neck.
!Only MB SummerFi tand MB WinterFit
washer flui dshould be mixed together. The
sprayn ozzles may otherwise become
blocked.
Do not use distille dorde-ionized water. Other-
wise, the levels ensor may giveafals ereading. When handling washer fluid, observe the impor-
tant safety notes on service products
(
Ypag
e315).
At temperatures above freezing:
XFill the washer flui dreservoir with amixture of
water and windshield washer fluid, e.g. MB
SummerFit.
Add 1part MB SummerFi tto100 parts water.
At temperatures below freezing:
XFill the washer flui dreservoir with amixture of
water and washer fluid, e.g. MB WinterFit.
For the correct mixing ratio refer to the infor-
mation on the antifreeze reservoir.
iAdd windshield washer fluid, e.g. MB Sum-
merFit or MB WinterFit, to the washer flui dall
yea rround.
Climate control system refrigerant
Important safety notes
The climate control system of you rvehicleisf il-
led with refrigerant R ‑134a.
The instruction label regarding the refrigerant
type use dcan be found on the left, on the under-
side of the hood.
!Only the refrigerant R ‑134a and the PAG oil
approved by Mercedes-Benz may be used.
The approved PAG oil may not be mixed with
any other PAG oil that is not approved for
R-134a refrigerant. Otherwise, the climate
control system may be damaged.
Service work, such as refilling with refrigerant or
replacing component parts, may only be carried
out by aqualified specialist workshop. All appli-
cabl eregulations, as wellasS AE standard J639,
must be adhered to.
Always have work on the climate control system
carrie dout at aqualified specialist workshop.
Service products and filling capacities319
Technical data
Z