ECO mode MERCEDES-BENZ CLA SHOOTING BRAKE 2015 Owners Manual
[x] Cancel search | Manufacturer: MERCEDES-BENZ, Model Year: 2015, Model line: CLA SHOOTING BRAKE, Model: MERCEDES-BENZ CLA SHOOTING BRAKE 2015Pages: 421, PDF Size: 12.52 MB
Page 8 of 421
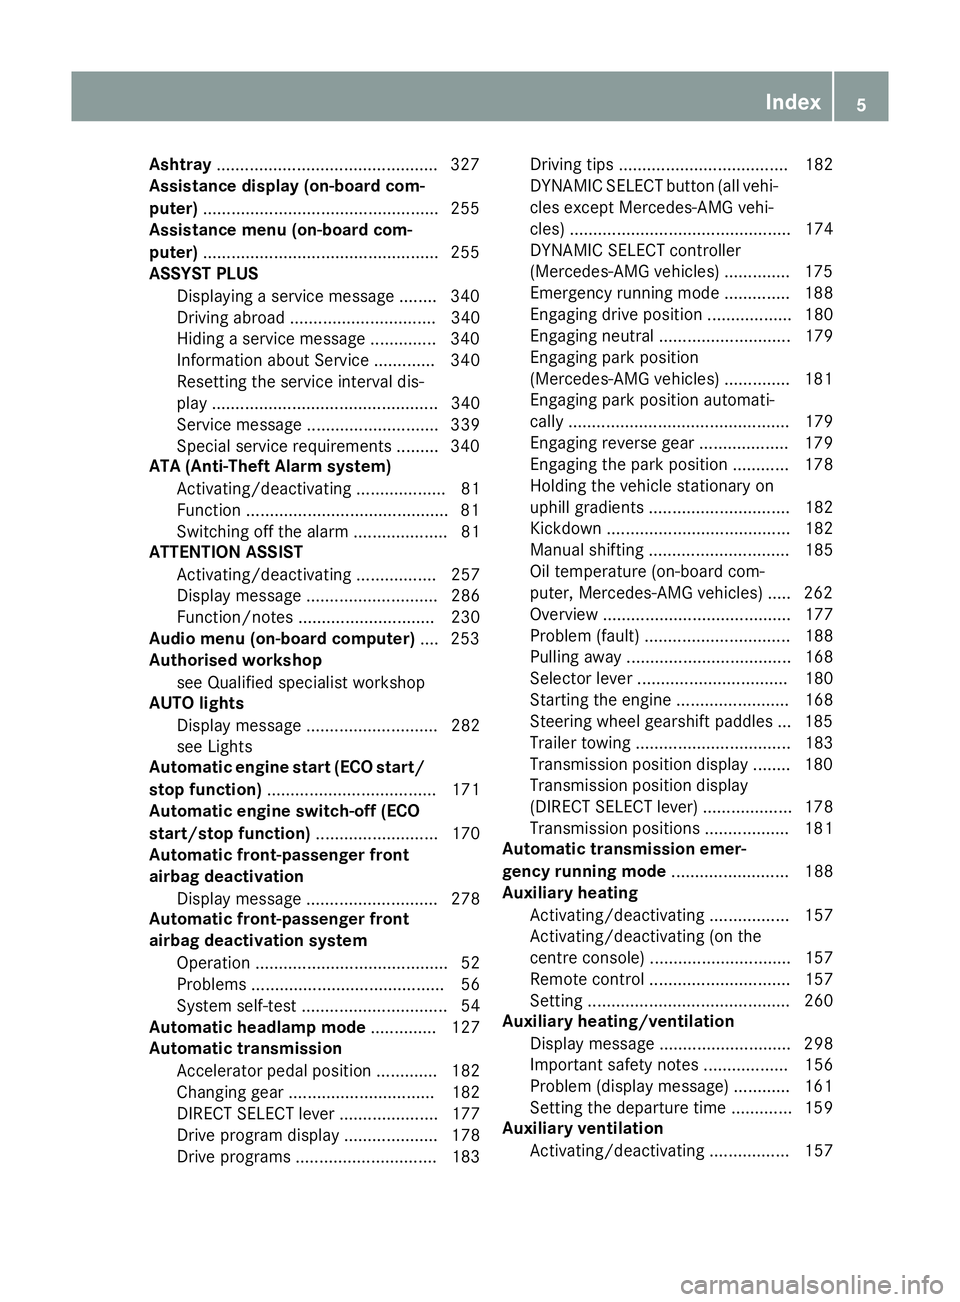
Ashtray
.............................................. .327
Assistance display (on-board com-
puter) ................................................. .255
Assistance menu (on-board com-
puter) ................................................. .255
ASSYST PLUS
Displaying a service message ....... .340
Driving abroad ............................... 340
Hiding a service message .............. 340
Information about Service ............. 340
Resetting the service interval dis-
play ................................................ 340
Service message ............................ 339
Special service requirements ......... 340
ATA (Anti-Theft Alarm system)
Activating/deactivating ................... 81
Function .......................................... .81
Switching off the alarm .................... 81
ATTENTION ASSIST
Activating/deactivating ................. 257
Display message ............................ 286
Function/note s............................. 230
Audio menu (on-board computer) .... 253
Authorised workshop
see Qualified specialist workshop
AUTO lights
Display message ............................ 282
see Lights
Automatic engine start (ECO start/
stop function) .................................... 171
Automatic engine switch-off (ECO
start/stop function) .......................... 170
Automatic front-passenger front
airbag deactivation
Display message ............................ 278
Automatic front-passenger front
airbag deactivation system
Operation ......................................... 52
Problems ......................................... 56
System self-test ............................... 54
Automatic headlamp mode .............. 127
Automatic transmission
Accelerator pedal position ............. 182
Changing gear ............................... 182
DIRECT SELECT lever ..................... 177
Drive program display .................... 178
Drive programs .............................. 183 Driving tips .................................... 182
DYNAMIC SELECT button (all vehi-
cles except Mercedes-AMG vehi-
cles) ............................................... 174
DYNAMIC SELECT controller
(Mercedes-AMG vehicles) .............. 175
Emergency running mod e.............. 188
Engaging drive position .................. 180
Engaging neutral ............................ 179
Engaging park position
(Mercedes-AMG vehicles) .............. 181
Engaging park position automati-
cally ............................................... 179
Engaging reverse gear ................... 179
Engaging the park position ............ 178
Holding the vehicle stationary on
uphill gradients .............................. 182
Kickdown ....................................... 182
Manual shifting .............................. 185
Oil temperature (on-board com-
puter, Mercedes-AMG vehicles) ..... 262
Overview ........................................ 177
Problem (fault) ............................... 188
Pulling away ................................... 168
Selector lever ................................ 180
Starting the engine ........................ 168
Steering wheel gearshift paddle s... 185
Trailer towing ................................. 183
Transmission position display ........ 180
Transmission position display
(DIRECT SELECT lever) ................... 178
Transmission positions .................. 181
Automatic transmission emer-
gency running mode ......................... 188
Auxiliary heating
Activating/deactivating ................. 157
Activating/deactivating (on the
centre console ).............................. 157
Remote control .............................. 157
Setting ........................................... 260
Auxiliary heating/ventilation
Display message ............................ 298
Important safety notes .................. 156
Problem (display message) ............ 161
Setting the departure time ............. 159
Auxiliary ventilation
Activating/deactivating ................. 157 Index
5
Page 10 of 421
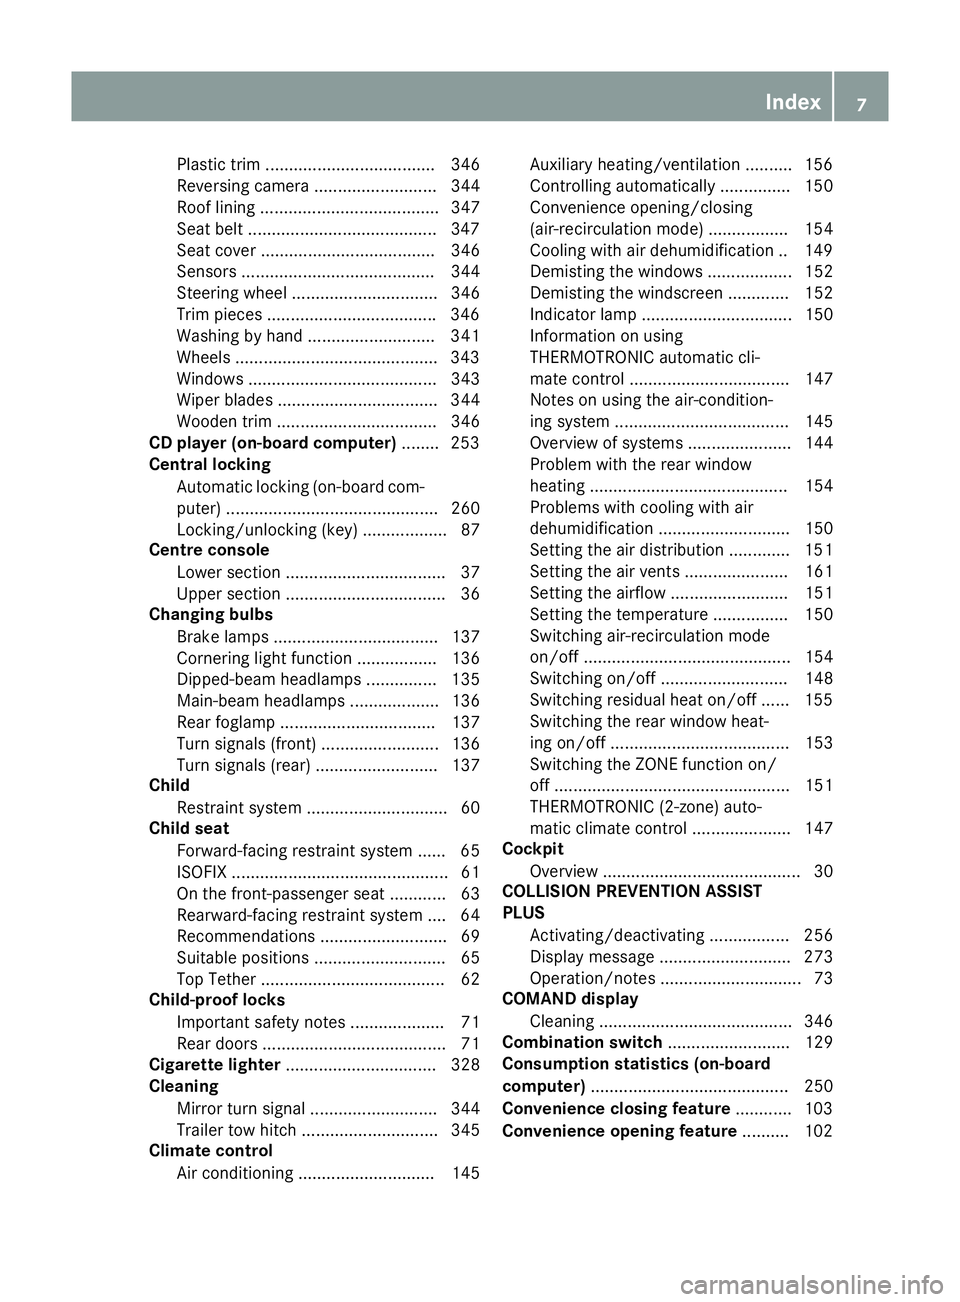
Plastic trim .................................... 346
Reversing camera .......................... 344
Roof lining ...................................... 347
Seat belt ........................................3 47
Seat cover ..................................... 346
Sensors ......................................... 344
Steering wheel ............................... 346
Trim pieces ................................... .346
Washing by hand ........................... 341
Wheels .......................................... .343
Windows ........................................ 343
Wiper blades .................................. 344
Wooden trim .................................. 346
CD player (on-board computer) ........253
Central locking
Automatic locking (on-board com-
puter) ............................................. 260
Locking/unlocking (key ).................. 87
Centre console
Lower section .................................. 37
Upper section .................................. 36
Changing bulbs
Brake lamps ................................... 137
Cornering light function ................. 136
Dipped-beam headlamp s............... 135
Main-beam headlamp s................... 136
Rear foglamp ................................. 137
Turn signals (front) ......................... 136
Turn signals (rear) .......................... 137
Child
Restraint system .............................. 60
Child seat
Forward-facing restraint system ...... 65
ISOFIX .............................................. 61
On the front-passenger sea t............ 63
Rearward-facing restraint system .... 64
Recommendations ........................... 69
Suitable positions ............................ 65
Top Tether ....................................... 62
Child-proof locks
Important safety notes .................... 71
Rear doors ....................................... 71
Cigarette lighter ................................ 328
Cleaning
Mirror turn signal ........................... 344
Trailer tow hitch ............................. 345
Climate control
Air conditioning ............................. 145 Auxiliary heating/ventilation .......... 156
Controlling automaticall
y............... 150
Convenience opening/closing
(air-recirculation mode) ................. 154
Cooling with air dehumidification .. 149
Demisting the windows .................. 152
Demisting the windscreen ............. 152
Indicator lamp ................................ 150
Information on using
THERMOTRONIC automatic cli-
mate control .................................. 147
Notes on using the air-condition-
ing system ..................................... 145
Overview of systems ...................... 144
Problem with the rear window
heating .......................................... 154
Problems with cooling with air
dehumidification ............................ 150
Setting the air distribution ............. 151
Setting the air vents ...................... 161
Setting the airflow ......................... 151
Setting the temperature ................ 150
Switching air-recirculation mode
on/of f............................................ 154
Switching on/of f........................... 148
Switching residual heat on/off ...... 155
Switching the rear window heat-
ing on/of f...................................... 153
Switching the ZONE function on/
off .................................................. 151
THERMOTRONIC (2-zone) auto-
matic climate control ..................... 147
Cockpit
Overview .......................................... 30
COLLISION PREVENTION ASSIST
PLUS
Activating/deactivating ................. 256
Display message ............................ 273
Operation/note s.............................. 73
COMAND display
Cleaning ......................................... 346
Combination switch .......................... 129
Consumption statistics (on-board
computer) .......................................... 250
Convenience closing feature ............ 103
Convenience opening feature .......... 102 Index
7
Page 17 of 421
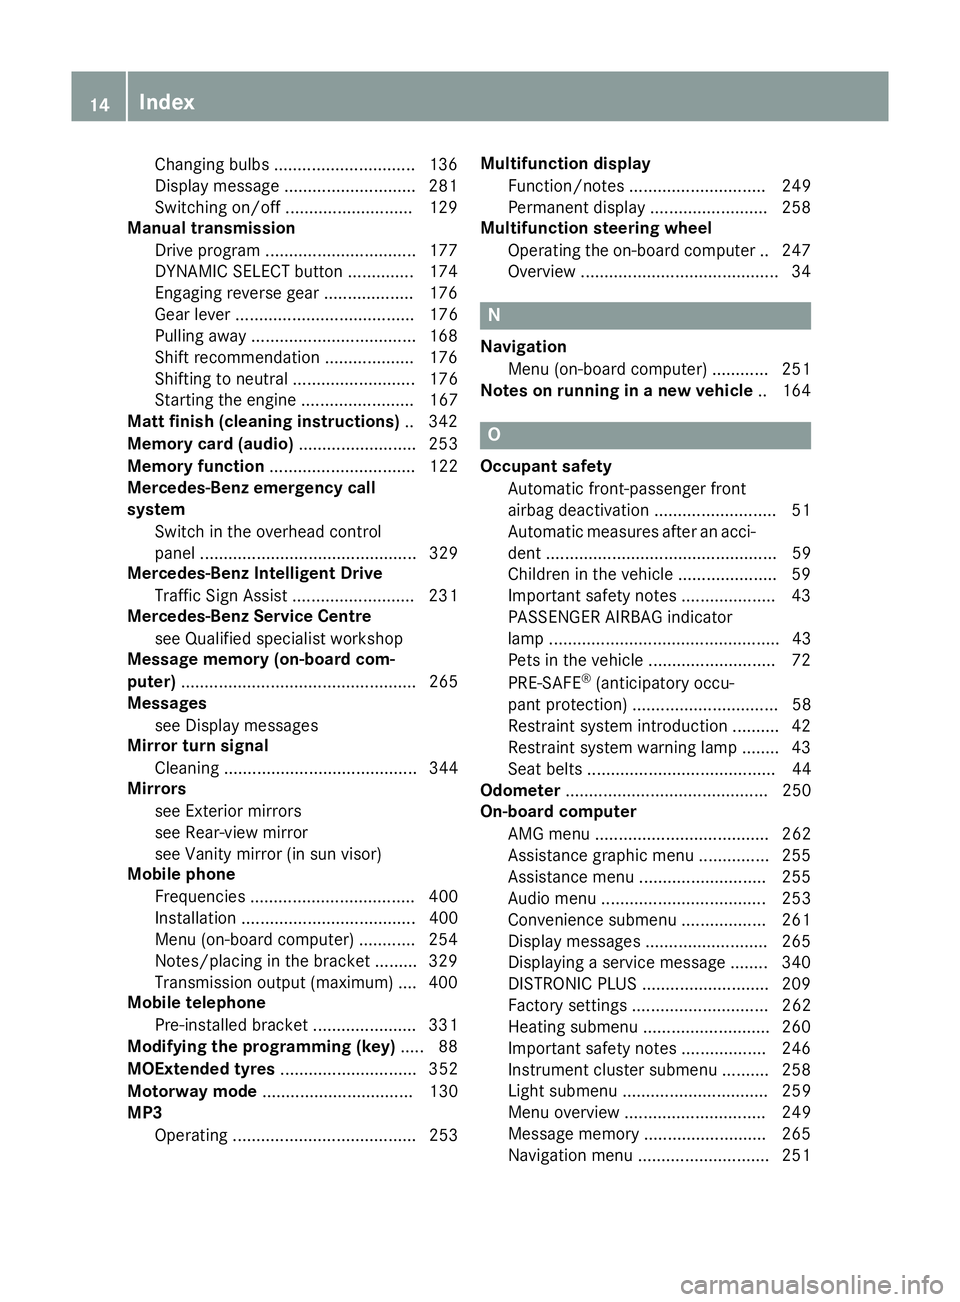
Changing bulbs .............................. 136
Display message ............................ 281
Switching on/off ..........................
.129
Manual transmission
Drive program ................................ 177
DYNAMIC SELECT button .............. 174
Engaging reverse gear ................... 176
Gear lever ...................................... 176
Pulling away ................................... 168
Shift recommendation ................... 176
Shifting to neutra l.......................... 176
Starting the engine ........................ 167
Matt finish (cleaning instructions) .. 342
Memory card (audio) ......................... 253
Memory function ............................... 122
Mercedes-Benz emergency call
system
Switch in the overhead control
panel .............................................. 329
Mercedes-Benz Intelligent Drive
Traffic Sign Assist .......................... 231
Mercedes-Benz Service Centre
see Qualified specialist workshop
Message memory (on-board com-
puter) .................................................. 265
Messages
see Display messages
Mirror turn signal
Cleaning ......................................... 344
Mirrors
see Exterior mirrors
see Rear-view mirror
see Vanity mirror (in sun visor)
Mobile phone
Frequencies ................................... 400
Installation ..................................... 400
Menu (on-board computer) ............ 254
Notes/placing in the bracket ......... 329
Transmission output (maximum) .... 400
Mobile telephone
Pre-installed bracket ...................... 331
Modifying the programming (key) ..... 88
MOExtended tyres ............................. 352
Motorway mode ................................ 130
MP3
Operating ....................................... 253 Multifunction display
Function/note s............................. 249
Permanent display ......................... 258
Multifunction steering wheel
Operating the on-board compute r..2 47
Overview .......................................... 34 N
Navigation Menu (on-board computer) ............ 251
Notes on running in a new vehicle .. 164 O
Occupant safety Automatic front-passenger front
airbag deactivatio n.......................... 51
Automatic measures after an acci-
dent ................................................. 59
Children in the vehicle ..................... 59
Important safety notes .................... 43
PASSENGER AIRBAG indicator
lamp ................................................. 43
Pets in the vehicle ........................... 72
PRE-SAFE ®
(anticipatory occu-
pant protection) ............................... 58
Restraint system introduction .......... 42
Restraint system warning lamp ........ 43
Seat belts ........................................ 44
Odometer ........................................... 250
On-board computer
AMG menu ..................................... 262
Assistance graphic menu ............... 255
Assistance menu ........................... 255
Audio menu ................................... 253
Convenience submenu .................. 261
Display messages .......................... 265
Displaying a service message ........ 340
DISTRONIC PLUS ........................... 209
Factory settings ............................. 262
Heating submenu ........................... 260
Important safety notes .................. 246
Instrument cluster submenu .......... 258
Light submenu ............................... 259
Menu overview .............................. 249
Message memory .......................... 265
Navigation menu ............................ 251 14
Index
Page 21 of 421
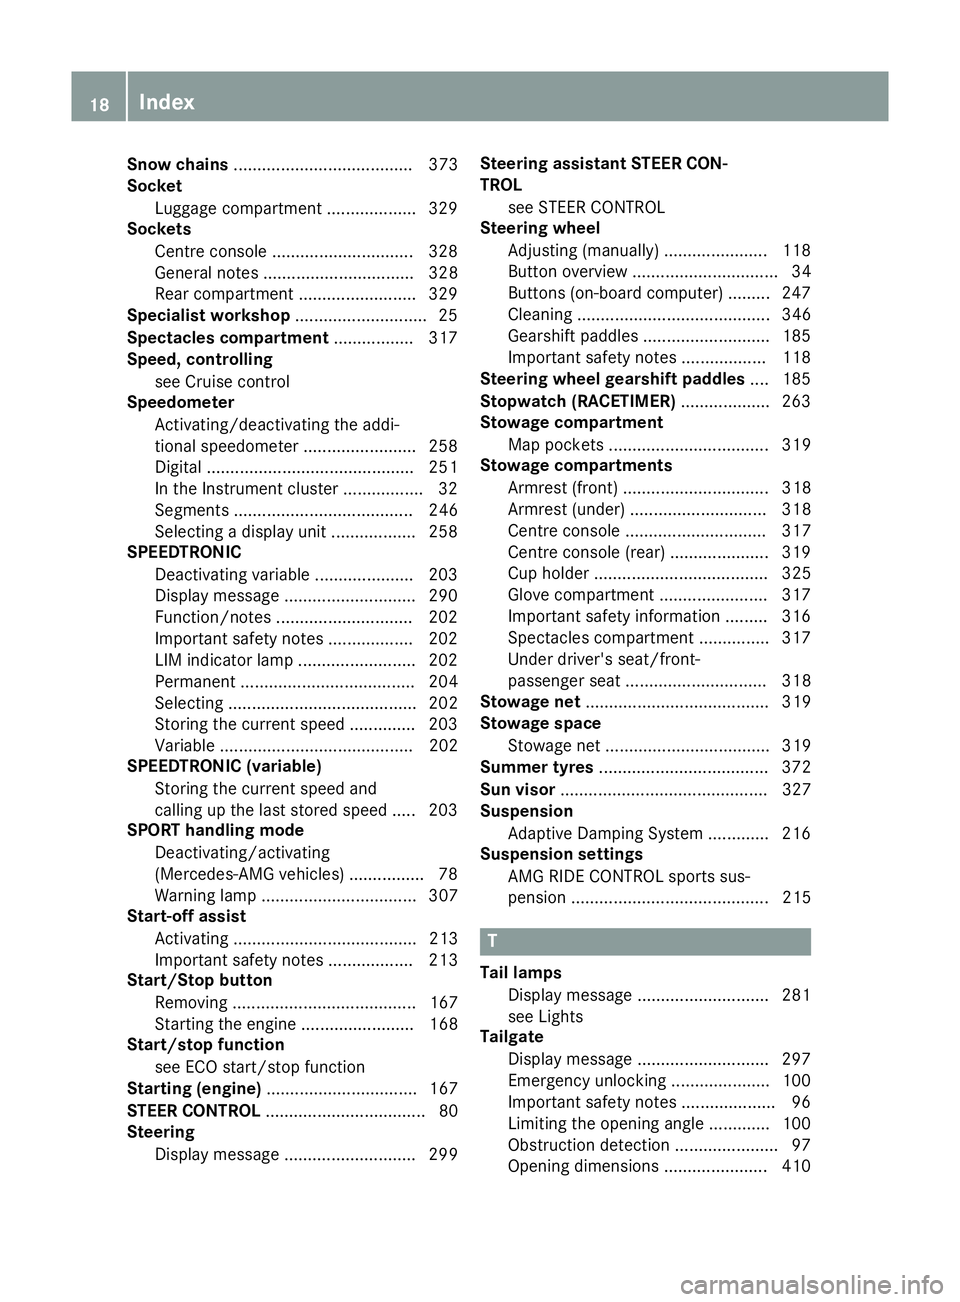
Snow chains
...................................... 373
Socket
Luggage compartment ...................3 29
Sockets
Centre console .............................. 328
General notes ................................ 328
Rear compartment ......................... 329
Specialist workshop ............................ 25
Spectacles compartment ................. 317
Speed, controlling
see Cruise control
Speedometer
Activating/deactivating the addi-
tional speedometer ........................ 258
Digital ............................................ 251
In the Instrument cluster ................. 32
Segments ...................................... 246
Selecting a display unit .................. 258
SPEEDTRONIC
Deactivating variable ..................... 203
Display message ............................ 290
Function/notes ............................ .202
Important safety notes .................. 202
LIM indicator lamp ......................... 202
Permanent ..................................... 204
Selecting ........................................ 202
Storing the current spee d.............. 203
Variabl e......................................... 202
SPEEDTRONIC (variable)
Storing the current speed and
calling up the last stored speed ..... 203
SPORT handling mode
Deactivating/activating
(Mercedes-AMG vehicles) ................ 78
Warning lamp ................................. 307
Start-off assist
Activating ....................................... 213
Important safety notes .................. 213
Start/Stop button
Removing ....................................... 167
Starting the engine ........................ 168
Start/stop function
see ECO start/stop function
Starting (engine) ................................ 167
STEER CONTROL .................................. 80
Steering
Display message ............................ 299 Steering assistant STEER CON-
TROL
see STEER CONTROL
Steering wheel
Adjusting (manually) ...................... 118
Button overview ............................... 34
Buttons (on-board computer) ......... 247
Cleaning ......................................... 346
Gearshift paddle s........................... 185
Important safety notes .................. 118
Steering wheel gearshift paddles .... 185
Stopwatch (RACETIMER) ................... 263
Stowage compartment
Map pockets .................................. 319
Stowage compartments
Armrest (front) ............................... 318
Armrest (under) ............................. 318
Centre console .............................. 317
Centre console (rear) ..................... 319
Cup holde r..................................... 325
Glove compartment ....................... 317
Important safety information ......... 316
Spectacles compartment ............... 317
Under driver's seat/front-
passenger sea t.............................. 318
Stowage net ....................................... 319
Stowage space
Stowage net ................................... 319
Summer tyres .................................... 372
Sun visor ............................................ 327
Suspension
Adaptive Damping System ............. 216
Suspension settings
AMG RIDE CONTROL sports sus-
pension .......................................... 215 T
Tail lamps Display message ............................ 281
see Lights
Tailgate
Display message ............................ 297
Emergency unlocking ..................... 100
Important safety notes .................... 96
Limiting the opening angle ............. 100
Obstruction detectio n...................... 97
Opening dimensions ...................... 410 18
Index
Page 26 of 421
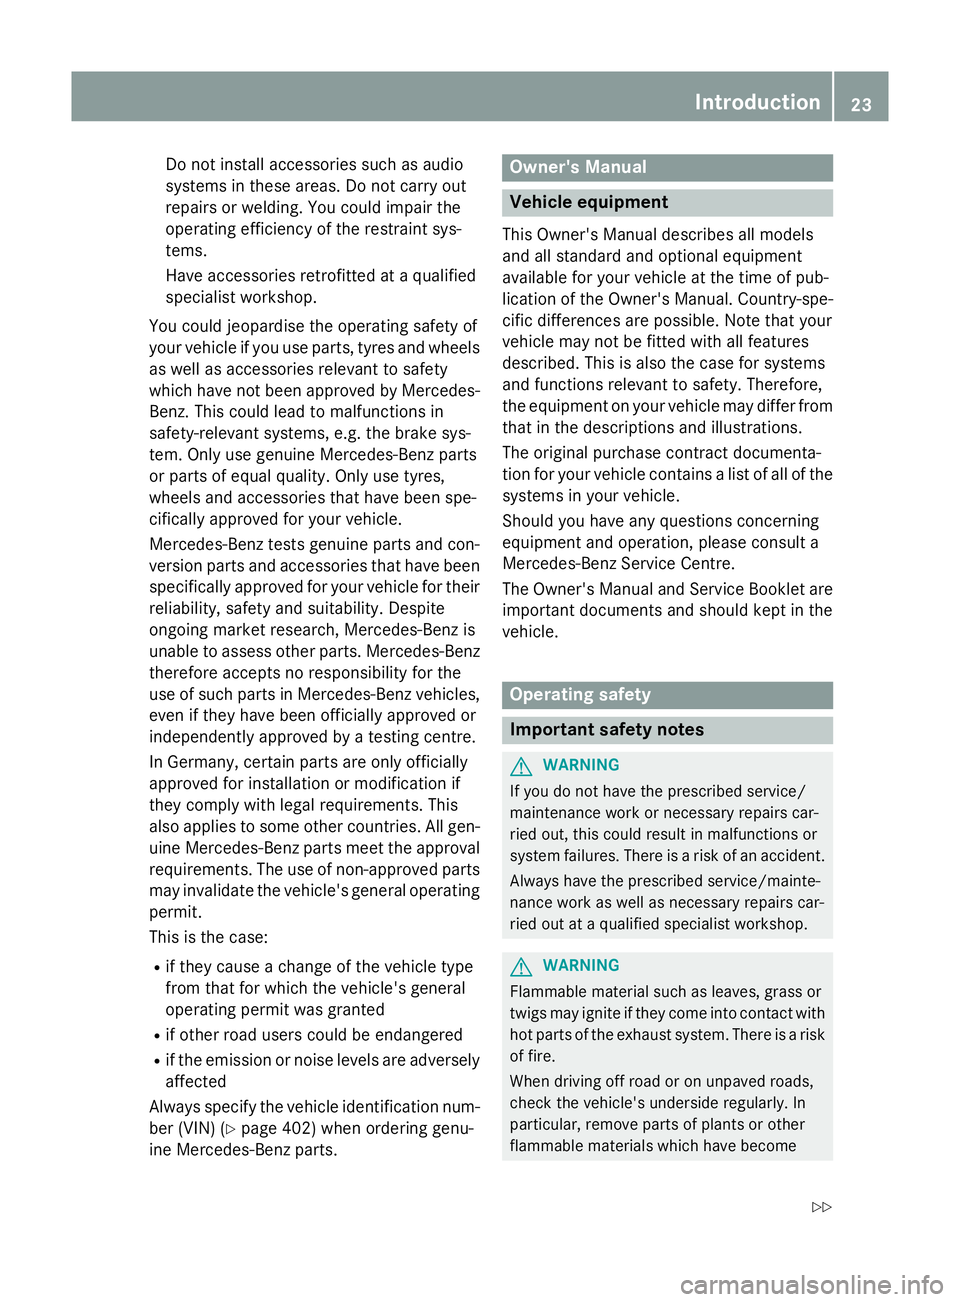
Do not install accessories such as audio
systems in these areas. Do not carry out
repairs or welding. You could impair the
operating efficiency of the restraint sys-
tems.
Have accessories retrofitted at a qualified
specialist workshop.
You could jeopardise the operating safety of
your vehicle if you use parts, tyres and wheels
as well as accessories relevant to safety
which have not been approved by Mercedes- Benz. This could lead to malfunctions in
safety-relevant systems, e.g. the brake sys-
tem. Only use genuine Mercedes-Benz parts
or parts of equal quality. Only use tyres,
wheels and accessories that have been spe-
cifically approved for your vehicle.
Mercedes-Benz tests genuine parts and con-
version parts and accessories that have been
specifically approved for your vehicle for their reliability, safety and suitability. Despite
ongoing market research, Mercedes-Benz is
unable to assess other parts. Mercedes-Benz
therefore accepts no responsibility for the
use of such parts in Mercedes-Benz vehicles, even if they have been officially approved or
independently approved by a testing centre.
In Germany, certain parts are only officially
approved for installation or modification if
they comply with legal requirements. This
also applies to some other countries. All gen- uine Mercedes-Benz parts meet the approval
requirements. The use of non-approved parts
may invalidate the vehicle's general operating permit.
This is the case:
R if they cause a change of the vehicle type
from that for which the vehicle's general
operating permit was granted
R if other road users could be endangered
R if the emission or noise levels are adversely
affected
Always specify the vehicle identification num- ber (VIN) (Y page 402) when ordering genu-
ine Mercedes-Benz parts. Owner's Manual
Vehicle equipment
This Owner's Manual describes all models
and all standard and optional equipment
available for your vehicle at the time of pub-
lication of the Owner's Manual. Country-spe- cific differences are possible. Note that your
vehicle may not be fitted with all features
described. This is also the case for systems
and functions relevant to safety. Therefore,
the equipment on your vehicle may differ from
that in the descriptions and illustrations.
The original purchase contract documenta-
tion for your vehicle contains a list of all of the
systems in your vehicle.
Should you have any questions concerning
equipment and operation, please consult a
Mercedes-Benz Service Centre.
The Owner's Manual and Service Booklet are important documents and should kept in the
vehicle. Operating safety
Important safety notes
G
WARNING
If you do not have the prescribed service/
maintenance work or necessary repairs car-
ried out, this could result in malfunctions or
system failures. There is a risk of an accident. Always have the prescribed service/mainte-
nance work as well as necessary repairs car-
ried out at a qualified specialist workshop. G
WARNING
Flammable material such as leaves, grass or
twigs may ignite if they come into contact with hot parts of the exhaust system. There is a risk of fire.
When driving off road or on unpaved roads,
check the vehicle's underside regularly. In
particular, remove parts of plants or other
flammable materials which have become Introduction
23 Z
Page 70 of 421
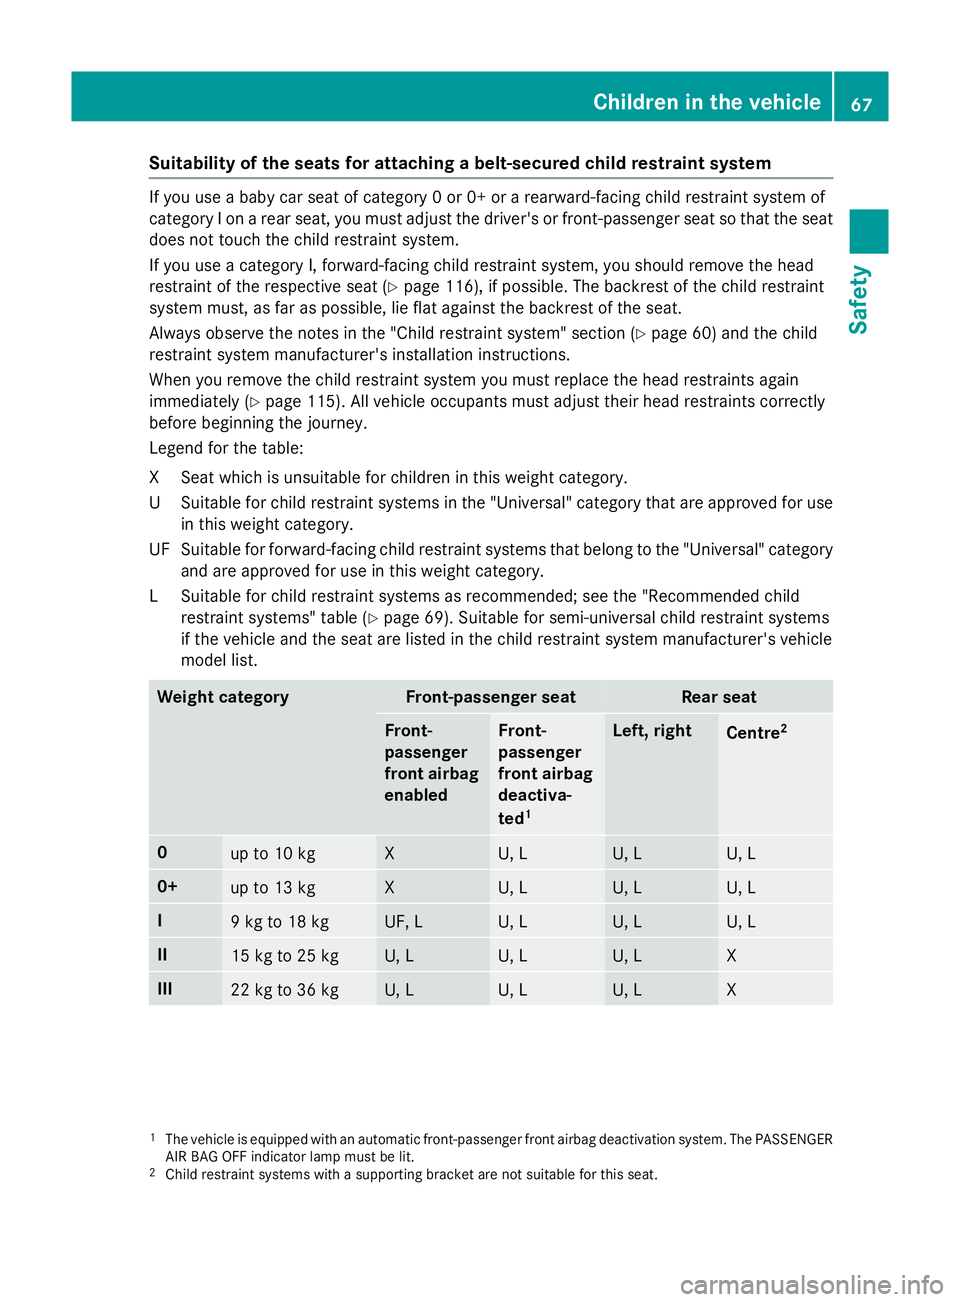
Suitability of the seats for attaching a belt-secured child restraint system
If you use a baby car seat of category 0 or 0+ or a rearward-facing child restraint system of
category I on a rear seat, you must adjust the driver's or front-passenger seat so that the seat
does not touch the child restraint system.
If you use a category I, forward-facing child restraint system, you should remove the head
restraint of the respective seat (Y page 116), if possible. The backrest of the child restraint
system must, as far as possible, lie flat against the backrest of the seat.
Always observe the notes in the "Child restraint system" section (Y page 60) and the child
restraint system manufacturer's installation instructions.
When you remove the child restraint system you must replace the head restraints again
immediately (Y page 115). All vehicle occupants must adjust their head restraints correctly
before beginning the journey.
Legend for the table:
XS eat which is unsuitable for children in this weight category.
US uitable for child restraint systems in the "Universal" category that are approved for use
in this weight category.
UF Suitable for forward-facing child restraint systems that belong to the "Universal" category and are approved for use in this weight category.
LS uitable for child restraint systems as recommended; see the "Recommended child
restraint systems" table (Y page 69). Suitable for semi-universal child restraint systems
if the vehicle and the seat are listed in the child restraint system manufacturer's vehicle
model list. Weight category Front-passenger seat Rear seat
Front-
passenger
front airbag
enabled Front-
passenger
front airbag
deactiva-
ted 1 Left, right
Centre
2 0
up to 10 kg X U, L U, L U, L
0+
up to 13 kg X U, L U, L U, L
I
9 kg to 18 kg UF, L U, L U, L U, L
II
15 kg to 25 kg U, L U, L U, L X
III
22 kg to 36 kg U, L U, L U, L X
1
The vehicle is equipped with an automatic front-passenger front airbag deactivation system. The PASSENGER
AIR BAG OFF indicator lamp must be lit.
2 Child restraint systems with a supporting bracket are not suitable for this seat. Children in the vehicle
67Safety Z
Page 71 of 421
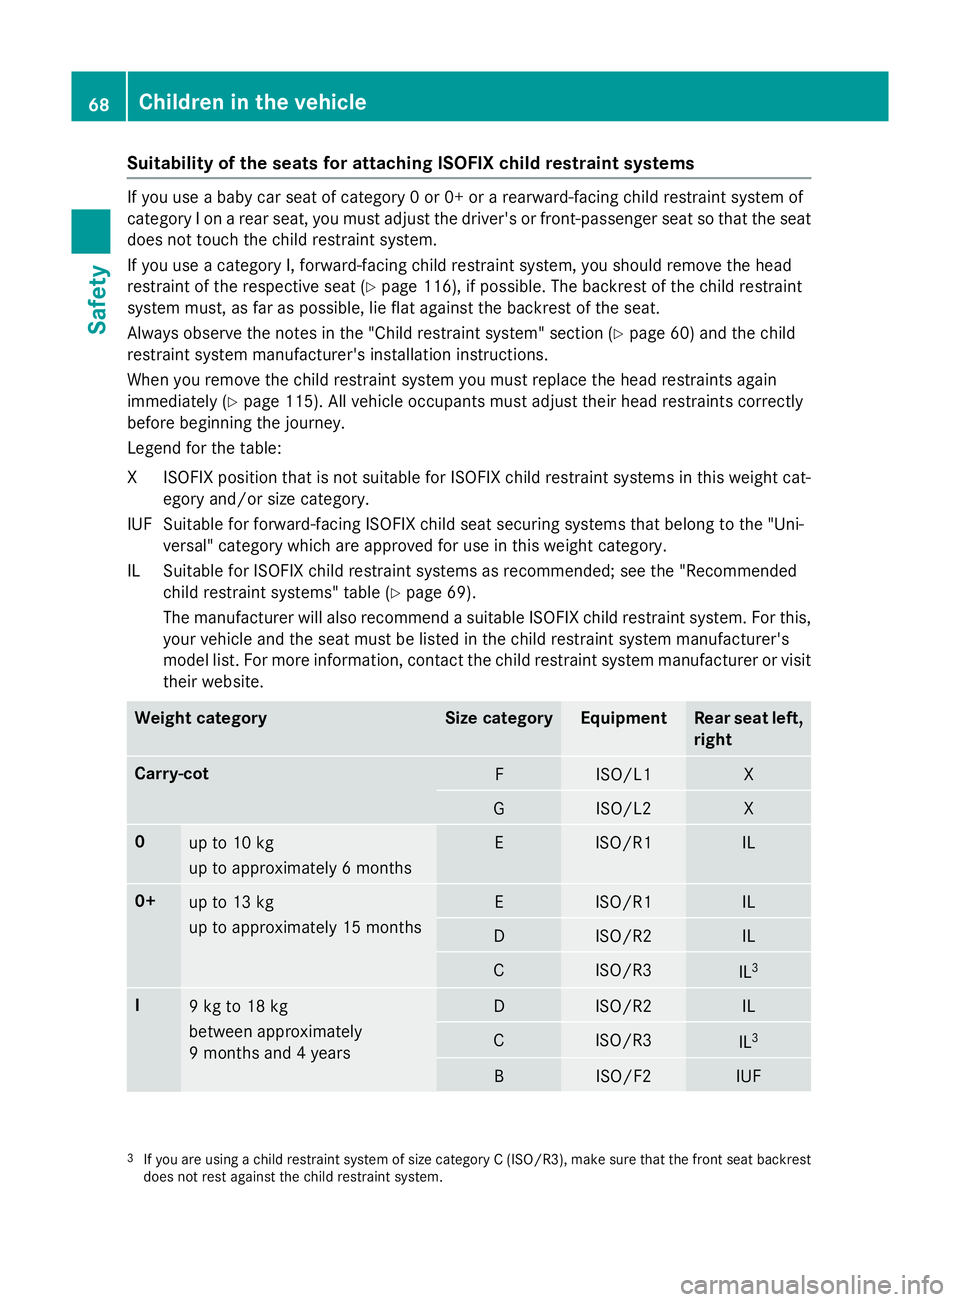
Suitability of the seats for attaching ISOFIX child restraint systems
If you use a baby car seat of category 0 or 0+ or a rearward-facing child restraint system of
category I on a rear seat, you must adjust the driver's or front-passenger seat so that the seat
does not touch the child restraint system.
If you use a category I, forward-facing child restraint system, you should remove the head
restraint of the respective seat (Y page 116), if possible. The backrest of the child restraint
system must, as far as possible, lie flat against the backrest of the seat.
Always observe the notes in the "Child restraint system" section (Y page 60) and the child
restraint system manufacturer's installation instructions.
When you remove the child restraint system you must replace the head restraints again
immediately (Y page 115). All vehicle occupants must adjust their head restraints correctly
before beginning the journey.
Legend for the table:
XI SOFIX position that is not suitable for ISOFIX child restraint systems in this weight cat-
egory and/or size category.
IUF Suitable for forward-facing ISOFIX child seat securing systems that belong to the "Uni- versal" category which are approved for use in this weight category.
IL Suitable for ISOFIX child restraint systems as recommended; see the "Recommended child restraint systems" table (Y page 69).
The manufacturer will also recommend a suitable ISOFIX child restraint system. For this,
your vehicle and the seat must be listed in the child restraint system manufacturer's
model list. For more information, contact the child restraint system manufacturer or visit
their website. Weight category Size category Equipment Rear seat left,
right Carry-cot
F ISO/L1 X
G ISO/L2 X
0
up to 10 kg
up to approximately 6 months E ISO/R1 IL
0+
up to 13 kg
up to approximately 15 months E ISO/R1 IL
D ISO/R2 IL
C ISO/R3
IL
3 I
9 kg to 18 kg
between approximately
9 months and 4 years D ISO/R2 IL
C ISO/R3
IL
3 B ISO/F2 IUF
3
If you are using a child restraint system of size category C (ISO/R3), make sure that the front seat backrest
does not rest against the child restraint system. 68
Children in the vehicleSafety
Page 129 of 421
Useful information
i This Owner's Manual describes all mod-
els, series and optional equipment for your
vehicle that were available at the time of
going to press. National variations are pos- sible. Note that your vehicle may not be
equipped with all of the functions descri-
bed. This is also the case for systems and
functions relevant to safety.
i Read the information on qualified special-
ist workshops: (Y page 25). Exterior lighting
General notes
For reasons of safety, Mercedes-Benz recom- mends that you drive with the lights switched
on even during the daytime. In some coun-
tries, operation of the headlamps varies due
to legal requirements and self-imposed obli-
gations. Driving abroad
General notes If your journey takes you to countries where
vehicles are driven on the opposite side of the
road to the country in which the vehicle is
registered, your headlamps must be switched to symmetrical dipped beam as soon as pos-
sible after crossing the border (only vehicles
with Intelligent Light System). This prevents
oncoming traffic from being dazzled. Sym-
metrical lights do not illuminate as large an
area of the edge of the carriageway.
Vehicles with bi-xenon or halogen head-
lamps It is not necessary to switch your headlamps
to symmetrical dipped beam when driving in
countries where vehicles are driven on the
opposite side of the road to the country in
which the vehicle is registered. Legal require- ments are fulfilled without switching the
headlamps to symmetrical dipped beam.
Vehicles with Intelligent Light System Before crossing the border, set the head-
lamps to symmetrical dipped beam and after
returning back to asymmetrical dipped beam via the "Dipped-beam headlamps for driving
on the right/left" function in the on-board
computer (Y page 259).
If the headlamps are converted to symmetri-
cal dipped beam, the "motorway mode" and
"extended range foglamps" functions are not
available. Setting the exterior lighting
Setting options Exterior lighting can be set using the:
R light switch
R combination switch (Y page 129)
R headlamp range adjustment (only vehicles
with halogen headlamps) (Y page 128)
R on-board computer (Y page 259)
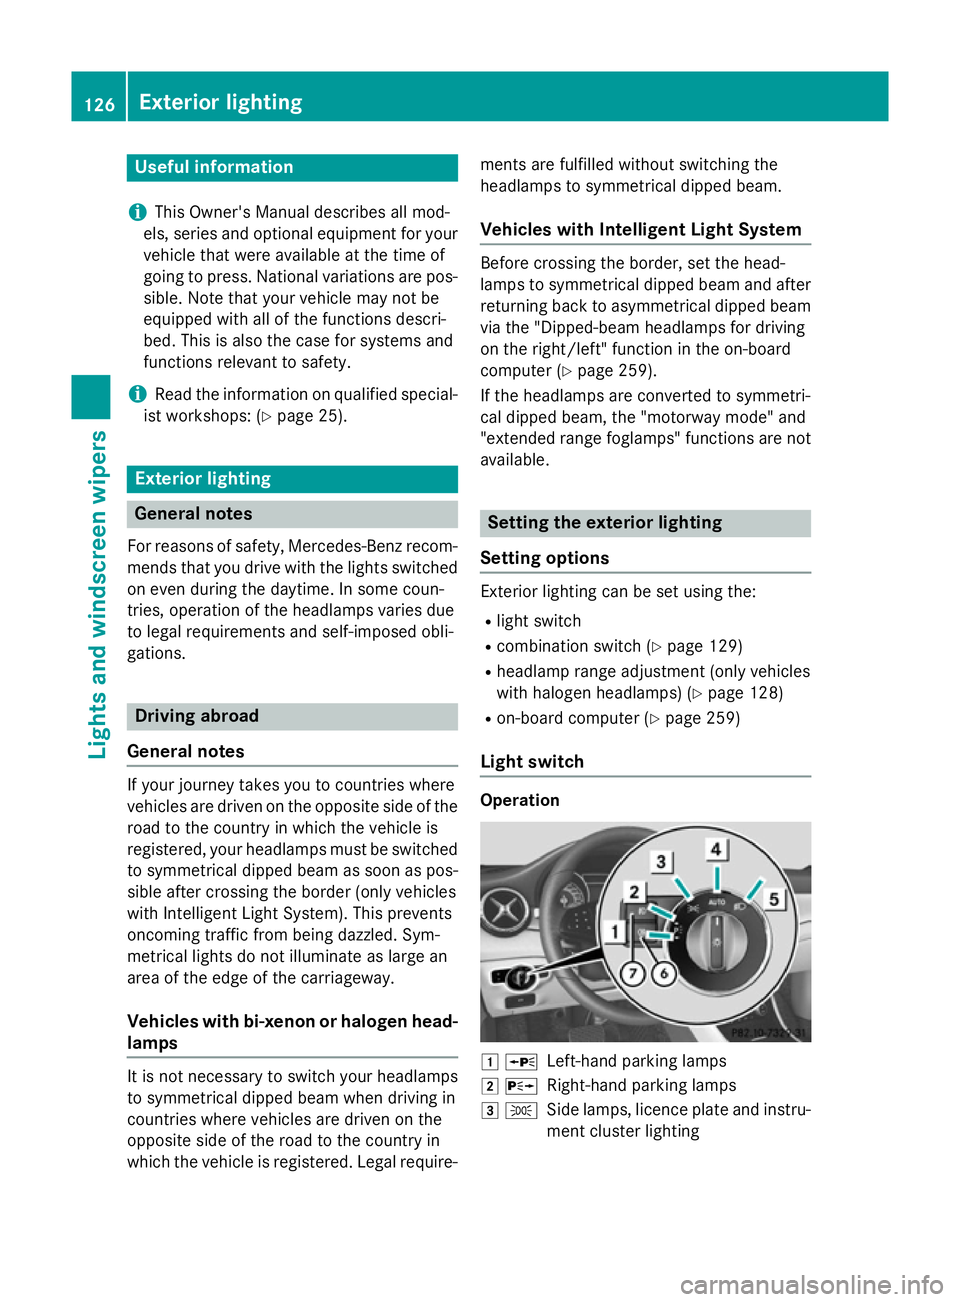
Light switch Operation
1
W
Left-hand parking lamps
2 X
Right-hand parking lamps
3 T
Side lamps, licence plate and instru-
ment cluster lighting 126
Exterior lightingLights and windscreen wipers
Page 133 of 421
The hazard warning lamps switch on auto-
matically if:
R an airbag is deployed or
R the vehicle decelerates rapidly from a
speed of above 70 km/h and comes to a
standstill
The hazard warning lamps switch off auto-
matically if the vehicle reaches a speed of
above 10 km/ha gain after a full brake appli-
cation.
The hazard warning lamps continue to oper-
ate even if the ignition is switched off. Intelligent Light System
General notes The Intelligent Light System is a system that
adjusts the headlamps automatically to suit
the prevailing driving and weather conditions.
It offers advanced functions for improved illu-
mination of the road surface, e.g. depending
on the vehicle speed or weather conditions.
The system includes the active light function, cornering light function, motorway mode and
extended range foglamps. The system is only active when it is dark.
You can activate or deactivate the "Intelligent
Light System" function using the on-board
computer (Y page 259).
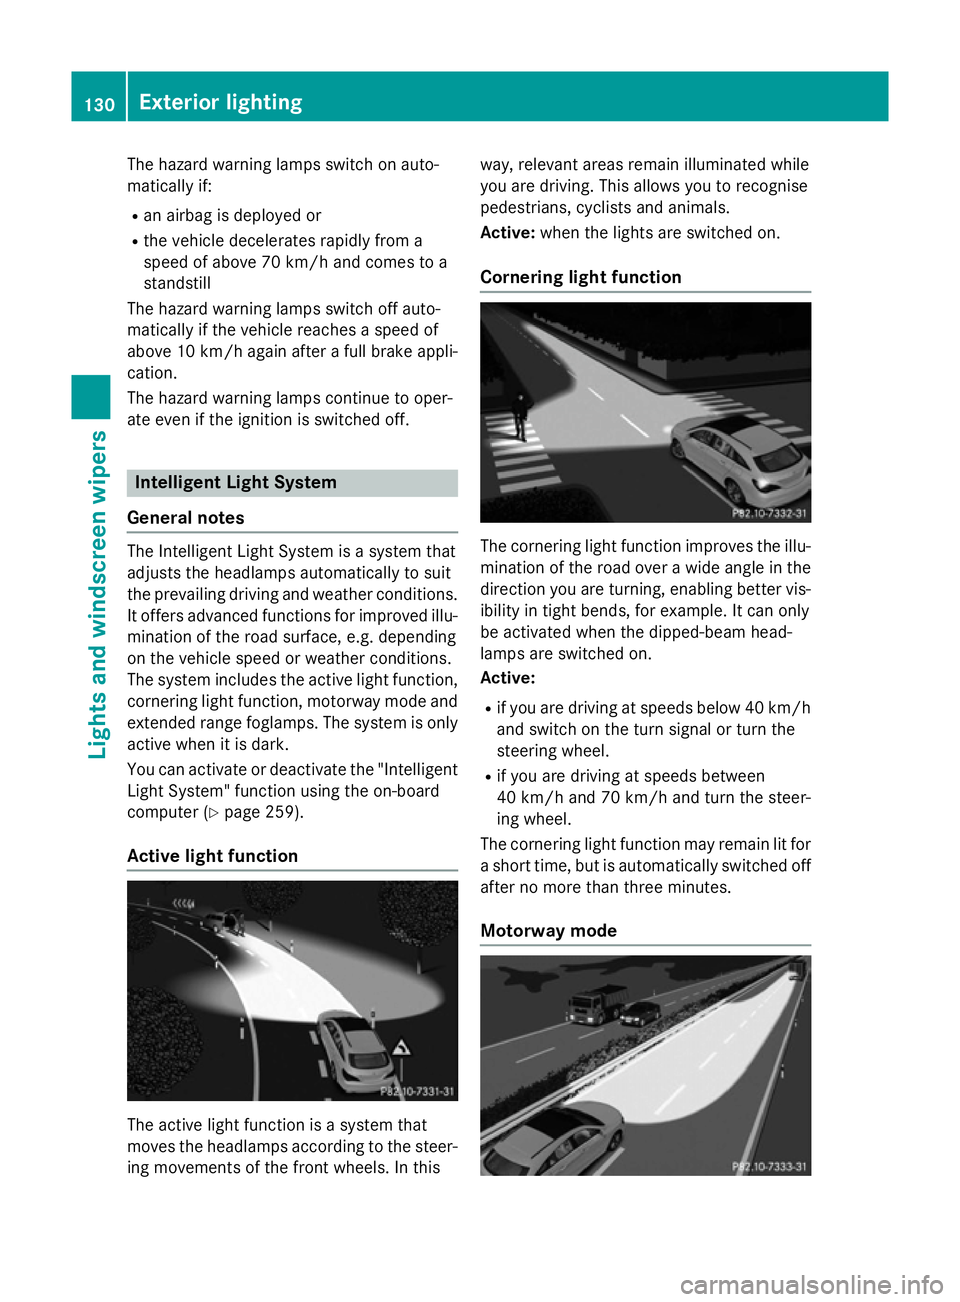
Active light function The active light function is a system that
moves the headlamps according to the steer-
ing movements of the front wheels. In this way, relevant areas remain illuminated while
you are driving. This allows you to recognise
pedestrians, cyclists and animals.
Active:
when the lights are switched on.
Cornering light function The cornering light function improves the illu-
mination of the road over a wide angle in the direction you are turning, enabling better vis-
ibility in tight bends, for example. It can only
be activated when the dipped-beam head-
lamps are switched on.
Active:
R if you are driving at speeds below 40 km/h
and switch on the turn signal or turn the
steering wheel.
R if you are driving at speeds between
40 km/ha nd 70 km/h and turn the steer-
ing wheel.
The cornering light function may remain lit for
a short time, but is automatically switched off after no more than three minutes.
Motorway mode 130
Exterior lightingLights and
windscreen wipers
Page 147 of 421
Useful information
i This Owner's Manual describes all mod-
els, series and optional equipment for your
vehicle that were available at the time of
going to press. National variations are pos- sible. Note that your vehicle may not be
equipped with all of the functions descri-
bed. This is also the case for systems and
functions relevant to safety.
i Read the information on qualified special-
ist workshops: (Y page 25). Overview of climate control systems
General notes
Observe the settings recommended on the
following pages. The windows could other-
wise mist up.
To prevent the windows from misting up:
R switch off climate control only briefly
R activate air-recirculation mode only briefly
R activate the "Cooling with air dehumidifica-
tion" function
R activate the windscreen demisting function
briefly, if required
The air-conditioning system/
THERMOTRONIC automatic climate control
regulates the temperature and the humidity
of the vehicle interior and filters undesirable
substances from the air.
The air-conditioning system/
THERMOTRONIC automatic climate control
can only be operated when the engine is run-
ning. Optimum operation is only achieved
with the side windows and panorama sliding
sunroof closed.
The residual heat function can only be acti-
vated or deactivated with the ignition
switched off (Y page 155).
Always keep the ventilation flaps behind the
side panelling clear (Y page 136). Otherwise
the vehicle will not be ventilated correctly. i
Ventilate the vehicle for a brief period
during warm weather, e.g. using the con-
venience opening feature (Y page 102).
This will speed up the cooling process and
the desired interior temperature will be
reached more quickly.
i The integrated filter filters out most par-
ticles of dust and soot and completely fil-
ters out pollen. With THERMOTRONIC auto-
matic climate control, gaseous pollutants
and odours will also be reduced. A clogged
filter reduces the amount of air supplied to the vehicle interior. For this reason, you
should always observe the interval for
replacing the filter, which is specified in the
Service Booklet. As this depends on envi-
ronmental conditions, e.g. heavy air pollu-
tion, the interval may be shorter than stated in the Service Booklet.
i Vehicles with auxiliary heating:
under
certain environmental conditions, the
residual heat function may be activated
automatically an hour after the key has
been removed in order to dry the automatic climate control. When the automatic cli-
mate control drying function is active, the
blue LED lamp is lit in the rocker switch in
the centre console. The vehicle is then ven-
tilated for 30 minutes.
Vehicles without auxiliary heating:
under certain environmental conditions,
the residual heat function may be activated automatically an hour after the key has
been removed in order to dry the automatic
climate control. The vehicle is then ventila-
ted for 30 minutes. 144
Overview of climate control systemsClimate control