trunk release MERCEDES-BENZ CLK-CLASS 2000 Owners Manual
[x] Cancel search | Manufacturer: MERCEDES-BENZ, Model Year: 2000, Model line: CLK-CLASS, Model: MERCEDES-BENZ CLK-CLASS 2000Pages: 299, PDF Size: 7.58 MB
Page 3 of 299

IntroductionCentral locking switch 35 Exterior rear view mirrors 75
Product information 7 Automatic central locking 36 Instrument cluster 78
Operator’s manual 8 Emergency unlocking in case of accident 37 Multifunction steering wheel,
Wheretofindit 13 Trunk 38multifunction display
84
Reporting Safety Defects 15 Trunk lid release switch 40Trip and main odometer,
Antitheft alarm system 41 vehicle speed, FSS and engine
Instruments and controlsTow-away alarm 43 oil level indicator 88
Instruments and controls 18 Power seats, front 44
Center console 20 Front head restraints 49 Audio systems 89
Overhead control panel 21 Head restraints, rear 50 Telephone 92
Backrest 51 Navigation system 97
OperationMulticontour seat 52 Trip computer 98
Vehicle keys 24 Heated seats 53 Malfunction message memory 100
Start lock-out 26 Seat belts and integrated restraint system 55 Individual settings 102
General notes on the central
locking system 26Seat belts 55 Setting the audio volume 104
Central locking system 27 Seat belt nonusage warning system 56 Flexible service system (FSS) 105
Radio frequency and infrared
remote control 27BabySmart™ airbag deactivation system 62 Checking engine oil level 108
Locking and unlocking 29 Supplemental restraint system (SRS) 63 Engine oil consumption 109
Choosing global or selective mode
on remote control 29Emergency tensioning retractor (ETR) 63 Exterior lamp switch 110
Opening the trunk 30 Airbags 64 Night security illumination 111
Opening and closing windows
from outside 30Safety guidelines for the seat belt,
emergency tensioning retractor and airbag 69Headlamp cleaning system 112
Panic button 32 Infant and child restraint systems 70 Combination switch 113
Mechanical keys 32 Adjusting telescoping steering column 73 Hazard warning flasher switch 115
Doors
33 Inside rear view mirror 74 Automatic climate control 116
3
ProCarManuals.com
Page 5 of 299

Instrument cluster displayBRAKE FLUID 217 Coolant level 236
PARKING BRAKE 218 Adding coolant 237
Malfunction and indicator lamps in the
instrument cluster 208ENGINE FAN 218 Windshield washer / headlamp
clean.system 238
On-board diagnostic systemCheck engine malfunction indicator lamp
208COOLANT (coolant level) 219 Windshield and headlamp
washer fluid mixing ratio 238
Brake warning lamp 209 COOLANT (coolant temp.) 220 Wheels 239
Supplemental restraint system STEER. WHEEL ADJUST. 221 Tire replacement 239
(SRS) indicator lamp 210 LIGHT SENSOR 221 Rotating wheels 240
Fuel reserve and fuel cap LIGHTING SYSTEM 222 Spare wheel 241
placement warning 210 WASHER FLUID 223 Changing wheels 242
Electronic stability program(ESP) OIL TEMP. (engine oil temperature) 224 Tire inflation pressure 247
warning lamp 211 ENGINE OIL LEVEL 224 Battery 249
BAS/ESP malfunction indicator lamp 211 ELEC. STABIL. PROG. (Electronic Jump starting 251
ABS malfunction indicator lamp 211 stability program) 226 Towing the vehicle 253
Telescoping steering column – Transmission selector lever,
indicator lamp 212
Practical hintsmanually unlocking 255
Seat belt warning lamp 212 Bulbs 256
Malfunction and indicator lamps in the First aid kit 228 Adjusting headlamp aim 261
center console 212 Shelf below rear window 228 Changing batteries in the
AIRBAG OFF indicator lamp 212 Stowing things in the vehicle 228 electronic main key 264
Roll bar warning lamp 221 Spare wheel, vehicle tools, storage Synchronizing remote control 266
Malfunction and warning messages in compartment 229 Emergency operation of
the multifunction display 213 Vehicle jack 230 sliding/pop-up roof 267
DISPLAY DEFECTIVE 214 Fuses 231
Manual release for fuel filler flap
268
BATTERY/ALTERNATOR 215 Hood 233 Replacing wiper blade insert 268
ABS-SYSTEM 216 Checking engine oil level 234 Trunk lamp 270
BRAKE ASSIST 216 Automatic transmission fluid level 236 Roof rack 270
BRAKE LINING WEAR 217
5
ProCarManuals.com
Page 20 of 299
Instruments and controls
Te ch n ica l
data Instruments
and controlsOperation DrivingInstrument
cluster displayPractical hints Car care Index
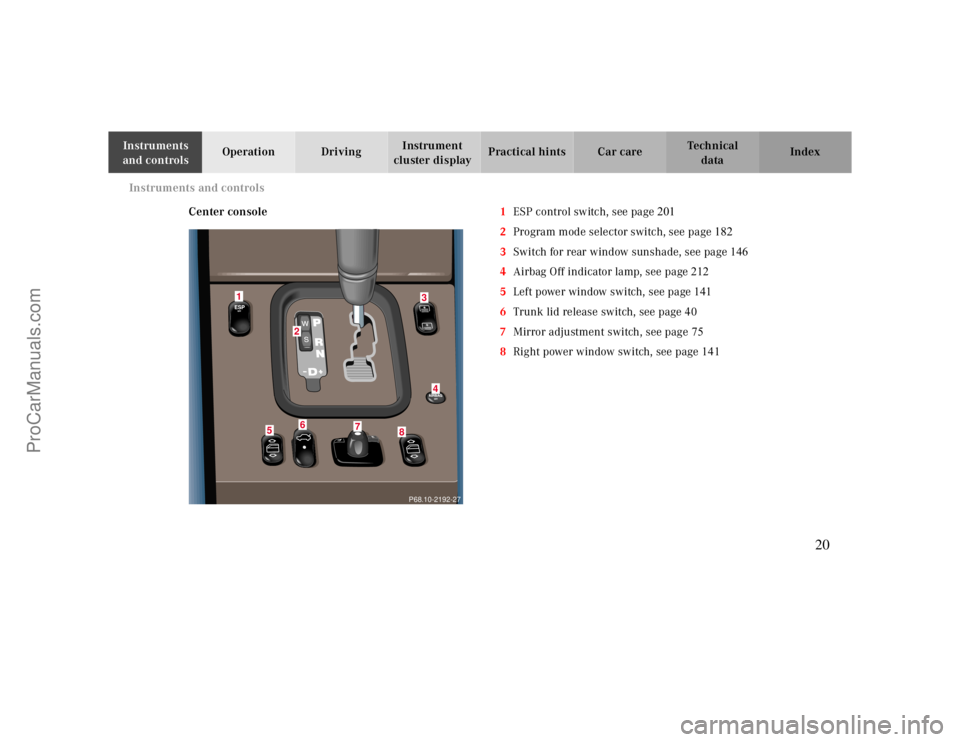
Center console1ESP control switch, see page
201
2Program mode selector switch, see page
182
3Switch for rear window sunshade, see page 146
4Airbag Off indicator lamp, see page 212
5Left power window switch, see page 141
6Trunk lid release switch, see page 40
7Mirror adjustment switch, see page 75
8Right power window switch, see page 141
P68.10-2192-27
2
5
1
6
7
8
43
20
ProCarManuals.com
Page 22 of 299

Operation
Tow-away alarm 43 Multifunction steering wheel,
Power seats, front 44multifunction display
84
Vehicle keys 24 Front head restraints 49Trip and main odometer, vehicle
speed, FSS and engine
Start lock-out 26 Head restraints, rear 50 oil level indicator 88
General notes on the central
locking system 26Backrest 51 Audio systems 89
Central locking system 27 Multicontour seat 52 Telephone 92
Radio frequency and infrared
remote control 27Heated seats 53 Navigation system 97
Locking and unlocking 29 Seat belts and integrated restraint system 55 Trip computer 98
Choosing global or selective mode
on remote control 29Seat belts 55 Malfunction message memory 100
Opening the trunk 30 Seat belt nonusage warning system 56 Individual settings 102
Opening and closing windows
from outside 30BabySmart™ airbag deactivation system 62 Setting the audio volume 104
Panic button 32 Supplemental restraint system (SRS) 63 Flexible service system (FSS) 105
Mechanical keys 32 Emergency tensioning retractor (ETR) 63 Checking engine oil level 108
Doors 33 Airbags 64
Central locking switch 35 Safety guidelines for the seat belt,
emergency tensioning retractor and airbag 69
Automatic central locking 36 Infant and child restraint systems 70
Emergency unlocking in case of Adjusting telescoping steering column 73
accident 37 Inside rear view mirror 74
Trunk 38 Exterior rear view mirrors 75
Trunk lid release switch 40 Instrument cluster 78
Antitheft alarm system 41
22
ProCarManuals.com
Page 27 of 299
Central locking system
Te ch n ica l
data Instruments
and controlsOperationDrivingInstrument
cluster displayPractical hints Car care Index
Central locking system
Radio frequency and infrared remote control
The electronic main key has an integrated radio
frequency and infrared remote control.
Due to the extended operational range of the remote
control, it could be possible to unintentionally lock or
unlock the vehicle by pressing the transmit button. If
one of the transmit buttons is pressed, the battery check
lamp lights up briefly – indicating that the batteries are
in order.
The vehicle doors, trunk and fuel filler flap can be
centrally locked and unlocked via remote control.
Opening and closing the windows remotely can only be
done with the infrared portion of the remote control.
Aim transmitter eye at a receiver (6 or 7), press and
hold transmit button Œor ‹.
If the electronic key is inserted in steering lock, the
vehicle cannot be locked or unlocked with the remote
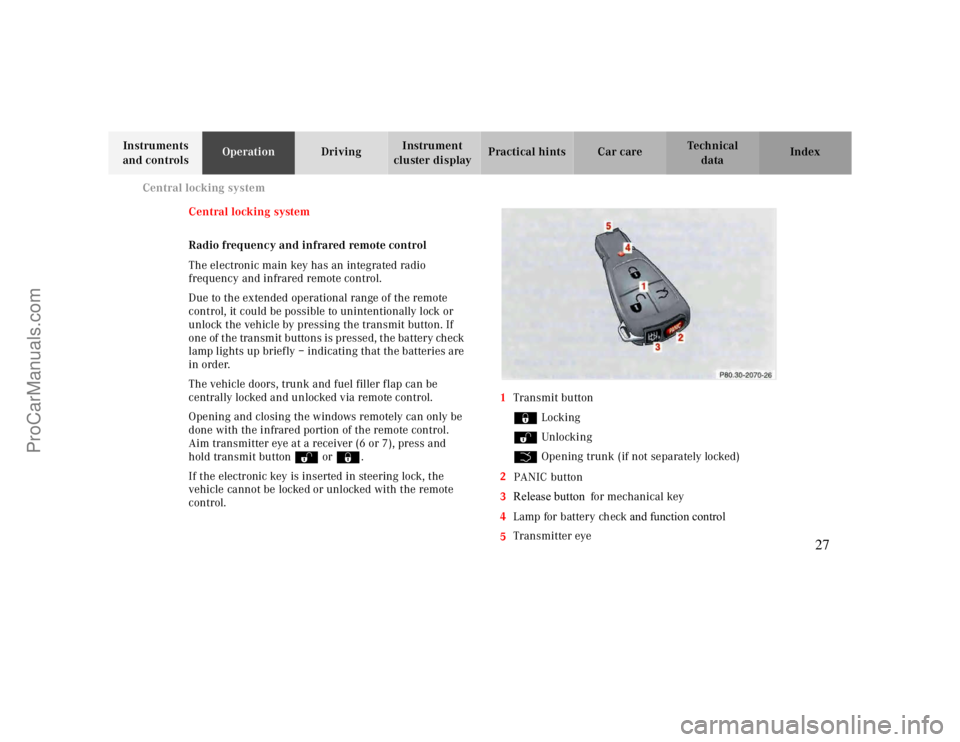
control.1Transmit button
‹ Locking
ΠUnlocking
Š Opening trunk (if not separately locked)
2
Lamp for battery check and function control 3PANIC button
4
Transmitter eye
5
Release button
for mechanical key
P80.30-2070-26
27
ProCarManuals.com
Page 30 of 299
Central locking system
Te ch n ica l
data Instruments
and controlsOperationDrivingInstrument
cluster displayPractical hints Car care Index Opening the trunk
The trunk lid will swing open automatically. You should
always make sure there is sufficient clearance.
A minimum height clearance of 5.9 ft. (1.8 m) is
required to open the trunk lid.
Press transmit buttonŠ until trunk lid is open.
Important!
Do not place remote control in trunk since trunk is
locked when the lid is closed if the vehicle is centrally
locked.
Note:
If the trunk was previously locked separately, it will
remain locked, see page 38.Opening and closing windows and
sliding / pop-up roof from outside
Aim transmitter eye of remote control at a door receiver.
To o pen :
Continue to press transmit button Πafter unlocking
the vehicle.
The windows and sliding / pop-up roof begin to open
after approx. 1 second.
To interrupt opening procedure, release transmit
button.
30
ProCarManuals.com
Page 40 of 299
Central locking system
Te ch n ica l
data Instruments
and controlsOperationDrivingInstrument
cluster displayPractical hints Car care Index
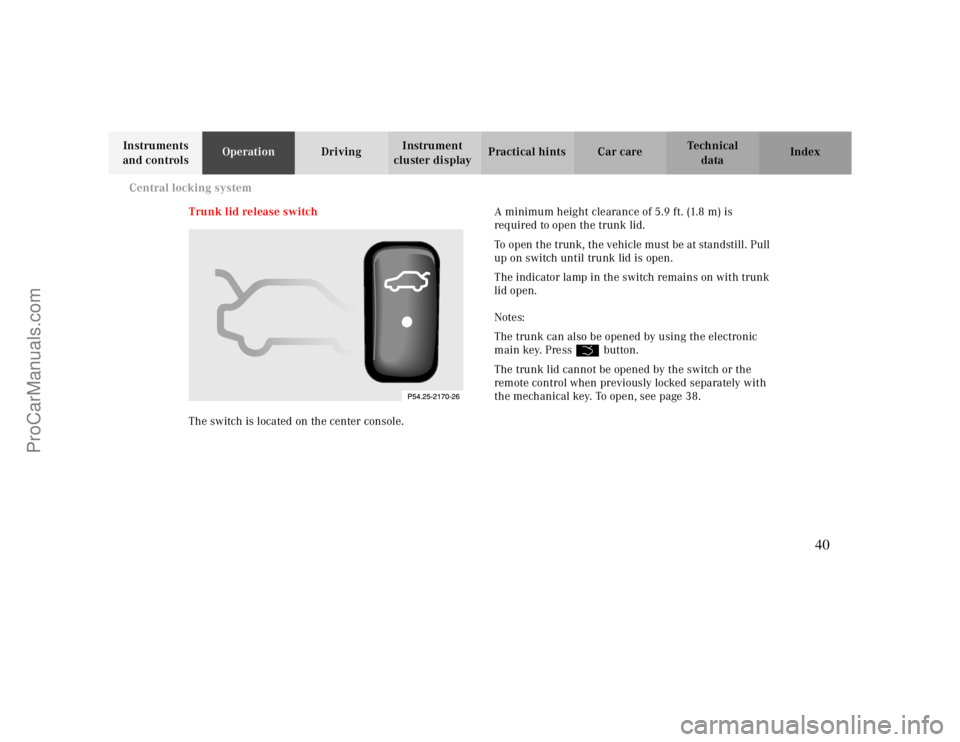
Trunk lid release switch
The switch is located on the center console.A minimum height clearance of 5.9 ft. (1.8 m) is
required to open the trunk lid.
To open the trunk, the vehicle must be at standstill. Pull
up on switch until trunk lid is open.
The indicator lamp in the switch remains on with trunk
lid open.
Notes:
The trunk can also be opened by using the electronic
main key. Press Š button.
The trunk lid cannot be opened by the switch or the
remote control when previously locked separately with
the mechanical key. To open, see page 38.
40
ProCarManuals.com
Page 142 of 299
Interior equipment
Te ch n ica l
data Instruments
and controlsOperationDrivingInstrument
cluster displayPractical hints Car care Index Express opening and closing of front door windows
Press switch k or j past resistance point and
release — window opens or closes completely.
To interrupt procedure, briefly press k or j.
If the upward movement of the window is blocked
during the closing procedure, the window will stop
during the last few inches before closure and open
slightly.
When pressing and holding the switch j to close the
window, and upward movement of the window is
blocked during the last few inches before closure, it will
stop but not
open slightly.Note:
The power windows can also be closed with the infrared
remote control while locking the vehicle doors or trunk,
see page30.
Synchronizing power windows
If the power supply was interrupted (battery
disconnected or low), the windows cannot be opened by
the express feature.
To resynchronize the express feature, press j side of
power window switch until the window is completely
closed and hold for additional 2 seconds. Repeat
procedure for each window.
The automatic full opening procedure of the windows
should now be restored.
Warning!
When leaving the vehicle, always remove the
electronic key from the steering lock and lock the
vehicle. Do not leave children unattended in the
vehicle, or with access to an unlocked vehicle.
Unsupervised use of vehicle equipment can cause
serious personal injury.
142
ProCarManuals.com
Page 227 of 299

Practical hints
Spare wheel 241
Changing wheels 242
First aid kit 228 Tire inflation pressure 247
Shelf below rear window 228 Battery 249
Stowing things in the vehicle 228 Jump starting 251
Spare wheel, vehicle tools, storage Towing the vehicle 253
compartment 229 Transmission selector lever,
Vehicle jack 230 manually unlocking 255
Fuses 231 Bulbs 256
Hood 233 Adjusting headlamp aim 261
Checking engine oil level 234 Changing batteries in the
Automatic transmission fluid level 236 electronic main key 264
Coolant level 236 Synchronizing remote control 266
Adding coolant 237 Emergency operation of
Windshield washer / headlamp
clean.system 238sliding/pop-up roof 267
Windshield and headlamp washer fluid
mixing ratio 238Manual release for fuel filler flap
268
Wheels 239 Replacing wiper blade insert 268
Tire replacement 239 Trunk lamp 270
Rotating wheels 240 Roof rack 270
227
ProCarManuals.com
Page 268 of 299
Manual release for fuel filler flap
Te ch n ica l
data Instruments
and controlsOperation DrivingInstrument
cluster displayPractical hintsCar care Index Manual release for fuel filler flap
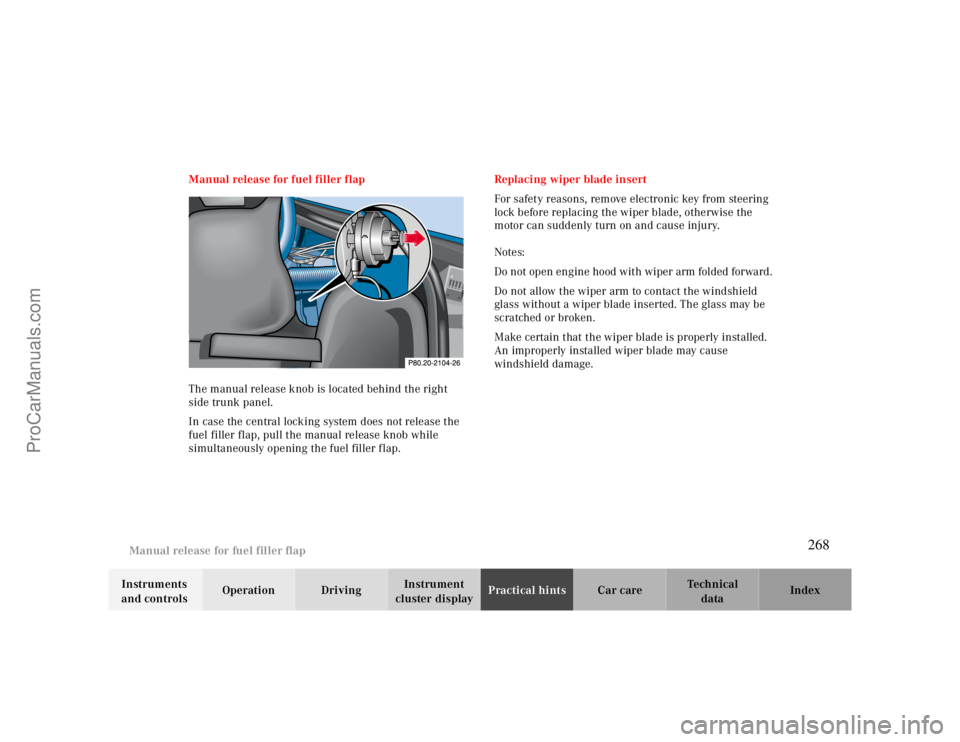
The manual release knob is located behind the right
side trunk panel.
In case the central locking system does not release the
fuel filler flap, pull the manual release knob while
simultaneously opening the fuel filler flap.Replacing wiper blade insert
For safety reasons, remove electronic key from steering
lock before replacing the wiper blade, otherwise the
motor can suddenly turn on and cause injury.
Notes:
Do not open engine hood with wiper arm folded forward.
Do not allow the wiper arm to contact the windshield
glass without a wiper blade inserted. The glass may be
scratched or broken.
Make certain that the wiper blade is properly installed.
An improperly installed wiper blade may cause
windshield damage.
268
ProCarManuals.com