wheel bolts MERCEDES-BENZ CLS 2018 Owners Manual
[x] Cancel search | Manufacturer: MERCEDES-BENZ, Model Year: 2018, Model line: CLS, Model: MERCEDES-BENZ CLS 2018Pages: 334, PDF Size: 7.87 MB
Page 275 of 334

! Do not use wash programs with a hot wax
treatment under any circumstances.
Observe these notes if your vehicle has a clear
matte finish. This will help you to avoid damage
to the paintwork due to incorrect treatment.
These notes also apply to light alloy wheels with
a clear matte finish.
The vehicle should ideally be washed by hand
using a soft sponge, car shampoo and plenty of
water.
Use only insect remover and car shampoo from
the range of recommended and approved
Mercedes-Benz care products.
Cleaning the vehicle parts
Cleaning the wheels
G WARNING
The water jet from a circular jet nozzle (dirt
blasters) can cause invisible exterior damage
to the tires or chassis components. Compo-
nents damaged in this way may fail unexpect-
edly. There is a risk of an accident.
Do not use power washers with circular jet
nozzles to clean the vehicle. Have damaged
tires or chassis components replaced imme-
diately.
! Do not use acidic wheel cleaning products
to remove brake dust. This could damage
wheel bolts and brake components.
! Do not park your vehicle for a long period of
time directly after cleaning, particularly after
cleaning the wheel rim with wheel cleaner.
Wheel cleaner can lead to the increased cor-
rosion of the brake discs and pads. Therefore,
drive for a few minutes after cleaning. By
heating up the brakes, the brake discs and
pads dry. The vehicle can then be parked for a
long period of time.
Cleaning the windows
G WARNING
You could become trapped by the windshield
wipers if they start moving while cleaning the
windshield or wiper blades. There is a risk of
injury. Always switch off the windshield wipers and
the ignition before cleaning the windshield or
wiper blades.
! Do not use dry cloths, abrasive products,
solvents or cleaning agents containing sol-
vents to clean the inside of the windows. Do
not touch the insides of the windows with
hard objects, e.g. an ice scraper or ring. There
is otherwise a risk of damaging the windows.
! Clean the water drainage channels of the
windshield and the rear window at regular
intervals. Deposits such as leaves, petals and
pollen may under certain circumstances pre-
vent water from draining away. This can lead
to corrosion damage and damage to elec-
tronic components. X
Clean the inside and outside of the windows
with a damp cloth and a cleaning product that
is recommended and approved by Mercedes-
Benz.
Cleaning wiper blades
G WARNING
You could become trapped by the windshield
wipers if they start moving while cleaning the
windshield or wiper blades. There is a risk of
injury.
Always switch off the windshield wipers and
the ignition before cleaning the windshield or
wiper blades.
! Do not pull the wiper blade. Otherwise, the
wiper blade could be damaged.
! Do not clean wiper blades too often and do
not rub them too hard. Otherwise, the graph-
ite coating could be damaged. This could
cause wiper noise.
! Hold the wiper arm securely when folding
back. The windshield could be damaged if the
wiper arm smacks against it suddenly. X
Fold the windshield wiper arms away from the
windshield. X
Carefully clean the wiper blades with a damp
cloth. X
Fold the windshield wiper arms back again
before switching on the ignition. Care 273
Maintenance and care Z
Page 316 of 334

must be positioned vertically, directly under
the jacking point of the vehicle.
! The jack is designed exclusively for jacking
up the vehicle at the jacking points. Other-
wise, your vehicle could be damaged.
Observe the following when raising the vehicle: R
To raise the vehicle, only use the vehicle-spe-
cific jack that has been tested and approved
by Mercedes-Benz. If used incorrectly, the
jack could tip over with the vehicle raised. R
The jack is designed only to raise and hold the
vehicle for a short time while a wheel is being
changed. It must not be used for performing
maintenance work under the vehicle. R
Avoid changing the wheel on uphill and down-
hill slopes. R
Before raising the vehicle, secure it from roll-
ing away by applying the parking brake and
inserting wheel chocks. Do not disengage the
parking brake while the vehicle is raised. R
The jack must be placed on a firm, flat and
non-slip surface. On a loose surface, a large,
flat, load-bearing underlay must be used. On a
slippery surface, a non-slip underlay must be
used, e.g. rubber mats. R
Do not use wooden blocks or similar objects
as a jack underlay. Otherwise, the jack will not
be able to achieve its load-bearing capacity
due to the restricted height. R
Make sure that the distance between the
underside of the tires and the ground does not
exceed 1.2 in (3 cm). R
Never place your hands and feet under the
raised vehicle. R
Do not lie under the vehicle. R
Do not start the engine when the vehicle is
raised. R
Do not open or close a door or the trunk lid
when the vehicle is raised. R
Make sure that no persons are present in the
vehicle when the vehicle is raised.
Vehicles with alloy wheels and hub caps: the
wheel bolts are covered by a hub cap. Before y ou
ca n unscrew the wheel bolts, you must remove
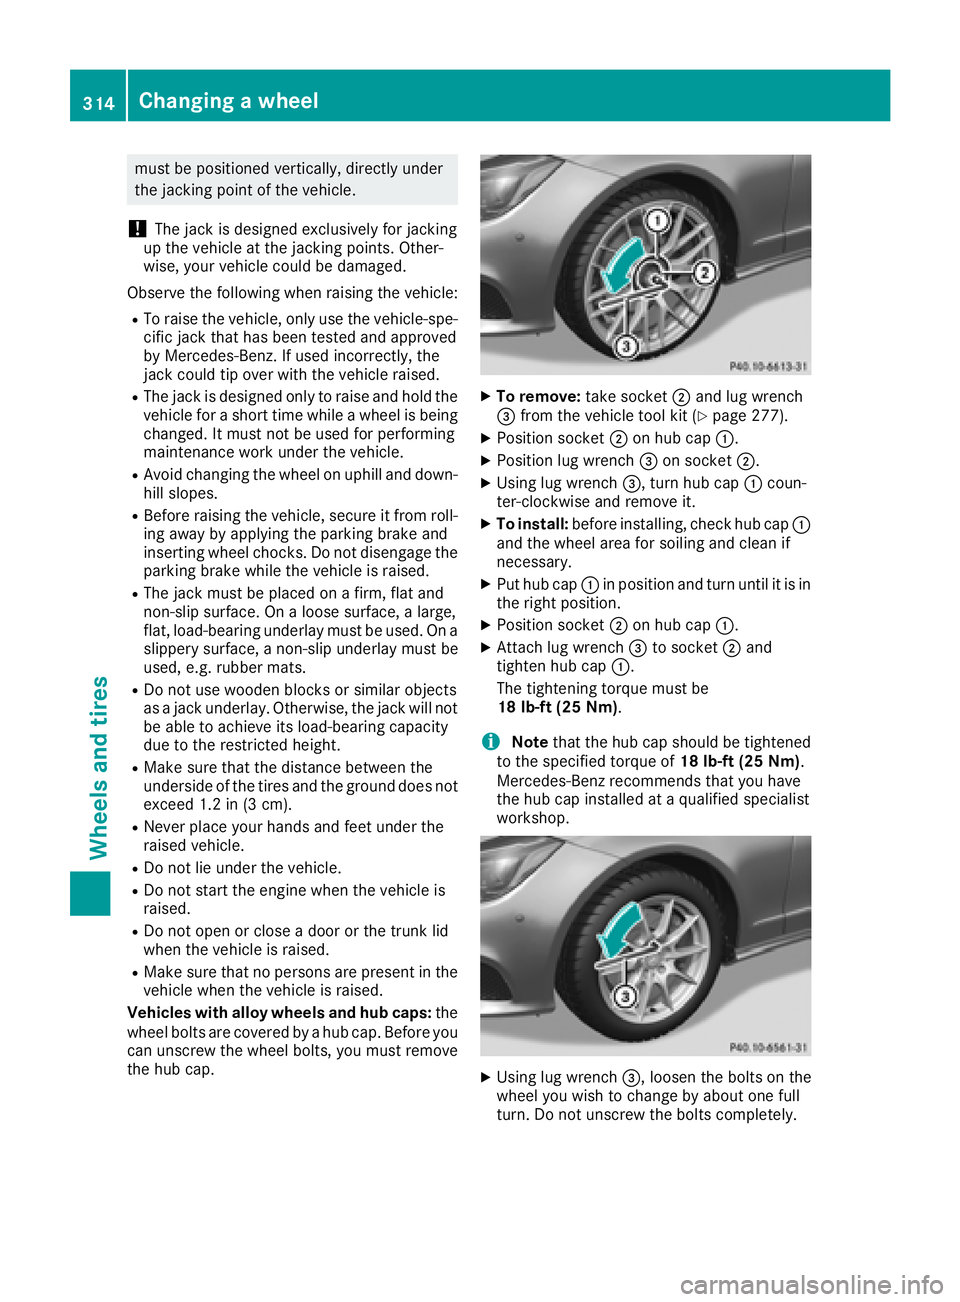
the hub cap. X
To remove: take socket �D and lug wrench
�
Page 318 of 334

Always pay attention to the instructions and
safety notes in the "Changing a wheel" section
( Y
page 312).
Only use wheel bolts that have been designed
for the wheel and the vehicle. For safety rea-
sons, Mercedes-Benz recommends that you
only use wheel bolts which have been approved
for Mercedes-Benz vehicles and the respective
wheel.
! Mercedes-AMG vehicles with ceramic-
brake disc: during removal and repositioning
of the wheel, the wheel rim can strike the
ceramic-brake disc and damage it. Therefore,
you should proceed carefully and get a sec-
ond person assist to you. Alternatively, you
can use a second alignment bolt.
! To prevent damage to the paintwork, hold
the wheel securely against the wheel hub
while screwing in the first wheel bolt.
X
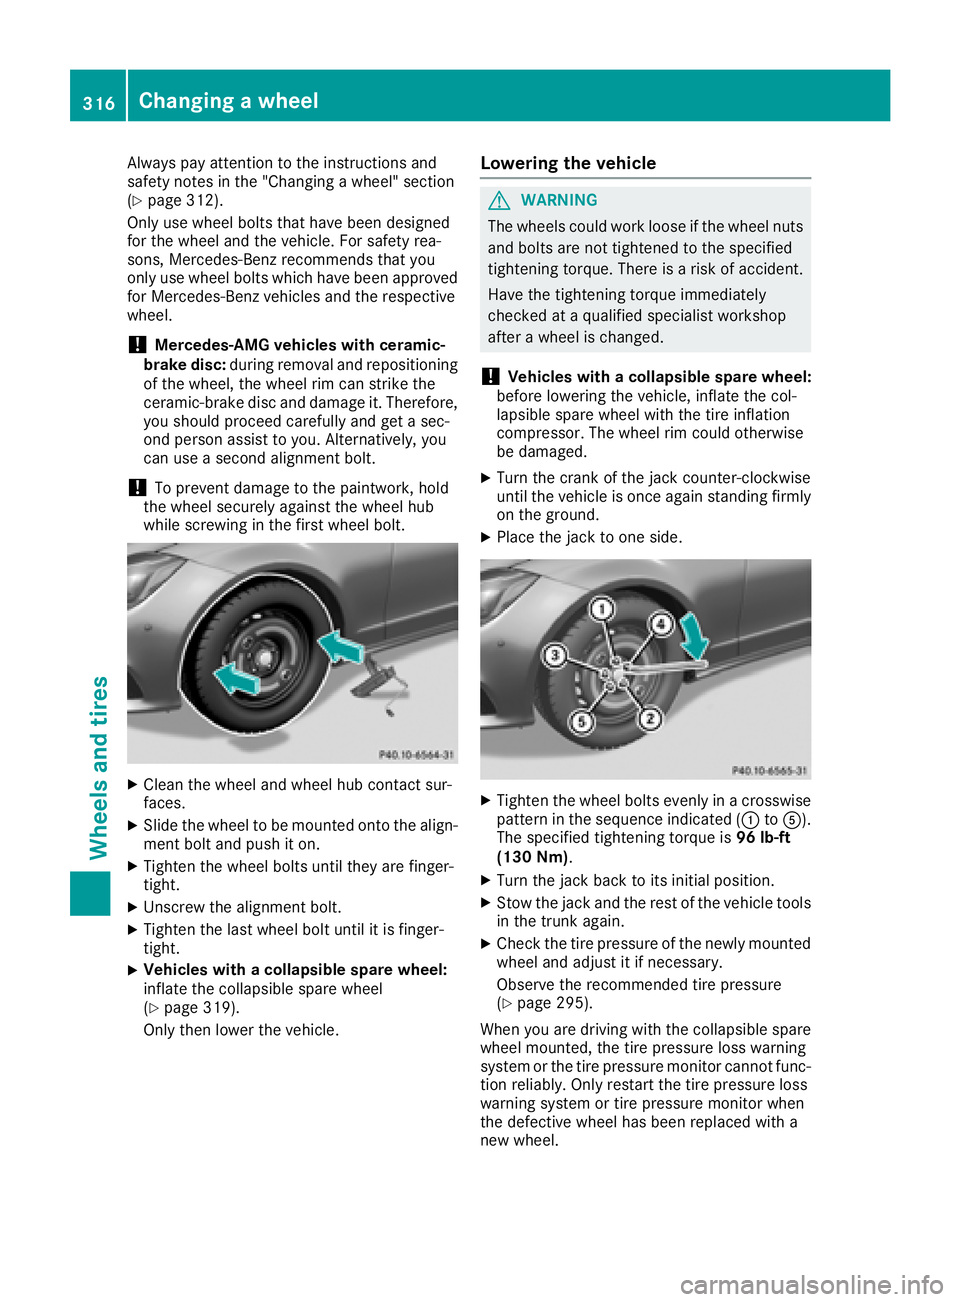
Clean the wheel and wheel hub contact sur-
faces. X
Slide the wheel to be mounted onto the align-
ment bolt and push it on. X
Tighten the wheel bolts until they are finger-
tight. X
Unscrew the alignment bolt. X
Tighten the last wheel bolt until it is finger-
tight. X
Vehicles with a collapsible spare wheel:
inflate the collapsible spare wheel
( Y
page 319).
Only then lower the vehicle. Lowering the vehicle
G WARNING
The wheels could work loose if the wheel nuts
and bolts are not tightened to the specified
tightening torque. There is a risk of accident.
Have the tightening torque immediately
checked at a qualified specialist workshop
after a wheel is changed.
! Vehicles with a collapsible spare wheel:
before lowering the vehicle, inflate the col-
lapsible spare wheel with the tire inflation
compressor. The wheel rim could otherwise
be damaged. X
Turn the crank of the jack counter-clockwise
until the vehicle is once again standing firmly
on the ground. X
Place the jack to one side.
X
Tighten the wheel bolts evenly in a crosswise
pattern in the sequence indicated ( �C to �