ignition MERCEDES-BENZ CLS-Class 2013 W218 Owner's Manual
[x] Cancel search | Manufacturer: MERCEDES-BENZ, Model Year: 2013, Model line: CLS-Class, Model: MERCEDES-BENZ CLS-Class 2013 W218Pages: 376, PDF Size: 13.45 MB
Page 351 of 376
to the tires or chassis components.
Components damaged in this way may fail
unexpectedly. There is a risk of an accident.
Do not use power washers with circular jet
nozzles to clean the vehicle. Have damaged
tires or chassis components replaced
immediately.
Mounting a wheel
Preparing the vehicle X
Park the vehicle on firm, non-slippery and
level ground.
X Apply the parking brake.
X Bring the front wheels into the straight-
ahead position.
X Shift the transmission to position P.
X Vehicles with AIRMATIC: make sure that
"normal" level is selected
(Y page 180).
X Switch off the engine.
X Vehicles without KEYLESS-GO: remove
the SmartKey from the ignition lock.
X Vehicles with KEYLESS-GO: open the
driver's door.
The on-board electronics have status 0,
which is the same as the SmartKey having
been removed.
X Vehicles with KEYLESS-GO: remove the
Start/Stop button from the ignition lock
(Y page 139).
X If included in the vehicle equipment, take
the tire-change tool kit out of the vehicle.
X Secure the vehicle to prevent it from rolling
away. Securing the vehicle to prevent it from
rolling away
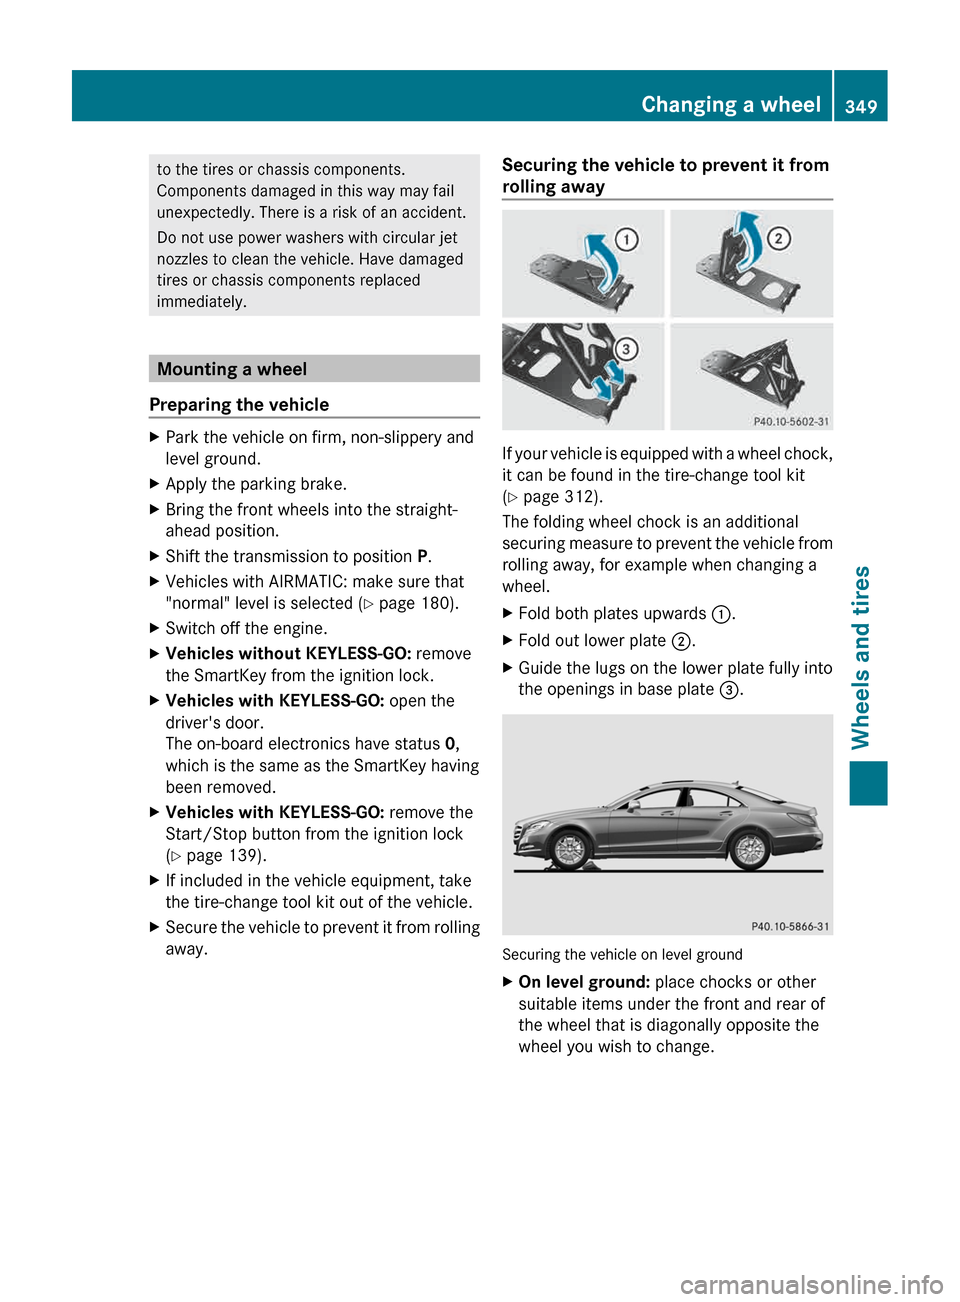
If your vehicle is equipped with a wheel chock,
it can be found in the tire-change tool kit
(Y page 312).
The folding wheel chock is an additional
securing
measure to prevent the vehicle from
rolling away, for example when changing a
wheel.
X Fold both plates upwards :.
X Fold out lower plate ;.
X Guide the lugs on the lower plate fully into
the openings in base plate =. Securing the vehicle on level ground
X
On level ground: place chocks or other
suitable items under the front and rear of
the wheel that is diagonally opposite the
wheel you wish to change. Changing a wheel
349
Wheels and tires Z
Page 361 of 376
For further information on changing and
mounting a wheel, see
(Y page 349). Stowing a used collapsible spare
wheel
! Only place the collapsible spare wheel in
the vehicle when it is dry. Otherwise,
moisture may get into the vehicle.
Take the following steps to stow a used
collapsible spare wheel. It will not otherwise
install into the spare wheel well. Mercedes-
Benz recommends that you have this work
performed
at a qualified specialist workshop,
e.g. at an authorized Mercedes-Benz Center.
X Unscrew the valve cap from the valve.
X Use the back of the valve cap to unscrew
the valve insert from the valve and release
the air.
i Fully deflating the tires can take a few
minutes.
X Screw the valve insert back into the valve.
X Screw the valve cap back on.
X Remove the protective sheet from the
vehicle tool kit and pull it over the
collapsible spare wheel.
X Stow the collapsible spare wheel in the
emergency spare wheel well under the
trunk. Inflating the collapsible spare wheel
! Inflate the collapsible spare wheel using
the tire inflation compressor before
lowering the vehicle. The wheel rim could
otherwise be damaged.
! Do not operate the tire inflation
compressor for longer than eight minutes
at
a time without a break. It may otherwise
overheat.
The tire inflation compressor can be
operated again once it has cooled down. X
Mount the collapsible spare wheel as
described ( Y page 348).
The collapsible spare wheel must be
mounted before it is inflated.
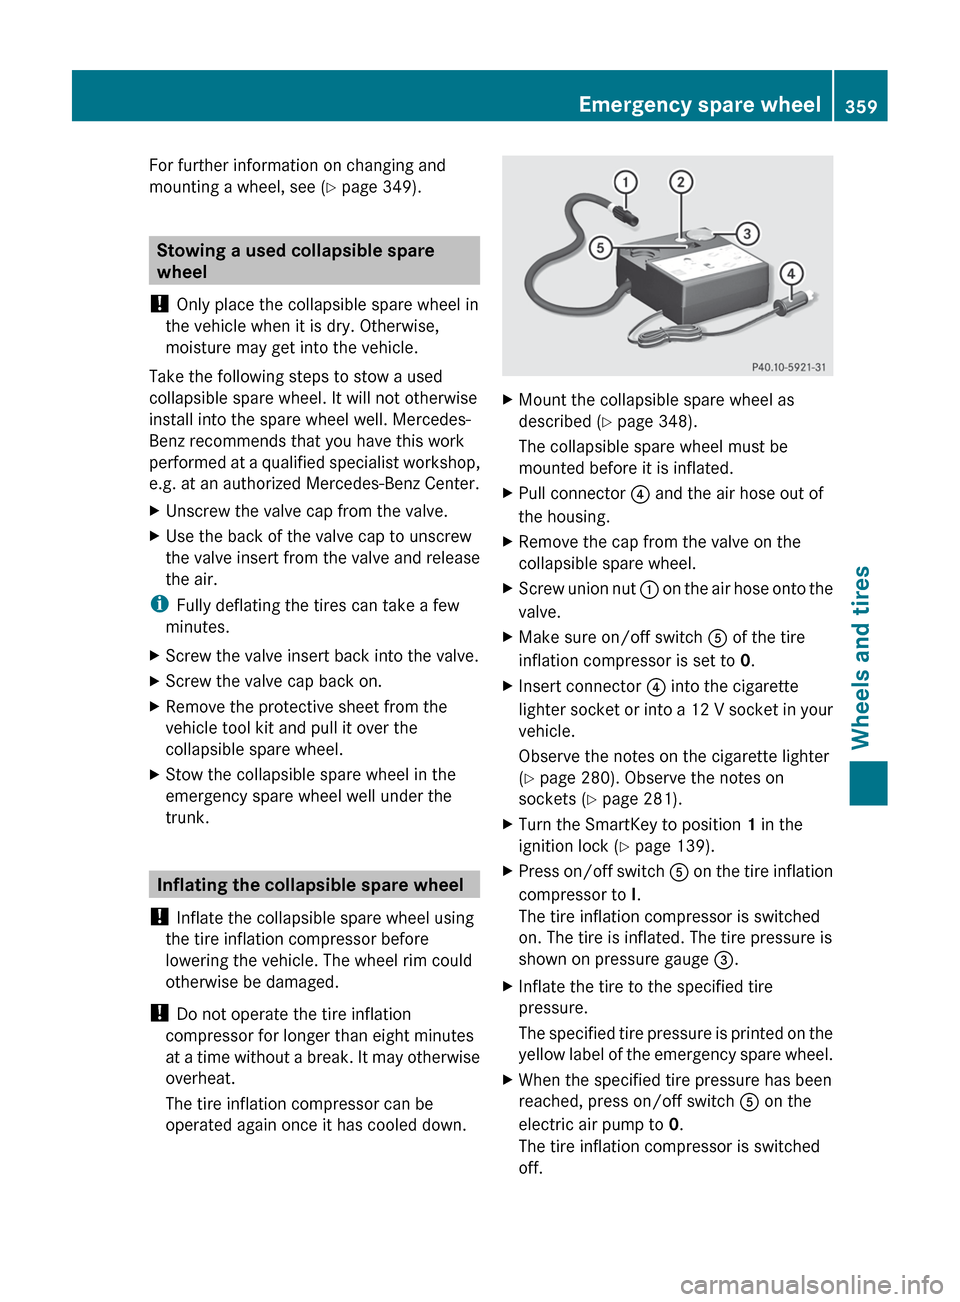
X Pull connector ? and the air hose out of
the housing.
X Remove the cap from the valve on the
collapsible spare wheel.
X Screw union nut :
on the air hose onto the
valve.
X Make sure on/off switch A of the tire
inflation compressor is set to 0.
X Insert connector ? into the cigarette
lighter
socket or into a 12 V socket in your
vehicle.
Observe the notes on the cigarette lighter
(Y page 280). Observe the notes on
sockets ( Y page 281).
X Turn the SmartKey to position 1 in the
ignition lock ( Y page 139).
X Press on/off switch A
on the tire inflation
compressor to I.
The tire inflation compressor is switched
on. The tire is inflated. The tire pressure is
shown on pressure gauge =.
X Inflate the tire to the specified tire
pressure.
The
specified tire pressure is printed on the
yellow label of the emergency spare wheel.
X When the specified tire pressure has been
reached, press on/off switch A on the
electric air pump to 0.
The tire inflation compressor is switched
off. Emergency spare wheel
359
Wheels and tires Z
Page 362 of 376
X
Turn the SmartKey to position 0 in the
ignition lock.
X If the tire pressure is higher than the
specified pressure, press pressure release
button ;
until the correct tire pressure has
been reached.
X Unscrew union nut :
on the air hose from
the valve.
X Screw the valve cap onto the collapsible
spare wheel valve again.
X Stow plug ? and the air hose in the lower
section of the blower housing.
X Stow the tire inflation compressor in the
vehicle.360
Emergency spare wheel
Wheels and tires