warning lights MERCEDES-BENZ CLS-Class 2013 W218 Owner's Guide
[x] Cancel search | Manufacturer: MERCEDES-BENZ, Model Year: 2013, Model line: CLS-Class, Model: MERCEDES-BENZ CLS-Class 2013 W218Pages: 376, PDF Size: 13.45 MB
Page 134 of 376
X
To activate: press the Ù button.
The indicator lamp in the button lights up.
X To activate: press off-road button Ù
again.
The
indicator lamp goes out. The previously
selected settings are restored.
When you activate MAX COOL, climate
control switches to the following functions:
R maximum cooling
R maximum airflow
R air-recirculation mode on Defrosting the windows
Windows fogged up on the inside X
Activate the ¿ cooling with air
dehumidification function.
X Activate automatic mode Ã.
X If the windows continue to fog up, activate
the defrosting function
(Y page 131).
i You should only select this setting until
the windshield is clear again.
Windows fogged up on the outside X
Press the _ button repeatedly until the
P or O symbol appears in the
display.
i You should only select this setting until
the windshield is clear again. Rear window defroster
Activating/deactivating G
WARNING
Clear all windows of ice or snow before setting
off. Otherwise, impaired visibility could
endanger you and others.
The
rear window defroster has a high current
draw. You should therefore switch it off as
soon as the rear window is clear. Otherwise, the rear window defroster switches off
automatically after several minutes.
If the battery voltage is too low, the rear
window defroster may switch off.
X
Turn the SmartKey to position 2 in the
ignition lock.
X Press the ¤ button.
The
indicator lamp in the ¤ button lights
up or goes out.
Problems with the rear window
defroster The rear window defroster has deactivated
prematurely or cannot be activated.
X
Switch off any consumers that are not
required, e.g. reading lamps or interior
lighting.
When the battery is sufficiently charged,
the rear window defroster is activated
again automatically. Activating/deactivating air-
recirculation mode
G
WARNING
At low outside temperatures, only switch over
to air-recirculation mode for brief periods.
Otherwise, the windows could fog up, thus
impairing visibility and endangering yourself
and others. This may prevent you from
observing the traffic conditions and thereby
cause an accident.
You can deactivate the flow of fresh air if
unpleasant odors are entering the vehicle
from outside. The air already inside the
vehicle will then be recirculated.
The
operation of air-recirculation mode is the
same for all control panels. 132
Operating the climate control systems
Climate control
Page 135 of 376
X
Turn the SmartKey to position 2 in the
ignition lock.
X To activate: press the g button.
The indicator lamp in the g button lights
up.
i In
the event of high pollution levels 1
or at
high outside temperatures, air-
recirculation mode is automatically
activated. When air-recirculation mode is
activated automatically, the indicator lamp
above the g button does not light up.
Outside air is added after about
30 minutes.
X To deactivate: press the g button.
The
indicator lamp in the g button goes
out.
i Air-recirculation mode deactivates
automatically:
R after approximately five minutes at
outside temperatures below
approximately
41 ‡ (5 †)
R after approximately five minutes if
cooling with air dehumidification is
deactivated
R after approximately 30 minutes at
outside temperatures above
approximately 41 ‡ (5 †) Activating/deactivating the residual
heat function
The
residual heat function is only available in
vehicles for Canada with automatic climate
control.
It is possible to make use of the residual heat
of the engine to continue heating the
stationary vehicle for up to 30 minutes after
the engine has been switched off. The heating
time depends on the temperature that has
been set. X
To activate: press the Ì button.
The
indicator lamp in the Ì button lights
up.
i The blower will run at a low speed
regardless of the airflow setting.
i If you activate the residual heat function
at high temperatures, only the ventilation
will be activated. The blower runs at
medium speed.
X To deactivate: press the Ì button.
The
indicator lamp in the Ì button goes
out.
i It is possible that the residual heat
function
may be activated automatically an
hour after the SmartKey is removed. The
vehicle is then ventilated for 30 minutes to
dry the air-conditioning system.
Residual heat is deactivated automatically:
R after approximately 30 minutes
R when the ignition is switched on
R if the battery voltage drops Setting the air vents
Important safety notes
G
WARNING
Very hot or very cold air can flow from the air
vents. This could cause burns or frostbite to
bare skin in the immediate vicinity of the
vents. Keep bare skin away from these air
vents.
If necessary, direct the airflow away to
a different area of the vehicle interior.
In order to ensure the direct flow of fresh air
through the air vents into the vehicle interior,
please observe the following notes:
R keep the air inlet between the windshield
and the hood free of blockages, such as ice,
snow or leaves.
R never cover the air vents or air intake grilles
in the vehicle interior.
1 Automatic climate control only. Setting the air vents
133
Climate control Z
Page 161 of 376
They could also operate the vehicle's
equipment.
There is a risk of an accident and
injury.
When leaving the vehicle, always take the
SmartKey with you and lock the vehicle. Never
leave children unsupervised in the vehicle. If you brake the vehicle with the parking
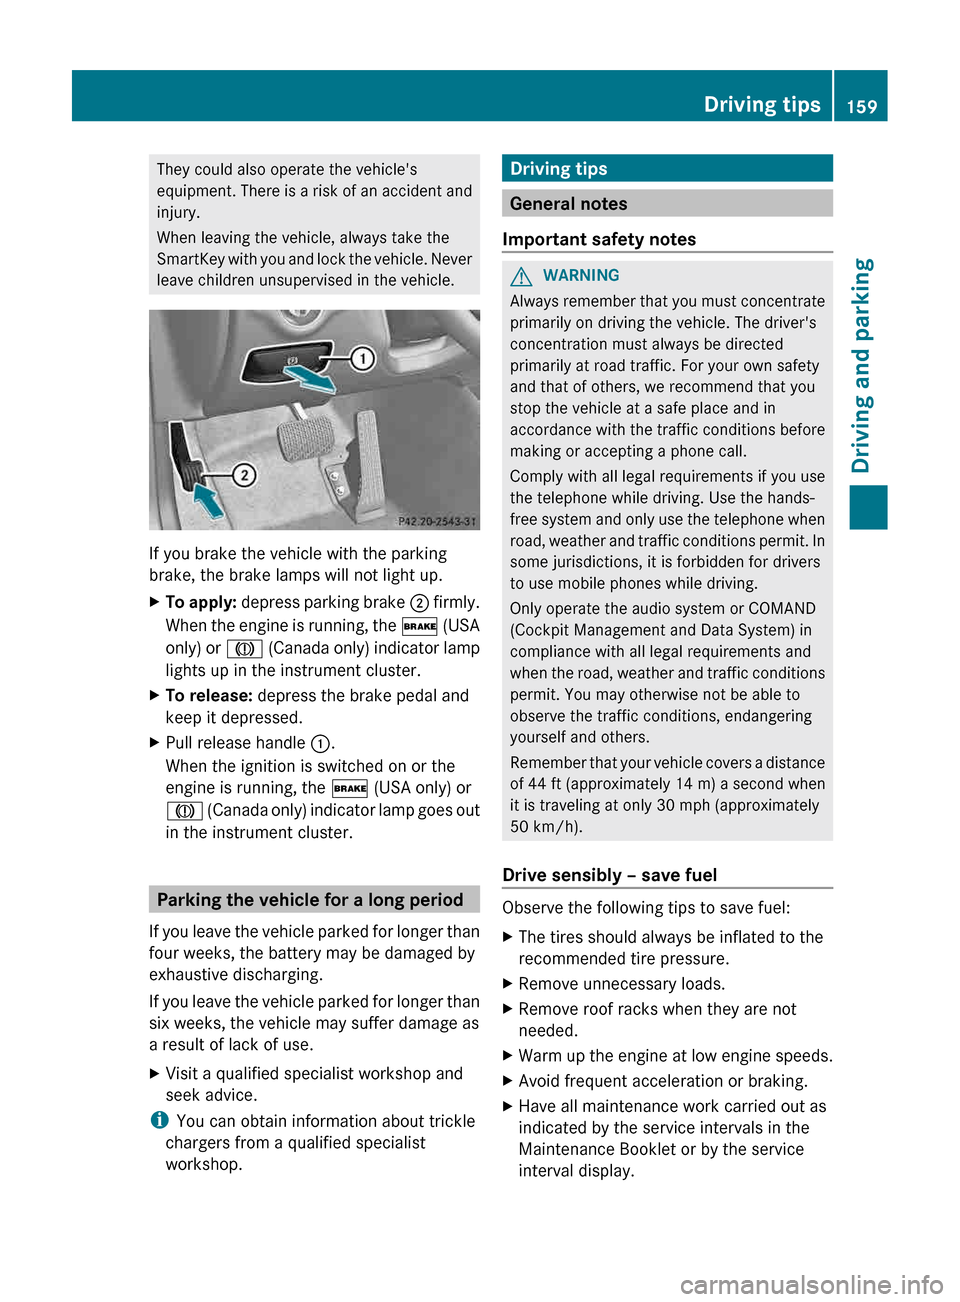
brake, the brake lamps will not light up.
X
To apply:
depress parking brake ; firmly.
When the engine is running, the $ (USA
only) or J (Canada only) indicator lamp
lights up in the instrument cluster.
X To release: depress the brake pedal and
keep it depressed.
X Pull release handle :.
When the ignition is switched on or the
engine is running, the $ (USA only) or
J
(Canada only) indicator lamp goes out
in the instrument cluster. Parking the vehicle for a long period
If
you leave the vehicle parked for longer than
four weeks, the battery may be damaged by
exhaustive discharging.
If you leave the vehicle parked for longer than
six weeks, the vehicle may suffer damage as
a result of lack of use.
X Visit a qualified specialist workshop and
seek advice.
i You can obtain information about trickle
chargers from a qualified specialist
workshop. Driving tips
General notes
Important safety notes G
WARNING
Always remember that you must concentrate
primarily on driving the vehicle. The driver's
concentration must always be directed
primarily at road traffic. For your own safety
and that of others, we recommend that you
stop the vehicle at a safe place and in
accordance
with the traffic conditions before
making or accepting a phone call.
Comply with all legal requirements if you use
the telephone while driving. Use the hands-
free system and only use the telephone when
road, weather and traffic conditions permit. In
some jurisdictions, it is forbidden for drivers
to use mobile phones while driving.
Only operate the audio system or COMAND
(Cockpit Management and Data System) in
compliance with all legal requirements and
when the road, weather and traffic conditions
permit. You may otherwise not be able to
observe the traffic conditions, endangering
yourself and others.
Remember that your vehicle covers a distance
of 44 ft (approximately 14 m) a second when
it is traveling at only 30 mph (approximately
50 km/h).
Drive sensibly – save fuel Observe the following tips to save fuel:
X
The tires should always be inflated to the
recommended tire pressure.
X Remove unnecessary loads.
X Remove roof racks when they are not
needed.
X Warm up the engine at low engine speeds.
X Avoid frequent acceleration or braking.
X Have all maintenance work carried out as
indicated by the service intervals in the
Maintenance Booklet or by the service
interval display. Driving tips
159
Driving and parking Z
Page 164 of 376
Braking
Important safety notes G
WARNING
If you shift down on a slippery road surface in
an attempt to increase the engine's braking
effect, the drive wheels could lose their grip.
There is an increased danger of skidding and
accidents.
Do not shift down for additional engine
braking on a slippery road surface.
Downhill gradients !
On long and steep gradients, you must
reduce the load on the brakes by shifting
early
to a lower gear. This allows you to take
advantage of the engine braking effect and
helps avoid overheating and excessive
wear of the brakes.
When you take advantage of the engine
braking effect, a drive wheel may not turn
for some time, e.g. on a slippery road
surface. This could cause damage to the
drive train. This type of damage is not
covered by the Mercedes-Benz warranty.
Heavy and light loads G
WARNING
If you rest your foot on the brake pedal while
driving,
the braking system can overheat. This
increases the stopping distance and can even
cause the braking system to fail. There is a
risk of an accident.
Never use the brake pedal as a footrest. Never
depress the brake pedal and the accelerator
pedal at the same time.
! Depressing the brake pedal constantly
results in excessive and premature wear to
the brake pads.
If the brakes have been subjected to a heavy
load, do not stop the vehicle immediately, but
drive on for a short while. This allows the
airflow to cool the brakes more quickly. Wet roads If you have driven for a long time in heavy rain
without braking, there may be a delayed
reaction
from the brakes when braking for the
first time. This may also occur after the
vehicle has been washed or driven through
deep water.
You have to depress the brake pedal more
firmly. Maintain a greater distance from the
vehicle in front.
After driving on a wet road or having the
vehicle washed, brake firmly while paying
attention to the traffic conditions. This will
warm up the brake discs, thereby drying them
more quickly and protecting them against
corrosion.
Limited braking performance on salt-
treated roads If you drive on salted roads, a layer of salt
residue may form on the brake discs and
brake pads. This can result in a significantly
longer braking distance.
R
Brake
occasionally to remove any possible
salt residue. Make sure that you do not
endanger other road users when doing so.
R Carefully depress the brake pedal and the
beginning and end of a journey.
R Maintain a greater distance to the vehicle
ahead.
Servicing the brakes G
WARNING
If brake pads or brake fluid other than those
recommended are used, the braking
properties of the vehicle can be degraded to
an extent that safe braking is substantially
impaired. This could result in an accident. G
WARNING
Make sure that you do not endanger other
road users when you apply the brakes.
! If
the red brake warning lamp lights up in
the instrument cluster and you hear a 162
Driving tips
Driving and parking
Page 180 of 376
because of its narrow width. The distance to
the vehicle in front will be too short.
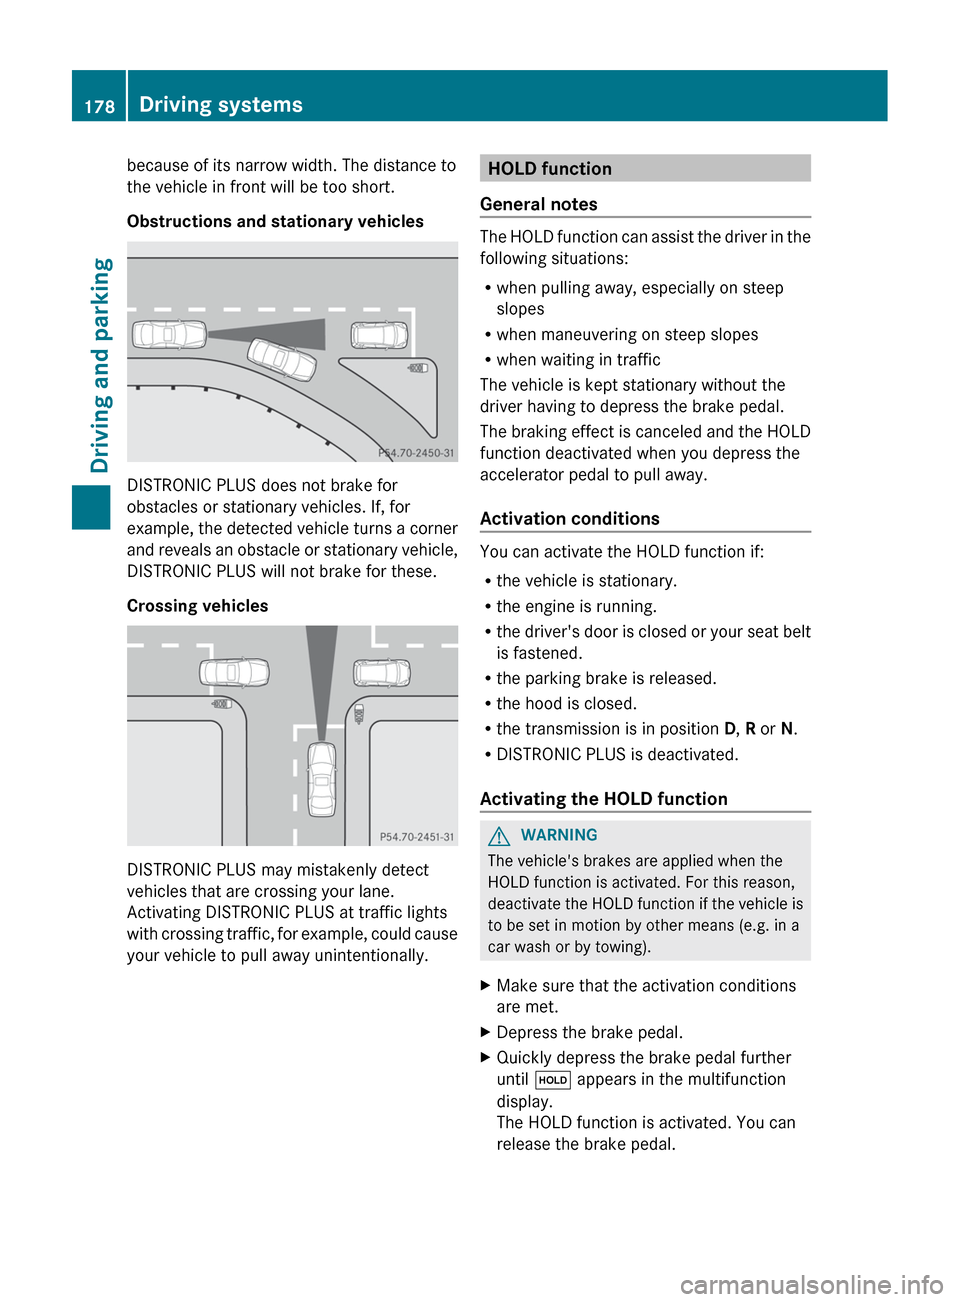
Obstructions and stationary vehicles
DISTRONIC PLUS does not brake for
obstacles or stationary vehicles. If, for
example,
the detected vehicle turns a corner
and reveals an obstacle or stationary vehicle,
DISTRONIC PLUS will not brake for these.
Crossing vehicles DISTRONIC PLUS may mistakenly detect
vehicles that are crossing your lane.
Activating DISTRONIC PLUS at traffic lights
with
crossing traffic, for example, could cause
your vehicle to pull away unintentionally. HOLD function
General notes The HOLD function can assist the driver in the
following situations:
R
when pulling away, especially on steep
slopes
R when maneuvering on steep slopes
R when waiting in traffic
The vehicle is kept stationary without the
driver having to depress the brake pedal.
The
braking effect is canceled and the HOLD
function deactivated when you depress the
accelerator pedal to pull away.
Activation conditions You can activate the HOLD function if:
R
the vehicle is stationary.
R the engine is running.
R the
driver's door is closed or your seat belt
is fastened.
R the parking brake is released.
R the hood is closed.
R the transmission is in position D, R or N.
R DISTRONIC PLUS is deactivated.
Activating the HOLD function G
WARNING
The vehicle's brakes are applied when the
HOLD function is activated. For this reason,
deactivate
the HOLD function if the vehicle is
to be set in motion by other means (e.g. in a
car wash or by towing).
X Make sure that the activation conditions
are met.
X Depress the brake pedal.
X Quickly depress the brake pedal further
until ë appears in the multifunction
display.
The HOLD function is activated. You can
release the brake pedal.178
Driving systems
Driving and parking
Page 183 of 376
i
These changes in level are so slight that
you are hardly aware of them.
The
"Normal" and "Raised" vehicle levels can
be set manually.
The "Lowered” vehicle level is set
automatically:
R at speeds above 70 mph (113 km/h)
R if you have selected "Sports tuning"
(Y page 181)
Setting the vehicle level G
WARNING
To help avoid personal injury, keep hands and
feet away from wheel housing area, and stay
away from under the vehicle when lowering
the vehicle chassis.
Select the "Normal" setting for normal road
surfaces and "Raised" for driving with snow
chains or on particularly poor road surfaces.
Your selection remains stored even if you
remove the SmartKey from the ignition lock.
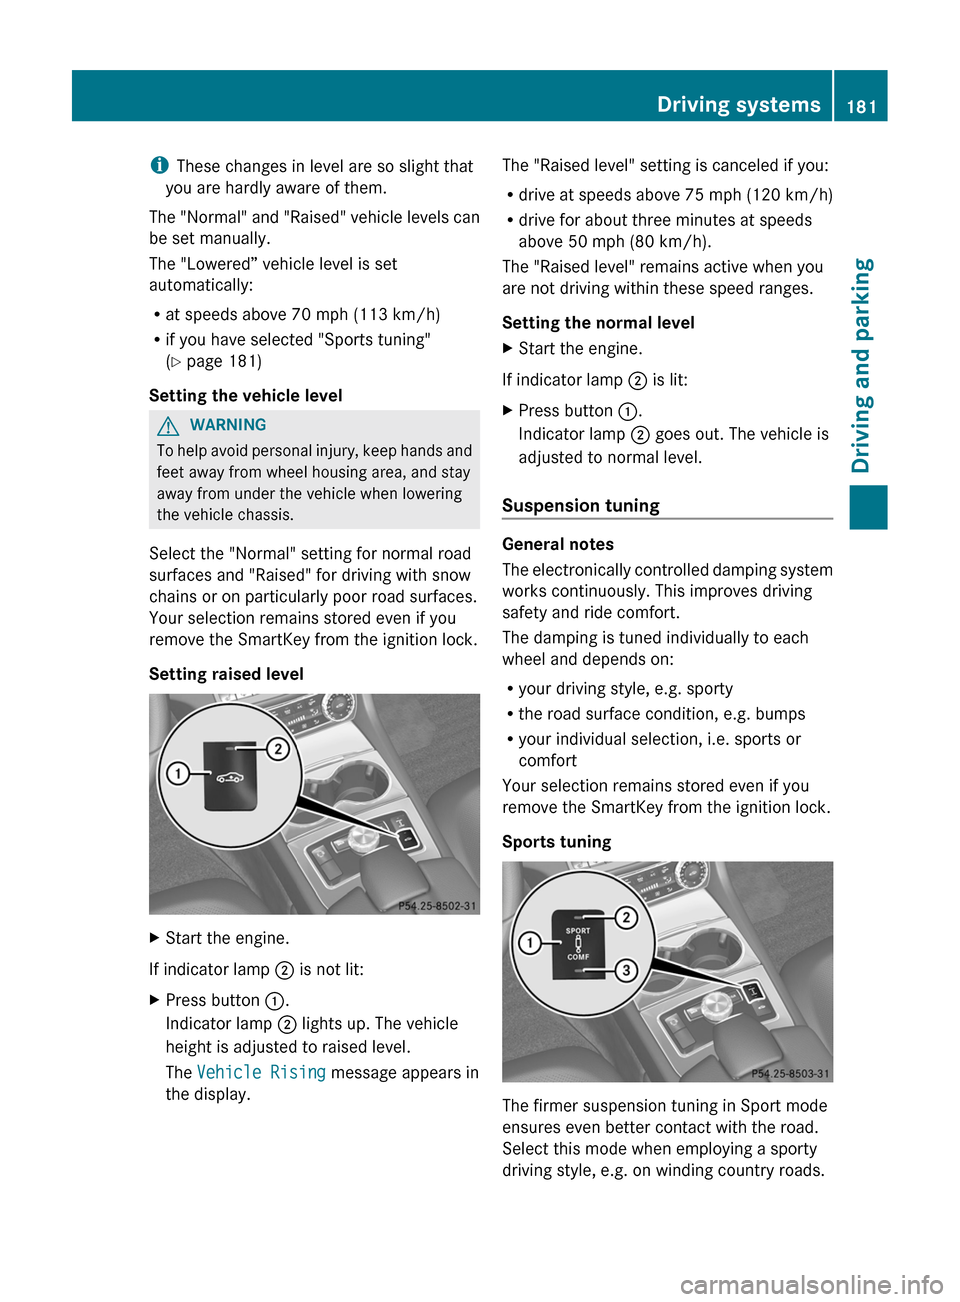
Setting raised level X
Start the engine.
If indicator lamp ; is not lit:
X Press button :.
Indicator lamp ; lights up. The vehicle
height is adjusted to raised level.
The Vehicle Rising message appears in
the display. The "Raised level" setting is canceled if you:
R
drive
at speeds above 75 mph (120 km/h)
R drive for about three minutes at speeds
above 50 mph (80 km/h).
The "Raised level" remains active when you
are not driving within these speed ranges.
Setting the normal level
X Start the engine.
If indicator lamp ; is lit:
X Press button :.
Indicator lamp ; goes out. The vehicle is
adjusted to normal level.
Suspension tuning General notes
The
electronically controlled damping system
works continuously. This improves driving
safety and ride comfort.
The damping is tuned individually to each
wheel and depends on:
R your driving style, e.g. sporty
R the road surface condition, e.g. bumps
R your individual selection, i.e. sports or
comfort
Your selection remains stored even if you
remove the SmartKey from the ignition lock.
Sports tuning The firmer suspension tuning in Sport mode
ensures even better contact with the road.
Select this mode when employing a sporty
driving style, e.g. on winding country roads. Driving systems
181
Driving and parking Z
Page 185 of 376
If indicator lamps = and ? are off:
X
Press button : twice.
Indicator lamps = and ? light up. You
have selected Sport + mode.
The AMG Suspension System SPORT +
message appears in the multifunction
display.
If indicator lamp ? lights up:
X Press the : button once.
Second indicator lamp = lights up. You
have selected Sport + mode.
The AMG Suspension System SPORT +
message appears in the multifunction
display.
Comfort mode
In Comfort mode, the driving characteristics
of your vehicle are more comfortable.
Therefore, select this mode if you favor a
more comfortable driving style. Select
comfort mode also when driving fast on
straight roads, e.g. on straight stretches of
freeway.
X Press button : repeatedly until indicator
lamps = and ? go out.
You have selected Comfort mode.
The AMG Suspension System COMFORT
message appears in the multifunction
display.
Storing and calling up settings
Once the suspension tuning and drive
program have been selected, you can store
and call up your settings using AMG
button ;.
X To store: press AMG button ; until you
hear a tone.
X To call up: press AMG button ;.
The stored suspension tuning and drive
program are selected.
X To display: briefly press AMG button ;.
Your selection appears in the multifunction
display. 4MATIC (permanent four-wheel drive)
G
WARNING
If a drive wheel is spinning due to insufficient
traction:
R While driving off, apply as little throttle as
possible.
R While driving, ease up on the accelerator
pedal.
R Adapt your speed and driving style to the
prevailing road conditions.
Failure to observe these guidelines could
cause the vehicle to skid.
4MATIC cannot prevent accidents resulting
from excessive speed.
! Never tow the vehicle with one axle
raised.
This may damage the transfer case.
Damage of this sort is not covered by the
Mercedes-Benz Limited Warranty. All
wheels must remain either on the ground
or be fully raised. Observe the instructions
for towing the vehicle with all wheels in full
contact with the ground.
i In wintry driving conditions, the maximum
effect of 4MATIC can only be achieved if
you use winter tires (M+S tires), with snow
chains if necessary.
4MATIC ensures that all four wheels are
permanently driven. Together with ESP ®
, it
improves the traction of your vehicle
whenever a drive wheel spins due to
insufficient grip. PARKTRONIC
Important safety notes G
WARNING
The PARKTRONIC is a supplemental system.
It is not intended to, nor does it replace, the
need for extreme care. The responsibility
during parking and other critical maneuvers
always remains with the driver. Driving systems
183
Driving and parking Z
Page 187 of 376
Front sensors
Center Approx. 40in (approx.
100cm)
Corners Approx. 24in (approx.
60cm)
Rear sensors
Center Approx. 48in (approx.
120cm)
Corners Approx. 32in (approx.
80cm)
Minimum distance
Center Approx. 8in (approx. 20cm)
Corners Approx. 6in
(approx. 15cm)
If there is an obstacle within this range, the
relevant warning displays light up and a
warning tone sounds. If the distance falls
below the minimum, the distance may no
longer be shown.
Warning displays
The warning displays show the distance
between the sensors and the obstacle. The
warning display for the front area is located
on
the dashboard above the center air vents.
The warning display for the rear area is
located on the headliner in the rear
compartment.
The warning display for each side of the
vehicle is divided into five yellow and two red
segments. PARKTRONIC is operational if
yellow segments showing operational
readiness = light up. Transmission
position Warning display
D
Front area activated
R, N or the vehicle
is rolling
backwards Rear and front areas
activated
P
No areas activated
One or more segments light up as the vehicle
approaches an obstacle, depending on the
vehicle's distance from the obstacle.
From the:
R
sixth segment onwards, you will hear an
intermittent warning tone for
approximately two seconds.
R seventh segment onwards, you will hear a
warning tone for approximately two
seconds. This indicates that you have now
reached the minimum distance.
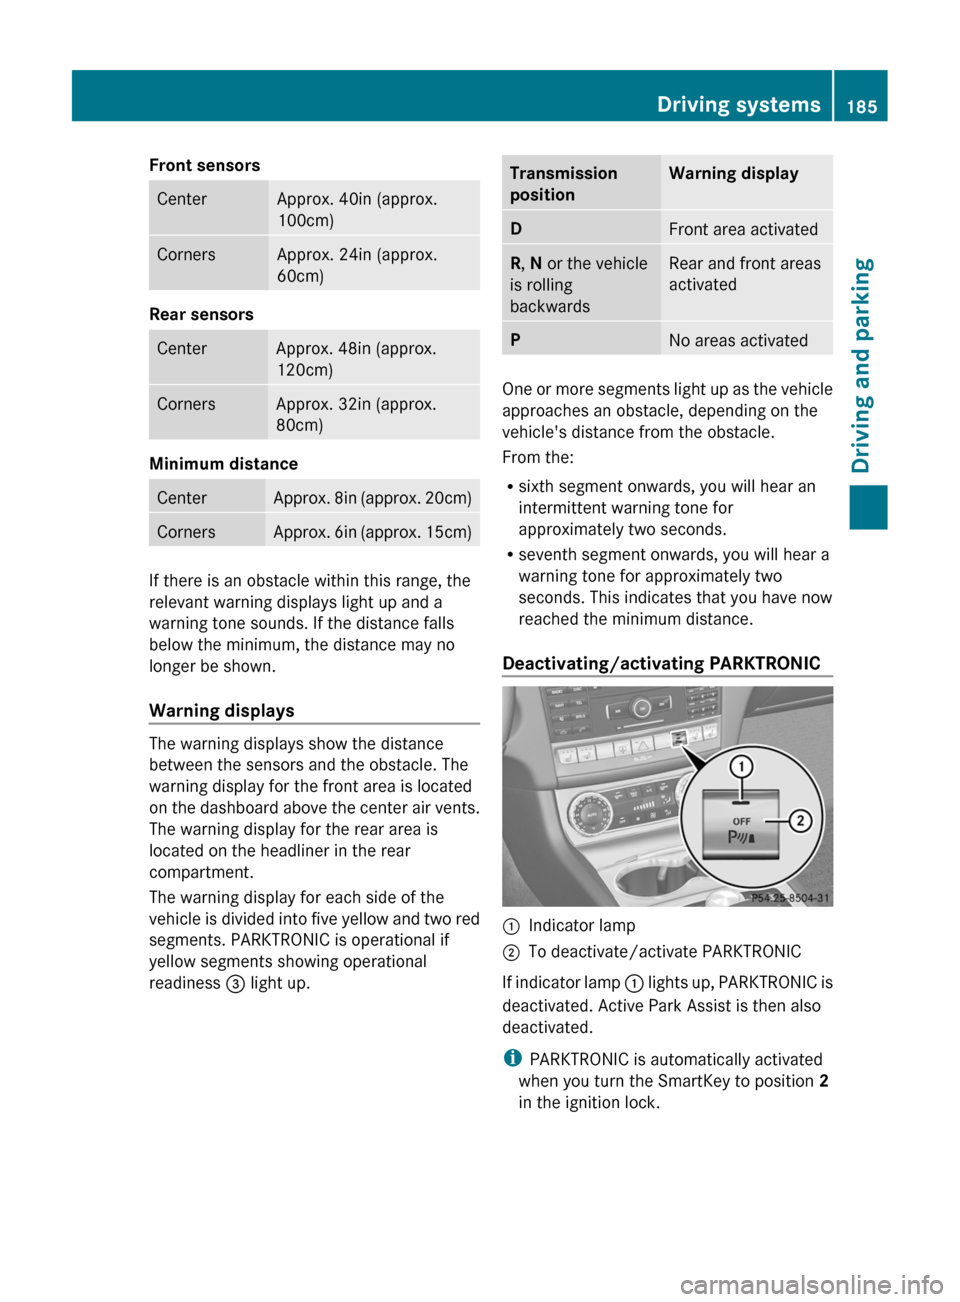
Deactivating/activating PARKTRONIC :
Indicator lamp
; To deactivate/activate PARKTRONIC
If indicator lamp :
lights up, PARKTRONIC is
deactivated. Active Park Assist is then also
deactivated.
i PARKTRONIC is automatically activated
when you turn the SmartKey to position 2
in the ignition lock. Driving systems
185
Driving and parking Z
Page 188 of 376
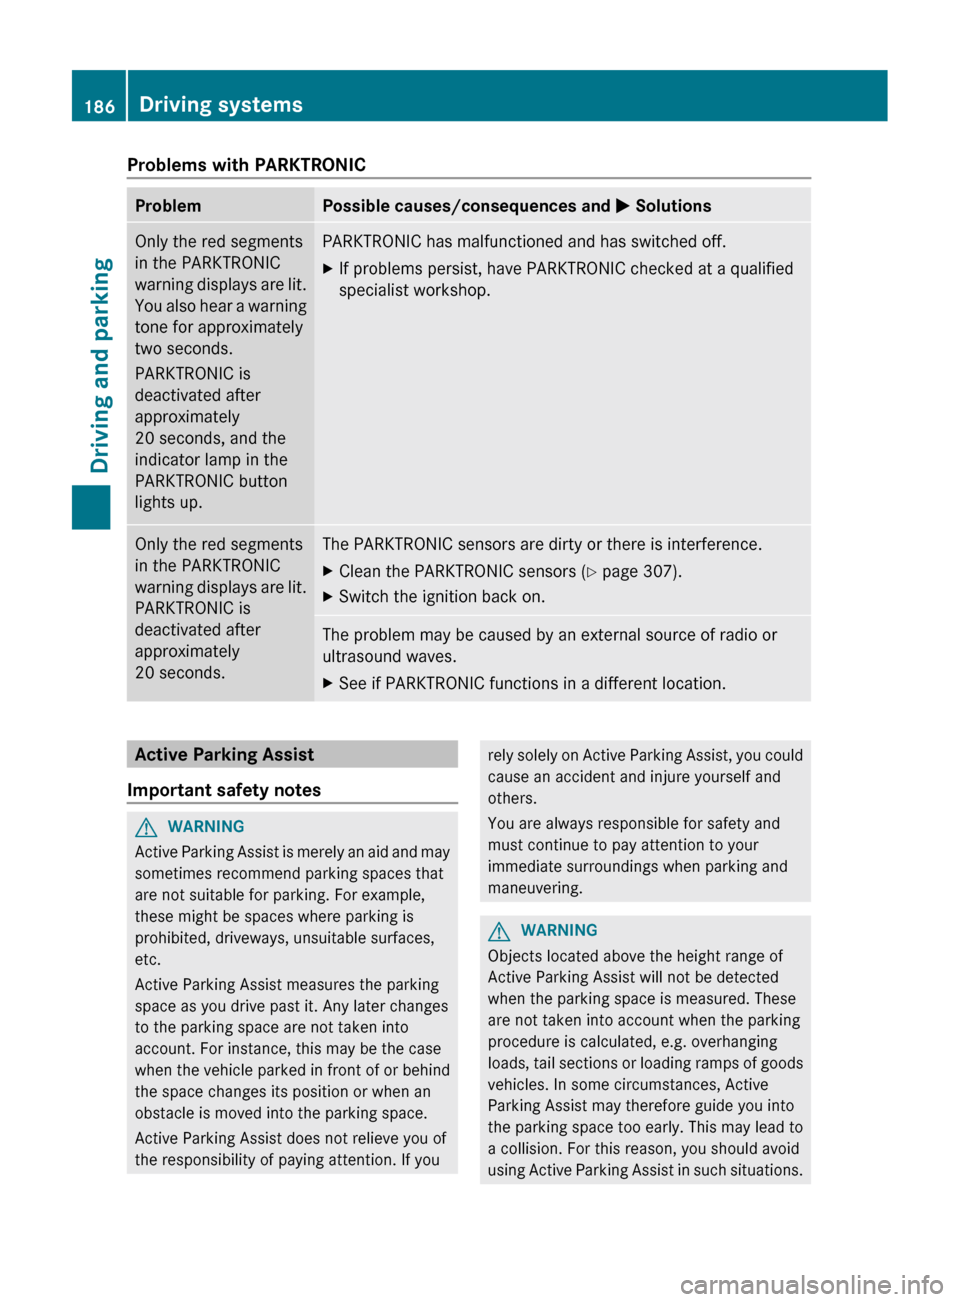
Problems with PARKTRONIC
Problem Possible causes/consequences and
M SolutionsOnly the red segments
in the PARKTRONIC
warning
displays are lit.
You also hear a warning
tone for approximately
two seconds.
PARKTRONIC is
deactivated after
approximately
20 seconds, and the
indicator lamp in the
PARKTRONIC button
lights up. PARKTRONIC has malfunctioned and has switched off.
X
If problems persist, have PARKTRONIC checked at a qualified
specialist workshop. Only the red segments
in the PARKTRONIC
warning
displays are lit.
PARKTRONIC is
deactivated after
approximately
20 seconds. The PARKTRONIC sensors are dirty or there is interference.
X
Clean the PARKTRONIC sensors ( Y page 307).
X Switch the ignition back on. The problem may be caused by an external source of radio or
ultrasound waves.
X
See if PARKTRONIC functions in a different location. Active Parking Assist
Important safety notes G
WARNING
Active Parking Assist is merely an aid and may
sometimes recommend parking spaces that
are not suitable for parking. For example,
these might be spaces where parking is
prohibited, driveways, unsuitable surfaces,
etc.
Active Parking Assist measures the parking
space as you drive past it. Any later changes
to the parking space are not taken into
account. For instance, this may be the case
when
the vehicle parked in front of or behind
the space changes its position or when an
obstacle is moved into the parking space.
Active Parking Assist does not relieve you of
the responsibility of paying attention. If you rely solely on Active Parking Assist, you could
cause an accident and injure yourself and
others.
You are always responsible for safety and
must continue to pay attention to your
immediate surroundings when parking and
maneuvering.
G
WARNING
Objects located above the height range of
Active Parking Assist will not be detected
when the parking space is measured. These
are not taken into account when the parking
procedure is calculated, e.g. overhanging
loads,
tail sections or loading ramps of goods
vehicles. In some circumstances, Active
Parking Assist may therefore guide you into
the parking space too early. This may lead to
a collision. For this reason, you should avoid
using Active Parking Assist in such situations. 186
Driving systems
Driving and parking
Page 191 of 376
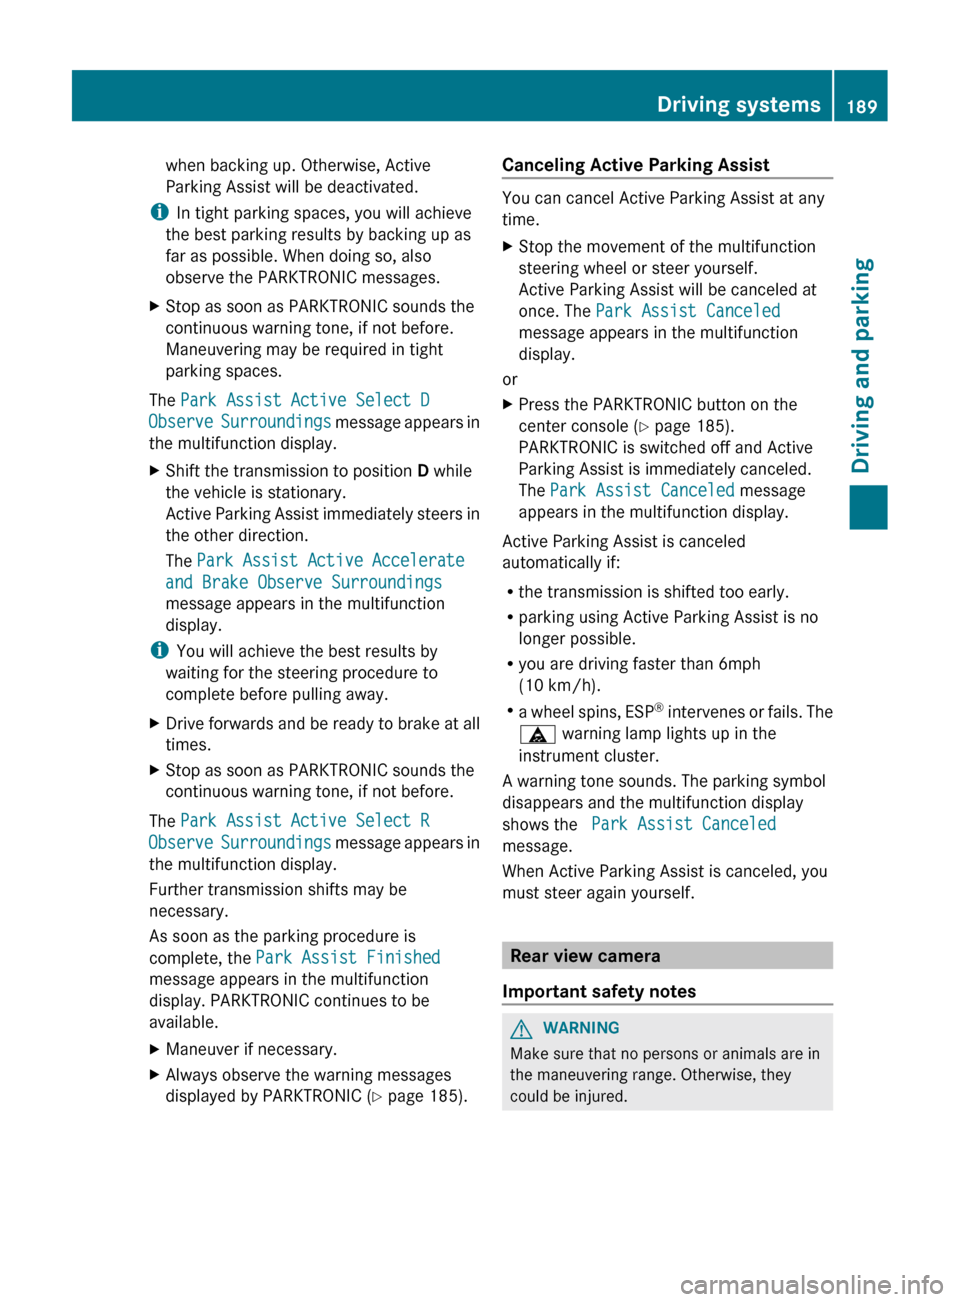
when backing up. Otherwise, Active
Parking Assist will be deactivated.
i In tight parking spaces, you will achieve
the best parking results by backing up as
far as possible. When doing so, also
observe the PARKTRONIC messages.
X Stop as soon as PARKTRONIC sounds the
continuous warning tone, if not before.
Maneuvering may be required in tight
parking spaces.
The Park Assist Active Select D
Observe Surroundings message appears in
the multifunction display.
X Shift the transmission to position D while
the vehicle is stationary.
Active
Parking Assist immediately steers in
the other direction.
The Park Assist Active Accelerate
and Brake Observe Surroundings
message appears in the multifunction
display.
i You will achieve the best results by
waiting for the steering procedure to
complete before pulling away.
X Drive forwards and be ready to brake at all
times.
X Stop as soon as PARKTRONIC sounds the
continuous warning tone, if not before.
The Park Assist Active Select R
Observe
Surroundings message appears in
the multifunction display.
Further transmission shifts may be
necessary.
As soon as the parking procedure is
complete, the Park Assist Finished
message appears in the multifunction
display. PARKTRONIC continues to be
available.
X Maneuver if necessary.
X Always observe the warning messages
displayed by PARKTRONIC
(Y page 185). Canceling Active Parking Assist You can cancel Active Parking Assist at any
time.
X
Stop the movement of the multifunction
steering wheel or steer yourself.
Active Parking Assist will be canceled at
once. The Park Assist Canceled
message appears in the multifunction
display.
or
X Press the PARKTRONIC button on the
center console
(Y page 185).
PARKTRONIC is switched off and Active
Parking Assist is immediately canceled.
The Park Assist Canceled message
appears in the multifunction display.
Active Parking Assist is canceled
automatically if:
R the transmission is shifted too early.
R parking using Active Parking Assist is no
longer possible.
R you are driving faster than 6mph
(10 km/h).
R a
wheel spins, ESP ®
intervenes or fails. The
ä warning lamp lights up in the
instrument cluster.
A warning tone sounds. The parking symbol
disappears and the multifunction display
shows the Park Assist Canceled
message.
When Active Parking Assist is canceled, you
must steer again yourself. Rear view camera
Important safety notes G
WARNING
Make sure that no persons or animals are in
the maneuvering range. Otherwise, they
could be injured. Driving systems
189
Driving and parking Z