navigation system MERCEDES-BENZ CLS-Class 2014 W218 Comand Manual
[x] Cancel search | Manufacturer: MERCEDES-BENZ, Model Year: 2014, Model line: CLS-Class, Model: MERCEDES-BENZ CLS-Class 2014 W218Pages: 270, PDF Size: 5.76 MB
Page 58 of 270
viously selected display as soon as you shift
out of reverse gear.
i For further information on the rear view
camera, see separate vehicle Operator's
Manual.
X Press the 0066function button.
The system menu appears.
X Select Settings
Settings by turning 00790052007Athe
COMAND controller and press 0098to con-
firm.
X Select Rear
Rear View
ViewCamera
Camera and press 0098to
confirm.
X Select Activation by R gear
Activation by R gear and press
0098 to confirm.
The function is switched on 0073or off 0053,
depending on the previous status. Night View Assist Plus
On vehicles with Night View Assist Plus you
can have the image from Night View Assist
Plus shown on the COMAND display.
X Switch on COMAND (Y page 29).
X Activate Night View Assist Plus, see the
separate operating instructions.
The image from Night View Assist Plus
appears in the COMAND display.
X To adjust the brightness: selectBright‐
Bright‐
ness ness by turning 00790052007Athe COMAND con-
troller and press 0098to confirm.
X Turn 00790052007A the COMAND controller and
press 0098to confirm.
X Switching automatic activation on/off:
select Night
Night View
ViewAssist
Assist Auto.
Auto.Acti‐
Acti‐
vation
vation and press 0098to confirm.
Switch the option on 0073or off 0053.
Option switched on: while using other func-
tions e.g. the navigation system, Night View
Assist Plus is active in the background. In
the dark, in unlit surroundings and at
speeds in excess of 37 mph (60 km/h), the
Night View image is automatically dis- played as soon as pedestrians or animals
are detected.
X To switch off the display: selectBack Backand
press 0098to confirm or press the 003Dbut-
ton. 360° camera
Important notes
The 360° camera is only an aid. It is not a
replacement for your attention to your imme-
diate surroundings. You are always responsi-
ble for safe maneuvering and parking. When
maneuvering or parking, make sure that there
are no persons, animals or objects in the area
in which you are maneuvering. Overview
The 360° camera surveys the vehicle sur-
roundings and assists you, for example when
parking or at exits with reduced visibility.
The 360° camera images can be shown in full
screen mode or in seven different split-screen
views on the COMAND display. A split-screen
view also includes a top view of the vehicle.
This view is calculated from the data supplied
by the installed cameras (virtual camera). Displaying the 360° camera image
The 360° camera image can be displayed if:
R your vehicle is equipped with a 360° cam-
era
R COMAND is switched on (Y page 29)
R the 360° Camera 360° Camera function is activated56
360° cameraVehicle functions
Page 62 of 270
Your COMAND equipment
These operating instructions describe all the
standard and optional equipment for your
COMAND system, as available at the time of
going to print. Country-specific differences
are possible. Please note that your
COMAND system may not be equipped with
all the features described. Introduction
Important safety notes
G
WARNING
If you operate information systems and com-
munication equipment integrated in the vehi-
cle while driving, you will be distracted from
traffic conditions. You could also lose control
of the vehicle. There is a risk of an accident.
Only operate the equipment when the traffic
situation permits. If you are not sure that this
is possible, park the vehicle paying attention
to traffic conditions and operate the equip-
ment when the vehicle is stationary.
You must observe the legal requirements for
the country in which you are currently driving
when operating COMAND.
COMAND calculates the route to the destina-
tion without taking account of the following,
for example:
R traffic lights
R stop and yield signs
R merging lanes
R parking or stopping in a no parking/no
stopping zone
R other road and traffic rules and regulations
R narrow bridges
COMAND can give incorrect navigation com-
mands if the actual street/traffic situation
does not correspond with the digital map's
data. Digital maps do not cover all areas nor
all routes in an area. For example, a route may have been diverted or the direction of a one-
way street may have changed.
For this reason, you must always observe
road and traffic rules and regulations during
your journey. Road and traffic rules and reg-
ulations always have priority over the sys-
tem's driving recommendations.
Navigation announcements are intended to
direct you while driving without diverting your
attention from the road and driving.
Please always use this feature instead of con-
sulting the map display for directions. Look-
ing at the icons or map display can distract
you from traffic conditions and driving, and
increase the risk of an accident.
General notes
Operational readiness of the navigation
system The navigation system must determine the
position of the vehicle before first use or
whenever operational status is restored.
Therefore, you may have to drive for a while
before precise route guidance is possible.
GPS reception Among other things, correct functioning of
the navigation system depends on GPS recep-
tion. In certain situations, GPS reception may
be impaired, there may be interference or
there may be no reception at all, e.g. in tun-
nels or parking garages.
i Using roof carriers may impair the correct
functioning of a roof antenna (phone, sat-
ellite radio, GPS).
Entry restriction On vehicles for certain countries, there is a
restriction on entering data.
The restriction is active from a vehicle speed
of above approximately 3 mph (5 km/h). As
soon as the speed falls below approximately 60
Int
roductionNavigation
Page 64 of 270
Basic settings
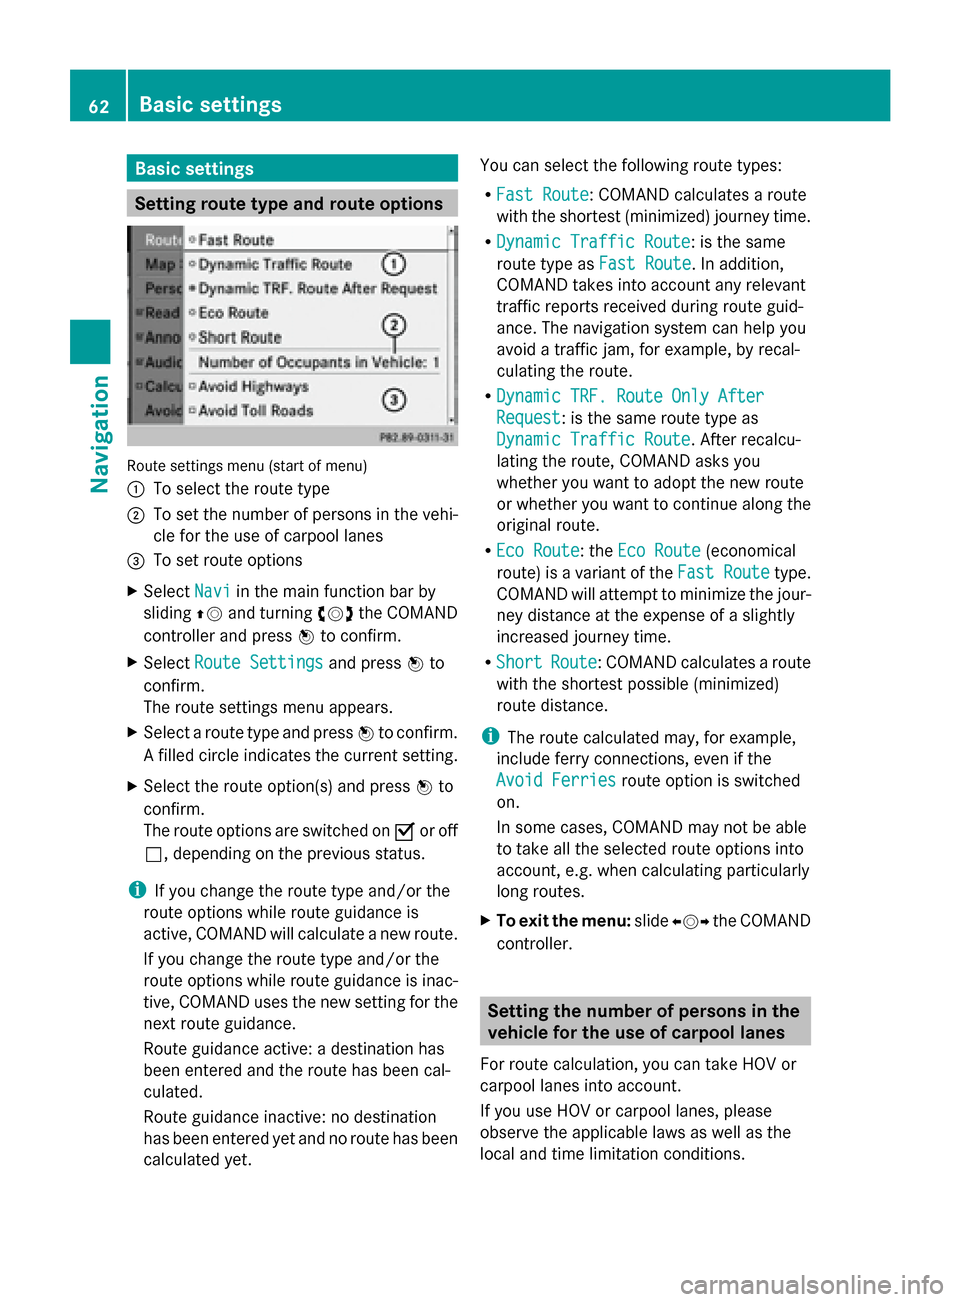
Setting route type and route options
Route settings menu (start of menu)
0043
To select the route type
0044 To set the number of persons in the vehi-
cle for the use of carpool lanes
0087 To set route options
X Select Navi Naviin the main function bar by
sliding 00970052and turning 00790052007Athe COMAND
controller and press 0098to confirm.
X Select Route Settings
Route Settings and press0098to
confirm.
The route settings menu appears.
X Select a route type and press 0098to confirm.
A filled circle indicates the current setting.
X Select the route option(s) and press 0098to
confirm.
The route options are switched on 0073or off
0053, depending on the previous status.
i If you change the route type and/or the
route options while route guidance is
active, COMAND will calculate a new route.
If you change the route type and/or the
route options while route guidance is inac-
tive, COMAND uses the new setting for the
next route guidance.
Route guidance active: a destination has
been entered and the route has been cal-
culated.
Route guidance inactive: no destination
has been entered yet and no route has been
calculated yet. You can select the following route types:
R
Fast Route
Fast Route: COMAND calculates a route
with the shortest (minimized) journey time.
R Dynamic Traffic Route Dynamic Traffic Route: is the same
route type as Fast Route Fast Route. In addition,
COMAND takes into account any relevant
traffic reports received during route guid-
ance. The navigation system can help you
avoid a traffic jam, for example, by recal-
culating the route.
R Dynamic TRF. Route Only After Dynamic TRF. Route Only After
Request Request: is the same route type as
Dynamic Traffic Route Dynamic Traffic Route. After recalcu-
lating the route, COMAND asks you
whether you want to adopt the new route
or whether you want to continue along the
original route.
R Eco Route Eco Route: the Eco Route
Eco Route(economical
route) is a variant of the Fast Route
Fast Routetype.
COMAND will attempt to minimize the jour-
ney distance at the expense of a slightly
increased journey time.
R Short Short Route
Route: COMAND calculates a route
with the shortest possible (minimized)
route distance.
i The route calculated may, for example,
include ferry connections, even if the
Avoid Ferries Avoid Ferries route option is switched
on.
In some cases, COMAND may not be able
to take all the selected route options into
account, e.g. when calculating particularly
long routes.
X To exit the menu: slide009500520096 the COMAND
controller. Setting the number of persons in the
vehicle for the use of carpool lanes
For route calculation, you can take HOV or
carpool lanes into account.
If you use HOV or carpool lanes, please
observe the applicable laws as well as the
local and time limitation conditions. 62
Basic settingsNavigation
Page 65 of 270
Carpool lanes may only be used under certain
conditions. They can normally be used when
there are two people in the vehicle. However,
there are also carpool lanes which can only
be used when there are three or more people
in the vehicle. In California, lone drivers can
use a carpool lane if their vehicle's emission
level or fuel consumption is below a fixed
threshold.
Carpool lanes may be reserved for specific
times (e.g. during the peak period).
Carpool lanes are identified by HOV symbols
on special road signs and by markings on the
road. The road signs may also include the
designation CARPOOL
CARPOOL. The lanes are arranged
as a separate lane next to the others or are
built as a physically separate lane.
Depending on the setting under Number of
Number of
Occupants
Occupants in inVehicle
Vehicle , COMAND uses car-
pool lanes when calculating the route.
COMAND then guides you in and out of car-
pool lanes using visual and acoustic driving
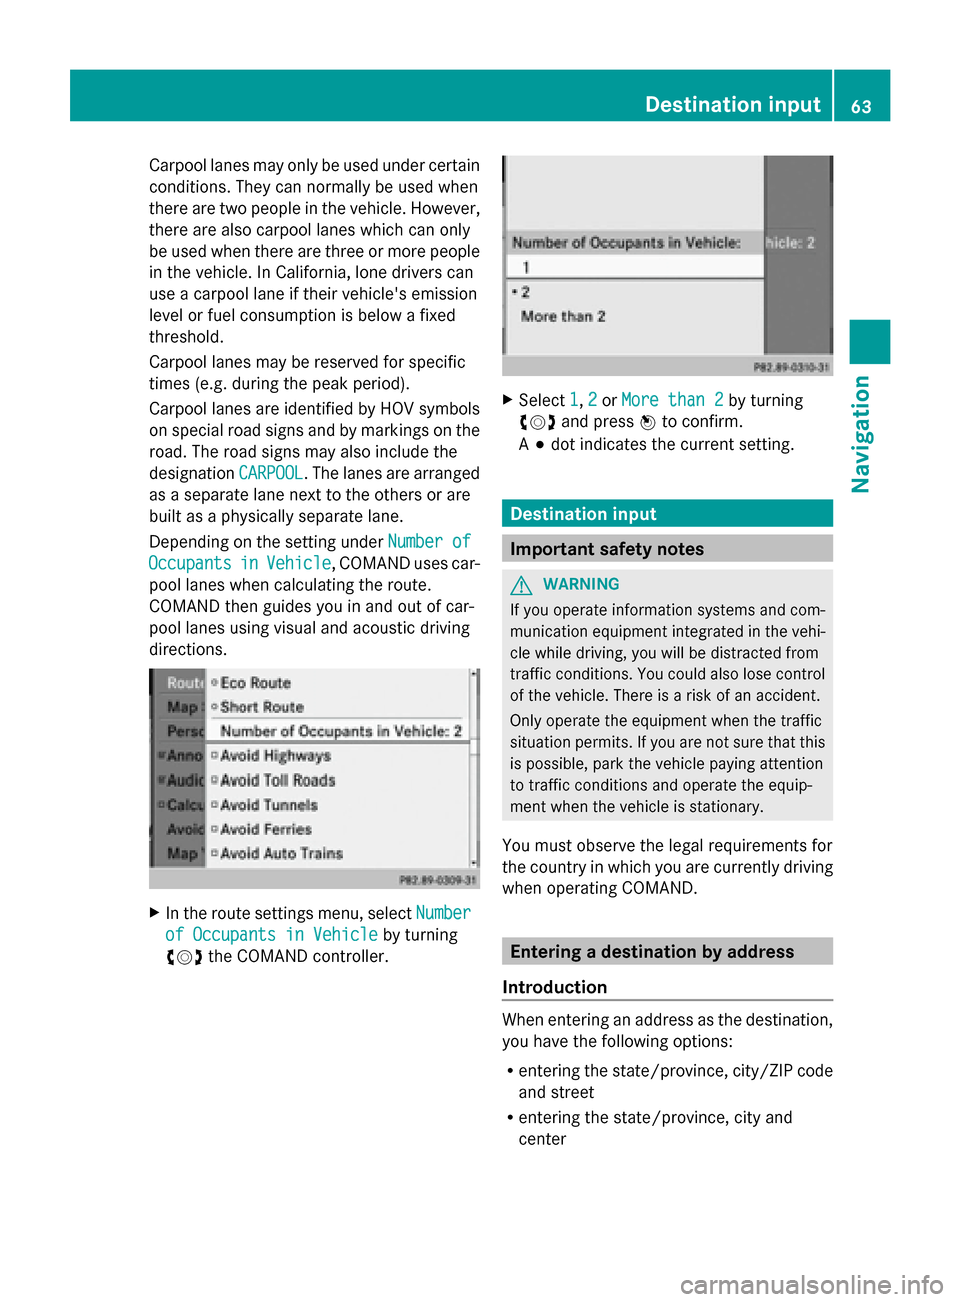
directions. X
In the route settings menu, select Number Number
of Occupants in Vehicle
of Occupants in Vehicle by turning
00790052007A the COMAND controller. X
Select 1
1,2
2or More than 2
More than 2 by turning
00790052007A and press 0098to confirm.
A 003B dot indicates the current setting. Destination input
Important safety notes
G
WARNING
If you operate information systems and com-
munication equipment integrated in the vehi-
cle while driving, you will be distracted from
traffic conditions. You could also lose control
of the vehicle. There is a risk of an accident.
Only operate the equipment when the traffic
situation permits. If you are not sure that this
is possible, park the vehicle paying attention
to traffic conditions and operate the equip-
ment when the vehicle is stationary.
You must observe the legal requirements for
the country in which you are currently driving
when operating COMAND. Entering a destination by address
Introduction When entering an address as the destination,
you have the following options:
R
entering the state/province, city/ZIP code
and street
R entering the state/province, city and
center Destination input
63Navigation Z
Page 72 of 270
Selecting a destination from the des-
tination memory (e.g. My address)
Introduction The destination memory always contains an
entry named "My Address". You may wish to
assign your home address to this entry, for
example (Y page 69), and select it for route
guidance. This entry is always located at the
top of the list in the destination memory.
X To switch to navigation mode: press the
00BE button.
X To show the menu: press0098the COMAND
controller.
X Select Destination
Destination in the navigation sys-
tem menu bar by turning 00790052007Athe
COMAND controller and pressing 0098to
confirm.
X Select From Memory
From Memory and press0098to con-
firm.
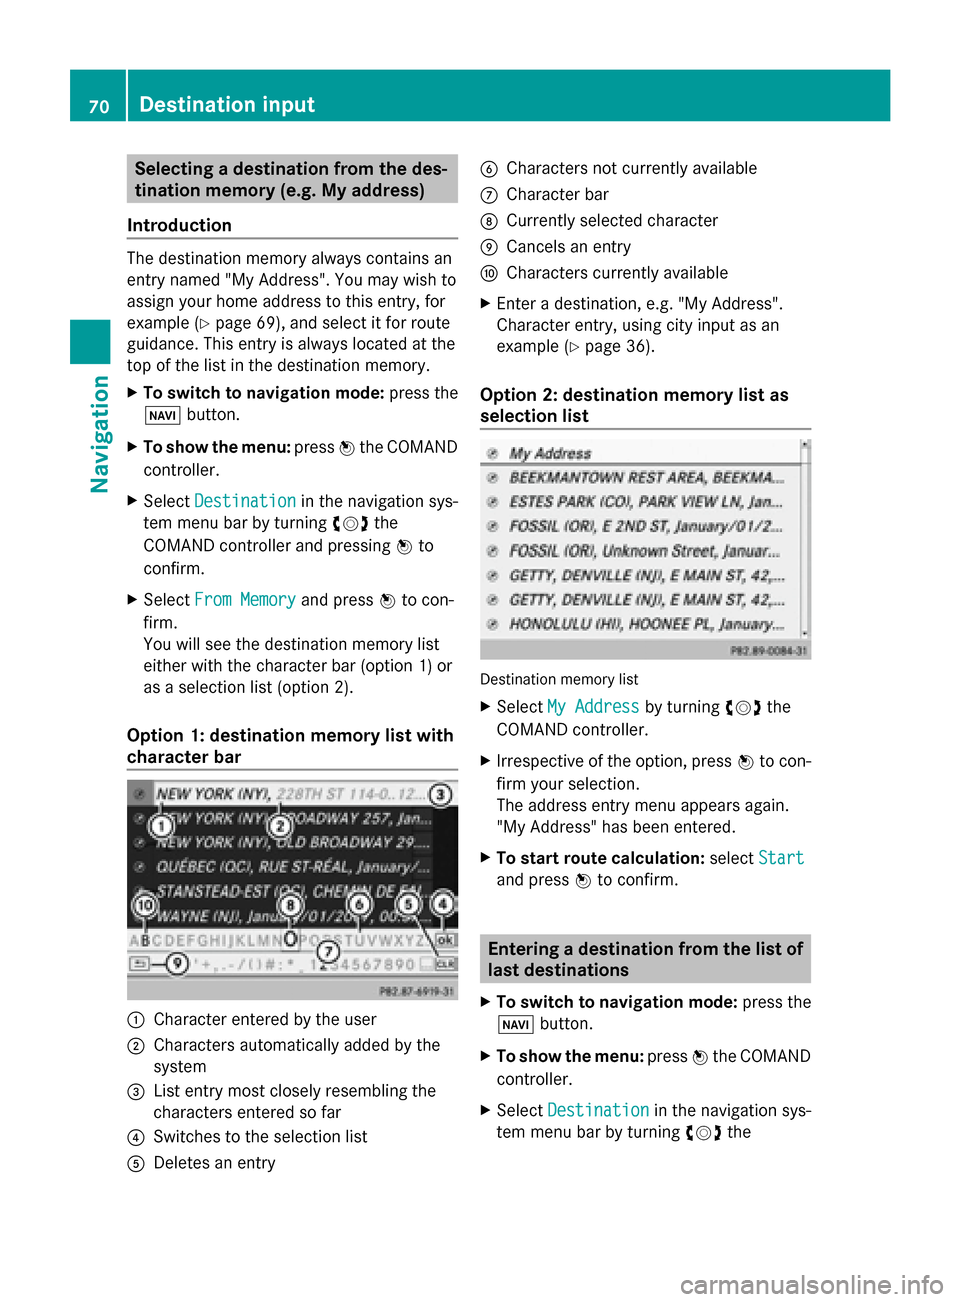
You will see the destination memory list
either with the character bar (option 1) or
as a selection list (option 2).
Option 1: destination memory list with
character bar 0043
Character entered by the user
0044 Characters automatically added by the
system
0087 List entry most closely resembling the
characters entered so far
0085 Switches to the selection list
0083 Deletes an entry 0084
Characters not currently available
006B Character bar
006C Currently selected character
006D Cancels an entry
006E Characters currently available
X Enter a destination, e.g. "My Address".
Character entry, using city input as an
example (Y page 36).
Option 2: destination memory list as
selection list Destination memory list
X
Select My Address My Address by turning00790052007Athe
COMAND controller.
X Irrespective of the option, press 0098to con-
firm your selection.
The address entry menu appears again.
"My Address" has been entered.
X To start route calculation: selectStart
Start
and press 0098to confirm. Entering a destination from the list of
last destinations
X To switch to navigation mode: press the
00BE button.
X To show the menu: press0098the COMAND
controller.
X Select Destination Destination in the navigation sys-
tem menu bar by turning 00790052007Athe 70
Destination inputNavigation
Page 80 of 270
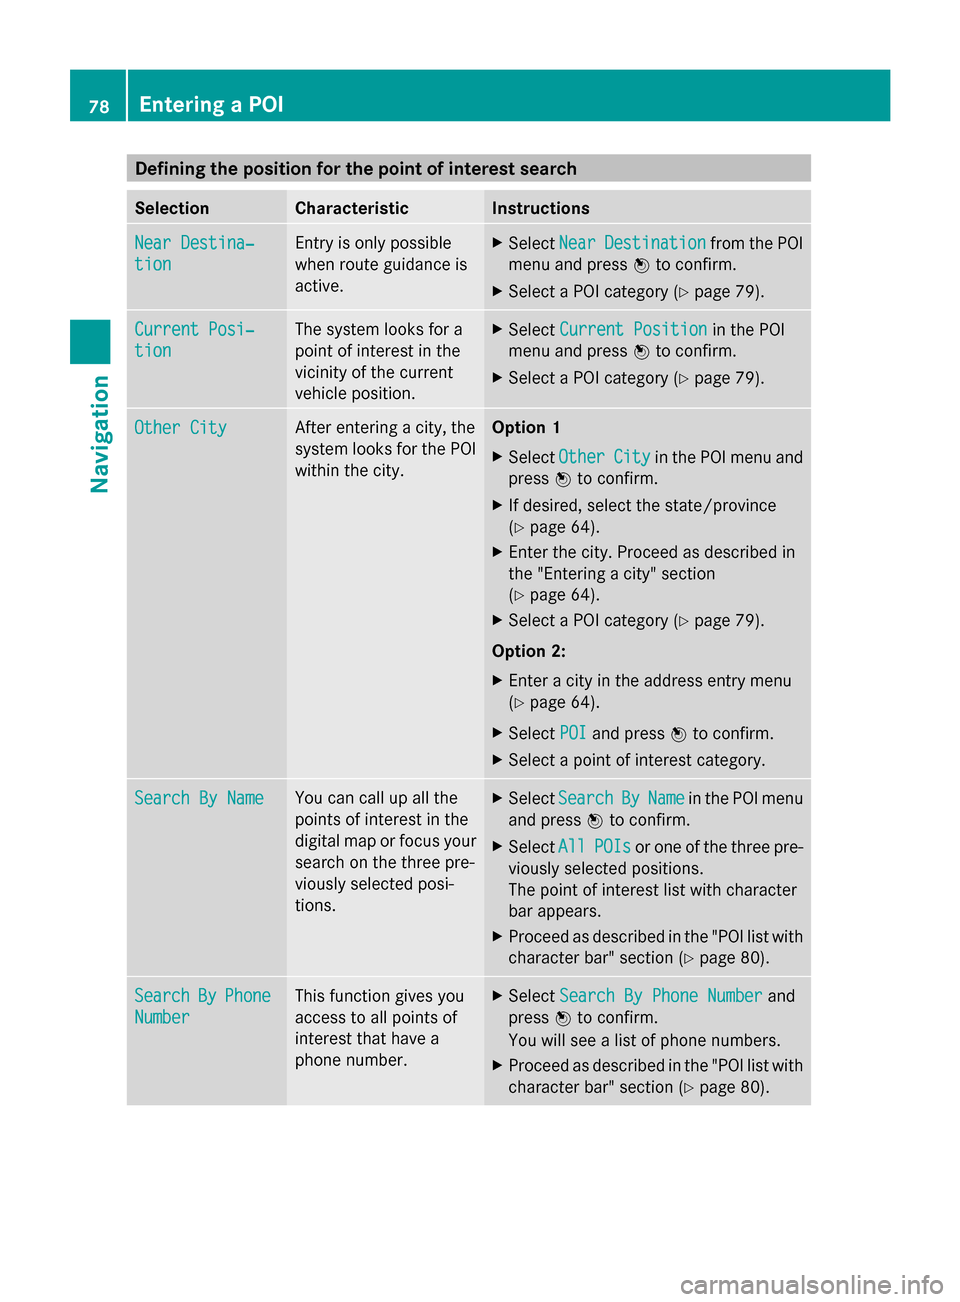
Defining the position for the point of interest search
Selection Characteristic Instructions
Near Destina‐
Near Destina‐
tion tion Entry is only possible
when route guidance is
active. X
Select Near NearDestination
Destination from the POI
menu and press 0098to confirm.
X Select a POI category (Y page 79).Current Posi‐
Current Posi‐
tion tion The system looks for a
point of interest in the
vicinity of the current
vehicle position. X
Select Current Position Current Position in the POI
menu and press 0098to confirm.
X Select a POI category (Y page 79).Other City
Other City After entering a city, the
system looks for the POI
within the city. Option 1
X Select Other Other City
Cityin the POI menu and
press 0098to confirm.
X If desired, select the state/province
(Y page 64).
X Enter the city. Proceed as described in
the "Entering a city" section
(Y page 64).
X Select a POI category (Y page 79).
Option 2:
X Enter a city in the address entry menu
(Y page 64).
X Select POI
POI and press 0098to confirm.
X Select a point of interest category. Search By Name Search By Name You can call up all the
points of interest in the
digital map or focus your
search on the three pre-
viously selected posi-
tions. X
Select Search Search By
ByName
Name in the POI menu
and press 0098to confirm.
X Select All
AllPOIs
POIs or one of the three pre-
viously selected positions.
The point of interest list with character
bar appears.
X Proceed as described in the "POI list with
character bar" section (Y page 80).Search Search
By
ByPhone
Phone
Number
Number This function gives you
access to all points of
interest that have a
phone number. X
Select Search By Phone Number Search By Phone Number and
press 0098to confirm.
You will see a list of phone numbers.
X Proceed as described in the "POI list with
character bar" section (Y page 80).78
Entering a POINavigation
Page 83 of 270
Depending on your selection, you can select
all available points of interest on the digital
map or the points of interest in the vicinity of
the selected position.
X Proceed as described in "Searching for a
phone book entry" (Y page 138).
If COMAND can assign the characters
entered to one entry unambiguously, the
address entry appears automatically.
X To start route calculation: selectStart
Start
and press 0098to confirm. ZAGAT
®
survey service The Z icon before a search result shows that
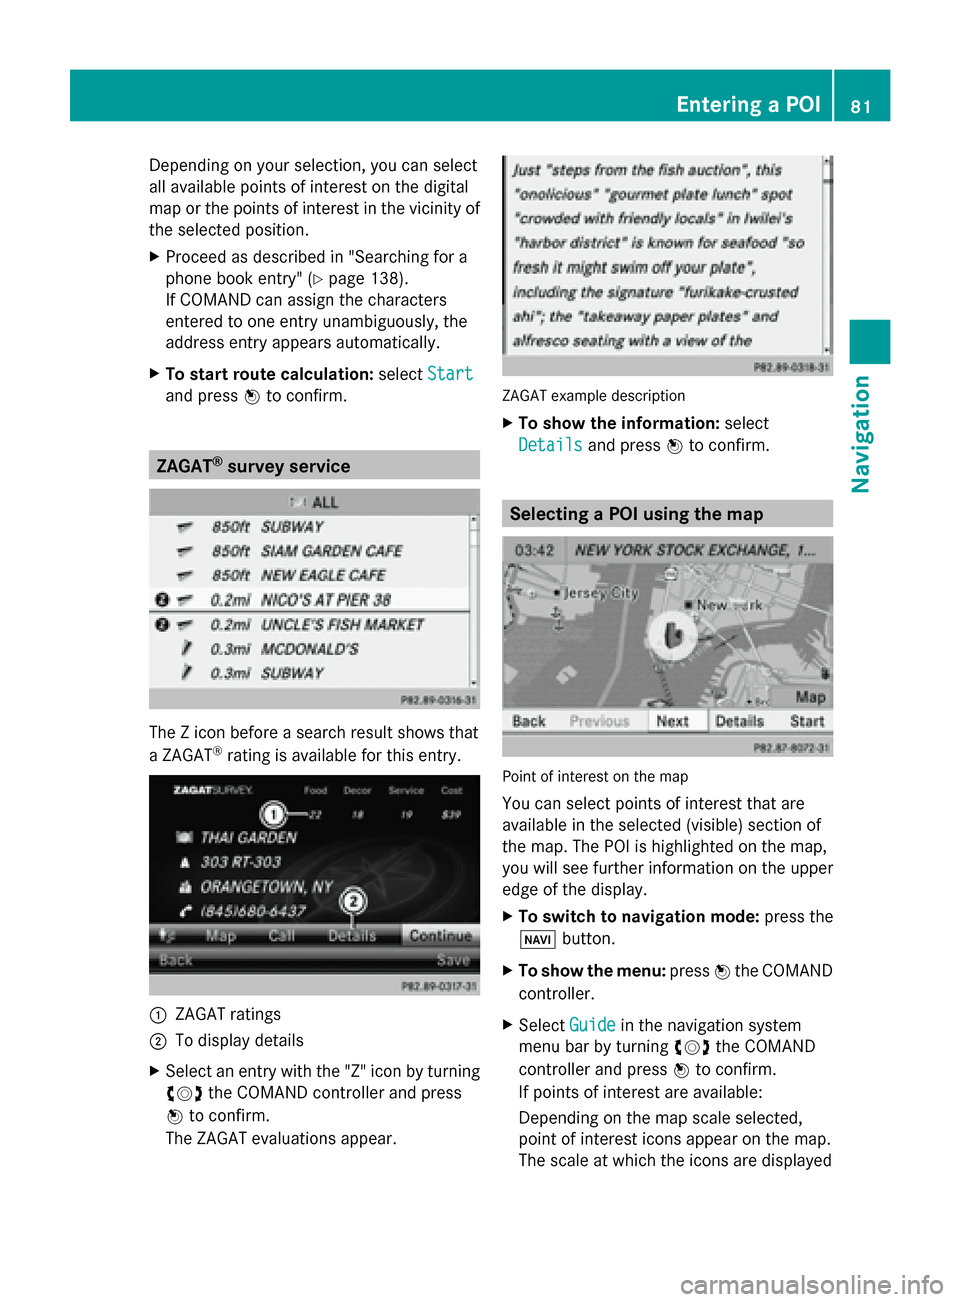
a ZAGAT ®
rating is available for this entry. 0043
ZAGAT ratings
0044 To display details
X Select an entry with the "Z" icon by turning
00790052007A the COMAND controller and press
0098 to confirm.
The ZAGAT evaluations appear. ZAGAT example description
X
To show the information: select
Details Details and press 0098to confirm. Selecting a POI using the map
Point of interest on the map
You can select points of interest that are
available in the selected (visible) section of
the map. The POI is highlighted on the map,
you will see further information on the upper
edge of the display.
X
To switch to navigation mode: press the
00BE button.
X To show the menu: press0098the COMAND
controller.
X Select Guide
Guide in the navigation system
menu bar by turning 00790052007Athe COMAND
controller and press 0098to confirm.
If points of interest are available:
Depending on the map scale selected,
point of interest icons appear on the map.
The scale at which the icons are displayed Entering a POI
81Navigation Z
Page 87 of 270
X
Hide the menu to show the map in full
screen mode (Y page 61).
X Press 0098the COMAND controller for longer
than two seconds.
The current position of the vehicle is saved
as a personal POI on the SD memory card
in the Not Classified
Not Classified category.
i The crosshair position is saved in the
scrolling map function (Y page 108).
Option 2:
X Insert the SD memory card (Y page 191).
X To switch to navigation mode: press the
00BE button.
X To show the menu: press0098the COMAND
controller.
X Select Position
Position in the navigation system
menu bar by turning 00790052007Athe COMAND
controller and press 0098to confirm.
X Select Save Position As Personal Save Position As Personal
POI
POI orSave Crosshair Pos. as Per‐
Save Crosshair Pos. as Per‐
sonal POI
sonal POI ("Move map" function active)
and press 0098to confirm.
The list of personal categories appears.
X Select a category and press 0098to confirm.
X Name for the personal point of interest.
Character entry (Y page 34).
Option 3
X Insert the SD memory card (Y page 191).
X To switch to navigation mode: press the
00BE button.
X Call up the address entry menu
(Y page 64).
X Select Save Savefrom the address entry menu
and press 0098to confirm.
X Select Save As Personal POI
Save As Personal POI and press
0098 to confirm.
X Select a category.
X Enter the name.
The current address is saved as a personal
point of interest on the SD memory card. Importing personal POIs via the online
function
You can import personal POIs (destinations,
routes) via the online function (Y page 163).
When importing, you can choose whether to
write files to the SD memory card or to file
them in the address book. The imported per-
sonal POIs have their own icon and are filed
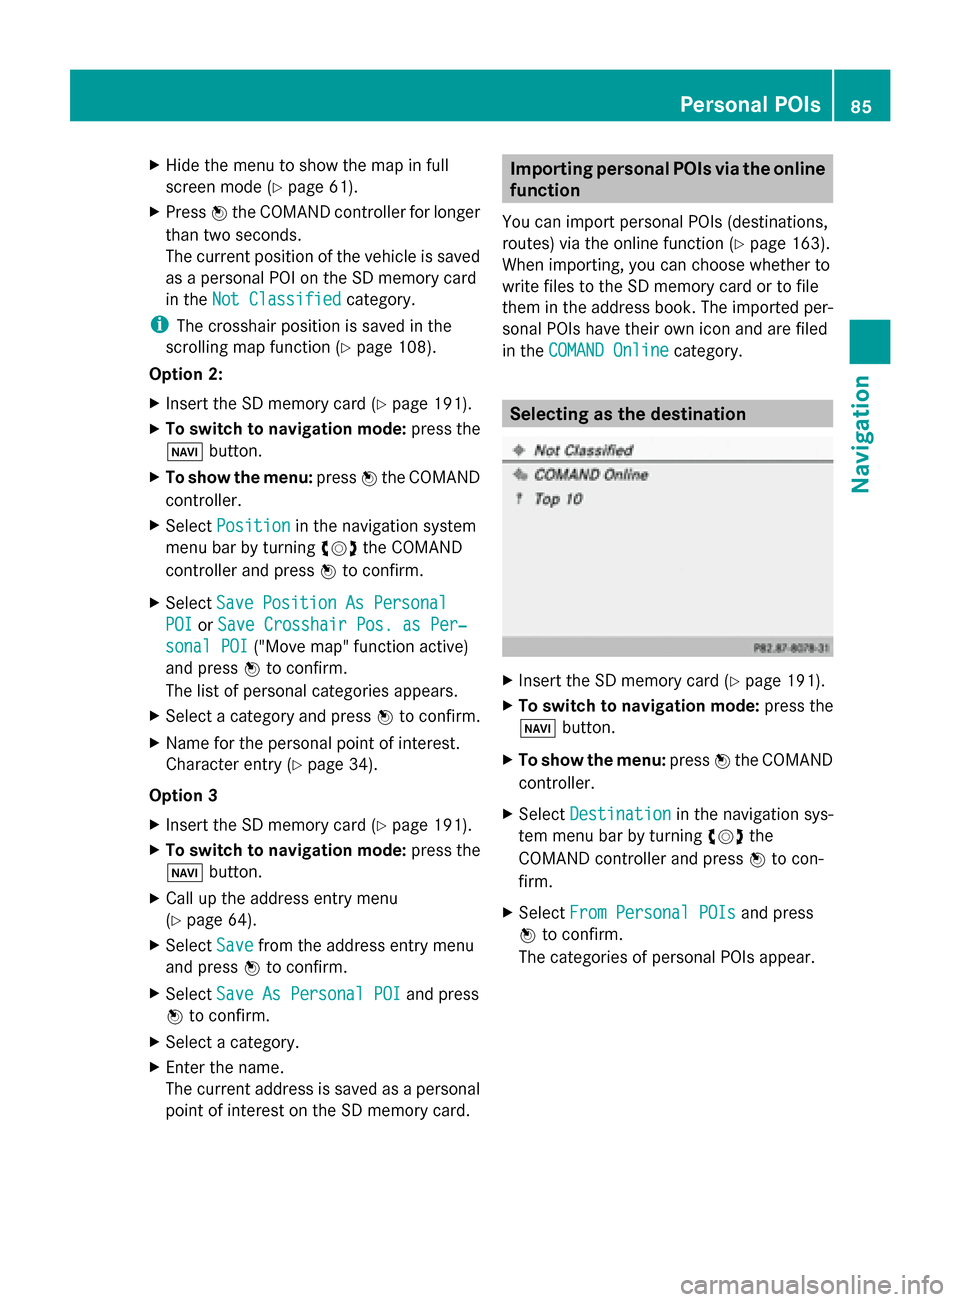
in the COMAND Online COMAND Online category. Selecting as the destination
X
Insert the SD memory card (Y page 191).
X To switch to navigation mode: press the
00BE button.
X To show the menu: press0098the COMAND
controller.
X Select Destination
Destination in the navigation sys-
tem menu bar by turning 00790052007Athe
COMAND controller and press 0098to con-
firm.
X Select From Personal POIs
From Personal POIs and press
0098 to confirm.
The categories of personal POIs appear. Personal POIs
85Navigation Z
Page 88 of 270
Selection Explanation
Not Classi‐
Not Classi‐
fied fied Standard entry for per-
sonal points of interest.
COMAND COMAND
Online Online Personal POIs which you
have imported via the
online function
(Y
page 163). Coffee Coffee
Shops Shops Symbol and category that
you have created yourself
(Y
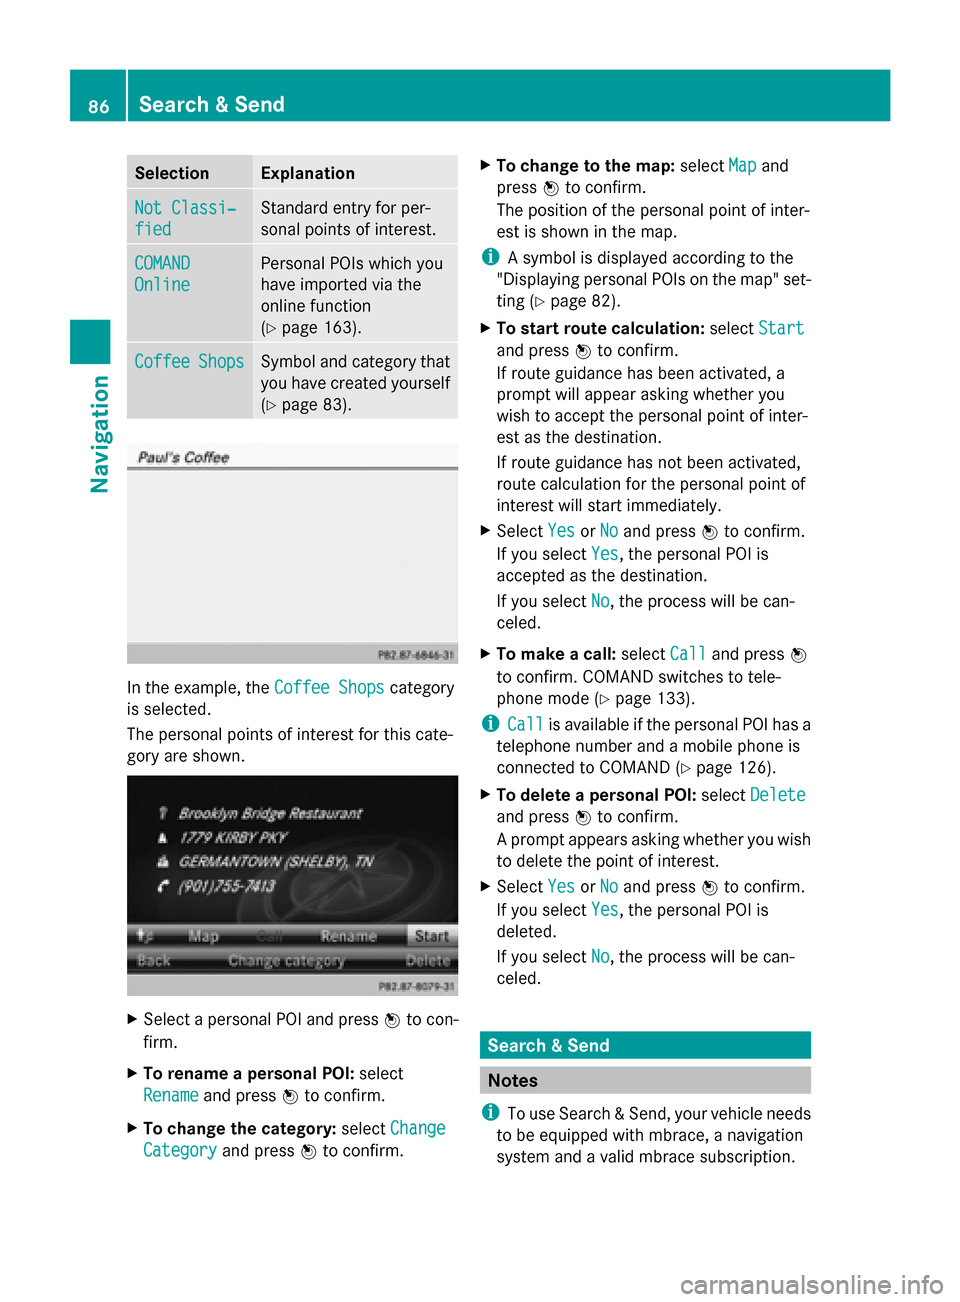
page 83). In the example, the
Coffee Shops Coffee Shopscategory
is selected.
The personal points of interest for this cate-
gory are shown. X
Select a personal POI and press 0098to con-
firm.
X To rename a personal POI: select
Rename
Rename and press 0098to confirm.
X To change the category: selectChange Change
Category
Category and press0098to confirm. X
To change to the map: selectMap
Mapand
press 0098to confirm.
The position of the personal point of inter-
est is shown in the map.
i A symbol is displayed according to the
"Displaying personal POIs on the map" set-
ting (Y page 82).
X To start route calculation: selectStart Start
and press 0098to confirm.
If route guidance has been activated, a
prompt will appear asking whether you
wish to accept the personal point of inter-
est as the destination.
If route guidance has not been activated,
route calculation for the personal point of
interest will start immediately.
X Select Yes
Yes orNo No and press 0098to confirm.
If you select Yes
Yes, the personal POI is
accepted as the destination.
If you select No No, the process will be can-
celed.
X To make a call: selectCall
Calland press 0098
to confirm. COMAND switches to tele-
phone mode (Y page 133).
i Call Call is available if the personal POI has a
telephone number and a mobile phone is
connected to COMAND (Y page 126).
X To delete a personal POI: selectDelete Delete
and press 0098to confirm.
A prompt appears asking whether you wish
to delete the point of interest.
X Select Yes YesorNo
No and press 0098to confirm.
If you select Yes
Yes, the personal POI is
deleted.
If you select No No, the process will be can-
celed. Search & Send
Notes
i To use Search & Send, your vehicle needs
to be equipped with mbrace, a navigation
system and a valid mbrace subscription. 86
Search & SendNavigation
Page 89 of 270
Search & Send is a service assisting you in
entering destinations for the navigation sys-
tem. This mbrace service can send a destina-
tion address directly from the Google
Maps ®
website to the navigation system of
your vehicle. Selecting and sending a destination
address
Please also refer to the notes about address
entry online: maps.google.com.
X Call up the maps.google.com website and
enter the destination address in the
address entry field.
X Click the corresponding button to send the
destination address to the e-mail address
registered with mbrace.
X Enter the e-mail address you specified
when setting up your mbrace account into
the corresponding field in the "Send" dialog
window.
X Click "Send". Calling up destination addresses
X
Press the 00D9mbrace information button.
Downloading of the destination address to
the navigation system of your vehicle
begins.
i If you have sent more than one destina-
tion address to your vehicle's navigation
system, you will need to call up the infor- mation individually for every address to be
downloaded.
X
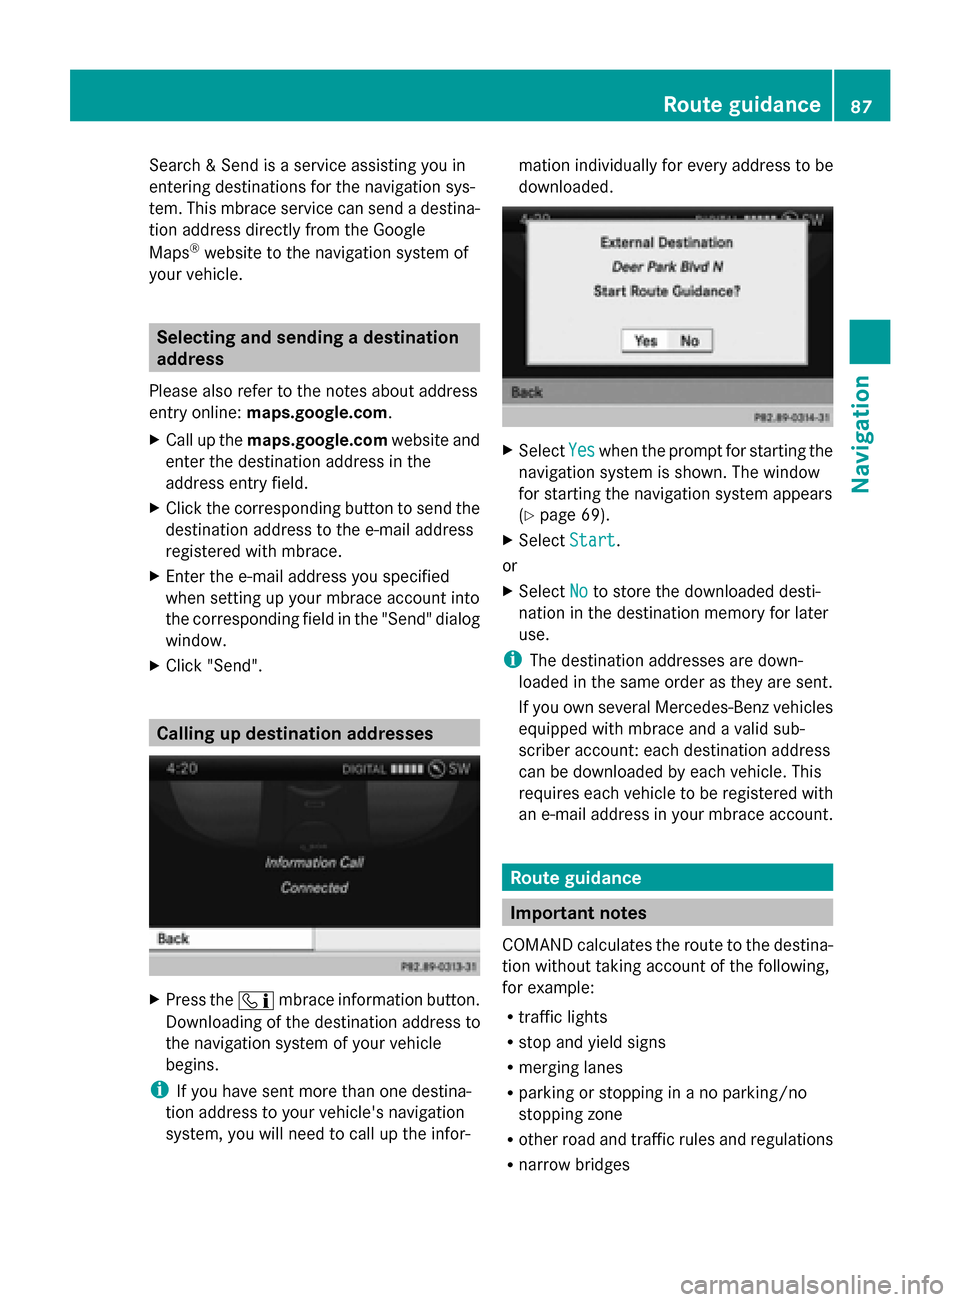
Select Yes Yeswhen the prompt for starting the
navigation system is shown. The window
for starting the navigation system appears
(Y page 69).
X Select Start Start.
or
X Select No Noto store the downloaded desti-
nation in the destination memory for later
use.
i The destination addresses are down-
loaded in the same order as they are sent.
If you own several Mercedes-Benz vehicles
equipped with mbrace and a valid sub-
scriber account: each destination address
can be downloaded by each vehicle. This
requires each vehicle to be registered with
an e-mail address in your mbrace account. Route guidance
Important notes
COMAND calculates the route to the destina-
tion without taking account of the following,
for example:
R traffic lights
R stop and yield signs
R merging lanes
R parking or stopping in a no parking/no
stopping zone
R other road and traffic rules and regulations
R narrow bridges Route guidance
87Navigation Z