four wheel drive MERCEDES-BENZ CLS COUPE 2011 Owners Manual
[x] Cancel search | Manufacturer: MERCEDES-BENZ, Model Year: 2011, Model line: CLS COUPE, Model: MERCEDES-BENZ CLS COUPE 2011Pages: 337, PDF Size: 7.37 MB
Page 152 of 337

X
To apply: depress parking brake ;firmly.
The J indicator lamp in the instrument
cluster lights up if the engine is running.
X To release: depress the brake pedal and
keep it depressed.
X Pull release handle :.
The J indicator lamp in the instrument
cluster goes out. Parking up the vehicle
If you leave the vehicle parked up for longer
tha nfour weeks, the battery may be damaged
by exhaustive discharge.
X Disconnect the battery (Y page 292) or
connect it to a trickle charger.
i You can obtain information about trickle
chargers from a qualified specialist work-
shop, e.g. a Mercedes-Benz Service
Centre.
If you leave the vehicle parked up for longer
than six weeks, the vehicle may suffer dam-
age as a result of lack of use.
X Visit a qualified specialist workshop and
seek advice. Driving tips
General driving tips
Rolling with the engine switched off G
Risk of accident
Never switch the engine off while the vehicle
is in motion.
There is no power assistance for the steering
and the service brake when the engine is not
running.
You will require considerably more effort to
steer and brake, and you could therefore lose
control of the vehicle and cause an accident. Engine oil
! Vehicles with adiesel particle filter:
If the vehicle is mostly driven for short dis-
tances, it is possible that malfunctions may
occur during the automatic cleaning of the
diesel particle filter. This can lead to engine
damage. Therefore, if you frequently drive
short distances, make sure to drive on
motorways or country roads for 20 minutes
at least every 500 km. Brakes
Important safety notes G
Risk of accident
Do not change down for additional engine
braking on a slippery road surface. This could
cause the drive wheels to lose their grip and
the vehicle could skid. G
Risk of accident
Make sure that other road users are not
endangered by your braking.
Downhill gradients On long and steep downhill gradients, espe-
cially if the vehicle is laden, you must select
shift range
1,2or 3in good time.
i This also applies if you have activated
cruise control, SPEEDTRONIC or DIS-
TRONIC PLUS.
This will use the braking effect of the engine,
so less braking will be required to maintain
the speed. This relieves the load on the brake
system and prevents the brakes from over-
heating and wearing too quickly. If you need
additional braking, depress the brake pedal
repeatedly rather than continuously. Driving tips
149Driving and parking Z
Page 235 of 337

Display messages Possible causes/consequences and
M Solutions
Cruise control
--- km/h A condition for activating cruise control has not been met.
You have tried to store
aspeed below 30 km/h, for example.
X If conditions permit, drive faster than 30 km/h and store the
speed.
X Check the activation conditions for cruise control
(Y page 152). 120 km/h
Maximum speed
exceeded The maximum speed has been exceeded
34
.
X Drive slower. Tyres
Display messages Possible causes/consequences and
M Solutions
Tyre pressure
Check tyres G
Risk of accident
The tyre pressure loss warning system has detected a significant
loss in pressure.
Aw arning tone also sounds.
X Stop the vehicle without making any sudde nsteering or braking
manoeuvres .Pay attentio nto the traffic conditions as you do
so.
X Check the tyres and, if necessary, change the wheel
(Y page 309).
X Check the tyre pressures and, if necessary, set to the correct
tyre pressure.
X Restart the tyre pressure loss warning system when the tyre
pressure is correc t(Ypage 306). Check tyre pres‐
sures
then restart Run
Flat Indicator The tyre pressure loss warning system generated a display mes-
sage and has not been restarted since.
X
Set the correct tyre pressure in all four tyres.
X Restart the tyre pressure loss warning system (Y page 306).Run Flat Indicator
inoperative The tyre pressure loss warning system is faulty.
X
Visit a qualified specialist workshop. Tyre press. monitor
inoperative The tyre pressure monitor is faulty.
X
Visit a qualified specialist workshop. 34
Only for certain countries. 232
Display messagesOn-board computer and displays
Page 287 of 337

X
Correct the tyre pressure if it is still at least
130 kPa (1.3 bar/20 psi) (for the values,
see the fuel fille rflap).
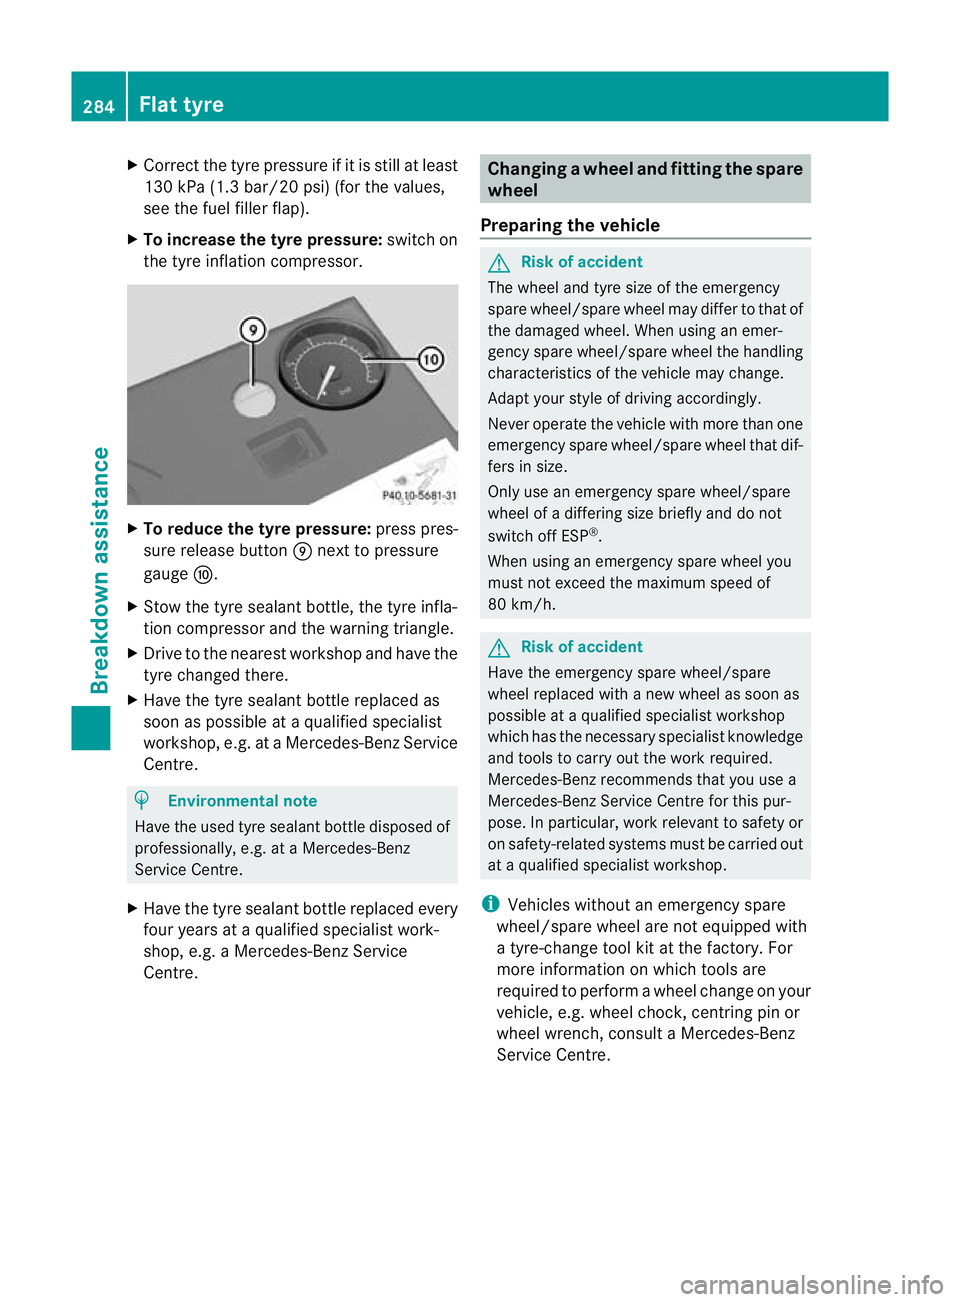
X To increase the tyre pressure: switch on
the tyre inflation compressor. X
To reduce the tyre pressure: press pres-
sure release button Enext to pressure
gauge F.
X Stow the tyre sealant bottle, the tyre infla-
tion compressor and the warning triangle.
X Drive to the nearest workshop and have the
tyre changed there.
X Have the tyre sealant bottle replaced as
soon as possible at a qualified specialist
workshop, e.g. at a Mercedes-Ben zService
Centre. H
Environmental note
Have the used tyre sealant bottle disposed of
professionally, e.g. at aMercedes-Benz
Service Centre.
X Have the tyre sealant bottle replaced every
four years at a qualified specialist work-
shop, e.g. a Mercedes-Benz Service
Centre. Changing
awheel and fitting the spare
wheel
Preparing the vehicle G
Risk of accident
The wheel and tyre size of the emergency
spare wheel/spare wheel may diffe rto that of
the damaged wheel. When using an emer-
gency spare wheel/spare wheel the handling
characteristics of the vehicle may change.
Adapt your style of driving accordingly.
Never operate the vehicle with more than one
emergency spare wheel/spare wheel that dif-
fers in size.
Only use an emergency spare wheel/spare
wheel of a differing size briefly and do not
switch off ESP ®
.
When using an emergency spare wheel you
must not exceed the maximum speed of
80 km/h. G
Risk of accident
Have the emergency spare wheel/spare
wheel replaced with a new wheel as soon as
possible at a qualified specialist workshop
which has the necessary specialist knowledge
and tools to carry out the work required.
Mercedes-Benz recommends that you use a
Mercedes-Benz Service Centre for this pur-
pose. In particular, work relevant to safety or
on safety-related systems must be carried out
at a qualified specialist workshop.
i Vehicles without an emergency spare
wheel/spare wheel are not equipped with
a tyre-change tool kit at the factory. For
more information on which tools are
required to perform a wheel change on your
vehicle, e.g. wheel chock, centring pin or
wheel wrench, consult a Mercedes-Benz
Service Centre. 284
Flat tyreBreakdown assistance
Page 312 of 337

i
For an overview of the menus, see
(Y page 197).
If you wish to define the new reference values
manually:
X Use the table on the inside of the fuel filler
flap to ensure that the tyre pressure is set
correctly in all four tyres for the current
operating conditions.
Also observe the notes in the section on
tyre pressures (Y page 305).
X Make sure that the key is in position 2in
the ignition lock.
X Use the =or; button on the steer-
ing wheel to select the Service menu.
X Use the 9or: button to select
Tyre pressure .
X Press the abutton.
The current tyre pressure of the individual
wheels is displayed in the multifunction dis-
play or the Tyre pressures will be displayed after a few minutes of
driving message appears.
X Press the :button.
The Use current pressure values as
new reference values message appears
in the multifunction display.
If you wish to confirm the restart:
X Press the abutton.
The Tyre press. monitor restarted message appears in the multifunction dis-
play.
After you have driven for a few minutes, the
system checks whether the current tyre
pressures are within the specified range.
The new tyre pressures are then accepted
as reference values and monitored.
If you wish to cancel the restart:
X Press the %button.
The tyre pressure values stored at the last
restart will continue to be monitored. Changing
awheel Flat tyre
The "Breakdown assistance" section
(Y page 281) contains information and notes
on how to deal with a fla ttyre. It also provides
instructions on changing a wheel or fitting the
spare wheel or emergency spare wheel. Interchanging the wheels
G
Risk of accident
Interchange the front and rear wheels only if
they have the same dimensions :for example
size, offset, etc.
After every wheel interchange/change, have
the tightening torque checked at a qualified
specialist workshop that has the necessary
specialist knowledge and tools to carry out
the work required. Mercedes-Benz recom-
mends that you use a Mercedes-Benz Service
Centre for this purpose. In particular, work
relevant to safety or on safety-related sys-
tems must be carried out at a qualified spe-
cialist workshop.
The wheels could work loose if they are not
tightened to a torque of 130 Nm.
For safety reasons, Mercedes-Benz recom-
mends that you only use wheel bolts of the
correc tsize which have been approved for
Mercedes-Ben zvehicles.
The wear patterns on the fron tand rea rtyres
differ, depending on the operating conditions.
Interchange the wheels before a clear wear
pattern has formed on the tyres. Front tyres
typically wear more on the shoulders and the
rear tyres in the centre.
On vehicles that have th esame size fron tand
rea rwheels, you can interchange the wheels
every 5000 km to 10,000 km depending on
the degree of tyre wear. Do not reverse the
direction of tyre rotation.
Cleant he contact surfaces of the wheel and
the brake disc thoroughly every time a wheel
is interchanged. Check the tyre pressure and, Changing
awheel
309Wheels and tyres Z