fuel consumption MERCEDES-BENZ CLS COUPE 2014 Owners Manual
[x] Cancel search | Manufacturer: MERCEDES-BENZ, Model Year: 2014, Model line: CLS COUPE, Model: MERCEDES-BENZ CLS COUPE 2014Pages: 417, PDF Size: 14.15 MB
Page 14 of 417
Problem (fault) ...............................1
66
Engine jump starting
see Jump starting (engine)
Engine oil
Additives ........................................ 404
Checking the oil level ..................... 329
Checking the oil level using the
dipstick .......................................... 329
Display message ............................ 272
Filling capacity ............................... 404
Notes about oil grades ................... 404
Notes on oil level/consumption .... 329
Temperature (on-board com-
puter) ............................................. 258
Topping up ..................................... 330
Viscosity ........................................ 405
Environmental protection
Returning an end-of-life vehicle ....... 23
ESP® (Electronic Stability Pro-
gram)
AMG menu (on-board computer) ... 258
Characteristics ................................. 73
Deactivating/activating (AMG
vehicles) .......................................... 74
Deactivating/activating (except
AMG vehicles) ................................ 250
Deactivating/activating (notes;
except AMG vehicles) ..................... .73
Display message ............................ 262
ETS/4ETS ........................................ 72
Function/note s................................ 72
General notes .................................. 72
Important safety guidelines ............. 73
Trailer stabilisation .......................... 75
Warning lamp ................................. 291
ETS/4ETS (Electronic Traction Sys-
tem) ...................................................... 72
Exhaust pipe (cleaning instruc-
tions) .................................................. 338
Exterior lighting
Settings options ............................. 122
see Lights
Exterior mirrors
Adjusting ....................................... 116
Anti-dazzle mode (automatic) ........ 117
Folding in when locking (on-board computer) ...................................... 257
Folding in/out (automatically )....... 117 Folding in/out (electrically) ........... 117
Out of position (troubleshooting) ... 117
Parking position ............................. 118
Resetting ....................................... 117
Storing settings (memory func-
tion) ............................................... 119 F
Fault message see Display messages
Filler cap
see Fuel filler flap
Fire extinguisher ............................... 345
First-aid kit ......................................... 344
Fitting a wheel
Fitting a wheel ............................... 377
Lowering the vehicle ...................... 378
Preparing the vehicle ..................... 374
Raising the vehicle ......................... 375
Removing a whee l.......................... 377
Securing the vehicle against roll-
ing away ........................................ 375
Flat tyre
MOExtended tyre s......................... 347
Preparing the vehicle ..................... 347
TIREFIT kit ...................................... 348
see Emergency spare wheel
Floormat ............................................. 326
Foglamps (extended range) .............. 128
Frequencies
Garage door opener ....................... 323
Mobile phone ................................. 396
Two-way radio ................................ 396
Fuel
Additives ........................................ 401
Consumption information .............. 402
Consumption statistics .................. 243
Displaying the current consump-
tion ................................................ 244
Displaying the range ...................... 244
E10 ................................................ 400
Fuel gaug e....................................... 32
Grade (petrol) ................................ 400
Important safety notes .................. 399
Notes for AMG vehicles ................. 401
Problem (malfunction) ................... 180
Quality (diesel )............................... 402 Index
11
Page 26 of 417
Protection of the environment
General notes
H
Environmental note
Daimler's declared policy is one of compre-
hensive environmental protection.
Our objectives are to use the natural resour-
ces which form the basis of our existence on
this planet sparingly and in a manner which
takes the requirements of both nature and
humanity into consideration.
You too can help to protect the environment
by operating your vehicle in an environmen-
tally-responsible manner.
Fuel consumption and the rate of engine,
transmission, brake and tyre wear depend on
the following factors:
R operating conditions of your vehicle
R your personal driving style
You can influence both factors. Therefore,
please bear the following in mind:
Operating conditions:
R avoid short trips, as these increase fuel
consumption.
R observe the correct tyre pressure.
R do not carry any unnecessary weight in the
vehicle.
R remove the roof rack once you no longer
need it.
R a regularly serviced vehicle will contribute
to environmental protection. You should
therefore adhere to the service intervals.
R all maintenance work should be carried out
at a qualified specialist workshop.
Personal driving style:
R do not depress the accelerator pedal when
starting the engine.
R do not warm up the engine when the vehicle
is stationary.
R drive carefully and maintain a safe distance
from the vehicle in front.
R avoid frequent, sudden acceleration and
braking. R
change gear in good time and use each gear
only up to Ôof its maximum engine speed.
R switch off the engine in stationary traffic.
R monitor the vehicle's fuel consumption. Returning an end-of-life vehicle
EU countries only:
Mercedes-Benz will take back your old vehicle to dispose of it in an environmentally-respon-sible manner in accordance with the Euro-
pean Union (EU) End of Life Vehicles Direc-
tive.
There is a network of return points and dis-
assembly plants available. You can return
your vehicle to these plants free of charge.
This makes a valuable contribution to the
recycling process and the conservation of
resources.
For further information on recycling old vehi- cles, recovery and the terms of the policy,
visit the Mercedes-Benz homepage. Genuine Mercedes-Benz parts
H
Environmental note
Daimler AG also supplies reconditioned
assemblies and parts which are of the same
quality as new parts. For these, the same war-
ranty applies as for new parts.
! Airbags and seat belt tensioners, as well
as control units and sensors for these
restraint systems, may be installed in the
following areas of your vehicle:
R doors
R door pillars
R door sills
R seats
R dashboard
R instrument cluster
R centre console Introduction
23 Z
Page 176 of 417
Steering wheel gearshift paddles
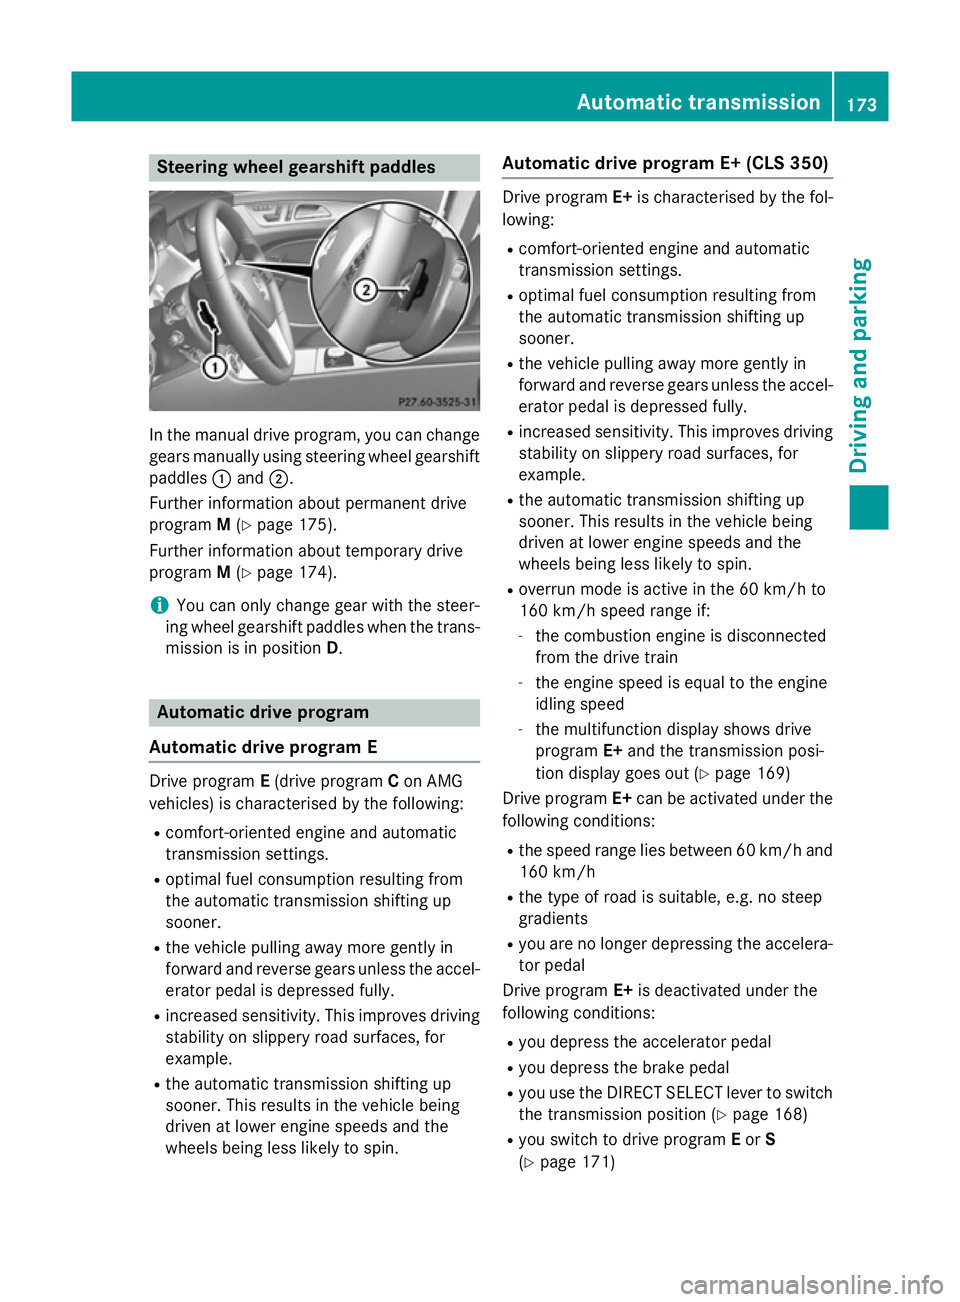
In the manual drive program, you can change
gears manually using steering wheel gearshift
paddles :and ;.
Further information about permanent drive
program M(Y page 175).
Further information about temporary drive
program M(Y page 174).
i You can only change gear with the steer-
ing wheel gearshift paddles when the trans- mission is in position D.Automatic drive program
Automatic drive program E Drive program
E(drive program Con AMG
vehicles) is characterised by the following:
R comfort-oriented engine and automatic
transmission settings.
R optimal fuel consumption resulting from
the automatic transmission shifting up
sooner.
R the vehicle pulling away more gently in
forward and reverse gears unless the accel- erator pedal is depressed fully.
R increased sensitivity. This improves driving
stability on slippery road surfaces, for
example.
R the automatic transmission shifting up
sooner. This results in the vehicle being
driven at lower engine speeds and the
wheels being less likely to spin. Automatic drive program E+ (CLS 350) Drive program
E+is characterised by the fol-
lowing:
R comfort-oriented engine and automatic
transmission settings.
R optimal fuel consumption resulting from
the automatic transmission shifting up
sooner.
R the vehicle pulling away more gently in
forward and reverse gears unless the accel-
erator pedal is depressed fully.
R increased sensitivity. This improves driving
stability on slippery road surfaces, for
example.
R the automatic transmission shifting up
sooner. This results in the vehicle being
driven at lower engine speeds and the
wheels being less likely to spin.
R overrun mode is active in the 60 km/h to
160 km/h speed range if:
- the combustion engine is disconnected
from the drive train
- the engine speed is equal to the engine
idling speed
- the multifunction display shows drive
program E+and the transmission posi-
tion display goes out (Y page 169)
Drive program E+can be activated under the
following conditions:
R the speed range lies between 60 km/h and
160 km/h
R the type of road is suitable, e.g. no steep
gradients
R you are no longer depressing the accelera-
tor pedal
Drive program E+is deactivated under the
following conditions:
R you depress the accelerator pedal
R you depress the brake pedal
R you use the DIRECT SELECT lever to switch
the transmission position (Y page 168)
R you switch to drive program Eor S
(Y page 171) Automatic transmission
173Driving and parking Z
Page 177 of 417
R
you are driving slower than 60 km/h
R you are driving faster than 160 km/h
Automatic drive program S Drive program
S(or, in the case of AMG vehi-
cles, drive programs Sand S+) is character-
ised by the following:
R sporty engine and automatic transmission
settings
R the automatic transmission shifting up
later
R as a result of the later automatic transmis-
sion shift points, the fuel consumption pos-sibly being higher
Manual drive program M General notes
In this drive program, you can briefly change
gear yourself by using the steering wheel
gearshift paddles. The transmission must be
in position D.
You can activate manual drive program Min
the E,E+ (CLS 350) and Sautomatic drive
programs.
i In addition to temporary drive program
M,
you can also activate permanent drive pro- gram M(Y page 171).
Further information about permanent drive program M(Y page 175).
Activating
X Shift the transmission to position D.
X Pull the left or right steering wheel gearshift
paddle (Y page 173).
Manual drive program Mis temporarily acti-
vated. The selected gear and Mappear in
the multifunction display.
Shifting gears
If you pull on the left or right steering wheel
gearshift paddle, the automatic transmission switches to manual drive program Mfor a
limited amount of time. Depending on which
gearshift paddle is pulled, the automatic transmission immediately shifts into the next
gear up or down, if permitted.
X To shift up: pull the right-hand steering
wheel gearshift paddle (Y page 173).
The automatic transmission shifts up to the next gear.
i If the maximum engine speed on the cur-
rently engaged gear is reached and you
continue to accelerate, the automatic
transmission automatically shifts up in
order to prevent engine damage.
X To shift down: pull on the left-hand steer-
ing wheel gearshift paddle (Y page 173).
The automatic transmission shifts down to
the next gear.
i If the engine exceeds the maximum
engine speed when shifting down, the auto- matic transmission protects against engine
damage by not shifting down.
i Automatic downshifting occurs when
coasting.
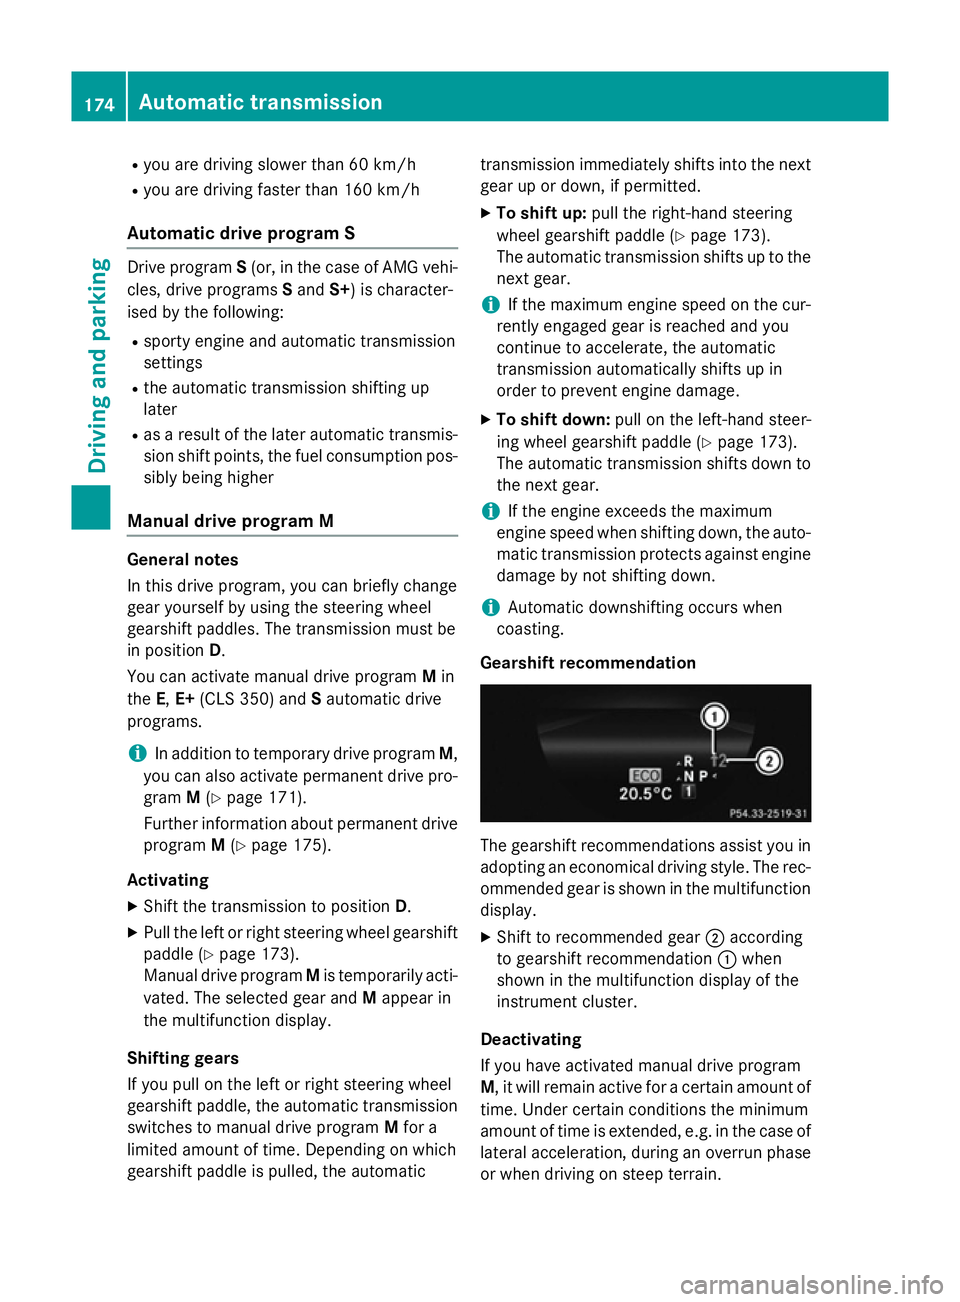
Gearshift recommendation The gearshift recommendations assist you in
adopting an economical driving style. The rec- ommended gear is shown in the multifunction
display.
X Shift to recommended gear ;according
to gearshift recommendation :when
shown in the multifunction display of the
instrument cluster.
Deactivating
If you have activated manual drive program
M, it will remain active for a certain amount of time. Under certain conditions the minimum
amount of time is extended, e.g. in the case oflateral acceleration, during an overrun phase
or when driving on steep terrain. 174
Automatic transmissionDriving and pa
rking
Page 185 of 417
In addition, they may operate vehicle equip-
ment and become trapped. There is a risk of
an accident and injury.
When leaving the vehicle, always take the key with you and lock the vehicle. Never leave
children unattended in the vehicle. The brake lights do not light up when you
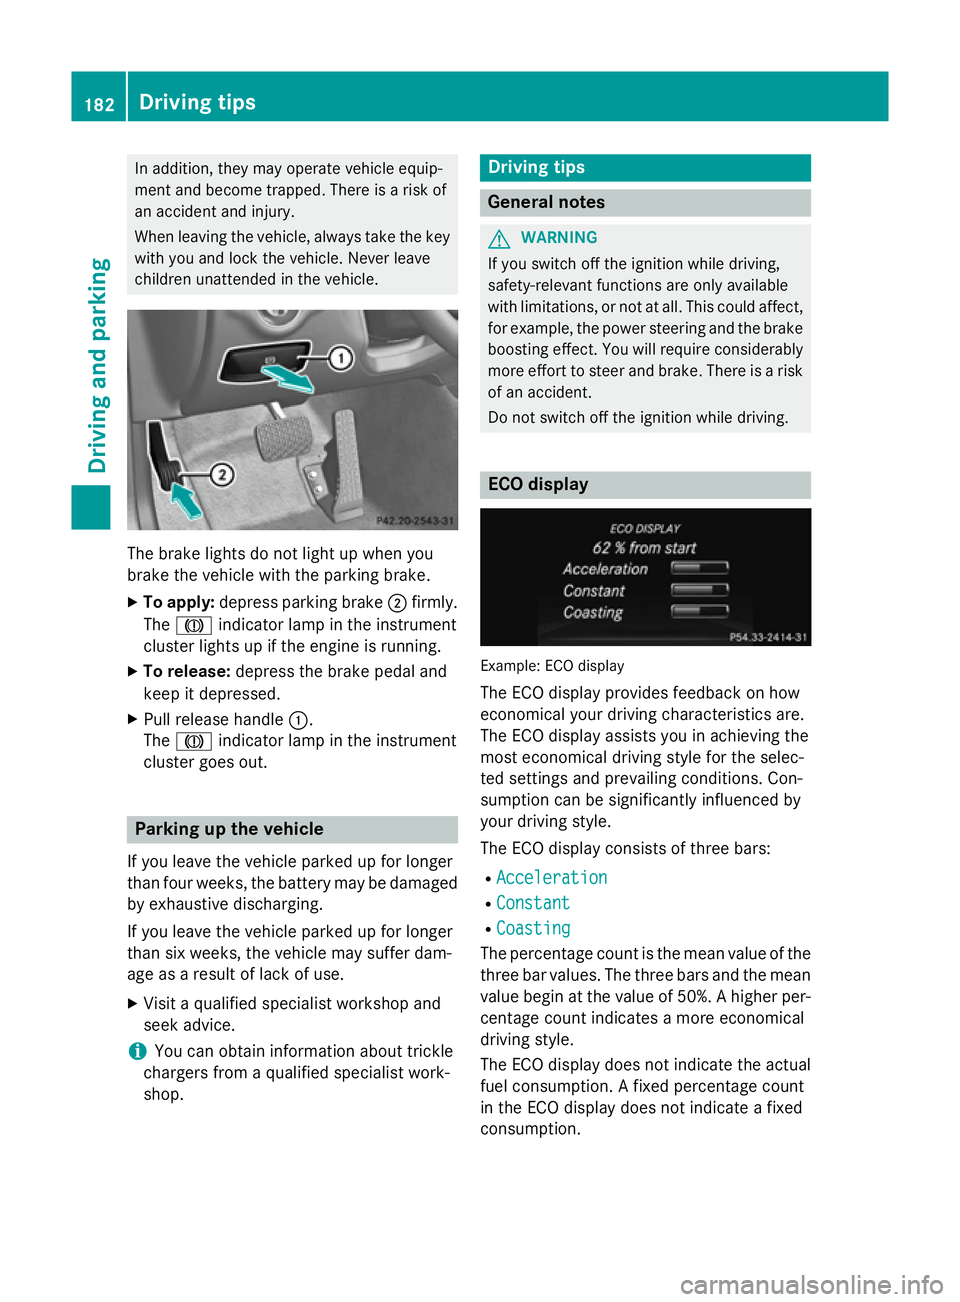
brake the vehicle with the parking brake.
X To apply: depress parking brake ;firmly.
The J indicator lamp in the instrument
cluster lights up if the engine is running.
X To release: depress the brake pedal and
keep it depressed.
X Pull release handle :.
The J indicator lamp in the instrument
cluster goes out. Parking up the vehicle
If you leave the vehicle parked up for longer
than four weeks, the battery may be damaged
by exhaustive discharging.
If you leave the vehicle parked up for longer
than six weeks, the vehicle may suffer dam-
age as a result of lack of use.
X Visit a qualified specialist workshop and
seek advice.
i You can obtain information about trickle
chargers from a qualified specialist work-
shop. Driving tips
General notes
G
WARNING
If you switch off the ignition while driving,
safety-relevant functions are only available
with limitations, or not at all. This could affect, for example, the power steering and the brake
boosting effect. You will require considerably
more effort to steer and brake. There is a risk of an accident.
Do not switch off the ignition while driving. ECO display
Example: ECO display
The ECO display provides feedback on how
economical your driving characteristics are.
The ECO display assists you in achieving the
most economical driving style for the selec-
ted settings and prevailing conditions. Con-
sumption can be significantly influenced by
your driving style.
The ECO display consists of three bars:
R Acceleration Acceleration
R Constant
Constant
R Coasting
Coasting
The percentage count is the mean value of the three bar values. The three bars and the mean
value begin at the value of 50%. A higher per- centage count indicates a more economical
driving style.
The ECO display does not indicate the actual
fuel consumption. A fixed percentage count
in the ECO display does not indicate a fixed
consumption. 182
Driving tipsDriving and parking
Page 206 of 417
!
The vehicle is lowered by about 15 mm if:
R you have selected "Comfort tuning"
R you switch off the engine and
R you lock the vehicle within approximately
60 seconds
When parking, position your vehicle so that it does not make contact with the kerb as
the vehicle is lowered. Your vehicle could
otherwise be damaged.
If you unlock the vehicle within 60 seconds of
having switched the engine off, the vehicle is
lowered slightly when Comfort suspension
mode is selected.
Observe the notes on driving with a trailer
(Y page 233).
Your vehicle regulates its height automati-
cally. All-round level control ensures the best
possible suspension and constant ground
clearance, even with a laden vehicle. When
you drive fast, the vehicle is lowered auto-
matically to improve driving safety and to
reduce fuel consumption.
The following vehicle levels are possible:
R Normal
R Raised: the vehicle is raised by approx-
imately 25 mm when compared with the
normal level
R Lowered: the vehicle is lowered by approx-
imately 10 mm when compared with the
normal level
The "Normal" and "Raised" vehicle levels can be set manually.
The "Lowered" vehicle level is set automati-
cally:
R at speeds above 140 km/h
R if you have selected "Comfort mode"
(Y page 204) and then lock the vehicle
within 60 seconds of the engine being
switched off
R if you have selected "Sport mode"
(Y page 204) Setting the vehicle level
Select the "Normal" setting for normal road
surfaces and "Raised" for driving with snow
chains or on particularly poor road surfaces.
Your selection remains stored even if you
remove the key from the ignition lock.
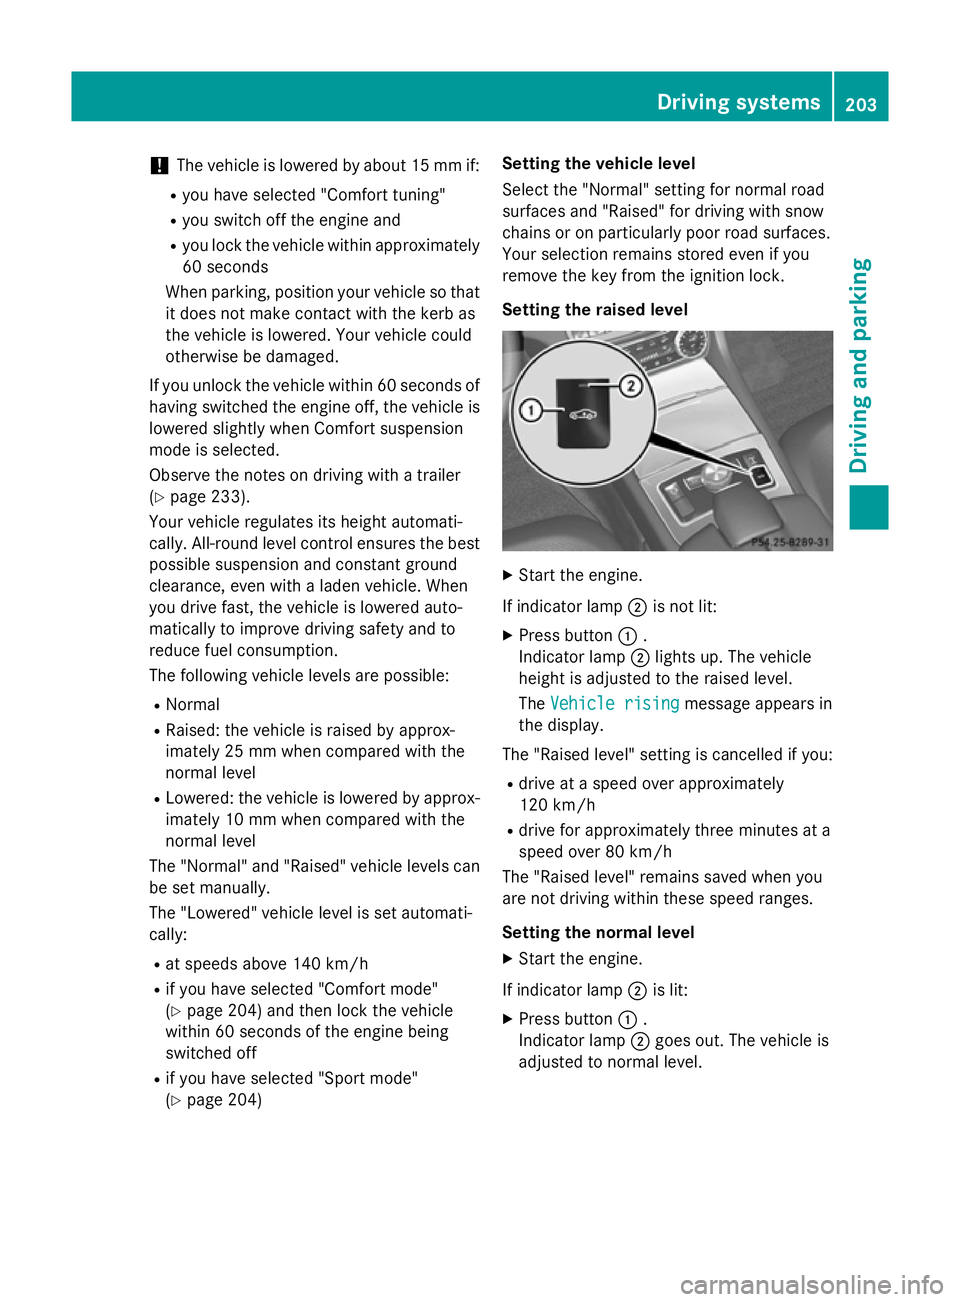
Setting the raised level X
Start the engine.
If indicator lamp ;is not lit:
X Press button :.
Indicator lamp ;lights up. The vehicle
height is adjusted to the raised level.
The Vehicle rising Vehicle rising message appears in
the display.
The "Raised level" setting is cancelled if you:
R drive at a speed over approximately
120 km/h
R drive for approximately three minutes at a
speed over 80 km/h
The "Raised level" remains saved when you
are not driving within these speed ranges.
Setting the normal level
X Start the engine.
If indicator lamp ;is lit:
X Press button :.
Indicator lamp ;goes out. The vehicle is
adjusted to normal level. Driving systems
203Driving and parking Z
Page 246 of 417
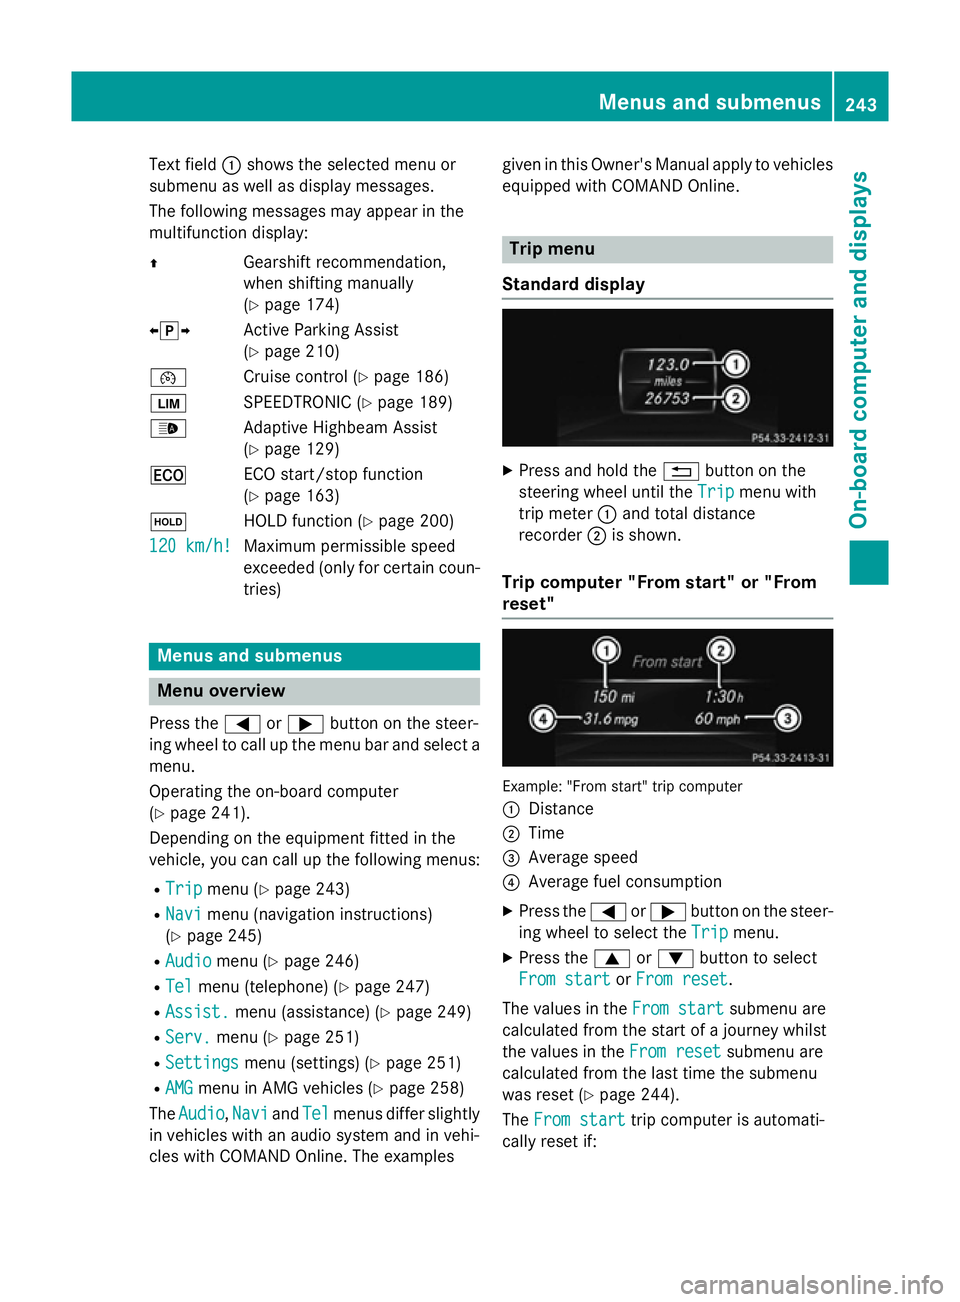
Text field
:shows the selected menu or
submenu as well as display messages.
The following messages may appear in the
multifunction display:
Z Gearshift recommendation,
when shifting manually
(Ypage 174)
XjY Active Parking Assist
(Ypage 210)
¯ Cruise control (Y page 186)
È SPEEDTRONIC (Y page 189)
_ Adaptive Highbeam Assist
(Ypage 129)
¤ ECO start/stop function
(Ypage 163)
ë HOLD function (Y page 200)
120 km/h!
120 km/h! Maximum permissible speed
exceeded (only for certain coun-
tries) Menus and submenus
Menu overview
Press the =or; button on the steer-
ing wheel to call up the menu bar and select a
menu.
Operating the on-board computer
(Y page 241).
Depending on the equipment fitted in the
vehicle, you can call up the following menus:
R Trip Trip menu (Y page 243)
R Navi
Navi menu (navigation instructions)
(Y page 245)
R Audio
Audio menu (Y page 246)
R Tel
Tel menu (telephone) (Y page 247)
R Assist.
Assist. menu (assistance) (Y page 249)
R Serv.
Serv. menu (Y page 251)
R Settings
Settings menu (settings) (Y page 251)
R AMG
AMG menu in AMG vehicles (Y page 258)
The Audio
Audio, Navi
NaviandTel
Tel menus differ slightly
in vehicles with an audio system and in vehi-
cles with COMAND Online. The examples given in this Owner's Manual apply to vehicles
equipped with COMAND Online. Trip menu
Standard display X
Press and hold the %button on the
steering wheel until the Trip
Tripmenu with
trip meter :and total distance
recorder ;is shown.
Trip computer "From start" or "From
reset" Example: "From start" trip computer
:
Distance
; Time
= Average speed
? Average fuel consumption
X Press the =or; button on the steer-
ing wheel to select the Trip Tripmenu.
X Press the 9or: button to select
From start From start orFrom reset
From reset.
The values in the From start
From startsubmenu are
calculated from the start of a journey whilst
the values in the From reset From resetsubmenu are
calculated from the last time the submenu
was reset (Y page 244).
The From start From start trip computer is automati-
cally reset if: Menus and submenus
243On-board computer and displays Z
Page 247 of 417
R
the ignition has been switched off for more
than four hours
R 999 hours have been exceeded
R 9,999 kilometres have been exceeded.
The From reset
From reset trip computer is automati-
cally reset if the value exceeds 9,999 hours or 99,999 kilometres.
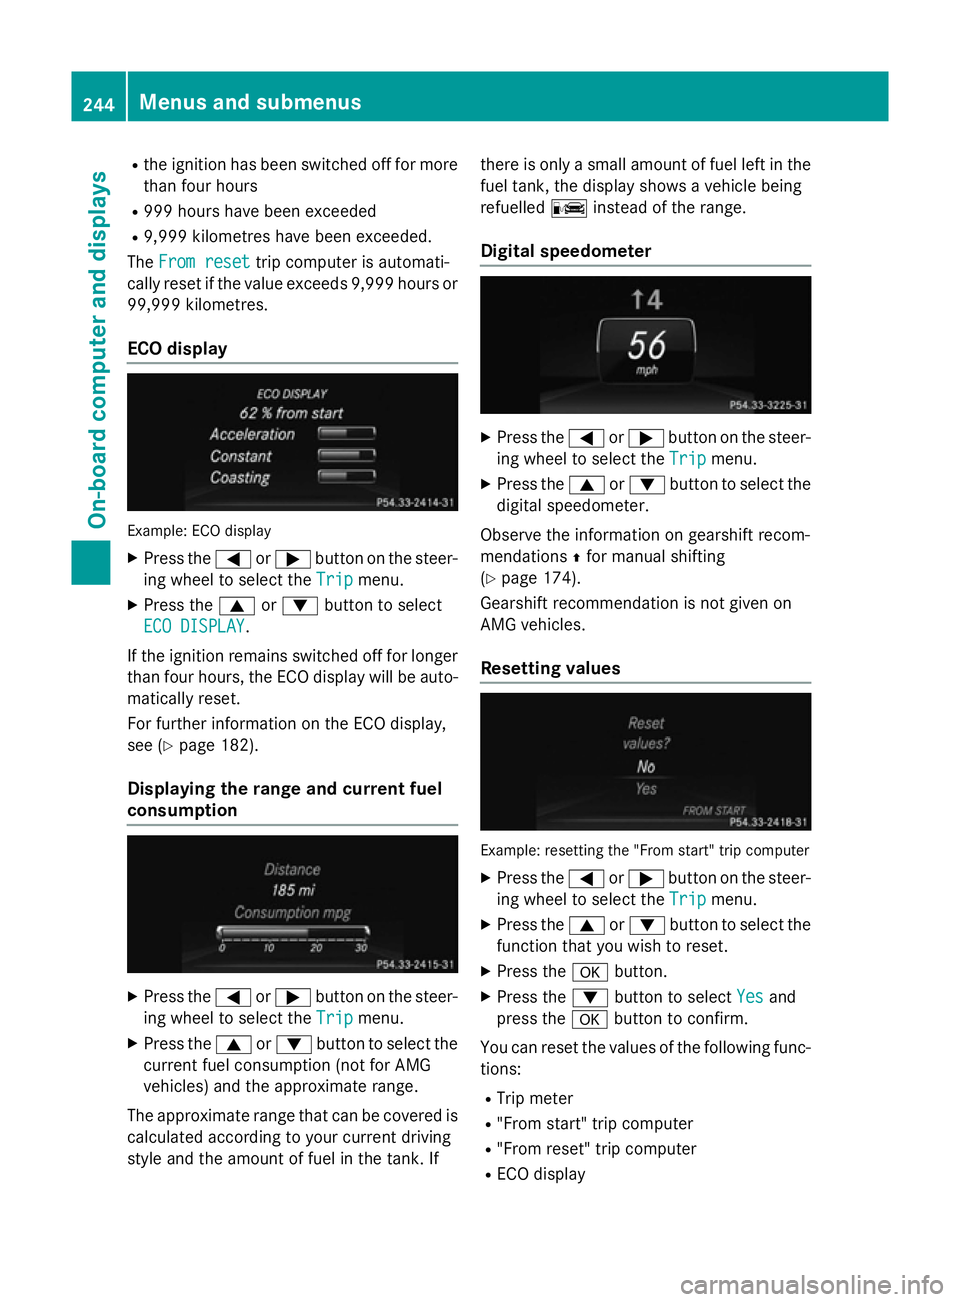
ECO display Example: ECO display
X Press the =or; button on the steer-
ing wheel to select the Trip
Tripmenu.
X Press the 9or: button to select
ECO DISPLAY
ECO DISPLAY.
If the ignition remains switched off for longer than four hours, the ECO display will be auto-
matically reset.
For further information on the ECO display,
see (Y page 182).
Displaying the range and current fuel
consumption X
Press the =or; button on the steer-
ing wheel to select the Trip Tripmenu.
X Press the 9or: button to select the
current fuel consumption (not for AMG
vehicles) and the approximate range.
The approximate range that can be covered is calculated according to your current driving
style and the amount of fuel in the tank. If there is only a small amount of fuel left in the
fuel tank, the display shows a vehicle being
refuelled Cinstead of the range.
Digital speedometer X
Press the =or; button on the steer-
ing wheel to select the Trip Tripmenu.
X Press the 9or: button to select the
digital speedometer.
Observe the information on gearshift recom-
mendations Zfor manual shifting
(Y page 174).
Gearshift recommendation is not given on
AMG vehicles.
Resetting values Example: resetting the "From start" trip computer
X Press the =or; button on the steer-
ing wheel to select the Trip Tripmenu.
X Press the 9or: button to select the
function that you wish to reset.
X Press the abutton.
X Press the :button to select Yes
Yesand
press the abutton to confirm.
You can reset the values of the following func- tions:
R Trip meter
R "From start" trip computer
R "From reset" trip computer
R ECO display 244
Menus and submenusOn-board computer and displays
Page 372 of 417
10 kPa (0.1 bar/1.5 psi) per 10 †. Take this
into account when checking the pressure of
warm tyres. Only correct the tyre pressure if it
is too low for the current operating condi-
tions.
Driving with tyre pressure that is too high or
too low can:
R shorten the service life of the tyres
R cause increased tyre damage
R have a negative effect on handling charac-
teristics and thus driving safety (e.g. aqua-
planing)
i The tyre pressure values given for low
loads are minimum values which offer you
good ride comfort characteristics.
However, you can also use the values given for higher loads. These are permissible and
will not adversely affect the running of the
vehicle.
For speeds up to 210 km/h (does not
apply to AMG vehicles): for speeds up to
210 km/h, the values given on the tyre pres- sure information label (fuel filler flap) may be
reduced by 20 kPa (0.2 bar/3 psi) without a
reduction in safety.
This improves the ride comfort of your vehi-
cle; however, fuel consumption may increase
slightly. Tyre pressure loss warning system
General notes While the vehicle is in motion, the tyre pres-
sure loss warning system monitors the set
tyre pressure using the rotational speed of
the wheels. This enables the system to detect significant pressure loss in a tyre. If the speed
of rotation of a wheel changes as a result of a loss of pressure, a corresponding warning
message will appear in the multifunction dis- play.
You can recognise the tyre pressure loss
warning by the Run Flat Indicator
Run Flat Indicator
active Restart with OK active Restart with OK message whichappears in the
Serv.
Serv.menu of the multifunc-
tion display. Information on the message dis- play can be found in the "Restarting the tyre
pressure loss warning system" section
(Y page 369).
Important safety notes The tyre pressure warning system does not
warn you of an incorrectly set tyre pressure.
Observe the notes on the recommended tyre
pressure (Y page 367).
The tyre pressure loss warning does not
replace the need to regularly check the tyre
pressures. An even loss of pressure on sev-
eral tyres at the same time cannot be detec-
ted by the tyre pressure loss warning system.
The tyre pressure monitor is not able to warn you of a sudden loss of pressure, e.g. if the
tyre is penetrated by a foreign object. In the
event of a sudden loss of pressure, bring the
vehicle to a halt by braking carefully. Avoid
abrupt steering manoeuvres.
The function of the tyre pressure loss warning
system is limited or delayed if:
R snow chains are fitted to your vehicle's
tyres
R road conditions are wintry
R you are driving on sand or gravel
R you adopt a very sporty driving style (cor-
nering at high speeds or driving with high
rates of acceleration)
R you are towing a very heavy or large trailer
R you are driving with a heavy load (in the
vehicle or on the roof)
Restarting the tyre pressure loss warn-
ing system Restart the tyre pressure loss warning system
if you have:
R changed the tyre pressure
R changed the wheels or tyres
R fitted new wheels or tyres
X Before restarting, make sure that the tyre
pressures are set properly on all four tyres Tyre pressure
369Wheels and tyres Z
Page 381 of 417
X
Tighten the last wheel bolt until it is finger-
tight.
X Vehicles with a collapsible emergency
spare wheel: inflate the collapsible emer-
gency spare wheel (Y page 392).
Only then lower the vehicle.
Lowering the vehicle G
WARNING
The wheels could work loose if the wheel nuts and bolts are not tightened to the specified
tightening torque. There is a risk of accident.
Have the tightening torque immediately
checked at a qualified specialist workshop
after a wheel is changed.
! Vehicles with a collapsible emergency
spare wheel: Inflate the collapsible emer-
gency spare wheel using the tyre inflation
compressor before lowering the vehicle.
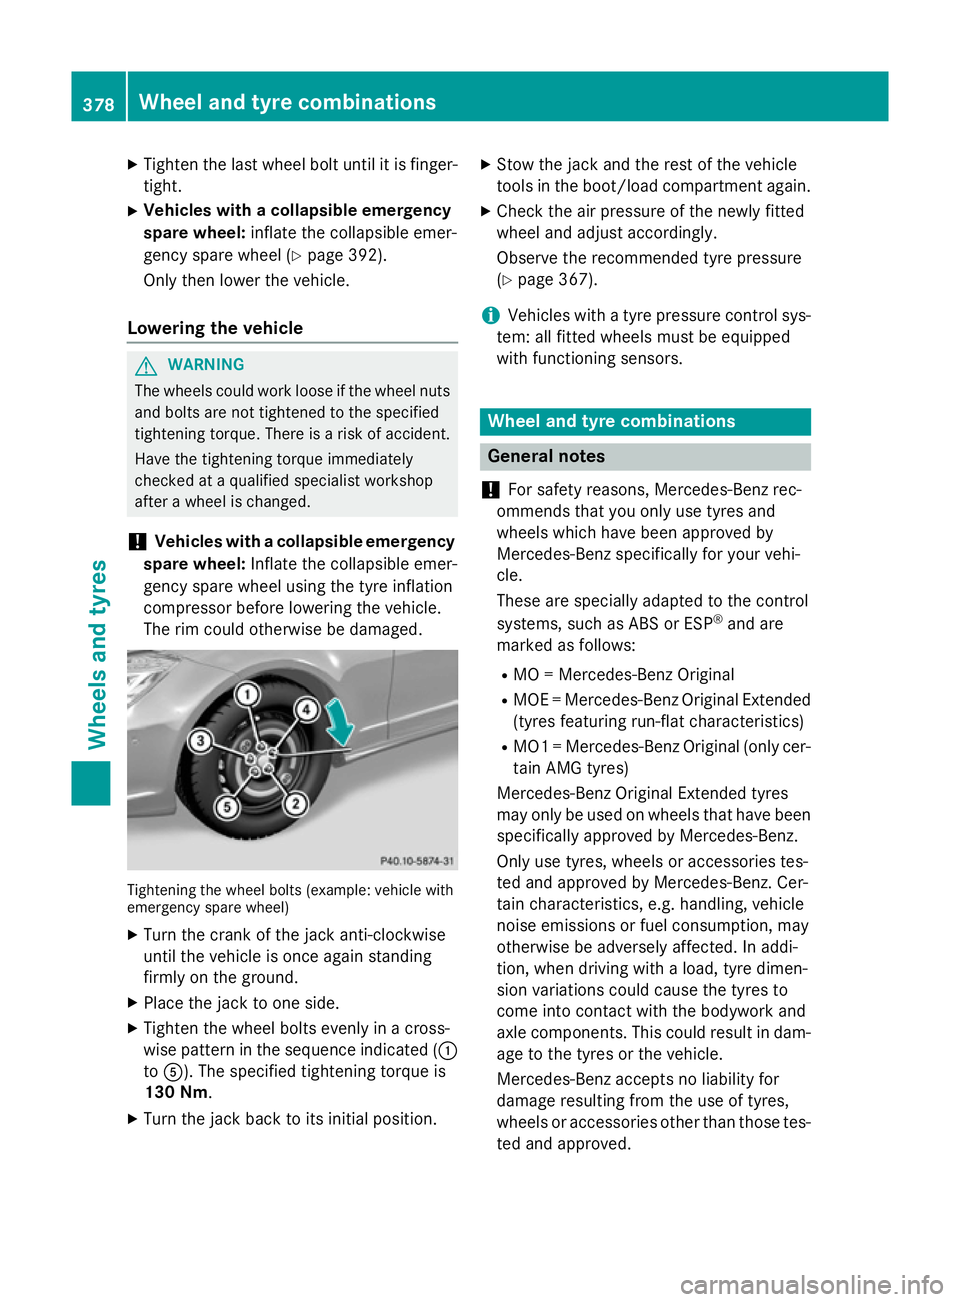
The rim could otherwise be damaged. Tightening the wheel bolts (example: vehicle with
emergency spare wheel)
X Turn the crank of the jack anti-clockwise
until the vehicle is once again standing
firmly on the ground.
X Place the jack to one side.
X Tighten the wheel bolts evenly in a cross-
wise pattern in the sequence indicated ( :
to A). The specified tightening torque is
130 Nm.
X Turn the jack back to its initial position. X
Stow the jack and the rest of the vehicle
tools in the boot/load compartment again.
X Check the air pressure of the newly fitted
wheel and adjust accordingly.
Observe the recommended tyre pressure
(Y page 367).
i Vehicles with a tyre pressure control sys-
tem: all fitted wheels must be equipped
with functioning sensors. Wheel and tyre combinations
General notes
! For safety reasons, Mercedes-Benz rec-
ommends that you only use tyres and
wheels which have been approved by
Mercedes-Benz specifically for your vehi-
cle.
These are specially adapted to the control
systems, such as ABS or ESP ®
and are
marked as follows:
R MO = Mercedes-Benz Original
R MOE = Mercedes-Benz Original Extended
(tyres featuring run-flat characteristics)
R MO1 = Mercedes-Benz Original (only cer-
tain AMG tyres)
Mercedes-Benz Original Extended tyres
may only be used on wheels that have been
specifically approved by Mercedes-Benz.
Only use tyres, wheels or accessories tes-
ted and approved by Mercedes-Benz. Cer-
tain characteristics, e.g. handling, vehicle
noise emissions or fuel consumption, may
otherwise be adversely affected. In addi-
tion, when driving with a load, tyre dimen-
sion variations could cause the tyres to
come into contact with the bodywork and
axle components. This could result in dam- age to the tyres or the vehicle.
Mercedes-Benz accepts no liability for
damage resulting from the use of tyres,
wheels or accessories other than those tes-
ted and approved. 378
Wheel and tyre combinationsWheels and tyres