oil MERCEDES-BENZ CLS COUPE 2018 Owners Manual
[x] Cancel search | Manufacturer: MERCEDES-BENZ, Model Year: 2018, Model line: CLS COUPE, Model: MERCEDES-BENZ CLS COUPE 2018Pages: 589, PDF Size: 10.95 MB
Page 168 of 589
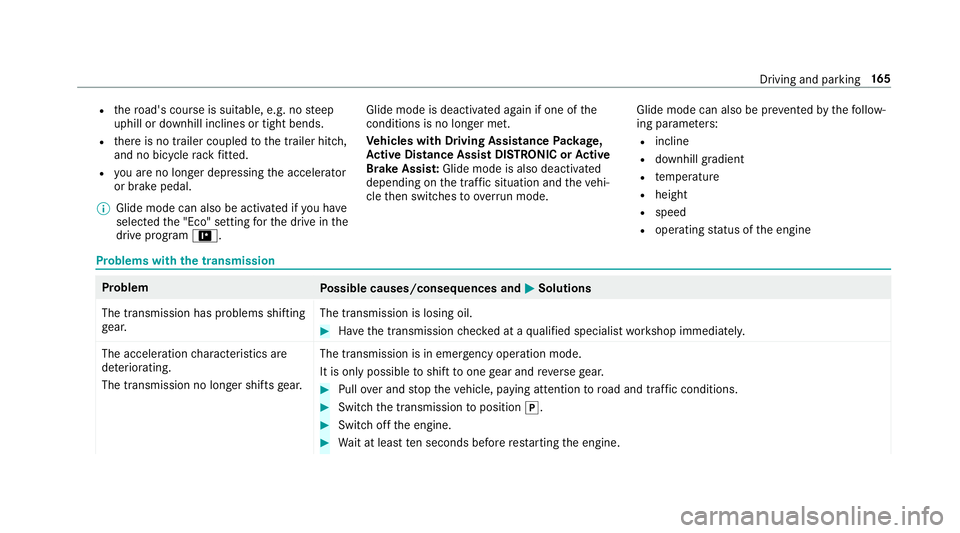
R
thero ad's course is suitable, e.g. no steep
uphill or downhill inclines or tight bends.
R there is no trailer coupled tothe trailer hitch,
and no bicycle rack fitted.
R you are no lon ger depressing the accelera tor
or brake pedal.
% Glide mode can also be activated if you ha ve
selected the "Eco" setting forth e drive in the
drive prog ram =. Glide mode is deactivated again if one of
the
conditions is no longer met.
Ve hicles with Driving Assistance Package,
Ac tive Di stance Assist DISTRO NIC orActive
Brake Assi st:Glide mode is also deacti vated
depending on the traf fic situation and theve hi‐
cle then switches to overru n mode. Glide mode can also be pr
evented bythefo llow‐
ing parame ters:
R incline
R downhill gradient
R temp erature
R height
R speed
R operating status of the engine Problems with
the transmission Problem
Possible causes/consequences and M
MSolutions
The transmission has problems shifting
ge ar. The transmission is losing oil. #
Have the transmission checked at a qualified specialist workshop immediatel y.
The acceleration characteristics are
de teriorating.
The transmission no longer shifts gear. The transmission is in emer
gency operation mode.
It is only possible toshift toone gear and reve rsege ar. #
Pull over and stop theve hicle, paying attention toroad and traf fic conditions. #
Switch the transmission toposition j. #
Switch off the engine. #
Wait at least ten seconds be fore re starting the engine. Driving and parking
16 5
Page 170 of 589
#
Do not get into theve hicle again during
th ere fuelling process.
Otherwise, electros tatic charge could
build up again. &
WARNING Risk offire from fuel mixture
Ve hicles with a diesel engine:
If yo u mix diesel fuel with petrol, theflash
point of the fuel mixture is lo werth an that of
pure diesel fuel.
While the engine is running, component
pa rts in theex haust sy stem may overheat
without warning. #
Neverre fuel using petrol. #
Never mix petrol with diesel fuel. *
NO
TEDama gecaused bythe wrong fuel Ve
hicles with a petrol engine:
Even small amounts of the wrong fuel could
re sult in damage tothe fuel sy stem, the
engine and the emission control sy stem. #
Only refuel using unleaded, sulphu r-free
fuel that con form sto European EN 228,
or an equi valent specification. #
The RONrequ irement is located in the
fuel filler flap.
Fu el of this specification may con tain up to
10 %ethanol. Your vehicle is suitable for use
with E10 fuel.
Ne verre fuel using:
R diesel
R regular petrol with an octane number
lo we rth an 91 RON
R petrol with more than 10%ethanol byvol‐
ume, e.g. E15, E20, E85, E100
R petrol with more than 3% me thanol by
vo lume, e.g. M15, M30
R petrol with additives con taining me tal
If yo u acciden tally refuel with the wrong fuel: #
Do not switch the ignition on. #
Consult a qualified specialist workshop. *
NO
TEDama gecaused bythe wrong fuel Ve
hicles with a diesel engine:
Even small amounts of the wrong fuel could
re sult in damage tothe fuel sy stem, the
engine and the emission control sy stem. #
Only refuel using sulphu r-free diesel
fuel that con form sto European stand‐
ard EN 590, or an equivalent specifica‐
tion.
In countries without sulphur-f ree diesel
fuel, only refuel with lo w-sulphur diesel
fuel with a sulphur content less than
50 ppm. #
Vehicles without diesel particulate
fi lter: refuel using only diesel fuel with
a sulphur content less than 500 ppm.
Ne verre fuel using:
R petrol
R marine diesel
R heating oil
R pure bio-diesel fuel or vege table oil Driving and parking
167
Page 184 of 589
Fu
nction of thera dar senso rs Some driving and driving sa
fety sy stems use
ra dar sensors tomonitor the area in front of,
behind or next totheve hicle (depending on the
ve hicle's equipment).
Depending on theve hicle's equipment, thera dar
sensors are integrated behind the bumpers
and/or behind the Mercedes star. Keep these
parts free of dirt, ice and slush (→ page 400).
The sensors must not be co vered, forex ample
by cycle rack s, ove rhanging loads, sticke rs,fo il
or foils toprotect against stone chipping. In the
eve nt of dama getothe bumpers or radiator
grille, or following a collision impacting the
bumpers or radiator grille, ha vethe function of
th era dar sensors checked at a qualified special‐
ist workshop. The driver assis tance sy stem may
no longer workproper ly. Overview of driving sy
stems and driving
saf ety sy stems In
this section, you will find information about
th efo llowing driving sy stems and driving saf ety
sy stems:
R 360° Camera (→ page 220)
R ABS (A nti-lock Braking System)
(→ page 182)
R Active Dis tance Assi stDISTRONIC
(→ page 196)
R Adaptive brake lights (→ page192)
R AIR BODY CONTROL (→ page210)
R Active Brake Assi st (→page 187)
R Active Lane Keeping Assist (→ page243)
R ATTENTION ASSIST (→ page 235)
R BAS (Brak eAssist System) (→ page182)
R Hill Start Assist (→ page 208)
R DYNA MIC BODY CONTROL (→ page 209)
R EBD ( Electronic Brakefo rc eDistribution)
(→ page 186) R
ESP ®
(Electronic Stability Program)
(→ page 182)
R Speed Limit Assist (→ page 237)
R Active Speed Limit Assi st (→page 200)
R HOLD function (→ page 208)
R STEER CONTROL (→ page 187)
R Active Steering Assist (→ page 202)
R Speed limiter (→ page193)
R Active Parking Assist (→ page 224)
R Parking Assist PARKTRONIC (→ page213)
R Reversing camera (→ page217)
(→ page 222)
R Cruise control (→ page192)
R Blind Spot Assist and Active Blind Spot Assi st
( → page 241) (→ page241)
R Traf fic Sign Assi st (→page 238) Driving and parking
181
Page 261 of 589
Ad
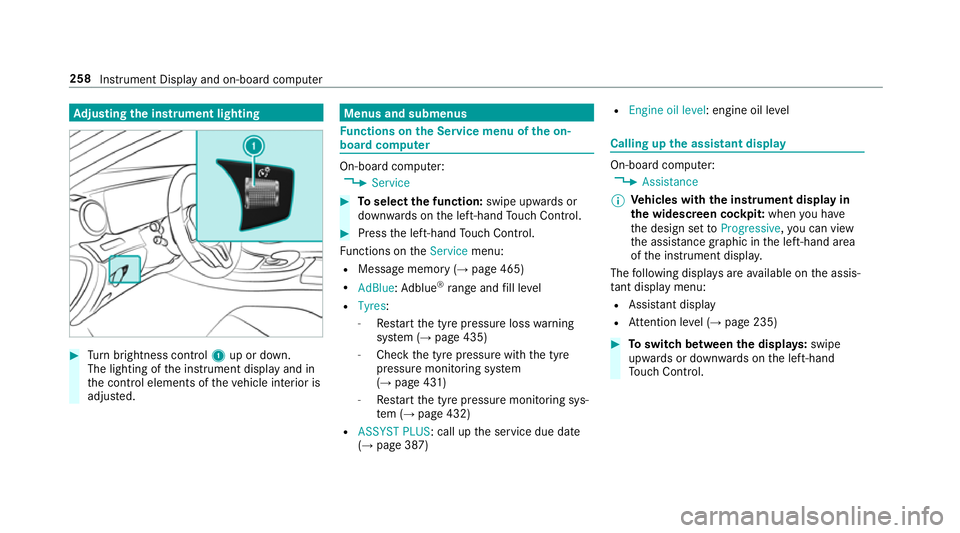
justing the in stru ment lighting #
Turn brightness control 1up or down.
The lighting of the instrument display and in
th e control elements of theve hicle interior is
adjus ted. Menus and submenus
Fu
nctions on the Service menu of the on-
board compu ter On-board computer:
, Service #
Toselect the function: swipe upwards or
down wards on the left-hand Touch Control. #
Press the left-hand Touch Control.
Fu nctions on theService menu:
R Message memory (→ page 465)
R AdBlue :Ad blue ®
ra nge and fill le vel
R Tyres:
- Restart the tyre pressure loss warning
sy stem (→ page 435)
- Check the tyre pressure with the tyre
pressure monitoring sy stem
(→ page 431)
- Restart the tyre pressure monitoring sys‐
te m (→ page 432)
R ASSYST PLUS : call upthe service due date
(→ page 387) R
Engine oil level: engine oil le vel Calling up
the assistant display On-board computer:
, Assistance
% Ve
hicles with the instrument display in
th e widescreen cockpit: whenyou ha ve
th e design set toProgressive ,yo u can view
th e assis tance graphic in the left-hand area
of the instrument displa y.
The following displa ysare available on the assis‐
ta nt displ aymenu:
R Assis tant displ ay
R Attention le vel (→ page 235) #
Toswitch between the displa ys:swipe
upwards or down wards on the left-hand
To uch Control. 258
Instru ment Display and on-board computer
Page 276 of 589
Vo
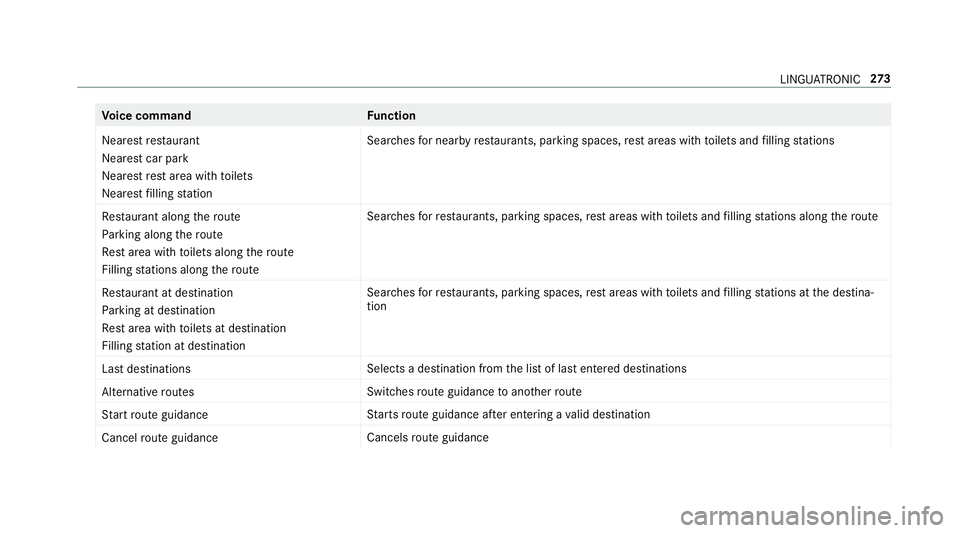
ice command Function
Nearest restaurant
Nearest car park
Nearest rest area with toilets
Nearest filling station Sear
ches for nearby restaurants, parking spaces, rest areas with toilets and filling stations
Restaurant along the route
Parking along the route
Rest area with toilets along the route
Filling stations along the route Sear
ches forre staurants, parking spaces, rest areas with toilets and filling stations along thero ute
Restaurant at destination
Parking at destination
Rest area with toilets at destination
Filling station at destination Sea
rches forre staurants, parking spaces, rest areas with toilets and filling stations at the destina‐
tion
Last destinations Selects a destination from
the list of last entered destinations
Alternative routes Switches
route guidance toano ther route
Start route guidance St
arts route guidance af ter entering a valid destination
Cancel route guidance Cancels
route guidance LINGU
ATRO NIC 273
Page 391 of 589
needs
tobe per form ed more of tenth an speci‐
fi ed based on the actual operating conditions
and/or loads.
Examples of arduous operating conditions:
R regular city driving with frequent intermedi‐
ate stops
R mainly short-dis tance driving
R frequent operation in mountainous terrain or
on poor road sur faces
R when the engine is of ten le ftidling for long
periods
R operation in particula rly dusty conditions
and/or if air-recirculation mode is frequently
used
In these or similar operating conditions, ha vethe
interior air filter, engine air cleaner, engine oil
and oil filter etc. changed more frequent ly. The
ty re s must be checked more frequently if the
ve hicle is operated under increased loads. Fur‐
th er information can be obtained at a qualified
specialist workshop. Battery disconnection periods
The ASS
YST PLUS se rvice inter val display
can only calculate the service due da tewhen
th e bat tery is connected. #
Notedown the service due date displa yed on
th e instrument display before disconnecting
th e battery (→ page 387). Engine compartment
Ac
tive bonn et(pedestrian pr otection) Operation of
the active bonnet (pedestrian
pr otection)
In cer tain accident situations, therisk of injury
to pedestrians can be reduced bythe actuation
of the active bonn et. The rear area of the engine
bonn etisraised byappr oximately 85 mm.
Fo rth e drive tothewo rkshop, reset the trig‐
ge red active bonn etyourself. Af terth e active
bonn ethas been triggered, pedestrian pr otection
may be limited.
A qu alified specialist workshop must re-ins tate
th e full functionality of the active bonn et. The active bonnet is not
available in all coun‐
tries.
Re setting the active bonnet &
WARNING Danger of bu rns from hot
component parts in the engine compart‐
ment
Cer tain component parts in the engine com‐
partment may be very hot, e.g. the engine,
th era diator and parts of theex haust sy stem. #
Let the engine cool down and only
to uch the component parts described
below: 388
Maintenance and care
Page 394 of 589
#
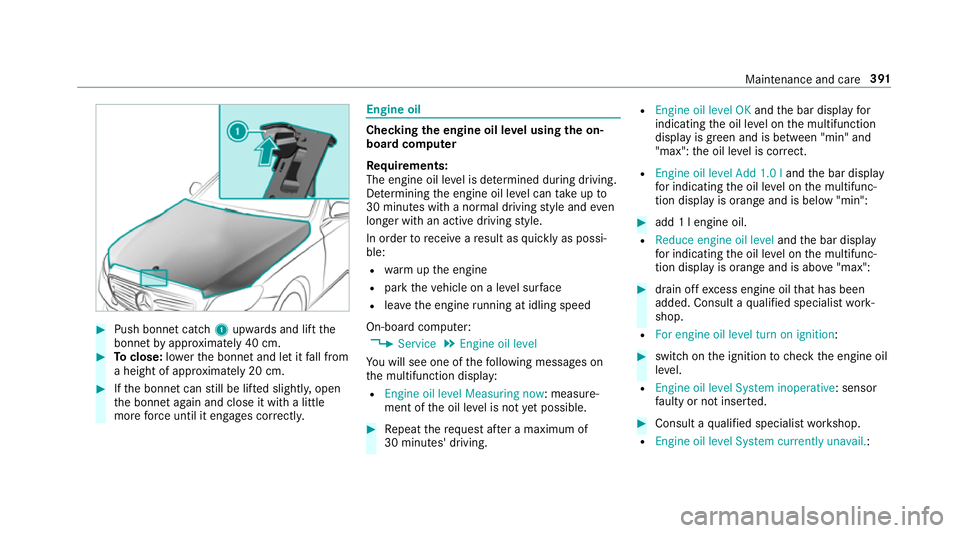
Push bonnet catch 1upwards and lift the
bonn etby appr oximately 40 cm. #
Toclose: lowe rth e bonn etand let it fall from
a height of appr oximately 20 cm. #
Ifth e bonn etcan still be lif ted slightl y,open
th e bonn etagain and close it with a little
more forc e until it engages cor rectly. Engine oil
Che
cking the engine oil le vel using the on-
board compu ter
Re quirements:
The engine oil le vel is de term ined during driving.
De term ining the engine oil le vel can take up to
30 minutes with a normal driving style and even
longer with an active driving style.
In order torecei veare sult as quickly as possi‐
ble:
R warm upthe engine
R park theve hicle on a le vel sur face
R leave the engine running at idling speed
On-board compu ter:
, Service .
Engine oil level
Yo u will see one of thefo llowing messages on
th e multifunction display:
R Engine oil level Measuring now : measure‐
ment of the oil le vel is not yet possible. #
Repeat there qu est af ter a maximum of
30 minutes' driving. R
Engine oil level OK andthe bar display for
indicating the oil le vel on the multifunction
display is green and is between "min" and
"max": the oil le vel is cor rect.
R Engine oil level Add 1.0 l andthe bar display
fo r indicating the oil le vel on the multifunc‐
tion display is orange and is below "min": #
add 1 l engine oil.
R Reduce engine oil level andthe bar display
fo r indicating the oil le vel on the multifunc‐
tion display is orange and is abo ve"max": #
drain off excess engine oil that has been
added. Consult a qualified specialist work‐
shop.
R For engine oil level turn on ignition: #
switch on the ignition tocheck the engine oil
le ve l.
R Engine oil level System inoperative : sensor
fa ulty or not inser ted. #
Consult a qualified specialist workshop.
R Engine oil level System currently unavail. : Maintenance and care
391
Page 395 of 589
#
close the bonn et.
To pping up engine oil &
WARNING Danger of bu rns from hot
component parts in the engine compart‐
ment
Cer tain component parts in the engine com‐
partment may be very hot, e.g. the engine,
th era diator and parts of theex haust sy stem. #
Let the engine cool down and only
to uch the component parts described
below: &
WARNING Risk offire and injury from
engine oil
If engine oil comes into con tact wi thhot
component parts in the engine compart‐
ment, it may ignite. #
Make sure that no engine oil is spilled
next tothefiller opening. #
Allow the engine tocool off and thor‐
oughly clean the engine oil from compo‐
nent parts before starting theve hicle. *
NO
TEEngine dama gecaused byan
incor rect oil filter, incor rect oil or addi‐
tives #
Do not use engine oils or oil filters
which do not cor respond tothe specifi‐
cations explicitly prescribed forthe
service inter vals. #
Do not alter the engine oil or oil filter in
order toachie velonger change inter vals
th an presc ribed. #
Do not use additives. #
Follow the instructions in the service
inter val display rega rding the oil
ch ange. *
NO
TEDama gecaused bytopping up too
much engine oil To
pping up too much engine oil can cause
damage tothe engine or the catalytic con‐
ve rter. #
Have excess engine oil remo ved at a
qu alified specialist workshop. 392
Maintenance and care
Page 396 of 589

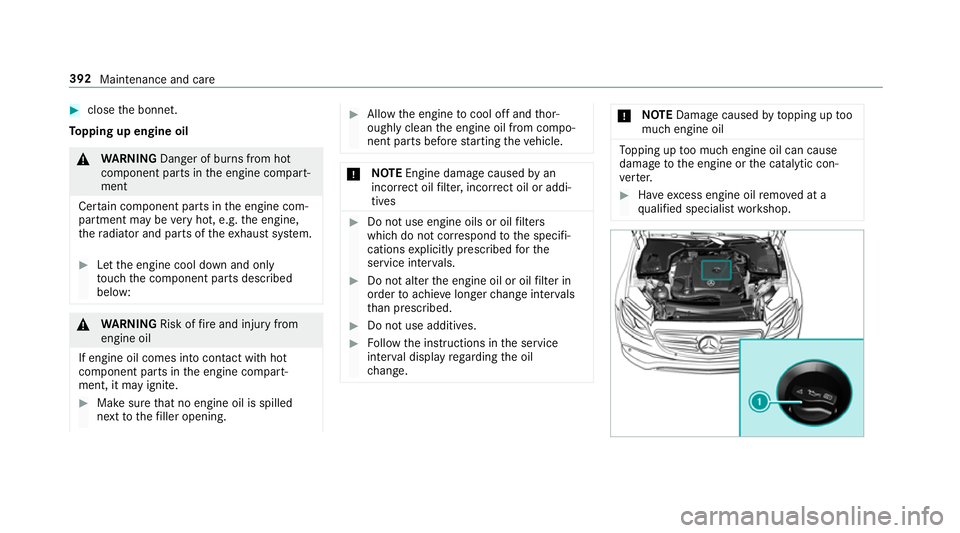
#
Turn cap 1anti-clockwise and remo veit. #
Top up the engine oil. #
Replace cap 1and turn it clockwise as far
as it will go. #
Check the oil le vel again (→ page 391). Checking
the coolant le vel &
WARNING Danger of bu rns from hot
component parts in the engine compart‐
ment
Cer tain component parts in the engine com‐
partment may be very hot, e.g. the engine,
th era diator and parts of theex haust sy stem. #
Let the engine cool down and only
to uch the component parts described
below: &
WARNING Danger of bu rns when open‐
ing the bonn et
If yo u open the engine bonn etwhen the
engine has overheated or during a fire inthe
engine compartment, you could come into
contact with hot gases or other escaping
operating fluids. #
Before opening the bonn et, allow the
engine tocool down. #
Intheeve nt of a fire inthe engine com‐
partment, keep the engine bonn et
closed and call thefire service. &
WARNING Risk of scalding from hot
coolant
The engine cooling sy stem is pressurised,
particularly when the engine is warm. If you
open the cap, you could be scalded byhot
coolant spr aying out. #
Let the engine cool down before open‐
ing the cap. #
When opening the cap, wear pr otective
gl ove s and saf etygl asses. #
Open the cap slowly torelease pres‐
sure. #
Park theve hicle on a le vel sur face. Maintenance and care
393
Page 399 of 589
Information on using a high-p
ressure cleaner &
WARNING Risk of an accident when
using high-pressure cleane rswith circu‐
lar jet nozzles
The wate r jet of a circular jet nozzle (dirt
grinder) can cause extern ally invisible dam‐
age tothe tyres or chassis parts.
Components damaged in this wa y may unex‐
pec tedly fail. #
Do not use high-pressure cleaners with
circular jet nozzles toclean theve hicle. #
Have damaged tyres or chassis parts
re placed immediatel y.To
avo id damage to yourvehicle, obser vethefo l‐
lowing when using a high-pressure cleaner:
R keep theke y at least 3 m away from theve hi‐
cle. Otherwise the boot lid could open unin‐
te ntional ly. R
maintain a dis tance of at least 30 cm tothe
ve hicle.
R vehicles with deco rative foil: parts of your
ve hicle are co vered with a decorative foil.
Maintain a dis tance of at least 70 cm
between thefo il-c ove red parts of theve hicle
and the nozzle of the high-pressure cleaner.
Mo vethe high-pressure cleaner nozzle
around whilst cleaning. The waterte mp era‐
ture of the high-pressure cleaner must not
exc eed 60 °C.
R obser vethe information on the cor rect dis‐
ta nce in the equipment manufacturer's oper‐
ating instructions.
R do not point the nozzle of the high-pressure
cleaner directly at sensitive parts such as
tyres, slits, electrical components, bat teries,
light bulbs and ventilation sl ots. Wa
shing theve hicle byhand Obser
vethe legal requ irements, e.g. in a number
of countries, washing byhand is only permitted
in specially designated wash ba ys. #
Use a mild cleaning agent, e.g. car shampoo. #
Washtheve hicle with luk ewarmwate r using
a soft car sponge. When doing so, do not
ex pose theve hicle todirect sunlight. #
Carefully hose theve hicle off with water and
dry using a chamois. Take care not topoint
th ewate r jet directly towa rdsth e air inlet
grille. 396
Maintenance and care