garage door opener MERCEDES-BENZ CLS SHOOTING BRAKE 2012 Owners Manual
[x] Cancel search | Manufacturer: MERCEDES-BENZ, Model Year: 2012, Model line: CLS SHOOTING BRAKE, Model: MERCEDES-BENZ CLS SHOOTING BRAKE 2012Pages: 405, PDF Size: 10.21 MB
Page 14 of 405
Folding in whe
nlocking (on-board
computer) ...................................... 245
Out of position (troubleshooting) ...109
Parking position ............................. 110
Resetting ....................................... 109
Storing settings (memory func-
tion) ............................................... 111F
Faul tmessage
see Display messages
Filler cap
see Fuel filler flap
Fire extinguisher ............................... 335
First-aid kit ......................................... 334
Fitting awheel
Removing awheel .......................... 365
Fitting wheels
Fitting awheel ............................... 366
Lowering the vehicle ......................366
Raising the vehicle .........................364
Securing the vehicle against roll-
ing away ........................................ 363
Flat tyre
MOExtended tyres .........................337
Preparing the vehicle .....................336
TIREFIT kit ...................................... 338
Floormat ............................................ .317
Foglamps (extende drange) .............. 120
Frequencies Garage door opener .......................314
Mobile phone ................................. 383
Two-way radio ................................ 383
Front foglamps
Display message ............................ 257
Fuel
Additives ........................................ 389
Consumption information ..............390
Consumption statistics ..................231
Displaying the current consump-
tion ................................................ 231
Displaying the range ......................231
Fuel gauge ............................... 30, 227
Grade (petrol) ................................ 387
Important safety notes ..................386
Notes for AMG vehicles .................388
Problem (malfunction) ...................164Quality (diesel
)............................... 389
Refuelling ...................................... .161
Tank content/reserve fuel .............387
Fuel filler flap
Emergency release ........................163
Opening/closing ............................ 162
Fuel filte r(white display message) .261
Fuel level Calling up the range (on-board
computer) ...................................... 231
Gauge ...................................... 30, 227
Fuel reserve
see Fuel
Fuel tank
Capacity ........................................ 387
Problem (malfunction) ...................164
Fuse allocation chart (vehicle tool
kit) ...................................................... 335
Fuses Allocation chart ............................. 350
Before changing ............................. 350
Fuse box in the boot ......................351
Fuse box in the engine compart-
ment .............................................. 350
Fuse box in the luggage compart-
ment .............................................. 351
Important safety notes ..................350 G
Garage door opener Clearing the memory .....................313
Frequencies ................................... 314
Important safety notes ..................311
Opening/closing the garage door ..313
Programming (button in the rear-
view mirror) ................................... 312
Gear indicator (on-board com-
puter) ................................................. .246
Gearshift program SETUP (on-board computer) ..........246
Genuine Mercedes-Benz parts .........382
Glove compartment ..........................291 Index
11
Page 19 of 405
Rear compartment
Setting the ai rvents. ..................... 143
Rear-compartment seat belt sta-
tus indicator ........................................ 52
Rear foglamp Display message ............................ 257
Switching on/off ........................... 116
Rear seat
Display message ............................ 273
Rear seat (folding the backrest for-
wards/back) ...................................... 293
Rear Seat Entertainment System see Separate operating instructions
Rear-view mirror
Anti-dazzle mode (automatic) ........109
Dipping (manual )........................... 108
Rear window blind ............................305
Rear window heating Problem (fault) ............................... 137
Switching on/off ........................... 137
Rear window wiper
Replacing the wiper blade .............. 127
Switching on/off ........................... 126
Refuelling
Fuel gauge ............................... 30, 227
Important safety notes ..................161
Notes for AMG vehicles .................388
Refuelling proces s......................... 162
see Fuel
Remote control
Auxiliary heating/ventilation .......... 139
Changing the batteries (auxiliary
heating) ......................................... 141
Garage door opener .......................311
Programming (garage door
opener) .......................................... 312
Replacing the battery (auxiliary
heating remote control) .................... 141
Reserve (fuel tank) see Fuel
Reserve fuel
Display message ............................ 260
Warning lamp ................................. 285
Residual heat (climate control) ........138
Restraint system see SRS (Supplemental Restraint
System) Rev counter
........................................ 228
Reverse gear (selector lever) ...........154
Reversing camera Cleaning instructions .....................329
Function/notes ............................. 198
Switching on/off ........................... 199
Reversing lamp
Changing bulbs .............................. 124
Reversing lamp (display message) ..257
Roller sunblind Rea rwindow .................................. 305
Roof carrier ........................................ 302
Roof lining and carpets (cleaning
instructions) ...................................... 332
Roof load (maximum) ........................394 S
Safety Childre ninthe vehicle ..................... 53
Child restraint systems ....................53
Safety net
Attaching ....................................... 298
Important safety information .........298
Safety system
see Driving safety system
Seat
Folding the backres t(rear com-
partment) forwards/back ..............295
Seat backrest display message .....273
Seat belt
Adjusting the driver's and front-
passenger sea tbelt ......................... 50
Adjusting the height ......................... 50
Belt force limiter .............................. 52
Belt tensione r.................................. 52
Centre rear-compartment sea t........ 51
Cleaning ......................................... 331
Display message ............................ 253
Fastening ......................................... 50
Important safety guidelines .............49
Rea rseat belt status indicator .........52
Releasing ......................................... 51
Switching belt adjustment on/off
(on-board computer) ......................245
Warning lamp ................................. 277
Warning lamp (function) ................... 51 16
Index
Page 40 of 405
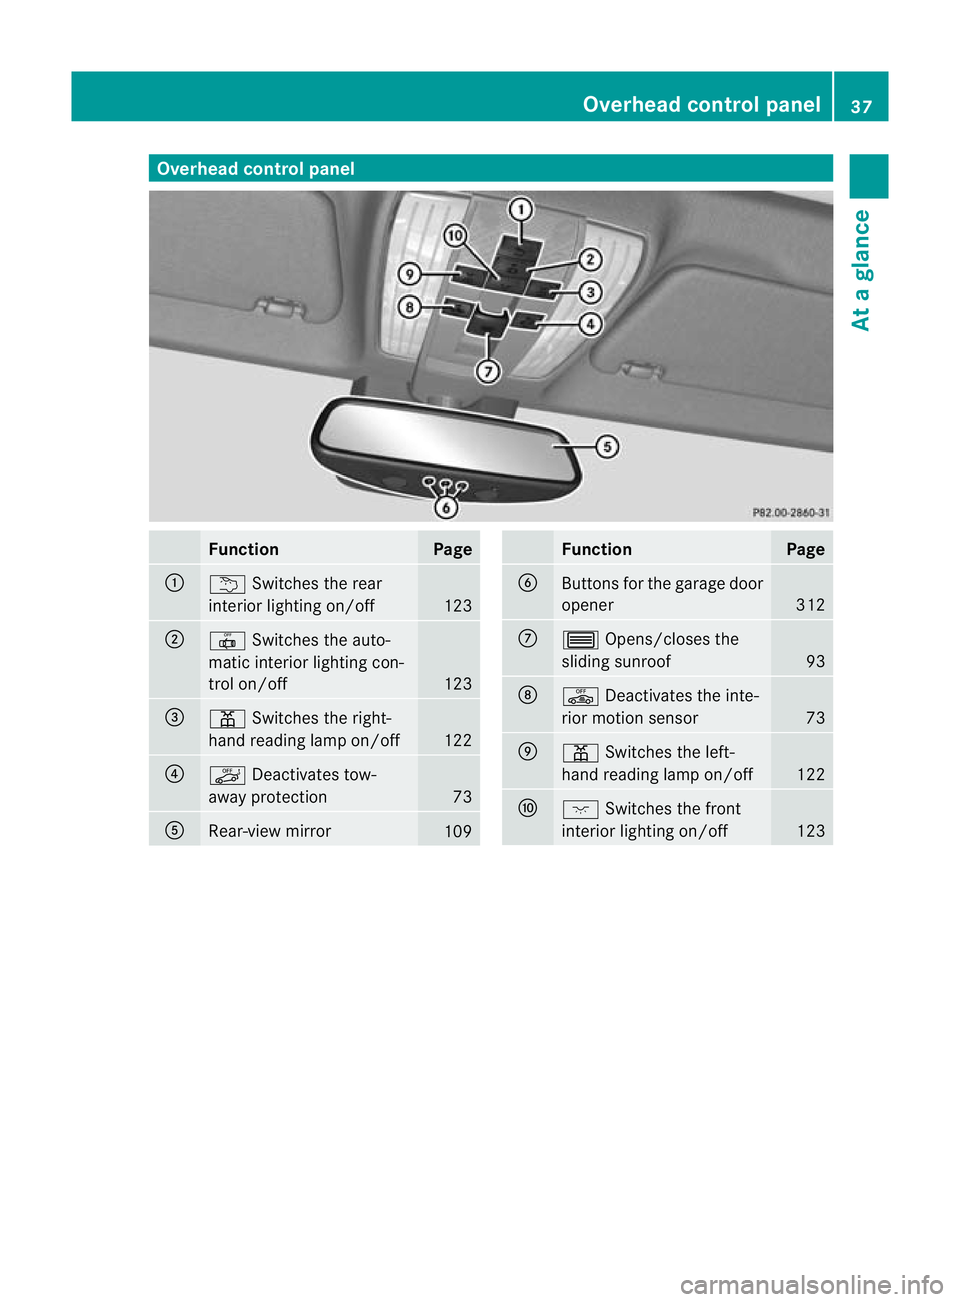
Overhea
dcontrol panel Function Page
:
u
Switches the rear
interio rlighting on/off 123
;
|
Switches the auto-
matic interior lighting con-
trol on/off 123
=
p
Switches the right-
hand reading lamp on/off 122
?
ë
Deactivates tow-
away protection 73
A
Rear-view mirror
109 Function Page
B
Buttons for the garage door
opener
312
C
3
Opens/closes the
sliding sunroof 93
D
ê
Deactivates the inte-
rior motion sensor 73
E
p
Switches the left-
hand reading lamp on/off 122
F
c
Switches the front
interior lighting on/off 123Overhead control panel
37At a glance
Page 314 of 405
Sliding adapter for the mobile phone
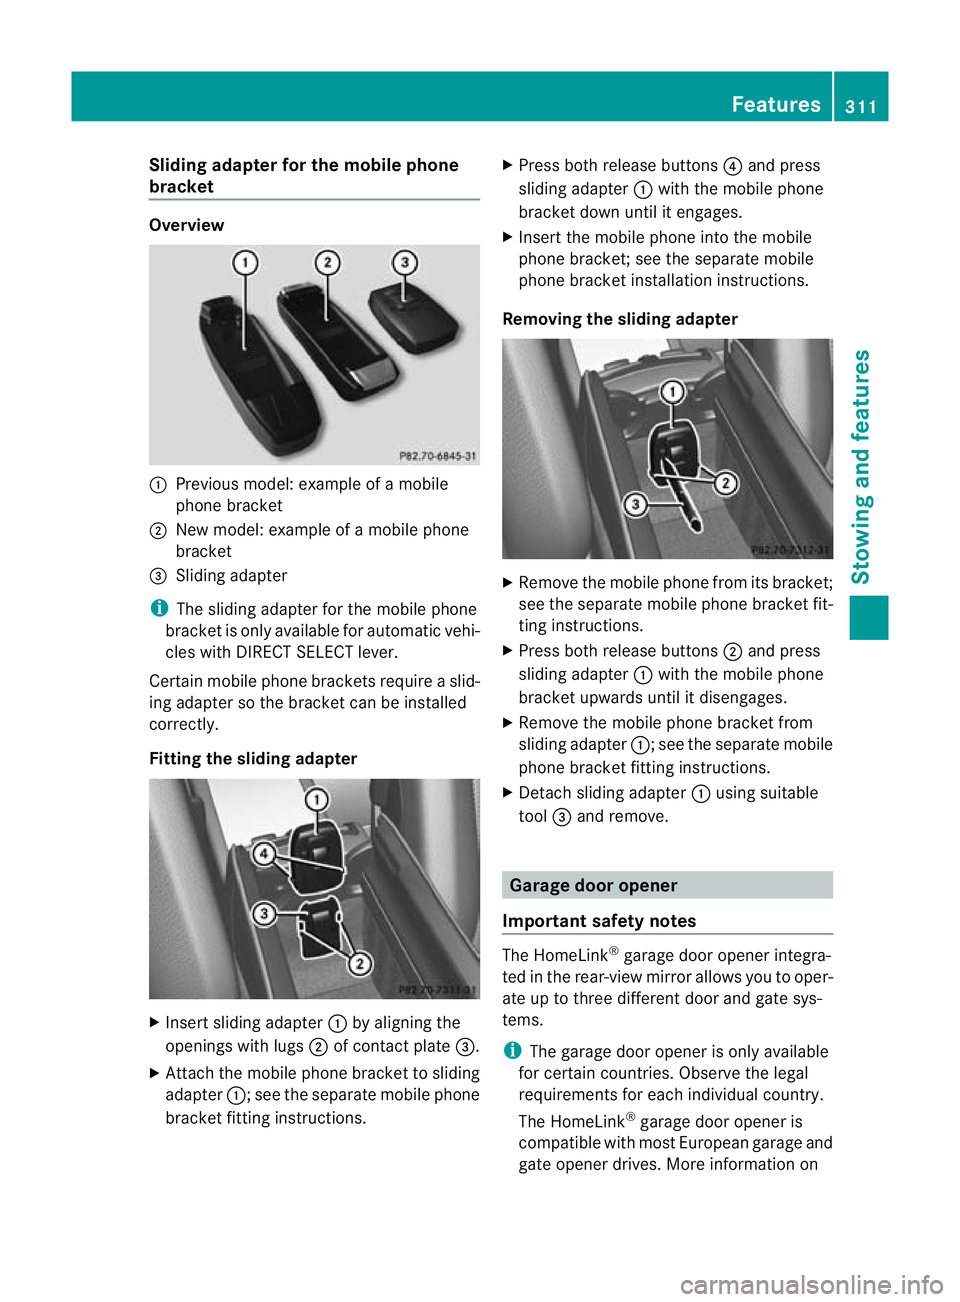
bracket Overview
:
Previous model: example of a mobile
phone bracket
; New model: example of a mobile phone
bracket
= Sliding adapter
i The sliding adapter for the mobile phone
bracket is only available for automatic vehi-
cles with DIRECT SELECT lever.
Certain mobile phone brackets require a slid-
ing adapter so the bracket can be installed
correctly.
Fitting the sliding adapter X
Insert sliding adapter :by aligning the
openings with lugs ;of contact plate =.
X Attach the mobile phone bracket to sliding
adapter :; see the separate mobile phone
bracket fitting instructions. X
Press both release buttons ?and press
sliding adapter :with the mobile phone
bracket down until it engages.
X Insert the mobile phone into the mobile
phone bracket; see the separate mobile
phone bracket installation instructions.
Removing the sliding adapter X
Remove the mobile phone from its bracket;
see the separate mobile phone bracket fit-
ting instructions.
X Press both release buttons ;and press
sliding adapter :with the mobile phone
bracket upwards until it disengages.
X Remove the mobile phone bracket from
sliding adapter :; see the separate mobile
phone bracket fitting instructions.
X Detach sliding adapter :using suitable
tool =and remove. Garage door opener
Important safety notes The HomeLink
®
garage door opener integra-
ted in the rear-view mirror allows you to oper-
ate up to three different door and gate sys-
tems.
i The garage door opener is only available
for certain countries. Observe the legal
requirements for each individual country.
The HomeLink ®
garage door opener is
compatible with most European garage and
gate opener drives. More information on Features
311Stowing and features Z
Page 315 of 405
HomeLink
®
and/o rcompatible products is
available from:
R at a qualified specialised workshop
R the HomeLink ®
hotline
(0) 08000 466 354 65 (free of charge) or
+49 (0) 6838 907 277 (charges apply)
R on the Internet at:
http://www.homelink.com
Programming Programming buttons
G
WARNING
Only press the button on the integrated
garage door opener if there are no persons or
objects present within the sweep of the
garage door. Persons could otherwise be
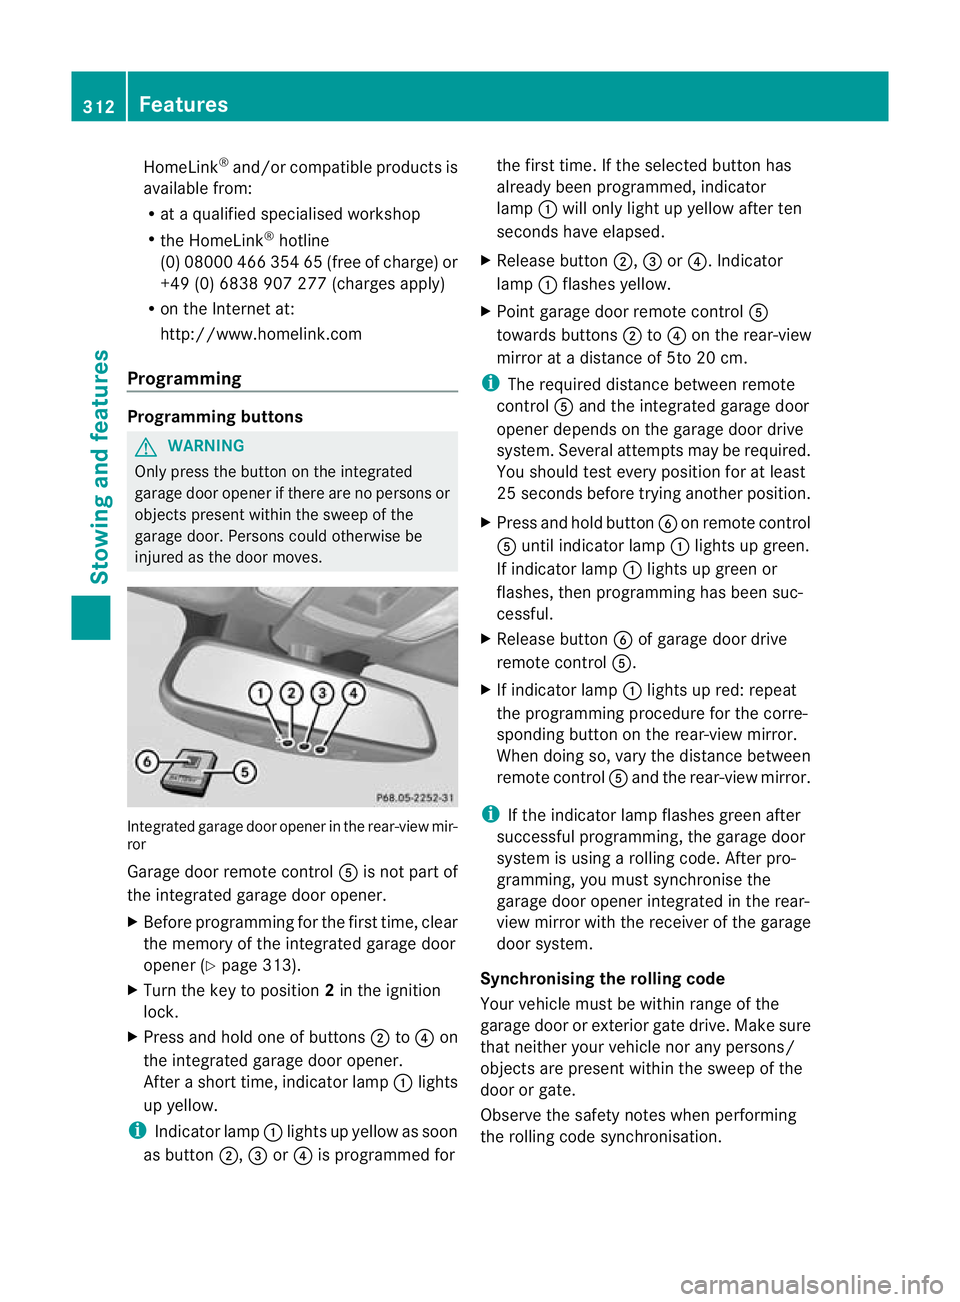
injured as the door moves. Integrated garage door opener in the rear-view mir-
ror
Garage door remote control
Ais not part of
the integrated garage door opener.
X Before programming for the first time, clear
the memory of the integrated garage door
opener (Y page 313).
X Turn the key to position 2in the ignition
lock.
X Press and hold one of buttons ;to? on
the integrated garage door opener.
After a short time, indicator lamp :lights
up yellow.
i Indicator lamp :lights up yellow as soon
as button ;,=or? is programmed for the first time. If the selected button has
already been programmed, indicator
lamp
:will only light up yellow after ten
seconds have elapsed.
X Release button ;,=or?. Indicator
lamp :flashes yellow.
X Point garage door remote control A
towards buttons ;to? on the rear-view
mirror at a distance of 5to 20 cm.
i The required distance between remote
control Aand the integrated garage door
opener depends on the garage door drive
system. Several attempt smay be required.
You should test every positio nfor at least
25 seconds before trying another position.
X Press and hold button Bon remote control
A until indicator lamp :lights up green.
If indicator lamp :lights up green or
flashes, then programming has been suc-
cessful.
X Release button Bof garage door drive
remote control A.
X If indicator lamp :lights up red: repeat
the programming procedure for the corre-
sponding button on the rear-view mirror.
When doing so, vary the distance between
remote control Aand the rear-view mirror.
i If the indicator lamp flashes green after
successful programming, the garage door
system is using a rolling code. After pro-
gramming, you must synchronise the
garage door opener integrated in the rear-
view mirror with the receiver of the garage
door system.
Synchronising the rolling code
Your vehicle must be within range of the
garage door or exterior gate drive. Make sure
that neither your vehicle nor any persons/
objects are present within the sweep of the
door or gate.
Observe the safety notes when performing
the rolling code synchronisation. 312
FeaturesStowing and features
Page 316 of 405
X
Turn the key to position 2in the ignition
lock.
X Press the programming button of the door
or gate drive (see the door or gate drive
operating instructions, e.g. under "Pro-
gramming of additional remote controls").
i Usually, you now have 30seconds to ini-
tiate the next step.
X Press previously programmed button ;,
= or? of the integrated garage door
opener until the door closes.
The rolling code synchronisation is then
complete.
Problems when programming
If you have problems when programming the
integrated garage door opener, please note
the following:
R Check the transmitter frequency of garage
door drive remote control A.This can usu-
ally be found on the back of the remote
control.
R Replace the batteries in garage door
remote control A.This increases the like-
lihood that garage door remote control A
will transmit a strong and precise signal to
the integrated garage door opener in the
rear-view mirror.
R When programming, hold remote control
A at varying distances and angles from the
button which you are programming. Try var-
ious angles at a distance between 5and
30 cm or at the same angle but at varying
distances.
R If there is another remote control for the
same garage door drive, perform the pro-
gramming steps again using this remote
control. Before performing these steps,
make sure that new batteries have been
fitted in garage door drive remote control
A.
R Note that some remote controls transmit
only for a limited period (the indicator lamp
on the remote control goes out). Press but- ton
Bon remote control Aagain before
transmission ends.
R Align the aerial cable of the garage door
opener unit. This can improve signal recep-
tion/transmission.
Opening or closing the garage door Once programmed, the integrated garage
door opener will assume the function of the
garage door system's remote control. Please
also read the operating instructions for the
garage door system.
X
Turn the key to position 2in the ignition
lock.
X Press button ;,=or? which you have
programmed to operate the garage door.
Garage door system with a fixed code: indi-
cator lamp :lights up green.
Garage door system with a rolling code:
indicator lamp :flashes green.
i The transmitter will transmit a signal for
as long as the button is pressed. The trans-
mission is halted after a maximum of ten
seconds and indicator lamp :lights up
yellow. Press button ;,=or? again if
necessary.
Clearing the memory X
Turn the key to position 2in the ignition
lock.
X Press buttons ;and ?.
The indicator lamp lights up yellow.
X Press and hold buttons ;and ?until the
indicator lamp turns green.
i Make sure that you clear the memory of
the integrated garage door opener before
selling the vehicle. Features
313Stowing and features Z