key battery MERCEDES-BENZ CLS SHOOTING BRAKE 2012 Owners Manual
[x] Cancel search | Manufacturer: MERCEDES-BENZ, Model Year: 2012, Model line: CLS SHOOTING BRAKE, Model: MERCEDES-BENZ CLS SHOOTING BRAKE 2012Pages: 405, PDF Size: 10.21 MB
Page 8 of 405
Ashtray
.............................................. .306
Assistance menu (on-board com-
puter) ................................................. .236
ASSYST PLUS Displaying a service message ........324
Hiding a service message ..............324
Notes ............................................. 324
Resetting the service interval dis-
pla y................................................ 324
Service message ............................ 324
Special service requirements ......... 325
ATA (Anti-Theft Alarm system)
Activating/deactivating ...................72
Function .......................................... .72
Interior motion sensor .....................73
Switching off the alarm ....................72
Tow-away protection ........................ 73
ATTENTIO NASSIST
Activating/deactivating .................238
Display message ............................ 261
Function/notes ............................. 202
Authorised workshop
see Qualified specialist workshop
AUTO lights
Display message ............................ 258
see Lights
Automatic engine start (ECO start/
stop function) .................................... 151
Automatic engine switch-off (ECO
start/stop function) ..........................150
Automatic headlamp mode ..............115
Automatic transmission Accelerator pedal position .............157
Automatic drive program ...............158
Changing gea r............................... 157
DIRECT SELECT leve r..................... 155
Display message ............................ 272
Drive program displa y.................... 155
Driving tips .................................... 157
Emergency running mode ..............161
Engaging drive position .................. 156
Engaging neutra l............................ 156
Engaging revers egear ................... 156
Engaging the par kposition ............ 155
Kickdow n....................................... 157
Manual drive program ....................160
Overview ........................................ 154
Problem (fault) ............................... 161Progra
mselecto rbutton ................ 157
Pulling away ................................... 149
Selector leve r................................ 154
Shift range s................................... 159
Starting the engine ........................149
Steering wheel gearshift paddle s... 158
Trailer towing ................................. 157
Transmissio nposition display ........155
Transmission position display
(DIRECT SELECT lever) ................... 155
Transmission positions ..................156
Automatic transmission emer-
gency running mode .........................161
Auxiliary heating Activating/deactivating .................139
Activating/deactivating (on the
centre console ).............................. 139
Display message ............................ 274
Important safety notes ..................138
Problem (display message) ............142
Remote control .............................. 139
Setting ........................................... 243
Setting the departur etime ............ .141
Auxiliary ventilation
Activating/deactivating .................139
Activating/deactivating (on the
centre console ).............................. 139
Problem (display message) ............142
Remote control .............................. 139
Axle load, permissible (traile rtow-
ing) ...................................................... 398 B
Bag hook ............................................ 296
Ball coupling Folding in ....................................... 221
Folding out ..................................... 220
BAS (Brake Assist System) .................64
BAS PLUS (Brake Assist System
PLUS) .................................................... 65
Battery (key) Checking .......................................... 79
Important safety notes ....................79
Replacing ......................................... 79
Battery (vehicle)
Charging ........................................ 343
Display message ............................ 260 Index
5
Page 15 of 405
H
Handbrake see Parking brake
Hazard warning lamps ......................118
Headbag Display message ............................ 255
Headlamp
Cleaning system (function) ............118
Cleaning system (notes) ................393
Headlamps
Misting up ...................................... 121
Topping up the cleaning system ....323
see Automatic headlamp mode
Head restraints
Adjusting ....................................... 100
Adjusting (electrically). ..................101
Adjusting (manually). .....................100
Adjusting (rear) .............................. 101
Fitting/removing (rear) ..................102
Luxury ............................................ 101
Heating
see Climate control
High-pressure cleaners ....................326
Hill start assist .................................. 150
HOLD function Display message ............................ 263
Function/notes ............................. 186I
Ignition lock see Key positions
Immobiliser .......................................... 72
In-car hotspot see Separate operating instructions
Indicator and warning lamps
Coolant .......................................... 285
DISTRONI CPLUS ........................... 287
Engine diagnostics .........................284
SPORT handling mode ...................282
Indicator lamps
Display message ............................ 256
see Warning and indicator lamps
Insectp rotection on the radiator ....321
Inspection see ASSYST PLUS Instrument cluster
Overview .................................. 30, 227
Settings ......................................... 239
Warning and indicator
lamps ...................................... .32, 276
Instrument cluster lighting ..............240
Intelligen tLight System
Activating/deactivatin g................. 240
Display message ............................ 258
Overview ........................................ 119
Setting the dipped-bea mhead-
lamps for driving on the right/left .241
Interior lighting ................................. 122
Automatic control system ..............122
Delayed switch-off (on-board
computer) ...................................... 242
Emergency lighting ........................123
Manual control ............................... 123
Overview ........................................ 122
Reading lamp ................................. 122
Setting brightness for display/
switches (on-board computer) .......240
Setting the ambient lighting
brightness (on-board computer) ....241
Setting the ambient lighting col-
our (on-board computer) ................ 241
Interior motion sensor ........................73
ISOFIX child seat securing system ....56 J
Jack Storage location ............................ 335
Using ............................................. 364
Jump start (engine)
see Jump starting (engine)
Jump starting (engine) ......................344 K
Key Changing the battery .......................79
Checking the battery .......................79
Convenience closing feature ............91
Convenience opening feature ..........90
Display message ............................ 275
Door central locking/unlocking .......77
Emergency key element ................... 78 12
Index
Page 81 of 405
Changing the settings of the locking
system
You can change the settings of the locking
system. This means that only the driver's door
and the fuel fille rflap are unlocked when the
vehicle is unlocked. This is useful if you fre-
quently travel on your own.
X To change the setting: press and hold
down the %and& buttons on the
key simultaneously for approximately six
seconds until the battery chec klamp
flashes twice ( Ypage 79).
i If the setting of the locking system is
changed within the signal range of the vehi-
cle, pressing the &or% button:
R locks or
R unlocks the vehicle
The key now functions as follows:
X To unlock the driver's door: press the
% button once.
X To unlock centrally: press the%but-
ton twice.
X To lock centrally: press the&button.
The KEYLESS-GO function is changed as fol-
lows:
X To unlock the driver's door: touch the
inner surface of the door handle on the
driver's door.
X To unlock centrally: touch the inner sur-
face of the door handle on the front-
passenger door or the rear door.
X To lock centrally: touch the outer sensor
surface on one of the door handles.
X To restore the factory settings: press
and hold down the %and& buttons
simultaneously for approximately six sec-
onds until the battery check lamp flashes
twice (Y page 79). Emergency key element
General notes If the vehicle can no longer be locked or
unlocked with the key, use the emergency
key element.
If you use the emergenc
ykey element to
unlock and open the driver's door or the boot
lid/tailgate, the anti-thef talarm system will
be triggered (Y page 72).
There are several ways to tur noff the alarm:
X To turn the alarm off with the key: press
the % or& button on the key.
or
X Insert the key into the ignition lock.
or
X To deactivate the alarm with KEYLESS-
GO: press the Start/Stop button in the igni-
tion lock. The key must be in the vehicle.
or
X Lock or unlock the vehicle using KEYLESS-
GO. The key must be outside the vehicle.
If you unlock the vehicle using the emergency
key element, the fuel filler flap will not be
unlocked automatically.
X To unlock the fuel filler flap: insert the
key into the ignition lock.
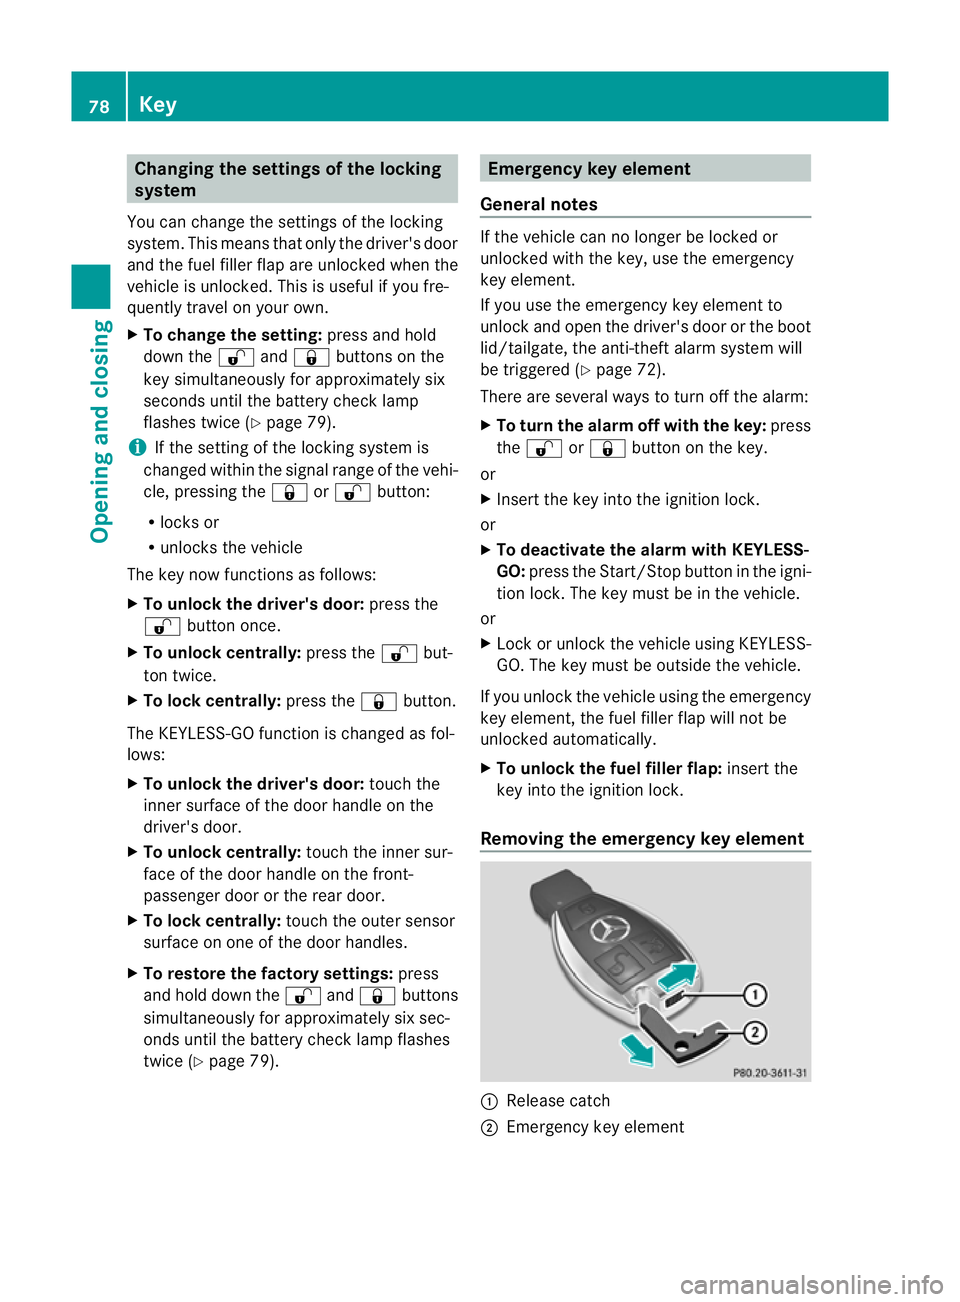
Removing the emergency key element :
Release catch
; Emergency key element 78
KeyOpening and closing
Page 82 of 405
X
Push release catch :in the direction of
the arrow and at the same time, remove
emergency key element ;from the key. Battery of the key
Important safety notes G
WARNING
Batteries are toxic and contain caustic sub-
stances. For this reason, keep batteries out of
the reach of children.
If a battery has been swallowed, visit a doctor
immediately. H
Environmental note Batteries contain pollutants.
It is illegal to dispose of them
with the household rubbish.
They must be collected sep-
arately and disposed of in an
environmentally responsible
recycling system.
Dispose of batteries in an
environmentally responsible
manner
.Take discharged
batteries to a qualified spe-
cialis tworkshop or to a col-
lection point for used batter-
ies.
Mercedes-Benz recommends that you have
the batteries replaced at a qualified specialist
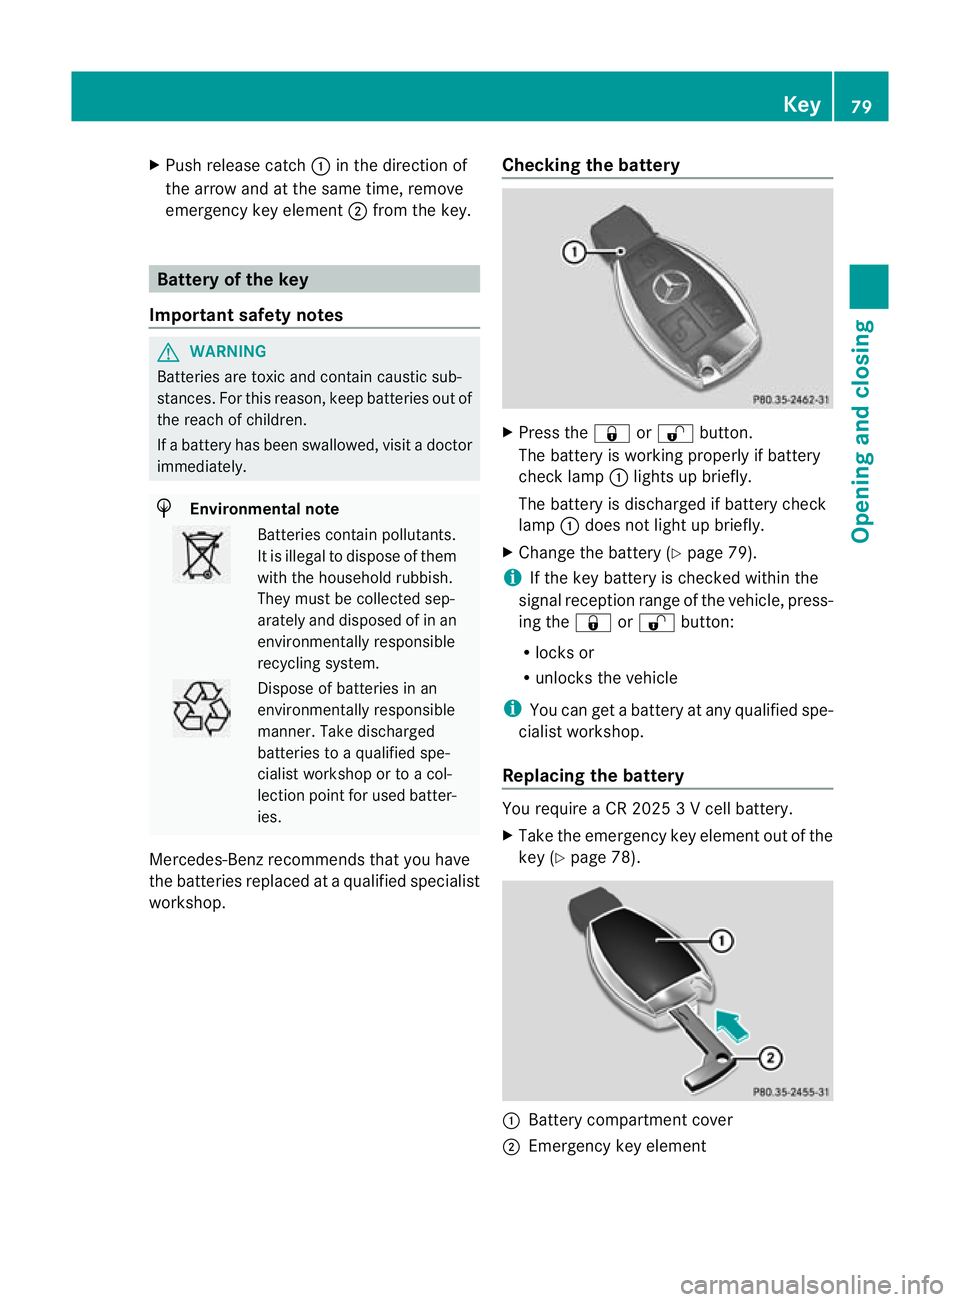
workshop. Checking the battery X
Press the &or% button.
The battery is working properly if battery
check lamp :lights up briefly.
The battery is discharged if battery check
lamp :does not light up briefly.
X Change the battery (Y page 79).
i If the key battery is checked within the
signal reception range of the vehicle, press-
ing the &or% button:
R locks or
R unlocks the vehicle
i You can get a battery at any qualified spe-
cialist workshop.
Replacing the battery You require a CR 2025 3 V cell battery.
X
Take the emergency key element out of the
key (Y page 78). :
Battery compartment cover
; Emergency key element Key
79Opening and closing Z
Page 83 of 405
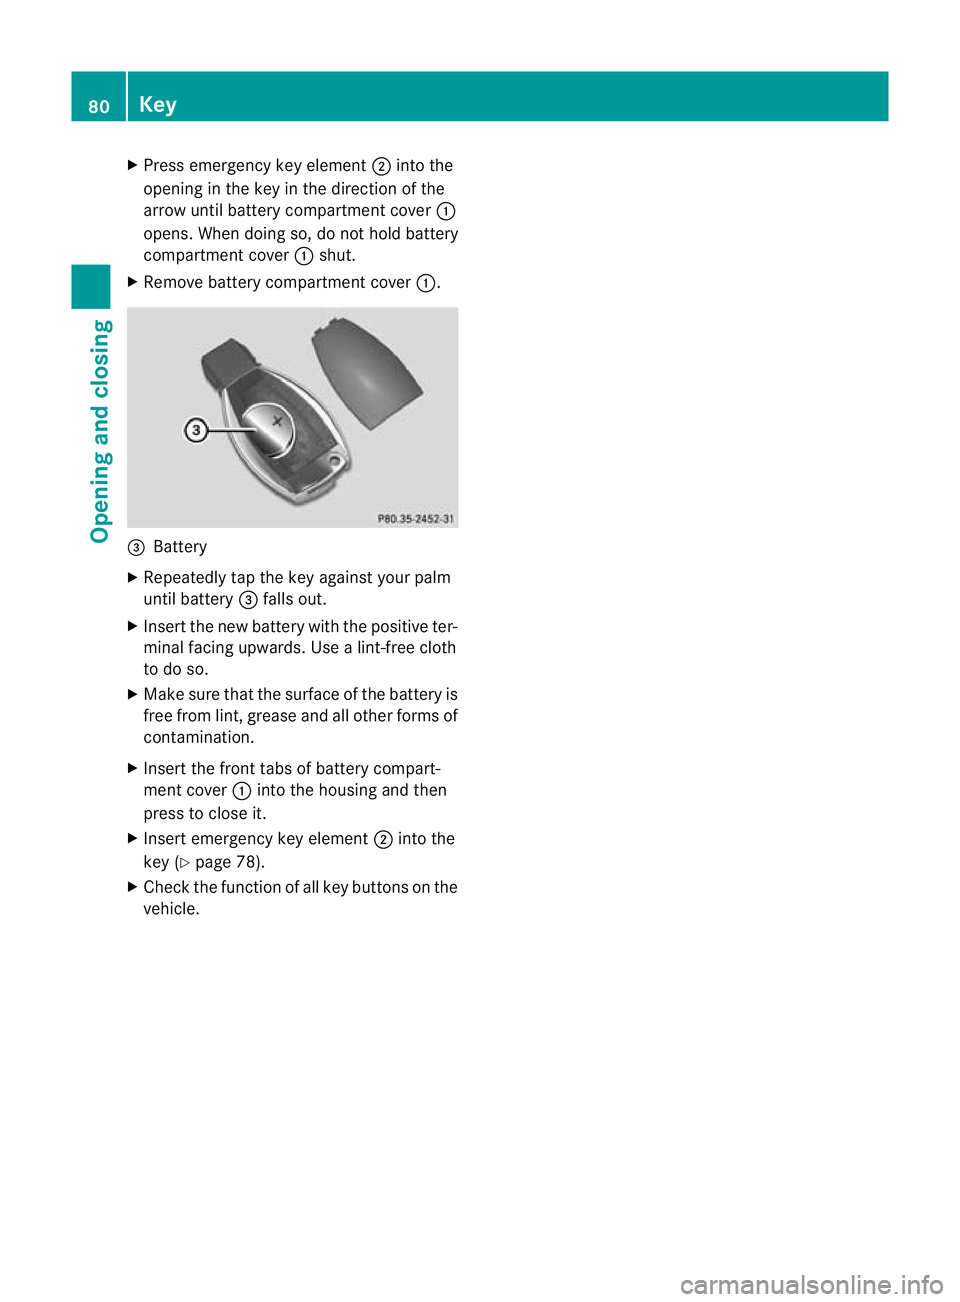
X
Press emergency key element ;into the
opening in the key in the direction of the
arrow until battery compartment cover :
opens. When doing so, do not hold battery
compartment cover :shut.
X Remove battery compartment cover :.=
Battery
X Repeatedly tap the key against your palm
until battery =falls out.
X Inser tthe new battery with the positive ter-
minal facing upwards. Use a lint-free cloth
to do so.
X Make sure that the surface of the battery is
free from lint, grease and all other forms of
contamination.
X Insert the front tabs of battery compart-
ment cover :into the housing and then
press to close it.
X Insert emergency key element ;into the
key (Y page 78).
X Check the function of all key buttons on the
vehicle. 80
KeyOpening and closing
Page 84 of 405
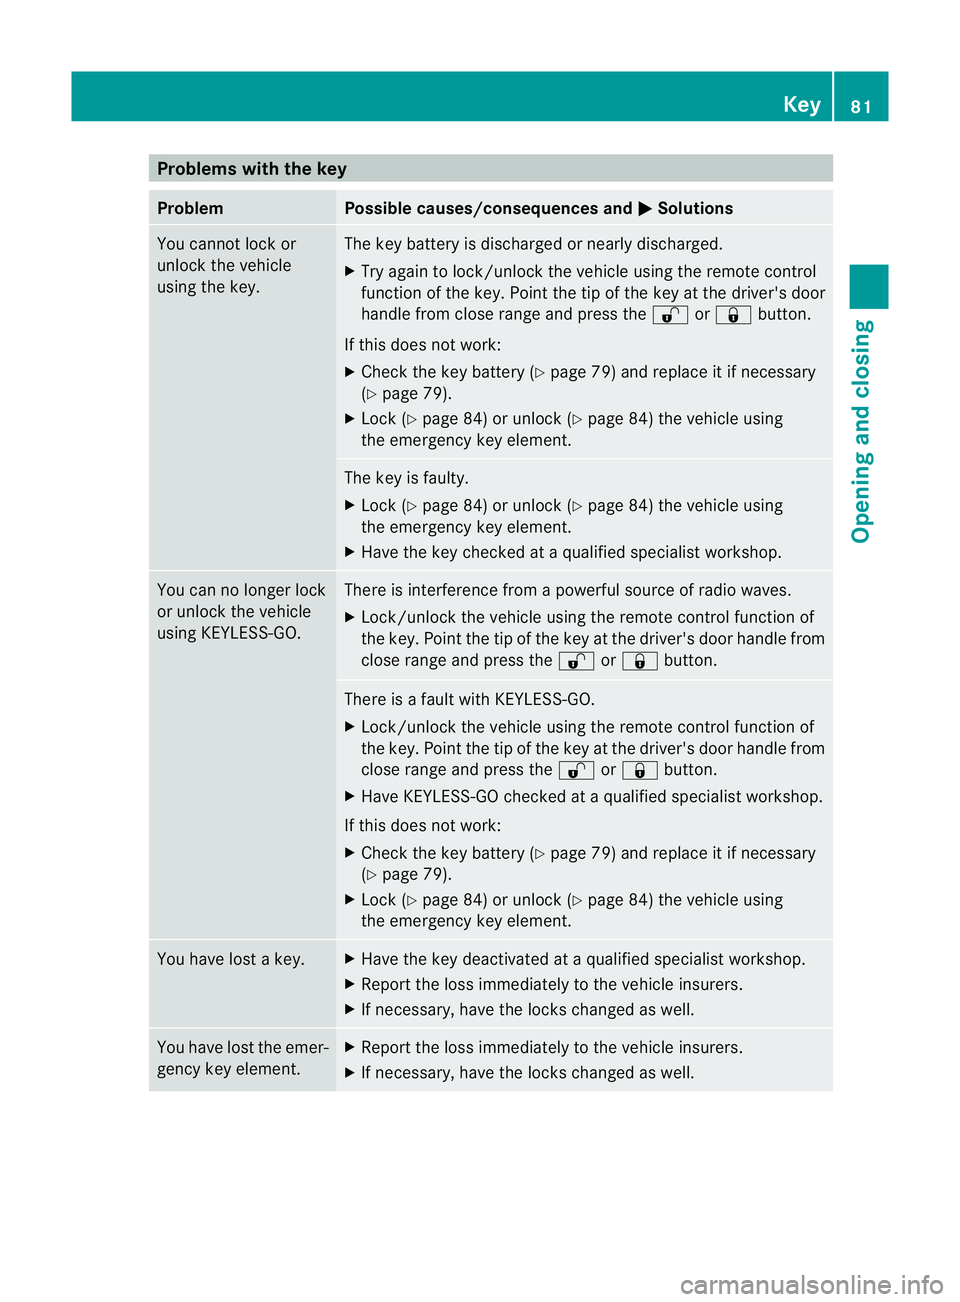
Problems with the key
Problem Possible causes/consequences and
M Solutions
You cannot lock or
unlock the vehicle
using the key. The key battery is discharged or nearly discharged.
X
Try again to lock/unlock the vehicle using the remote control
function of the key. Point the tip of the key at the driver's door
handle from close range and press the %or& button.
If this does not work:
X Check the key battery (Y page 79) and replace it if necessary
(Y page 79).
X Lock (Y page 84) or unlock (Y page 84) the vehicle using
the emergency key element. The key is faulty.
X
Lock (Y page 84) or unlock (Y page 84) the vehicle using
the emergency key element.
X Have the key checked at a qualified specialist workshop. You can no longer lock
or unlock the vehicle
using KEYLESS-GO. There is interference from a powerful source of radio waves.
X Lock/unlock the vehicle using the remote control function of
the key. Point the tip of the key at the driver's door handle from
close range and press the %or& button. There is a fault with KEYLESS-GO.
X
Lock/unlock the vehicle using the remote control function of
the key. Point the tip of the key at the driver's door handle from
close range and press the %or& button.
X Have KEYLESS-GO checked at a qualified specialist workshop.
If this does not work:
X Check the key battery (Y page 79) and replace it if necessary
(Y page 79).
X Lock (Y page 84) or unlock (Y page 84) the vehicle using
the emergency key element. You have lost a key. X
Have the key deactivated at a qualified specialist workshop.
X Report the loss immediately to the vehicle insurers.
X If necessary, have the locks changed as well. You have lost the emer-
gency key element. X
Report the loss immediately to the vehicle insurers.
X If necessary, have the locks changed as well. Key
81Opening and closing Z
Page 85 of 405
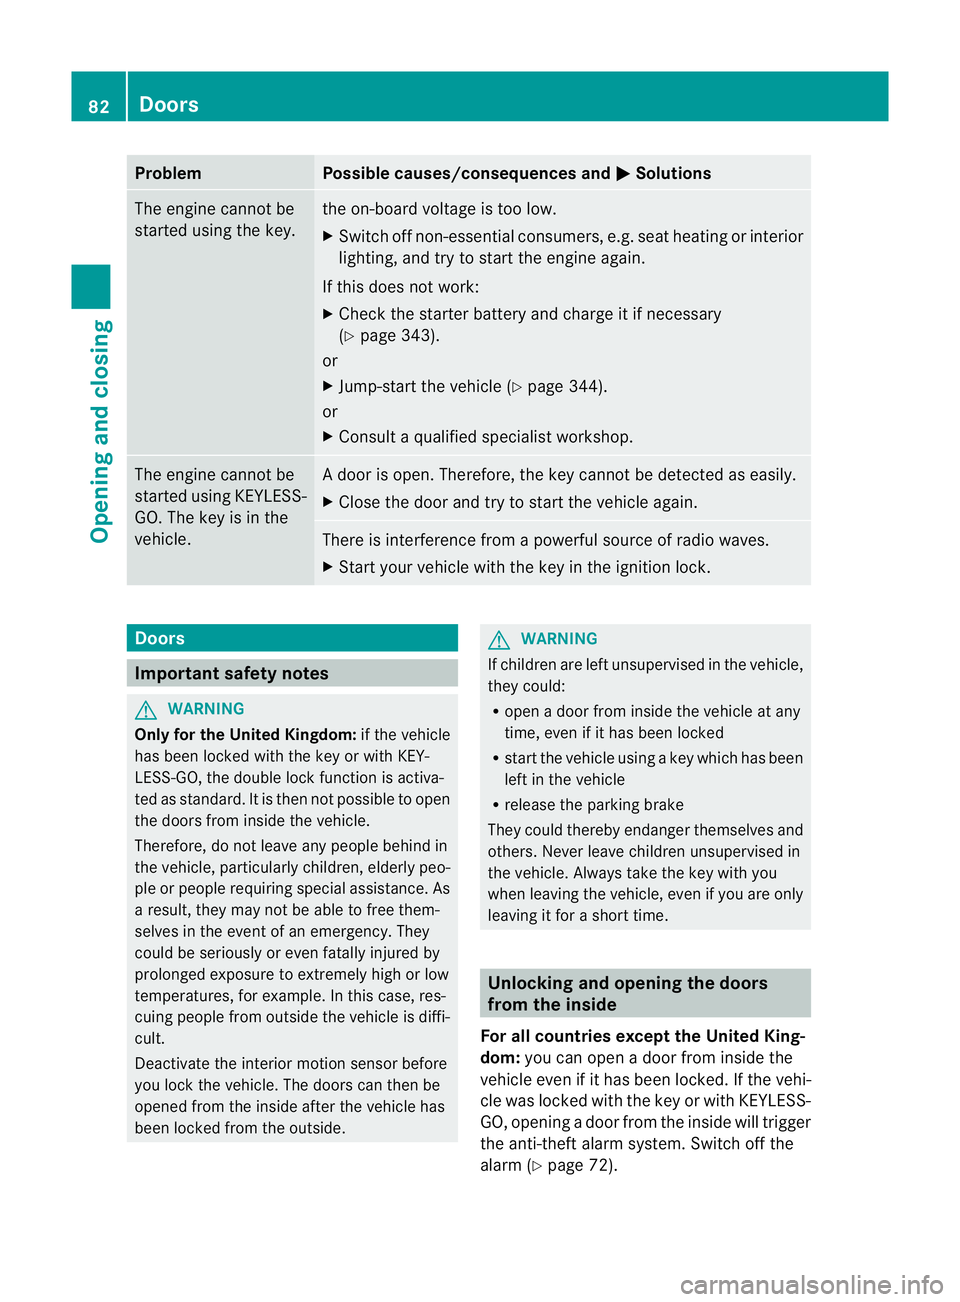
Problem Possible causes/consequences and
M Solutions
The engine cannot be
started using the key. the on-board voltage is too low.
X
Switch off non-essential consumers, e.g. seat heating or interior
lighting, and try to start the engine again.
If this does not work:
X Check the starter battery and charge it if necessary
(Y page 343).
or
X Jump-start the vehicle (Y page 344).
or
X Consult a qualified specialist workshop. The engine cannot be
started using KEYLESS-
GO. The key is in the
vehicle. Ad
oor is open. Therefore, the key cannot be detected as easily.
X Close the door and try to start the vehicle again. There is interference from a powerful source of radio waves.
X
Start your vehicle with the key in the ignition lock. Doors
Important safety notes
G
WARNING
Only for the United Kingdom: if the vehicle
has been locked with the key or with KEY-
LESS-GO, the double lock function is activa-
ted as standard. It is then not possible to open
the doors from inside the vehicle.
Therefore, do not leave any people behind in
the vehicle, particularly children, elderly peo-
ple or people requiring special assistance. As
a result, they may not be able to free them-
selves in the event of an emergency. They
could be seriously or even fatally injured by
prolonged exposure to extremely high or low
temperatures, for example. In this case, res-
cuing people from outside the vehicle is diffi-
cult.
Deactivate the interior motion sensor before
you lock the vehicle. The doors can then be
opened from the inside after the vehicle has
been locked from the outside. G
WARNING
If children are left unsupervised in the vehicle,
they could:
R open a door from inside the vehicle at any
time, even if it has been locked
R start the vehicle using akey which has been
left in the vehicle
R release the parking brake
They could thereby endanger themselves and
others. Never leave children unsupervised in
the vehicle. Always take the key with you
when leaving the vehicle, even if you are only
leaving it for a short time. Unlocking and opening the doors
from the inside
For all countries except the United King-
dom: you can open a door from inside the
vehicle even if it has been locked. If the vehi-
cle was locked with the key or with KEYLESS-
GO, opening a door from the inside will trigger
the anti-theft alarm system. Switch off the
alarm (Y page 72). 82
DoorsOpening and closing
Page 108 of 405
X
Make sure that the key is in position 1or
2 in the ignition lock.
X To switch on: press button:repeatedly
until the desired heating level is set.
X To switch off: press button:repeatedly
until all the indicator lamps go out.
i If the battery voltage is too low, the seat
heating may switch off.
Problems with the seat heating The seat heating has switched off prema-
turely or cannot be switched on. The vehicle's
electrical system voltage is too low because
too many electrical consumers are switched
on.
X Switch off electrical consumers that you do
not need, such as the rear window heating
or interior lighting. Switching the seat ventilation on/off
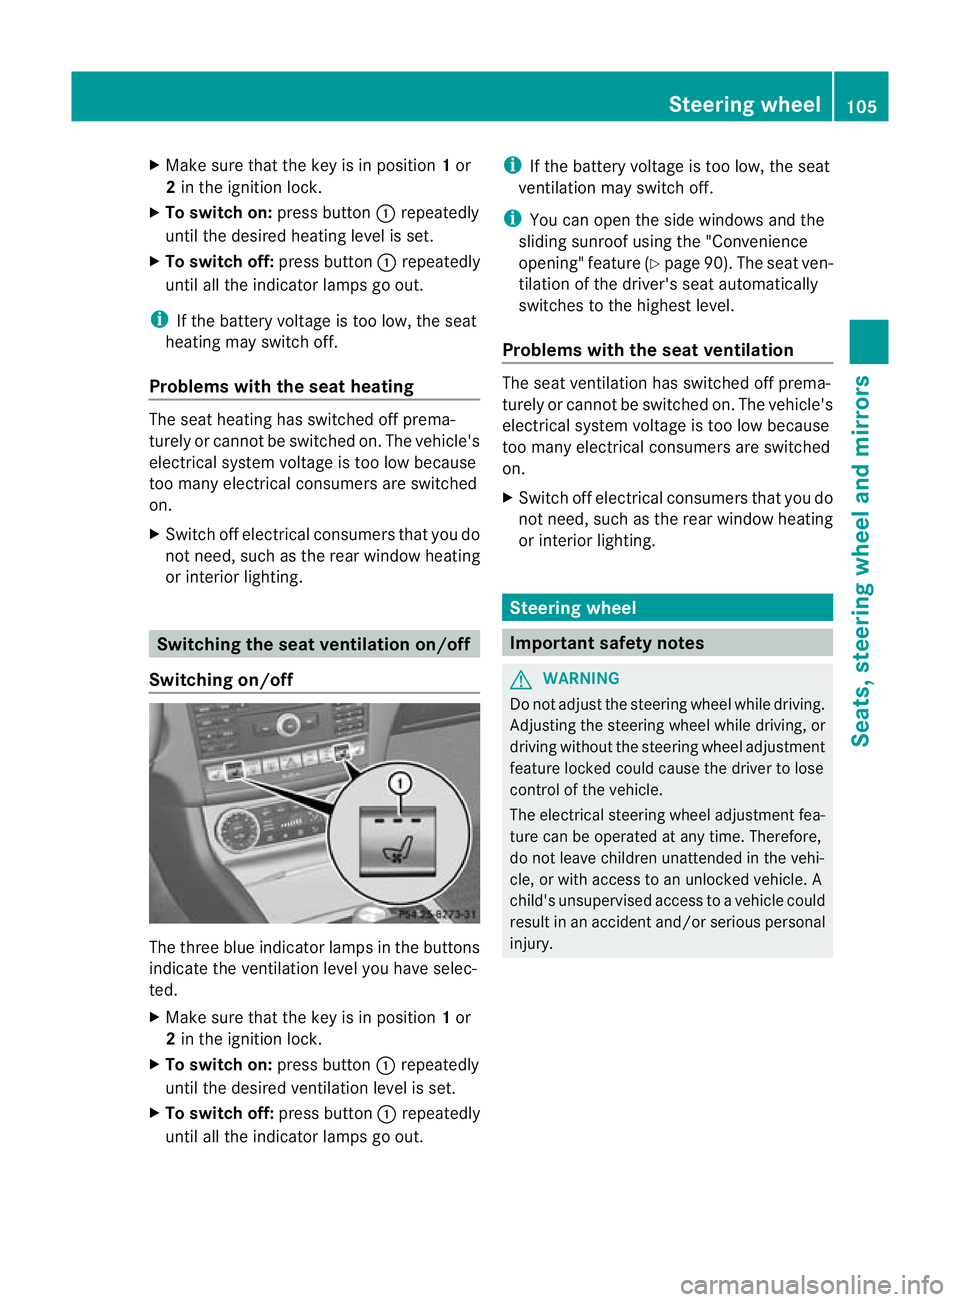
Switching on/off The three blue indicator lamps in the buttons
indicate the ventilation level you have selec-
ted.
X Make sure that the key is in position 1or
2 in the ignition lock.
X To switch on: press button:repeatedly
until the desired ventilation level is set.
X To switch off: press button:repeatedly
until all the indicator lamps go out. i
If the battery voltage is too low, the seat
ventilation may switch off.
i You can open the side windows and the
sliding sunroof using the "Convenience
opening" feature (Y page 90). The seat ven-
tilation of the driver's seat automatically
switches to the highest level.
Problems with the seat ventilation The seat ventilation has switched off prema-
turely or cannot be switched on. The vehicle's
electrical system voltage is too low because
too many electrical consumers are switched
on.
X
Switch off electrical consumers that you do
not need, such as the rear window heating
or interior lighting. Steering wheel
Important safety notes
G
WARNING
Do not adjust the steering wheel while driving.
Adjusting the steering wheel while driving, or
driving without the steering wheel adjustment
feature locked could cause the driver to lose
control of the vehicle.
The electrical steering wheel adjustment fea-
ture can be operated at any time. Therefore,
do not leave children unattended in the vehi-
cle, or with access to an unlocked vehicle. A
child's unsupervised access to a vehicle could
result in an accident and/or serious personal
injury. Steering wheel
105Seats, steering wheel and mirrors Z
Page 110 of 405
Problems with the steering wheel heat-
ing
If steering wheel heating indicator lamp
=is
flashing, the steering wheel heating has
switched off automatically. The vehicle's
electrical system voltage is too low because
too many electrical consumers are switched
on.
X Switch off electrical consumers that you do
not need, such as the rear window heating
or interior lighting.
Once the battery is sufficiently charged, the
steering wheel heating will switch back on
automatically. EASY-ENTRY/EXIT feature
Important safety notes G
WARNING
Make sure that nobody can become trapped
when you activate the EASY-ENTRY/EXIT fea-
ture.
If there is a risk of someone becoming trap-
ped, stop the adjustment procedure. To halt
the procedure:
R press the steering column adjustment but-
ton.
R briefly press one of the memory function
position buttons.
The steering column stops moving immedi-
ately.
Do not keep the memory function position
button pressed down, otherwise the memory
function will start and the steering wheel and
seat will begin to move.
Never leave children unsupervised in the vehi-
cle. They could open the driver's door and
thereby unintentionally activate the EASY-
ENTRY feature and become trapped.
The EASY-ENTRY/EXIT feature makes getting
in and out of your vehicle easier. You can activate and deactivate the EASY-
ENTRY/EXIT feature in the on-board com-
puter (Y
page 244).
Position of the steering wheel when the
EASY-ENTRY/EXIT featurei s active The steering wheel tilts upwards if you:
R
remove the key from the ignition lock
R open the driver's door and KEYLESS-GO is
in position 1
R open the driver's door and the key is in
position 0or 1in the ignition lock
i The steering wheel only moves upwards if
it has not already reached the upper end
stop.
Position of the steering wheel for driv-
ing The steering wheel is moved to the previously
set position if:
R
the driver's door is closed and
R you insert the key into the ignition lock
or
R you press the Start/Stop button once on
vehicles with KEYLESS-GO.
If you close the driver's door with the key
inserted into the ignition lock, the steering
wheel is automatically moved to the previ-
ously set position.
The last position of the steering wheel is
stored when you switch off the ignition or
when you store the setting with the memory
function (Y page 111).
Crash-responsive EASY-EXIT feature If the crash-responsive EASY-EXIT feature is
triggered in an accident, the steering column
will move upwards when the driver's door is
opened. This occurs irrespective of the posi-
tion of the key in the ignition lock. This makes
it easier to exit the vehicle and rescue the
occupants. Steering wheel
107Seats, steering wheel and mirrors Z
Page 112 of 405
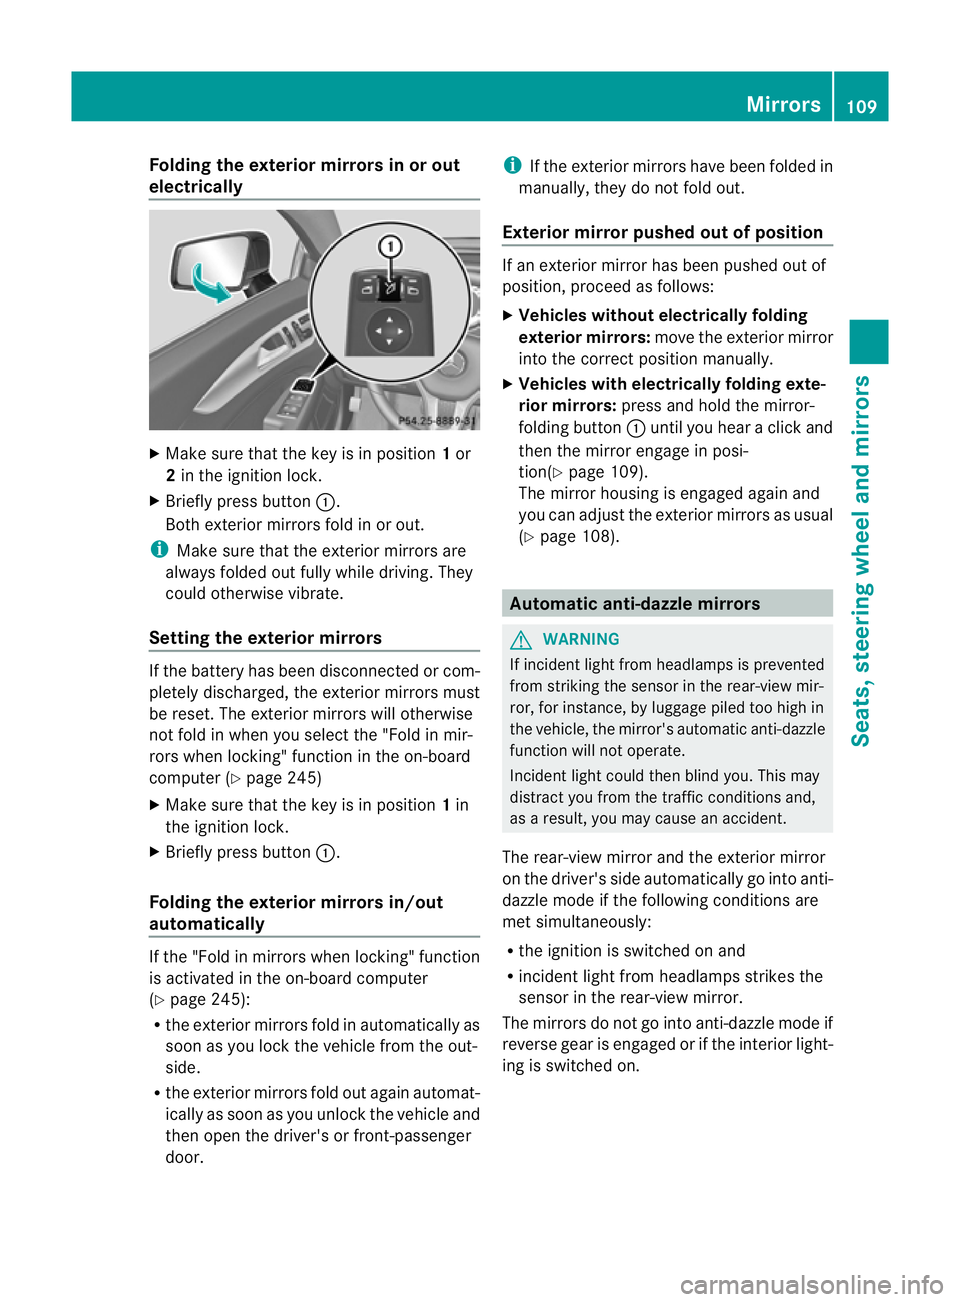
Folding the exterior mirrors in or out
electrically X
Make sure that the key is in position 1or
2 in the ignition lock.
X Briefly press button :.
Both exterior mirrors fold in or out.
i Make sure that the exterior mirrors are
always folded out fully while driving .They
could otherwise vibrate.
Setting the exterior mirrors If the battery has been disconnected or com-
pletely discharged, the exterior mirrors must
be reset. The exterior mirrors will otherwise
not fold in when you select the "Fold in mir-
rors when locking" function in the on-board
computer (Y page 245)
X Make sure that the key is in position 1in
the ignition lock.
X Briefly press button :.
Folding the exterior mirrors in/out
automatically If the "Fold in mirrors when locking" function
is activated in the on-board computer
(Y page 245):
R the exterior mirrors fold in automatically as
soon as you lock the vehicle from the out-
side.
R the exterior mirrors fold out again automat-
ically as soon as you unlock the vehicle and
then open the driver's or front-passenger
door. i
If the exterior mirrors have been folded in
manually, they do not fold out.
Exterior mirror pushed out of position If an exterior mirror has been pushed out of
position, proceed as follows:
X
Vehicles without electrically folding
exterior mirrors: move the exterior mirror
into the correct position manually.
X Vehicles with electrically folding exte-
rior mirrors: press and hold the mirror-
folding button :until you hear a click and
then the mirror engage in posi-
tion(Y page 109).
The mirror housing is engaged again and
you can adjust the exterior mirrors as usual
(Y page 108). Automatic anti-dazzle mirrors
G
WARNING
If incident light from headlamps is prevented
from striking the sensor in the rear-view mir-
ror, for instance, by luggage piled too high in
the vehicle, the mirror's automatic anti-dazzle
function will not operate.
Incident light could then blind you. This may
distract you from the traffic conditions and,
as a result, you may cause an accident.
The rear-view mirror and the exterior mirror
on the driver's side automatically go into anti-
dazzle mode if the following conditions are
met simultaneously:
R the ignition is switched on and
R incident light from headlamps strikes the
sensor in the rear-view mirror.
The mirrors do not go into anti-dazzle mode if
reverse gear is engaged or if the interior light-
ing is switched on. Mirrors
109Seats, steering wheel and mirrors Z