wheel MERCEDES-BENZ E-Class 2014 W212 Comand Manual
[x] Cancel search | Manufacturer: MERCEDES-BENZ, Model Year: 2014, Model line: E-Class, Model: MERCEDES-BENZ E-Class 2014 W212Pages: 270, PDF Size: 5.82 MB
Page 136 of 270
Switching the microphone on/off
This function is also available during an active
phone call.
X Call up the telephone basic menu
(Y page 131).
X To switch off: selectMic
MicOff
Offand press 0098
to confirm.
If the microphone is switched off, the dis-
play shows the 004Dicon, and the The
The
microphone microphone is
isoff
off message appears for
a short period.
X To switch on: selectMic on Mic on and press 0098
to confirm.
The 004Dsymbol disappears. You will briefly
see the The
The microphone microphone is
ison
onmessage.
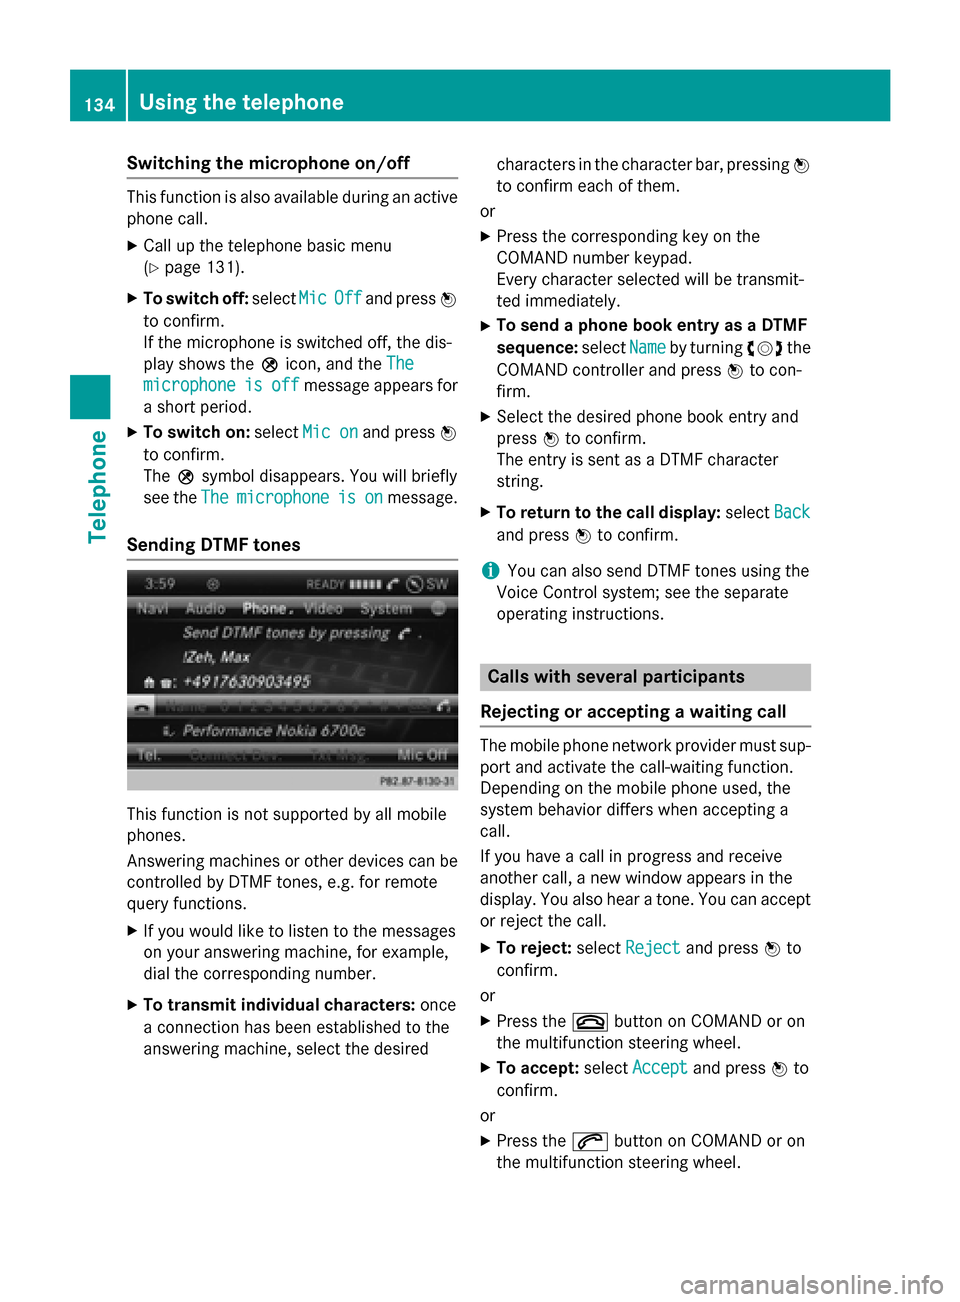
Sending DTMF tones This function is not supported by all mobile
phones.
Answering machines or other devices can be
controlled by DTMF tones, e.g. for remote
query functions.
X If you would like to listen to the messages
on your answering machine, for example,
dial the corresponding number.
X To transmit individual characters: once
a connection has been established to the
answering machine, select the desired characters in the character bar, pressing
0098
to confirm each of them.
or
X Press the corresponding key on the
COMAND number keypad.
Every character selected will be transmit-
ted immediately.
X To send a phone book entry as a DTMF
sequence: selectName
Name by turning 00790052007Athe
COMAND controller and press 0098to con-
firm.
X Select the desired phone book entry and
press 0098to confirm.
The entry is sent as a DTMF character
string.
X To return to the call display: selectBack Back
and press 0098to confirm.
i You can also send DTMF tones using the
Voice Control system; see the separate
operating instructions. Calls with several participants
Rejecting or accepting a waiting call The mobile phone network provider must sup-
port and activate the call-waiting function.
Depending on the mobile phone used, the
system behavior differs when accepting a
call.
If you have a call in progress and receive
another call, a new window appears in the
display. You also hear a tone. You can accept or reject the call.
X To reject: selectReject Reject and press 0098to
confirm.
or
X Press the 0076button on COMAND or on
the multifunction steering wheel.
X To accept: selectAccept
Accept and press 0098to
confirm.
or
X Press the 0061button on COMAND or on
the multifunction steering wheel. 134
Using the telephoneTelephone
Page 138 of 270
To switch between the active call and the call
on hold (call waiting):
X Select call on hold 0044and press 0098to con-
firm.
or
X Press the 0061button on COMAND or on
the multifunction steering wheel.
The previous call on hold is activated.
X To end the active call: select0071in the
telephone basic menu and press 0098to con-
firm.
or X Press the 0076button on COMAND or on
the multifunction steering wheel.
The call on hold is activated.
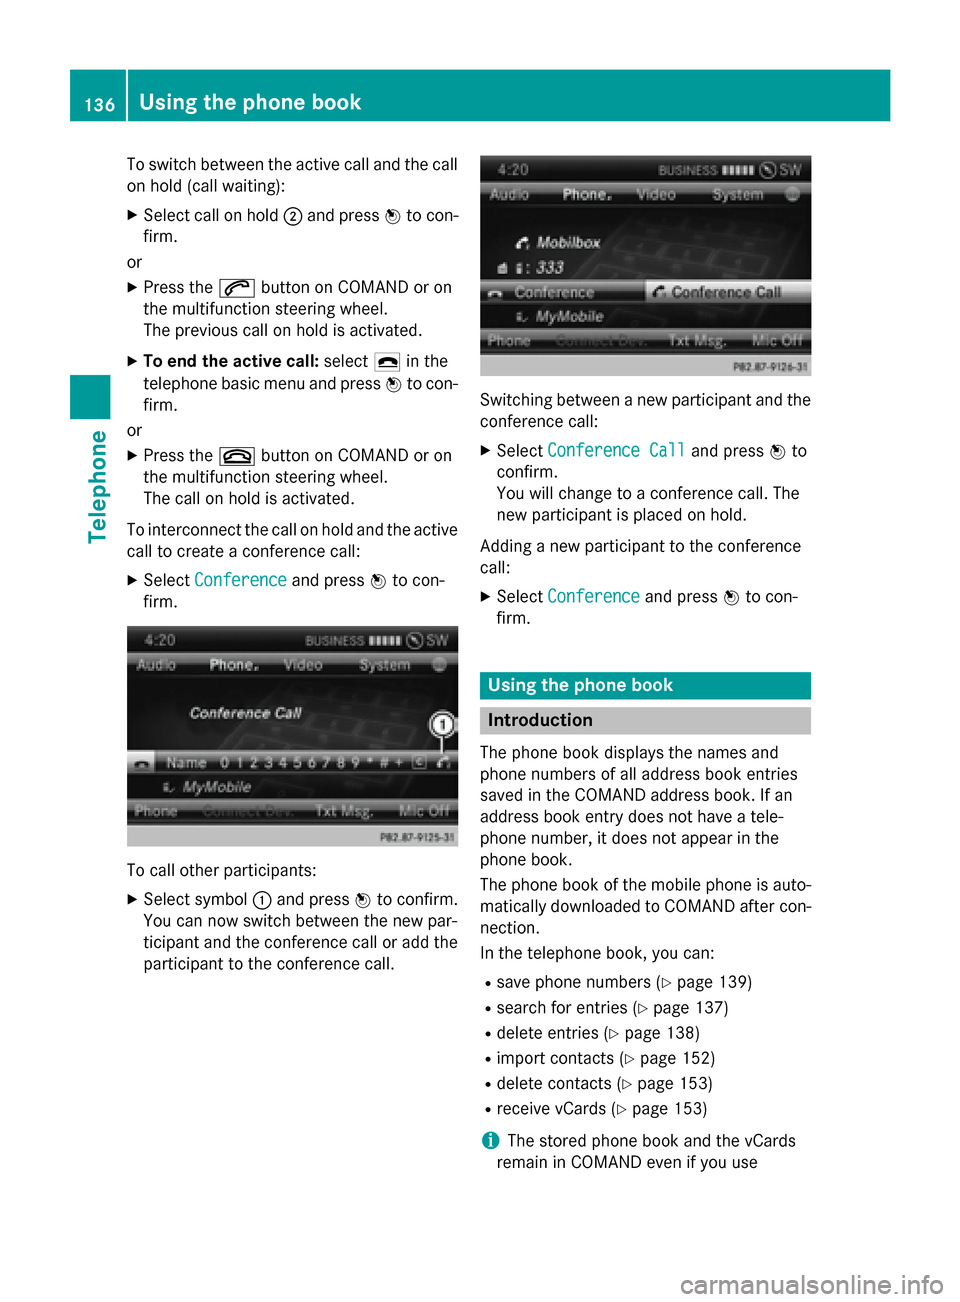
To interconnect the call on hold and the active call to create a conference call:
X Select Conference
Conference and press0098to con-
firm. To call other participants:
X Select symbol 0043and press 0098to confirm.
You can now switch between the new par-
ticipant and the conference call or add the
participant to the conference call. Switching between a new participant and the
conference call:
X Select Conference Call
Conference Call and press0098to
confirm.
You will change to a conference call. The
new participant is placed on hold.
Adding a new participant to the conference
call:
X Select Conference Conference and press0098to con-
firm. Using the phone book
Introduction
The phone book displays the names and
phone numbers of all address book entries
saved in the COMAND address book. If an
address book entry does not have a tele-
phone number, it does not appear in the
phone book.
The phone book of the mobile phone is auto- matically downloaded to COMAND after con-
nection.
In the telephone book, you can:
R save phone numbers (Y page 139)
R search for entries (Y page 137)
R delete entries (Y page 138)
R import contacts (Y page 152)
R delete contacts (Y page 153)
R receive vCards (Y page 153)
i The stored phone book and the vCards
remain in COMAND even if you use 136
Using the phone bookTelephone
Page 139 of 270
COMAND with another mobile phone. The
entries can be viewed without a mobile
phone. For this reason, you should delete
any phone book entries before handing
over or selling the vehicle. Calling up the phone book
Opening the phone book X
Press the 002Bfunction button.
X Select Name Namein the telephone basic menu by
turning 00790052007Athe COMAND controller and
press 0098to confirm.
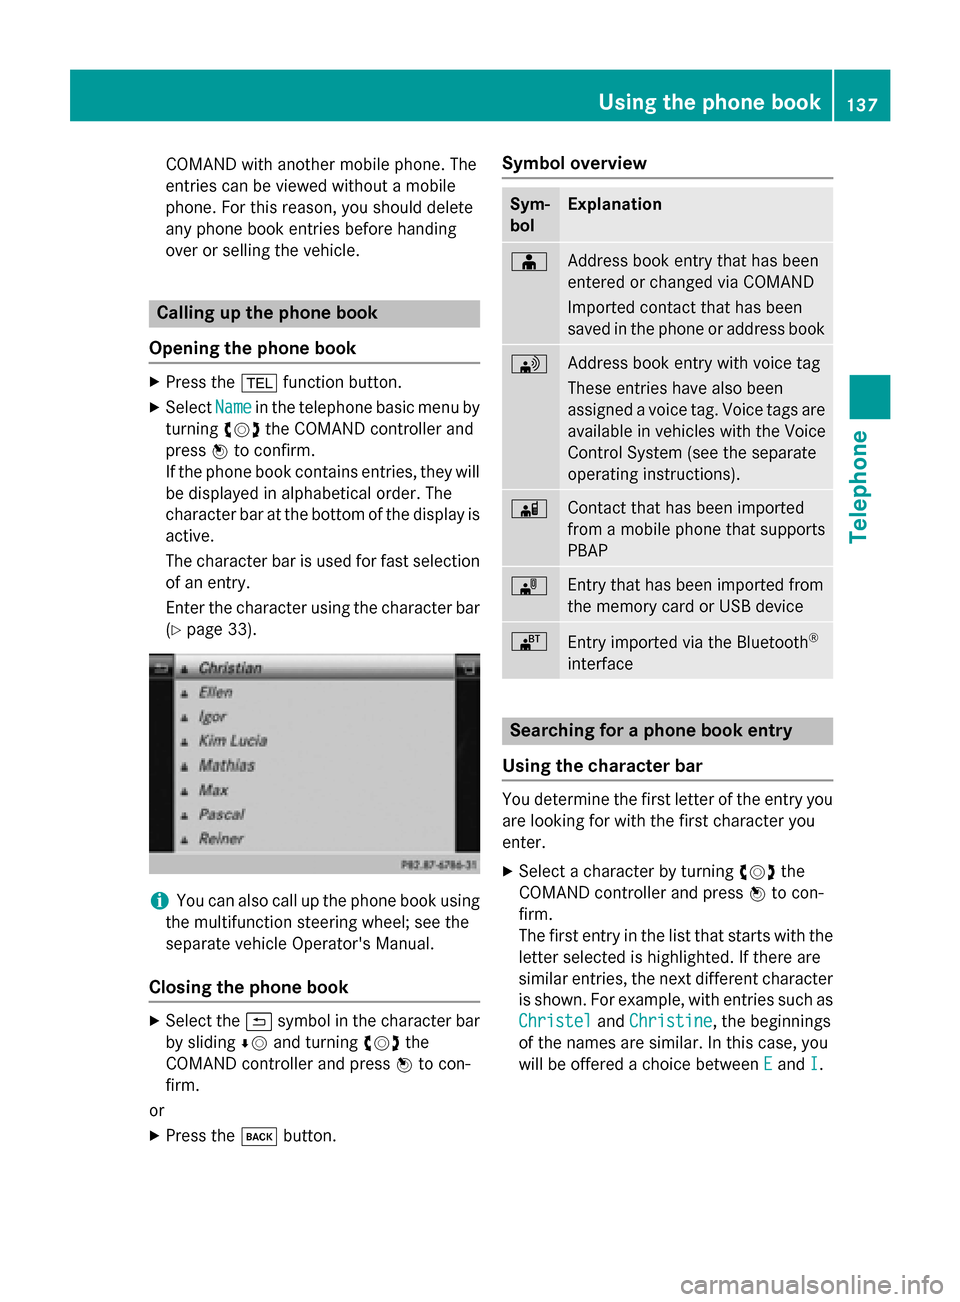
If the phone book contains entries, they will
be displayed in alphabetical order. The
character bar at the bottom of the display is
active.
The character bar is used for fast selection of an entry.
Enter the character using the character bar(Y page 33). i
You can also call up the phone book using
the multifunction steering wheel; see the
separate vehicle Operator's Manual.
Closing the phone book X
Select the 0039symbol in the character bar
by sliding 00640052and turning 00790052007Athe
COMAND controller and press 0098to con-
firm.
or
X Press the 003Dbutton. Symbol overview Sym-
bol Explanation
00D8
Address book entry that has been
entered or changed via COMAND
Imported contact that has been
saved in the phone or address book 0094
Address book entry with voice tag
These entries have also been
assigned a voice tag. Voice tags are available in vehicles with the Voice
Control System (see the separate
operating instructions). 00D7
Contact that has been imported
from a mobile phone that supports
PBAP 00BB
Entry that has been imported from
the memory card or USB device 00BA
Entry imported via the Bluetooth
®
interface Searching for a phone book entry
Using the character bar You determine the first letter of the entry you
are looking for with the first character you
enter.
X Select a character by turning 00790052007Athe
COMAND controller and press 0098to con-
firm.
The first entry in the list that starts with the
letter selected is highlighted. If there are
similar entries, the next different character
is shown. For example, with entries such as
Christel Christel andChristine
Christine , the beginnings
of the names are similar. In this case, you
will be offered a choice between E Eand I
I. Using the phone book
137Telephone Z
Page 168 of 270
If a preset time has elapsed during which nei-
ther the online functions nor the Internet have
been used, COMAND automatically discon-
nects from the Internet.
X Select Settings Settings in the carousel view by
sliding 00640052and turning 00790052007Athe COMAND
controller and press 0098to confirm.
X Select Disconnect Automatically
Disconnect Automatically
After:
After: and press 0098to confirm.
The 003Bdot indicates the current setting.
X Select 5 min
5 min ,15 min
15 min orOff
Off and press 0098
to confirm.
Off
Off switches the function off.
An active Internet connection is identified by the double arrows on the top right of the dis-
play. Establishing/ending the connection
Establishing the connection
Preconditions for establishing a connection
can be found under "General notes"
(Y page 158).
X Option 1: select the00A7icon in the main
function bar by turning 00790052007Athe COMAND
controller and press 0098to confirm.
The carousel view appears.
X Turn 00790052007A or slide 009500520096the COMAND con-
troller until the Mercedes-Benz Apps Mercedes-Benz Apps
panel or a favorite is brought to the front, if
these have been previously created
(Y page 181).
X Option 2: enter a web address
(Y page 176). X
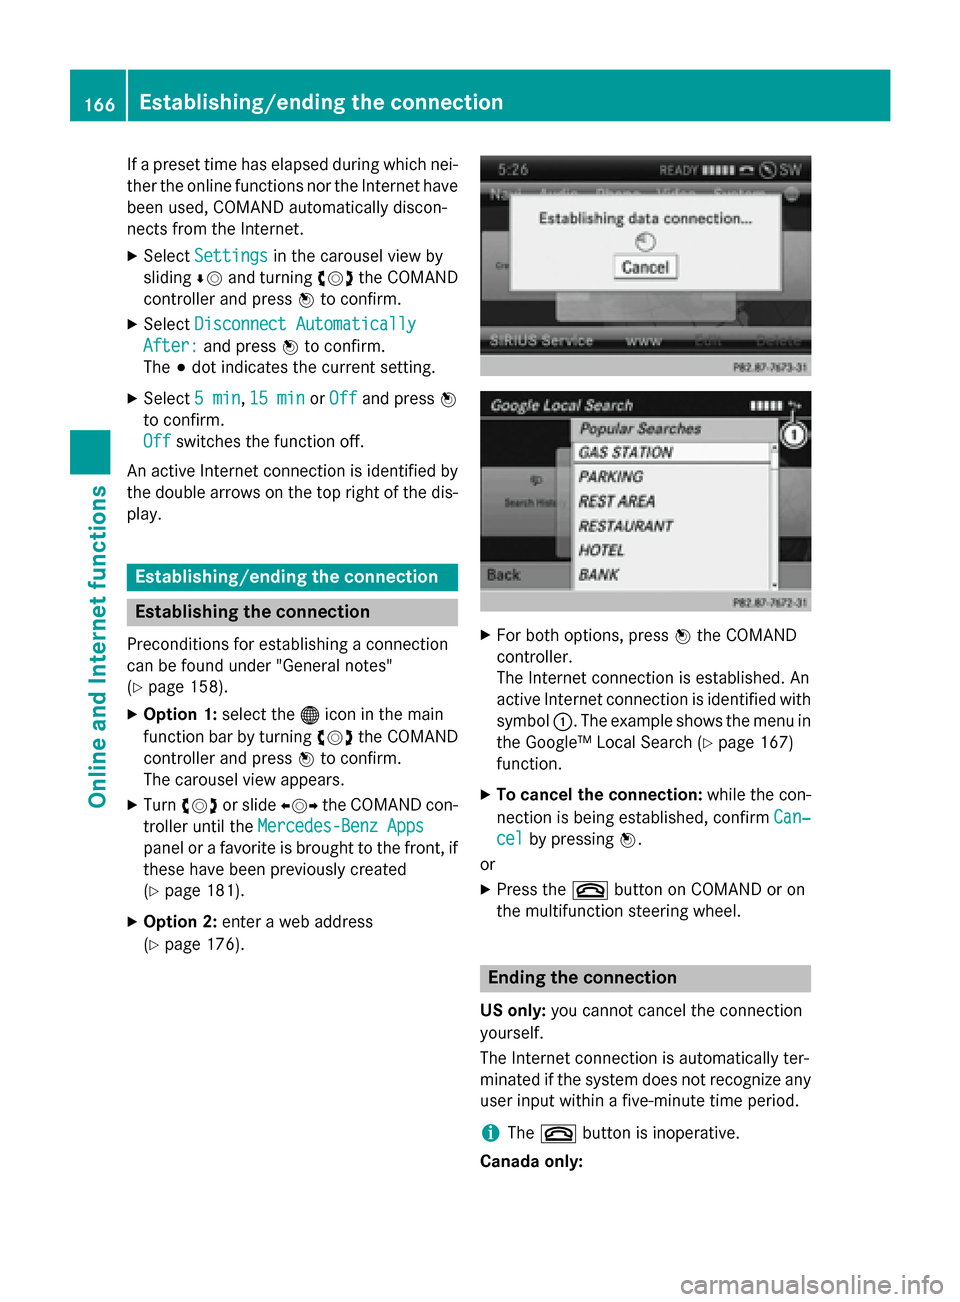
For both options, press 0098the COMAND
controller.
The Internet connection is established. An
active Internet connection is identified with symbol 0043. The example shows the menu in
the Google™ Local Search (Y page 167)
function.
X To cancel the connection: while the con-
nection is being established, confirm Can‐
Can‐
cel cel by pressing 0098.
or
X Press the 0076button on COMAND or on
the multifunction steering wheel. Ending the connection
US only: you cannot cancel the connection
yourself.
The Internet connection is automatically ter-
minated if the system does not recognize any user input within a five-minute time period.
i The
0076 button is inoperative.
Canada only: 166
Establishing/ending the connectionOnline and Internet functions
Page 169 of 270

X
Press the 0076button on COMAND or on
the multifunction steering wheel.
or X Select the scissors symbol on the bottom
right of the carousel view and press 0098to
confirm.
i If the mobile phone Internet connection is
canceled, COMAND tries to reconnect. You
should therefore always close the connec-
tion on COMAND or via the multifunction
steering wheel. Google™ local search
Calling up the Local Search menu
X
Select the 00A7icon in the main function bar
by turning 00790052007Athe COMAND controller
and press 0098to confirm.
A list with active Mercedes-Benz Apps
appears.
X Bring the Mercedes-Benz Apps
Mercedes-Benz Apps panel to
the front by turning 00790052007Athe COMAND
controller and pressing 0098to confirm.
The Mercedes-Benz Apps menu is dis-
played.
X Confirm the Google Local Search Google Local Search entry
by pressing 0098.
The Google Local Search menu appears.
X To exit the menu: selectBack
Back by sliding
00520064 and turning 00790052007Athe COMAND con-
troller and press 0098to confirm. Search
Entry restriction It is only possible to enter a search term in the
input menu when the vehicle is stationary.
Entering a search term Input menu
X Confirm Search
Searchin the Google Local Search
menu by pressing 0098.
The input menu appears.
X To enter using the character bar: enter
the search term.
X To enter characters using the number
pad: press the number keys in rapid suc-
cession.
The character appears when the key is
pressed. The first available character is
highlighted. Google™ local search
167Online andInternet functions Z
Page 193 of 270
i
SIRIUS XM Radio offers more than 130
radio stations in digital quality, for example 100% commercial-free music, sports, news
and entertainment.
SIRIUS XM Radio employs a fleet of high-
performance satellites to broadcast around
the clock in the contiguous USA and Can-
ada.
The satellite radio program is available for a
monthly fee. Details are available from the
SIRIUS XM Service Center and at
http://www.sirius.com (USA) or
http://www.siriuscanada.com (Can-
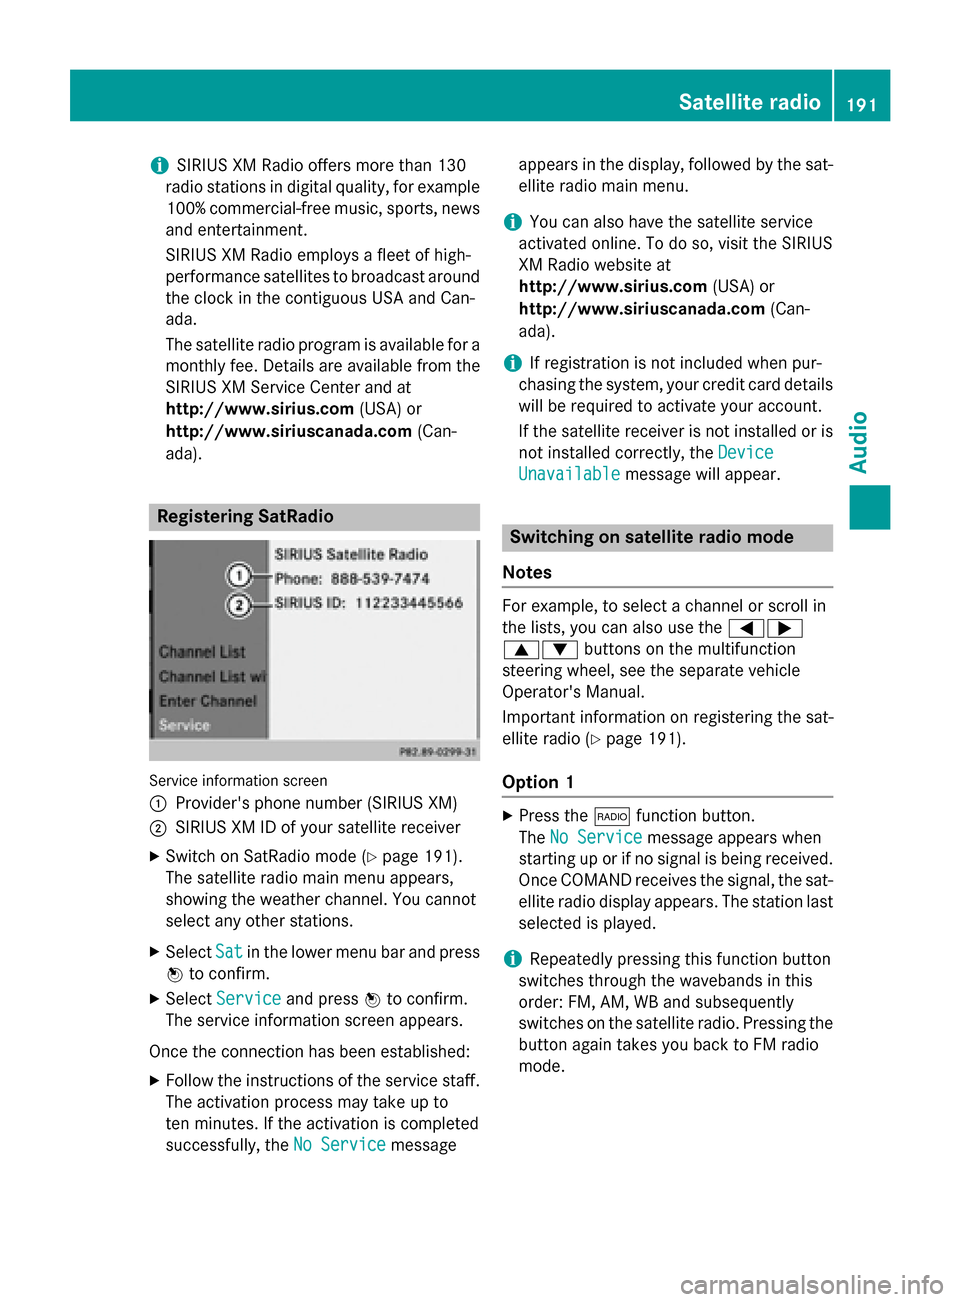
ada). Registering SatRadio
Service information screen
0043
Provider's phone number (SIRIUS XM)
0044 SIRIUS XM ID of your satellite receiver
X Switch on SatRadio mode (Y page 191).
The satellite radio main menu appears,
showing the weather channel. You cannot
select any other stations.
X Select Sat Satin the lower menu bar and press
0098 to confirm.
X Select Service
Service and press 0098to confirm.
The service information screen appears.
Once the connection has been established: X Follow the instructions of the service staff.
The activation process may take up to
ten minutes. If the activation is completed
successfully, the No Service
No Service message appears in the display, followed by the sat-
ellite radio main menu.
i You can also have the satellite service
activated online. To do so, visit the SIRIUS
XM Radio website at
http://www.sirius.com (USA) or
http://www.siriuscanada.com (Can-
ada).
i If registration is not included when pur-
chasing the system, your credit card details
will be required to activate your account.
If the satellite receiver is not installed or is
not installed correctly, the Device Device
Unavailable
Unavailable message will appear. Switching on satellite radio mode
Notes For example, to select a channel or scroll in
the lists, you can also use the
00590065
00630064 buttons on the multifunction
steering wheel, see the separate vehicle
Operator's Manual.
Important information on registering the sat-
ellite radio (Y page 191).
Option 1 X
Press the 002Afunction button.
The No Service No Service message appears when
starting up or if no signal is being received.
Once COMAND receives the signal, the sat-
ellite radio display appears. The station last selected is played.
i Repeatedly pressing this function button
switches through the wavebands in this
order: FM, AM, WB and subsequently
switches on the satellite radio. Pressing the button again takes you back to FM radio
mode. Satellite radio
191Audio
Page 218 of 270
X
To stop playback: select00DBby turning
00790052007A the COMAND controller and press 0098
to confirm.
A message appears. 00D0is selected.
X To continue playback: select00D0by
turning 00790052007Athe COMAND controller and
press 0098to confirm.
A message appears. 00DBis selected. Restarting playback after stopping
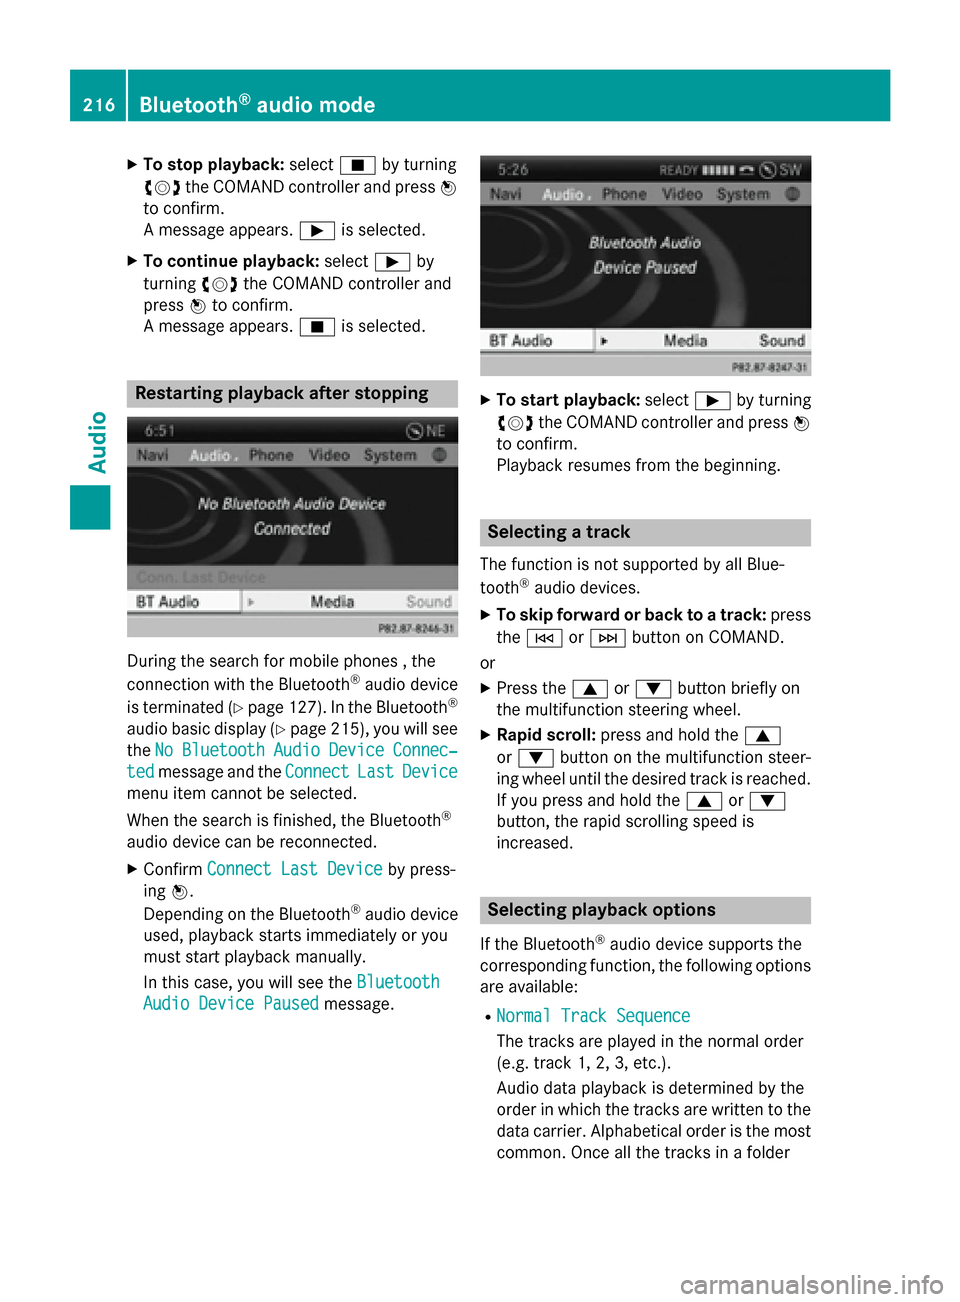
During the search for mobile phones , the
connection with the Bluetooth ®
audio device
is terminated (Y page 127). In the Bluetooth ®
audio basic display (Y page 215), you will see
the No
No Bluetooth Bluetooth Audio
Audio Device
Device Connec‐
Connec‐
ted
ted message and the Connect
ConnectLast
LastDevice
Device
menu item cannot be selected.
When the search is finished, the Bluetooth ®
audio device can be reconnected. X Confirm Connect Last Device
Connect Last Device by press-
ing 0098.
Depending on the Bluetooth ®
audio device
used, playback starts immediately or you
must start playback manually.
In this case, you will see the Bluetooth Bluetooth
Audio Device Paused
Audio Device Paused message. X
To start playback: select00D0by turning
00790052007A the COMAND controller and press 0098
to confirm.
Playback resumes from the beginning. Selecting a track
The function is not supported by all Blue-
tooth ®
audio devices.
X To skip forward or back to a track: press
the 0048 or0049 button on COMAND.
or
X Press the 0063or0064 button briefly on
the multifunction steering wheel.
X Rapid scroll: press and hold the 0063
or 0064 button on the multifunction steer-
ing wheel until the desired track is reached.
If you press and hold the 0063or0064
button, the rapid scrolling speed is
increased. Selecting playback options
If the Bluetooth ®
audio device supports the
corresponding function, the following options
are available:
R Normal Track Sequence Normal Track Sequence
The tracks are played in the normal order
(e.g. track 1, 2, 3, etc.).
Audio data playback is determined by the
order in which the tracks are written to the
data carrier. Alphabetical order is the most
common. Once all the tracks in a folder 216
Bluetooth ®
audio modeAudio
Page 239 of 270
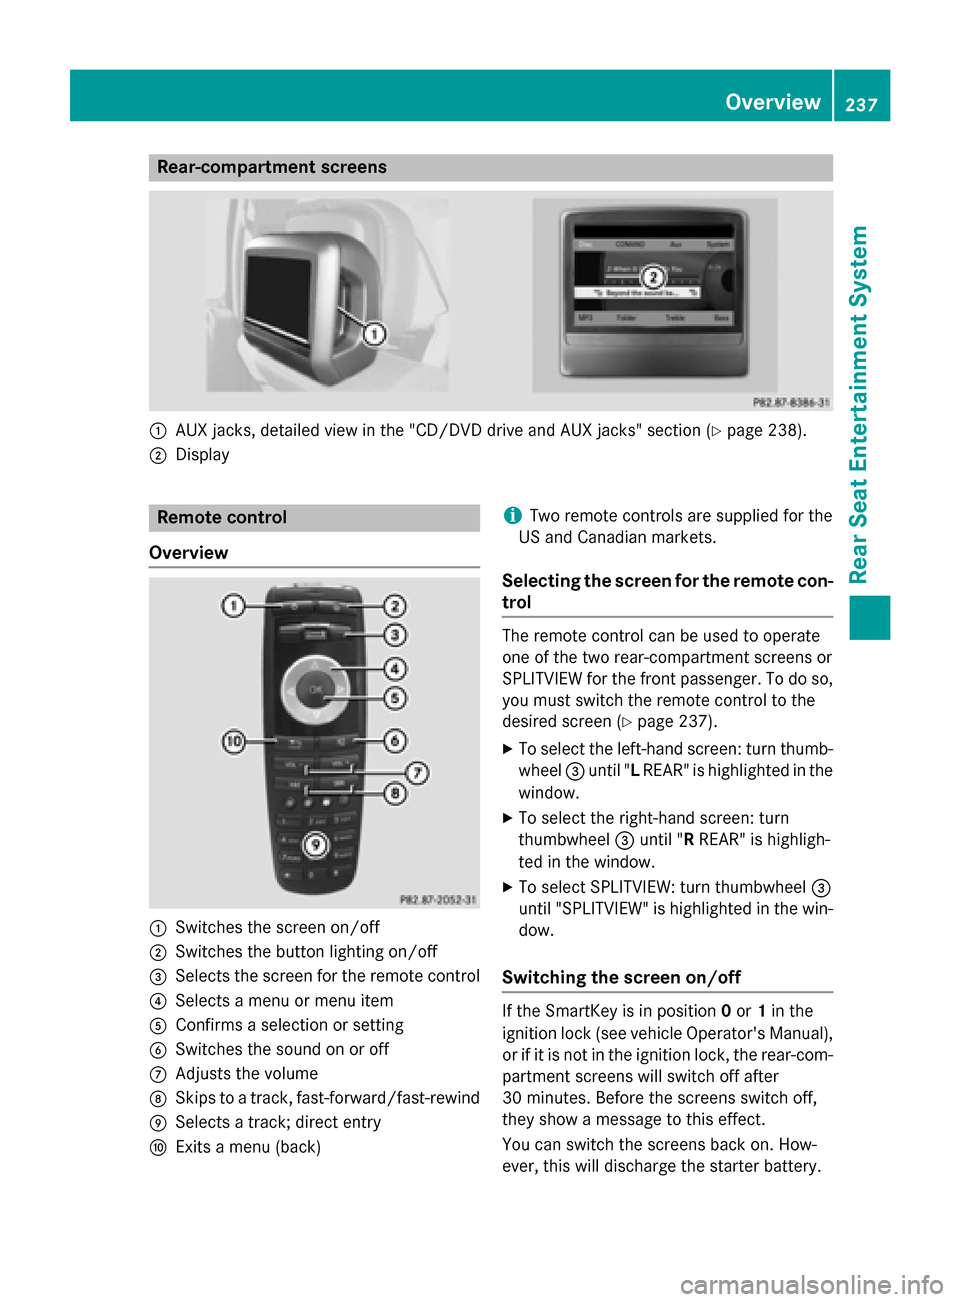
Rear-compartment screens
0043
AUX jacks, detailed view in the "CD/DVD drive and AUX jacks" section (Y page 238).
0044 Display Remote control
Overview 0043
Switches the screen on/off
0044 Switches the button lighting on/off
0087 Selects the screen for the remote control
0085 Selects a menu or menu item
0083 Confirms a selection or setting
0084 Switches the sound on or off
006B Adjusts the volume
006C Skips to a track, fast-forward/fast-rewind
006D Selects a track; direct entry
006E Exits a menu (back) i
Two remote controls are supplied for the
US and Canadian markets.
Selecting the screen for the remote con-
trol The remote control can be used to operate
one of the two rear-compartment screens or
SPLITVIEW for the front passenger. To do so,
you must switch the remote control to the
desired screen (Y page 237).
X To select the left-hand screen: turn thumb-
wheel 0087until "L REAR" is highlighted in the
window.
X To select the right-hand screen: turn
thumbwheel 0087until "R REAR" is highligh-
ted in the window.
X To select SPLITVIEW: turn thumbwheel 0087
until "SPLITVIEW" is highlighted in the win-
dow.
Switching the screen on/off If the SmartKey is in position
0or 1in the
ignition lock (see vehicle Operator's Manual), or if it is not in the ignition lock, the rear-com-
partment screens will switch off after
30 minutes. Before the screens switch off,
they show a message to this effect.
You can switch the screens back on. How-
ever, this will discharge the starter battery. Overview
237Rear Seat Entertainment System Z
Page 256 of 270
X
To select a folder: press the0064button
on the remote control.
X Highlight one of the two folder symbols
with the 0059or0065 button and press 008B
to confirm.
Depending on your selection, the previous
or next folder is selected and the first track
is played.
Additional setting option:
R Adjusting the sound settings (Y page 242)
Video DVD mode X
To hide a menu: confirmMenu Menuwith the 008B
button.
The video image is played in full screen
mode.
Additional setting options: R Adjusting the brightness, contrast and
color (Y page 242)
R Changing the picture format (Y page 243)
R Adjusting the sound settings (Y page 242)AUX mode
Introduction
You can connect one external video source to each of the displays of the Rear Seat Enter-
tainment System (AUX display) and also one
external video source to the rear-compart-
ment CD/DVD drive (AUX drive) with a sound
and video signal.
Please see the corresponding operating
instructions for information on how to oper-
ate the external video source.
For further details about external video sour- ces, please consult an authorized Mercedes-
Benz Center. Connecting AUX equipment
AUX drive The AUX drive jacks are located on the
CD/DVD drive next to the CD/DVD eject but-
ton (Y page 238).
Displaying AUX The AUX display jacks are on the side of the
screen (Y
page 237).
Audio and video connection X
Insert the audio plugs for the left and right
signals into the corresponding Land R
jacks.
X Insert the video plug into the Vjack. Activating AUX mode
AUX drive X
Select Aux Auxin the menu using the
006300590065 buttons on the remote
control and press the 008Bbutton to confirm.
The AUX menu appears.
X Select Source Source from the AUX menu and
press the 008Bbutton to confirm.
X Select Disc Drive Aux
Disc Drive Aux and press the008B
button to confirm.
You will hear and see the content of the
external video source if it is connected to
the CD/DVD drive and switched to play-
back. If no video image is available from the AUX source connected, you will see an
audio menu.
Displaying AUX X
Select the screen by turning the scroll
wheel on the remote control (Y page 237)254
AUX modeRear Seat Entertainment System