bluetooth MERCEDES-BENZ E-Class 2014 W212 Comand Manual
[x] Cancel search | Manufacturer: MERCEDES-BENZ, Model Year: 2014, Model line: E-Class, Model: MERCEDES-BENZ E-Class 2014 W212Pages: 270, PDF Size: 5.82 MB
Page 133 of 270
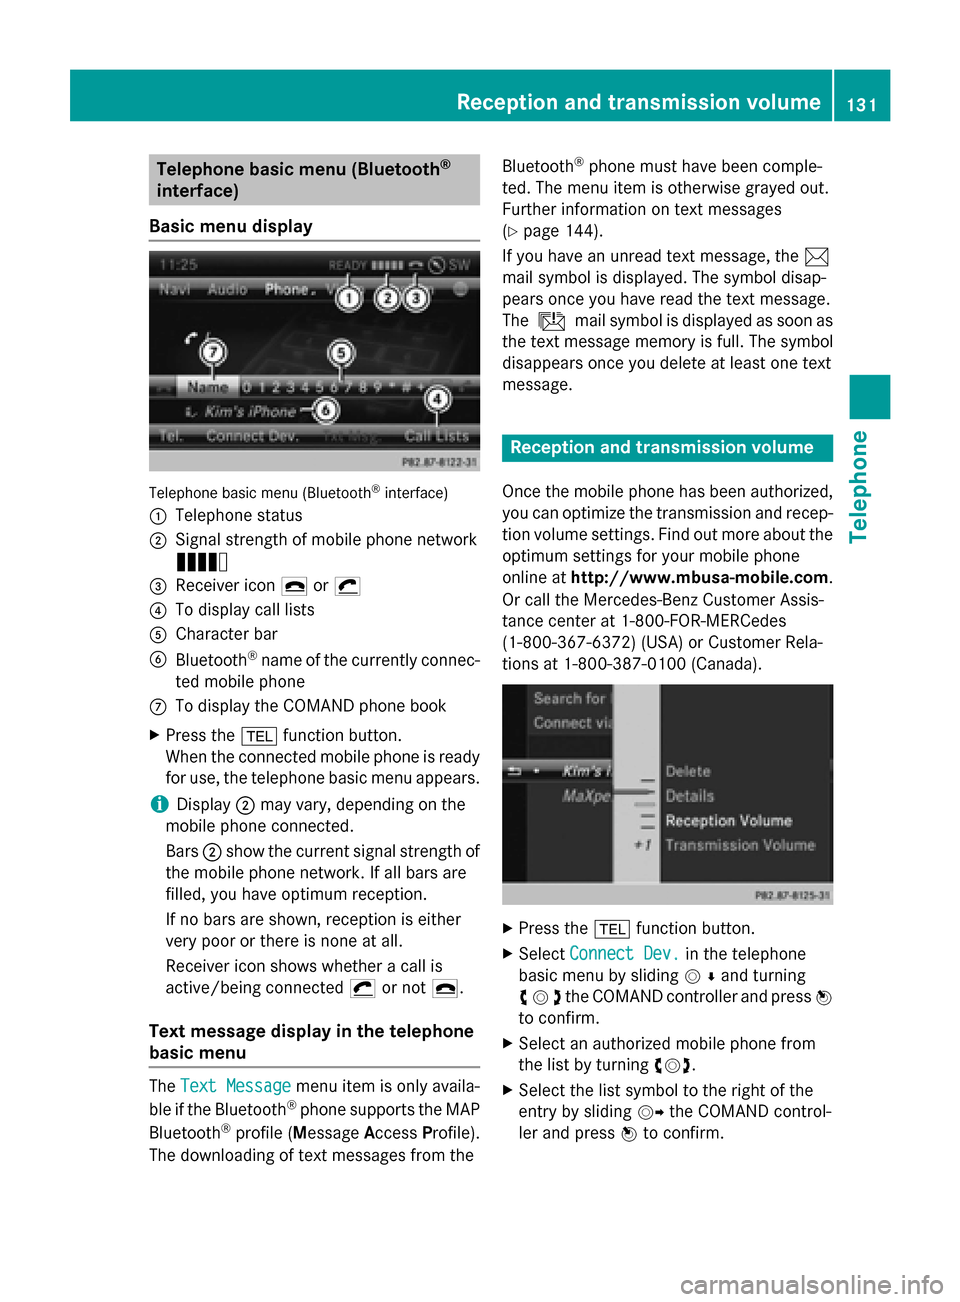
Telephone basic menu (Bluetooth
®
interface)
Basic menu display Telephone basic menu (Bluetooth
®
interface)
0043 Telephone status
0044 Signal strength of mobile phone network
Ä
0087 Receiver icon 0071or0075
0085 To display call lists
0083 Character bar
0084 Bluetooth ®
name of the currently connec-
ted mobile phone
006B To display the COMAND phone book
X Press the 002Bfunction button.
When the connected mobile phone is ready
for use, the telephone basic menu appears.
i Display
0044may vary, depending on the
mobile phone connected.
Bars 0044show the current signal strength of
the mobile phone network. If all bars are
filled, you have optimum reception.
If no bars are shown, reception is either
very poor or there is none at all.
Receiver icon shows whether a call is
active/being connected 0075or not 0071.
Text message display in the telephone
basic menu The
Text Message Text Message menu item is only availa-
ble if the Bluetooth ®
phone supports the MAP
Bluetooth ®
profile ( Message AccessProfile).
The downloading of text messages from the Bluetooth
®
phone must have been comple-
ted. The menu item is otherwise grayed out.
Further information on text messages
(Y page 144).
If you have an unread text message, the 0083
mail symbol is displayed. The symbol disap-
pears once you have read the text message.
The ú mail symbol is displayed as soon as
the text message memory is full. The symbol
disappears once you delete at least one text
message. Reception and transmission volume
Once the mobile phone has been authorized,
you can optimize the transmission and recep-
tion volume settings. Find out more about the optimum settings for your mobile phone
online at http://www.mbusa-mobile.com.
Or call the Mercedes-Benz Customer Assis-
tance center at 1-800-FOR-MERCedes
(1-800-367-6372) (USA) or Customer Rela-
tions at 1-800-387-010 0(Canada). X
Press the 002Bfunction button.
X Select Connect Dev. Connect Dev. in the telephone
basic menu by sliding 00520064and turning
00790052007Athe COMAND controller and press 0098
to confirm.
X Select an authorized mobile phone from
the list by turning 00790052007A.
X Select the list symbol to the right of the
entry by sliding 00520096the COMAND control-
ler and press 0098to confirm. Reception and transmission volume
131Telephone Z
Page 137 of 270
The system behavior after accepting the
incoming call depends on your mobile phone.
R The mobile phone supports the call waiting
function (via Bluetooth ®
) when:
The previously active call is held. You can
then switch back and forth between both
calls (toggling) (Y page 135).
R The mobile phone does not support the call
waiting function (via Bluetooth ®
) when:
The previously active call is ended.
This is also the case if you accept the wait- ing call using the Voice Control System (see
the separate operating instructions).
The COMAND display changes. If you con-
tinue to operate functions on the mobile
phone, the COMAND display may differ from
that of the mobile phone.
Making a second call If the following requirements are met, you can
make another call while on the phone with
someone else:
R The function has to be supported by the
mobile phone network.
R The mobile phone has to support the con-
nection of a further call via Bluetooth ®
. This
action puts the previous call on hold if the
mobile phone supports this function.
R The appropriate setting has to be activated
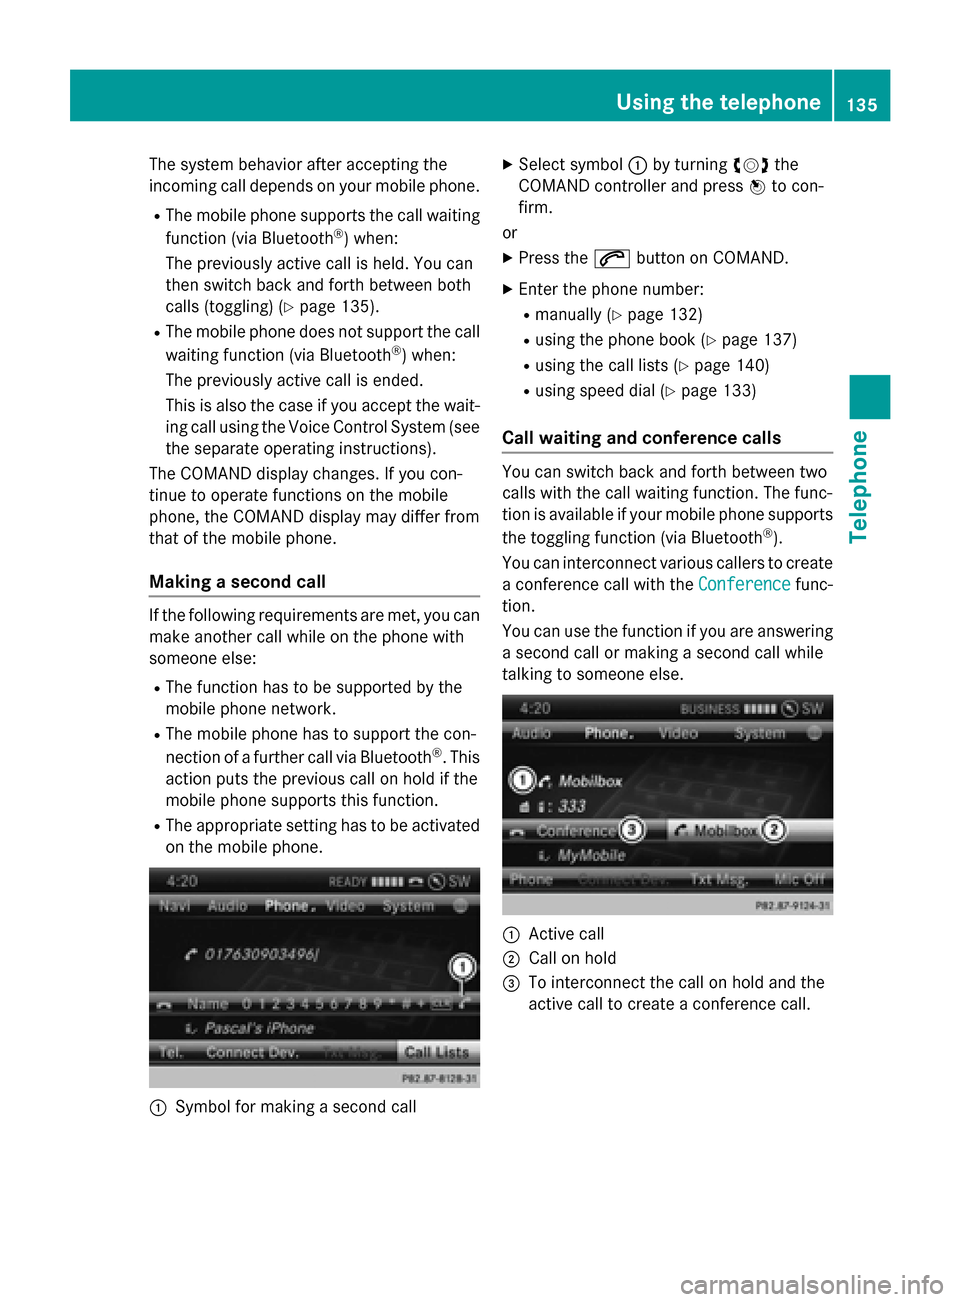
on the mobile phone. 0043
Symbol for making a second call X
Select symbol 0043by turning 00790052007Athe
COMAND controller and press 0098to con-
firm.
or
X Press the 0061button on COMAND.
X Enter the phone number:
R manually (Y page 132)
R using the phone book (Y page 137)
R using the call lists (Y page 140)
R using speed dial (Y page 133)
Call waiting and conference calls You can switch back and forth between two
calls with the call waiting function. The func-
tion is available if your mobile phone supports
the toggling function (via Bluetooth ®
).
You can interconnect various callers to create
a conference call with the Conference Conferencefunc-
tion.
You can use the function if you are answering a second call or making a second call while
talking to someone else. 0043
Active call
0044 Call on hold
0087 To interconnect the call on hold and the
active call to create a conference call. Using the telephone
135Telephone Z
Page 139 of 270
COMAND with another mobile phone. The
entries can be viewed without a mobile
phone. For this reason, you should delete
any phone book entries before handing
over or selling the vehicle. Calling up the phone book
Opening the phone book X
Press the 002Bfunction button.
X Select Name Namein the telephone basic menu by
turning 00790052007Athe COMAND controller and
press 0098to confirm.
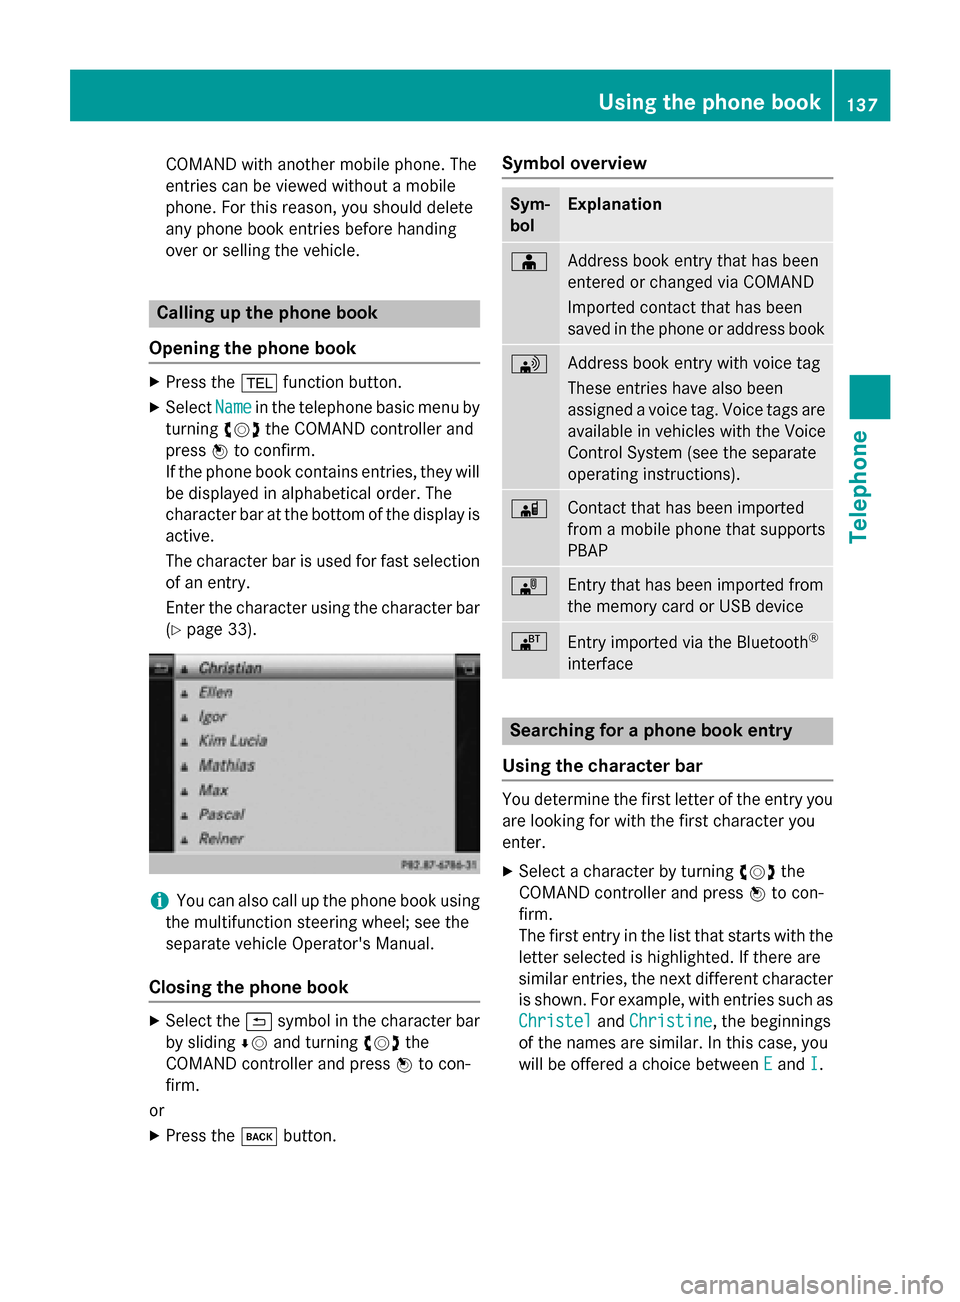
If the phone book contains entries, they will
be displayed in alphabetical order. The
character bar at the bottom of the display is
active.
The character bar is used for fast selection of an entry.
Enter the character using the character bar(Y page 33). i
You can also call up the phone book using
the multifunction steering wheel; see the
separate vehicle Operator's Manual.
Closing the phone book X
Select the 0039symbol in the character bar
by sliding 00640052and turning 00790052007Athe
COMAND controller and press 0098to con-
firm.
or
X Press the 003Dbutton. Symbol overview Sym-
bol Explanation
00D8
Address book entry that has been
entered or changed via COMAND
Imported contact that has been
saved in the phone or address book 0094
Address book entry with voice tag
These entries have also been
assigned a voice tag. Voice tags are available in vehicles with the Voice
Control System (see the separate
operating instructions). 00D7
Contact that has been imported
from a mobile phone that supports
PBAP 00BB
Entry that has been imported from
the memory card or USB device 00BA
Entry imported via the Bluetooth
®
interface Searching for a phone book entry
Using the character bar You determine the first letter of the entry you
are looking for with the first character you
enter.
X Select a character by turning 00790052007Athe
COMAND controller and press 0098to con-
firm.
The first entry in the list that starts with the
letter selected is highlighted. If there are
similar entries, the next different character
is shown. For example, with entries such as
Christel Christel andChristine
Christine , the beginnings
of the names are similar. In this case, you
will be offered a choice between E Eand I
I. Using the phone book
137Telephone Z
Page 142 of 270
X
Select Yes
YesorNo
No and press 0098to confirm.
If you select Yes
Yes, a selection list will appear
containing the five existing numbers.
If you select No
No, the process will be can-
celed.
X Select the number to be overwritten by
turning 00790052007Athe COMAND controller and
press 0098to confirm.
An input menu appears. The data field for
entering the new phone number is high-
lighted.
X Enter characters (Y page 33)
X Store the entry (Y page 34)Using call lists
Introduction
While the telephone is being used, COMAND
stores individual lists for both incoming and
outgoing calls (including missed calls). Call
lists are not available unless a mobile phone is connected to COMAND.
COMAND supports the PBAP Bluetooth ®
pro-
file. How COMAND processes call lists
depends on the model of the mobile phone
connected:
R Bluetooth ®
telephone with PBAP Blue-
tooth ®
profile:
The call lists are downloaded automatically from the mobile phone by COMAND as
soon as the mobile phone is connected to
COMAND.
R Bluetooth ®
telephone without PBAP Blue-
tooth ®
profile:
COMAND creates the call lists from both
incoming and outgoing calls (including
missed calls) as soon as the mobile phone
is connected to COMAND.
i For Bluetooth ®
telephones without the
PBAP Bluetooth ®
profile, the call lists in
COMAND are not synchronized with those
on your mobile phone. These calls may or may not be listed on your mobile phone,
depending on the model.
i If no mobile phone is connected, then the
Call Lists
Call Lists menu item is grayed out and
cannot be selected. If you connect a mobile phone other than the previous one to
COMAND, the previously available call listsand their entries will be deleted automati-
cally. They are still available on the mobile
phone itself.
i You will only be able to select the respec-
tive menu items once calls have been
received or dialed from COMAND.
Displaying missed calls in the COMAND
display is not supported by all mobile
phones. Opening the call list and selecting an
entry
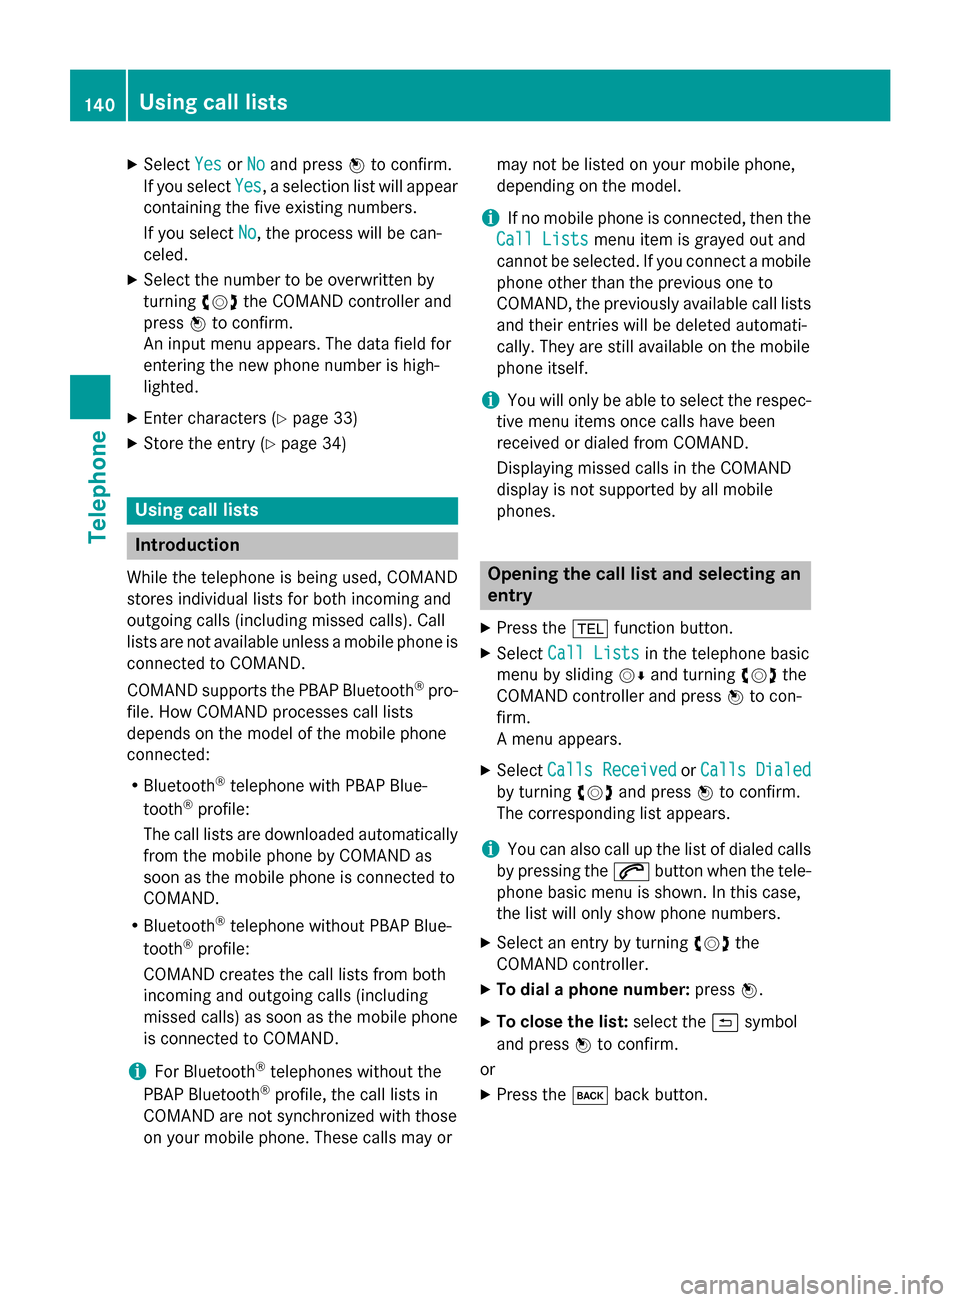
X Press the 002Bfunction button.
X Select Call Lists Call Lists in the telephone basic
menu by sliding 00520064and turning 00790052007Athe
COMAND controller and press 0098to con-
firm.
A menu appears.
X Select Calls Received Calls Received orCalls Dialed
Calls Dialed
by turning 00790052007Aand press 0098to confirm.
The corresponding list appears.
i You can also call up the list of dialed calls
by pressing the 0061button when the tele-
phone basic menu is shown. In this case,
the list will only show phone numbers.
X Select an entry by turning 00790052007Athe
COMAND controller.
X To dial a phone number: press0098.
X To close the list: select the0039symbol
and press 0098to confirm.
or X Press the 003Dback button. 140
Using call listsTelephone
Page 144 of 270
i
Save
Save
is shown in gray if the selected list
entry has already been saved.
X Select Add Phone No.
Add Phone No. and press0098to
confirm.
X Select a category for the number, e.g. Home
Home,
and press 0098to confirm.
X Select a category for the phone, e.g.
Mobile
Mobile, and press 0098to confirm.
X Select Save
Save.
The search menu for address book entries
appears.
X Search for the desired entry (Y page 137).
X Press 0098when you have finished searching.
COMAND stores the data if there are fewer
than five numbers assigned to the entry you
are searching for in the selected number
category.
You will see a message to this effect.
If five numbers are stored for the entry you are searching for, a prompt will appear ask- ing whether you wish to overwrite one of
the existing numbers.
X Select Yes
Yes orNo No and press 0098to confirm.
If you select Yes Yes, a selection list with the
five existing numbers is displayed.
If you select No
No, the process will be can-
celed.
X Select the number to be overwritten in the
list by turning 00790052007Athe COMAND controller
and press 0098to confirm.
COMAND overwrites the selected number
with the new data. Deleting call lists
If you are using a Bluetooth ®
phone that does
not support the PBAP Bluetooth ®
profile, the
call lists are generated and managed by
COMAND. You can delete these call lists in
COMAND.
If you download call lists from a Bluetooth ®
phone that supports the PBAP Bluetooth ®
profile, you cannot delete them from
COMAND. X
Select Call Lists
Call Lists in the telephone basic
menu by turning 00790052007Athe COMAND con-
troller and press 0098to confirm.
X Select Delete Call Lists Delete Call Lists and press0098
to confirm.
A prompt appears asking whether you wish to delete all call lists.
X Select Yes YesorNo
No and press 0098to confirm.
If you select Yes
Yes, the call lists are deleted.
If you select No
No, the process will be can-
celed.
i If you delete these call lists from the
mobile phone (see the separate mobile
phone operating instructions), COMAND
updates the call list display the next time it connects. Using the speed dial list
Storing an entry
You can assign ten speed dial presets (0 – 9) to the speed dial list. There are two options
available for this purpose.
Option 1:
X Search for a phone book entry in the phone
book (Y page 137).
X If an entry has several phone numbers,
select the desired number by turning 00790052007A
the COMAND controller.
X Select the list symbol to the right of the
entry by sliding 00520096the COMAND control-
ler and press 0098to confirm.
A menu appears.
X Select Speed Dial Speed Dial by turning00790052007Athe
COMAND controller and press 0098to con-
firm.
A menu appears. 142
Using the speed dial listTelephone
Page 146 of 270
X
Select Speed
Speed Dial
DialPreset
Preset List
Listby turn-
ing 00790052007A the COMAND controller and press
0098 to confirm.
The speed dial list appears.
X Select preset and press 0098to confirm.
The telephone basic menu displays the
selected entry. This initiates dialing. Deleting a speed dial number
X To delete a speed dial number: select
Delete Speed Dial Preset
Delete Speed Dial Preset in the
"Speed dial" menu by turning 00790052007Athe
COMAND controller and press 0098to con-
firm.
The speed dial number is deleted.
X To delete all speed dial numbers: select
Delete All Speed Dial Presets
Delete All Speed Dial Presets in the
"Speed dial" menu by turning 00790052007Athe
COMAND controller and press 0098to con-
firm.
You will be asked whether you want to con- tinue.
X Select Yes
Yes orNo No and press 0098to confirm.
If you select Yes
Yes, all speed dial presets will
be deleted from the speed dial list.
If you select No
No, the process will be can-
celed. Text messages
Information and requirements
In order to be able to use the text message
function, the mobile phone has to support the
MAP Bluetooth ®
profile (Message Access
Profile).
If the above conditions are met, new incoming
text messages appear in the COMAND text
message inbox. The 008Fsymbol appears in
the status bar. The symbol disappears once
you have read the text message. The ú
mail symbol is displayed if the text message
memory is full. The symbol is no longer dis- played once you delete at least one text mes-
sage.
i COMAND may not load all of the most
recent text messages:
This may occur in exceptional cases, for
example when using certain mobile
phones/brackets and if the mobile phone
inbox holds a large number of text mes-
sages. Displaying the text message inbox
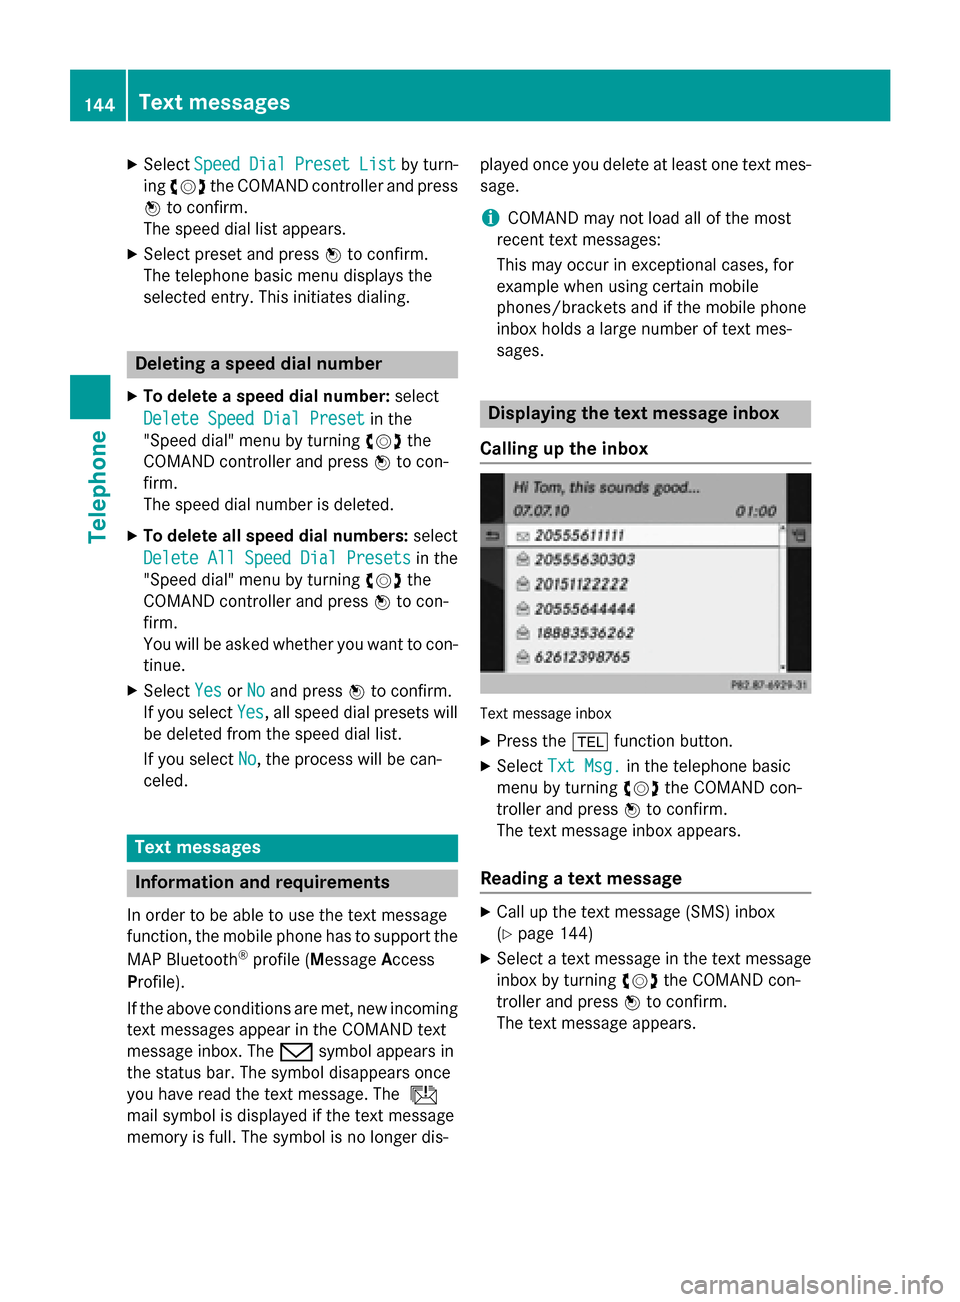
Calling up the inbox Text message inbox
X
Press the 002Bfunction button.
X Select Txt Msg. Txt Msg. in the telephone basic
menu by turning 00790052007Athe COMAND con-
troller and press 0098to confirm.
The text message inbox appears.
Reading a text message X
Call up the text message (SMS) inbox
(Y page 144)
X Select a text message in the text message
inbox by turning 00790052007Athe COMAND con-
troller and press 0098to confirm.
The text message appears. 144
Text messagesTelephone
Page 152 of 270
Changing the category of a telephone
number data field X
Display details for an address book entry
(Y page 149).
X Select the telephone number data field.
X Select the list symbol to the right of the
entry by sliding 00520096the COMAND control-
ler and press 0098to confirm.
X Select Change Category Change Category and press0098to
confirm.
X Select a number category, e.g. Home
Home.
X Select a telephone category, e.g. Mobile
Mobile.
X If desired, select Preferred
Preferred and press0098
to confirm.
Depending on the previous status, switch
the option on 0073or off 0053. The phone num-
ber is displayed as the first number in the
phone book and can be dialed immediately.
X Select Save
Save and press 0098to confirm.
The new category is stored. Calling a number stored in an entry
Prerequisites The mobile phone must be connected via the
Bluetooth ®
Interface (Y page 126).
Dialing a number X
Display details for an address book entry
(Y page 149).
X Select the phone number data field by turn-
ing 00790052007A the COMAND controller.
X Press 0098the COMAND controller to con-
firm.
or X Select the list symbol to the right of the
data field by sliding 00520096the COMAND con-
troller.
X Press 0098the COMAND controller to con-
firm.
X Select Call
Call and press 0098to confirm.
The phone makes the call. The display
switches to telephone mode. Storing the phone number as a speed
dial number
X Display details for an address book entry
(Y page 149).
X Select the phone number data field by turn-
ing 00790052007A the COMAND controller.
X Select the list symbol to the right of the
data field by sliding 00520096the COMAND con-
troller and press 0098to confirm.
X Select Speed Dial Speed Dial and press0098to con-
firm.
You can now store the number in one of the ten speed dial presets (Y page 142). Starting route guidance to an entry
Address book entry with navigable data This function is available as soon as you have
stored a destination in the destination mem-
ory (Y page 104).
X Search for an address book entry with the
0048 symbol and select it from the list
(Y page 148).
X Display details for an address book entry
(Y page 149).
X Select the address data field by turning
00790052007A the COMAND controller and press 0098
to confirm.
Route guidance begins.
or X Select the list symbol to the right of the
entry by sliding 00520096the COMAND control-
ler and press 0098to confirm.
X Select Navigate
Navigate and press0098to confirm.
Route guidance begins.
Address book entry without navigable
data Route guidance can also be started for an
address book entry without the
0048symbol. If
the address data or designations do not
match the digital map, COMAND prompts you
to re-enter the address. 150
Using the address bookTelephone
Page 153 of 270
X
Enter the destination address (Y page 63)
X Start route guidance.
The navigable address is automatically
added to the address book entry.
i This will provide you with an address book
entry that is suitable for navigation. The
next time the navigation is started, the
address data in the navigation, rather than
the postal address, is used if you have
changed address in the address entry
menu. Therefore, make sure that the des-
tination address is the desired destination
when starting navigation from the address
book. Voice tags
Introduction You can enter voice tags via the Voice Control
System (see the separate operating instruc-
tions). Once you have assigned a voice tag to
an address book entry, you can call up this
entry with a voice command and dial a phone
number, for example. You can add one voice
tag per address book entry.
Adding or changing a voice tag X
Search for an address book entry with or
without a voice tag (¦) (Y page 148).
X Select the list symbol to the right of the
entry by sliding 00520096the COMAND control-
ler and press 0098to confirm.
X Select Voice Name Voice Name and press0098to con-
firm.
X Select Add
Add orChange
Change and press 0098to con-
firm.
Subsequent operation is voice-controlled.
The Voice Control System guides you
through the dialogs. Deleting a voice tag X
Search for an address book entry with a
voice tag (Y page 148).
X Select the list symbol to the right of the
entry by sliding 00520096the COMAND control-
ler and press 0098to confirm.
X Select Voice Name Voice Name and press0098to con-
firm.
X Select Delete
Delete and press 0098to confirm.
A deletion prompt appears.
X Select Yes
YesorNo
No and press the 008Bbutton to
confirm.
If you select Yes Yes, COMAND deletes the
voice tag.
If you select No No, the process will be can-
celed.
Listening to a voice tag X
Search for an address book entry with a
voice tag (Y page 148).
X Select the list symbol to the right of the
entry by sliding 00520096the COMAND control-
ler and press 0098to confirm.
X Select Voice Name Voice Name and press0098to con-
firm.
X Select Listen
Listen and press 0098to confirm.
You hear the voice tag. Importing phone book entries
This function allows you to store phone book
entries from the mobile phone in the address book.
The following can be used as a source:
R the mobile phone
R the memory card
R the USB device
R the Bluetooth ®
Interface
Imported phone book entries are indicated in
the phone book by different symbols
(Y page 137). Using the address book
151Telephone Z
Page 154 of 270
X
Search for an entry in the phone book on
the mobile phone 0034(Ypage 137).
X Select the list symbol to the right of the
entry by sliding 00520096the COMAND control-
ler and press 0098to confirm.
X Select Save Entry
Save Entry and press0098to con-
firm.
The Data saved
Data saved message appears. The
phone book entry is now saved as an
address book entry.
The 0034symbol is replaced by the ¥sym-
bol. Importing contacts
Information and requirements You can import contacts (vCards) from the
memory card and a USB device into the
address book, or receive vCards via Blue-
tooth ®
.
i Up to 2500 entries can be imported into
the address book. A message notifies you
when the maximum number is reached.
You then have to delete existing entries in
order to import new entries (Y page 148).
Depending on the source of the contact data, different requirements apply: Source Prerequisites
Memory card The SD memory card is
inserted (Y
page 196). It
contains importable con-
tact details. USB device The USB device is inserted
into the USB port
(Y
page 197). It contains
importable contact details. Requirements for receiving vCards via
Bluetooth
®
You can receive vCards from devices (e.g.
from a PC) that support the sending of vCards
via Bluetooth ®
. It is not necessary to authorize the device in
COMAND to do so.
Please bear the following in mind:
R Bluetooth ®
must be activated in COMAND
and on the Bluetooth ®
device; see the oper-
ating instructions for the device.
R the Bluetooth ®
device must be able to send
vCards via Bluetooth ®
(see operating
instructions for the device).
R the Bluetooth ®
device in the vehicle must
be switched on.
Importing from the memory card or USB device Entries imported from the memory card or
from a USB device have the
00BBsymbol.
The following conditions must be fulfilled in
order to import vCards:
R vCards (vcf files) may be located in the main
directory or in folders. COMAND allows you
to select the relevant folders directly.
R vCards must have the file extension ".vcf".
i One vcf file may contain several vCards.
COMAND supports vCards in versions 2.1
and 3.0.
X Select Address Book Address Book in the address book
or, if the telephone basic menu is shown,
select Phone
Phone by sliding 00520064and turning
00790052007A the COMAND controller and press 0098
to confirm.
X Select Download Contacts
Download Contacts and press0098
to confirm.
A menu appears.
X Select From The Memory Card
From The Memory Card orFrom From
USB Device
USB Device in the menu by turning 00790052007A
the COMAND controller and press 0098to
confirm.
X Select Add
AddorOverwrite
Overwrite and press0098to
confirm.
Add Add imports the entries from the memory
card or USB device into the address book. 152
Using the address bookTelephone
Page 155 of 270
Overwrite
Overwrite
imports the entries from the
memory card or USB device and overwrites all entries in the address book with the
00BB symbol. The previous entries are then
no longer available.
After the contact data has been imported
successfully, you will see a message to this
effect. The address book or the respective
telephone basic menu is displayed.
i You can select
Overwrite
Overwrite if the address
book already contains corresponding
entries. A message notifies you when the
address book is full.
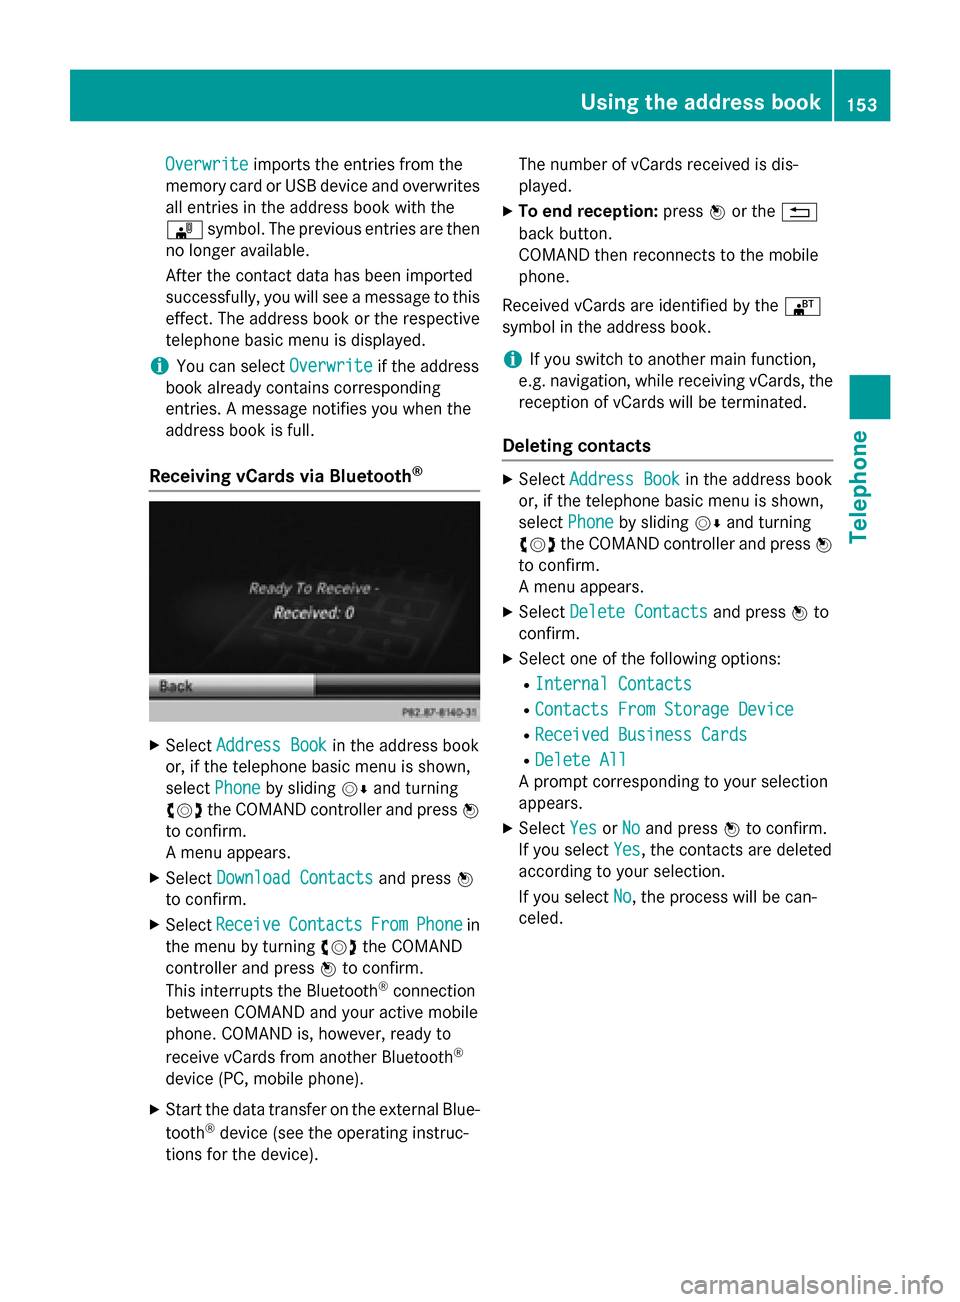
Receiving vCards via Bluetooth ®X
Select Address Book Address Book in the address book
or, if the telephone basic menu is shown,
select Phone
Phone by sliding 00520064and turning
00790052007A the COMAND controller and press 0098
to confirm.
A menu appears.
X Select Download Contacts
Download Contacts and press0098
to confirm.
X Select Receive Receive Contacts
Contacts From
FromPhone
Phone in
the menu by turning 00790052007Athe COMAND
controller and press 0098to confirm.
This interrupts the Bluetooth ®
connection
between COMAND and your active mobile
phone. COMAND is, however, ready to
receive vCards from another Bluetooth ®
device (PC, mobile phone).
X Start the data transfer on the external Blue-
tooth ®
device (see the operating instruc-
tions for the device). The number of vCards received is dis-
played.
X To end reception: press0098or the 0038
back button.
COMAND then reconnects to the mobile
phone.
Received vCards are identified by the 00BA
symbol in the address book.
i If you switch to another main function,
e.g. navigation, while receiving vCards, the
reception of vCards will be terminated.
Deleting contacts X
Select Address Book Address Book in the address book
or, if the telephone basic menu is shown,
select Phone
Phone by sliding 00520064and turning
00790052007A the COMAND controller and press 0098
to confirm.
A menu appears.
X Select Delete Contacts Delete Contacts and press0098to
confirm.
X Select one of the following options:
R Internal Contacts
Internal Contacts
R Contacts From Storage Device
Contacts From Storage Device
R Received Business Cards
Received Business Cards
R Delete All
Delete All
A prompt corresponding to your selection
appears.
X Select Yes
YesorNo
No and press 0098to confirm.
If you select Yes
Yes, the contacts are deleted
according to your selection.
If you select No No, the process will be can-
celed. Using the address book
153Telephone Z