key MERCEDES-BENZ E-Class 2016 W213 Comand Manual
[x] Cancel search | Manufacturer: MERCEDES-BENZ, Model Year: 2016, Model line: E-Class, Model: MERCEDES-BENZ E-Class 2016 W213Pages: 246, PDF Size: 6.7 MB
Page 123 of 246
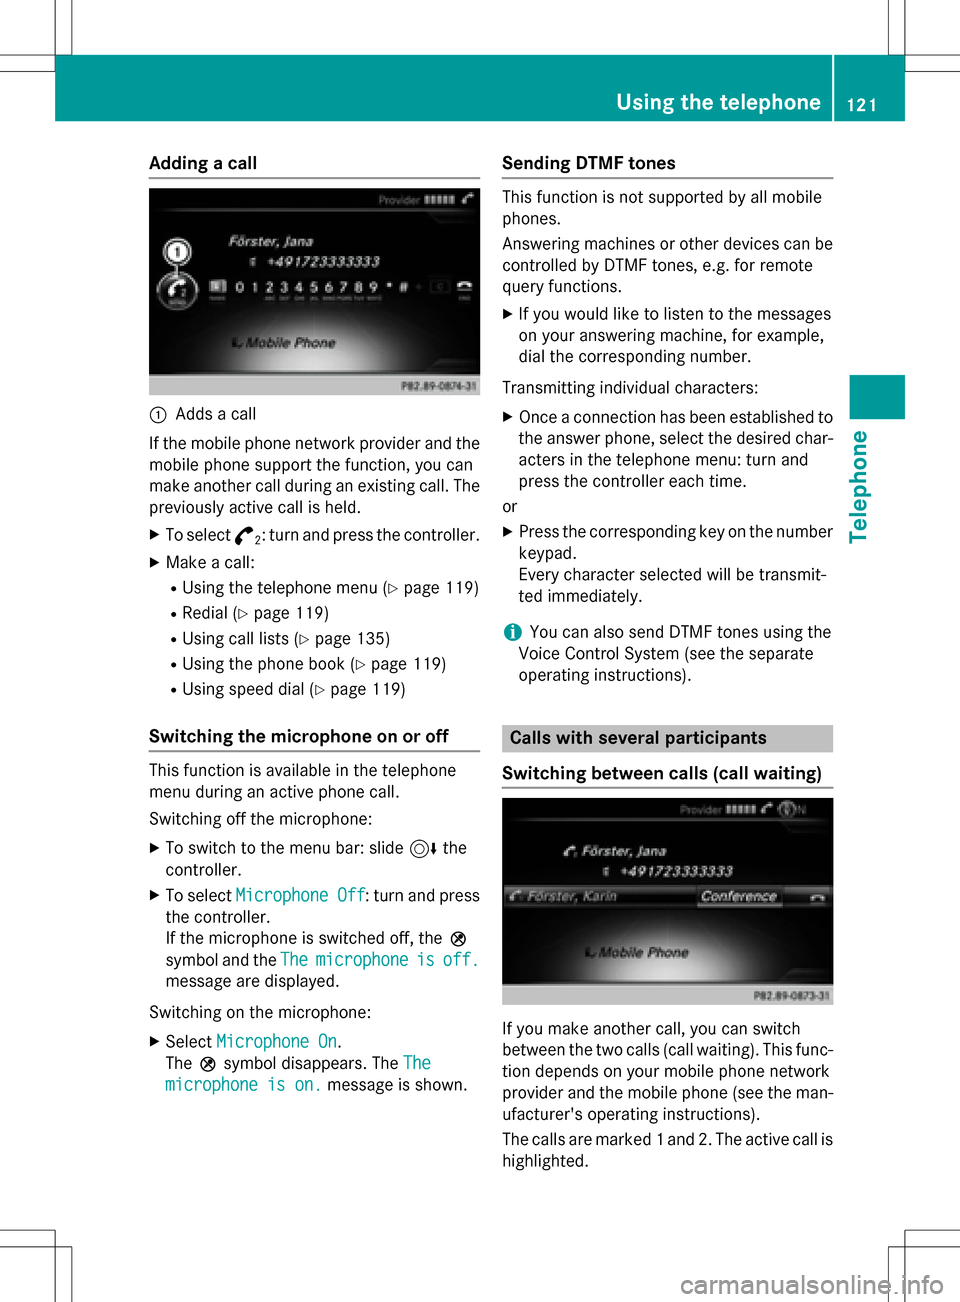
Adding a call
:Addsacall
If th emobile phone network provide rand th e
mobile phon esupport th efunction ,you can
mak eanother call during an existing call .The
previously active call is held .
XTo select°2:tur nand press th econtroller .
XMake acall:
RUsing th etelephon emen u (Ypage 119)
RRedial (Ypage 119)
RUsing call list s (Ypage 135)
RUsing thephone book (Ypage 119)
RUsing speeddial (Ypage 119)
Switching the microphone on oroff
This function is available in th etelephon e
men uduring an active phone call .
Switchin goff th emicrophone:
XTo switch to th emen ubar: slide 6the
controller .
XTo selectMicrophon eOff:tur nand press
th econtroller .
If th emicrophon eis switched off ,th eQ
symbol and th eThe
microphon eisoff.
message are displayed.
Switchin gon th emicrophone:
XSelec tMicrophon eOn.
The Qsymbol disappears. The The
microphoneis on.message is shown.
Sending DTMF tones
This function is no tsupported by all mobile
phones.
Answering machines or other device scan be
controlled by DTMF tones, e.g. for remot e
quer yfunctions.
XIf you would lik eto listen to th emessage s
on your answering machine, for example,
dial th ecorresponding number .
Transmitting individual characters :
XOnceaconnection has been established to
th eanswer phone, select th edesired char-
acters in th etelephon emenu: tur nand
press th econtroller eac htime.
or
XPre ssthecorresponding ke yon th enumber
keypad.
Every characte rselected will be transmit -
te dimmediately.
iYou can also sen dDTMF tone susin gth e
Voic eControl Syste m(see th eseparat e
operating instructions).
Calls with several pa rticipants
Switching between calls (call waiting)
If you mak eanother call ,you can switch
between th etwo call s(call waiting). This func-
tion depend son your mobile phone network
provide rand th emobile phone (see th eman -
ufacturer' soperating instructions).
The call sare marke d 1and 2. The active call is
highlighted.
Using the telephone121
Telephone
Z
Page 126 of 246
Symbol overview
Sym-
bolExplanation
ÆContact that has been entered, edi-
ted or saved on COMAND.
\Contact with voice tag
These contacts have also been
assigned a voice tag. Voice tags are
available in vehicles with the Voice
Control System (see the separate
operating instructions).
ÃContact that was called up from a
mobile phone
¯Contact imported from the SD
memory card or USB device.
®Contact imported via the Blue-
tooth®interface.
Searching for a contact
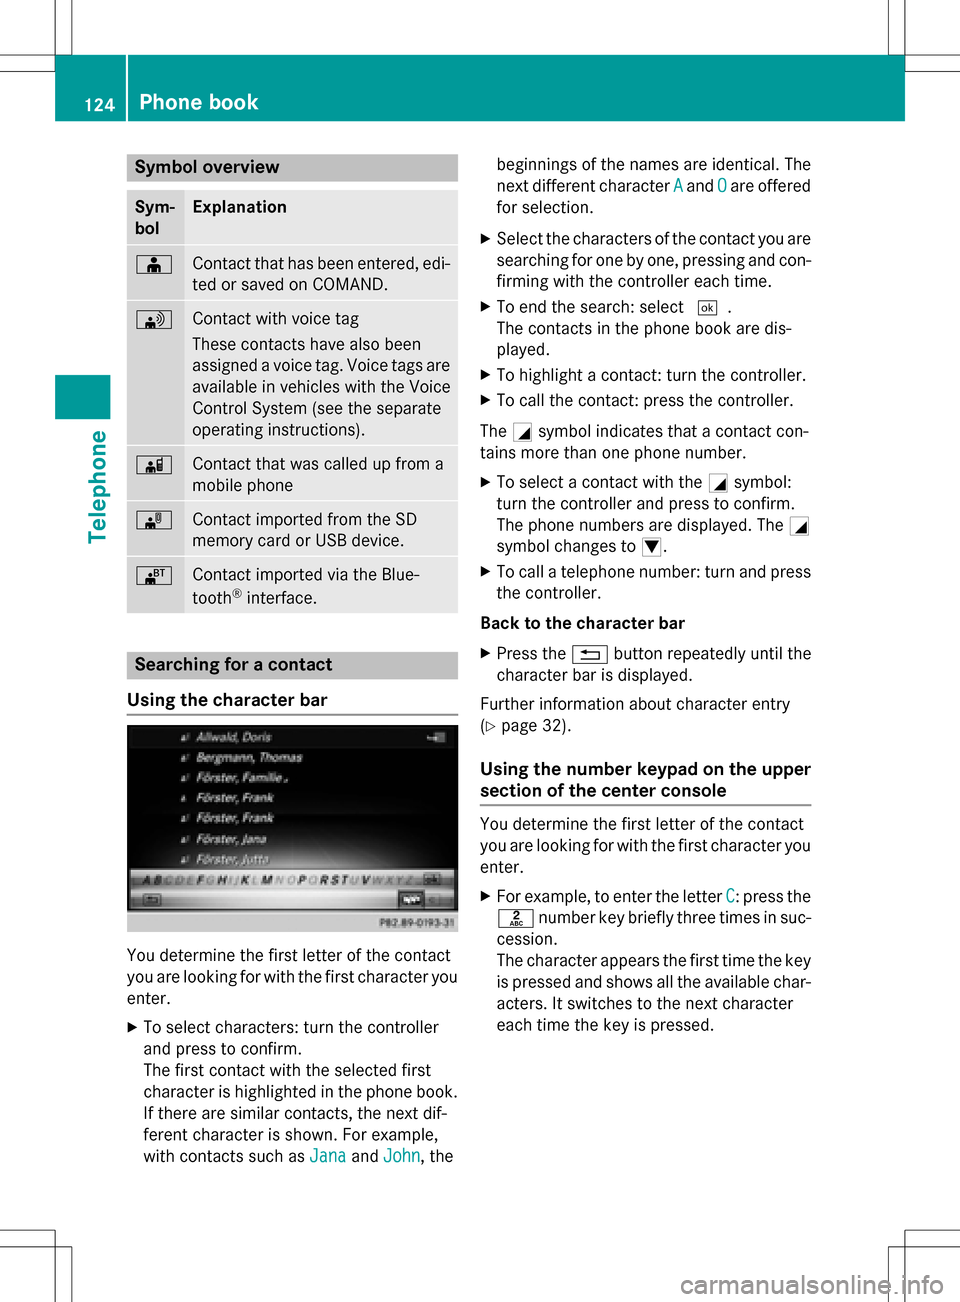
Using the character bar
You determine the first letter of the contact
you are looking for with the first character you
enter.
XTo select characters: turn the controller
and press to confirm.
The first contact with the selected first
character is highlighted in the phone book.
If there are similar contacts, the next dif-
ferent character is shown. For example,
with contacts such as Jana
andJohn, the beginnings of the names are identical. The
next different character
A
andOare offered
for selection.
XSelect the characters of the contact you are
searching for one by one, pressing and con- firming with the controller each time.
XTo end the search: select ¬.
The contacts in the phone book are dis-
played.
XTo highlight a contact: turn the controller.
XTo call the contact: press the controller.
The Gsymbol indicates that a contact con-
tains more than one phone number.
XTo select a contact with the Gsymbol:
turn the controller and press to confirm.
The phone numbers are displayed. The G
symbol changes to I.
XTo call a telephone number: turn and press
the controller.
Back to the character bar
XPress the %button repeatedly until the
character bar is displayed.
Further information about character entry
(
Ypage 32).
Using the number keypad on the upper
section of the center console
You determine the first letter of the contact
you are looking for with the first character you
enter.
XFor example, to enter the letter C: press the
l number key briefly three times in suc-
cession.
The character appears the first time the key
is pressed and shows all the available char-
acters. It switches to the next character
each time the key is pressed.
124Phone book
Telephone
Page 127 of 246
Using the touchpad
You determine the first letter of the contact
you are looking for with the first character you
enter.
XDraw the letter on the touchpad surface.
The first contact with the selected first
character is highlighted in the phone book.
Further information on handwriting recog-
nition on the touchpad (
Ypage 27).
XDraw additional letters on the touchpad
surface one after another.
XTo complete the search and return to the
phone book: press the touchpad.
XTo select and call the contact: glide up or
down and press.
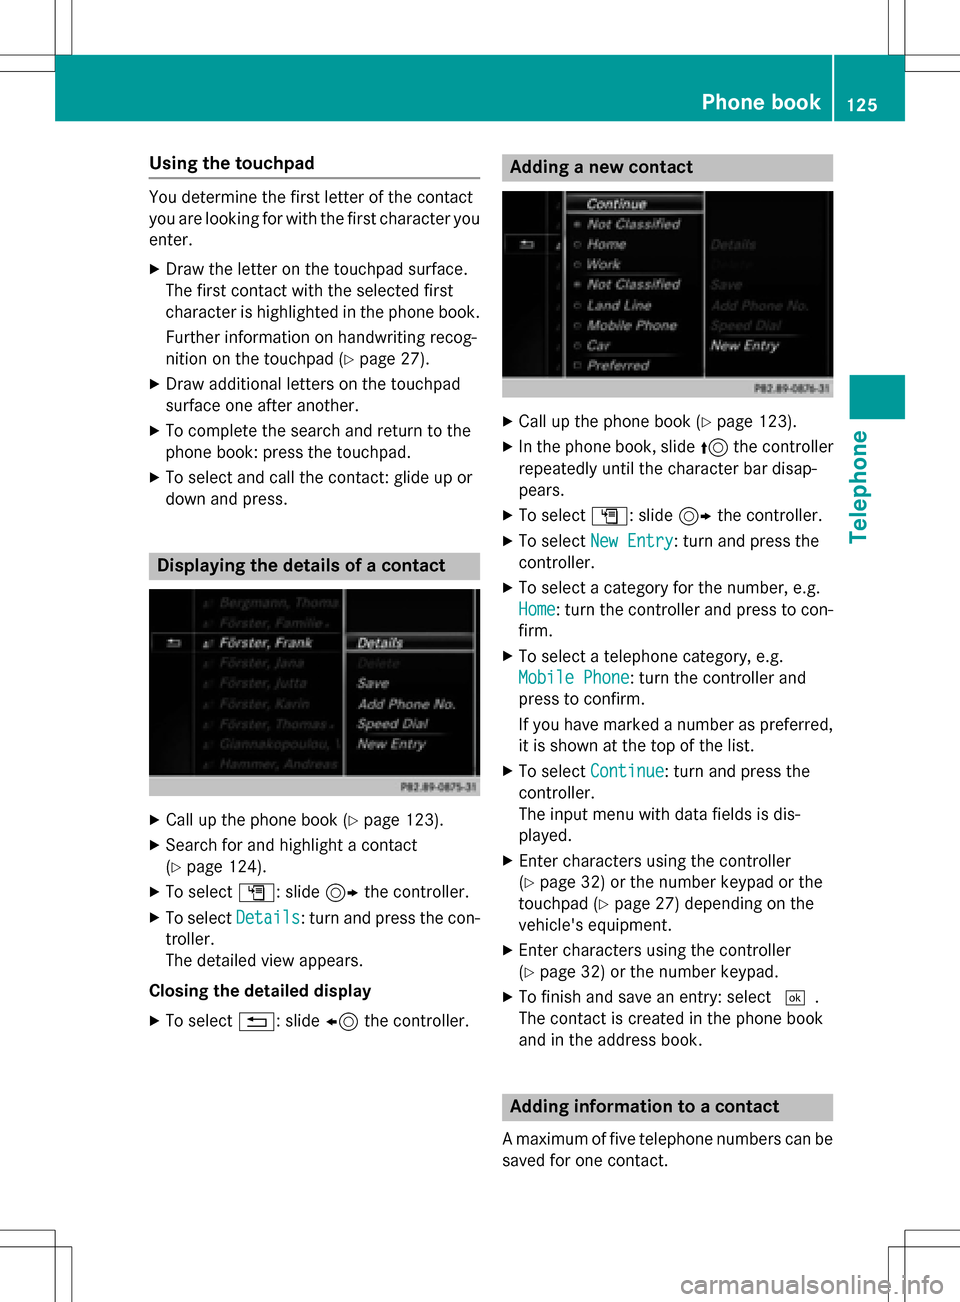
Displaying the details of a contact
XCall up the phone book (Ypage 123).
XSearch for and highlight a contact
(
Ypage 124).
XTo select G: slide 9the controller.
XTo select Details: turn and press the con-
troller.
The detailed view appears.
Closing the detailed display
XTo select %: slide 8the controller.
Adding a new contact
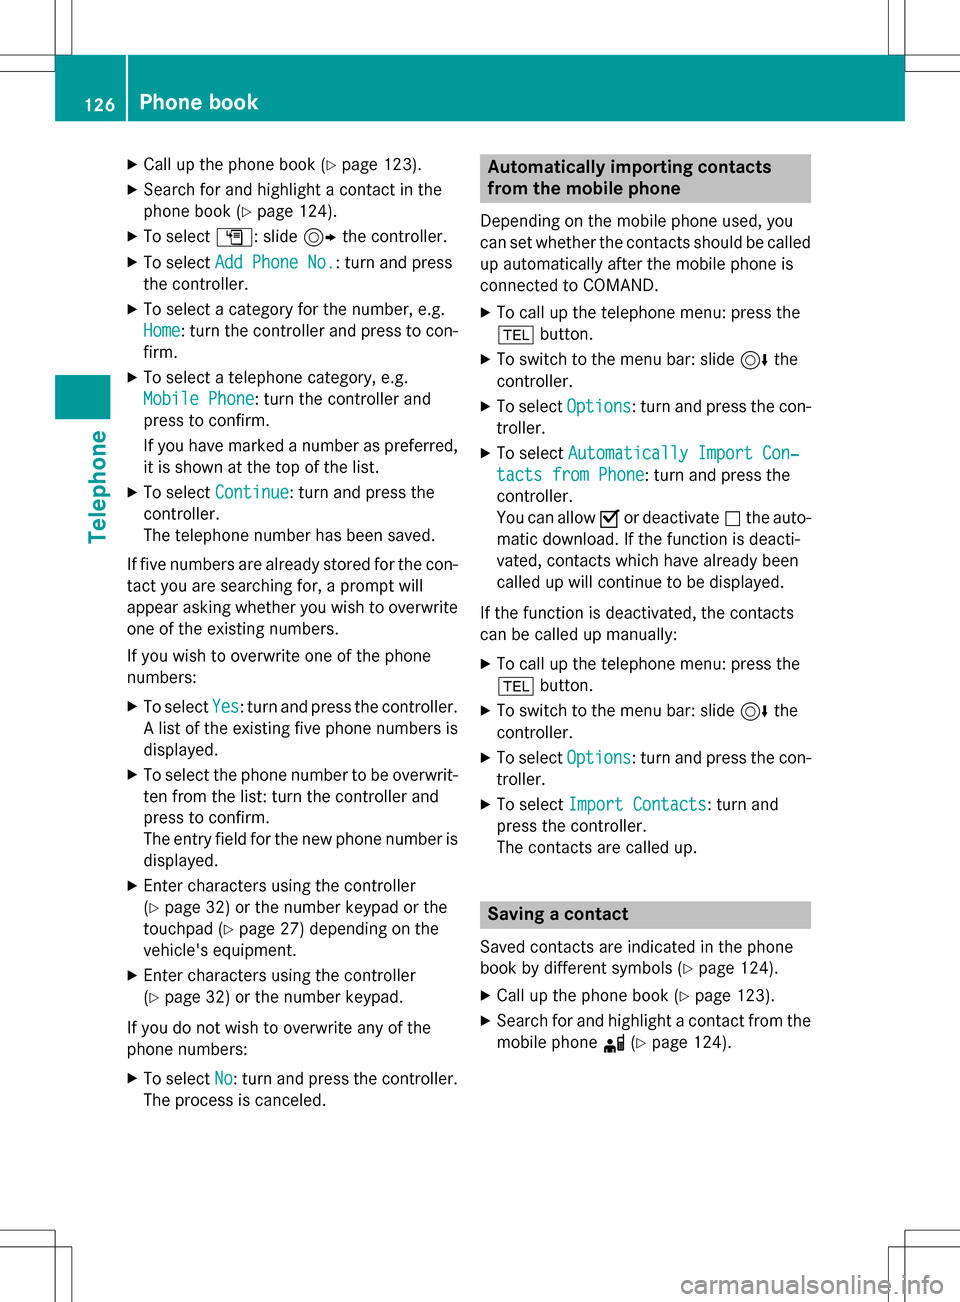
XCall up the phone book (Ypage 123).
XIn the phone book, slide 5the controller
repeatedly until the character bar disap-
pears.
XTo select G: slide 9the controller.
XTo select New Entry: turn and press the
controller.
XTo select a category for the number, e.g.
Home
: turn the controller and press to con-
firm.
XTo select a telephone category, e.g.
Mobile Phone
: turn the controller and
press to confirm.
If you have marked a number as preferred,
it is shown at the top of the list.
XTo select Continue: turn and press the
controller.
The input menu with data fields is dis-
played.
XEnter characters using the controller
(
Ypage 32) or the number keypad or the
touchpad (
Ypage 27) depending on the
vehicle's equipment.
XEnter characters using the controller
(
Ypage 32) or the number keypad.
XTo finish and save an entry: select ¬.
The contact is created in the phone book
and in the address book.
Adding information to a contact
A maximum of five telephone numbers can be
saved for one contact.
Phone book125
Telephone
Z
Page 128 of 246
XCallup the phone book (Ypage 123).
XSearch for and highlight a contact in the
phone book (
Ypage 124).
XTo select G: slide 9the controller.
XTo select Add Phone No.: turn and press
the controller.
XTo select a category for the number, e.g.
Home
: turn the controller and press to con-
firm.
XTo select a telephone category, e.g.
Mobile Phone
: turn the controller and
press to confirm.
If you have marked a number as preferred,
it is shown at the top of the list.
XTo select Continue: turn and press the
controller.
The te lephone number has been save d.
If five numbers are already stored for the con-
tact you are searching for, a prompt will
appear asking whether you wish to overwr ite
one of the existing numbers.
If you wish to overwr ite one of the phone
numbers:
XTo select Yes: turn and press the controller.
A list of the existing five phone numbers is
disp layed.
XTo select the phone number to beoverwr it-
ten from the list: turn the controller and
press to confirm.
The entry field for the new phone number is
disp layed.
XEnter characters using the controller
(
Ypage 32) or the number keypad or the
touchpad (
Ypage 27) depending on the
veh icle's equipment.
XEnter characters using the controller
(
Ypage 32) or the number keypad.
If you donot wish to overwrite any of the
phone numbers:
XTo select No: turn and press the controller.
The process iscanceled.
Automatically importing contacts
from the mobile phone
Depending on the mob ilephone used, you
can set whether the contacts should becalled
up automatical lyafter the mob ilephone is
connected to COMAND.
XTo call up the te lephone menu: press the
% button.
XTo switch to the menu bar: slide 6the
controller.
XTo select Options: turn and press the con-
troller.
XTo select Automatically Import Con‐
tacts from Phone: turn and press the
controller.
You can allow Oor deactivate ªthe auto-
mat ic down load.Ifthe function isdeacti-
vated, contacts which have already been
called up willcontinue to be displayed.
If the function isdeactivated, the contacts
can becalled up manually:
XTo call up the telephone menu: press the
% button.
XTo switch to the menu bar: slide 6the
controller.
XTo select Options: turn and press the con-
troller.
XTo select Import Contacts: turn and
press the controller.
The contacts are called up.
Saving a contact
Saved contacts are indicated inthe phone
book bydifferent symbols (
Ypage 124).
XCall up the phone book (Ypage 123).
XSearch for and highlight a contact from the
mob ilephone d(
Ypage 124).
126Phone book
Telephone
Page 130 of 246
iBefore selling your vehicle, delete the
contacts saved in COMAND using the reset function (
Ypage 51).
Calling up the address book
XTo call up the telephone menu: press the
% button.
XTo switch to the menu bar: slide 5the
controller.
XTo select Tel: turn the controller and press
to confirm.
XTo select Address Book: turn and press
the controller.
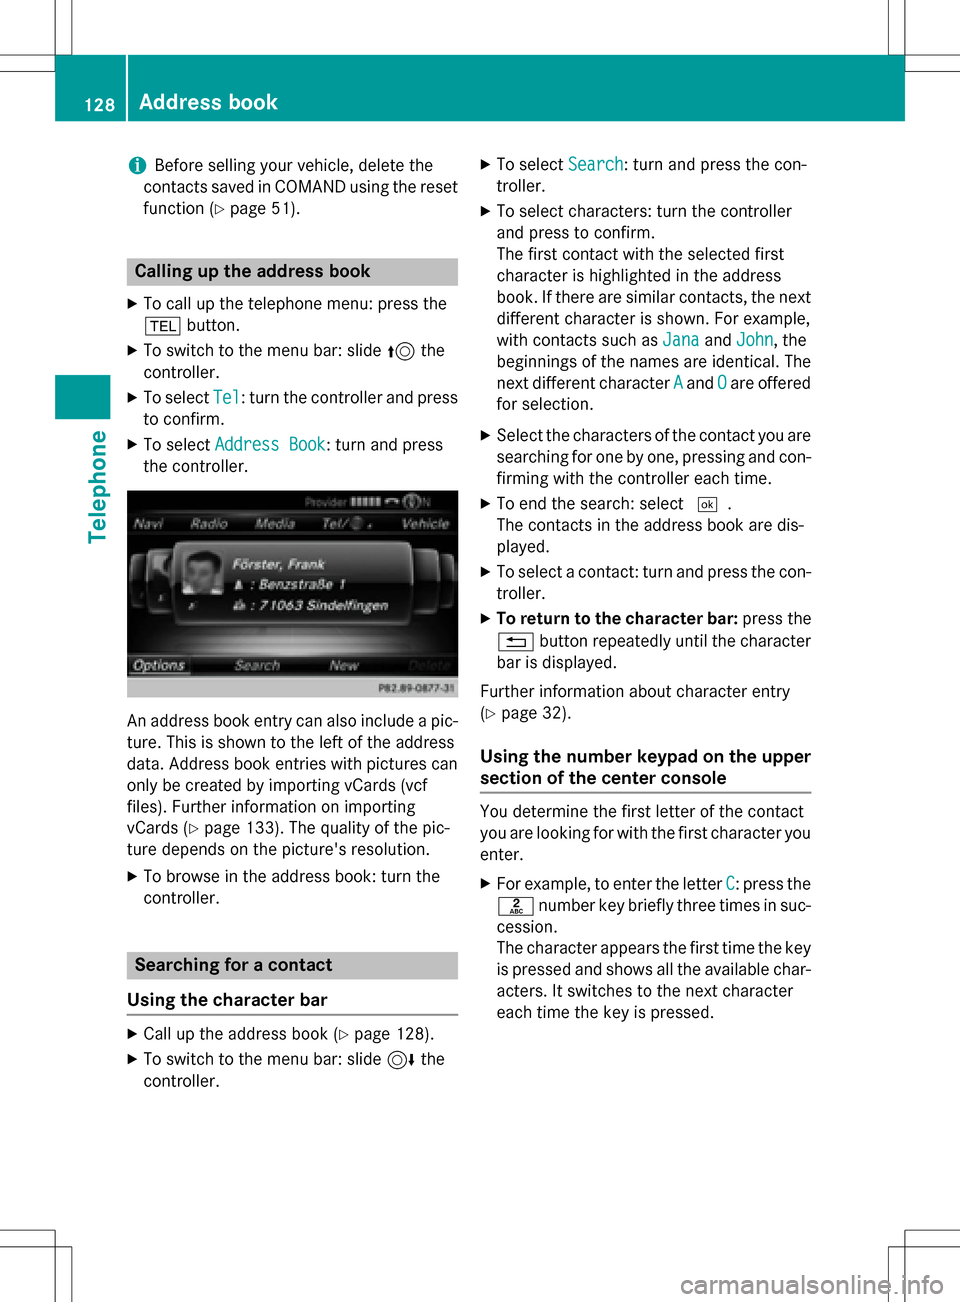
An address book entry can also include a pic-
ture. This is shown to the left of the address
data. Address book entries with pictures can
only be created by importing vCards (vcf
files). Further information on importing
vCards (
Ypage 133). The quality of the pic-
ture depends on the picture's resolution.
XTo browse in the address book: turn the
controller.
Searching for a contact
Using the character bar
XCall up the address book (Ypage 128).
XTo switch to the menu bar: slide 6the
controller.
XTo select Search: turn and press the con-
troller.
XTo select characters: turn the controller
and press to confirm.
The first contact with the selected first
character is highlighted in the address
book. If there are similar contacts, the next
different character is shown. For example,
with contacts such as Jana
andJohn, the
beginnings of the names are identical. The
next different character A
andOare offered
for selection.
XSelect the characters of the contact you are
searching for one by one, pressing and con- firming with the controller each time.
XTo end the search: select ¬.
The contacts in the address book are dis-
played.
XTo select a contact: turn and press the con-
troller.
XTo return to the character bar: press the
% button repeatedly until the character
bar is displayed.
Further information about character entry
(
Ypage 32).
Using the number keypad on the upper
section of the center console
You determine the first letter of the contact
you are looking for with the first character you
enter.
XFor example, to enter the letter C: press the
l number key briefly three times in suc-
cession.
The character appears the first time the key
is pressed and shows all the available char-
acters. It switches to the next character
each time the key is pressed.
128Address book
Telephone
Page 131 of 246
Using the touchpad
You determine the first letter of the contact
you are looking for with the first character you
enter.
XDraw the letter on the touchpad surface.
The first contact with the selected first
character is highlighted in the address
book.
Further information on handwriting recog-
nition on the touchpad (
Ypage 27).
XDraw additional letters on the touchpad
surface one after another.
XTo complete the search and return to the
address book: press the touchpad.
XTo select and call the contact: glide up or
down and press.
Adding a new contact
You can enter address data directly into the
address book. If you store telephone num-
bers in the COMAND phone book, these are
also saved in the address book. If you store a
navigation destination, COMAND creates an
address book entry which includes the com-
plete navigable address data.
XCall up the address book (Ypage 128).
XTo switch to the menu bar: slide 6the
controller.
XTo select New: turn and press the controller.
The surname and first name input lines are
displayed.
XEnter characters using the controller
(
Ypage 32) or the number keypad or the
touchpad (
Ypage 27) depending on the
vehicle's equipment.
XEnter characters using the controller
(
Ypage 32) or the number keypad.
XTo save the surname and first name: select
¬.
The details for the contact are displayed.
XTo add a desired entry (e.g. Add E-Mail
Address): turn and press the controller.
Depending on the type of entry, the corre-
sponding input menu appears.
XEnter characters using the controller
(
Ypage 32) or the number keypad or the
touchpad (
Ypage 27) depending on the
vehicle's equipment.
XEnter characters using the controller
(
Ypage 32) or the number keypad.
XTo finish and save an entry: select ¬.
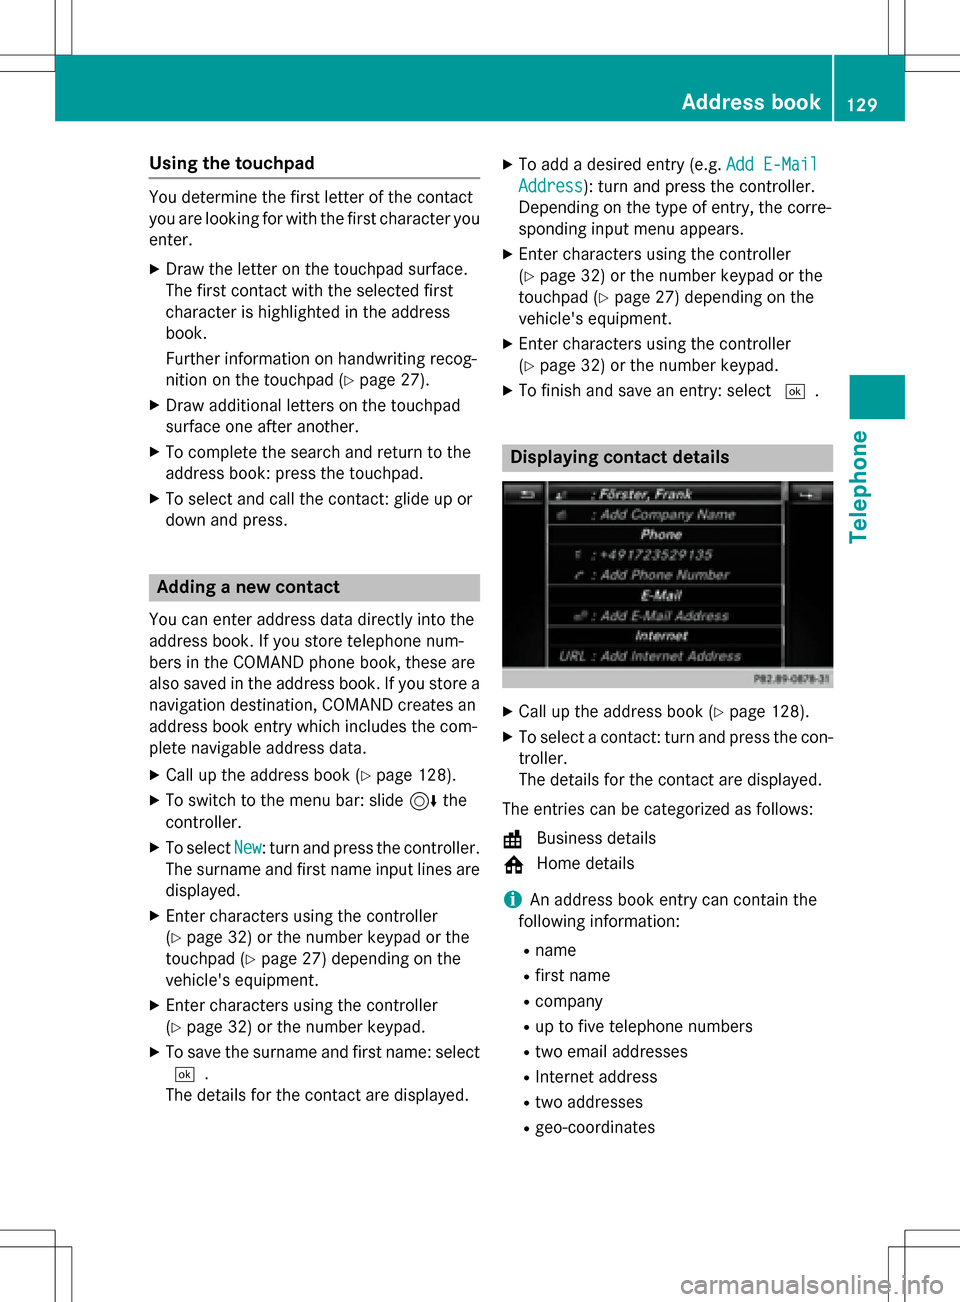
Displaying contact details
XCall up the address book (Ypage 128).
XTo select a contact: turn and press the con-
troller.
The details for the contact are displayed.
The entries can be categorized as follows:
\ Business details
6 Home details
iAn address book entry can contain the
following information:
Rname
Rfirst name
Rcompany
Rup to five telephone numbers
Rtwo email addresses
RInternet address
Rtwo addresses
Rgeo-coordinates
Address book129
Telephone
Z
Page 132 of 246
Adding information to a contact
Amaximum of fiv etelephon enumber scan be
saved for on econtact .
XCall up th eaddress book (Ypage 128).
XTo selectacontact :tur nand press th econ-
troller .
The details for th econtact are displayed.
XTo add th edesired entr y(e.g. AddE-Mail
Addres s): turnand press th econtroller .
Dependin gon th etyp eof entry, th ecorre-
sponding input men uappears.
XEnte rcharacters usin gth econtroller
(
Ypage 32 )or th enumber keypad or th e
touchpad (
Ypage 27)depending on th e
vehicle's equipment.
XEnte rcharacters usin gth econtroller
(
Ypage 32) or th enumber keypad.
XTo finish and sav ean entry: select ¬.
Startingroute guidance to an address
or geo-coor dinates
If an address wit h a ZIPcode is saved, th e
address can be used for rout eguidance .If th e
ZIP code canno tbe assigned to an exact
address ,you can adjust th edestination sub-
sequently usin gth econtroller .
XCall up theaddress book (Ypage 128).
XTo selectacontact :tur nand press th econ-
troller .
The details for th econtact are displayed.
XTo select th eaddress or geo-coordinates:
tur nand press th econtroller .
The navigation men uis displayed.
XTo select Start:slide 6and press th e
controller .
The rout eto th edestination address is cal-
culated and rout eguidance starts.
Making a call
XCall up th eaddr essbook (Ypage 128).
XTo select acontact :tur nand pre ssthecon-
troller .
The details for th econtact are displayed.
XTo select atelephon enumber :tur nand
pre ssthecontroller .
The number is dialed .Further information
about th efunction sduring acall
(
Ypage 120).
Sending text messages
XCall up th eaddress book (Ypage 128).
XTo selectacontact :tur nand pre ssthecon-
troller .
The details for th econtact are displayed.
XTo highligh tth etelephon enumber :tur nth e
controller .
XTo select G:slide9 thecontroller .
XTo select SendTex tMessag e:tur nand
press th econtroller .
The entr yfields for ate xt message are dis-
played (
Ypage 142).
Observ eth erequirements for th emessage
function (
Ypage 138).
Sending e-mail
XCall up th eaddr essbook (Ypage 128).
XSelectan entry: tur nand pre ssthecontrol -
ler .
The details for th econtact are displayed.
XTo select an e-mail address :tur nand pre ss
th econtroller .
The entr yfields for an e-mail are displayed
(
Ypage 142).
Observ eth erequirements for th emessage
function (
Ypage 138).
130Address book
Telephone
Page 138 of 246
XTo call up the telephone menu: press the
%button.
XTo switch to the menu bar: slide 6the
controller.
XTo select Call Lists: turn and press the
controller.
XTo select Calls ReceivedorCalls
Dialed: turn and press the controller.
The relevant list is displayed.
XTo highlight the desired entry: turn the con-
troller.
XTo select G: slide 9the controller.
XTo select Details: turn and press the con-
troller.
The details are displayed.
XTo go back to the list: slide 8the con-
troller repeatedly until the list is highligh-
ted.
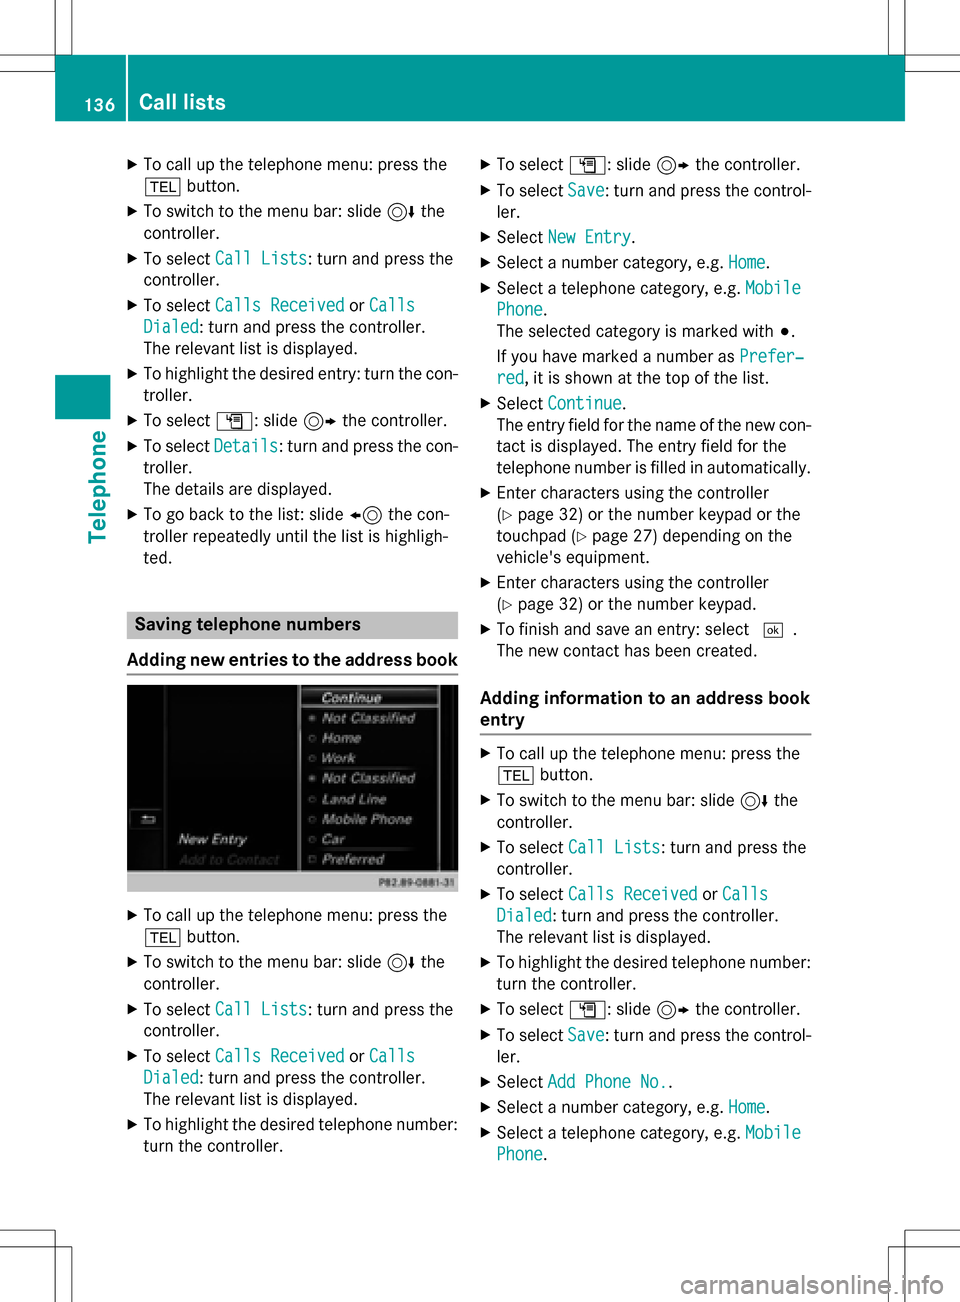
Saving telephone numbers
Adding new entries to the address book
XTo call up the telephone menu: press the
% button.
XTo switch to the menu bar: slide 6the
controller.
XTo select Call Lists: turn and press the
controller.
XTo select Calls ReceivedorCalls
Dialed: turn and press the controller.
The relevant list is displayed.
XTo highlight the desired telephone number:
turn the controller.
XTo select G: slide 9the controller.
XTo select Save: turn and press the control-
ler.
XSelect New Entry.
XSelect a number category, e.g. Home.
XSelect a telephone category, e.g. Mobile
Phone.
The selected category is marked with #.
If you have marked a number as Prefer‐
red, it is shown at the top of the list.
XSelectContinue.
The entry field for the name of the new con-
tact is displayed. The entry field for the
telephone number is filled in automatically.
XEnter characters using the controller
(
Ypage 32) or the number keypad or the
touchpad (
Ypage 27) depending on the
vehicle's equipment.
XEnter characters using the controller
(
Ypage 32) or the number keypad.
XTo finish and save an entry: select ¬.
The new contact has been created.
Adding information to an address book
entry
XTo call up the telephone menu: press the
% button.
XTo switch to the menu bar: slide 6the
controller.
XTo select Call Lists: turn and press the
controller.
XTo select Calls ReceivedorCalls
Dialed: turn and press the controller.
The relevant list is displayed.
XTo highlight the desired telephone number:
turn the controller.
XTo select G: slide 9the controller.
XTo select Save: turn and press the control-
ler.
XSelect Add Phone No..
XSelect a number category, e.g. Home.
XSelect a telephone category, e.g. Mobile
Phone.
136Call lists
Telephone
Page 144 of 246
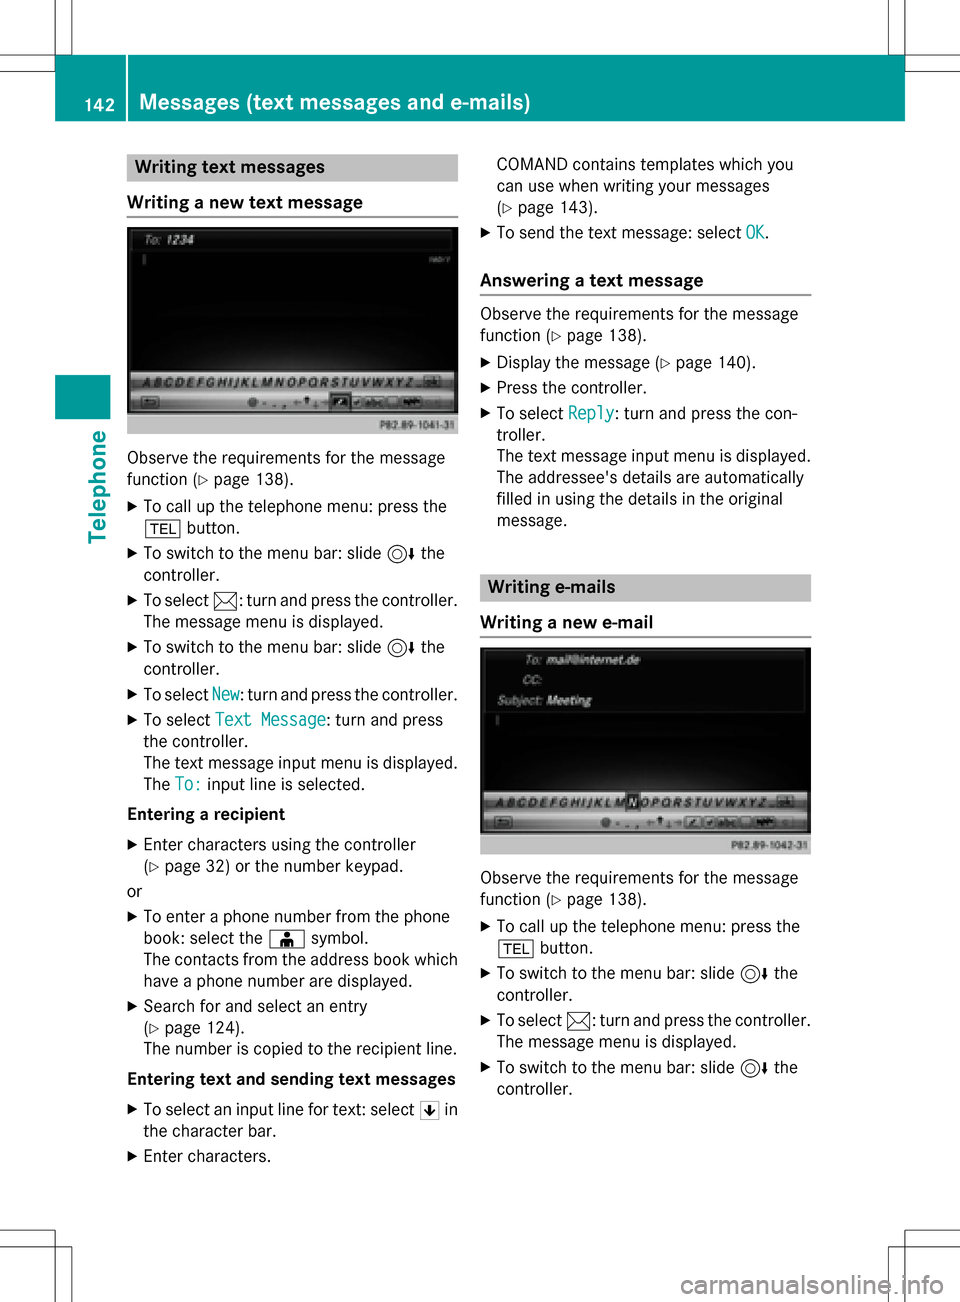
Writing text messages
Writing a new text message
Observe the requirements for the message
function (
Ypage 138).
XTo call up the telephone menu: press the
% button.
XTo switch to the menu bar: slide 6the
controller.
XTo select 1: turn and press the controller.
The message menu is displayed.
XTo switch to the menu bar: slide 6the
controller.
XTo select New: turn and press the controller.
XTo select Text Message: turn and press
the controller.
The text message input menu is displayed.
The To:
input line is selected.
Entering a recipient
XEnter characters using the controller
(
Ypage 32) or the number keypad.
or
XTo enter a phone number from the phone
book: select the Æsymbol.
The contacts from the address book which
have a phone number are displayed.
XSearch for and select an entry
(
Ypage 124).
The number is copied to the recipient line.
Entering text and sending text messages
XTo select an input line for text: select 5in
the character bar.
XEnter characters. COMAND contains templates which you
can use when writing your messages
(
Ypage 143).
XTo send the text message: select
OK.
Answering a text message
Observe the requirements for the message
function (
Ypage 138).
XDisplay the message (Ypage 140).
XPress the controller.
XTo selectReply: turn and press the con-
troller.
The text message input menu is displayed.
The addressee's details are automatically
filled in using the details in the original
message.
Writing e-mails
Writing a new e-mail
Observe the requirements for the message
function (
Ypage 138).
XTo call up the telephone menu: press the
% button.
XTo switch to the menu bar: slide 6the
controller.
XTo select 1: turn and press the controller.
The message menu is displayed.
XTo switch to the menu bar: slide 6the
controller.
142Messages (text messages and e-mails)
Telephone
Page 145 of 246
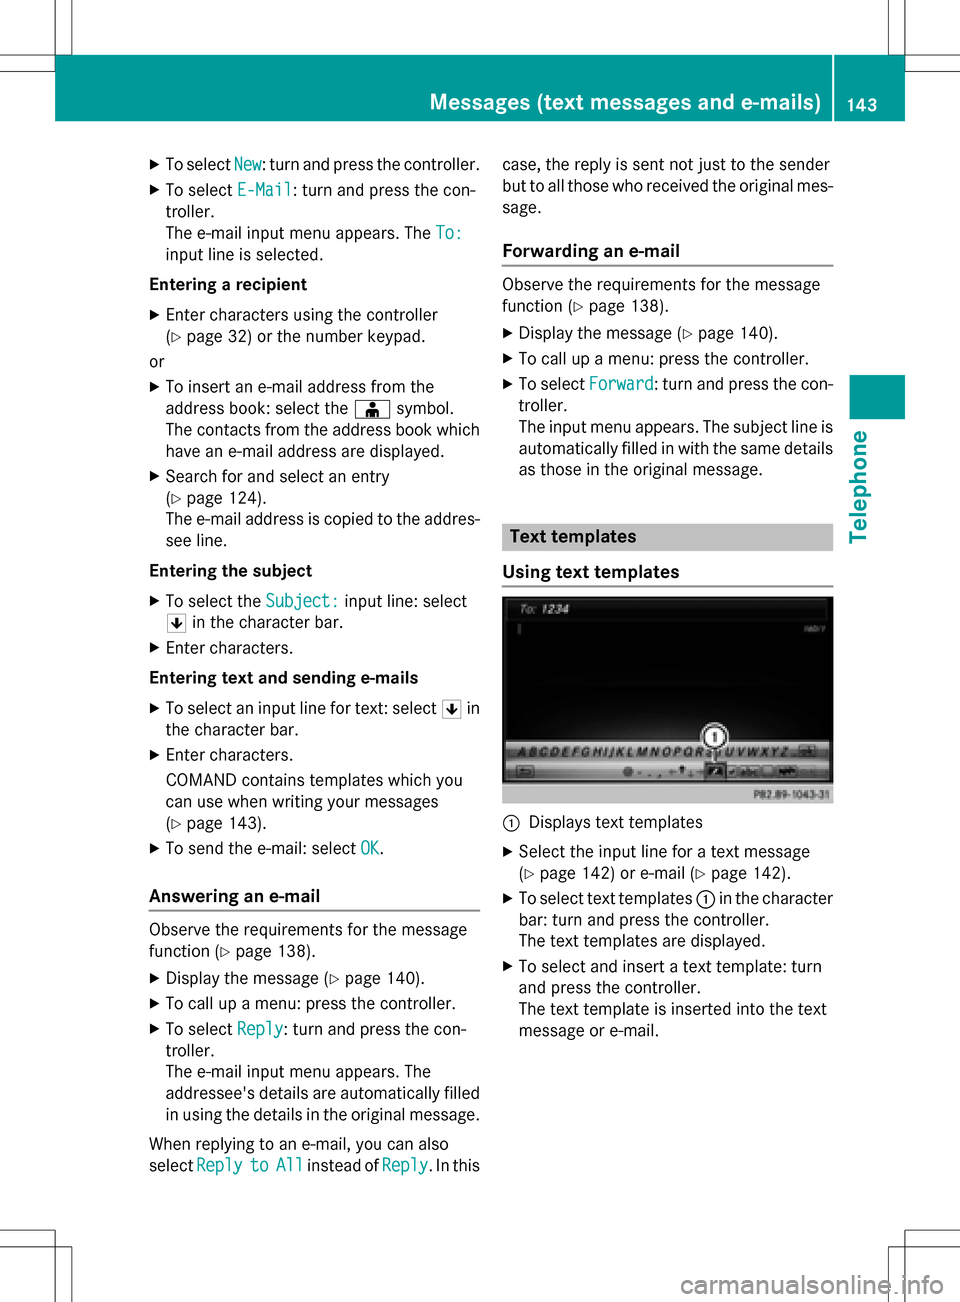
XTo selectNew: turn and press the controller.
XTo select E-Mail: turn and press the con-
troller.
The e-mail input menu appears. The To:
input line is selected.
Entering a recipient
XEnter characters using the controller
(
Ypage 32) or the number keypad.
or
XTo insert an e-mail address from the
address book: select the Æsymbol.
The contacts from the address book which
have an e-mail address are displayed.
XSearch for and select an entry
(
Ypage 124).
The e-mail address is copied to the addres-
see line.
Entering the subject
XTo select the Subject:input line: select
5 in the character bar.
XEnter characters.
Entering text and sending e-mails
XTo select an input line for text: select 5in
the character bar.
XEnter characters.
COMAND contains templates which you
can use when writing your messages
(
Ypage 143).
XTo send the e-mail: select OK.
Answering an e-mail
Observe the requirements for the message
function (
Ypage 138).
XDisplay the message (Ypage 140).
XTo call up a menu: press the controller.
XTo selectReply: turn and press the con-
troller.
The e-mail input menu appears. The
addressee's details are automatically filled
in using the details in the original message.
When replying to an e-mail, you can also
select Reply
toAllinstead of Reply. In thiscase, the reply is sent not just to the sender
but to all those who received the original mes-
sage.
Forwarding an e-mail
Observe the requirements for the message
function (
Ypage 138).
XDisplay the message (Ypage 140).
XTo call up a menu: press the controller.
XTo select Forward: turn and press the con-
troller.
The input menu appears. The subject line is automatically filled in with the same details
as those in the original message.
Text templates
Using text templates
:Displays text templates
XSelect the input line for a text message
(
Ypage 142) or e-mail (Ypage 142).
XTo select text templates :in the character
bar: turn and press the controller.
The text templates are displayed.
XTo select and insert a text template: turn
and press the controller.
The text template is inserted into the text
message or e-mail.
Messages (text messages and e-mails)143
Telephone
Z