Radio MERCEDES-BENZ E-Class 2016 W213 Comand Manual
[x] Cancel search | Manufacturer: MERCEDES-BENZ, Model Year: 2016, Model line: E-Class, Model: MERCEDES-BENZ E-Class 2016 W213Pages: 246, PDF Size: 6.7 MB
Page 209 of 246
XCallup the sound menu (Ypage 206).
XTurn the controller until Balance/Faderis
brought to the front and then slide 6the
controller.
XTo activate the menu for balance and fader:
press the controller.
XTo adjust the balance: slide 8or9
the controller.
XTo adjust the fader: slide 6or5 the
controller.
XTo return to the basic menu: press the %
button briefly.
Harman/kardon®Logic 7®surround
sound system
General notes
The harman/kardon®Logic7®surround
sound system isavailab lefor all functions in
the radio and media modes.
The harman/kardon
®Logic7®surround
sound system isavailab lefor the following
operating modes:
Rradio (FM only)
Rsatellit e radio
RaudioCD
RMP3 (including SDmemory card and USB
storage device)
RMedia Interface
RBluetooth®audio mode
Rvide o DVD (PCM, DTS®and Dolby®Digital
audio formats)
iFor the best sound, CD or WAV CD format
is recommended. For data-reduced media,
AAC with a data rate of 320 kbit/s isrec-
ommended.
Discs which support the audio formats men-
tioned have the fol lowing logos:
iManufactured under license from Dolby
Laboratories. Dolby and the double-D sym-
bol are trademarks of Do lbyLaboratories.
iFor DTS patents see http://
patents.dts.com. Manufactured under
license from DTS Licensing Limit ed. DTS,
the Symbol & DTS and the Symbol together
are registered trademarks, and DTS Dig ital
Surround isa trademark of DT S, Inc.
©DTS,
In c. All rights reserved.
Calling up the sound menu
You can make various sound settings for the
diff erent audio and video sources. It ispossi-
ble to set more bass for radio mode than for
audio CDmode, for example. The respecti ve
sound menu iscalled up from the menu of the
desired mode.
XSwit ch to radio mode (Ypage 166).
or
XSwit ch to med iamode (Ypage 178).
XTo switch to the menu bar: slide 6the
controller.
XTo select Sound: turn and press the con-
troller.
The menu appears with the last setting
accessed, e.g. Balance/Fader
.
Harman/kardon®Logic 7®surround sound system207
Sound
Page 211 of 246
XCallup the sound menu (Ypage 207).
XTurn the controller until Logic7is inthe
center.
XSlide 6the controller.
The left-hand rotary menu to switch sur-
round sound on and off isactivated.
XTo activate Logic7: turn the controller unt il
On
is active.
or
XTo deactivate Logic7: turn the controller,
unt ilOFF
is active.
XTo return to the menu: slide 5the con-
troller.
XTo return to the basic menu: press the %
button briefly.
For the optimum audio experience for all pas-
sengers when Logic7
®is switched on, the
balance settings should be set to the center
of the veh icleinterior.
MP3 tracks should have a bit rate of at least
128 kb it/s.
Surround sound playback does not function
for mono signal sources, such as for AM radio
mode.
If radio reception ispoor, e.g. ina tunne l,you
should switch off Logic7
®, since itmay oth-
erwise switch dynamically between stereo
and mono and cause temporary sound dis-
tortions.
Bang & Olufsen BeoSound
General notes
The Bang & Olufsen Beo Sound AMG sound
system isavailab lefor all functions inthe
radio and med iamodes.
The fol lowing modes are available for the
Bang & Olufsen Beo Sound AMG sound sys-
tem:
Rradio (FM only)
Rsatellit e radio
RaudioCD
RMP3/A AC
RMediaInterface
RBluetooth®audio mode
Rvide o DVD (PCM, DTS®and Dolby®Digital
audio formats)
iFor the best sound, CD or WAVCDformat
is recommended. For data-reduced media,
AAC with a data rate of 320 kb it/s isrec-
ommended.
iManufactured under license from Dolby
Laboratories. Dolby and the double-D sym-
bol are trademarks of Do lbyLaboratories.
iFor DTS patents see http://
patents.dts.com. Manufactured under
license from DTS Licensing Limit ed. DTS,
the Symbol & DTS and the Symbol together
are registered trademarks, and DTS Dig ital
Surround isa trademark of DT S, Inc.
©DTS,
In c. All rights reserved.
Calling up the sound menu
You can make various sound settings for the
diff erent audio and video sources. It ispossi-
ble to set more bass for radio mode than for
audio CDmode, for example. The respecti ve
sound menu iscalled up from the menu of the
desired mode.
XSwit ch to radio mode (Ypage 166).
or
XSwit ch to med iamode (Ypage 178).
Bang & Olufsen BeoSound209
Sound
Page 216 of 246
Your COMANDequipment
These operatin ginstruction sdescribe all
standar dan doptional equipmen tavailable
fo ryour COMAN Dsyste mat th etime of pur -
chase. Country-specifi cdifference sare pos -
sible. Please note that your COMAN Dsyste m
may no tbe equipped wit hall th efeature s
described .Thi salso applies to safety-relevan t
systems an dfunctions. Therefore, th eequip -
men ton your COMAN Dsyste mmay diffe r
from that in th edescription san dillustrations.
Should you hav ean yquestion sconcernin g
equipmen tan doperation ,pleas econsult an
authorized Mercedes-Ben zCenter.
Weather forecasts
Introduction
Thi sfunction is currentl yno tavailable fo r
Canada.
Fo rth ereception of weather forecast svia
satellite radio, you will need aSIRIU SXM Sat -
ellite Weather subscription .
If th emessage: Please call SIRIUS to
activate the syste mat:
SIRIUS_numbe rESN: SIRIUS_I Dappears
alon gwit hth eID number of th eSIRIU S
device, you will need to hav eth eweather ser -
vic eactivated first .
XTo selectCal lorCancel:turn an dpress
th econtroller .
If amobile phone is connecte dto COMAN D
(
Ypage 114), th ecal lwill connec tto aSIR-
IU Sservic eemploye eafter selecting Call
.
The ID number of th eSIRIU Sdevic ewill be
transferred to th etelephon edisplay.
XThi swill be followed by instruction sfrom
th eservic eemployee.
COMAN Dcan receiv eweather forecast svia
satellite radio fo rth eentire US A(includin g
Alask aan dHawaii).
The received weather dat acan be displaye d
as an information chart (dail yforecast ,five- day forecast
,detailed information )or on th e
weather map .
The weather dat areceived from aweather
station is stored in COMAN Dforon ehour .It
can therefore be displaye dagain immediately
after restartin gth eengin e(fo rexample after
refueling).
Dependin gon whic hscale has bee nselected,
th eweather map can display th efollowin g
weather dat awit hsymbols :
Rrain radar
The rain radar canno tbe displaye dfo r
Alaska, Hawaii an dPuerto Rico.
Rstor mcharacteristics
Rhig han dlow-pressure areas, weather
fronts
Rcours eof tropical cyclones (hurricanes,
typhoons )
Rgale warnings
Rwinddirection an dspeeds
iHurricane: term used to describe th etrop-
ical cyclones that primarily develop in th e
Atlantic, North Pacifi can dSout hPacifi c
oceans. The win dspeeds are abov e74 mph
(11 8k
m/ h). Five categories are used to
classify the strength of a hurricane.
Typhoon: term used to describe a tropical
cyclone that develops in the northwestern
Pacific. The wind speeds are in the category
of a hurricane.
214Weather forecasts
SIRIUS Weather
Page 229 of 246
Cordless headphones
Overview
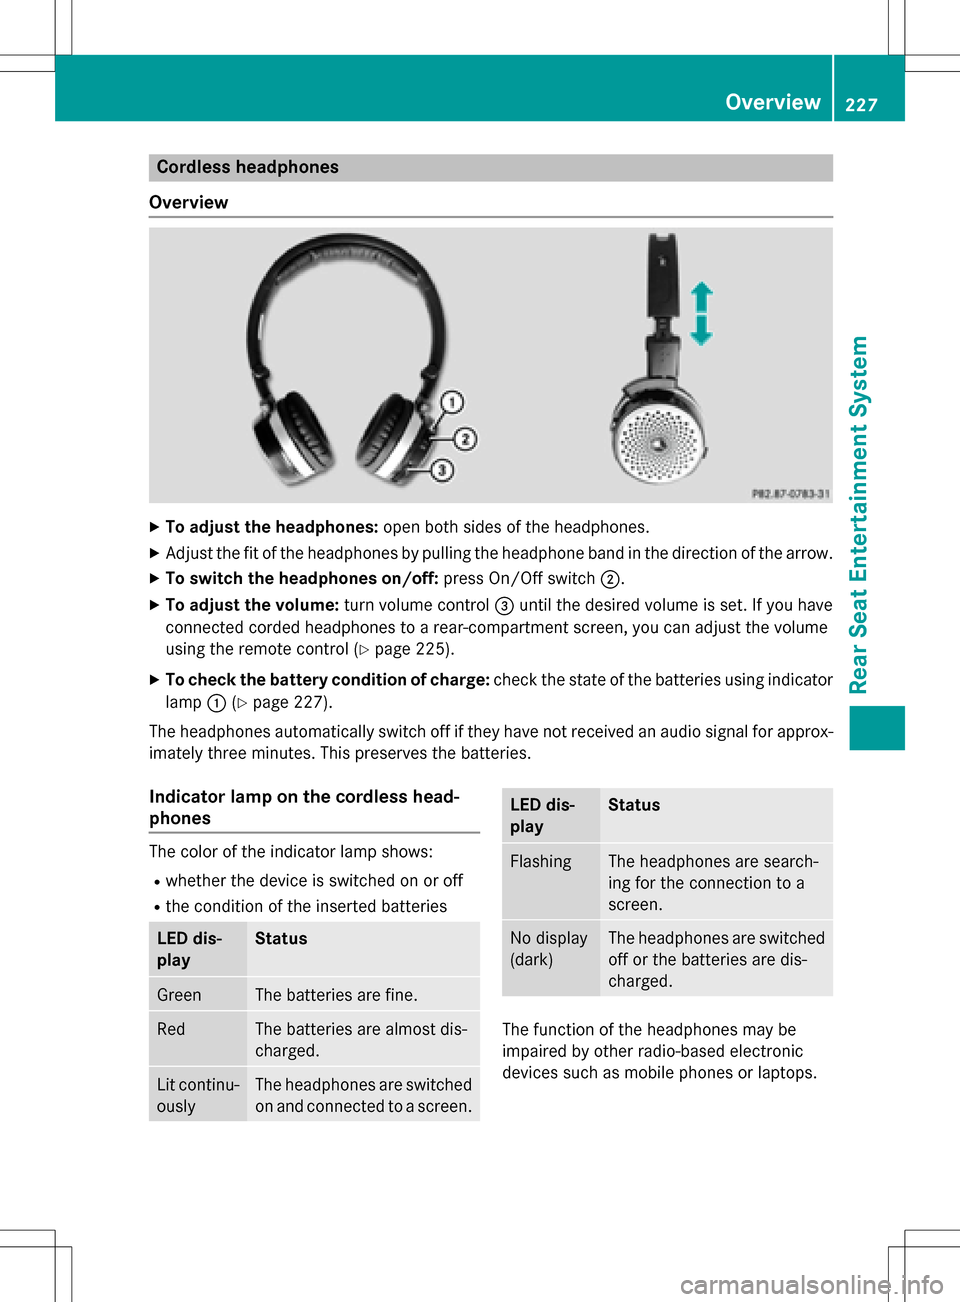
XTo adjust the headphones: open both sides of the headphones.
XAdjust the fit of the headphones by pulling the headphone band in the direction of the arrow.
XTo switch the headphones on/off: press On/Off switch;.
XTo adjust the volume: turn volume control=until the desired volume is set. If you have
connected corded headphones to a rear-compartment screen, you can adjust the volume
using the remote control (
Ypage 225).
XTo check the battery condition of charge: check the state of the batteries using indicator
lamp :(
Ypage 227).
The headphones automatically switch off if they have not received an audio signal for approx-
imately three minutes. This preserves the batteries.
Indicator lamp on the cordless head-
phones
The color of the indicator lamp shows:
Rwhether the device is switched on or off
Rthe condition of the inserted batteries
LED dis-
playStatus
GreenThe batteries are fine.
RedThe batteries are almost dis-
charged.
Lit continu-
ouslyThe headphones are switched
on and connected to a screen.
LED dis-
playStatus
FlashingThe headphones are search-
ing for the connection to a
screen.
No display
(dark)The headphones are switched
off or the batteries are dis-
charged.
The function of the headphones may be
impaired by other radio-based electronic
devices such as mobile phones or laptops.
Overview227
Rear Seat Entertainment System
Z
Page 232 of 246
Selecting sound settings
You can select sound settings in the following
operating modes:
RCD/MP3
RVideo DVD
RRadio (active media source in COMAND)
RAUX
XSwitch on an operating mode (e.g. audio
CD mode) (
Ypage 232).
XSelect TrebleorBassusing
the :=; buttons on the remote
control and press the 9button to confirm.
An adjustment scale appears.
XSelect a setting using the 9:but-
tons and press the 9button to confirm.
Multiple users
Simultaneous use of the rear-compart-
ment disc drive
The two rear-compartment screens can be
operated almost entirely independently from
one another. However, a conflict may occur in
some menus if the two screens are used
simultaneously.
The following functions affect both screens:
Rchanging playback options
Rselecting a track (from a track list or folder)
Rusing the play, pause and stop functions
Rfast forward/rewind or scrolling
Rcalling up the DVD menu and navigating
within it
Rsetting the language, subtitles and camera angle
Rcalling up interactive DVD content
The following functions affect only one
screen:
Rchanging audio and video functions as well
as picture settings
Rswitching between full screen and the
menu
Switching between operating modes
When you exit an operating mode (e.g. audio
CD mode), the current setting is saved. If you
call up this operating mode again later, there
are two possibilities:
Rthe operating mode has been changed on
the other screen.
Rthe operating mode has not been changed.
In the first case, the operating mode appears as it is on the other screen.
In the second case, the setting appears on the
screen as it was when you last exited the
operating mode.
Picture settings
Overview
You can select the picture settings in video
DVD and AUX mode (
Ypage 241).
Adjusting the brightness, contrast and
color
XSwitch to video DVD mode (Ypage 235).
XTo show the menu: press the9button on
the remote control.
XSelect DVD-Videousing
the :=; buttons and press the
9 button to confirm.
XSelect Brightness,Contrastor Color
using the 9: buttons and press the
9 button to confirm.
A scale appears.
XSelect a setting using the 9:but-
tons and press the 9button to confirm.
230Basic functions
Rear Seat Entertainment System
Page 241 of 246
XTo show the menu:press the9button on
the remote control.
XSelect DVD-Videoand press the 9button
on the remote control to confirm.
XSelect DVD Functionsand press the 9
button to confirm.
XSelect SubtitlesorCamera Angleand
press the 9button to confirm.
In both cases, a menu appears after a few
seconds. The #dot indicates the current
setting.
XSelect a setting using the 9:but-
tons and press the 9button to confirm.
XTo exit the menu: press the=or;
button.
Interactive content
DVDs can also contain interactive content
(e.g. a video game). In a video game, you may
be able to influence events, for example, by
selecting and triggering actions. The type and
number of actions depend on the DVD.
XSelect an action using the
9;:= buttons on the
remote control and press the 9button to
execute it.
A menu appears and the first entry, Select
,
is highlighted.
XPress the 9button.
Active COMAND media source mode
Overview
You can transfer a media source selected in
COMAND to the Rear Seat Entertainment
System. If you switch the media source in
COMAND, this will not be transferred to the
Rear Seat Entertainment System.
You can transfer these media sources to the
Rear Seat Entertainment System:
RRadio
RCD/MP3 mode (CD, SD card, USB)
RMedia Interface
RVideo DVD mode
Observe the sequence described below when
playing a COMAND media source on the Rear
Seat Entertainment System.
1. Activating the function in COMAND
XSwitch on the radio (Ypage 166).
XActivate CD/MP3 mode (CD, SD card, USB)
(
Ypage 178)
XSwitch on the media interface
(
Ypage 196).
2. Transferring the active COMAND
media to the Rear Seat Entertainment
System
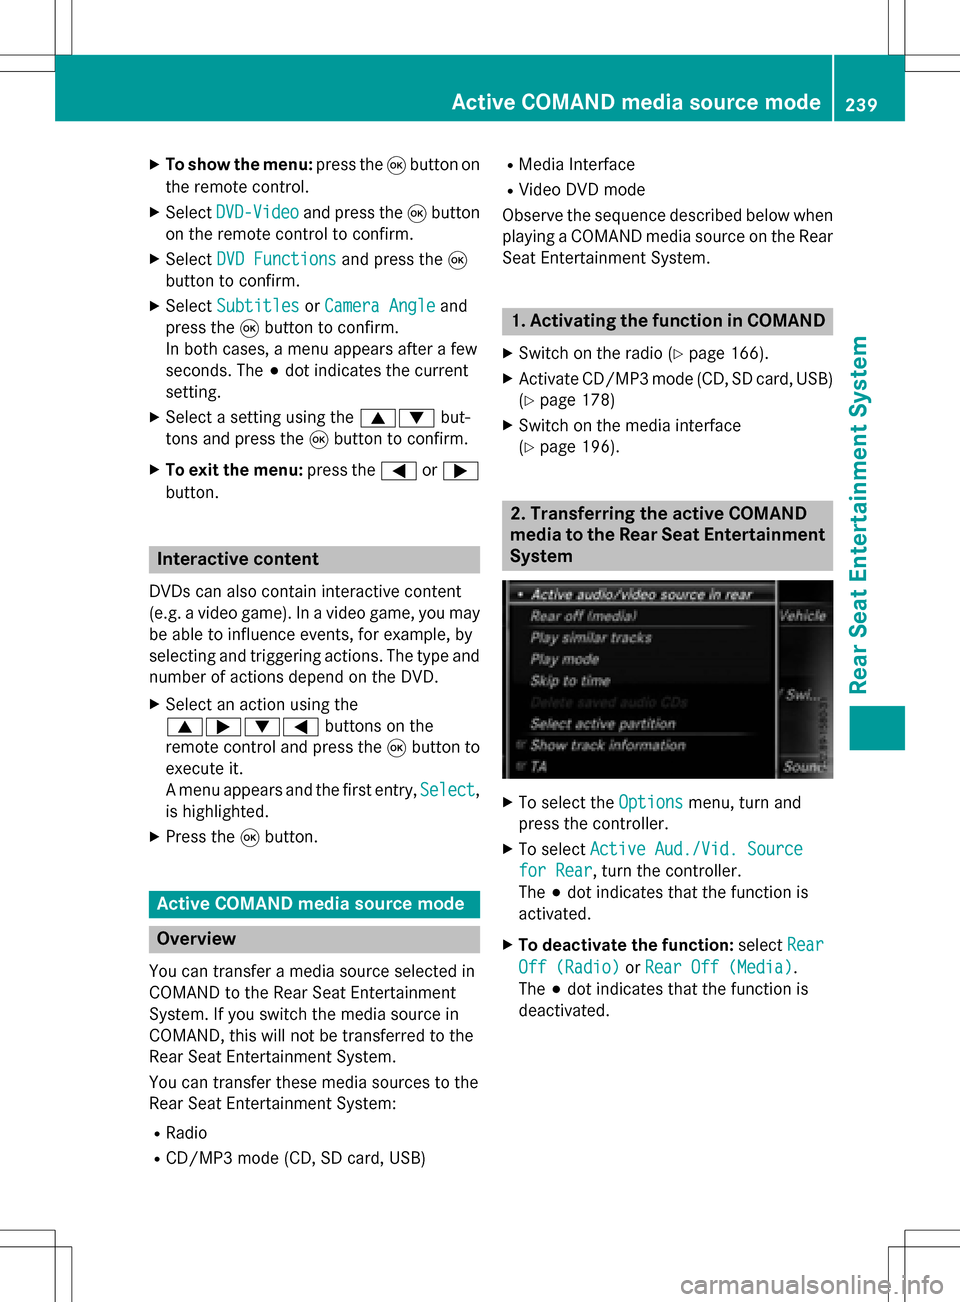
XTo select the Optionsmenu, turn and
press the controller.
XTo select Active Aud./Vid. Source
for Rear, turn the controller.
The #dot indicates that the function is
activated.
XTo deactivate the function: selectRear
Off (Radio)orRear Off (Media).
The #dot indicates that the function is
deactivated.
Active COMAND media source mode239
Rear Seat Entertainment System
Z
Page 242 of 246
3. Transferring the active COMAND
media source to the Rear Seat Enter-
tainment System
XSelectCOMANDusing the 9=;
buttons on the remote control and press 9
to confirm.
A message appears stating that the desired
audio or video source needs to be activated
in COMAND. If the media source is activa-
ted in COMAND, it is loaded on the Rear
Seat Entertainment System and is then
played.
If Rear Off
is activated in COMAND, the
COMAND
isofforthereisnoactive
COMAND source.message appears.
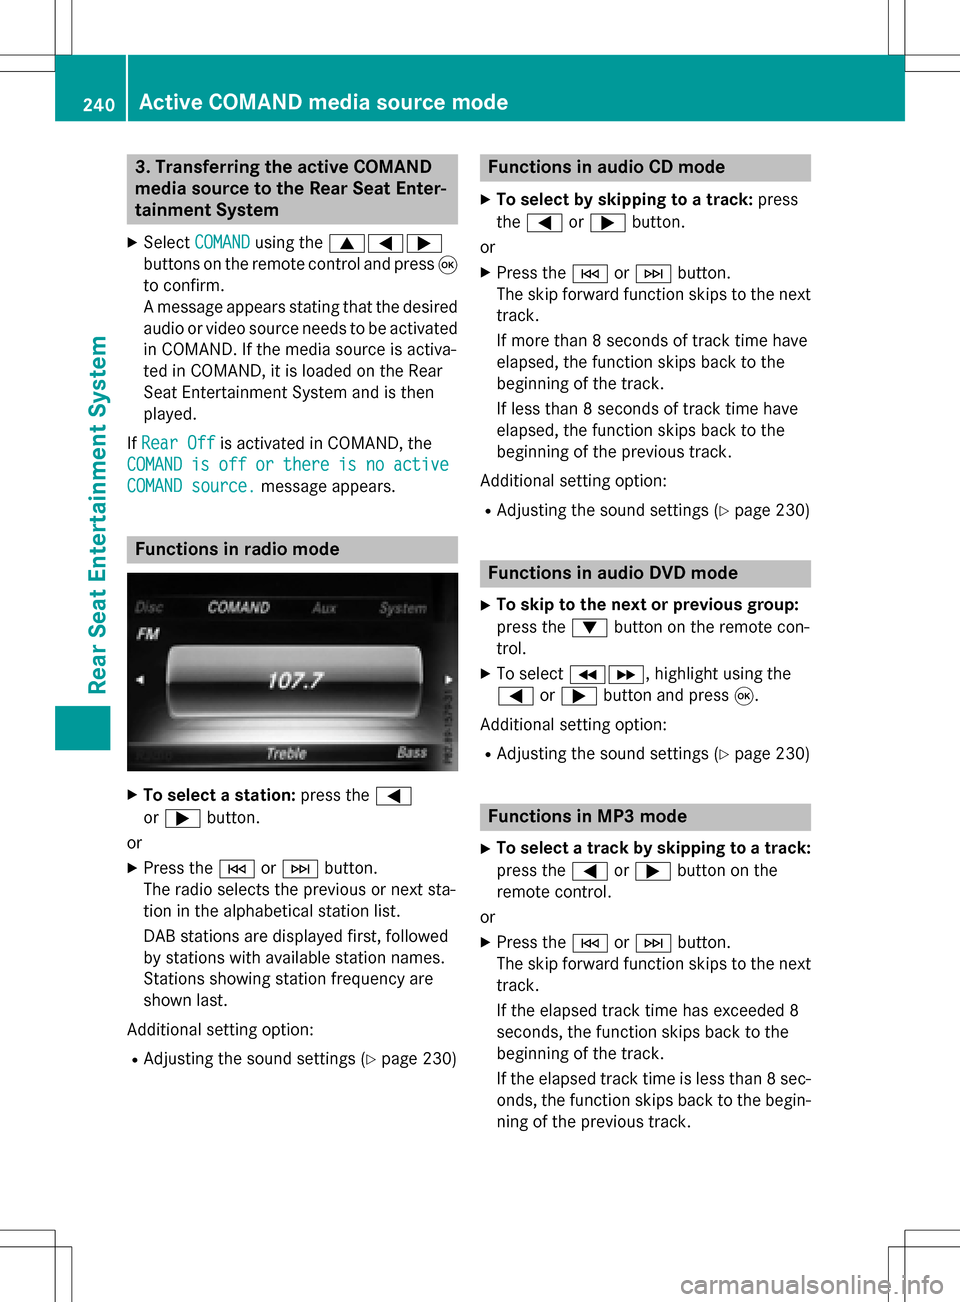
Functions in radio mode
XTo select a station: press the=
or ; button.
or
XPress the EorF button.
The radio selects the previous or next sta-
tion in the alphabetical station list.
DAB stations are displayed first, followed
by stations with available station names.
Stations showing station frequency are
shown last.
Additional setting option:
RAdjusting the sound settings (Ypage 230)
Functions in audio CD mode
XTo select by skipping to a track: press
the = or; button.
or
XPress the EorF button.
The skip forward function skips to the next
track.
If more than 8 seconds of track time have
elapsed, the function skips back to the
beginning of the track.
If less than 8 seconds of track time have
elapsed, the function skips back to the
beginning of the previous track.
Additional setting option:
RAdjusting the sound settings (Ypage 230)
Functions in audio DVD mode
XTo skip to the next or previous group:
press the :button on the remote con-
trol.
XTo select KL, highlight using the
= or; button and press 9.
Additional setting option:
RAdjusting the sound settings (Ypage 230)
Functions in MP3 mode
XTo select a track by skipping to a track:
press the =or; button on the
remote control.
or
XPress the EorF button.
The skip forward function skips to the next
track.
If the elapsed track time has exceeded 8
seconds, the function skips back to the
beginning of the track.
If the elapsed track time is less than 8 sec-
onds, the function skips back to the begin- ning of the previous track.
240Active COMAND media source mode
Rear Seat Entertainment System