set clock MERCEDES-BENZ E-Class 2016 W213 Comand Manual
[x] Cancel search | Manufacturer: MERCEDES-BENZ, Model Year: 2016, Model line: E-Class, Model: MERCEDES-BENZ E-Class 2016 W213Pages: 246, PDF Size: 6.7 MB
Page 28 of 246

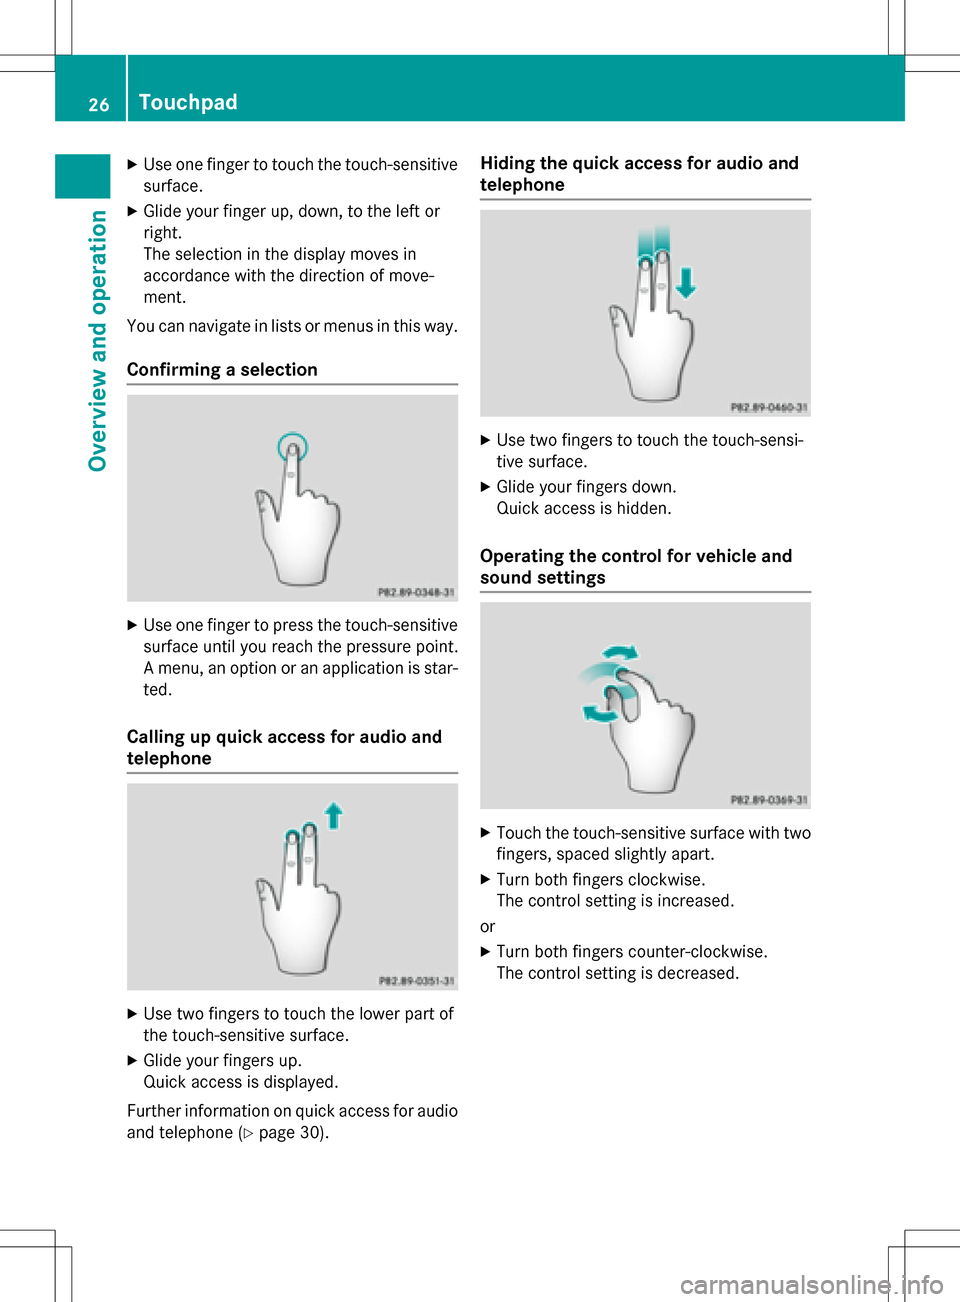
XUse one finger to touch the touch-sensitive
surface.
XGlide your finger up, down, to the left or
right.
The selection in the display moves in
accordance with the direction of move-
ment.
You can navigate in lists or menus in this way.
Confirming a selection
XUse one finger to press the touch-sensitive
surface until you reach the pressure point.
A menu, an option or an application is star-
ted.
Calling up quick access for audio and
telephone
XUse two fingers to touch the lower part of
the touch-sensitive surface.
XGlide your fingers up.
Quick access is displayed.
Further information on quick access for audio
and telephone (
Ypage 30).
Hiding the quick access for audio and
telephone
XUse two fingers to touch the touch-sensi-
tive surface.
XGlide your fingers down.
Quick access is hidden.
Operating the control for vehicle and
sound settings
XTouch the touch-sensitive surface with two fingers, spaced slightly apart.
XTurn both fingers clockwise.
The control setting is increased.
or
XTurn both fingers counter-clockwise.
The control setting is decreased.
26Touchpad
Overview and operation
Page 44 of 246

XSelect the country you are currently in by
turning and pressing the controller.
The country is accepted.
A time zone list may also be displayed,
depending on the country selected.
XTo select the desired time zone:turn and
press the controller.
The time zone is accepted.
A list of available options for setting sum-
mer time appears (
Ypage 42).
Setting summer and standard time
The Daylight Saving Timemenu is not
available in all countries.
You can use the Daylight Saving Time
menu to set automatic summer time change-
over or switch the summer time setting on or
off. The changeover to summer time advan-
ces the time by one hour.
XPress theØbutton on the COMAND
control panel.
or
XPress Vehiclein the main function bar.
The vehicle menu is displayed.
XTo select Time: slide6, turn and press
the controller to confirm.
A menu appears.
XTo select Daylight Saving Time: turn
and press the controller.
A list with options appears.
XTo select Automatic,Onor Off: turn and
press the controller.
SettingFunction
AutomaticThe summer and
standard time are
automatically
changed over.
OnThe clock is
advanced one hour
ahead of standard
time.
OffThe standard time
for the chosen time
zone is selected.
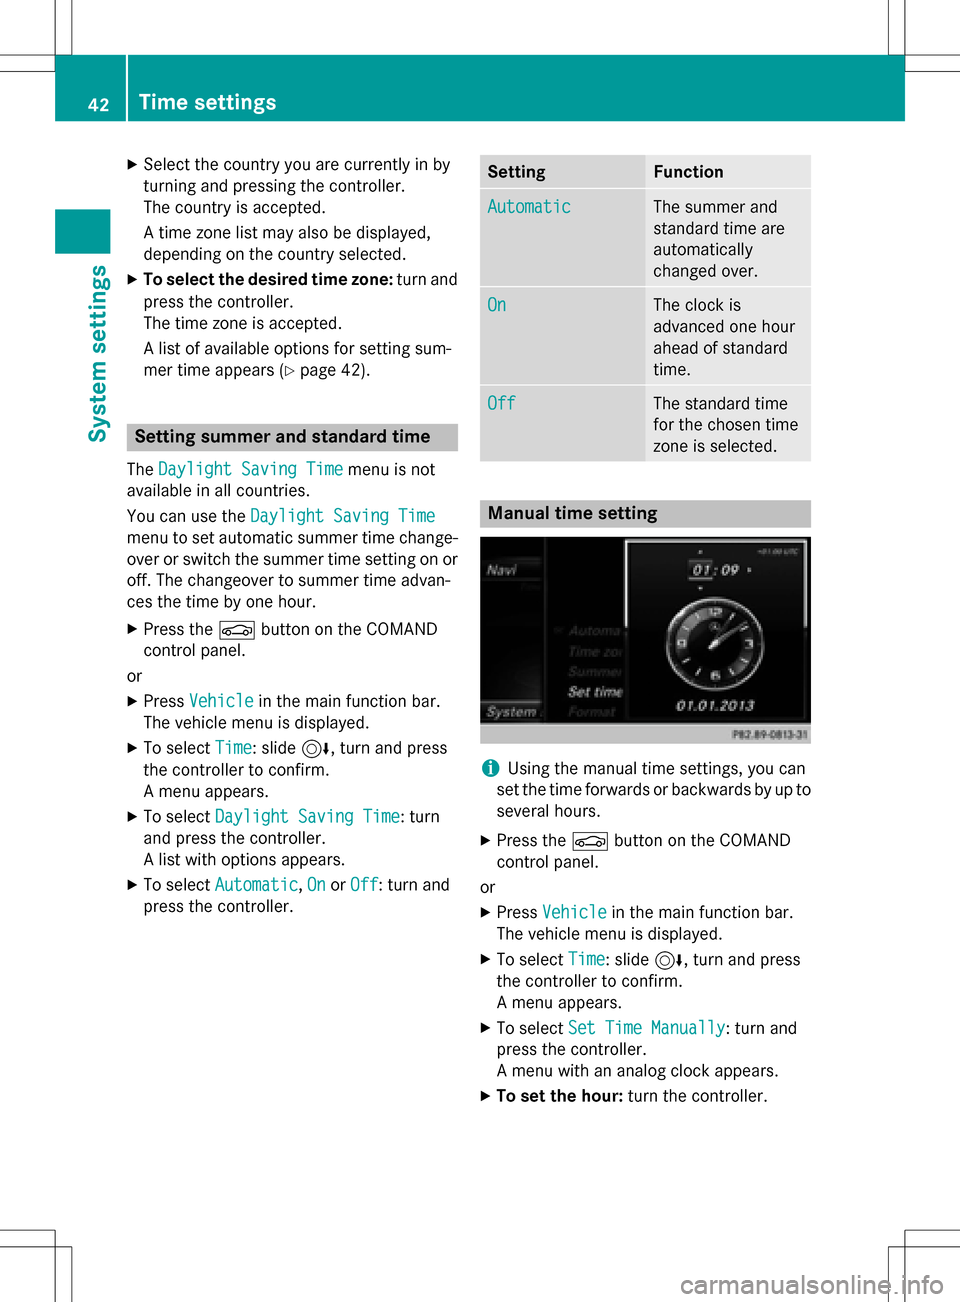
Manual time setting
iUsing the manual time settings, you can
set the time forwards or backwards by up to
several hours.
XPress the Øbutton on the COMAND
control panel.
or
XPress Vehiclein the main function bar.
The vehicle menu is displayed.
XTo select Time: slide6, turn and press
the controller to confirm.
A menu appears.
XTo select Set Time Manually: turn and
press the controller.
A menu with an analog clock appears.
XTo set the hour: turn the controller.
42Time settings
System settings
Page 80 of 246

Requirementsfor "Viewin gth evicinit yof th e
destination "and "Loadin gdat afrom th eInter-
net" (Canada): amobile phone mus tbe con-
nected via Bluetoot h
®(Ypage 114) or USB
(
Ypage 196) wit hCOMAND .
The complet eaddress of th ePOI is shown.
Viewing th evicinit yof th edestination
XTo select ::turnand press th econtroller .
If stree timages are available, th estree tin
th evicinit yof th edestination address is
shown.
Calling up th ema p
XSelec tMap.
XMov eth emap, chang eth emap scale
(
Ypage 78) and select th ePOI .
Calling up aPOI
XSelec tCal l.
If aphone number is available, COMAND
switches to th etelephon efunction .
Loading data from th eInternet
XSelec twww.
If an Internet address is available, dat ais
loade dfrom th eInternet .
Saving aPOI
XTo select Save:tur nand press th econtrol -
ler .
The POI can be saved as:
Rhom eaddress
Ranavigabl eaddress boo kcontact
(
Ypage 128)
Ra personal destination on th eSD memory
car d (
Ypage 99) Starting rout
ecalculation
XTo select StartorContinue:tur nand
press th econtroller .
If Calculate Alternative Routes
is
enabled in th ebasic settings, th emen u
item Continue
is displayed instead of
Start
(Ypage 66).
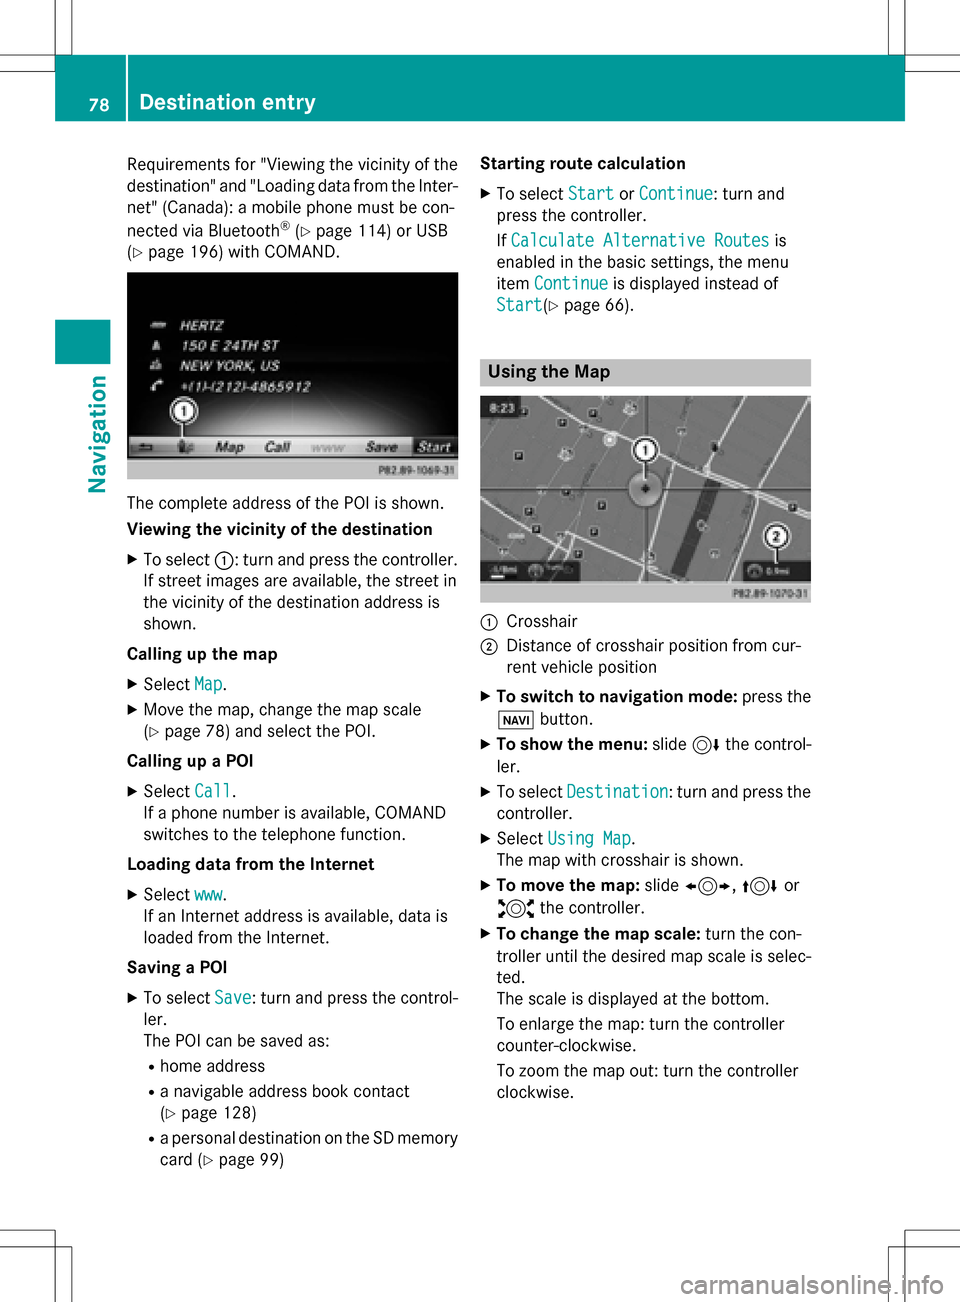
Usin gth eMa p
:Crosshai r
;Distanceof crosshair position from cur -
ren tvehicl eposition
XTo switch to navigation mode: press the
ß button.
XTo sho wthemenu: slide6 thecontrol -
ler .
XTo select Destination:tur nand press th e
controller .
XSelectUsing Map.
The map wit hcrosshair is shown.
XTo move th emap: slide1, 4or
2 thecontroller .
XTo change th ema pscale: turnth econ-
trolle runtil th edesire dmap scale is selec-
ted.
The scale is displayed at th ebottom.
To enlarg eth emap: tur nth econtroller
counter-clockwise .
To zoom th emap out :tur nth econtroller
clockwise .
78Destination entry
Navigation
Page 231 of 246

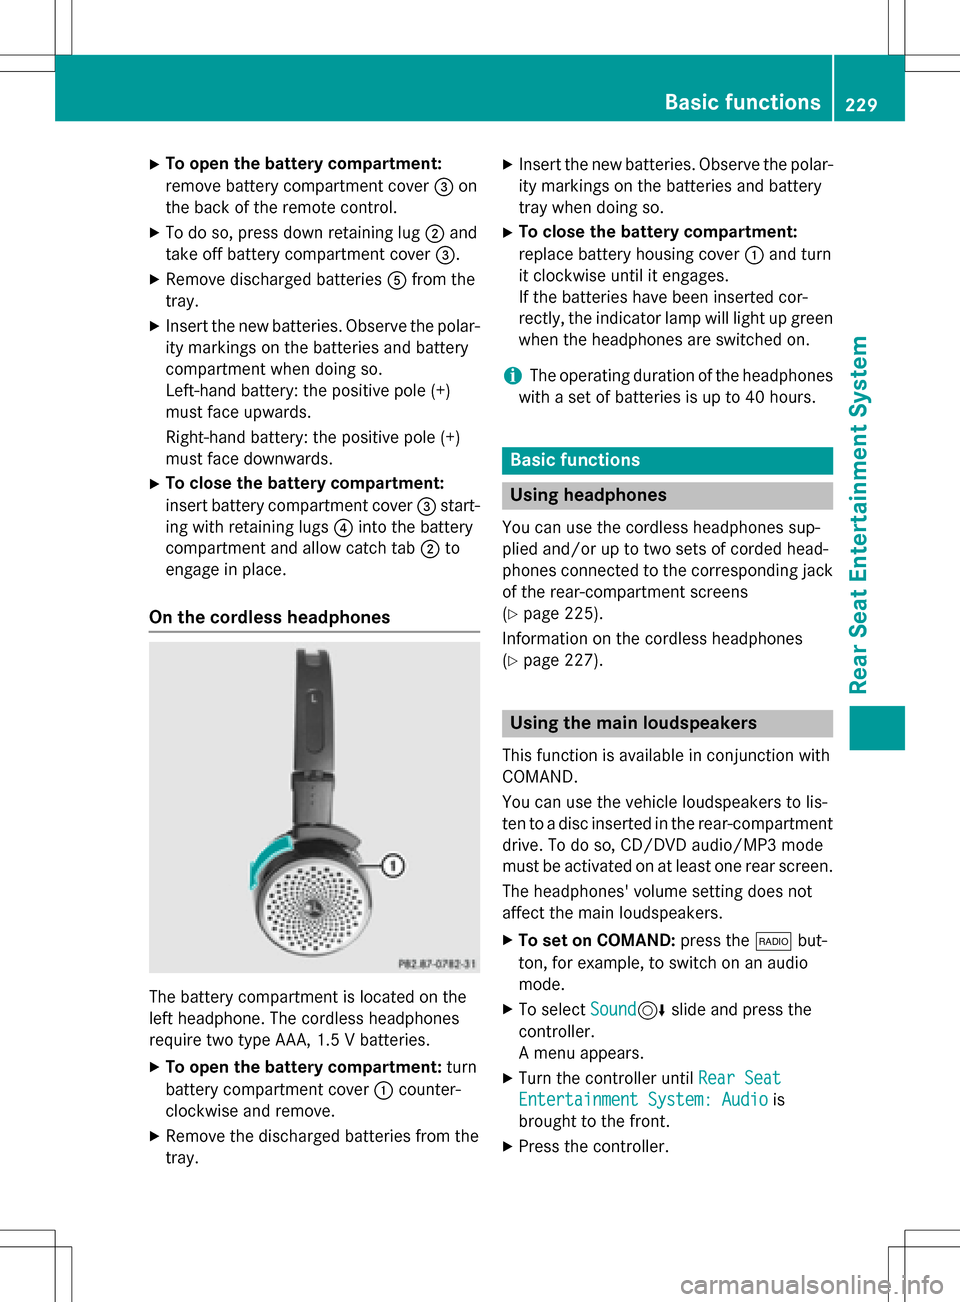
XTo open the battery compartment:
remove battery compartment cover=on
the back of the remote control.
XTo do so, press down retaining lug ;and
take off battery compartment cover =.
XRemove discharged batteriesAfrom the
tray.
XInsert the new batteries. Observe the polar-
ity markings on the batteries and battery
compartment when doing so.
Left-hand battery: the positive pole (+)
must face upwards.
Right-hand battery: the positive pole (+)
must face downwards.
XTo close the battery compartment:
insert battery compartment cover =start-
ing with retaining lugs ?into the battery
compartment and allow catch tab ;to
engage in place.
On the cordless headphones
The battery compartment is located on the
left headphone. The cordless headphones
require two type AAA, 1.5 V batteries.
XTo open the battery compartment: turn
battery compartment cover :counter-
clockwise and remove.
XRemove the discharged batteries from the
tray.
XInsert the new batteries. Observe the polar-
ity markings on the batteries and battery
tray when doing so.
XTo close the battery compartment:
replace battery housing cover :and turn
it clockwise until it engages.
If the batteries have been inserted cor-
rectly, the indicator lamp will light up green
when the headphones are switched on.
iThe operating duration of the headphones
with a set of batteries is up to 40 hours.
Basic functions
Using headphones
You can use the cordless headphones sup-
plied and/or up to two sets of corded head-
phones connected to the corresponding jack
of the rear-compartment screens
(
Ypage 225).
Information on the cordless headphones
(
Ypage 227).
Using the main loudspeakers
This function is available in conjunction with
COMAND.
You can use the vehicle loudspeakers to lis-
ten to a disc inserted in the rear-compartment
drive. To do so, CD/DVD audio/MP3 mode
must be activated on at least one rear screen.
The headphones' volume setting does not
affect the main loudspeakers.
XTo set on COMAND: press the$but-
ton, for example, to switch on an audio
mode.
XTo select Sound6slide and press the
controller.
A menu appears.
XTurn the controller until Rear Seat
Entertainment System: Audiois
brought to the front.
XPress the controller.
Basic functions229
Rear Seat Entertainment System
Z