start stop button MERCEDES-BENZ E-Class CABRIOLET 2013 C207 Owner's Guide
[x] Cancel search | Manufacturer: MERCEDES-BENZ, Model Year: 2013, Model line: E-Class CABRIOLET, Model: MERCEDES-BENZ E-Class CABRIOLET 2013 C207Pages: 372, PDF Size: 12.69 MB
Page 166 of 372
Problems with the transmission
Problem Possible causes/consequences and
M SolutionsThe transmission has
problems shifting gear. The transmission is losing oil.
X
Have the transmission checked at a qualified specialist
workshop immediately. The acceleration ability
is deteriorating.
The transmission no
longer changes gear. The transmission is in emergency mode.
It is only possible to shift into second
gear and reverse gear.
X Stop the vehicle.
X Shift the transmission to position P.
X Switch off the engine.
X Wait at least ten seconds before restarting the engine.
X Shift the transmission to position D or R.
If D
is selected, the transmission shifts into second gear; if R is
selected, the transmission shifts into reverse gear.
X Have the transmission checked at a qualified specialist
workshop immediately. Releasing the parking lock manually
! Do not use any sharp-edged objects to
remove the selector lever gaiter from the
center console. This could damage the
selector lever gaiter. X
Apply the parking brake.
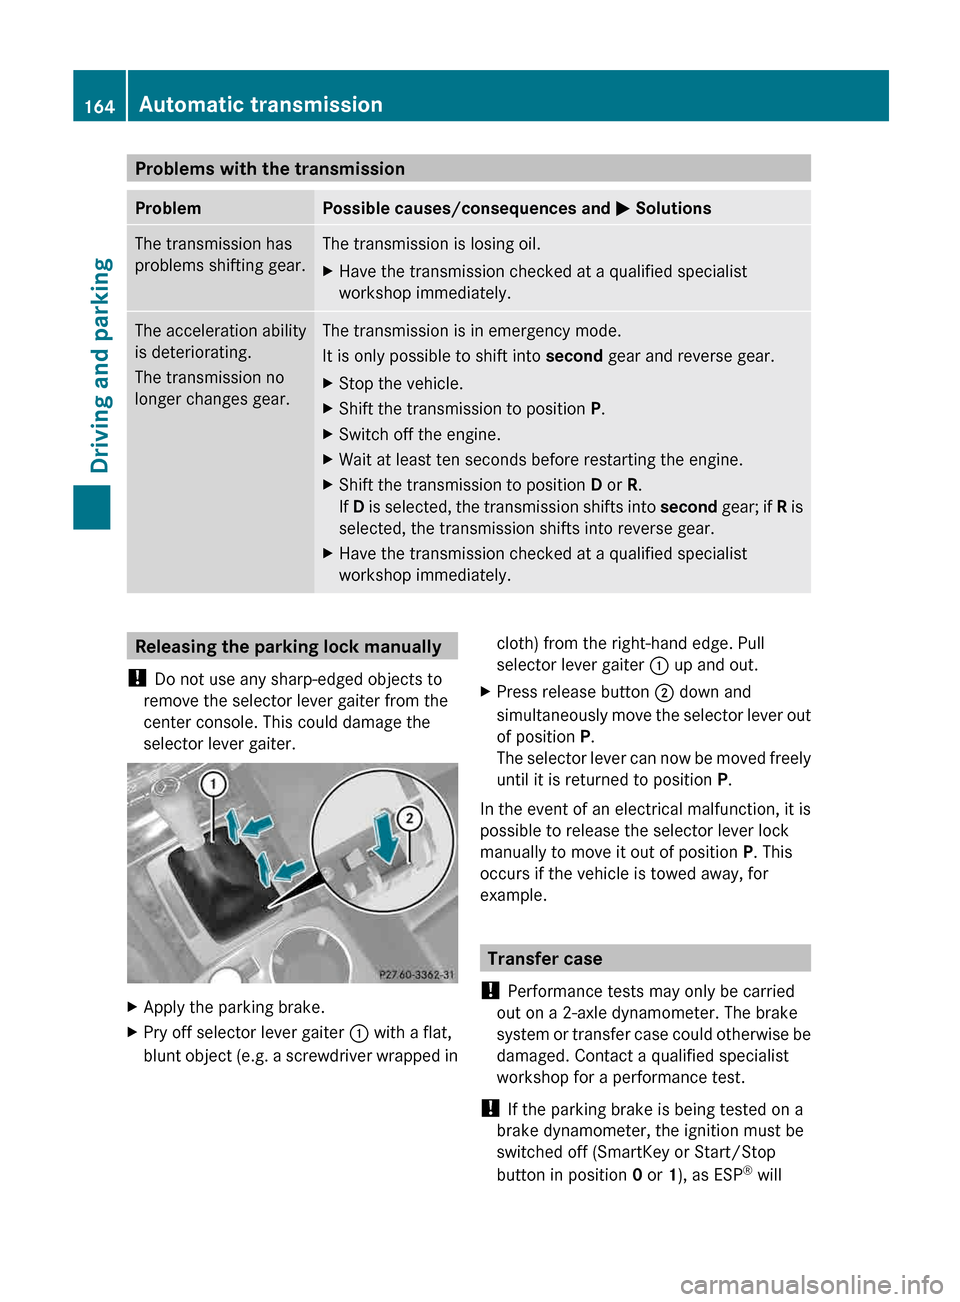
X Pry off selector lever gaiter : with a flat,
blunt
object (e.g. a screwdriver wrapped in cloth) from the right-hand edge. Pull
selector lever gaiter : up and out.
X Press release button ; down and
simultaneously
move the selector lever out
of position P.
The selector lever can now be moved freely
until it is returned to position P.
In the event of an electrical malfunction, it is
possible to release the selector lever lock
manually to move it out of position P. This
occurs if the vehicle is towed away, for
example. Transfer case
! Performance tests may only be carried
out on a 2-axle dynamometer. The brake
system
or transfer case could otherwise be
damaged. Contact a qualified specialist
workshop for a performance test.
! If the parking brake is being tested on a
brake dynamometer, the ignition must be
switched off (SmartKey or Start/Stop
button in position 0 or 1), as ESP®
will 164
Automatic transmission
Driving and parking
Page 170 of 372
To ensure that the vehicle is secured against
rolling away unintentionally:
R
the parking brake must be applied.
R the
transmission must be in position P and
the SmartKey must be removed from the
ignition lock.
R on uphill or downhill gradients, the front
wheels must be turned towards the curb. Switching off the engine
Vehicles with automatic transmission X
Apply the parking brake firmly.
X Shift the transmission to position P.
Using the SmartKey
X Turn the SmartKey to position 0 in the
ignition lock and remove it.
The immobilizer is activated.
i The
SmartKey can only be removed if the
transmission is in position P.
Using KEYLESS-GO
X Press the Start/Stop button (Y page
151).
The engine stops and all the indicator
lamps in the instrument cluster go out.
i When the driver's door is closed, this
corresponds
to SmartKey position 1. When
the driver's door is open, it corresponds to
SmartKey position 0 or "SmartKey
removed".
If you try to switch off the engine when the
transmission is not in position P, a message
appears in the multifunction display. A signal
sounds. Parking brake
G
WARNING
If you must brake the vehicle with the parking
brake, the braking distance is considerably
longer
and the wheels could lock. There is an
increased danger of skidding and accidents. Only use the parking brake to brake the
vehicle when the service brake is faulty. Do
not apply the parking brake too firmly. If the
wheels lock, release the parking brake until
the wheels begin turning again.
G
WARNING
If you leave children unsupervised in the
vehicle, they could set it in motion by, for
example:
R releasing the parking brake
R shifting the automatic transmission out of
the parking position P
R starting the engine.
They could also operate the vehicle's
equipment.
There is a risk of an accident and
injury.
When leaving the vehicle, always take the
SmartKey with you and lock the vehicle. Never
leave children unsupervised in the vehicle. If you brake the vehicle with the parking
brake, the brake lamps will not light up.
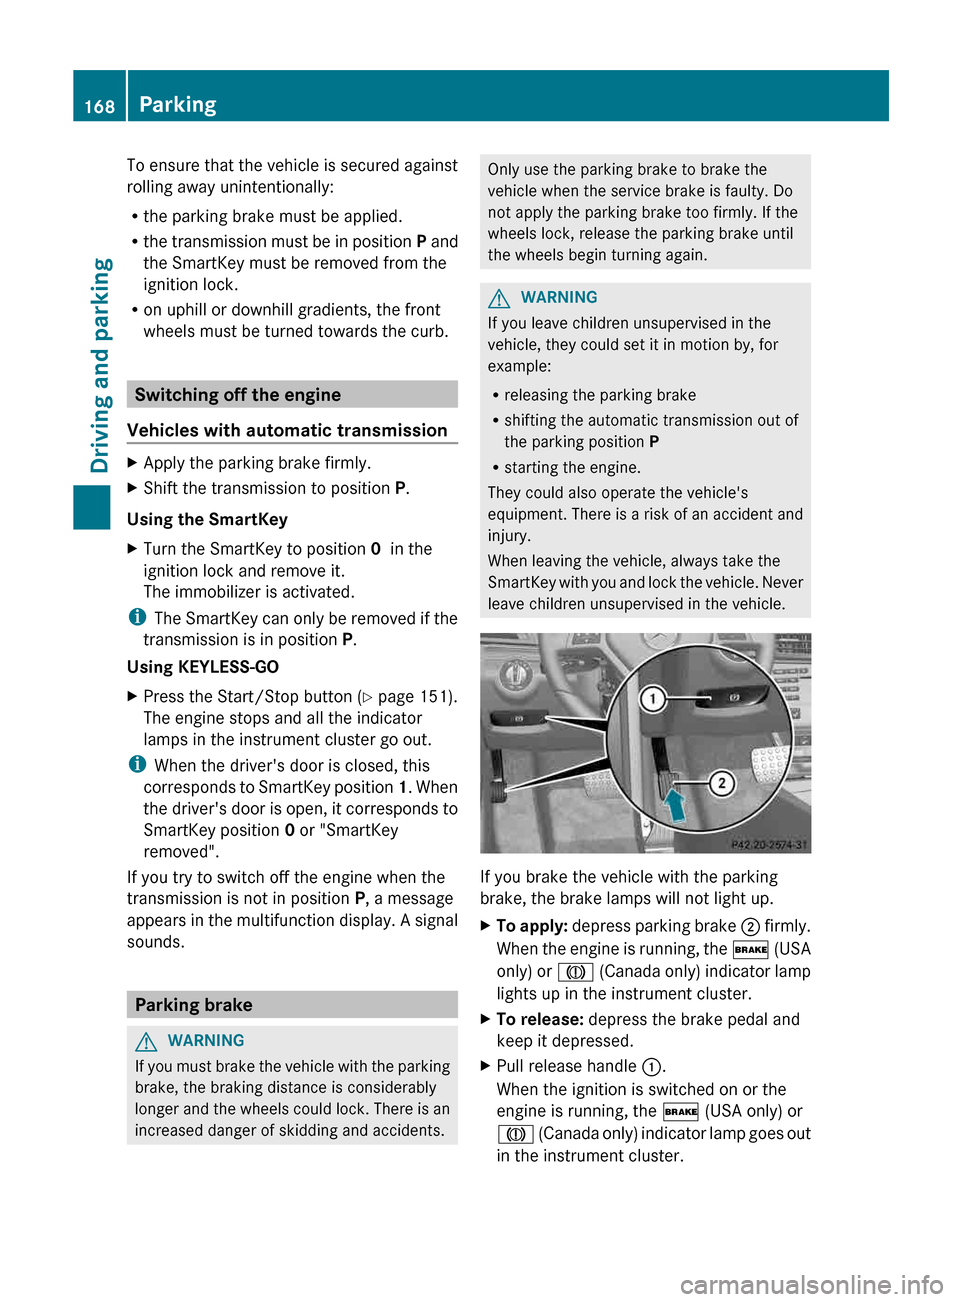
X
To apply:
depress parking brake ; firmly.
When the engine is running, the $ (USA
only) or J (Canada only) indicator lamp
lights up in the instrument cluster.
X To release: depress the brake pedal and
keep it depressed.
X Pull release handle :.
When the ignition is switched on or the
engine is running, the $ (USA only) or
J
(Canada only) indicator lamp goes out
in the instrument cluster. 168
Parking
Driving and parking
Page 174 of 372
!
Depressing the brake pedal constantly
results
in excessive and premature wear to
the brake pads.
If the brakes have been subjected to a heavy
load, do not stop the vehicle immediately, but
drive on for a short while. This allows the
airflow to cool the brakes more quickly.
Wet roads If you have driven for a long time in heavy rain
without braking, there may be a delayed
reaction
from the brakes when braking for the
first time. This may also occur after the
vehicle has been washed or driven through
deep water.
You have to depress the brake pedal more
firmly. Maintain a greater distance from the
vehicle in front.
After driving on a wet road or having the
vehicle washed, brake firmly while paying
attention to the traffic conditions. This will
warm up the brake discs, thereby drying them
more quickly and protecting them against
corrosion.
Limited braking performance on salt-
treated roads If you drive on salted roads, a layer of salt
residue may form on the brake discs and
brake pads. This can result in a significantly
longer braking distance.
R
Brake
occasionally to remove any possible
salt residue. Make sure that you do not
endanger other road users when doing so.
R Carefully depress the brake pedal and the
beginning and end of a journey.
R Maintain a greater distance to the vehicle
ahead.
Servicing the brakes G
WARNING
If brake pads or brake fluid other than those
recommended are used, the braking
properties of the vehicle can be degraded to an extent that safe braking is substantially
impaired. This could result in an accident.
G
WARNING
Make sure that you do not endanger other
road users when you apply the brakes.
! If
the red brake warning lamp lights up in
the instrument cluster and you hear a
warning tone while the engine is running,
the brake fluid level may be too low.
Observe additional warning messages in
the multifunction display.
The brake fluid level may be too low due to
brake pad wear or leaking brake lines.
Have the brake system checked
immediately. This work should be carried
out at a qualified specialist workshop.
! Vehicles with 4MATIC: function or
performance tests may only be carried out
on a 2-axle dynamometer. If you are
planning to have the vehicle tested on such
a dynamometer, contact an authorized
Mercedes-Benz Center to obtain further
information first. Otherwise, you could
damage the drive train or the brake system.
! Vehicles with 4MATIC: as the ESP®
system operates automatically, the engine
and the ignition must be switched off
(SmartKey in position 0 or 1 in the ignition
lock or Start/Stop button in position 0 or
1) while the parking brake is being tested
on a brake dynamometer.
Braking maneuvers triggered automatically
by ESP ®
may seriously damage the brake
system. 172
Driving tips
Driving and parking
Page 175 of 372
!
Vehicles with 4MATIC: as the ESP®
system operates automatically, the engine
and the ignition system must be switched
off (SmartKey in position 0 or 1 in the
ignition lock or Start/Stop button in
position 0 or 1) when:
R testing the parking brake on a brake
dynamometer.
R you
intend to have the vehicle towed with
the front axle raised.
Braking maneuvers triggered automatically
by ESP ®
may seriously damage the brake
system.
All checks and maintenance work on the
brake system must be carried out at a
qualified specialist workshop. Consult a
qualified specialist workshop to arrange this.
Have brake pads installed and brake fluid
replaced at a qualified specialist workshop.
If the brake system has only been subject to
moderate loads, you should test the
functionality of your brakes at regular
intervals. To do so, press firmly on the brake
pedal when driving at a high speed. This
improves the grip of the brake pads.
You can find a description of Brake Assist
(BAS) on ( Y page 64) or of BAS PLUS on
(Y page 65). Driving on wet roads
Hydroplaning If water has accumulated to a certain depth
on the road surface, there is a danger of
hydroplaning occurring, even if:
R
you drive at low speeds.
R the tires have adequate tread depth. For this reason, in the event of heavy rain or
in conditions in which hydroplaning may
occur, you must drive in the following
manner:
R
lower your speed.
R avoid ruts.
R brake carefully.
Driving on flooded roads !
Do not drive through flooded areas.
Check
the depth of any water before driving
through it. Drive slowly through standing
water. Otherwise, water may enter the
vehicle interior or the engine compartment.
This can damage the electronic
components in the engine or the automatic
transmission. Water can also be drawn in
by the engine's air suction nozzles and this
can cause engine damage. Winter driving
Important safety notes G
WARNING
If you shift down on a slippery road surface in
an attempt to increase the engine's braking
effect, the drive wheels could lose their grip.
There is an increased danger of skidding and
accidents.
Do not shift down for additional engine
braking on a slippery road surface. G
DANGER
If the exhaust pipe is blocked or adequate
ventilation is not possible, poisonous gases
such
as carbon monoxide (CO) may enter the
vehicle. This is the case, e.g. if the vehicle
becomes trapped in snow. There is a risk of
fatal injury.
If you leave the engine or the auxiliary heating
running, make sure the exhaust pipe and area
around the vehicle are clear of snow. To
ensure an adequate supply of fresh air, open Driving tips
173
Driving and parking
Z
Page 192 of 372
R
you depress the brake pedal again with a
certain amount of pressure until ë
disappears from the multifunction display.
R you activate DISTRONIC PLUS.
You will see a warning message in the
multifunction display if the HOLD function is
activated and:
R the driver's door is open and the driver's
seat belt is unfastened.
R the engine is switched off, unless it is
automatically switched off by the ECO
start/stop function.
R the hood is opened.
Shift to 'P'
X Shift the transmission to position P to
prevent the vehicle from rolling away.
The HOLD function is deactivated. The
warning message in the multifunction
display disappears.
A horn will also sound at regular intervals if
the HOLD function is activated and you:
R switch the engine off, open the driver's
door and remove your seat belt
R open the hood
The
sounding of the horn alerts you to the fact
that the vehicle has been parked while the
HOLD function is still activated. If you attempt
to lock the vehicle, the tone becomes louder.
The vehicle is not locked until the HOLD
function is deactivated.
i If the engine has been switched off, it
cannot be started again until the HOLD
function has been deactivated.
If there is a malfunction in the system or
power supply while the HOLD function is
activated, the Brake Immediately message
is shown in the multifunction display.
Immediately depress the brake firmly until
the warning message in the multifunction
display goes out.
You can also shift the transmission to position
P. This deactivates the HOLD function. Dynamic handling package with
sports mode
General notes The most important part of the dynamic
handling package with sports mode is the
adjustable damping system. This
automatically controls and adapts the
suspension to the respective driving
situation.
The calibration of the suspension depends
on:
R
your driving style
R the road surface conditions
R your individual selection; see the following
description
The dynamic handling package with sports
mode also includes steering wheel paddle
shifters (Y page 160) with a manual drive
program ( Y page 162).
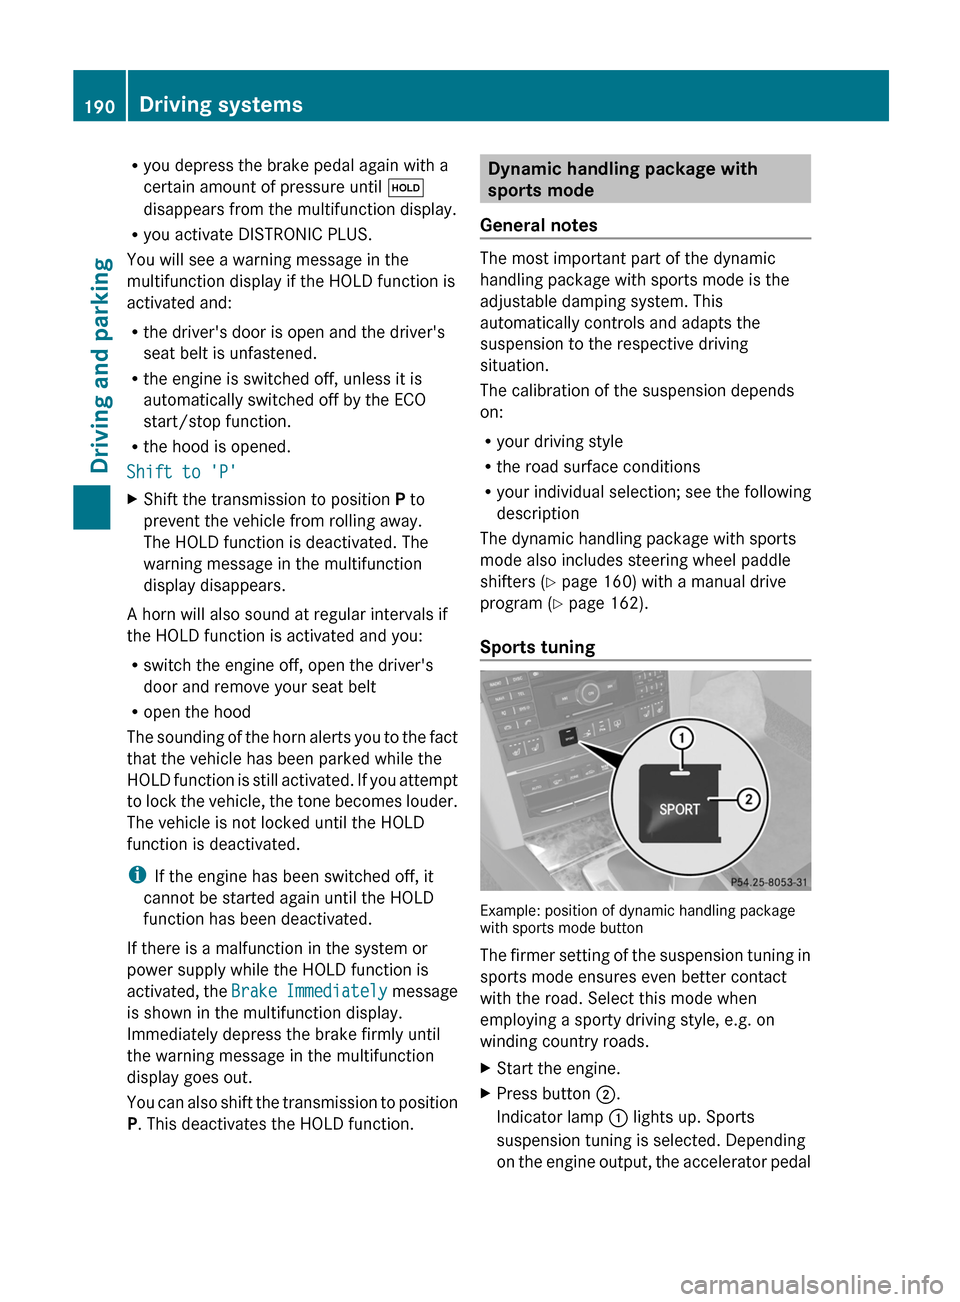
Sports tuning Example: position of dynamic handling package
with sports mode button
The
firmer setting of the suspension tuning in
sports mode ensures even better contact
with the road. Select this mode when
employing a sporty driving style, e.g. on
winding country roads.
X Start the engine.
X Press button ;.
Indicator lamp : lights up. Sports
suspension tuning is selected. Depending
on
the engine output, the accelerator pedal190
Driving systems
Driving and parking
Page 217 of 372
You can control the multifunction display and
the settings in the on-board computer using
the buttons on the multifunction steering
wheel.
Left control panel
=
; R
Calls up the menu and menu bar 9
:
Press briefly:
R
Scrolls in lists
R Selects a submenu or function
R In the Audio menu: selects a
stored station, an audio track or
a video scene
R In the Tel (telephone) menu:
switches to the phone book and
selects a name or telephone
number 9
:
Press and hold:
R
In the Audio menu: selects the
previous/next station or selects
an audio track or a video scene
using rapid scrolling
R In the Tel (Telephone) menu:
starts
rapid scrolling if the phone
book is open a R
Confirms a selection/display
message
R In the Tel (telephone) menu:
switches to the telephone book
and starts dialing the selected
number
R In the Audio menu: stops the
station search function at the
desired station Right control panel
~ R
Rejects or ends a call
R Exits phone book/redial
memory 6 R
Makes or accepts a call
R Switches to the redial memory W
X R
Adjusts the volume 8 R
Mute Back button
%
Press briefly:
R
Back
R Switches off the Voice Control
System; see the separate
operating instructions
R Hides display messages/calls
up the last Trip menu function
used
R Exits the telephone book/redial
memory %
Press and hold:
R
Calls up the standard display in
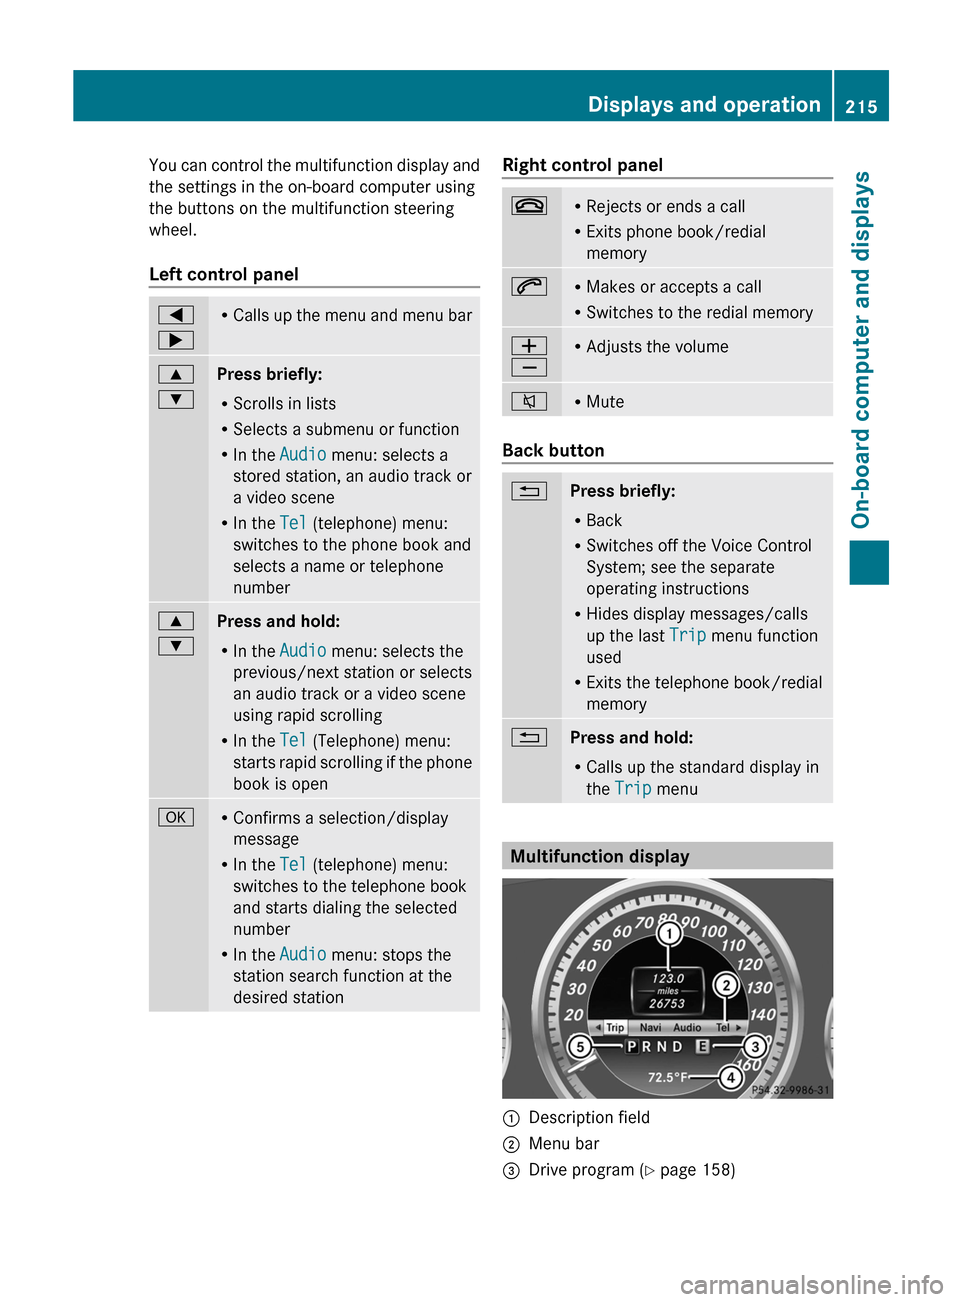
the Trip menu Multifunction display
:
Description field
; Menu bar
= Drive program (Y page 158) Displays and operation
215
On-board computer and displays Z
Page 218 of 372
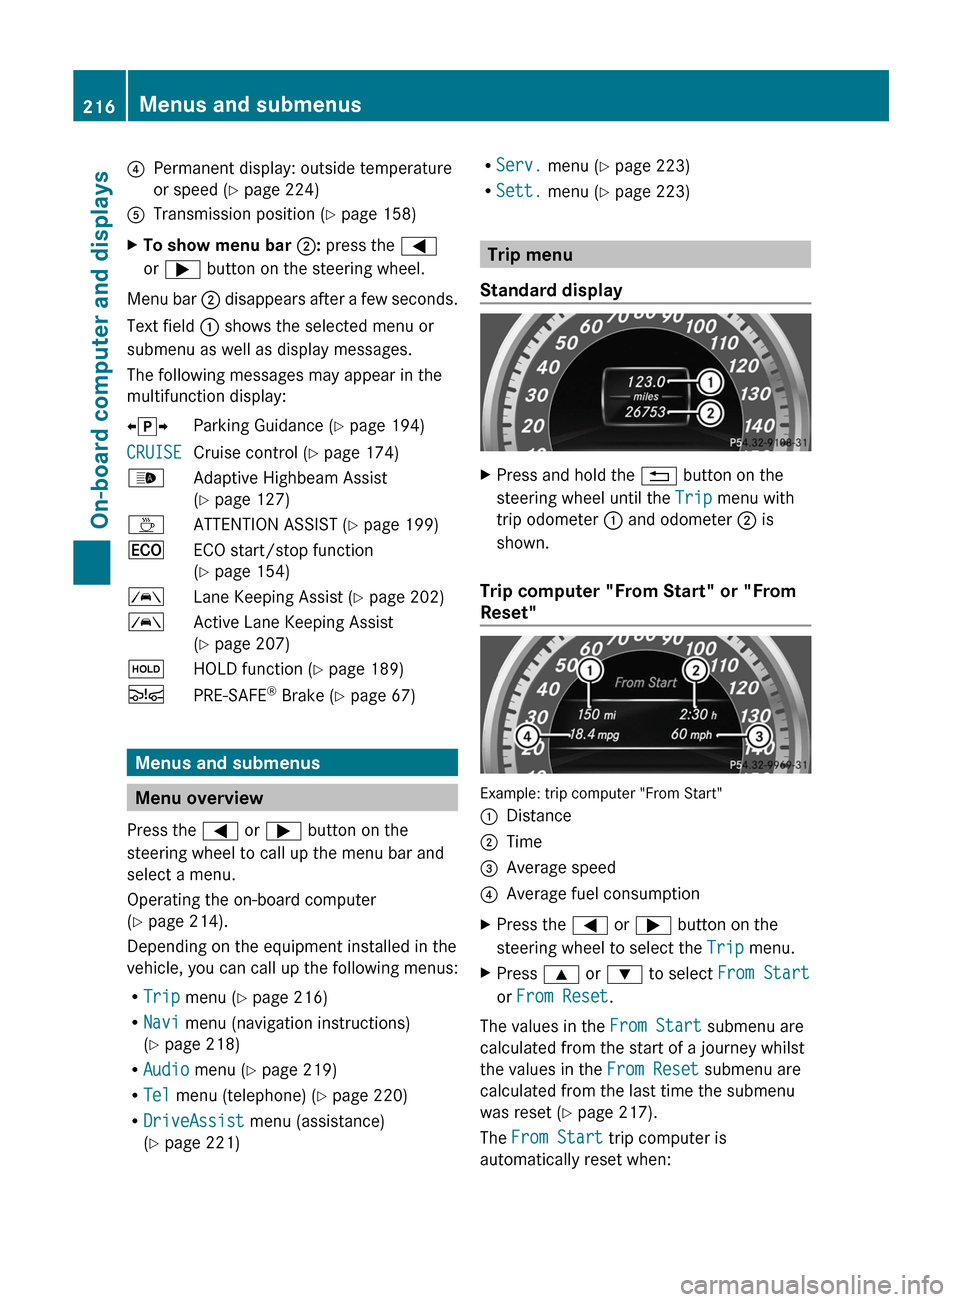
?
Permanent display: outside temperature
or speed ( Y page 224)
A Transmission position ( Y page 158)
X To show menu bar ;: press the =
or ; button on the steering wheel.
Menu bar ; disappears after a few seconds.
Text field : shows the selected menu or
submenu as well as display messages.
The following messages may appear in the
multifunction display:
XjY Parking Guidance (Y page 194)
CRUISE Cruise control (
Y page 174)
_ Adaptive Highbeam Assist
(Y page 127)
À ATTENTION ASSIST (Y page 199)
¤ ECO start/stop function
(Y page 154)
à Lane Keeping Assist (Y page 202)
à Active Lane Keeping Assist
(Y page 207)
ë HOLD function ( Y page 189)
Ä PRE-SAFE ®
Brake (Y page 67) Menus and submenus
Menu overview
Press the = or ; button on the
steering wheel to call up the menu bar and
select a menu.
Operating the on-board computer
(Y page 214).
Depending on the equipment installed in the
vehicle, you can call up the following menus:
R Trip menu (Y page 216)
R Navi menu (navigation instructions)
(Y page 218)
R Audio menu (Y page 219)
R Tel menu (telephone) ( Y page 220)
R DriveAssist menu (assistance)
(Y page 221) R
Serv. menu (Y page 223)
R Sett. menu (Y page 223) Trip menu
Standard display X
Press and hold the % button on the
steering wheel until the Trip menu with
trip odometer : and odometer ; is
shown.
Trip computer "From Start" or "From
Reset" Example: trip computer "From Start"
:
Distance
; Time
= Average speed
? Average fuel consumption
X Press the = or ; button on the
steering wheel to select the Trip menu.
X Press 9 or : to select From Start
or From Reset.
The values in the From Start submenu are
calculated from the start of a journey whilst
the values in the From Reset submenu are
calculated from the last time the submenu
was reset ( Y page 217).
The From Start trip computer is
automatically reset when: 216
Menus and submenus
On-board computer and displays
Page 223 of 372
Dialing a number from the phone book
X
Press the = or ; button on the
steering wheel to select the Tel menu.
X Press the 9, : or a button to
switch to the phone book.
X Press the 9 or : button to select the
desired name.
or
X To begin rapid scrolling: press and hold
the 9 or : button for longer than
one second.
Rapid
scrolling stops when you release the
button or reach the end of the list.
X If only one telephone number is stored
for
a name: press the 6 or a button
to start dialing.
or
X If there is more than one number for a
particular name: press the 6 or a
button to display the numbers.
X Press the 9
or : button to select the
number you want to dial.
X Press the 6 or a button to start
dialing.
or
X To exit the telephone book: press the
~ or % button.
Redialing The on-board computer saves the last names
or numbers dialed in the redial memory.
X
Press the = or ; button on the
steering wheel to select the Tel menu.
X Press the 6 button to switch to the
redial memory.
X Press the 9
or : button to select the
desired name or number.
X Press the 6 or a button to start
dialing.
or
X To exit the redial memory: press the
~ or % button. Assistance menu
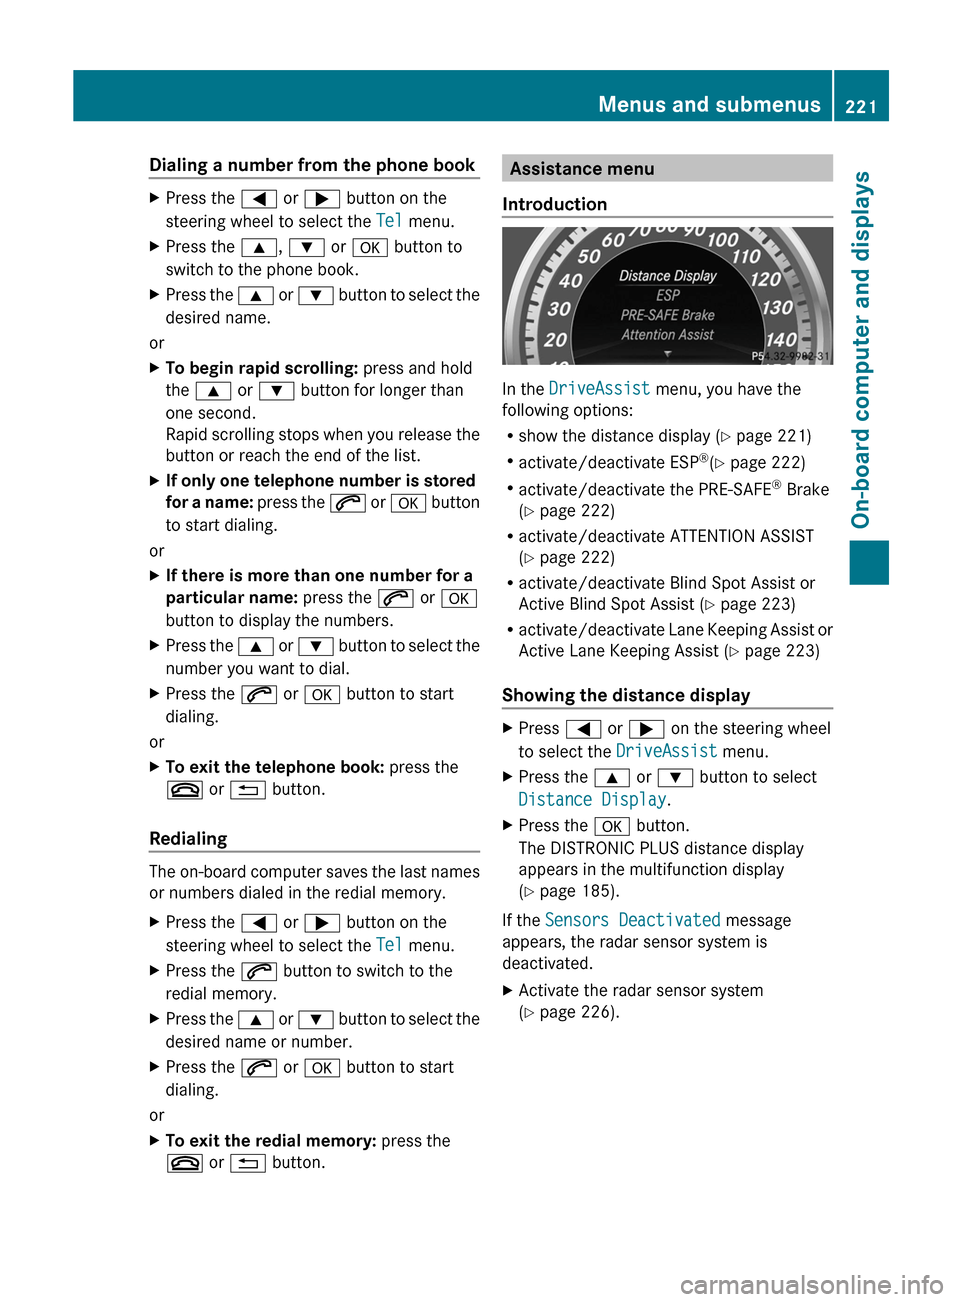
Introduction In the
DriveAssist menu, you have the
following options:
R show the distance display
(Y page 221)
R activate/deactivate ESP ®
(Y page 222)
R activate/deactivate the PRE-SAFE ®
Brake
(Y page 222)
R activate/deactivate ATTENTION ASSIST
(Y page 222)
R activate/deactivate Blind Spot Assist or
Active Blind Spot Assist (Y page 223)
R activate/deactivate Lane Keeping Assist or
Active Lane Keeping Assist (Y page 223)
Showing the distance display X
Press = or ; on the steering wheel
to select the DriveAssist menu.
X Press the 9 or : button to select
Distance Display.
X Press the a button.
The DISTRONIC PLUS distance display
appears in the multifunction display
(Y page 185).
If the Sensors Deactivated message
appears, the radar sensor system is
deactivated.
X Activate the radar sensor system
(Y page 226). Menus and submenus
221
On-board computer and displays Z
Page 253 of 372
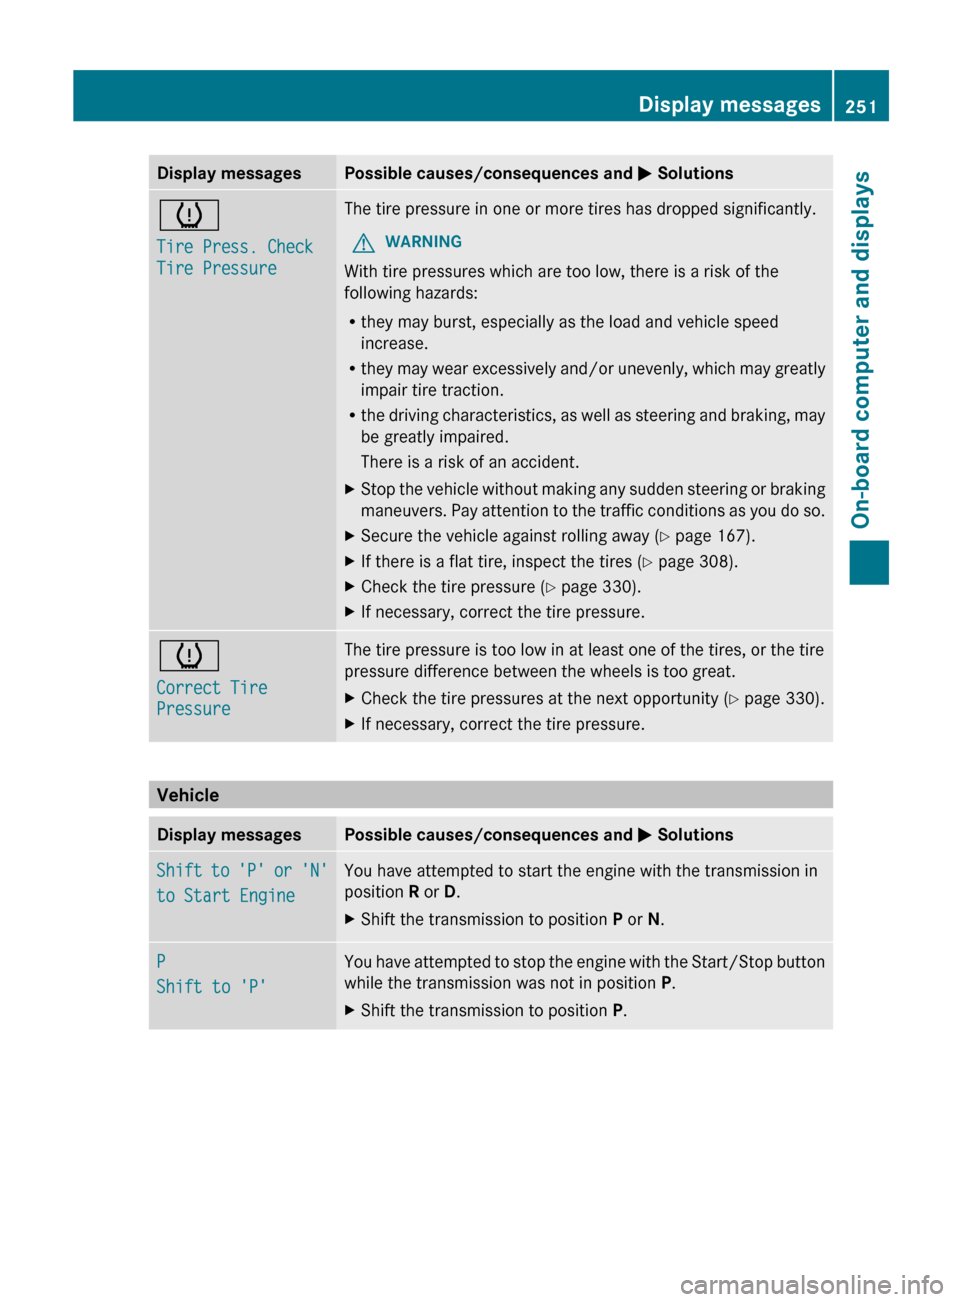
Display messages Possible causes/consequences and
M Solutionsh
Tire Press. Check
Tire Pressure The tire pressure in one or more tires has dropped significantly.
G WARNING
With tire pressures which are too low, there is a risk of the
following hazards:
R they may burst, especially as the load and vehicle speed
increase.
R they
may wear excessively and/or unevenly, which may greatly
impair tire traction.
R the driving characteristics, as well as steering and braking, may
be greatly impaired.
There is a risk of an accident.
X Stop the vehicle without making any sudden steering or braking
maneuvers.
Pay attention to the traffic conditions as you do so.
X Secure the vehicle against rolling away ( Y page 167).
X If there is a flat tire, inspect the tires ( Y page 308).
X Check the tire pressure (Y page 330).
X If necessary, correct the tire pressure. h
Correct Tire
Pressure The tire pressure is too low in at least one of the tires, or the tire
pressure difference between the wheels is too great.
X
Check the tire pressures at the next opportunity (Y page 330).
X If necessary, correct the tire pressure. Vehicle
Display messages Possible causes/consequences and
M SolutionsShift to 'P' or 'N'
to Start Engine You have attempted to start the engine with the transmission in
position R or D.
X
Shift the transmission to position P or N.P
Shift to 'P' You have attempted to stop the engine with the Start/Stop button
while the transmission was not in position P.
X
Shift the transmission to position P. Display messages
251
On-board computer and displays Z
Page 299 of 372
R
using a rag, slowly turn the cap
approximately 1
/ 2 turn to relieve excess
pressure. If opened immediately, scalding
hot
fluid and steam will be blown out under
pressure.
R do not spill antifreeze on hot engine parts.
Antifreeze contains ethylene glycol which
may burn if it comes into contact with hot
engine parts. X
Park the vehicle on a level surface.
Only check the coolant level when the
vehicle
is on a level surface and the engine
has cooled down.
X Turn the SmartKey to position 2 in the
ignition lock ( Y page 151).
On vehicles with KEYLESS-GO, press the
Start/Stop button twice
(Y page 151).
X Check the coolant temperature display in
the instrument cluster.
The coolant temperature must be below
158 ‡
(70 †).
X Turn the SmartKey to position
0 (Y page 151) in the ignition lock.
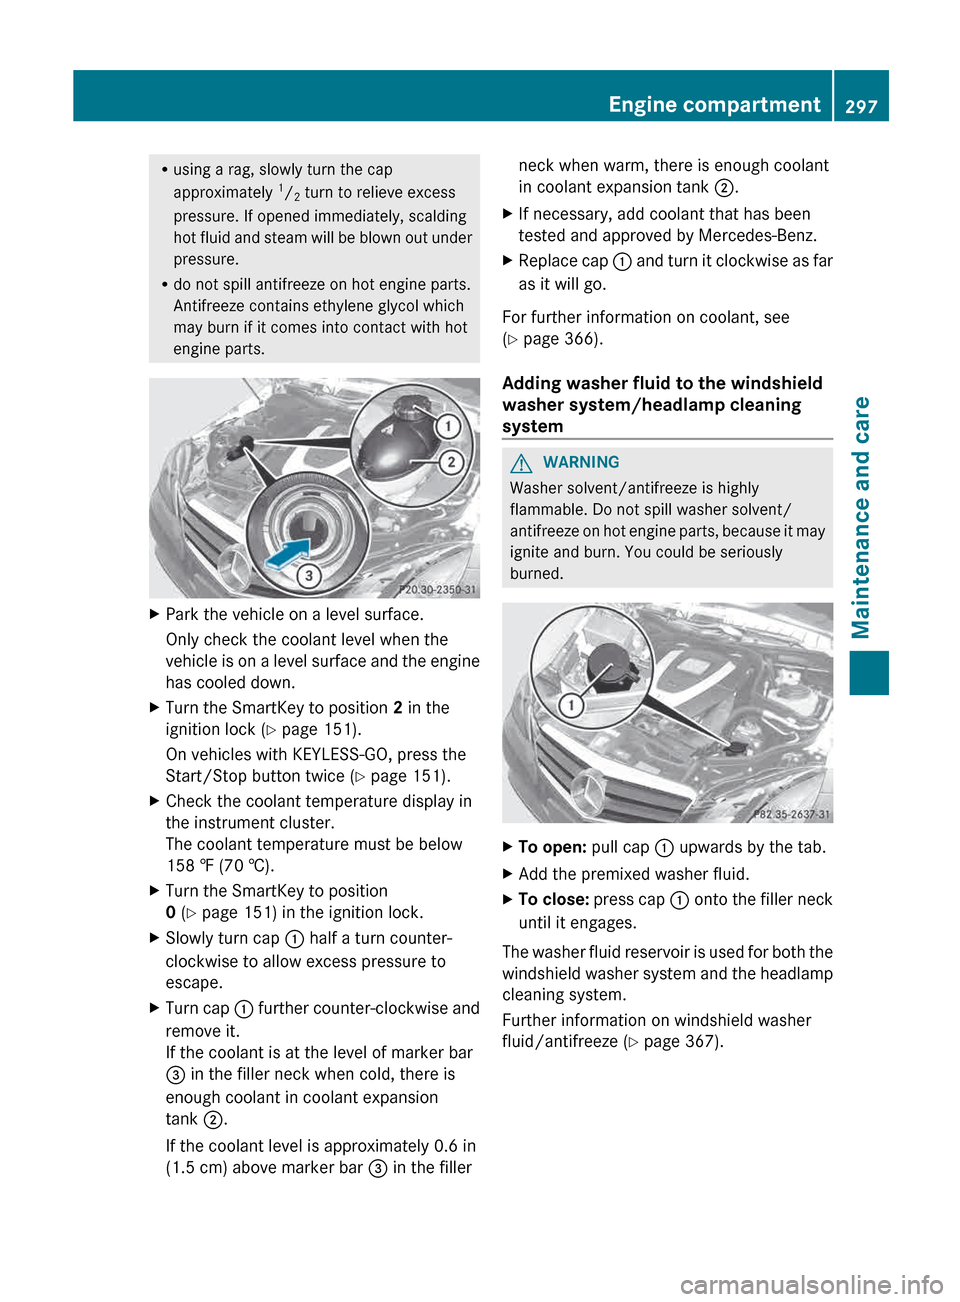
X Slowly turn cap : half a turn counter-
clockwise to allow excess pressure to
escape.
X Turn cap :
further counter-clockwise and
remove it.
If the coolant is at the level of marker bar
= in the filler neck when cold, there is
enough coolant in coolant expansion
tank ;.
If the coolant level is approximately 0.6 in
(1.5 cm) above marker bar = in the fillerneck when warm, there is enough coolant
in coolant expansion tank
;.
X If necessary, add coolant that has been
tested and approved by Mercedes-Benz.
X Replace cap :
and turn it clockwise as far
as it will go.
For further information on coolant, see
(Y page 366).
Adding washer fluid to the windshield
washer system/headlamp cleaning
system G
WARNING
Washer solvent/antifreeze is highly
flammable. Do not spill washer solvent/
antifreeze
on hot engine parts, because it may
ignite and burn. You could be seriously
burned. X
To open: pull cap : upwards by the tab.
X Add the premixed washer fluid.
X To close:
press cap : onto the filler neck
until it engages.
The washer fluid reservoir is used for both the
windshield
washer system and the headlamp
cleaning system.
Further information on windshield washer
fluid/antifreeze ( Y page 367). Engine compartment
297
Maintenance and care Z