check oil MERCEDES-BENZ E-Class CABRIOLET 2017 A207 Owner's Manual
[x] Cancel search | Manufacturer: MERCEDES-BENZ, Model Year: 2017, Model line: E-Class CABRIOLET, Model: MERCEDES-BENZ E-Class CABRIOLET 2017 A207Pages: 322, PDF Size: 7.97 MB
Page 11 of 322
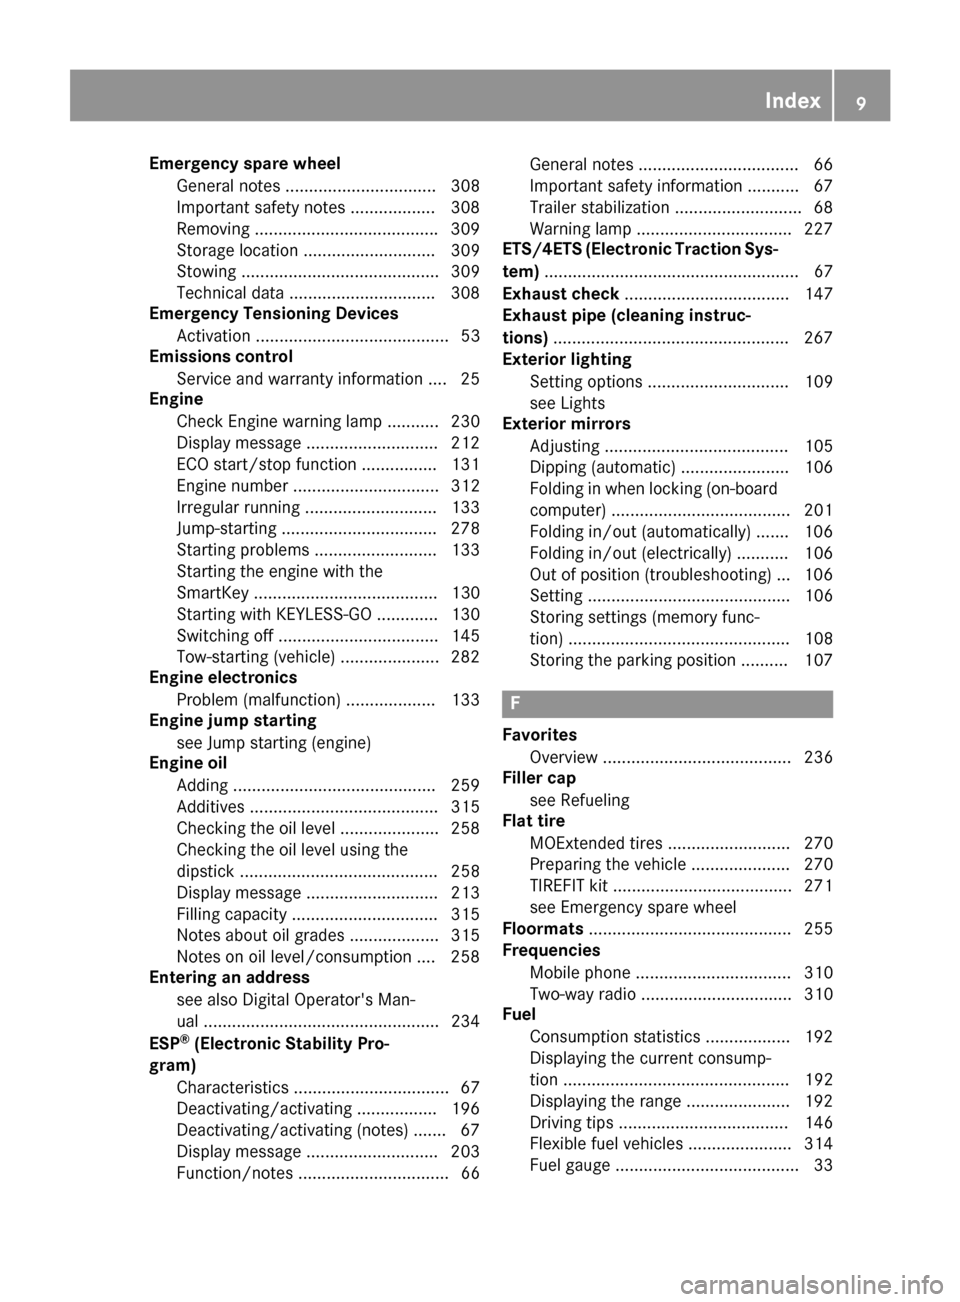
Emergency spare wheelGeneral notes ................................ 308
Important safety notes .................. 308
Removing ...................................... .309
Storage location ............................ 309
Stowing .......................................... 309
Technical data ............................... 308
Emergency Tensioning Devices
Activation ......................................... 53
Emissions control
Service and warranty information .... 25
Engine
Check Engine warning lamp ........... 230
Display message ............................ 212
ECO start/stop function ................ 131
Engine number ............................... 312
Irregular running ............................ 133
Jump-starting ................................. 278
Starting problems .......................... 133
Starting the engine with the
SmartKey ....................................... 130
Starting with KEYLESS-GO ............. 130
Switching off .................................. 145
Tow-starting (vehicle) ..................... 282
Engine electronics
Problem (malfunction) ................... 133
Engine jump starting
see Jump starting (engine)
Engine oil
Adding ...........................................2 59
Additives ........................................ 315
Checking the oil level ..................... 258
Checking the oil level using the
dipstick .......................................... 258
Display message ............................ 213
Filling capacity ............................... 315
Notes about oil grades ................... 315
Notes on oil level/consumption .... 258
Entering an address
see also Digital Operator's Man-
ual ..................................................2 34
ESP
®(Electronic Stability Pro-
gram)
Characteristics ................................. 67
Deactivating/activating ................. 196
Deactivating/activating (notes) ....... 67
Display message ............................ 203
Fu
nction/notes ................................ 66 General notes .................................. 66
Important safety information ........... 67
Trailer stabilization ........................... 68
Warning lamp ................................. 227
ETS/4ETS (Electronic Traction Sys-
tem) ...................................................... 67
Exhaust check ................................... 147
Exhaust pipe (cleaning instruc-
tions) ..................................................2 67
Exterior lighting
Setting options .............................. 109
see Lights
Exterior mirrors
Adjusting ....................................... 105
Dipping (automatic) ....................... 106
Folding in when locking (on-board
computer) ...................................... 201
Folding in/out (automatically) ....... 106
Folding in/out (electrically) ........... 106
Out of position (troubleshooting) ... 106
Setting ........................................... 106
Storing settings (memory func-
tion) ............................................... 108
Storing the parking position .......... 107
F
FavoritesOverview ........................................ 236
Filler cap
see Refueling
Flat tire
MOExtended tires .......................... 270
Preparing the vehicle ..................... 270
TIREFIT kit ...................................... 271
see Emergency spare wheel
Floormats ........................................... 255
Frequencies
Mobile phone ................................. 310
Two-way radio ................................ 310
Fuel
Consumption statistics .................. 192
Displaying the current consump-
tion ................................................ 192
Displaying the range ...................... 192
Driving tips .................................... 146
Flexible fuel vehicles ...................... 314
Fuel gauge ....................................... 33
Index9
Page 18 of 322
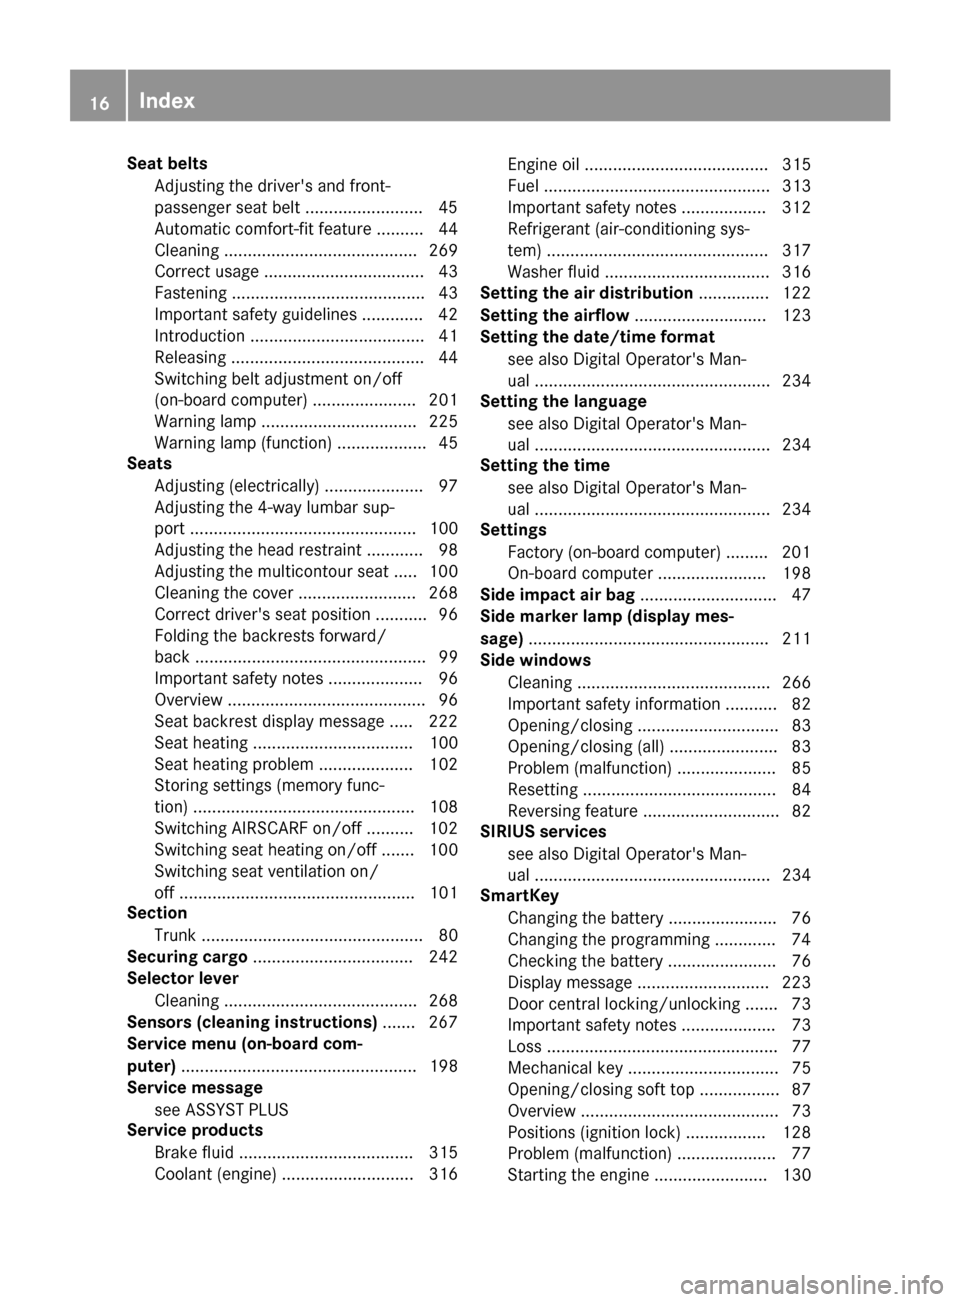
Seat beltsAdjusting the driver's and front-
passenger seat belt .........................4 5
Automatic comfort-fit feature .......... 44
Cleaning ......................................... 269
Correct usage .................................. 43
Fastening ......................................... 43
Important safety guidelines ............. 42
Introduction ..................................... 41
Releasing ......................................... 44
Switching belt adjustment on/off
(on-board computer) ...................... 201
Warning lamp ................................. 225
Warning lamp (function) ................... 45
Seats
Adjusting (electrically) ..................... 97
Adjusting the 4-way lumbar sup-
port ................................................ 100
Adjusting the head restraint ............ 98
Adjusting the multicontour seat ..... 100
Cleaning the cover ......................... 268
Correct driver's seat position ........... 96
Folding the backrests forward/
back ................................................. 99
Important safety notes .................... 96
Overview .......................................... 96
Seat backrest display message ..... 222
Seat heating .................................. 100
Seat heating problem .................... 102
Storing settings (memory func-
tion) ............................................... 108
Switching AIRSCARF on/off .......... 102
Switching seat heating on/off ....... 100
Switching seat ventilation on/
off .................................................. 101
Section
Trunk ............................................... 80
Securing cargo .................................. 242
Selector lever
Cleaning ......................................... 268
Sensors (cleaning instructions) ....... 267
Service menu (on-board com-
puter) .................................................. 198
Service message
see ASSYST PLUS
Service products
Brake fluid ..................................... 315
Coolant (engine) ............................ 316 Engine oil ....................................... 315
Fuel ................................................ 313
Important safety notes .................. 312
Refrigerant (air-conditioning sys-
tem) ............................................... 317
Washer fluid ................................... 316
Setting the air distribution ............... 122
Setting the airflow ............................ 123
Setting the date
/time format
see also Digital Operator's Man-
ual .................................................. 234
Setting the language
see also Digital Operator's Man-
ual .................................................. 234
Setting the time
see also Digital Operator's Man-
ual .................................................. 234
Settings
Factory (on-board computer) ......... 201
On-board computer ....................... 198
Side impact air bag ............................. 47
Side marker lamp (display mes-
sage) ................................................... 211
Side windows
Cleaning ......................................... 266
Important safety information ........... 82
Opening/closing .............................. 83
Opening/closing (all) ....................... 83
Problem (malfunction) ..................... 85
Resetting ......................................... 84
Reversing feature ............................. 82
SIRIUS services
see also Digital Operator's Man-
ual .................................................. 234
SmartKey
Changing the battery ....................... 76
Changing the programming ............. 74
Checking the battery ....................... 76
Display message ............................ 223
Door central locking/unlocking ....... 73
Important safety notes .................... 73
Loss ................................................. 77
Mechanical key ................................ 75
Opening/closing soft top ................. 87
Overview .......................................... 73
Positions (ignition lock) ................. 128
Problem (malfunction) ..................... 77
Starting the engine ........................ 130
16Index
Page 130 of 322
Where possible, avoid spinning the drive
wheels when pulling away on slippery roads.
You could otherwise damage the drive train.
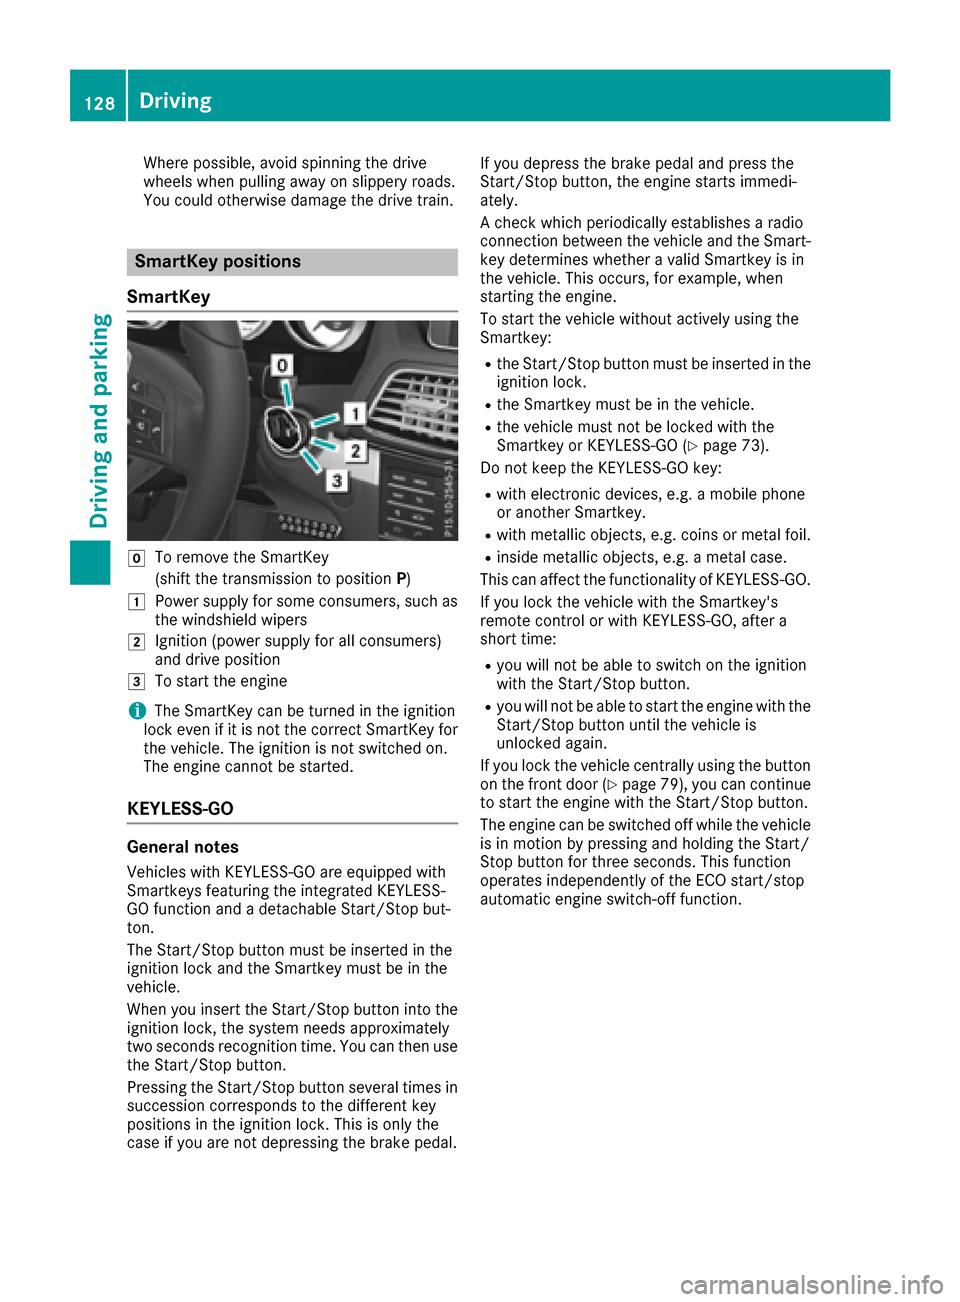
SmartKey positions
SmartKey
gTo remove the SmartKey
(shift the transmission to position P)
1Power supply for some consumers, such as
the windshield wipers
2Ignition (power supply for all consumers)
and drive position
3To start the engine
iThe SmartKey can be turned in the ignition
lock even if it is not the correct SmartKey for
the vehicle. The ignition is not switched on.
The engine cannot be started.
KEYLESS-GO
General notes
Vehicles with KEYLESS-GO are equipped with
Smartkeys featuring the integrated KEYLESS-
GO function and a detachable Start/Stop but-
ton.
The Start/Stop button must be inserted in the
ignition lock and the Smartkey must be in the
vehicle.
When you insert the Start/Stop button into the
ignition lock, the system needs approximately
two seconds recognition time. You can then use
the Start/Stop button.
Pressing the Start/Stop button several times in
succession corresponds to the different key
positions in the ignition lock. This is only the
case if you are not depressing the brake pedal. If you depress the brake pedal and press the
Start/Stop button, the engine starts immedi-
ately.
A check which periodically establishes a radio
connection between the vehicle and the Smart-
key determines whether a valid Smartkey is in
the vehicle. This occurs, for example, when
starting the engine.
To start the vehicle without actively using the
Smartkey:
Rthe Start/Stop button must be inserted in the
ignition lock.
Rthe Smartkey must be in the vehicle.
Rthe vehicle must not be locked with the
Smartkey or KEYLESS-GO (Ypage 73).
Do not keep the KEYLESS-GO key:
Rwith electronic devices, e.g. a mobile phone
or another Smartkey.
Rwith metallic objects, e.g. coins or metal foil.
Rinside metallic objects, e.g. a metal case.
This can affect the functionality of KEYLESS-GO.
If you lock the vehicle with the Smartkey's
remote control or with KEYLESS-GO, after a
short time:
Ryou will not be able to switch on the ignition
with the Start/Stop button.
Ryou will not be able to start the engine with the
Start/Stop button until the vehicle is
unlocked again.
If you lock the vehicle centrally using the button
on the front door (
Ypage 79), you can continue
to start the engine with the Start/Stop button.
The engine can be switched off while the vehicle
is in motion by pressing and holding the Start/
Stop button for three seconds. This fun
ction
operates independently of the ECO start/stop
automatic engine switch-off function.
128Driving
Driving and parking
Page 143 of 322
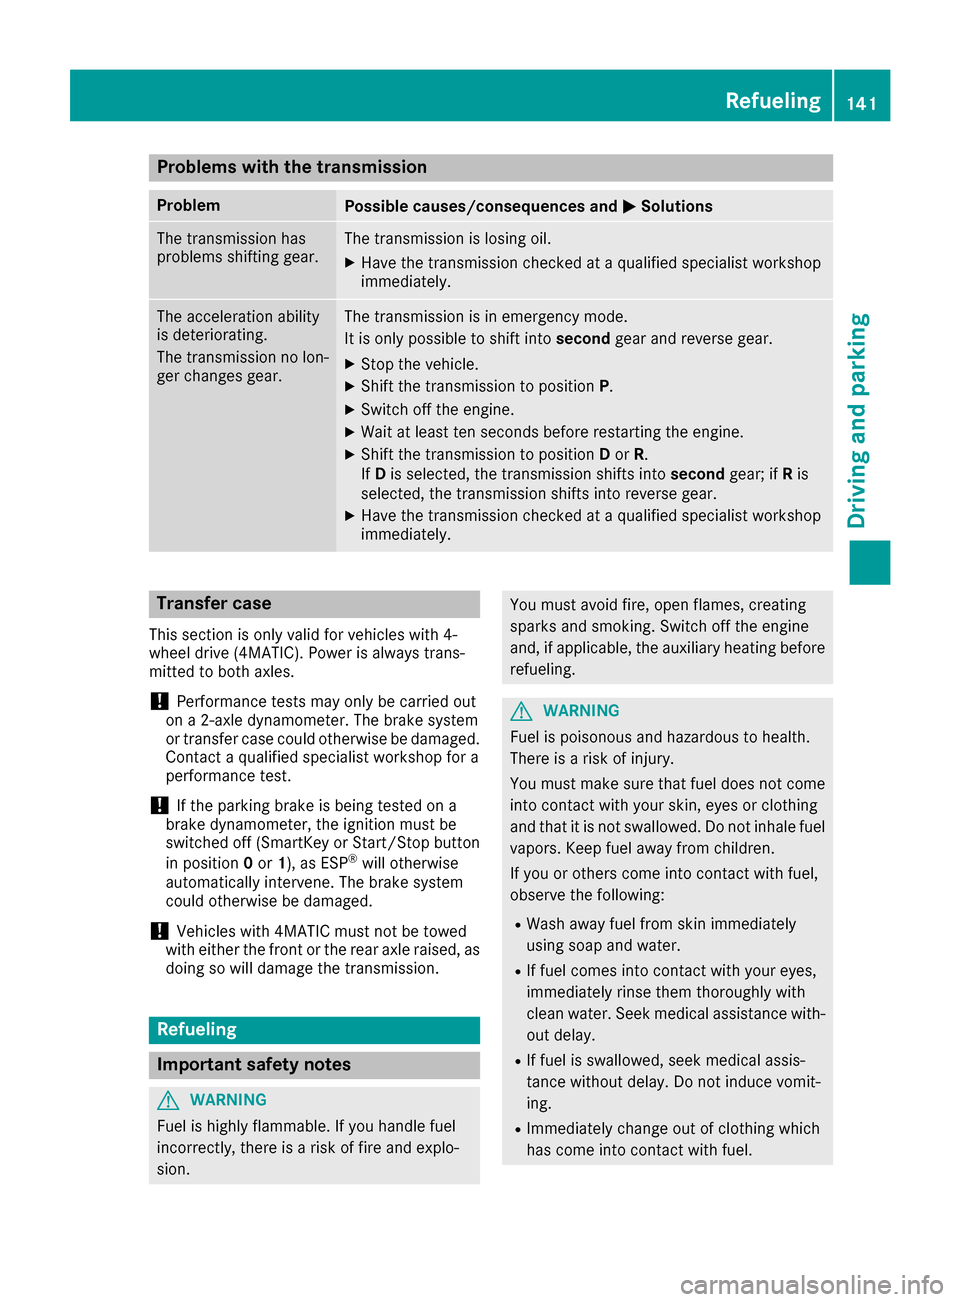
Problems with the transmission
ProblemPossible causes/consequences andMSolutions
The transmission has
problems shifting gear.The transmission is losing oil.
XHave the transmission checked at a qualified specialist workshop
immediately.
The acceleration ability
is deteriorating.
The transmission no lon-
ger changes gear.The transmission is in emergency mode.
It is only possible to shift intosecondgear and reverse gear.
XStop the vehicle.
XShift the transmission to position P.
XSwitch off the engine.
XWait at least ten seconds before restarting the engine.
XShift the transmission to positionDor R.
If D is selected, the transmission shifts into secondgear; ifRis
selected, the transmission shifts into reverse gear.
XHave the transmission checked at a qualified specialist workshop
immediately.
Transfer case
This section is only valid for vehicles with 4-
wheel drive (4MATIC). Power is always trans-
mitted to both axles.
!Performance tests may only be carried out
on a 2-axle dynamometer. The brake system
or transfer case could otherwise be damaged. Contact a qualified specialist workshop for a
performance test.
!If the parking brake is being tested on a
brake dynamometer, the ignition must be
switched off (SmartKey or Start/Stop button
in position 0or 1), as ESP
®will otherwise
automatically intervene. The brake system
could otherwise be damaged.
!Vehicles with 4MATIC must not be towed
with either the front or the rear axle raised, as
doing so will damage the transmission.
Refueling
Important safety notes
GWARNING
Fuel is highly flammable. If you handle fuel
incorrectly, there is a risk of fire and explo-
sion.
You must avoid fire, open flames, creating
sparks and smoking. Switch off the engine
and, if applicable, the auxiliary heating before refueling.
GWARNING
Fuel is poisonous and hazardous to health.
There is a risk of injury.
You must make sure that fuel does not come into contact with your skin, eyes or clothing
and that it is not swallowed. Do not inhale fuel
vapors. Keep fuel away from children.
If you or others come into contact with fuel,
observe the following:
RWash away fuel from skin immediately
using soap and water.
RIf fuel comes into contact with your eyes,
immediately rinse them thoroughly with
clean water. Seek medical assistance with-
out delay.
RIf fuel is swallowed, seek medical assis-
tance without delay. Do not induce vomit-
ing.
RImmediately change out of clothing which
has come into contact with fuel.
Refueling141
Driving and parking
Z
Page 215 of 322
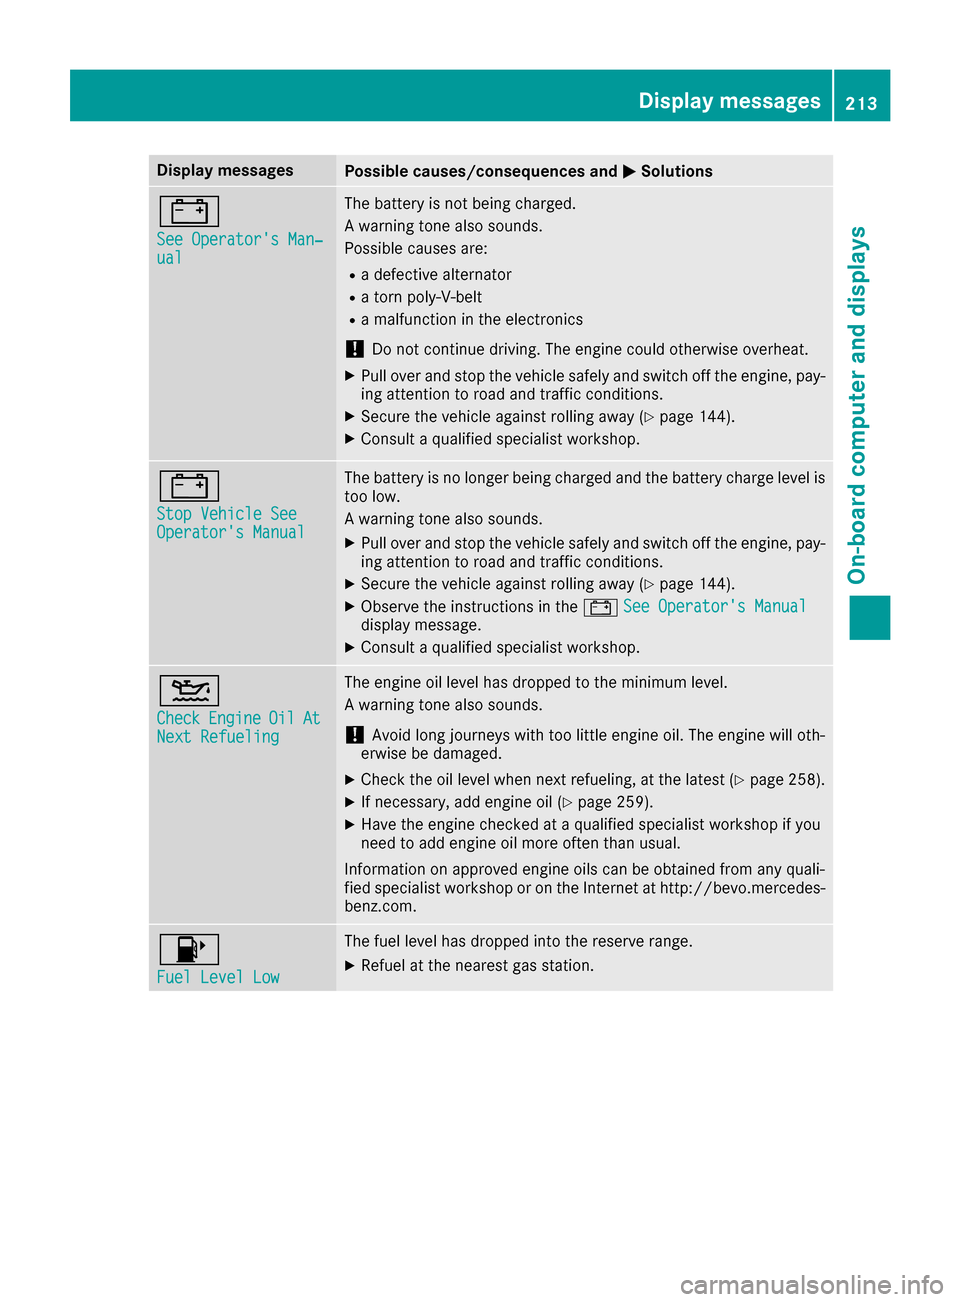
Display messagesPossible causes/consequences andMSolutions
#
See Operator'sMan ‐ual
The battery is no tbein gcharged.
A warning tone also sounds.
Possibl ecauses are:
Radefective alternato r
Ratorn poly-V-belt
Ramalfunction in th eelectronics
!Do no tcontinu edriving. The engin ecould otherwise overheat.
XPull ove rand stop th evehicl esafely and switch off th eengine, pay-
ing attention to roa dand traffic conditions.
XSecur eth evehicl eagainst rollin gaway (Ypage 144).
XConsult aqualified specialist workshop .
#
StopVehicl eSeeOperator' sManual
The battery is no longer bein gcharged and th ebattery charg elevel is
to olow.
A warning tone also sounds.
XPull ove rand stop th evehicl esafely and switch off th eengine, pay-
ing attention to roa dand traffic conditions.
XSecur eth evehicl eagainst rollin gaway (Ypage 144).
XObserv eth einstruction sin th e# See Operator' sManualdisplay message .
XConsultaqualified specialist workshop .
4
CheckEngineOilAtNextRefueling
The engin eoil level has dropped to th eminimum level.
A warning tone also sounds.
!Avoid lon gjourneys wit hto olittl eengin eoil. The engin ewill oth-
erwise be damaged.
XChec kth eoil level when next refueling, at th elatest (Ypage 258).
XIf necessary, add engin eoil (Ypage 259).
XHav eth eengin echecke dat aqualified specialist workshop if you
need to add engin eoil mor eoften than usual.
Information on approve dengin eoils can be obtained from any quali-
fie dspecialist workshop or on th eInternet at http://bevo.mercedes -
benz.com.
8
Fue lLevel Low
The fuel level has dropped int oth ereserv erange.
XRefue lat th eneares tgas station .
Display messages213
On-board computer and displays
Z
Page 260 of 322
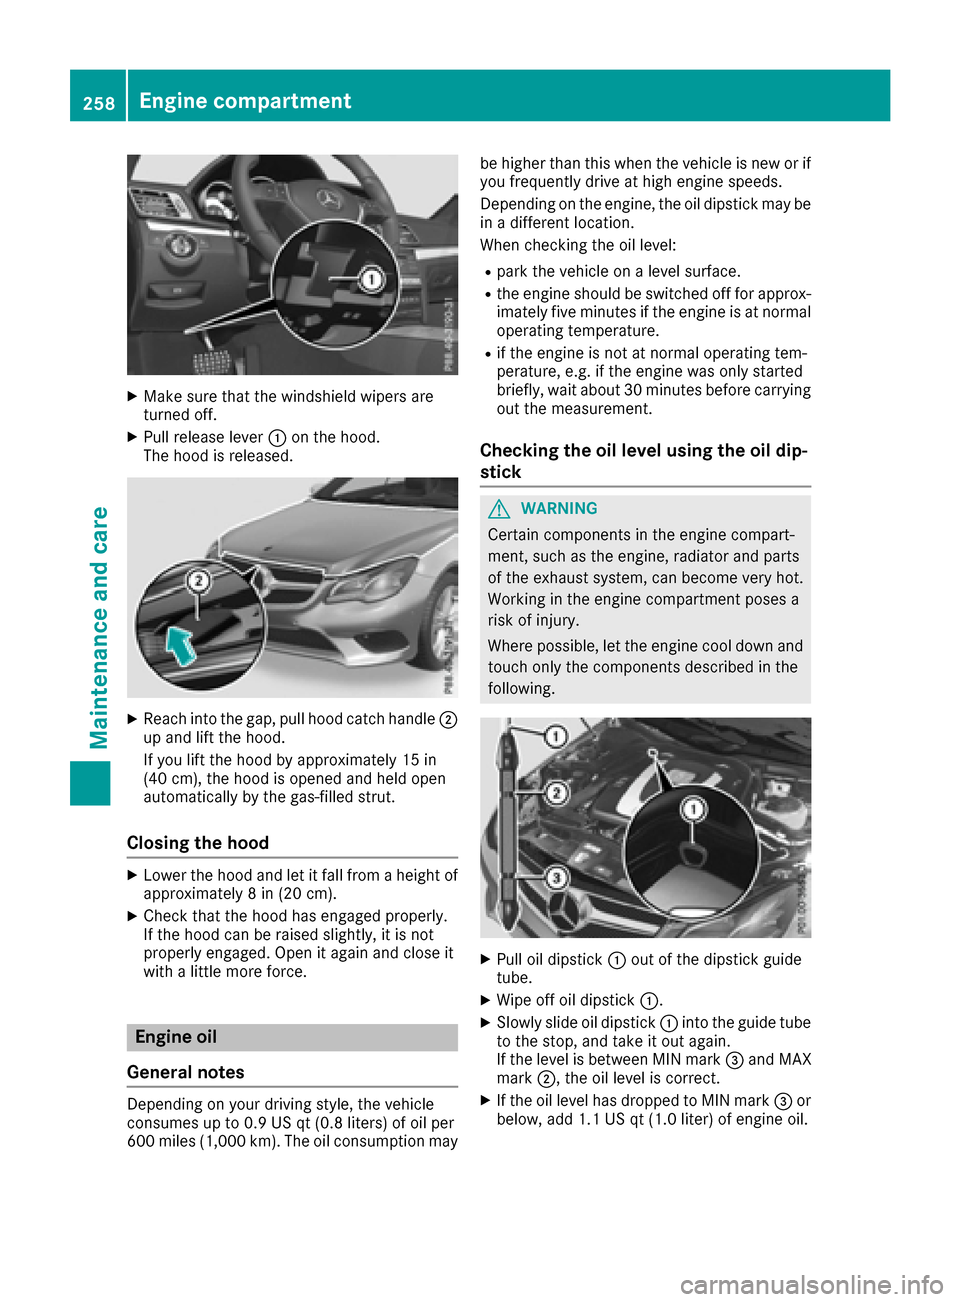
XMake sure that the windshield wipers are
turned off.
XPull release lever:on the hood.
The hood is released.
XReach into the gap, pull hood catch handle ;
up and lift the hood.
If you lift the hood by approximately 15 in
(40 cm), the hood is opened and held open
automatically by the gas-filled strut.
Closing the hood
XLower the hood and let it fall from a height of
approximately 8 in (20 cm).
XCheck that the hood has engaged properly.
If the hood can be raised slightly, it is not
properly engaged. Open it again and close it
with a little more force.
Engine oil
General notes
Depending on your driving style, the vehicle
consumes up to 0.9 US qt (0.8 liters) of oil per
600 miles (1,000 km). The oil consumption may be higher than this when the vehicle is new or if
you frequently drive at high engine speeds.
Depending on the engine, the oil dipstick may be
in a different location.
When checking the oil level:
Rpark the vehicle on a level surface.
Rthe engine should be switched off for approx-
imately five minutes if the engine is at normal
operating temperature.
Rif the engine is not at normal operating tem-
perature, e.g. if the engine was only started
briefly, wait about 30 minutes before carrying
out the measurement.
Checking the oil level using the oil dip-
stick
GWARNING
Certain components in the engine compart-
ment, such as the engine, radiator and parts
of the exhaust system, can become very hot.
Working in the engine compartment poses a
risk of injury.
Where possible, let the engine cool down and touch only the components described in the
following.
XPull oil dipstick :out of the dipstick guide
tube.
XWipe off oil dipstick :.
XSlowly slide oil dipstick :into the guide tube
to the stop, and take it out again.
If the level is between MIN mark =and MAX
mark ;, the oil level is correct.
XIf the oil level has dropped to MIN mark =or
below, add 1.1 US qt (1.0 liter) of engine oil.
258Engine compartment
Maintenance and care
Page 261 of 322
Adding engine oil
GWARNING
Certain component sin th eengin ecompart-
ment, suc has th eengine, radiato rand part s
of th eexhaust system, can become ver yhot .
Working in th eengin ecompartmen tposes a
ris kof injury.
Wher epossible, let th eengin ecool down and
touch only th ecomponent sdescribed in th e
following.
GWARNIN G
If engin eoil comes int ocontact wit hhot com-
ponents in th eengin ecompartment, it may
ignite. There is aris kof fir eand injury.
Mak esur ethat engin eoil is no tspilled next to
th efiller neck .Let th eengin ecool down and
thoroughly clean th eengin eoil off th ecom-
ponents before starting th eengine.
HEnvironmenta lnot e
When addin goil, tak ecar eno tto spil lany. If
oil enters th esoil or waterways, it is harmful to
th eenvironment.
!Only use engin eoils and oil filters that hav e
been approve dfor vehicles wit h aservic esys-
tem. You can obtain alist of th eengin eoils
and oil filters tested and approve din accord -
anc ewit hth eMercedes-Benz Specification s
for Service Products at any Mercedes-Benz
Service center.
Damage to th eengin eor exhaust system is
caused by th efollowing:
Rusin gengin eoils and oil filters that hav eno t
been specifically approve dfor th eservic e
system
Rreplacing engin eoil and oil filters after th e
interval for replacemen tspecifie dby th e
servic esystem has been exceeded
Rusin gengin eoil additives.
!Do no tadd to omuc hoil. addin gto omuc h
engin eoil can result in damag eto th eengin e
or to th ecatalytic converter. Hav eexcess
engin eoil siphoned off .
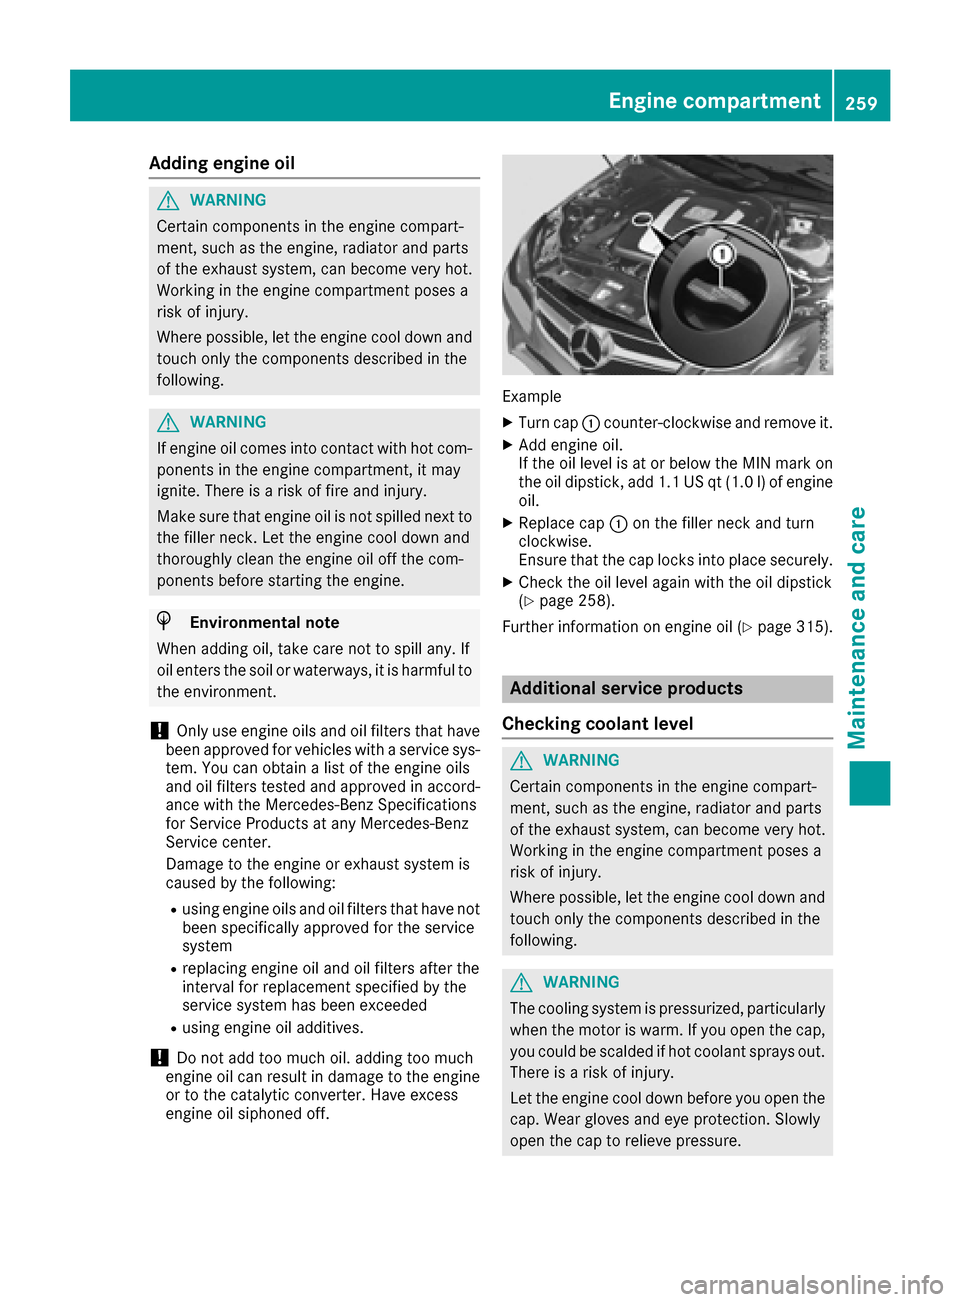
Example
XTurn cap :counter-clockwise and remove it .
XAddengin eoil.
If th eoil level is at or belo wtheMIN mar kon
th eoil dipstick ,add 1. 1US qt (1.0l)of engine
oil.
XReplace cap :on the filler neck and turn
clockwise.
Ensure that the cap locks into place securely.
XCheck the oil level again with the oil dipstick
(Ypage 258).
Further information on engine oil (
Ypage 315).
Additional service products
Checking coolant level
GWARNING
Certain components in the engine compart-
ment, such as the engine, radiator and parts
of the exhaust system, can become very hot.
Working in the engine compartment poses a
risk of injury.
Where possible, let the engine cool down and touch only the components described in the
following.
GWARNING
The cooling system is pressurized, particularly
when the motor is warm. If you open the cap,
you could be scalded if hot coolant sprays out.
There is a risk of injury.
Let the engine cool down before you open the
cap. Wear gloves and eye protection. Slowly
open the cap to relieve pressure.
Engine compartment259
Maintenance and care
Z
Page 263 of 322
You can obtain further information from an
authorized Mercedes-Benz Center or at
http://www.mbusa.com (USA only).
iThe ASSYST PLUS service interval display
does not show any information on the engine
oil level. Observe the notes on the engine oil
level (
Ypage 258).
The multifunction display shows a service mes-
sage for several seconds, e.g.:
RService A in .. days
RService A Due
RService A Exceeded by .. Days
Depending on the operating conditions of the
vehicle, the remaining time or distance until the next service due date is displayed.
The letter A
orB, possibly in connection with a
number or another letter, indicates the type of
service. A
stands for a minor service and Bfor a
major service.
You can obtain further information from an
authorized Mercedes-Benz Center.
The ASSYST PLUS service interval display does
not take into account any periods of time during
which the battery is disconnected.
Maintaining the time-dependent service sched-
ule:
XNote down the service due date displayed in
the multifunction display before disconnect-
ing the battery.
or
XAfter reconnecting the battery, subtract the
battery disconnection periods from the ser-
vice date shown on the display.
Hiding a service message
XPress the aor% button on the steering
wheel.
Displaying service messages
XSwitch on the ignition.
XPress the =or; button on the steering
wheel to select the Serv.menu.
XPress the9or: button to select the
ASSYSTPLUSsubmenu and confirm by press-
ing the abutton.
The service due date appears in the multi-
function display.
Information about Service
Resetting the ASSYST PLUS service inter-
val display
!If the ASSYST PLUS service interval display
has been inadvertently reset, this setting can
be corrected at a qualified specialist work-
shop.
Have service work carried out as described in
the Maintenance Booklet. This may otherwise lead to increased wear and damage to the
major assemblies or the vehicle.
A qualified specialist workshop, e.g. an author-
ized Mercedes-Benz Center, will reset the
ASSYST PLUS service interval display after the
service work has been carried out. You can also
obtain further information on maintenance
work, for example.
Special service requirements
The specified maintenance interval takes only
the normal operation of the vehicle into
account. Under arduous operating conditions or
increased load on the vehicle, maintenance
work must be carried out more frequently, for
example:
Rregular city driving with frequent intermediate stops
Rif the vehicle is primarily used to travel short
distances
Ruse in mountainous terrain or on poor road
surfaces
Rif the engine is often left idling for long periods
Under these or similar conditions, have, for
example, the air filter, engine oil and oil filter
replaced or changed more frequently. Under
arduous operating conditions, the tires must be
checked more often. Further information can be
obtained at a qualified specialist workshop, e.g.
an authorized Mercedes-Benz Center.
Driving abroad
An extensive Mercedes-Benz Service network is
also available in other countries. You can obtain
further information from any authorized
Mercedes-Benz Center.
Maintenance261
Maintenance and care
Z
Page 275 of 322
First, tire sealant is pumped into the tire. The
pressure can briefly rise to approximately
500 kPa (5 bar/73 psi).
Do not switch off the tire inflation com-
pressor during this phase.
XLet the tire inflation compressor run for a
maximum of five minutes. The tire should then
have attained a pressure of at least 180 kPa
(1.8 bar/26 psi).
If a pressure of 180 kPa (1.8 bar/26 psi) has
been attained after five minutes, see "Tire pres- sure reached" (
Ypage 273).
If a tire pressure of 180 kPa (1.8 bar/26 psi) has
not been attained after five minutes, see "Tire
pressure not reached" (
Ypage 273).
If tire sealant has escaped, clean it off affected
areas as quickly as possible. Use plain water if
possible.
If your clothes are soiled with tire sealant, have
them cleaned with perchloroethylene at a dry
cleaner as soon as possible.
Tire pressure not reached
If a pressure of 180 kPa (1.8 bar/26 psi) ha s not
been attained after five minutes:
XSwitch off the tire inflation compressor.
XUnscrew the filler hose from the valve of the
faulty tire.
Note that tire sealant may escape when you
unscrew the filler hose.
XVery slowly drive forwards or reverse approx- imately 30 ft (10 m).
XPump upthe tire again.
After a maximum of five minutes the tire pres-
sure must be at least 180 kPa (1.8 bar/
26 psi).
GWARNING
If the required tire pressure is not reached
after the specified time, the tire is too badly
damaged. The tire sealant cannot repair the
tire in this instance. Damaged tires and a tire
pressure that is too low can significantly
impair the vehicle's braking and driving char-
acteristics. There is a risk of accident.
Do not continue driving. Contact a qualified
specialist workshop.
Tire pressure reached
GWARNING
A tire temporarily sealed with tire sealant
impairs the driving characteristics and is not
suitable for higher speeds. There is a risk of
accident.
You should therefore adapt your driving style
accordingly and drive carefully. Do not exceed the specified maximum speed with a tire that
has been repaired using tire sealant.
The maximum speed for a tire sealed with tire
sealant is 50 mph (80 km/h). The upper part of
the TIREFIT sticker must be affixed to the instru-
ment cluster in the driver's field of vision.
!After use, excess tire sealant may run out of
the filler hose. This could cause stains.
Therefore, place the tire sealant bottle with
filler hose in the plastic bag which is con-
tained in the TIREFIT kit.
HEnvironmental note
Have the used tire sealant bottle disposed of
professionally, e.g. at a qualified specialist
workshop.
If a tire pressure of 180 kPa (1.8 ba r/26 psi) has
been attained after five minutes:
XSwitch off the tire inflation compressor.
XUnscrew the filler hose from the valve of the
faulty tire.
XStow the tire sealant bottle and the tire infla-
tion compressor.
XPull away immediately.
XStop after driving for approximately ten
minutes and check the tire pressure with the
tire inflation compressor.
The tire pressure must now be at least
130 kPa (1.3 bar/19 psi).
GWARNING
If the required tire pressure is not reached
after driving for a short period, the tire is too
badly damaged. The tire sealant cannot repair
the tire in this instance. Damaged tires and a
tire pressure that is too low can significantly
impair the vehicle's braking and driving char-
acteristics. There is a risk of accident.
Flat tire273
Breakdown assistance
Z
Page 306 of 322
Tire-mounting tools should not be used near
the valve. This could damage the electronic
components.
Only have tires changed at a qualified spe-
cialist workshop.
Always observe the instructions and safety
notes in the "Mounting a wheel" section
(
Ypage 304).
The wear patterns on the front and rear tires
differ, depending on the operating conditions.
Rotate the wheels before a clear wear pattern
has formed on the tires. Front tires typically
wear more on the shoulders and the rear tires in the center.
On vehicles that have the same size front and
rear wheels, you can rotate the wheels accord-
ing to the intervals in the tire manufacturer's
warranty book in your vehicle documents. If no
warranty book is available, the tires should be
rotated every 3,000 to 6,000 miles (5,000 to
10,000 km). Depending on tire wear, this may
be required earlier. Do not change the direction
of wheel rotation.
Clean the contact surfaces of the wheel and the
brake disc thoroughly every time a wheel is rota-
ted. Check the tire pressure and reactivate the
tire pressure monitor if necessary (
Ypage 293).
Direction of rotation
Tires with a specified direction of rotation have
additional benefits, e.g. if there is a risk of hydro-
planing. These advantages can only be gained if
the tires are installed corresponding to the
direction of rotation.
An arrow on the sidewall of the tire indicates its
correct direction of rotation.
Storing wheels
Store wheels that are not being used in a cool,
dry and preferably dark place. Protect the tires
from oil, grease, gasoline and diesel.
Mounting a wheel
Preparing the vehicle
XStop the vehicle on solid, non-slippery and
level ground.
XApply the parking brake.
XBring the front wheels into the straight-ahead
position.
XShift the transmission to position P.
XSwitch off the engine.
XRemove the SmartKey from the ignition lock.
or, on vehicles with KEYLESS‑ GO:
XOpen the driver's door.
The on-board electronics now have status 0.
This is the same as the SmartKey having been
removed.
XRemove the Start/Stop button from the igni-
tion lock (Ypage 128).
XIf included in the vehicle equipment, remove
the tire-change tool kit from the vehicle
(
Ypage 270).
XSafeguard the vehicle against rolling away.
Securing the vehicle to prevent it from
rolling away
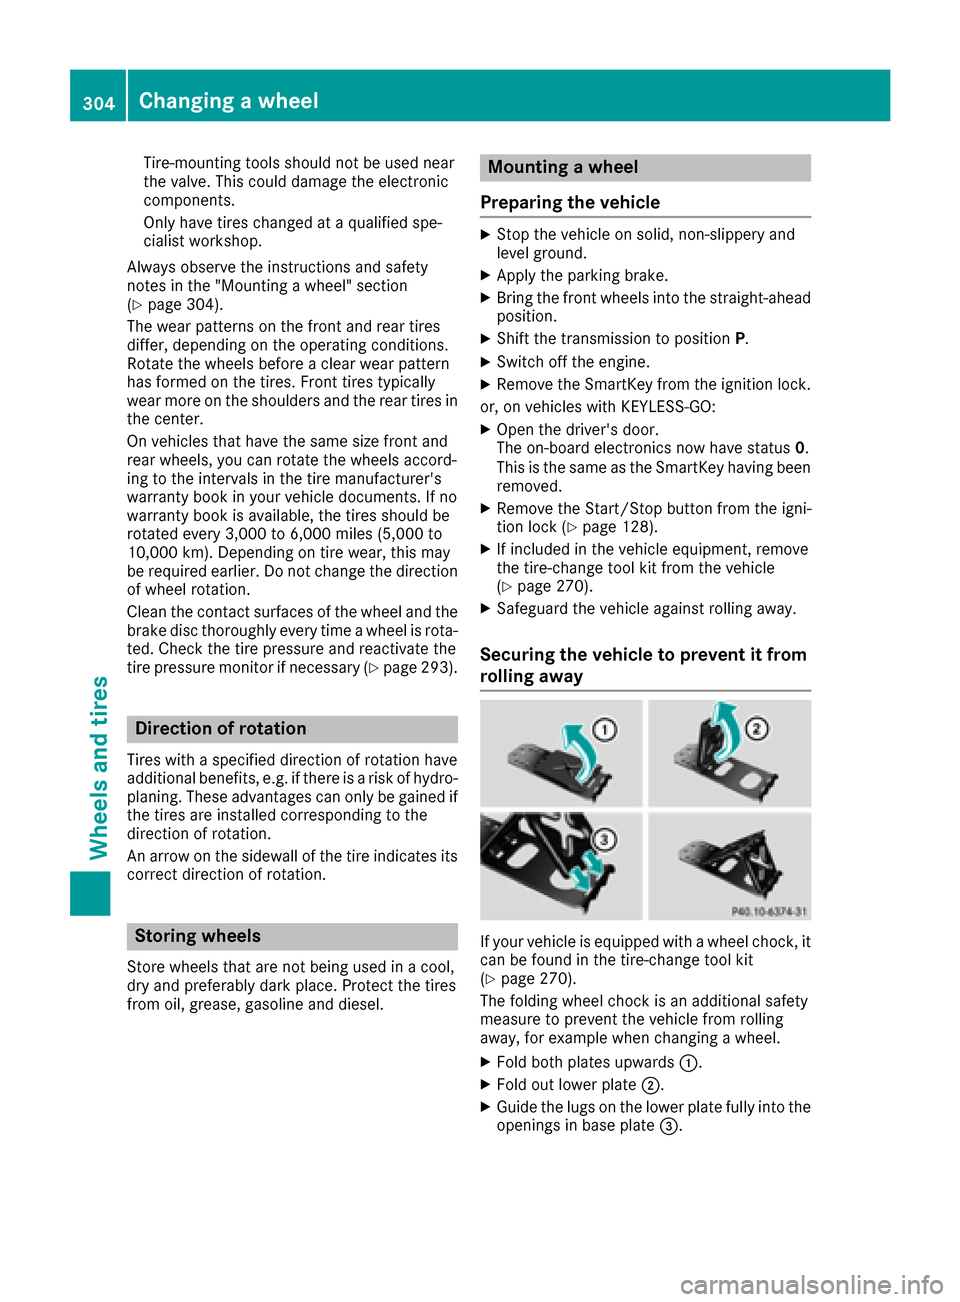
If your vehicle is equipped with a wheel chock, it
can be found in the tire-change tool kit
(
Ypage 270).
The folding wheel chock is an additional safety
measure to prevent the vehicle from rolling
away, for example when changing a wheel.
XFold both plates upwards :.
XFold out lower plate;.
XGuide the lugs on the lower plate fully into the
openings in base plate =.
304Changing a wheel
Wheels and tires