set MERCEDES-BENZ E-Class COUPE 2011 C207 Manual Online
[x] Cancel search | Manufacturer: MERCEDES-BENZ, Model Year: 2011, Model line: E-Class COUPE, Model: MERCEDES-BENZ E-Class COUPE 2011 C207Pages: 344, PDF Size: 14.06 MB
Page 204 of 344
Trip menu
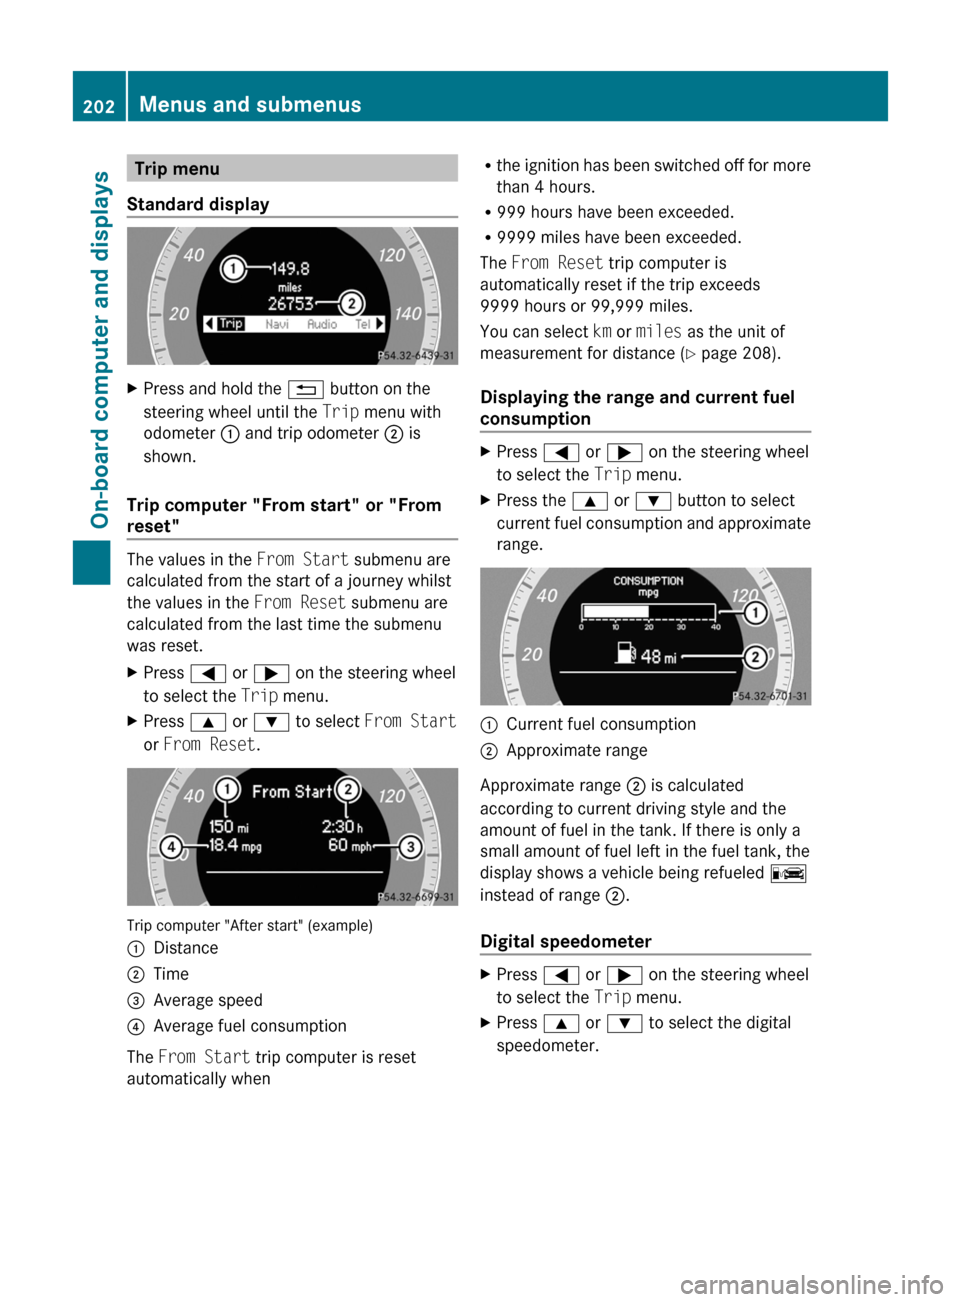
Standard displayXPress and hold the % button on the
steering wheel until the Trip menu with
odometer : and trip odometer ; is
shown.
Trip computer "From start" or "From
reset"
The values in the From Start submenu are
calculated from the start of a journey whilst
the values in the From Reset submenu are
calculated from the last time the submenu
was reset.
XPress = or ; on the steering wheel
to select the Trip menu.XPress 9 or : to select From Start
or From Reset .
Trip computer "After start" (example)
:Distance;Time=Average speed?Average fuel consumption
The From Start trip computer is reset
automatically when
R the ignition has been switched off for more
than 4 hours.
R 999 hours have been exceeded.
R 9999 miles have been exceeded.
The From Reset trip computer is
automatically reset if the trip exceeds
9999 hours or 99,999 miles.
You can select km or miles as the unit of
measurement for distance ( Y page 208).
Displaying the range and current fuel
consumptionXPress = or ; on the steering wheel
to select the Trip menu. XPress the 9 or : button to select
current fuel consumption and approximate
range.:Current fuel consumption;Approximate range
Approximate range ; is calculated
according to current driving style and the
amount of fuel in the tank. If there is only a
small amount of fuel left in the fuel tank, the
display shows a vehicle being refueled C
instead of range ;.
Digital speedometer
XPress = or ; on the steering wheel
to select the Trip menu. XPress 9 or : to select the digital
speedometer.202Menus and submenusOn-board computer and displays
BA 207 USA, CA Edition B 2011; 1; 3, en-USd2sboikeVersion: 3.0.3.62010-05-20T10:38:09+02:00 - Seite 202
Page 205 of 344
Resetting values
You can reset the values of the following
functions:
R Trip odometer
R Trip computer "From start"
R Trip computer "From reset"
XPress = or ; on the steering wheel
to select the Trip menu. XPress 9 or : to select the function
that you wish to reset.XPress a.
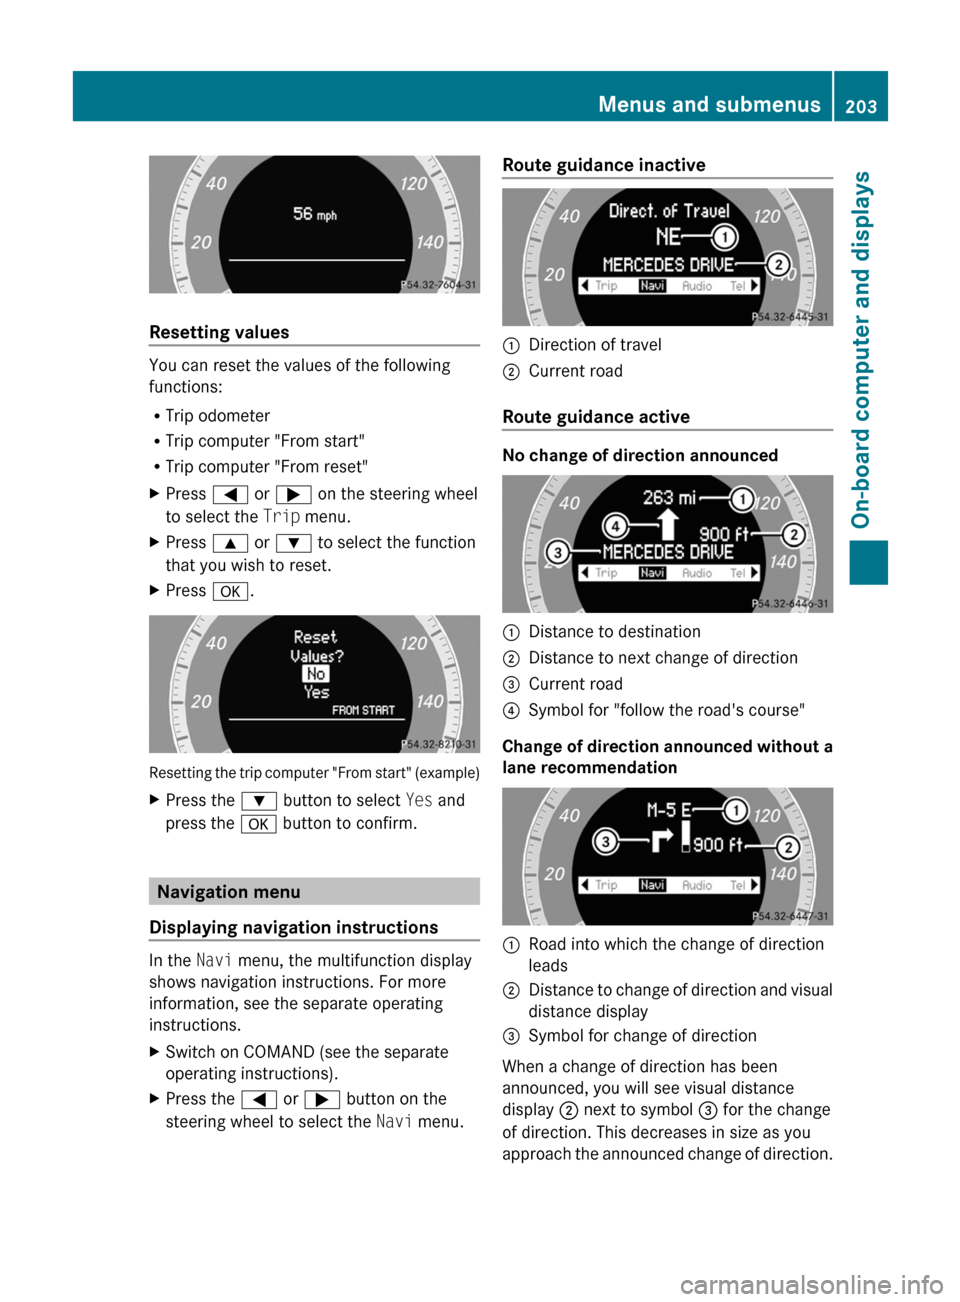
Resetting the trip computer "From start" (example)
XPress the : button to select Yes and
press the a button to confirm.
Navigation menu
Displaying navigation instructions
In the Navi menu, the multifunction display
shows navigation instructions. For more
information, see the separate operating
instructions.
XSwitch on COMAND (see the separate
operating instructions).XPress the = or ; button on the
steering wheel to select the Navi menu.Route guidance inactive:Direction of travel;Current road
Route guidance active
No change of direction announced
:Distance to destination;Distance to next change of direction=Current road?Symbol for "follow the road's course"
Change of direction announced without a
lane recommendation
:Road into which the change of direction
leads;Distance to change of direction and visual
distance display=Symbol for change of direction
When a change of direction has been
announced, you will see visual distance
display ; next to symbol = for the change
of direction. This decreases in size as you
approach the announced change of direction.
Menus and submenus203On-board computer and displaysBA 207 USA, CA Edition B 2011; 1; 3, en-USd2sboikeVersion: 3.0.3.62010-05-20T10:38:09+02:00 - Seite 203Z
Page 210 of 344
When ATTENTION ASSIST (Y page 193) is
activated, the À symbol appears in the
multifunction display when the ignition is on.
Activating/deactivating Blind Spot
Assist
You can use the Blind Spot Asst. function
to activate or deactivate Blind Spot Assist
( Y page 194).
XPress the = or ; button on the
steering wheel to select the DriveAssist
menu.XPress the 9 or : button to select
Blind Spot Asst. .XPress a.
The current selection is displayed.XTo activate/deactivate: press a
again.
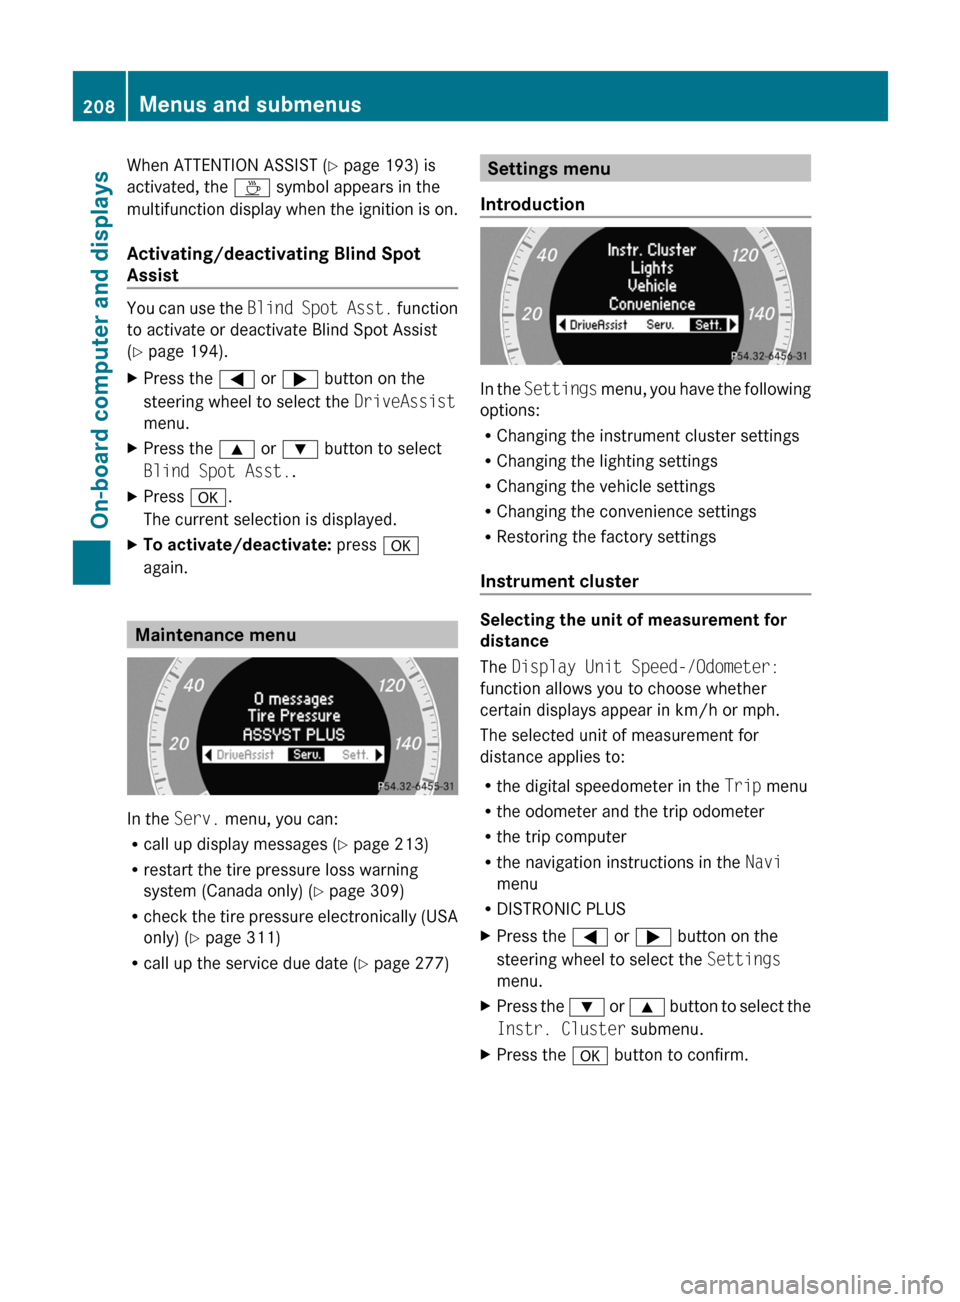
Maintenance menu
In the Serv. menu, you can:
R call up display messages ( Y page 213)
R restart the tire pressure loss warning
system (Canada only) ( Y page 309)
R check the tire pressure electronically (USA
only) ( Y page 311)
R call up the service due date ( Y page 277)
Settings menu
Introduction
In the Settings menu, you have the following
options:
R Changing the instrument cluster settings
R Changing the lighting settings
R Changing the vehicle settings
R Changing the convenience settings
R Restoring the factory settings
Instrument cluster
Selecting the unit of measurement for
distance
The Display Unit Speed-/Odometer:
function allows you to choose whether
certain displays appear in km/h or mph.
The selected unit of measurement for
distance applies to:
R the digital speedometer in the Trip menu
R the odometer and the trip odometer
R the trip computer
R the navigation instructions in the Navi
menu
R DISTRONIC PLUS
XPress the = or ; button on the
steering wheel to select the Settings
menu.XPress the : or 9 button to select the
Instr. Cluster submenu.XPress the a button to confirm.208Menus and submenusOn-board computer and displays
BA 207 USA, CA Edition B 2011; 1; 3, en-USd2sboikeVersion: 3.0.3.62010-05-20T10:38:09+02:00 - Seite 208
Page 211 of 344
XPress the : or 9 button to select the
Display Unit Speed-/Odometer.
function.
You will see the selected setting: km or
miles .XPress the a button to save the setting.
Selecting the permanent display function
The Permanent Display: function allows
you to choose whether the multifunction
display always shows the outside
temperature or the speed in km/h (USA) or
mph (Canada).
XPress the = or ; button on the
steering wheel to select the Settings
menu.XPress the : or 9 button to select the
Instr. Cluster submenu.XPress the a button to confirm.XPress : or 9 to select the
Permanent Display: function.
You will see the selected setting Outside
Temperature or Speedometer [km/h]: .XPress the a button to save the setting.
Lights
Switching the daytime running lamps on/
off
This function is not available in Canada.
If you have activated the Daytime Running
Lights: function and the light switch is in the
c position the daytime running lamps are
switched on automatically when the engine is
running.
In the dark, the following also light up:
R the low-beam headlamps
R the parking lamps
R the tail lamps
R the license plate lamp
R the side marker lamps
XPress the = or ; button on the
steering wheel to select the Settings
menu.XPress the : or 9 button to select the
Lights submenu.XPress the a button to confirm.XPress the : or 9 button to select the
Daytime Running Lights: function.
You will see the selected setting: Enabled
or Disabled .XPress the a button to save the setting.
Switching Adaptive Highbeam Assist on/
off
XPress the = or ; button on the
steering wheel to select the Settings
menu.XPress the : or 9 button to select the
Lights submenu.XPress the a button to confirm.XPress the : or 9 button to select the
Adaptive Highbeam Assist: function.
You will see the selected setting: Enabled
or Disabled .XPress the a button to save the setting.
Activating/deactivating surround
lighting and exterior lighting delayed
switch-off
If you switch on the Locator Lighting:
function and the light switch is set to c,
R the exterior lighting switches on when it is
dark after unlocking the vehicle with the
SmartKey.
The exterior lighting switches off when you
open the driver’s door.
R the exterior lighting remains on for 15
seconds when it is dark after closing the
doors.
If the engine is switched off and then none
of the doors are opened, or if an open door
is not closed, the exterior lighting goes out
after 60 seconds.
Menus and submenus209On-board computer and displaysBA 207 USA, CA Edition B 2011; 1; 3, en-USd2sboikeVersion: 3.0.3.62010-05-20T10:38:09+02:00 - Seite 209Z
Page 212 of 344
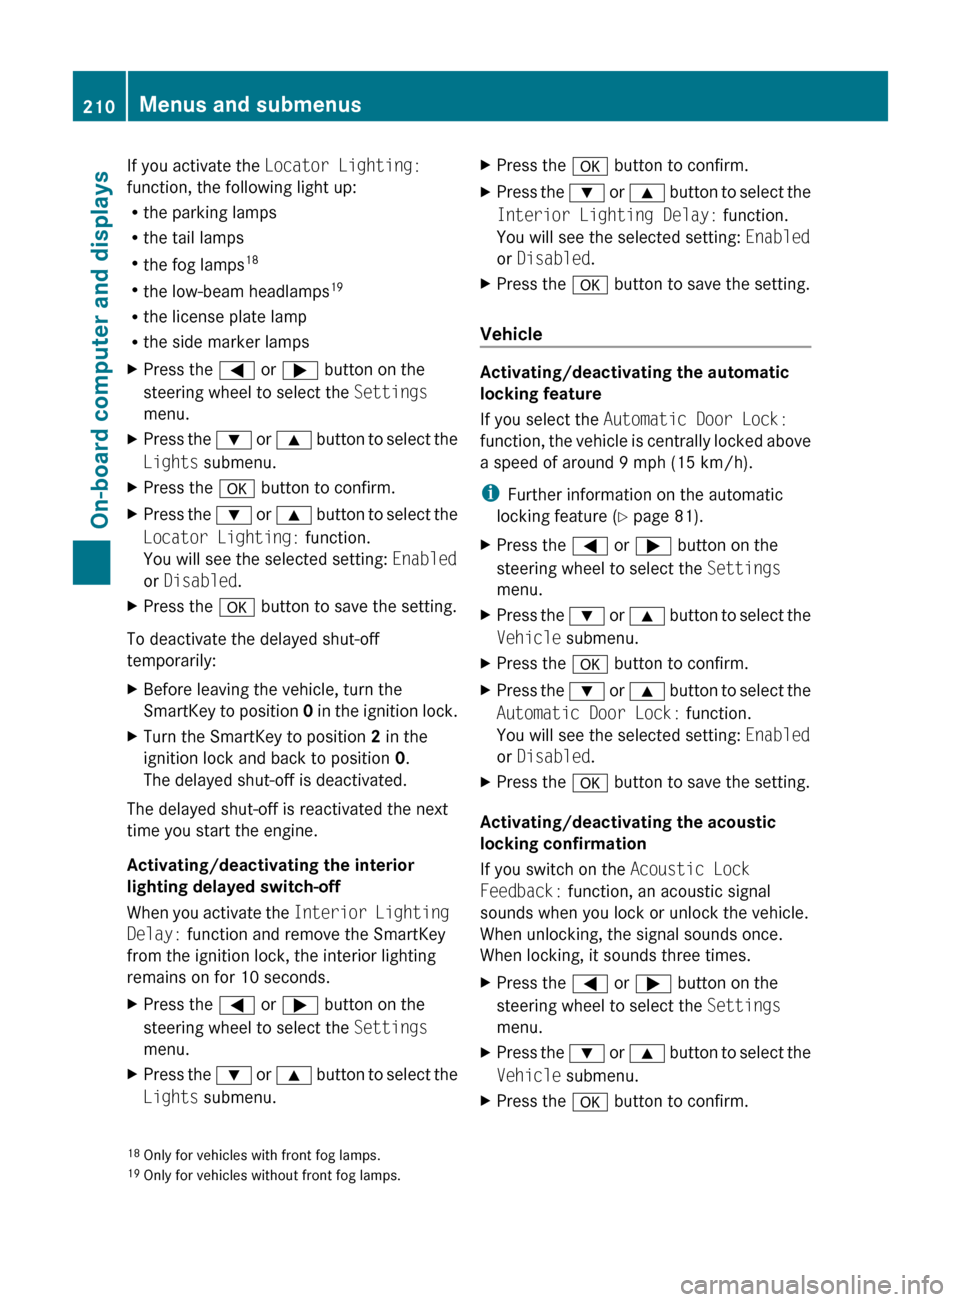
If you activate the Locator Lighting:
function, the following light up:
R the parking lamps
R the tail lamps
R the fog lamps 18
R the low-beam headlamps 19
R the license plate lamp
R the side marker lampsXPress the = or ; button on the
steering wheel to select the Settings
menu.XPress the : or 9 button to select the
Lights submenu.XPress the a button to confirm.XPress the : or 9 button to select the
Locator Lighting: function.
You will see the selected setting: Enabled
or Disabled .XPress the a button to save the setting.
To deactivate the delayed shut-off
temporarily:
XBefore leaving the vehicle, turn the
SmartKey to position 0 in the ignition lock.XTurn the SmartKey to position 2 in the
ignition lock and back to position 0.
The delayed shut-off is deactivated.
The delayed shut-off is reactivated the next
time you start the engine.
Activating/deactivating the interior
lighting delayed switch-off
When you activate the Interior Lighting
Delay: function and remove the SmartKey
from the ignition lock, the interior lighting
remains on for 10 seconds.
XPress the = or ; button on the
steering wheel to select the Settings
menu.XPress the : or 9 button to select the
Lights submenu.XPress the a button to confirm.XPress the : or 9 button to select the
Interior Lighting Delay: function.
You will see the selected setting: Enabled
or Disabled .XPress the a button to save the setting.
Vehicle
Activating/deactivating the automatic
locking feature
If you select the Automatic Door Lock:
function, the vehicle is centrally locked above
a speed of around 9 mph (15 km/h).
i Further information on the automatic
locking feature ( Y page 81).
XPress the = or ; button on the
steering wheel to select the Settings
menu.XPress the : or 9 button to select the
Vehicle submenu.XPress the a button to confirm.XPress the : or 9 button to select the
Automatic Door Lock: function.
You will see the selected setting: Enabled
or Disabled .XPress the a button to save the setting.
Activating/deactivating the acoustic
locking confirmation
If you switch on the Acoustic Lock
Feedback: function, an acoustic signal
sounds when you lock or unlock the vehicle.
When unlocking, the signal sounds once.
When locking, it sounds three times.
XPress the = or ; button on the
steering wheel to select the Settings
menu.XPress the : or 9 button to select the
Vehicle submenu.XPress the a button to confirm.18
Only for vehicles with front fog lamps.
19 Only for vehicles without front fog lamps.210Menus and submenusOn-board computer and displays
BA 207 USA, CA Edition B 2011; 1; 3, en-USd2sboikeVersion: 3.0.3.62010-05-20T10:38:09+02:00 - Seite 210
Page 213 of 344
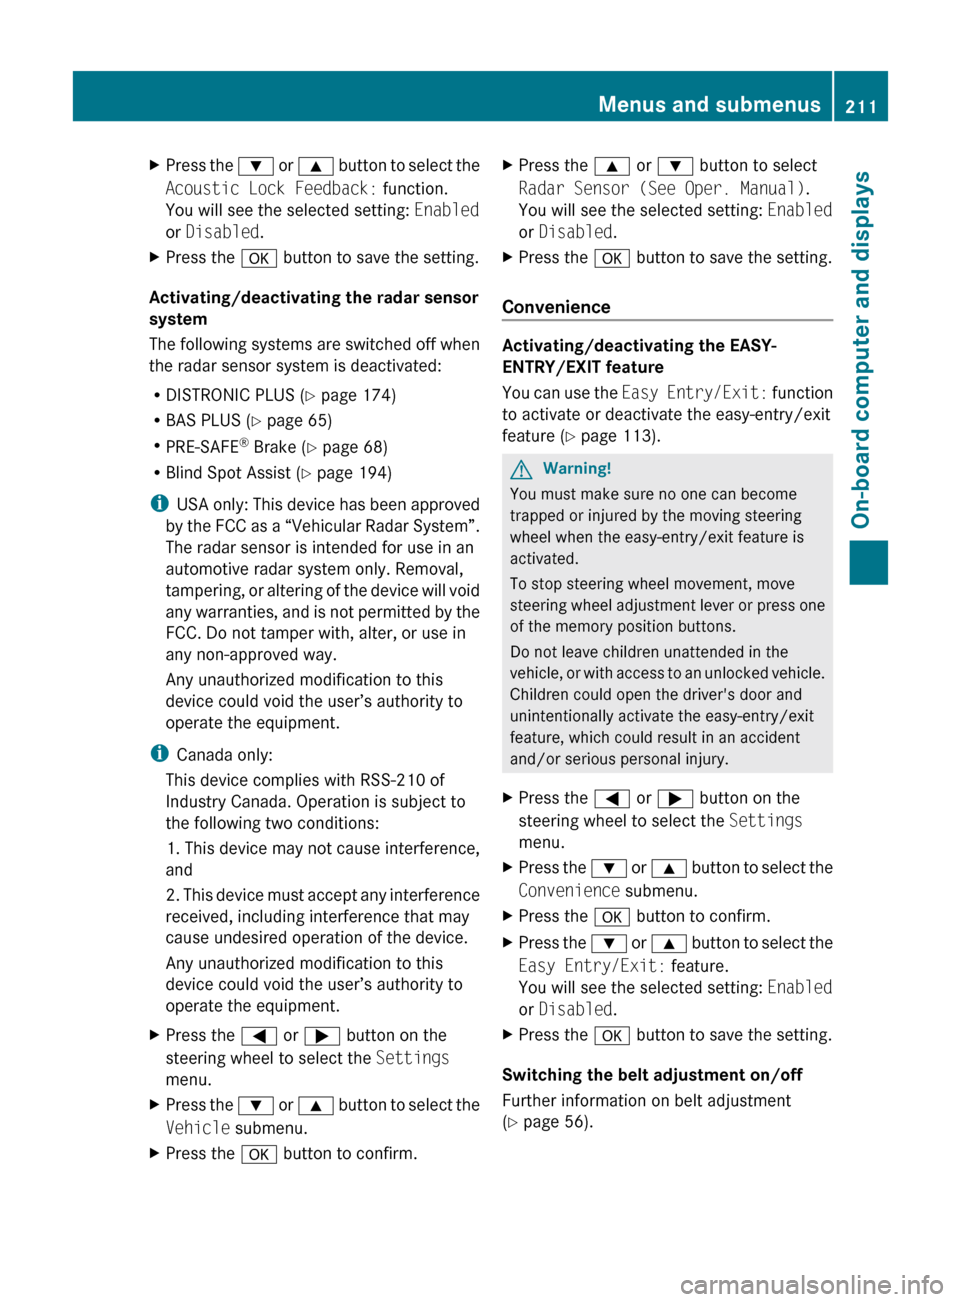
XPress the : or 9 button to select the
Acoustic Lock Feedback: function.
You will see the selected setting: Enabled
or Disabled .XPress the a button to save the setting.
Activating/deactivating the radar sensor
system
The following systems are switched off when
the radar sensor system is deactivated:
R DISTRONIC PLUS ( Y page 174)
R BAS PLUS ( Y page 65)
R PRE-SAFE ®
Brake ( Y page 68)
R Blind Spot Assist ( Y page 194)
i USA only: This device has been approved
by the FCC as a “Vehicular Radar System”.
The radar sensor is intended for use in an
automotive radar system only. Removal,
tampering, or altering of the device will void
any warranties, and is not permitted by the
FCC. Do not tamper with, alter, or use in
any non-approved way.
Any unauthorized modification to this
device could void the user’s authority to
operate the equipment.
i Canada only:
This device complies with RSS-210 of
Industry Canada. Operation is subject to
the following two conditions:
1. This device may not cause interference,
and
2. This device must accept any interference
received, including interference that may
cause undesired operation of the device.
Any unauthorized modification to this
device could void the user’s authority to
operate the equipment.
XPress the = or ; button on the
steering wheel to select the Settings
menu.XPress the : or 9 button to select the
Vehicle submenu.XPress the a button to confirm.XPress the 9 or : button to select
Radar Sensor (See Oper. Manual) .
You will see the selected setting: Enabled
or Disabled .XPress the a button to save the setting.
Convenience
Activating/deactivating the EASY-
ENTRY/EXIT feature
You can use the Easy Entry/Exit: function
to activate or deactivate the easy-entry/exit
feature ( Y page 113).
GWarning!
You must make sure no one can become
trapped or injured by the moving steering
wheel when the easy-entry/exit feature is
activated.
To stop steering wheel movement, move
steering wheel adjustment lever or press one
of the memory position buttons.
Do not leave children unattended in the
vehicle, or with access to an unlocked vehicle.
Children could open the driver's door and
unintentionally activate the easy-entry/exit
feature, which could result in an accident
and/or serious personal injury.
XPress the = or ; button on the
steering wheel to select the Settings
menu.XPress the : or 9 button to select the
Convenience submenu.XPress the a button to confirm.XPress the : or 9 button to select the
Easy Entry/Exit: feature.
You will see the selected setting: Enabled
or Disabled .XPress the a button to save the setting.
Switching the belt adjustment on/off
Further information on belt adjustment
( Y page 56).
Menus and submenus211On-board computer and displaysBA 207 USA, CA Edition B 2011; 1; 3, en-USd2sboikeVersion: 3.0.3.62010-05-20T10:38:09+02:00 - Seite 211Z
Page 214 of 344
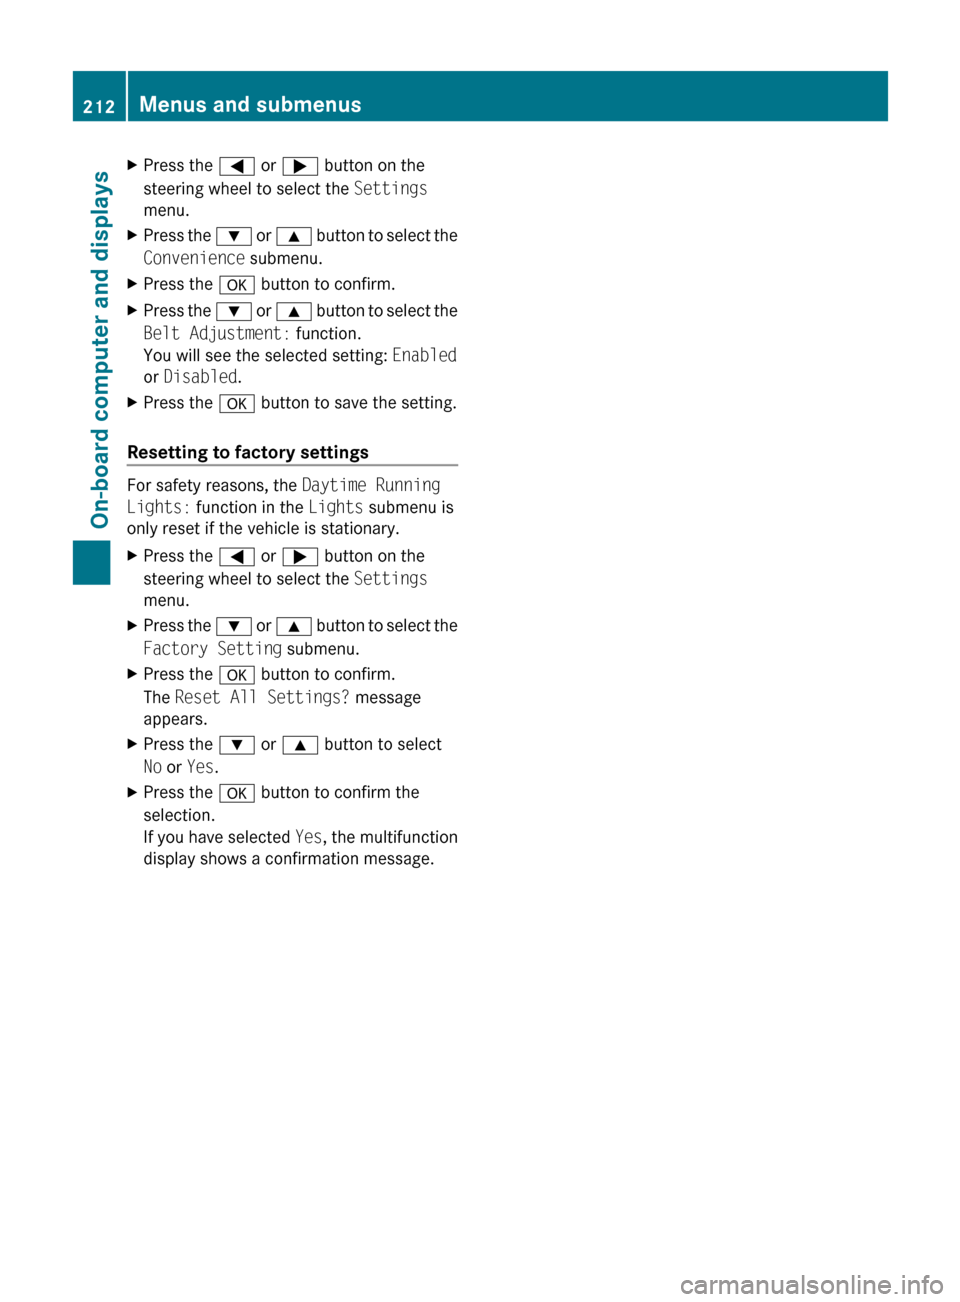
XPress the = or ; button on the
steering wheel to select the Settings
menu.XPress the : or 9 button to select the
Convenience submenu.XPress the a button to confirm.XPress the : or 9 button to select the
Belt Adjustment: function.
You will see the selected setting: Enabled
or Disabled .XPress the a button to save the setting.
Resetting to factory settings
For safety reasons, the Daytime Running
Lights: function in the Lights submenu is
only reset if the vehicle is stationary.
XPress the = or ; button on the
steering wheel to select the Settings
menu.XPress the : or 9 button to select the
Factory Setting submenu.XPress the a button to confirm.
The Reset All Settings? message
appears.XPress the : or 9 button to select
No or Yes .XPress the a button to confirm the
selection.
If you have selected Yes, the multifunction
display shows a confirmation message.212Menus and submenusOn-board computer and displays
BA 207 USA, CA Edition B 2011; 1; 3, en-USd2sboikeVersion: 3.0.3.62010-05-20T10:38:09+02:00 - Seite 212
Page 231 of 344
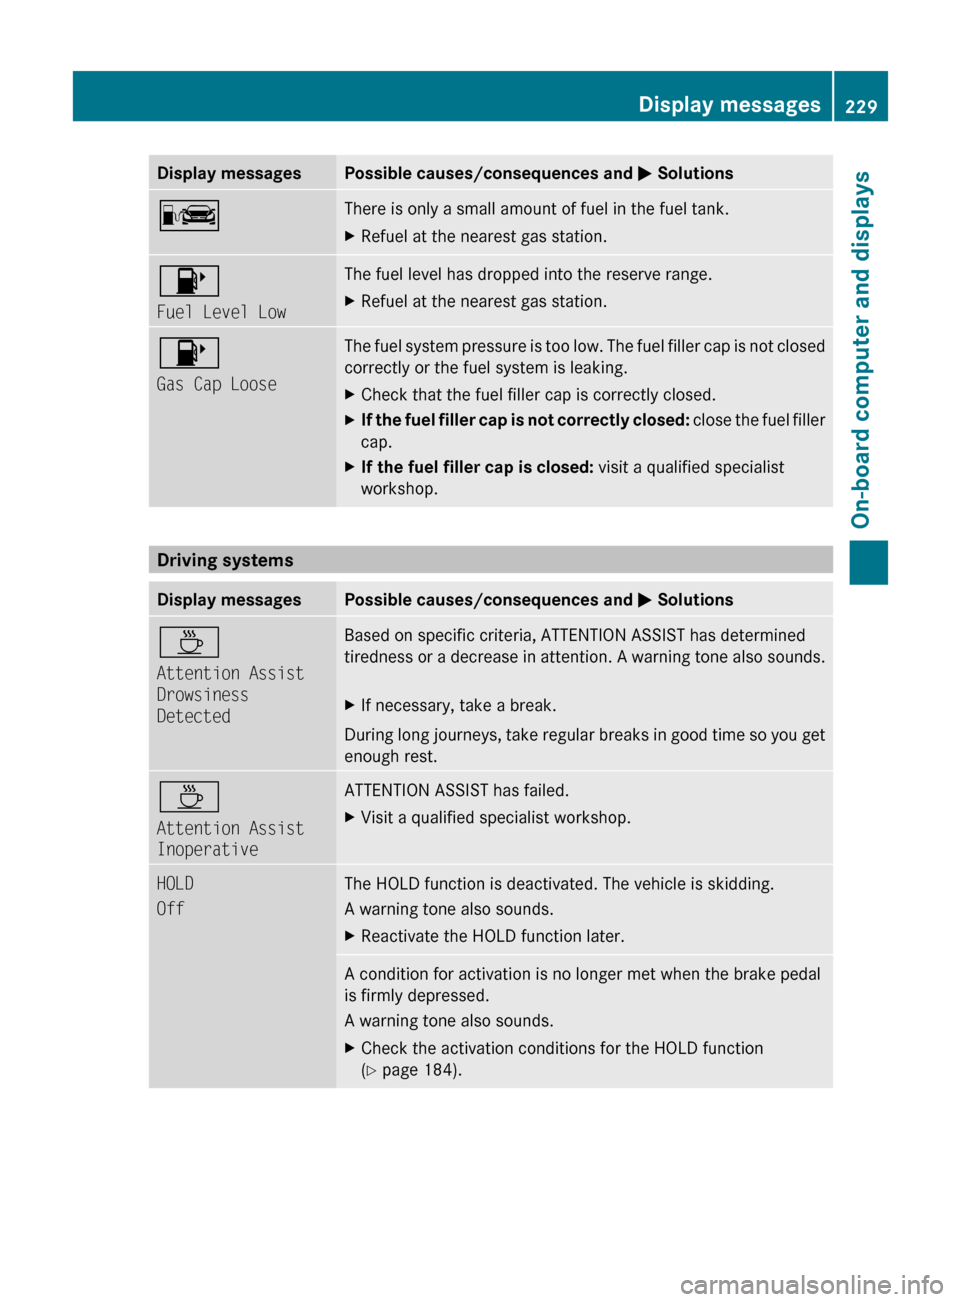
Display messagesPossible causes/consequences and M SolutionsCThere is only a small amount of fuel in the fuel tank.XRefuel at the nearest gas station.8
Fuel Level LowThe fuel level has dropped into the reserve range.XRefuel at the nearest gas station.8
Gas Cap LooseThe fuel system pressure is too low. The fuel filler cap is not closed
correctly or the fuel system is leaking.XCheck that the fuel filler cap is correctly closed.XIf the fuel filler cap is not correctly closed: close the fuel filler
cap.XIf the fuel filler cap is closed: visit a qualified specialist
workshop.
Driving systems
Display messagesPossible causes/consequences and M SolutionsÀ
Attention Assist
Drowsiness
DetectedBased on specific criteria, ATTENTION ASSIST has determined
tiredness or a decrease in attention. A warning tone also sounds.XIf necessary, take a break.
During long journeys, take regular breaks in good time so you get
enough rest.
À
Attention Assist
InoperativeATTENTION ASSIST has failed.XVisit a qualified specialist workshop.HOLD
OffThe HOLD function is deactivated. The vehicle is skidding.
A warning tone also sounds.XReactivate the HOLD function later.A condition for activation is no longer met when the brake pedal
is firmly depressed.
A warning tone also sounds.XCheck the activation conditions for the HOLD function
( Y page 184).Display messages229On-board computer and displaysBA 207 USA, CA Edition B 2011; 1; 3, en-USd2sboikeVersion: 3.0.3.62010-05-20T10:38:09+02:00 - Seite 229Z
Page 236 of 344
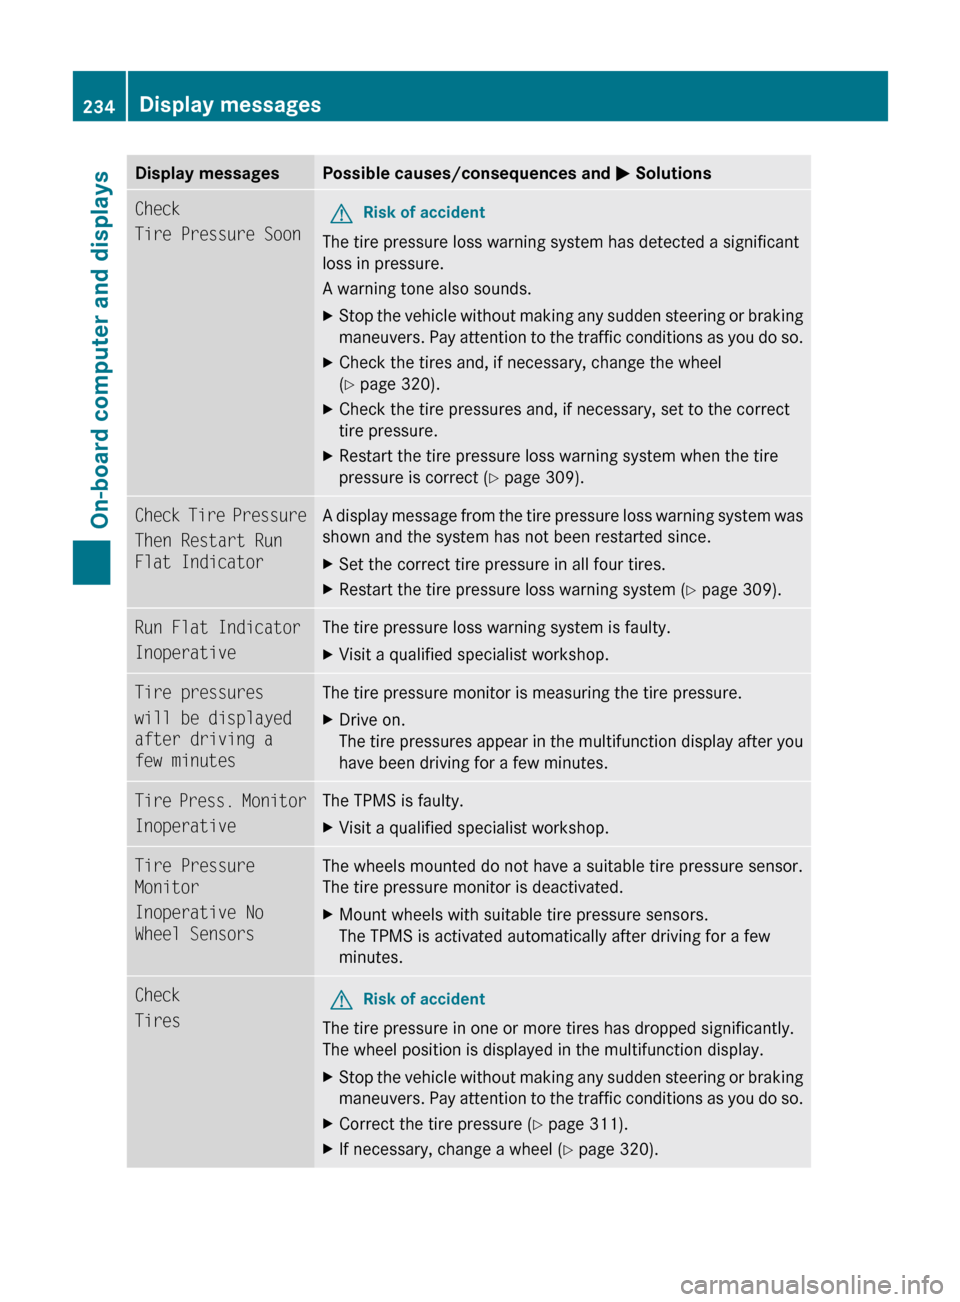
Display messagesPossible causes/consequences and M SolutionsCheck
Tire Pressure SoonGRisk of accident
The tire pressure loss warning system has detected a significant
loss in pressure.
A warning tone also sounds.
XStop the vehicle without making any sudden steering or braking
maneuvers. Pay attention to the traffic conditions as you do so.XCheck the tires and, if necessary, change the wheel
( Y page 320).XCheck the tire pressures and, if necessary, set to the correct
tire pressure.XRestart the tire pressure loss warning system when the tire
pressure is correct ( Y page 309).Check Tire Pressure
Then Restart Run
Flat IndicatorA display message from the tire pressure loss warning system was
shown and the system has not been restarted since.XSet the correct tire pressure in all four tires.XRestart the tire pressure loss warning system ( Y page 309).Run Flat Indicator
InoperativeThe tire pressure loss warning system is faulty.XVisit a qualified specialist workshop.Tire pressures
will be displayed
after driving a
few minutesThe tire pressure monitor is measuring the tire pressure.XDrive on.
The tire pressures appear in the multifunction display after you
have been driving for a few minutes.Tire Press. Monitor
InoperativeThe TPMS is faulty.XVisit a qualified specialist workshop.Tire Pressure
Monitor
Inoperative No
Wheel SensorsThe wheels mounted do not have a suitable tire pressure sensor.
The tire pressure monitor is deactivated.XMount wheels with suitable tire pressure sensors.
The TPMS is activated automatically after driving for a few
minutes.Check
TiresGRisk of accident
The tire pressure in one or more tires has dropped significantly.
The wheel position is displayed in the multifunction display.
XStop the vehicle without making any sudden steering or braking
maneuvers. Pay attention to the traffic conditions as you do so.XCorrect the tire pressure ( Y page 311).XIf necessary, change a wheel ( Y page 320).234Display messagesOn-board computer and displays
BA 207 USA, CA Edition B 2011; 1; 3, en-USd2sboikeVersion: 3.0.3.62010-05-20T10:38:09+02:00 - Seite 234
Page 269 of 344
not be long enough for the integrated signal
transmitter to pick up the signal during
programming. Similar to this Canadian law,
some U.S. gate operators are designed to
"time-out" in the same manner.
If you live in Canada or have difficulties
programming the garage door opener
(regardless of where you live) when using the
programming steps (see above), proceed as
follows:XPress transmitter button ( ;, = or ?) and
hold it down during the following steps until
the setup has been completed
successfully.XAt the same time, press transmitter button
B of the garage door remote control for
two seconds, then release it for two
seconds, then press it again for two
seconds.XRepeat this sequence on transmitter
button B of the garage door remote
control until the frequency signal has been
learned.XIf the setup procedure is successful,
indicator lamp : flashes once slowly and
goes out after a few seconds.XContinue with the other programming
steps (see above).
Problems when programming
If you have problems when programming the
integrated remote control, please note the
following:
R check the transmitter frequency of garage
door remote control A (which can usually
be found on the rear of the remote control).
The integrated remote control is
compatible with equipment that operates
in the frequency range 280 to 390 MHz.
R replace the batteries in garage door remote
control A. This increases the likelihood of
garage door remote control A sending a
strong and precise signal to the integrated
remote control on the rear-view mirror.
R When aiming the garage door remote
control at the transmitter buttons on the
rear-view mirror, hold garage door remote
control A at differing distances and angles
from the transmitter button that you are
programming. Try different angles from a
distance of 2 to 12 inches (5 to 30 cm) or
the same angle from differing distances.
R If there is another garage door remote
control for the same device, perform the
programming steps again using the remote
control. Before performing these steps,
make sure that new batteries have been
installed in the garage door remote control.
R Align the antenna cable of the garage door
opener unit. This can improve signal
reception/transmission.
Opening or closing the garage door
Once programmed, the integrated remote
control will assume the function of the garage
door system's remote control. Please also
read the operating instructions for the garage
door system.
XTurn the SmartKey to position 2 in the
ignition lock.XPress transmitter button ;, = or ? in the
overhead control panel that you have
programmed to operate the garage door.
Garage door system with fixed code:
indicator lamp : lights up continuously.
Garage door system with rolling code:
indicator lamp : flashes briefly and then
lights up for approximately two seconds.
This is repeated for up to 20 seconds.
i The transmitter will transmit a signal for
as long as the transmitter button is being
pressed. The transmission will be halted
after a maximum of 20 seconds and
indicator lamp : will flash. Press the
transmitter button again, if necessary.
Features267Loading, stowing and featuresBA 207 USA, CA Edition B 2011; 1; 3, en-USd2sboikeVersion: 3.0.3.62010-05-20T10:38:09+02:00 - Seite 267Z