tyre pressure MERCEDES-BENZ E-CLASS COUPE 2011 Owners Manual
[x] Cancel search | Manufacturer: MERCEDES-BENZ, Model Year: 2011, Model line: E-CLASS COUPE, Model: MERCEDES-BENZ E-CLASS COUPE 2011Pages: 353, PDF Size: 8.42 MB
Page 9 of 353
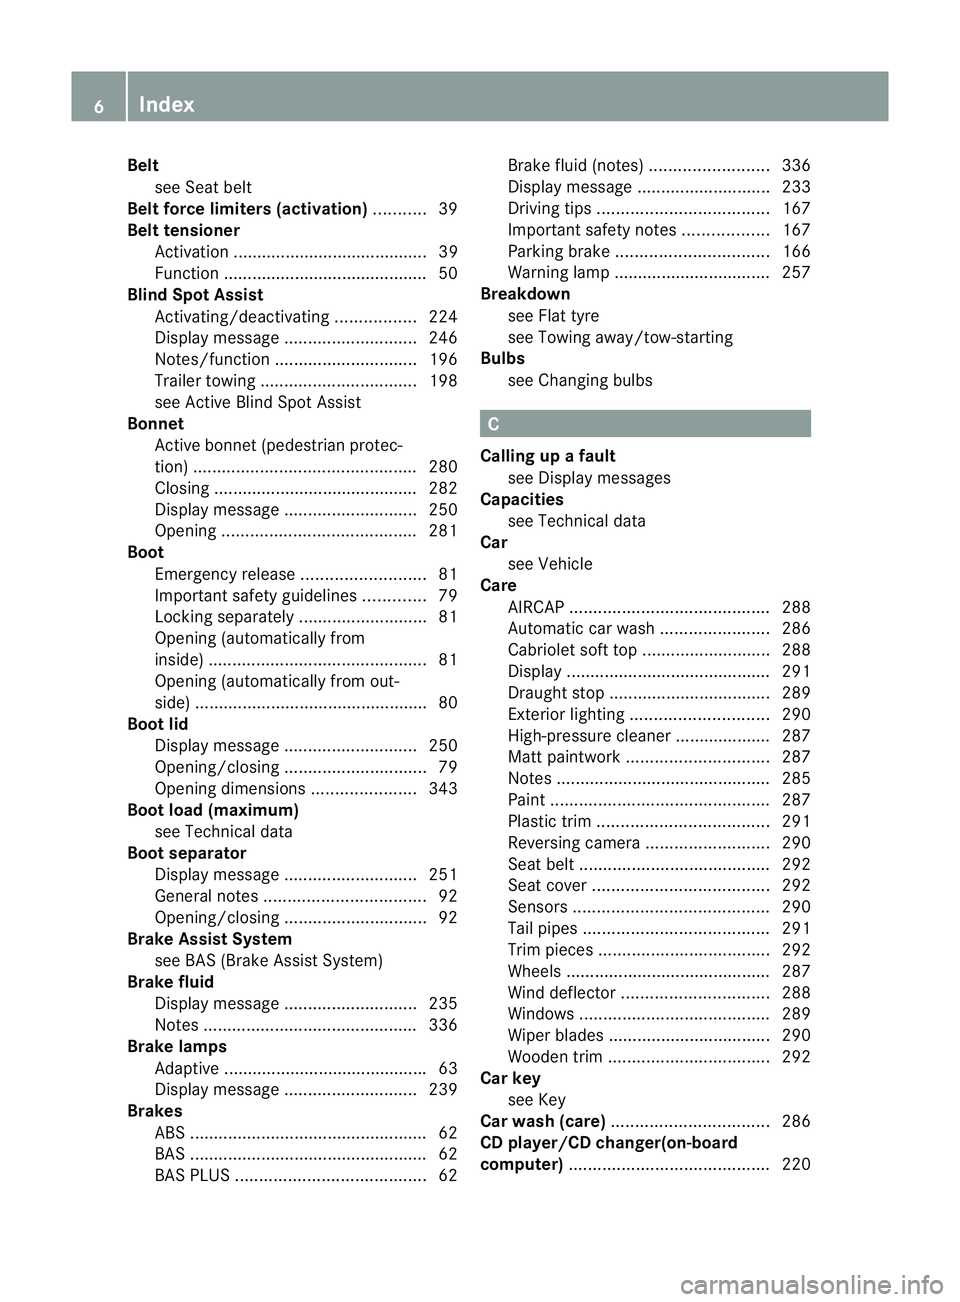
Belt
see Sea tbelt
Belt force limiter s(activation) ...........39
Belt tensioner Activatio n......................................... 39
Function .......................................... .50
Blind Spo tAssist
Activating/deactivating .................224
Display message ............................ 246
Notes/function .............................. 196
Trailer towing ................................. 198
see Active Blind Spot Assist
Bonnet
Active bonnet (pedestrian protec-
tion) ............................................... 280
Closing .......................................... .282
Display message ............................ 250
Opening ......................................... 281
Boot
Emergency release ..........................81
Important safety guidelines .............79
Locking separatel y........................... 81
Opening (automatically from
inside) .............................................. 81
Opening (automatically from out-
side) ................................................ .80
Boo tlid
Display message ............................ 250
Opening/closing .............................. 79
Opening dimensions ......................343
Boot load (maximum)
see Technical data
Boot separator
Display message ............................ 251
General notes .................................. 92
Opening/closing .............................. 92
Brake Assist System
see BAS (Brake Assist System)
Brake fluid
Display message ............................ 235
Notes ............................................. 336
Brake lamps
Adaptive .......................................... .63
Display message ............................ 239
Brakes
ABS .................................................. 62
BAS .................................................. 62
BAS PLUS ........................................ 62Brake fluid (notes)
.........................336
Display message ............................ 233
Driving tips .................................... 167
Important safety notes ..................167
Parking brake ................................ 166
Warning lamp ................................. 257
Breakdown
see Flat tyre
see Towing away/tow-starting
Bulbs
see Changing bulbs C
Calling up afault
see Display messages
Capacities
see Technical data
Car
see Vehicle
Care
AIRCAP .......................................... 288
Automatic car wash .......................286
Cabriolet soft top ........................... 288
Display ........................................... 291
Draught stop .................................. 289
Exterior lighting ............................. 290
High-pressure cleaner .................... 287
Matt paintwork .............................. 287
Notes ............................................. 285
Paint .............................................. 287
Plastic trim .................................... 291
Reversing camera ..........................290
Seat bel t........................................ 292
Seat cover ..................................... 292
Sensors ......................................... 290
Tai lpipes ....................................... 291
Trim pieces .................................... 292
Wheels ........................................... 287
Wind deflector ............................... 288
Windows ........................................ 289
Wiper blades .................................. 290
Wooden trim .................................. 292
Car key
see Key
Car wash (care) ................................. 286
CD player/CD changer(on-board
computer) .......................................... 2206
Index
Page 22 of 353
Trip meter
Calling up ....................................... 217
Resetting (on-boar dcomputer) ......218
Trip odometer
see Trip meter
Turn signals
Changing bulbs (front) ...................123
Switching on/off ........................... 116
TV
Operating (on-board computer) .....220
see Separate operating instructions
Two-way radio
Frequencies ................................... 331
Installatio n..................................... 331
Transmission output (maximum ).... 331
Type identification plate
see Vehicle identification plate
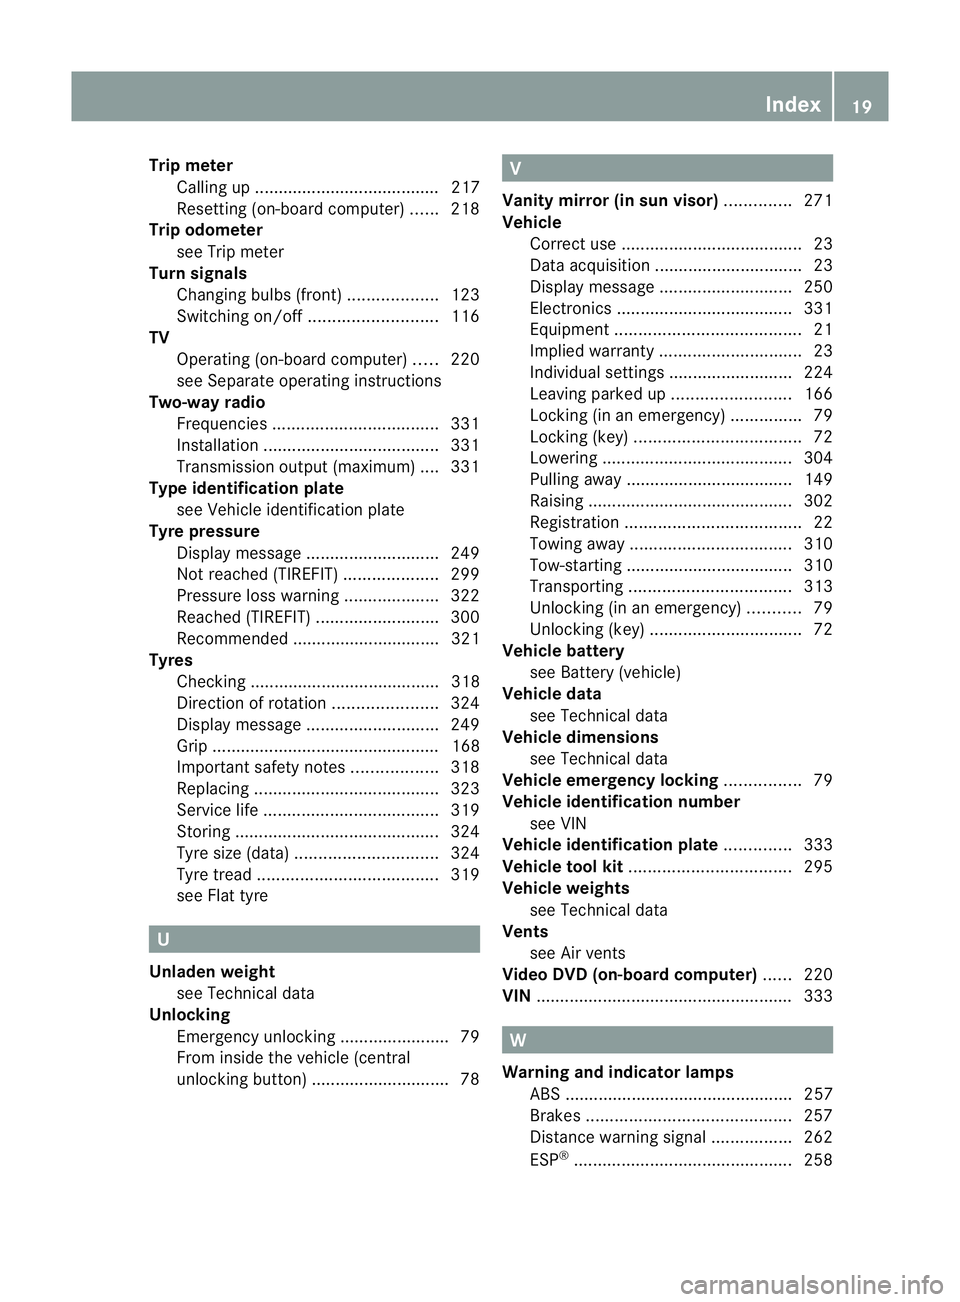
Tyre pressure
Display message ............................ 249
Not reached (TIREFIT) ....................299
Pressure loss warning ....................322
Reached (TIREFIT) ..........................300
Recommended ............................... 321
Tyres
Checking ........................................ 318
Directio nofrotation ...................... 324
Display message ............................ 249
Gri p................................................ 168
Important safety notes ..................318
Replacing ....................................... 323
Service life ..................................... 319
Storing ........................................... 324
Tyr esize (data) .............................. 324
Tyr etread ...................................... 319
see Flat tyre U
Unladen weight see Technical data
Unlocking
Emergency unlocking .......................79
From insid ethe vehicle (central
unlocking button) ............................. 78 V
Vanity mirror (in sun visor) ..............271
Vehicle Correct use ...................................... 23
Data acquisition ............................... 23
Display message ............................ 250
Electronics ..................................... 331
Equipment ....................................... 21
Implied warranty .............................. 23
Individua lsettings .......................... 224
Leaving parked up .........................166
Locking (in an emergency) ...............79
Locking (key )................................... 72
Lowering ........................................ 304
Pulling away ................................... 149
Raising ........................................... 302
Registration ..................................... 22
Towing away .................................. 310
Tow-starting ................................... 310
Transporting .................................. 313
Unlocking (in an emergency) ...........79
Unlocking (key )................................ 72
Vehicle battery
see Battery (vehicle)
Vehicle data
see Technical data
Vehicle dimensions
see Technical data
Vehicle emergency locking ................79
Vehicle identification number see VIN
Vehicle identification plate ..............333
Vehicle tool kit .................................. 295
Vehicle weights see Technical data
Vents
see Air vents
Video DVD (on-board computer) ......220
VIN ...................................................... 333 W
Warning and indicator lamps ABS ................................................ 257
Brakes ........................................... 257
Distance warning signa l................. 262
ESP ®
.............................................. 258 Index
19
Page 24 of 353
Protection of the environment
Notes
H
Environmental note
Daimler's declared policy is one of integrated
environmental protection.
The objectives are for the natural resources
which form the basis of our existence on this
planet to be used sparingly and in amanner
which takes the requirements of both nature
and humanity into account.
You too can help to protect the environment
by operating your vehicle in an environmen-
tally responsible manner.
Fuel consumption and the rate of engine,
transmission, brake and tyre wear depend on
the following factors:
R operating condition sofyour vehicle
R your personal driving style
You can influence both factors. You should
bear the following in mind:
Operating conditions:
R avoid short trips as these increase fuel con-
sumption.
R make sure that the tyre pressures are
always correct.
R do not carry any unnecessary weight.
R keep an eye on the vehicle's fuel consump-
tion.
R remove roof racks once you no longer need
them.
R ar egularly serviced vehicle will contribute
to environmental protection. You should
therefore adhere to the service intervals.
R always have maintenance work carried out
at aq ualified specialist workshop, e.g. a
Mercedes-Benz Service Centre.
Personal driving style:
R do not depress the accelerator pedal when
startingt he engine.
R do not warm up the engine with the vehicle
stationary. R
drive carefully and maintain asafe distance
from the vehicle in front.
R avoid frequent, sudden acceleration.
R change gear in good time and use each gear
only up to Ôof its maximum engine speed.
R switch off the engine in stationary traffic. Returning end-of-life vehicles
Mercedes-Benz will take back your
Mercedes-Benz to dispose of it in an environ-
mentally responsible manner, in accordance
with the European Union (EU) End of Life
Vehicles Directive.
The End of Life Vehicles Directive applies to
vehicles with agross vehicle weight of up to
3.5 t, in accordance with national regulations.
For several years, Mercedes-Benz has been
meeting all the legal requirements for a
design which allowsf or recycling and reuse.
There is anetwork of return points and dis-
assembly plants which can recycle your vehi-
cle in an environmentally responsible man-
ner. The options for recycling vehicles and
parts are constantly being developed and
improved. This means that your Mercedes-
Benz will also continue to meet even the
increased recycling quotas in the future in
good time. You can obtain further information
from your national Mercedes-Benz homepage
or your national hotline number. Vehicle equipment
This Owner's Manual describes all models
and all standard and optional equipment of
your vehicle available at the time of publica-
tion of the Owner's Manual. Country-specific
differences are possible. Please note that
your vehicle may not be equipped with all fea-
tures described. This also applies to safety-
relevant systems and functions. The equip-
ment in your vehicle may therefore differ from
that shown in the descriptions and illustra-
tions. All the systems found in your vehicle Introduction
21 Z
Page 65 of 353
In wintry driving conditions, alwaysu
se
winter tyres (M+S tyres) and if necessary,
snow chains. Only in this way willt he driv-
ing safety systems describe dinthis section
work as effectively as possible. ABS (Anti-loc
kBraking System)
Important safety notes i
Observe the "Important safety notes" sec-
tio n(Ypage 61).
ABS regulate sbrake pressure in such away
tha tthe wheels do not lock when you brake.
This allowsy ou to continue steering the vehi-
cle when braking.
ABS works from aspeed of about 8km/h
upwards, regardless of road-surface condi-
tions. ABS works on slippery surfaces, even
when you only brake gently. G
WARNING
If ABS is faulty, the wheels could lock when
braking. This limits the steerability of the vehi-
cle when braking and the braking distance
may increase.
If ABS is deactivated due to amalfunction,
then BAS and ESP are also deactivated. There
is an increased risk of your vehicle skidding in
certain situations.
You should always adapt your driving style to
suit the prevailing road and weather condi-
tions.
Braking If ABS intervenes when braking, you will feel
ap ulsing in the brake pedal.
X If ABS intervenes: continue to depress the
brake pedal with force until the braking sit-
uation is over.
X To make afull brake application:
depress the brake pedal with full force.
The pulsating brake pedal can be an indica-
tion of hazardous road conditionsa nd func-tions as
areminder to take extrac are while
driving. G
WARNING
Do not depress the brake pedal several times
in quick succession (pumping). Pumping the
brake pedal reduces the braking effect.Y ou
might otherwise not be able to stop the vehi-
cle in time and could cause an accident.
Depress the brake pedal firmly and smoothly. BAS (Brake Assist)
i Observe the "Important safety notes" sec-
tion (Y page 61).
BAS operates in emergenc ybraking situa-
tions. If you depress the brake pedal quickly,
BAS automatically boosts the braking force,
thus shortening the stopping distance.
X Keep the brake pedal firmly depressed until
the emergenc ybraking situation is over.
ABS prevent sthe wheels from locking.
The brakes will function as usual once you
release the brake pedal. BAS is deactivated. G
WARNING
If BAS has malfunctioned, the braking system
remains available with full brake boosting
effect .However, braking force is not auto-
matically increased in emergenc ybraking sit-
uations and the stopping distance may
increase. BAS PLUS (Brake Assist System
PLUS)
BAS PLUS is only available on vehicles with
DISTRONIC PLUS.
i Observe the "Important safety notes" sec-
tion (Y page 61).
BAS PLUS provides braking assistance in haz-
ardous situations at speeds of over
30 km/ha nd uses rada rsensor technology
to assess the traffic situation. 62
Driving safet
ysystemsSafety
Page 166 of 353
Refuelling
Fue lfille rflap The fuel filler flap is unlocked or locked auto-
matically when you open or close the vehicle
with the key or using KEYLESS-GO.
The position of the fuel filler cap is displayed
in the instrumen tcluster 8.T he arrow
next to the filling pump indicates the side of
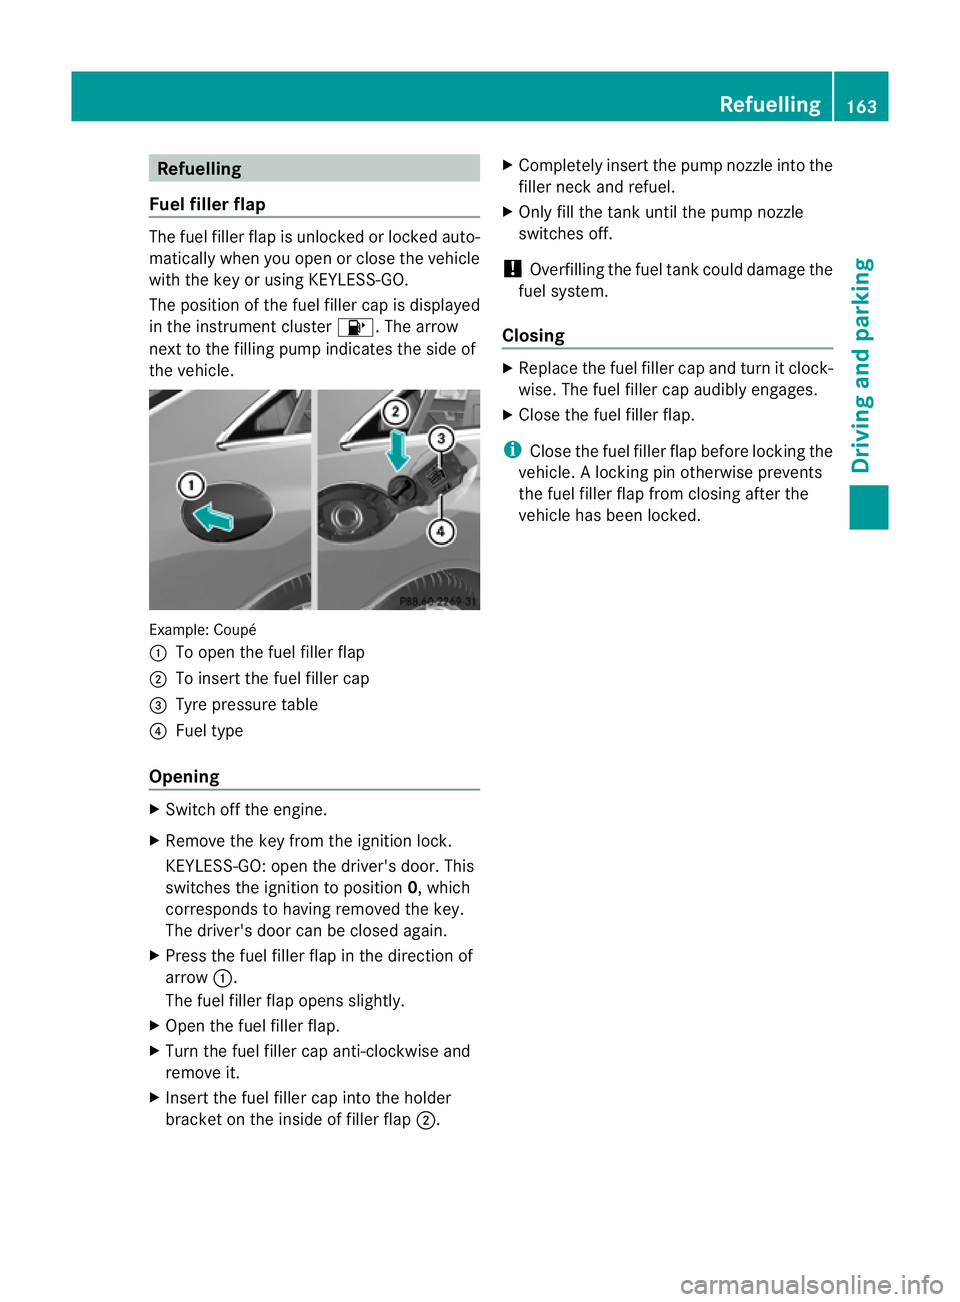
the vehicle. Example: Coupé
:
To open the fuel filler flap
; To insert the fuel filler cap
= Tyre pressure table
? Fuel type
Opening X
Switch off the engine.
X Remove the key from the ignition lock.
KEYLESS-GO: open the driver's door. This
switches the ignition to position 0,which
corresponds to having removed the key.
The driver's door can be closed again.
X Press the fuel filler flap in the direction of
arrow :.
The fuel filler flap opens slightly.
X Open the fuel filler flap.
X Turn the fuel filler cap anti-clockwise and
remove it.
X Insert the fuel filler cap into the holder
bracket on the inside of filler flap ;.X
Completely insert the pump nozzle into the
filler neck and refuel.
X Only fill the tank until the pump nozzle
switches off.
! Overfilling the fuel tank could damage the
fuel system.
Closing X
Replace the fuel filler cap and turn it clock-
wise. The fuel filler cap audibly engages.
X Close the fuel filler flap.
i Close the fuel filler flap before locking the
vehicle. Alockingp in otherwise prevents
the fuel filler flap from closing after the
vehicle has been locked. Refuelling
163Driving and parking Z
Page 171 of 353
R
occasionally brake carefully, without put-
ting other road users at risk, when you are
driving on salted roads. This helps to
remove any salt that may have started to
build up on the brake discs and the brake
pads/linings.
R maintain agreater distance to the vehicle
ahead and drive with particular care.
R carefully apply the brakes at the end of a
trip and immediately after commencing a
new trip, so that salt residues are removed
from the brake discs.
New brake pads/linings G
WARNING
New brake pads/linings only reach their opti-
mum braking effect after several hundred kil-
ometres of driving. Before this optimum brak-
ing effect is reached, you should compensate
for the reduced braking effect by applying
greater pressure when braking. This also
applies after the brake discs or the brake
pads/linings have been replaced.
For safety reasons, Mercedes-Benz recom-
mends that you only have brake pads/linings
fitted to your vehicle which have been
approved for Mercedes-Benz vehicles or
which correspon dtoanequivalent quality
standard. Brake pads/linings which have not
been approved for Mercedes-Benz vehicles or
which are not of an equivalent quality could
affect your vehicle's operating safety. Tyret
raction G
WARNING
Whereas the vehicle can be fully controlled at
ac ertain speed on dry roads, you must reduce
your speed on wet or icy roads to achieve the
same road safety. You could otherwise cause
an accident.
Pay particular attention to the road conditions
at temperatures around freezin gpoint. If ice has formed on the road surface (e.g.
from fog),
athin film of water rapidly forms on
the ice when you brake, considerably reduc-
ing tyre traction. Drive with particular care in
such weather conditions. Driving on wet roads
Aquaplaning If water has accumulated to
acertain depth
on the road surface, there is adanger of aqua-
planing occurring, even if:
R you drive at low speeds
R the tyres have adequate tread depth
For this reason, do not drive in tyre ruts, and
brake carefully.
Driving on flooded roads If you have to drive on stretches of road on
which water has collected, please bear in
mind that:
R
the maximum permitted still water depth is
25 cm.
R you should drive no faster than at walking
pace.
! Bear in mind that vehicles travelling in
front or in the opposite direction create
waves. This may cause the maximum per-
missible water depth to be exceeded.
These notes must be observed under all
circumstances. You could otherwise dam-
age the engine, the electronics or the trans-
mission. Winter driving
General notes G
WARNING
If the vehicle becomes trapped in snow,
ensure that snow is kept away from the
exhaust pipe and from around the vehicle as
long as the engine is running. Otherwise, poi- 168
Driving tipsDriving and parking
Page 184 of 353
G
WARNING
Do not change downf or additional engine
braking on aslippery road surface. This could
cause the drive wheels to lose their grip and
the vehicle could skid.
You can set avariable or permanent limit
speed:
R variable for speed limits, e.g. in built-up
areas
R permanent for long-term speed restric-
tions, e.g. when driving with winter tyres
fitted (Y page 183) G
WARNING
Speedtronic is only an aid designed to assist
driving. You are responsible for the vehicle's
speed and for braking in good time.
i The speed indicated in the speedometer
may differ slightly from the limit speed
stored.
Variable SPEEDTRONIC General notes
With the cruise control lever, you can operate
cruise control or DISTRONIC PLUS and vari-
able SPEEDTRONIC.
The LIM indicator lamp on the cruise control
lever indicates which system you have selec-
ted:
R LIM indicator lamp off: cruise control or
DISTRONIC PLUS is selected.
R LIM indicator lamp on: variable SPEED-
TRONIC is selected.
You can use the cruise control lever to limit
the speed to any speed above 30 km/hw hile
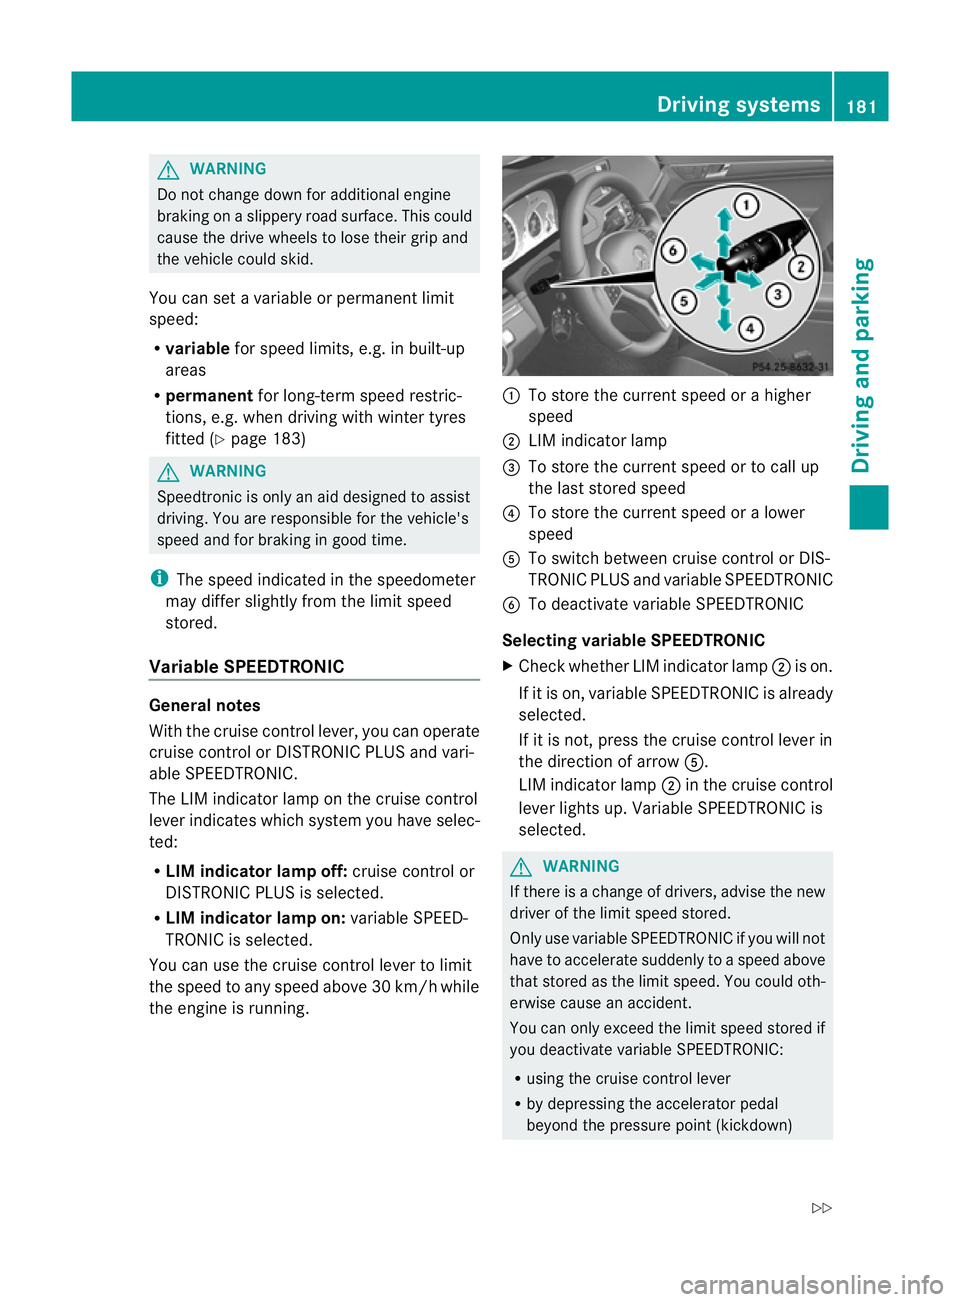
the engine is running. :
To store the current speed or ahigher
speed
; LIM indicator lamp
= To store the current speed or to call up
the last stored speed
? To store the current speed or alower
speed
A To switch between cruise control or DIS-
TRONIC PLUS and variable SPEEDTRONIC
B To deactivate variable SPEEDTRONIC
Selecting variable SPEEDTRONIC
X Check whether LIM indicator lamp ;is on.
If it is on, variable SPEEDTRONIC is already
selected.
If it is not, press the cruise control lever in
the direction of arrow A.
LIM indicator lamp ;in the cruise control
lever lights up. VariableS PEEDTRONIC is
selected. G
WARNING
If there is achange of drivers, advise the new
driver of the limit speed stored.
Only use variable SPEEDTRONIC if you will not
have to accelerate suddenly to aspeed above
that stored as the limit speed. You could oth-
erwise cause an accident.
You can only exceed the limit speed stored if
you deactivate variable SPEEDTRONIC:
R using the cruise control lever
R by depressing the accelerator pedal
beyond the pressure point (kickdown) Driving systems
181Driving and parking
Z
Page 186 of 353
Permanent SPEEDTRONIC
You can use the on-board computer to limit
the speed permanently to avalue between
16 0k m/ h(e.g. for driving on winter tyres)
and th emaximum spee d(Ypage 228).
Shortly before th estoreds peed is reached, it
appears in the multifunction display.
Permanent SPEEDTRONIC remains active,
even if variable SPEEDTRONIC is deactivated.
You cannot exceed the stored limit speed,
even if you depress the accelerator pedal
beyond the pressure point (kickdown). Dynamic handling package with
sports mode
General notes The most important part of the dynamic han-
dling package with sport smode is the adjust-
able suspension system. This automatically
controls and adapts the suspension to the
respective drivin gsituation.
The calibration of the suspension depends
on:
R your drivin gstyle
R the road surface conditions
R your individual selection; see the following
description
If your vehicle is equipped with automatic
transmission ,the dynamic handling package
with sport smode also includes steering
wheel gearshift paddles (Y page 157)with a
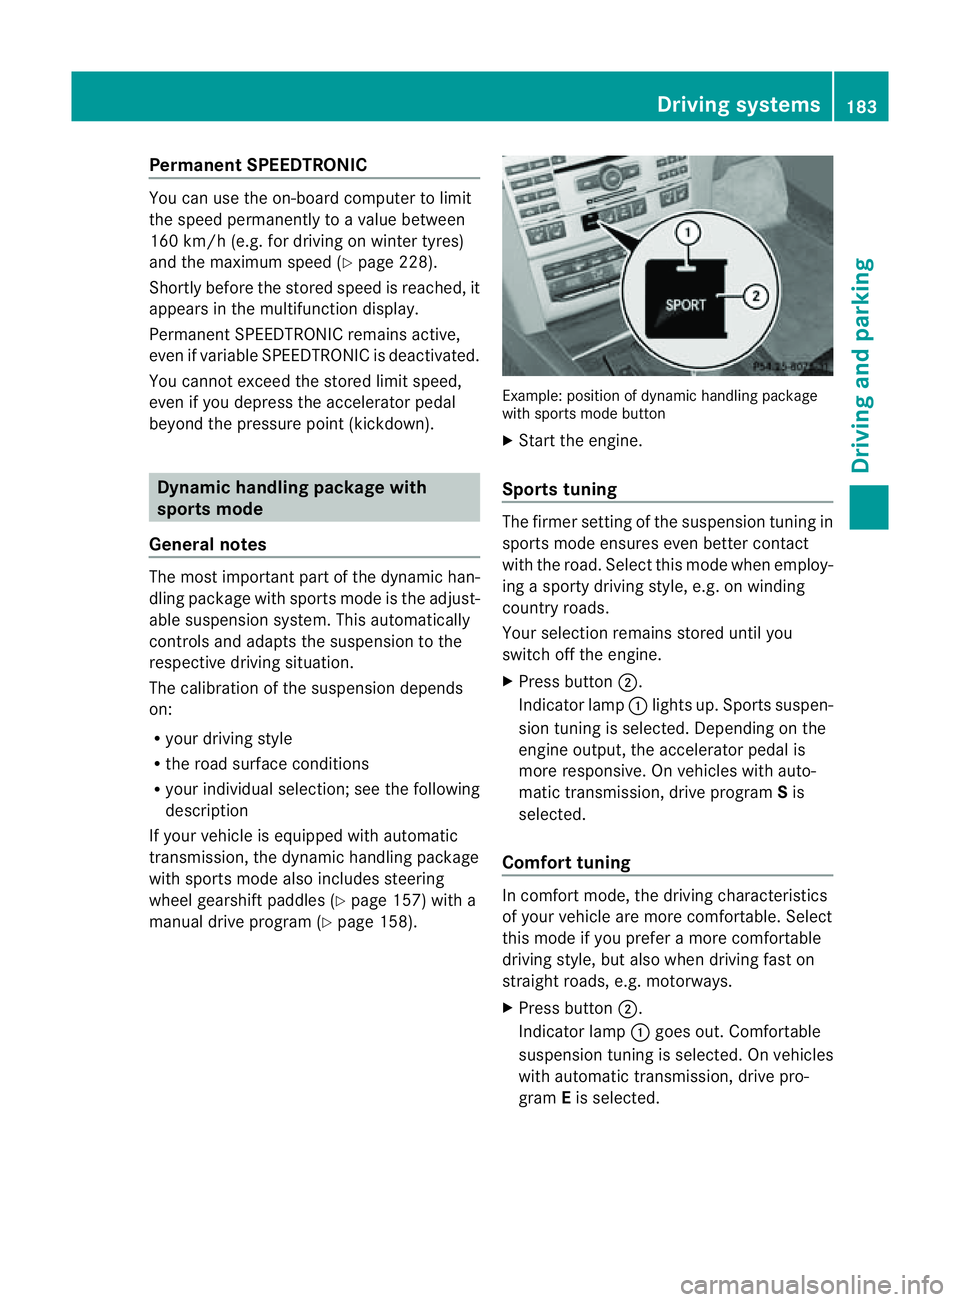
manual drive program (Y page 158). Example: position of dynamic handling package
with sport smode button
X Start the engine.
Sports tuning The firmer setting of the suspension tunin
gin
sport smode ensures even better contact
with the road. Select this mode when employ-
ing asport ydrivin gstyle, e.g. on winding
country roads.
Your selection remains stored until you
switc hoff the engine.
X Press button ;.
Indicator lamp :lights up. Sport ssuspen-
sion tunin gisselected. Depending on the
engin eoutput, the accelerator pedal is
more responsive. On vehicles with auto-
matic transmission ,drive program Sis
selected.
Comfor ttuning In comfort mode, the drivin
gcharacteristics
of your vehicle are more comfortable. Select
this mode if you prefer amore comfortable
drivin gstyle, but also when drivin gfast on
straight roads, e.g. motorways.
X Press button ;.
Indicator lamp :goes out. Comfortable
suspension tunin gisselected. On vehicles
with automatic transmission ,drive pro-
gram Eis selected. Driving systems
183Driving and parking Z
Page 193 of 353
might therefore issu
esteering instructions
too soon. This may leadtoac ollision. For this
reason, you should avoi dusing Parking Guid-
ance in such situations. G
WARNING
Make sure that no persons or animals are in
the manoeuvring range. Otherwise, they
could be injured.
When PARKTRONIC is deactivated, Parking
Guidance is alsou navailable.
Use Parking Guidance for parking spaces:
R that are paralleltot he directionoftravel
R that are on straight roads, not bends
R that are on the same leve lasthe road ,i.e.
not on the pavement, for example. Parking
Guidance may not detect flat kerbs
Parking tips:
R on narrow roads, drive pastt he parking
space as close as possible.
R parking spaces that are littered, overgrown
or partially occupied by trailer drawbars
might be identified incorrectly or not at all.
R snowfall or heavy rain may lead to aparking
space being measured inaccurately.
R pay attention to the PARKTRONIC
(Y page 187) warning messages during the
parking procedure.
R when transporting aload which protrudes
from your vehicle, you must not use Parking
Guidance.
R never use Parking Guidance with snow
chains or an emergency spare wheel fitted.
R make sure that the tyre pressures are
always correct.T his hasadirec teffect on
the steering instructions.
R the wayy ourv ehicle is positioned in the
parkin gspace after parkin gisdependent
on various factors. These include the posi-
tion and shape of the vehicles parked in
front and behind it and the conditions of the
location. In some cases, Parking Guidance
may guide you too far or not far enough into
ap arking space. In some cases, it may also lead you across or onto the kerb. If neces-
sary, cancel the parking procedure with
Parking Guidance.
! If unavoidable, you should drive over
obstacles such as kerbs slowly and not at
as harp angle. Otherwise, you may damage
the wheels or tyres.
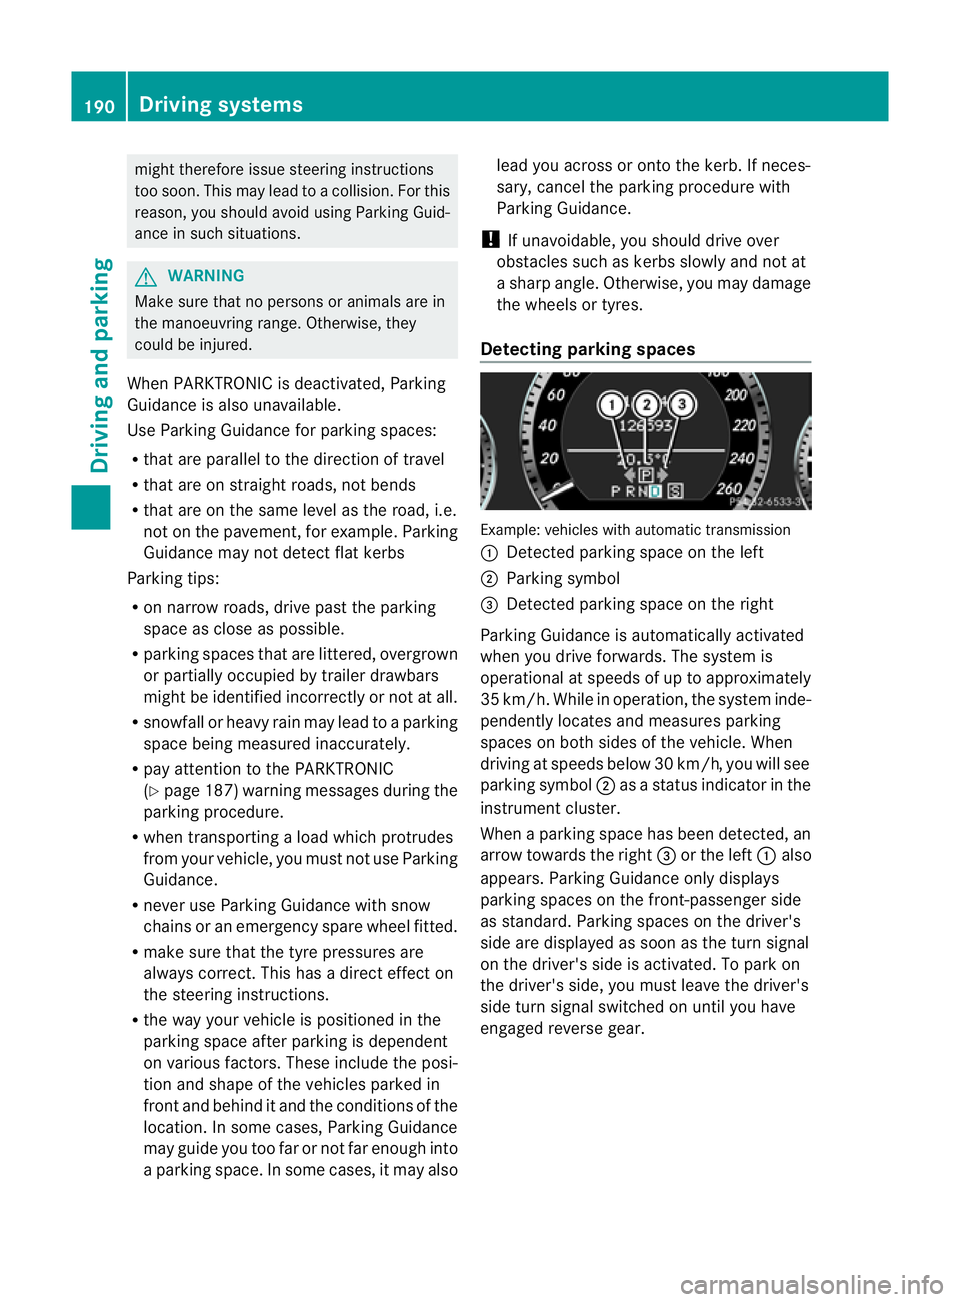
Detecting parking spaces Example: vehicles with automatic transmission
:
Detected parking space on the left
; Parking symbol
= Detected parking space on the right
Parking Guidance is automaticallya ctivated
when you drive forwards. The system is
operational at speeds of up to approximately
35 km/h. While in operation, the system inde-
pendently locates and measures parking
spaces on both sides of the vehicle. When
driving at speeds below 30 km/h ,you will see
parking symbol ;asastatus indicator in the
instrument cluster.
When aparking space has been detected, an
arrow towards the right =or the left :also
appears. Parking Guidance only displays
parking spaces on the front-passenger side
as standard. Parking spaces on the driver's
side are displayed as soon as the turn signal
on the driver's side is activated. To park on
the driver's side, you must leave the driver's
side turn signal switched on until you have
engaged reverse gear. 190
Driving systemsDriving and parking
Page 207 of 353
ings
.You can, for example, countersteer gen-
tly at any time to cancel inappropriate braking
action, e.g. if you intentionally drive across a
solid lane marking.
Active Lane Keeping Assist cannot take
weather conditions into account.
You are responsible for the vehicle's speed,
correc tsteerin gand for braking in good time.
Alway sadapt your drivin gstyle to suit the
prevailing road and weather conditions.
Always pay attention to traffic conditions and
your surroundings. Otherwise, you may fail to
recognise dangers in time, cause an accident
and injure yourself and others.
No lane-correcting brake application occurs
if:
R you clearly and actively steer, brake, or
accelerate.
R you cut the corner on asharp bend.
R you have switched on the turn signals.
R ad riving safety system intervenes, such as
ESP ®
,P RE-SAFE ®
Brake or Active Blind
Spot Assist.
R you have adopted asporty driving style with
high cornering speeds or high rates of
acceleration.
R on vehicles with atrailer tow hitch, the
electrical connection to the trailer has been
correctly established.
R ESP ®
is deactivated.
R the transmission is not in position D.
R al oss of tyre pressure or adefective tyre
has been detected and displayed.
Active Lane Keeping Assist does not detect
road and traffic conditions. An inappropriate
brake application may be interrupted at any
time if:
R you steer slightly in the opposite direction.
R you use aturn signal.
R you clearly brake or accelerate. Al
ane-correcting brak eapplicatio nisinter-
rupted automaticallyi f:
R ad riving safety system intervenes, such as
ESP ®
,P RE-SAFE ®
Brake or Active Blind
Spot Assist.
R lane markings can no longer be recognised.
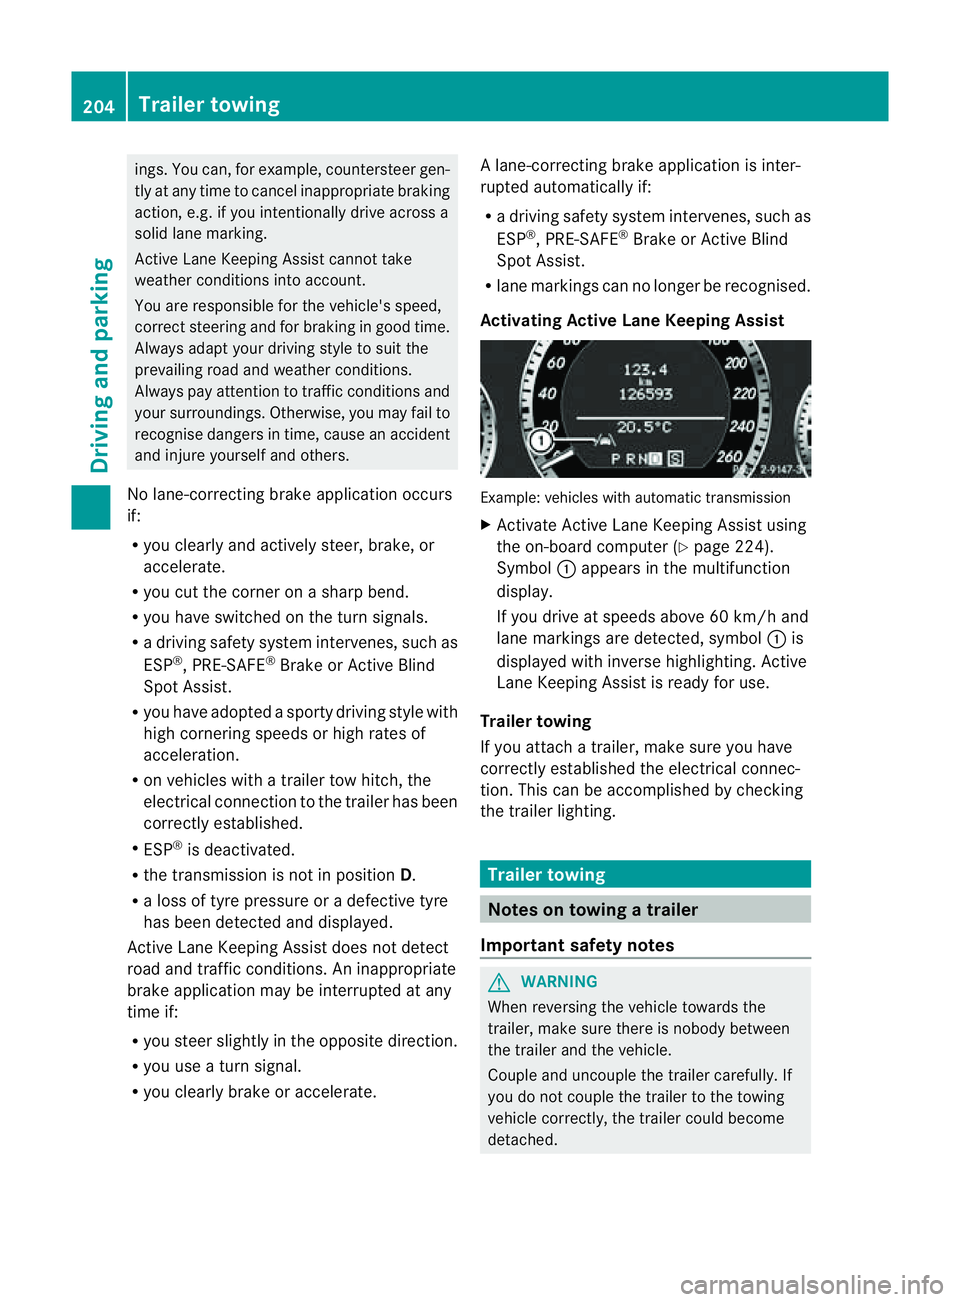
Activating Active Lane Keeping Assist Example: vehicles with automatic transmission
X
Activate Active Lane Keeping Assist using
the on-board computer (Y page 224).
Symbol :appears in the multifunction
display.
If you drive at speeds above 60 km/h and
lane markings are detected, symbol :is
displayed with inverse highlighting. Active
Lane Keeping Assist is ready for use.
Trailer towing
If you attach atrailer, make sure you have
correctly established the electrical connec-
tion. This can be accomplished by checking
the trailer lighting. Trailer towing
Notes on towing
atrailer
Important safety notes G
WARNING
When reversing the vehicl etowards the
trailer, make sure there is nobod ybetween
the trailer and the vehicle.
Couple and uncoupl ethe trailer carefully .If
you do no tcouple the trailer to the towing
vehicle correctly, the trailer could become
detached. 204
Trailer towingDriving and parking