MERCEDES-BENZ E-Class COUPE 2012 C207 Owner's Manual
Manufacturer: MERCEDES-BENZ, Model Year: 2012, Model line: E-Class COUPE, Model: MERCEDES-BENZ E-Class COUPE 2012 C207Pages: 352, PDF Size: 14.48 MB
Page 251 of 352
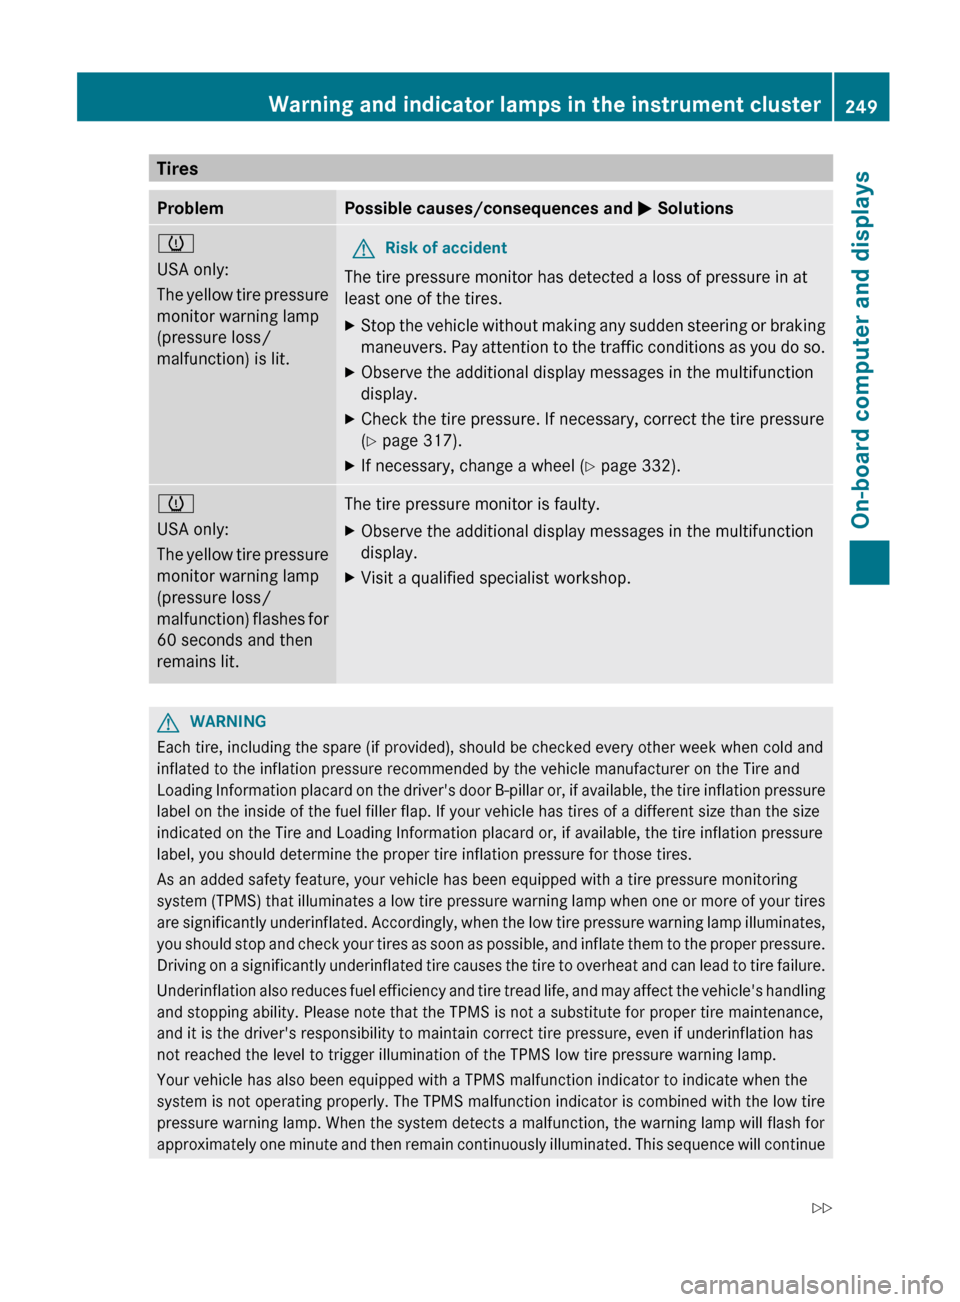
TiresProblemPossible causes/consequences and M Solutionsh
USA only:
The yellow tire pressure
monitor warning lamp
(pressure loss/
malfunction) is lit.GRisk of accident
The tire pressure monitor has detected a loss of pressure in at
least one of the tires.
XStop the vehicle without making any sudden steering or braking
maneuvers. Pay attention to the traffic conditions as you do so.XObserve the additional display messages in the multifunction
display.XCheck the tire pressure. If necessary, correct the tire pressure
( Y page 317).XIf necessary, change a wheel ( Y page 332).h
USA only:
The yellow tire pressure
monitor warning lamp
(pressure loss/
malfunction) flashes for
60 seconds and then
remains lit.The tire pressure monitor is faulty.XObserve the additional display messages in the multifunction
display.XVisit a qualified specialist workshop.GWARNING
Each tire, including the spare (if provided), should be checked every other week when cold and
inflated to the inflation pressure recommended by the vehicle manufacturer on the Tire and
Loading Information placard on the driver's door B-pillar or, if available, the tire inflation pressure
label on the inside of the fuel filler flap. If your vehicle has tires of a different size than the size
indicated on the Tire and Loading Information placard or, if available, the tire inflation pressure
label, you should determine the proper tire inflation pressure for those tires.
As an added safety feature, your vehicle has been equipped with a tire pressure monitoring
system (TPMS) that illuminates a low tire pressure warning lamp when one or more of your tires
are significantly underinflated. Accordingly, when the low tire pressure warning lamp illuminates,
you should stop and check your tires as soon as possible, and inflate them to the proper pressure.
Driving on a significantly underinflated tire causes the tire to overheat and can lead to tire failure.
Underinflation also reduces fuel efficiency and tire tread life, and may affect the vehicle's handling
and stopping ability. Please note that the TPMS is not a substitute for proper tire maintenance,
and it is the driver's responsibility to maintain correct tire pressure, even if underinflation has
not reached the level to trigger illumination of the TPMS low tire pressure warning lamp.
Your vehicle has also been equipped with a TPMS malfunction indicator to indicate when the
system is not operating properly. The TPMS malfunction indicator is combined with the low tire
pressure warning lamp. When the system detects a malfunction, the warning lamp will flash for
approximately one minute and then remain continuously illuminated. This sequence will continue
Warning and indicator lamps in the instrument cluster249On-board computer and displaysZ
Page 252 of 352
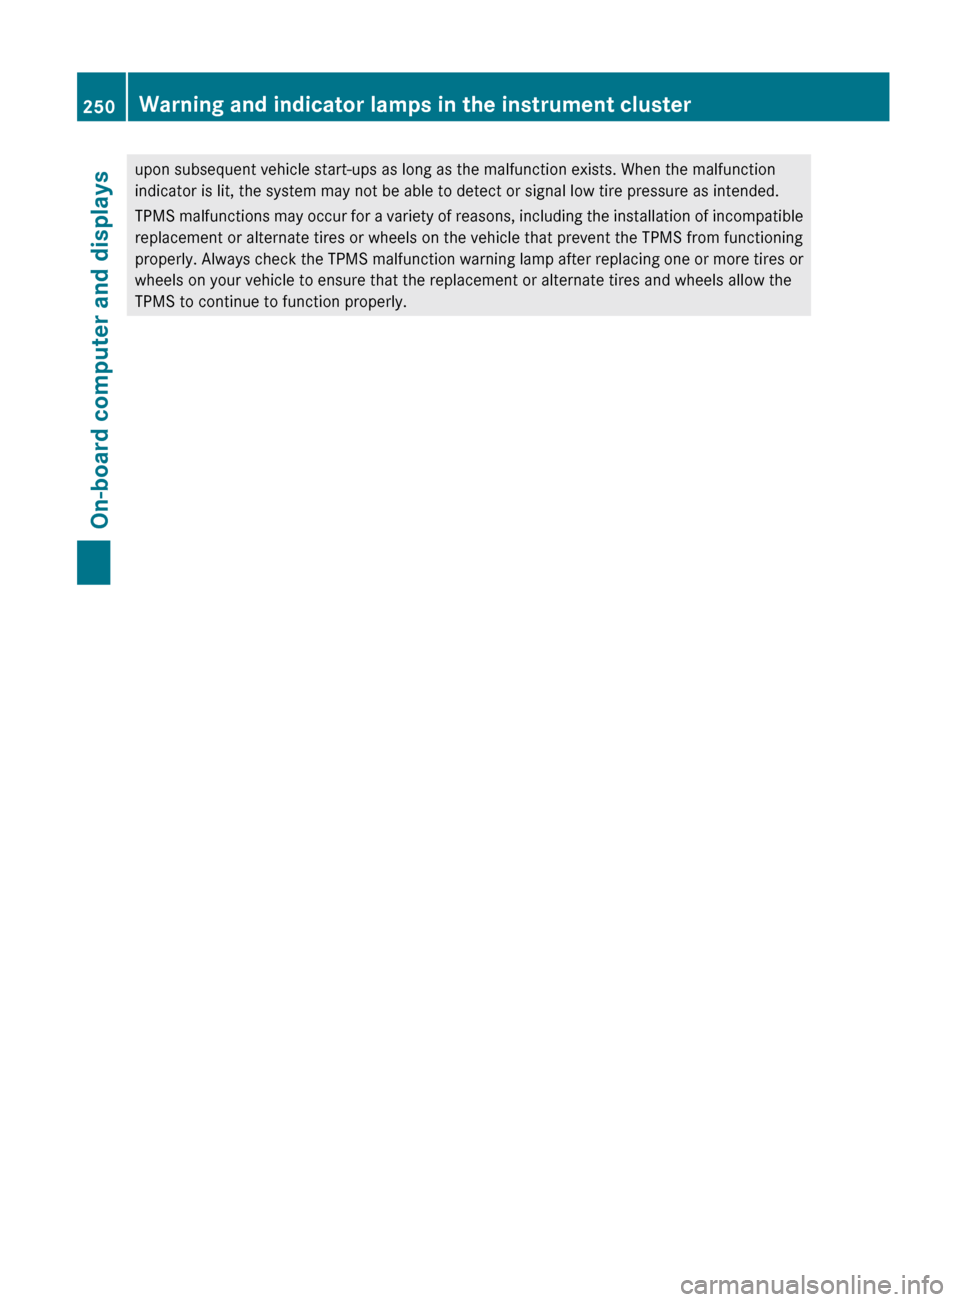
upon subsequent vehicle start-ups as long as the malfunction exists. When the malfunction
indicator is lit, the system may not be able to detect or signal low tire pressure as intended.
TPMS malfunctions may occur for a variety of reasons, including the installation of incompatible
replacement or alternate tires or wheels on the vehicle that prevent the TPMS from functioning
properly. Always check the TPMS malfunction warning lamp after replacing one or more tires or
wheels on your vehicle to ensure that the replacement or alternate tires and wheels allow the
TPMS to continue to function properly.250Warning and indicator lamps in the instrument clusterOn-board computer and displays
Page 253 of 352
Useful information ............................252
Loading guidelines ............................252
Stowage areas .................................. 252
Features ............................................. 257251Stowing and features
Page 254 of 352
Useful information
i This Operator's Manual describes all
models and all standard and optional
equipment of your vehicle available at the
time of publication of the Operator's
Manual. Country-specific differences are
possible. Please note that your vehicle may
not be equipped with all features
described. This also applies to safety-
related systems and functions.
i Please read the information on qualified
specialist workshops ( Y page 23).
Loading guidelines
GWARNING
Always fasten items being carried as securely
as possible. Use cargo tie-down rings and
fastening materials appropriate for the weight
and size of the load.
In an accident, during hard braking or sudden
maneuvers, loose items will be thrown around
inside the vehicle. This can cause injury to
vehicle occupants unless the items are
securely fastened in the vehicle.
To help avoid personal injury during a collision
or sudden maneuver, exercise care when
transporting cargo. Do not pile luggage or
cargo higher than the seat backrests.
The trunk is the preferred place to carry
objects.
Never drive a vehicle with the trunk open.
Deadly carbon monoxide (CO) gases may
enter vehicle interior resulting in
unconsciousness and death.
The handling characteristics of a laden
vehicle are dependent on the distribution of
the load within the vehicle. For this reason,
you should observe the following notes when
transporting a load:
R when transporting a load, never exceed the
maximum permissible gross vehicle weight
or the gross axle weight rating of the
vehicle (including occupants). The values
are specified on the vehicle identification
plate on the B-pillar of the driver's door.
R position heavy loads as far forwards as
possible and as low down in the trunk as
possible.
R the load must not protrude above the upper
edge of the seat backrests.
R always place the load against the rear or
front seat backrests. Make sure that the
seat backrests are securely locked into
place.
R always place the load behind unoccupied
seats if possible.
R secure the load with sufficiently strong and
wear-resistant tie down. pad sharp edges
for protection.
Stowage areas
Stowage compartments
Important safety notes
GWARNING
To help avoid personal injury during a collision
or sudden maneuver, exercise care when
storing objects in the vehicle. Put luggage or
cargo in the trunk if possible.
Do not pile luggage or cargo higher than the
seat backrests.
Keep compartment lids closed. This will help
to prevent stored objects from being thrown
about and injuring vehicle occupants during
R braking
R vehicle maneuvers
R an accident
Stowage compartments in the front
Glove box
i The glove box can be ventilated
( Y page 141).
252Stowage areasStowing and features
Page 255 of 352
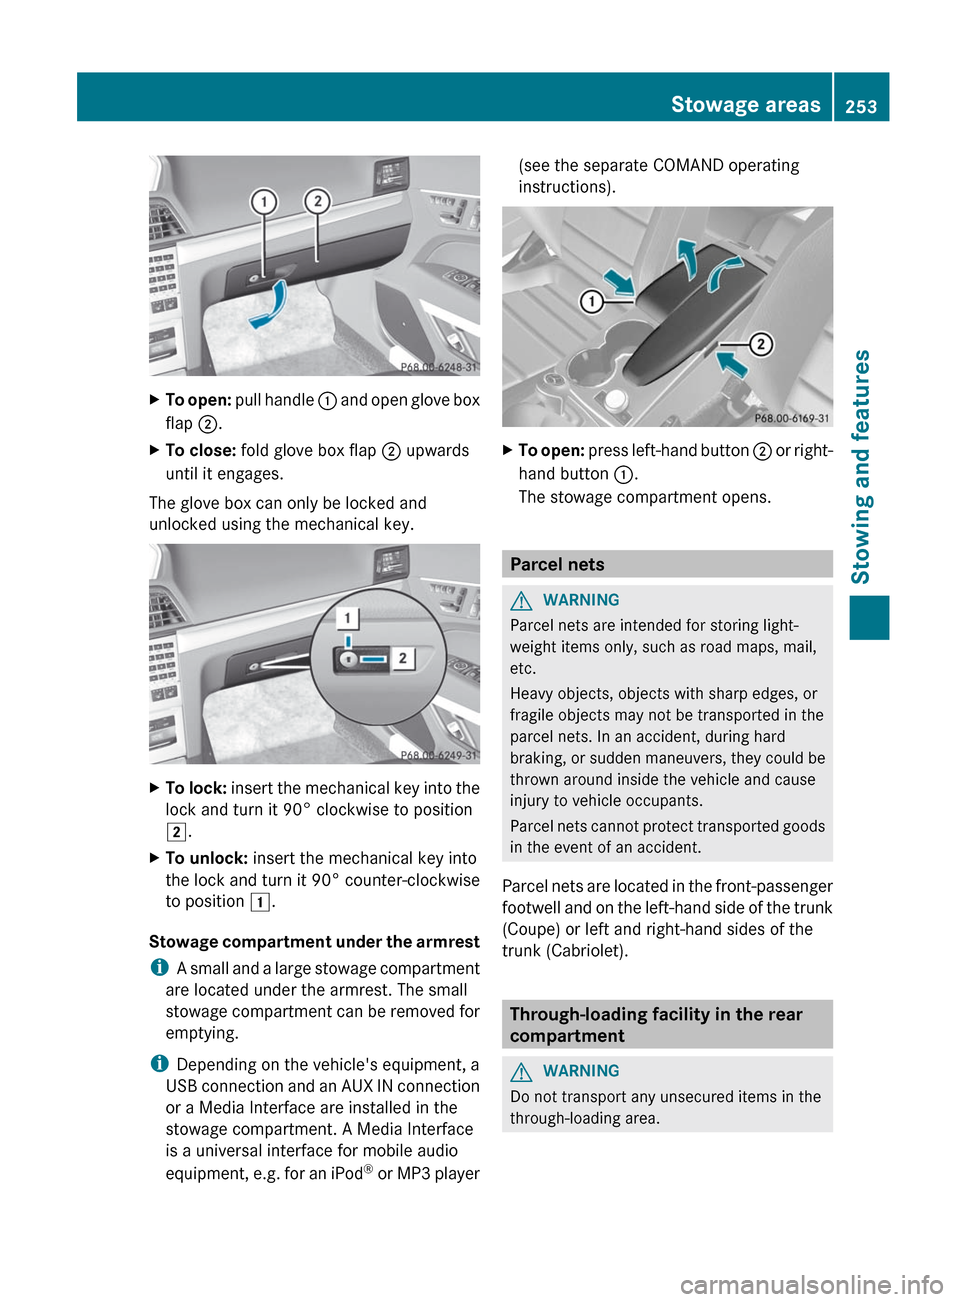
XTo open: pull handle : and open glove box
flap ;.XTo close: fold glove box flap ; upwards
until it engages.
The glove box can only be locked and
unlocked using the mechanical key.
XTo lock: insert the mechanical key into the
lock and turn it 90° clockwise to position
2 .XTo unlock: insert the mechanical key into
the lock and turn it 90° counter-clockwise
to position 1.
Stowage compartment under the armrest
i A small and a large stowage compartment
are located under the armrest. The small
stowage compartment can be removed for
emptying.
i Depending on the vehicle's equipment, a
USB connection and an AUX IN connection
or a Media Interface are installed in the
stowage compartment. A Media Interface
is a universal interface for mobile audio
equipment, e.g. for an iPod ®
or MP3 player
(see the separate COMAND operating
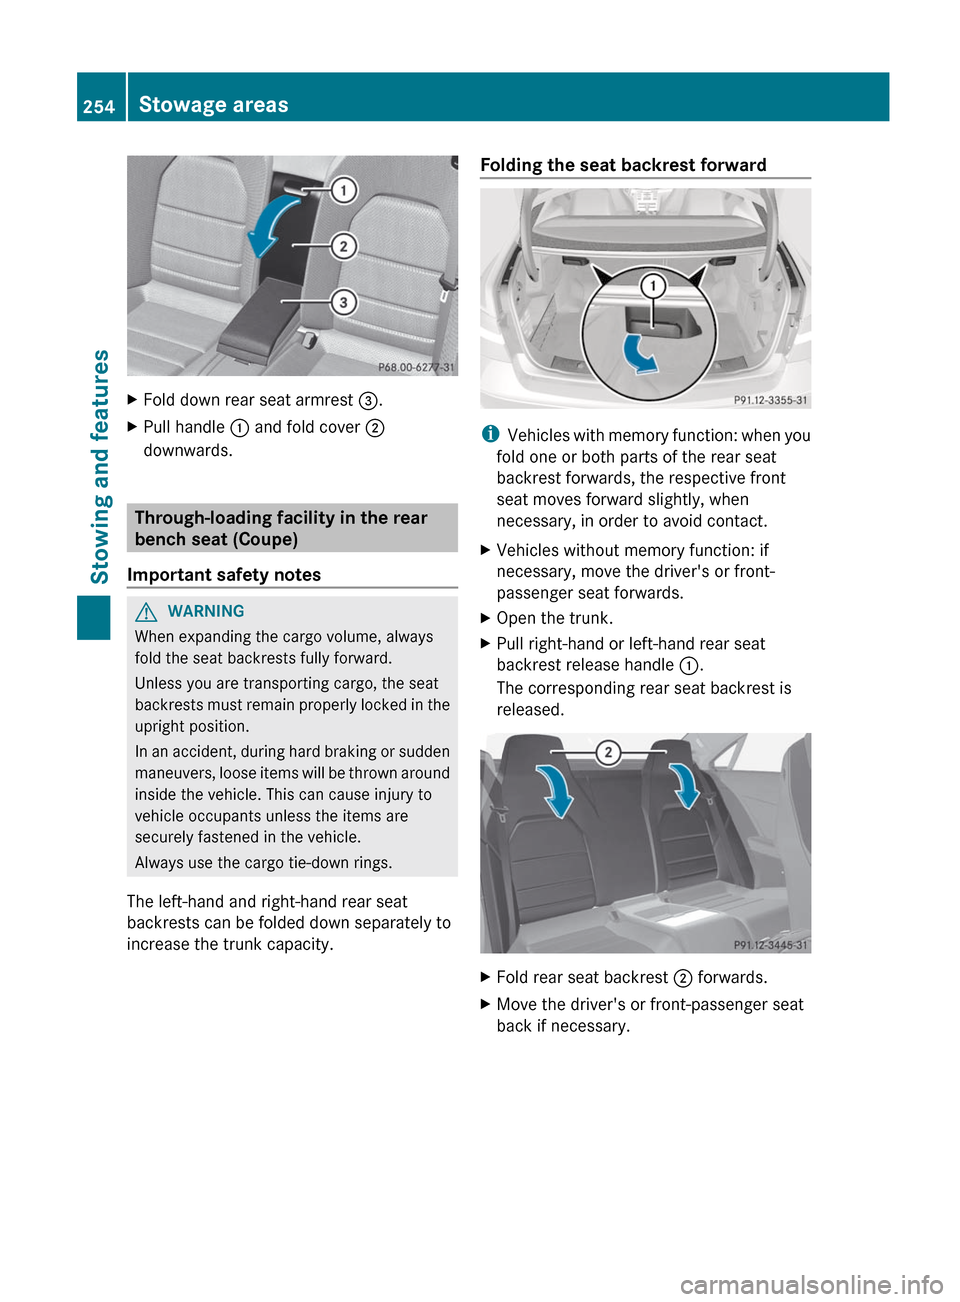
instructions).XTo open: press left-hand button ; or right-
hand button :.
The stowage compartment opens.
Parcel nets
GWARNING
Parcel nets are intended for storing light-
weight items only, such as road maps, mail,
etc.
Heavy objects, objects with sharp edges, or
fragile objects may not be transported in the
parcel nets. In an accident, during hard
braking, or sudden maneuvers, they could be
thrown around inside the vehicle and cause
injury to vehicle occupants.
Parcel nets cannot protect transported goods
in the event of an accident.
Parcel nets are located in the front-passenger
footwell and on the left-hand side of the trunk
(Coupe) or left and right-hand sides of the
trunk (Cabriolet).
Through-loading facility in the rear
compartment
GWARNING
Do not transport any unsecured items in the
through-loading area.
Stowage areas253Stowing and featuresZ
Page 256 of 352
XFold down rear seat armrest =.XPull handle : and fold cover ;
downwards.
Through-loading facility in the rear
bench seat (Coupe)
Important safety notes
GWARNING
When expanding the cargo volume, always
fold the seat backrests fully forward.
Unless you are transporting cargo, the seat
backrests must remain properly locked in the
upright position.
In an accident, during hard braking or sudden
maneuvers, loose items will be thrown around
inside the vehicle. This can cause injury to
vehicle occupants unless the items are
securely fastened in the vehicle.
Always use the cargo tie-down rings.
The left-hand and right-hand rear seat
backrests can be folded down separately to
increase the trunk capacity.
Folding the seat backrest forward
i Vehicles with memory function: when you
fold one or both parts of the rear seat
backrest forwards, the respective front
seat moves forward slightly, when
necessary, in order to avoid contact.
XVehicles without memory function: if
necessary, move the driver's or front-
passenger seat forwards.XOpen the trunk.XPull right-hand or left-hand rear seat
backrest release handle :.
The corresponding rear seat backrest is
released.XFold rear seat backrest ; forwards.XMove the driver's or front-passenger seat
back if necessary.254Stowage areasStowing and features
Page 257 of 352
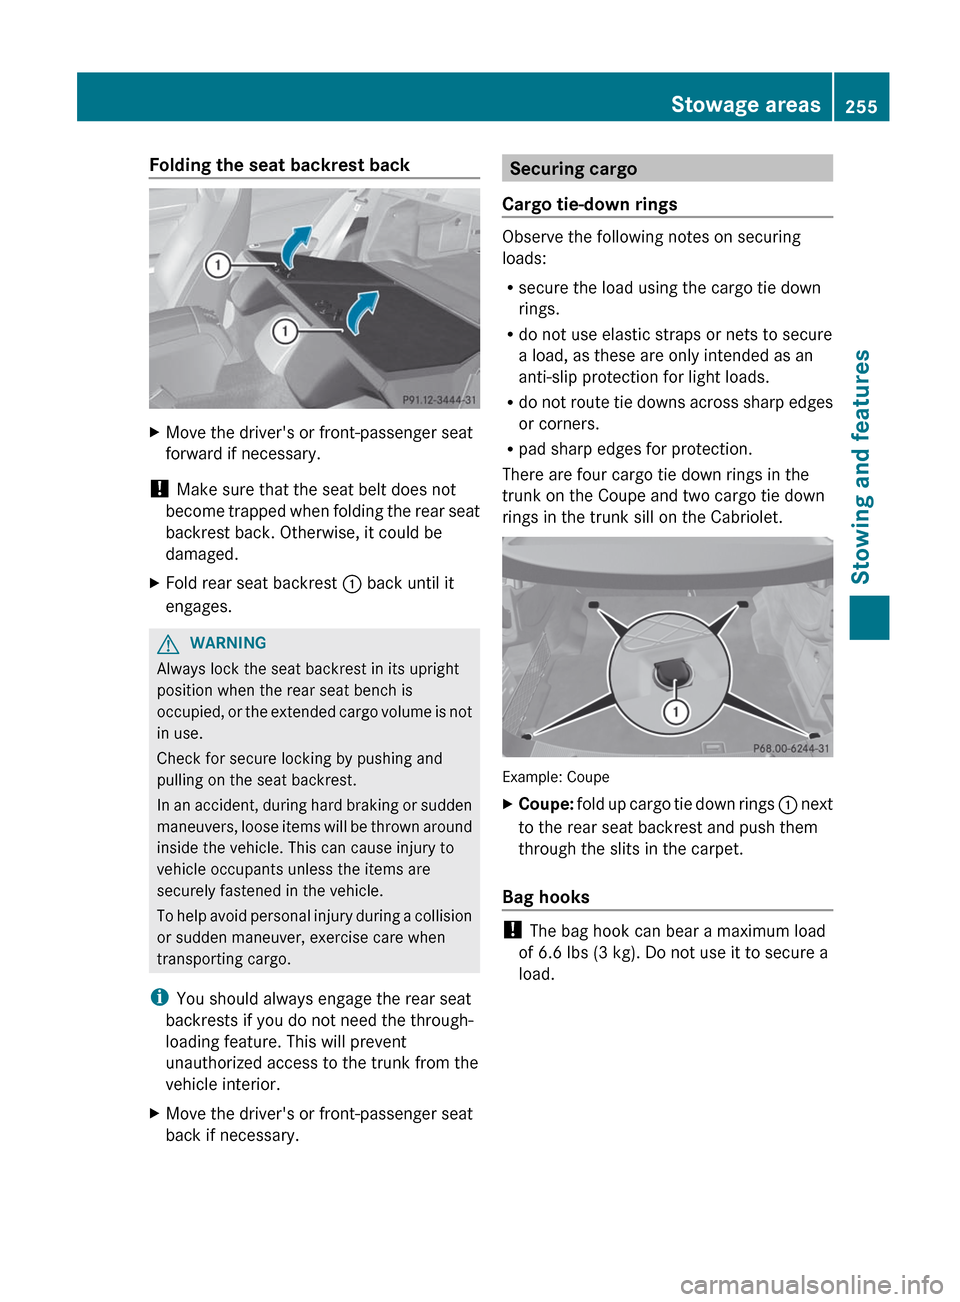
Folding the seat backrest backXMove the driver's or front-passenger seat
forward if necessary.
! Make sure that the seat belt does not
become trapped when folding the rear seat
backrest back. Otherwise, it could be
damaged.
XFold rear seat backrest : back until it
engages.GWARNING
Always lock the seat backrest in its upright
position when the rear seat bench is
occupied, or the extended cargo volume is not
in use.
Check for secure locking by pushing and
pulling on the seat backrest.
In an accident, during hard braking or sudden
maneuvers, loose items will be thrown around
inside the vehicle. This can cause injury to
vehicle occupants unless the items are
securely fastened in the vehicle.
To help avoid personal injury during a collision
or sudden maneuver, exercise care when
transporting cargo.
i You should always engage the rear seat
backrests if you do not need the through-
loading feature. This will prevent
unauthorized access to the trunk from the
vehicle interior.
XMove the driver's or front-passenger seat
back if necessary.Securing cargo
Cargo tie-down rings
Observe the following notes on securing
loads:
R secure the load using the cargo tie down
rings.
R do not use elastic straps or nets to secure
a load, as these are only intended as an
anti-slip protection for light loads.
R do not route tie downs across sharp edges
or corners.
R pad sharp edges for protection.
There are four cargo tie down rings in the
trunk on the Coupe and two cargo tie down
rings in the trunk sill on the Cabriolet.
Example: Coupe
XCoupe: fold up cargo tie down rings : next
to the rear seat backrest and push them
through the slits in the carpet.
Bag hooks
! The bag hook can bear a maximum load
of 6.6 lbs (3 kg). Do not use it to secure a
load.
Stowage areas255Stowing and featuresZ
Page 258 of 352
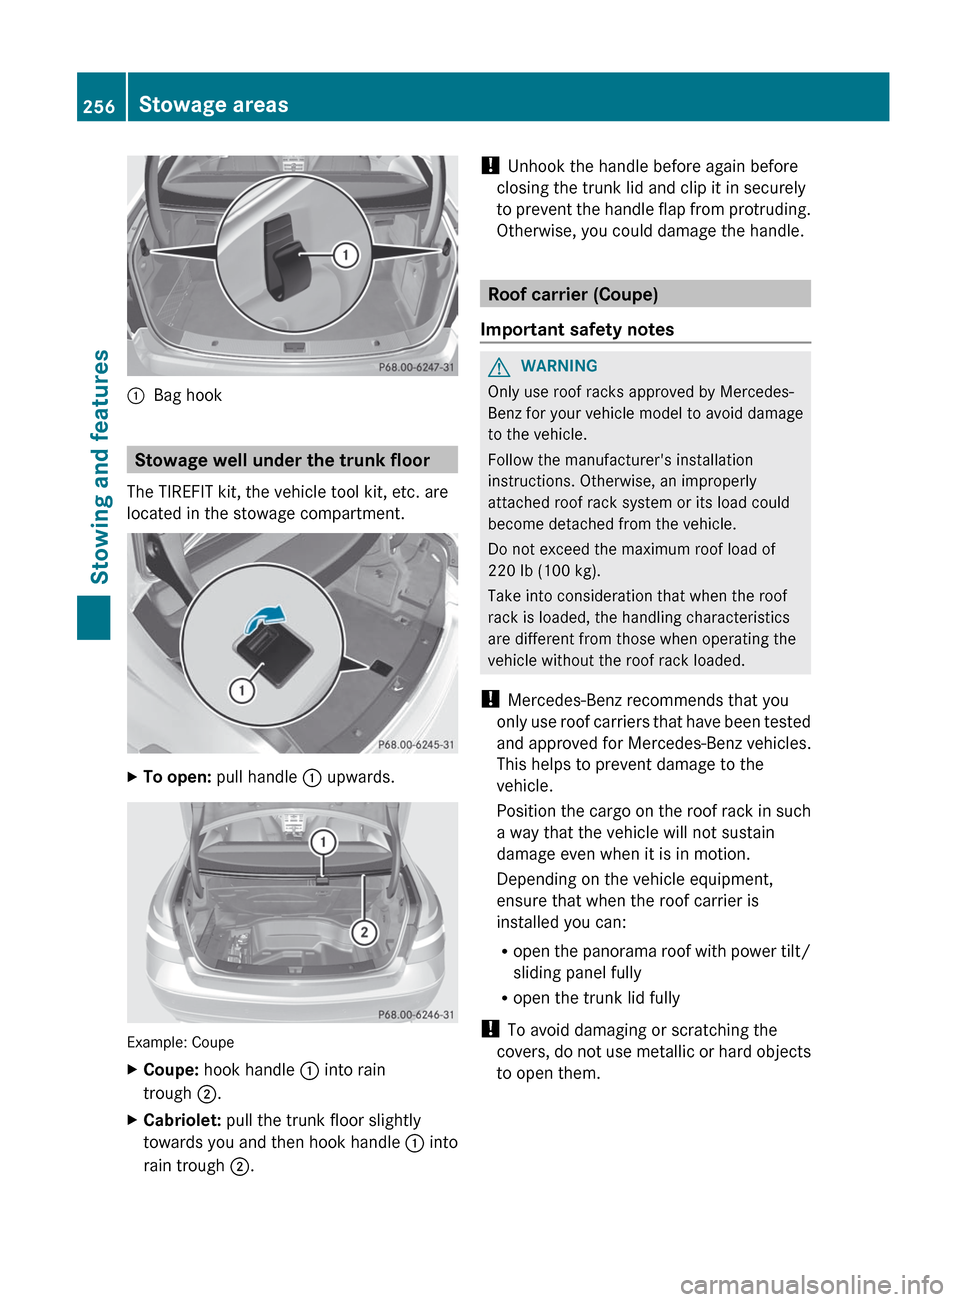
:Bag hook
Stowage well under the trunk floor
The TIREFIT kit, the vehicle tool kit, etc. are
located in the stowage compartment.
XTo open: pull handle : upwards.
Example: Coupe
XCoupe: hook handle : into rain
trough ;.XCabriolet: pull the trunk floor slightly
towards you and then hook handle : into
rain trough ;.!
Unhook the handle before again before
closing the trunk lid and clip it in securely
to prevent the handle flap from protruding.
Otherwise, you could damage the handle.
Roof carrier (Coupe)
Important safety notes
GWARNING
Only use roof racks approved by Mercedes-
Benz for your vehicle model to avoid damage
to the vehicle.
Follow the manufacturer's installation
instructions. Otherwise, an improperly
attached roof rack system or its load could
become detached from the vehicle.
Do not exceed the maximum roof load of
220 lb (100 kg).
Take into consideration that when the roof
rack is loaded, the handling characteristics
are different from those when operating the
vehicle without the roof rack loaded.
! Mercedes-Benz recommends that you
only use roof carriers that have been tested
and approved for Mercedes-Benz vehicles.
This helps to prevent damage to the
vehicle.
Position the cargo on the roof rack in such
a way that the vehicle will not sustain
damage even when it is in motion.
Depending on the vehicle equipment,
ensure that when the roof carrier is
installed you can:
R open the panorama roof with power tilt/
sliding panel fully
R open the trunk lid fully
! To avoid damaging or scratching the
covers, do not use metallic or hard objects
to open them.
256Stowage areasStowing and features
Page 259 of 352
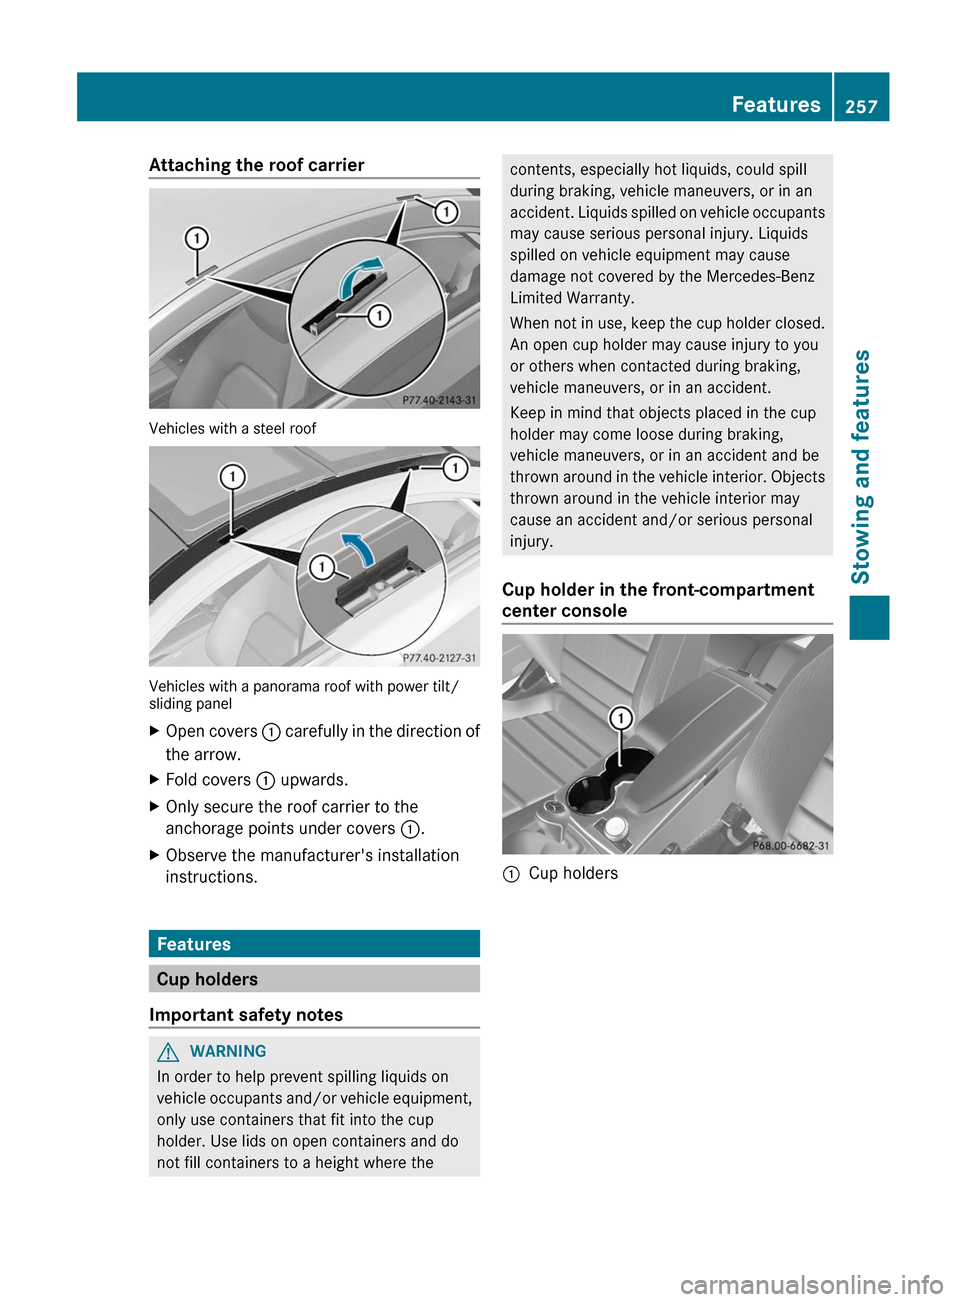
Attaching the roof carrier
Vehicles with a steel roof
Vehicles with a panorama roof with power tilt/
sliding panel
XOpen covers : carefully in the direction of
the arrow.XFold covers : upwards.XOnly secure the roof carrier to the
anchorage points under covers :.XObserve the manufacturer's installation
instructions.
Features
Cup holders
Important safety notes
GWARNING
In order to help prevent spilling liquids on
vehicle occupants and/or vehicle equipment,
only use containers that fit into the cup
holder. Use lids on open containers and do
not fill containers to a height where the
contents, especially hot liquids, could spill
during braking, vehicle maneuvers, or in an
accident. Liquids spilled on vehicle occupants
may cause serious personal injury. Liquids
spilled on vehicle equipment may cause
damage not covered by the Mercedes-Benz
Limited Warranty.
When not in use, keep the cup holder closed.
An open cup holder may cause injury to you
or others when contacted during braking,
vehicle maneuvers, or in an accident.
Keep in mind that objects placed in the cup
holder may come loose during braking,
vehicle maneuvers, or in an accident and be
thrown around in the vehicle interior. Objects
thrown around in the vehicle interior may
cause an accident and/or serious personal
injury.
Cup holder in the front-compartment
center console:Cup holdersFeatures257Stowing and featuresZ
Page 260 of 352
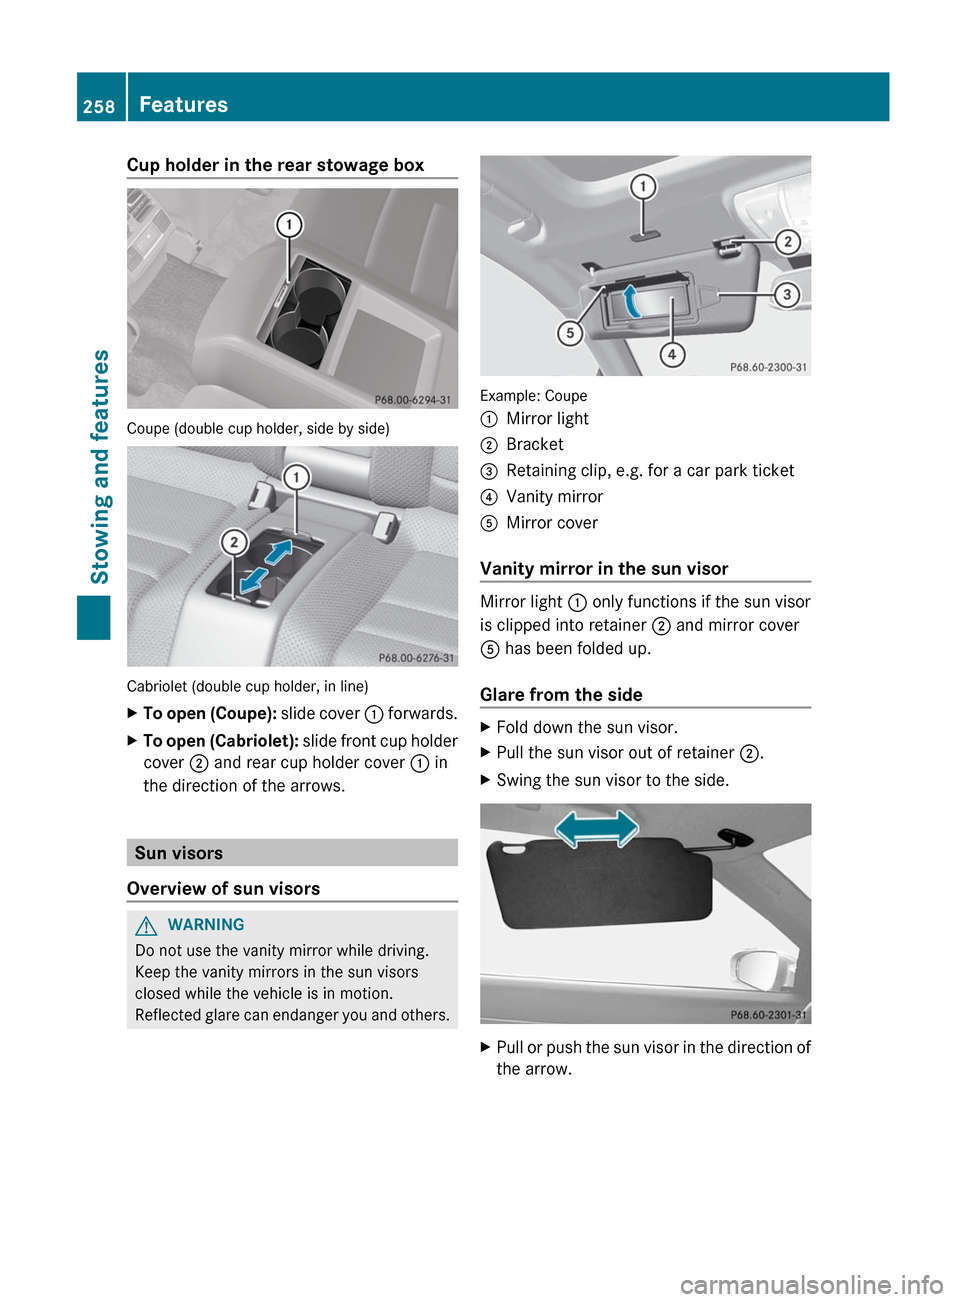
Cup holder in the rear stowage box
Coupe (double cup holder, side by side)
Cabriolet (double cup holder, in line)
XTo open (Coupe): slide cover : forwards.XTo open (Cabriolet): slide front cup holder
cover ; and rear cup holder cover : in
the direction of the arrows.
Sun visors
Overview of sun visors
GWARNING
Do not use the vanity mirror while driving.
Keep the vanity mirrors in the sun visors
closed while the vehicle is in motion.
Reflected glare can endanger you and others.
Example: Coupe
:Mirror light;Bracket=Retaining clip, e.g. for a car park ticket?Vanity mirrorAMirror cover
Vanity mirror in the sun visor
Mirror light : only functions if the sun visor
is clipped into retainer ; and mirror cover
A has been folded up.
Glare from the side
XFold down the sun visor.XPull the sun visor out of retainer ;.XSwing the sun visor to the side.XPull or push the sun visor in the direction of
the arrow.258FeaturesStowing and features