change time MERCEDES-BENZ E-Class COUPE 2016 C207 User Guide
[x] Cancel search | Manufacturer: MERCEDES-BENZ, Model Year: 2016, Model line: E-Class COUPE, Model: MERCEDES-BENZ E-Class COUPE 2016 C207Pages: 318, PDF Size: 7.35 MB
Page 135 of 318
sion automatically shifts up in order to pre-
vent engine damage.
XTo shift down:pull on the left-hand steering
wheel paddle shifter (Ypage 132).
The automatic transmission shifts down to
the next gear.
iIf the engine exceeds the maximum engine
speed when shifting down, the automatic
transmission protects against engine damage
by not shifting down.
iAutomatic down shifting occurs when
coasting.
Shift recommendation
The gearshift recommendations assist you in
adopting an economical driving style. The rec-
ommended gear is shown in the multifunction
display.
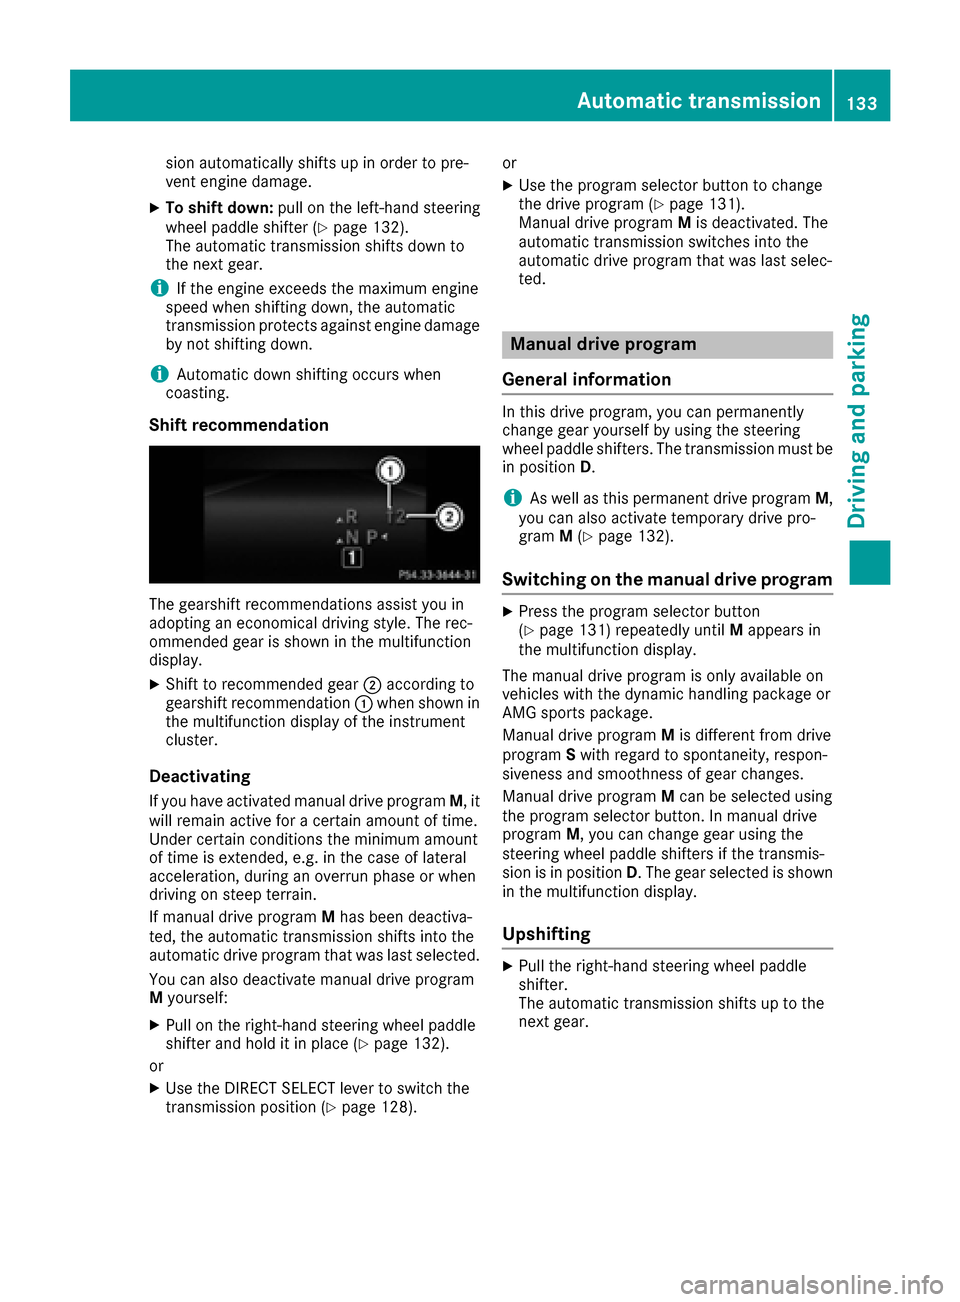
XShift to recommended gear ;according to
gearshift recommendation :when shown in
the multifunction display of the instrument
cluster.
Deactivating
If you have activated manual drive program M, it
will remain active for a certain amount of time.
Under certain conditions the minimum amount
of time is extended, e.g. in the case of lateral
acceleration, during an overrun phase or when
driving on steep terrain.
If manual drive program Mhas been deactiva-
ted, the automatic transmission shifts into the
automatic drive program that was last selected.
You can also deactivate manual drive program
M yourself:
XPull on the right-hand steering wheel paddle
shifter and hold it in place (Ypage 132).
or
XUse the DIRECT SELECT lever to switch the
transmission position (Ypage 128). or
XUse the program selector button to change
the drive program (Ypage 131).
Manual drive program Mis deactivated. The
automatic transmission switches into the
automatic drive program that was last selec-
ted.
Manual drive program
General information
In this drive program, you can permanently
change gear yourself by using the steering
wheel paddle shifters. The transmission must be
in position D.
iAs well as this permanent drive program M,
you can also activate temporary drive pro-
gram M(
Ypage 132).
Switching on the manual drive program
XPress the program selector button
(Ypage 131) repeatedly until Mappears in
the multifunction display.
The manual drive program is only available on
vehicles with the dynamic handling package or
AMG sports package.
Manual drive program Mis different from drive
program Swith regard to spontaneity, respon-
siveness and smoothness of gear changes.
Manual drive program Mcan be selected using
the program selector button. In manual drive
program M, you can change gear using the
steering wheel paddle shifters if the transmis-
sion is in position D. The gear selected is shown
in the multifunction display.
Upshifting
XPull the right-hand steering wheel paddle
shifter.
The automatic transmission shifts up to the
next gear.
Automatic transmission133
Driving and parking
Z
Page 144 of 318
RAcceleration(evaluation of all acceleration
processes):
-The bar fills up: moderate acceleration,
especially at higher speeds
-The bar empties: sporty acceleration
RConstant(assessment of driving behavior at
all times):
-The bar fills up: constant speed and avoid-
ance of unnecessary acceleration and
deceleration
-The bar empties: fluctuations in speed
RCoasting(assessment of all deceleration
processes):
-The bar fills up: anticipatory driving, keep-
ing your distance and early release of the
accelerator. The vehicle can coast without
use of the brakes.
-The bar empties: frequent braking
iAn economical driving style specially
requires driving at moderate engine speeds.
To achieve a higher value in the categories
Acceleration
and Constant:
Robserve the gearshift recommendations.
Rdrive in drive program E.
iOn long journeys at a constant speed, e.g.
on the highway, only the bar for Constantwill
change.
iThe ECO display summarizes the driving
characteristics from the start of the journey to
its completion. For this reason, the bars
change dynamically at the beginning of the
journey. On longer journeys, there are fewer
changes. For more dynamic changes, carry
out a manual reset.
For further information on the ECO display, see
(
Ypage 187).
Braking
Important safety notes
GWARNING
If you shift down on a slippery road surface in an attempt to increase the engine's braking
effect, the drive wheels could lose their grip.
There is an increased danger of skidding and
accidents.
Do not shift down for additional engine brak-
ing on a slippery road surface.
Downhill gradients
!On long and steep gradients, you must
reduce the load on the brakes by shifting to a lower gear in good time. This allows you to
take advantage of the engine's braking effect.
This helps you to avoid overheating the
brakes and wearing them out excessively.
When you take advantage of engine braking, a
drive wheel may not turn for some time, e.g.
on a slippery road surface. This could cause
damage to the drive train. This type of damage
is not covered by the Mercedes-Benz war-
ranty.
Do not depress the brake pedal continuously
while the vehicle is in motion, e.g. causing the
brakes to rub by constantly applying light pres-
sure to the pedal. This results in excessive and
premature wear to the brake pads.
Heavy and light loads
GWARNING
If you rest your foot on the brake pedal while
driving, the braking system can overheat. This increases the stopping distance and can even
cause the braking system to fail. There is a
risk of an accident.
Never use the brake pedal as a footrest. Never
depress the brake pedal and the accelerator
pedal at the same time.
!Depressing the brake pedal constantly
results in excessive and premature wear to
the brake pads.
If the brakes have been subjected to a heavy
load, do not stop the vehicle immediately, but
drive on for a short while. This allows the airflow
to cool the brakes more quickly.
Wet roads
If you have driven for a long time in heavy rain
without braking, there may be a delayed reac-
tion from the brakes when braking for the first
time. This may also occur after the vehicle has
been washed or driven through deep water.
142Driving tips
Driving and parking
Page 147 of 318
Cruise control
General notes
Cruise control maintains a constant road speed
for you. It brakes automatically in order to avoid
exceeding the set speed. On long and steep
downhill gradients, especially if the vehicle is
laden, you must shift to a lower gear in time. By
doing so, you will make use of the braking effect
of the engine. This relieves the load on the brake
system and prevents the brakes from overheat-
ing and wearing too quickly.
Use cruise control only if road and traffic con-
ditions make it appropriate to maintain a steady
speed for a prolonged period. You can store any
road speed above 20 mph (30 km/h).
Important safety notes
If you fail to adapt your driving style, cruise con-
trol can neither reduce the risk of an accident
nor override the laws of physics. Cruise control
cannot take into account the road, traffic and
weather conditions. Cruise control is only an
aid. You are responsible for the distance to the
vehicle in front, for vehicle speed, for braking in
good time and for staying in your lane.
Do not use cruise control:
Rin road and traffic conditions which do not
allow you to maintain a constant speed, e.g. in
heavy traffic or on winding roads
Ron slippery road surfaces. Braking or accel-
erating could cause the drive wheels to lose
traction and the vehicle could then skid
Rwhen there is poor visibility, e.g. due to fog,
heavy rain or snow
If there is a change of drivers, advise the new
driver of the speed stored.
Cruise control lever
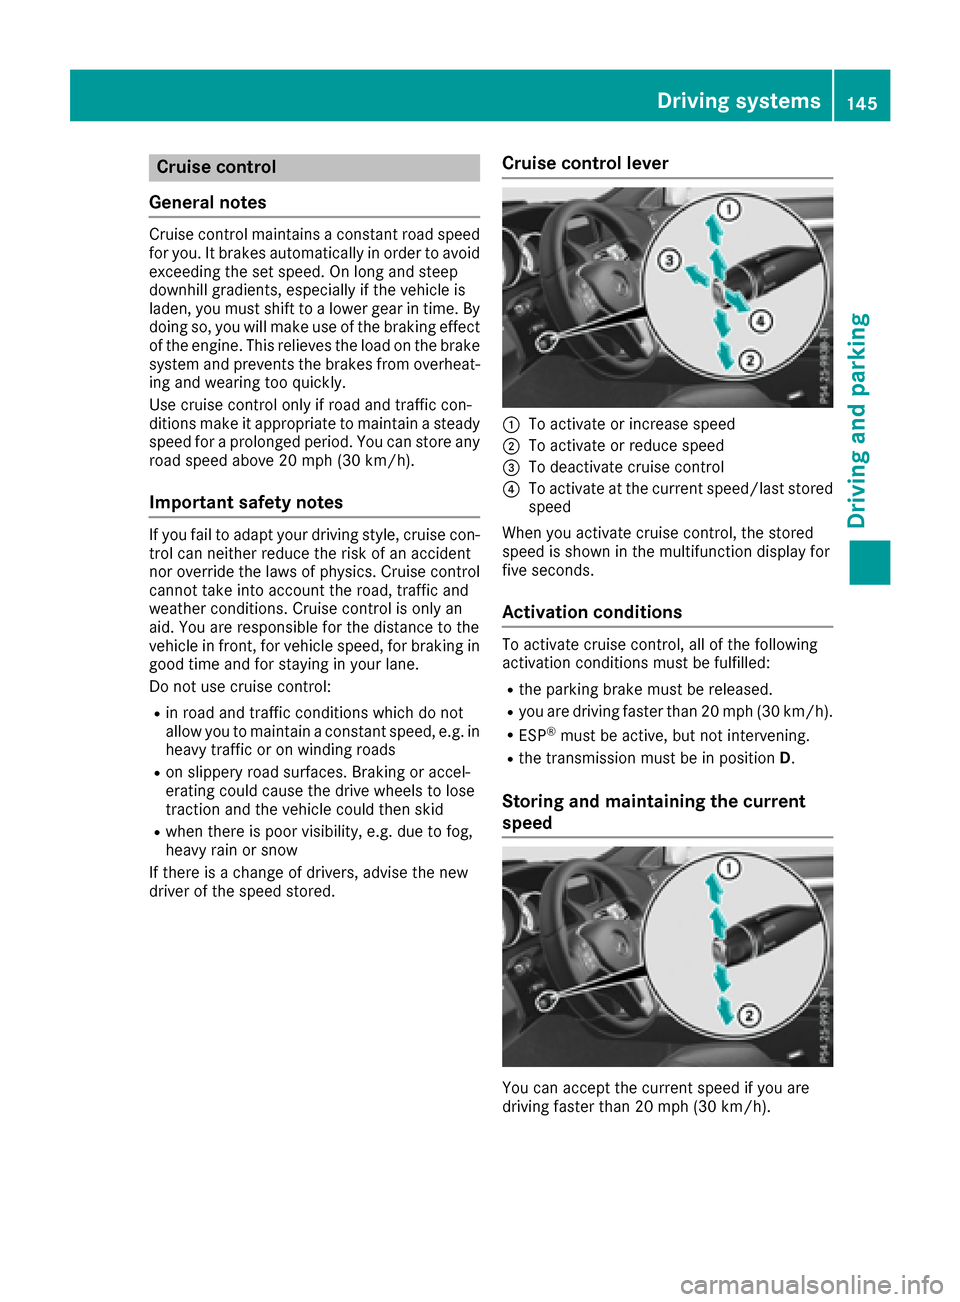
:To activate or increase speed
;To activate or reduce speed
=To deactivate cruise control
?To activate at the current speed/last stored
speed
When you activate cruise control, the stored
speed is shown in the multifunction display for
five seconds.
Activation conditions
To activate cruise control, all of the following
activation conditions must be fulfilled:
Rthe parking brake must be released.
Ryou are driving faster than 20 mph (30 km/h).
RESP®must be active, but not intervening.
Rthe transmission must be in position D.
Storing and maintaining the current
speed
You can accept the current speed if you are
driving faster than 20 mph(30 km/h).
Driving system s145
Driving an d parking
Z
Page 149 of 318
There are several ways to deactivate cruise con-
trol:
XBriefly press the cruise control lever for-
wards:.
or
XBrake.
Cruise control is automatically deactivated if:
Ryou depress the parking brake
Ryou are driving at less than 20 mph (30 km/h)
RESP®intervenes or you deactivate ESP®
Ryou shift the transmission to position Nwhile
driving
If cruise control is deactivated, you will hear a
warning tone. You will see the Cruise Con‐
trol Offmessage in the multifunction display
for approximately five seconds.
iWhen you switch off the engine, the last
speed stored is cleared.
DISTRONIC PLUS
General notes
DISTRONIC PLUS regulates the speed and auto-
matically helps you maintain the distance to the
vehicle detected in front. Vehicles are detected with the aid of the radar sensor system.
DISTRONIC PLUS brakes automatically so that
the set speed is not exceeded.
Change into a lower gear in good time on long
and steep downhill gradients. This is especially
important if the vehicle is laden. By doing so, you
will make use of the braking effect of the engine.
This relieves the load on the brake system and
prevents the brakes from overheating and wear-
ing too quickly.
If DISTRONIC PLUS detects that there is a risk of a collision, you will be warned visually and
acoustically. DISTRONIC PLUS cannot prevent a
collision without your intervention. An intermit-
tent warning tone will then sound and the dis-
tance warning lamp will light up in the instru-
ment cluster. Brake immediately in order to
increase the distance to the vehicle in front or
take evasive action provided it is safe to do so.
For DISTRONIC PLUS to assist you, the radar
sensor system must be operational.
DISTRONIC PLUS operates in range between
0 mph (0 km/h) and 120 mph (200 km/h). Do not use DISTRONI
C P
LUS while driving on
roads with steep gradients.
As DISTRONIC PLUS transmits radar waves, it
can resemble the radar detectors of the respon-
sible authorities. You can refer to the relevant
chapter in the Operator's Manual if questions
are asked about this.
iUSA only: This device has been approved by
the FCC as a "Vehicular Radar System". The
radar sensor is intended for use in an auto-
motive radar system only. Removal, tamper-
ing, or altering of the device will void any war-
ranties, and is not permitted by the FCC. Do
not tamper with, alter, or use in any non-
approved way.
Any unauthorized modification to this device
could void the user's authority to operate the
equipment.
iCanada only: This device complies with
RSS-210 of Industry Canada. Operation is
subject to the following two conditions:
1. This device may not cause harmful inter-
ference, and
2. This device must accept any interference
received, including interference that may
cause undesired operation of the device.
Removal, tampering, or altering of the device
will void any warranties, and is not permitted. Do not tamper with, alter, or use in any non-
ap prove
d way.
Any unauthorized modification to this device
could void the user's authority to operate the
equipment.
Important safety notes
GWARNING
DISTRONIC PLUS does not react to:
Rpeople or animals
Rstationary obstacles on the road, e.g. stop- ped or parked vehicles
Roncoming and crossing traffic
As a result, DISTRONIC PLUS may neither give
warnings nor intervene in such situations.
There is a risk of an accident.
Always pay careful attention to the traffic sit- uation and be ready to brake.
Driving system s147
Driving an d parking
Z
Page 150 of 318
GWARNING
DISTRONIC PLUS cannot always clearly iden-
tify other road users and complex traffic sit-
uations.
In such cases, DISTRONIC PLUS may:
Rgive an unnecessary warning and then
brake the vehicle
Rneither give a warning nor intervene
Raccelerate or brake unexpectedly
There is a risk of an accident.
Continue to drive carefully and be ready to
brake, in particular when warned to do so by
DISTRONIC PLUS.
GWARNING
DISTRONIC PLUS brakes your vehicle with up to 50% of the maximum possible deceleration.
If this braking force is insufficient, DISTRONIC
PLUS warns you visually and audibly. There isa risk of an accident.
In such cases, apply the brakes yourself and
try to take evasive action.
!If DISTRONIC PLUS or the HOLD function is
activated, the vehicle brakes automatically in
certain situations.
To prevent damage to the vehicle, deactivate
DISTRONIC PLUS and the HOLD function in
the following or other similar situations:
Rwhen towing the vehicle
Rin the car wash
If you fail to adapt your driving style, DISTRONIC
PLUS can neither reduce the risk of accident nor
override the laws of physics. DISTRONIC PLUS
cannot take into account the road, traffic and
weather conditions. DISTRONIC PLUS is only an
aid. You are responsible for the distance to the
vehicle in front, for vehicle speed, for braking in good time and for staying in your lane. Do not use DISTRONIC PLUS:
Rin road and traffic conditions which do not
allow you to maintain a constant speed, e.g. in
heavy traffic or on winding roads
Ron slippery road surfaces. Braking or accel-
erating could cause the drive wheels to lose
traction and the vehicle could then skid
Rwhen there is poor visibility, e.g. due to fog,
heavy rain or snow
DISTRONIC PLUS may not detect narrow vehi-
cles driving in front, e.g. motorcycles, or vehi-
cles driving on a different line.
In particular, the detection of obstacles can be
impaired if:
Rthere is dirt on the sensors or anything else
covering the sensors
Rthere is snow or heavy rain
Rthere is interference by other radar sources
Rthere are strong radar reflections, for exam-
ple, in parking garages
If DISTRONIC PLUS no longer detects a vehicle
in front, DISTRONIC PLUS may unexpected ly
a
ccelerate the vehicle to the stored speed.
This speed may:
Rbe too high if you are driving in a filter lane or an exit lane
Rbe so high in the right lane that you pass vehi-cles driving on the left (left-hand drive coun-
tries)
Rbe so high in the left lane that you pass vehi-
cles driving on the right (right-hand drive
countries)
If there is a change of drivers, advise the new
driver of the speed stored.
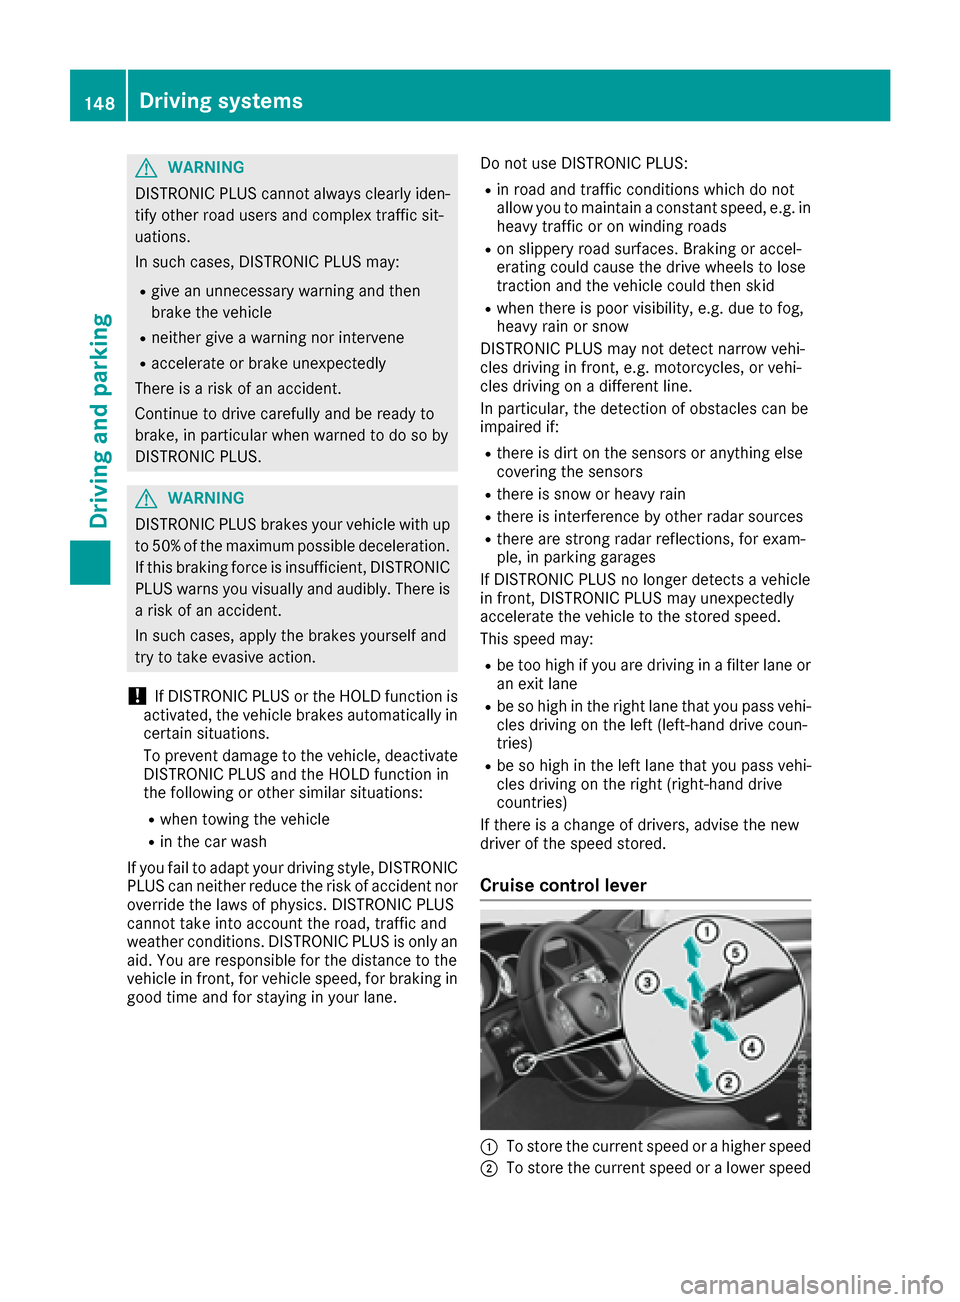
Cruise control lever
:To store the current speed or a higher speed
;To store the current speed or a lower speed
148Driving systems
Driving and parking
Page 157 of 318
cle could come into contact with the curb or
other road boundaries. Be particularly aware of
other road users, e.g. cyclists, that are directly
next to your vehicle.
Obstacles such as building site huts on the lane
or projecting out into the lane are not detected.
An inappropriate steering intervention, e.g. afterintentionally driving over a lane marking, can be
corrected at any time if you steer slightly in the
opposite direction.
DISTRONIC PLUS with Steering Assist and
Stop&Go Pilot cannot continuously keep your
vehicle in lane. In some cases, the steering
intervention is not sufficient to bring the vehicle
back to the lane. In such cases, you must steerthe vehicle yourself to ensure that it does not
leave the lane.
The support provided by the system can be
impaired if:
Rthere is poor visibility, e.g. due to insufficient
illumination of the road, or due to snow, rain,
fog or spray
Rthere is glare, e.g. from oncoming traffic, the
sun or reflection from other vehicles (e.g. if
the road surface is wet)
Rthe windshield is dirty, fogged up, damaged or
covered, for instance by a sticker, in the vicin-
ity of the camera
Rno, or several, unclear lane markings are pres-
ent for one lane, e.g. in a construction area
Rthe lane markings are worn away, dark or cov-
ered up, e.g. by dirt or snow
Rthe distance to the vehicle in front is too small
and the lane markings thus cannot be detec-
ted
Rthe lane markings change quickly, e.g. lanes
branch off, cross one another or merge
Rthe road is narrow and winding
Rthere are strong shadows cast on the road
The system is switched to passive and no longer
assists you by performing steering interventions if:
Ryou actively change lanes
Ryou switch on the turn signal
Rtake your hands off the steering wheel or do
not steer for a prolonged period of time
iAfter you have finished changing lanes,
Steering Assist and Stop&Go Pilot are auto-
matically active again. DISTRONIC PLUS Steering Assist does not pro-
vide assistance:
Ron very sharp corners
Rwhen a loss of tire pressure or a defective tire
has been detected and displayed
Pay attention also to the important safety notes for DISTRONIC PLUS (
Ypage 147).
The steering interventions are carried out with a
limited steering moment. The system requires
the driver to keep his hands on the steering
wheel and to steer himself.
If you do not steer yourself or if you take your
hands off the steering wheel for a prolonged
period of time, the system will first alert you with
a visual warning. A steering wheel symbol
appears in the multifunction display. If you have
still not started to steer and have not taken hold
of the steering wheel after five seconds at the
l
atest, a warning tone also sounds to remind you
to take control of the vehicle. Steering Assist
and Stop&Go Pilot are switched to passive.
DISTRONIC PLUS remains active.
Activating Steering Assist and Stop&Go
Pilot
XActivate the DISTRONIC PLUS with Steering
Assist and Stop&Go Pilot function using the
on-board computer (
Ypage 192).
The DTR+: Steering Assistant Onmes-
sage appears in the multifunction display.
Steering Assist and Stop&Go Pilot are active.
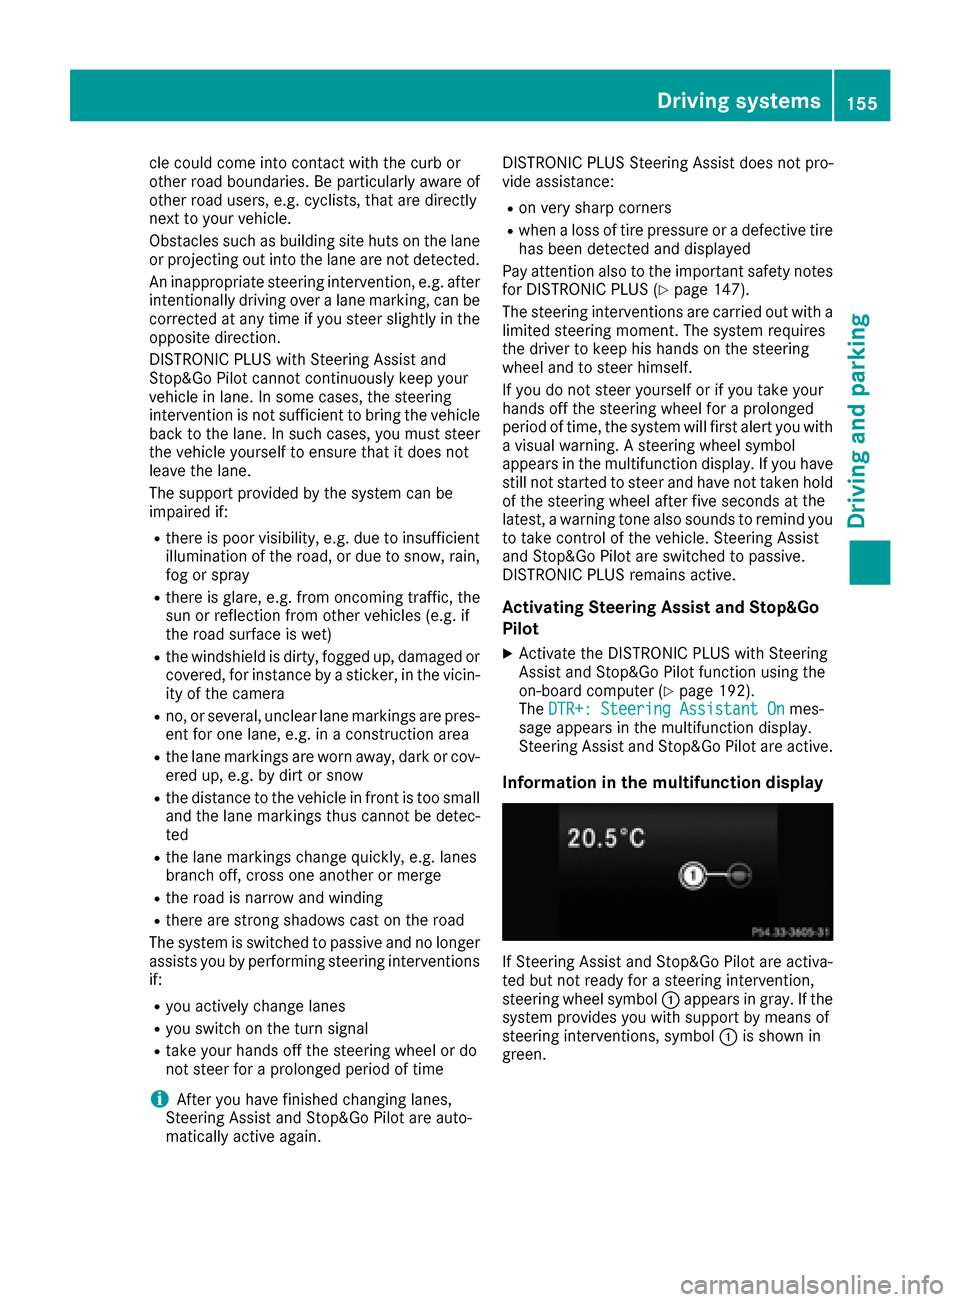
Information in the multifunction display
If Steering Assist and Stop&Go Pilot are activa-
ted but not ready for a steering intervention,
steering wheel symbol :appears in gray. If the
system provides you with support by means of
steering interventions, symbol :is shown in
green.
Driving systems155
Driving and parking
Z
Page 166 of 318
tone. The vehicle is now parked. The vehicle is
kept stationary without the driver having to
depress the brake pedal. The braking effect is
canceled when you depress the accelerator
pedal.
Active Parking Assist no longer supports you
with steering interventions and brake applica-
tions. When Active Parking Assist is finished,
you must steer and brake again yourself.
PARKTRONIC is still available.
XManeuver if necessary.
XAlways observe the warning messages dis-
played by PARKTRONIC (Ypage 159).
Parking tips:
RThe way your vehicle is positioned in the park-
ing space after parking is dependent on vari-
ous factors. These include the position and
shape of the vehicles parked in front and
behind it and the conditions of the location. It
may be the case that Active Parking Assist
guides you too far into a parking space, or not
far enough into it. In some cases, it may also
lead you across or onto the curb. If necessary,
you should cancel the parking procedure with
Active Parking Assist.
RYou can also select preselect transmission
position D. The vehicle redirects and does not
drive as far into the parking sp ace. Sh
ould a
gear be changed too early, the parking pro-
cedure will be canceled. A sensible parking
position can no longer be achieved from this
position.
Exiting a parking space
In order that Active Parking Assist can support
you when exiting the parking space:
Rthe border of the parking space must be high enough at the front and the rear. A curb is too
small, for example.
Rthe border of the parking space must not be
too wide, as the position of the vehicle must
not exceed an angle of 45° to the starting
position as it is maneuvering into the parking
space.
Ra maneuvering distance of at least 3.3 ft
(1.0 m) must be available .
iVehicles with automatic transmission:
If PARKTRONIC detects obstacles, Active
Parking Assist brakes automatically whilst the
vehicle exits the parking space. You are
responsible for braking in good time. Active Parking Assist can only assist you with
exiting a parking space if you have parked the
vehicle parallel to the direction of travel using
Active Parking Assist.
XStart the engine.
XRelease the parking brake.
XSwitch on the turn signal in the direction you
are pulling away.
XShift the transmission to position
Dor R.
The Start Park Assist? Yes: OK No:
% message appears in the multifunction
display.
XTo cancel the procedure: press the%
button on the multifunction steering wheel or
pull away.
or
XTo exit a parking space using Active Park-
ing Assist: press theabutton on the mul-
tifunction steering wheel.
The Park Assist Active Accelerate
and Brake Observe Surroundingsmes-
sage appears in the multifunction display.
XLet go of the multifunction steering wheel.
XPull away, being ready to brake at all times. Do
not exceed a maximum speed of approx-
imately 6 mph (10 km/h) when exiting a park-
ing space. Otherwise Active Parking Assist
will be canceled.
XShift the transmission to position Dor Ras
required or according to the message while
the vehicle is stationary.
Active Parking Assist immediately steers in
the other direction. The Park Assist
ActiveAccelerateandBrakeObserveSurroundingsmessage appears in the mul-
tifunction display.
iYou will achieve the best results by waiting
for the steering procedure to complete before
pulling away.
If you back up after activation, the steering
wheel is moved to the straight-ahead posi-
tion.
XDrive forwards and back up as instructed by
the PARKTRONIC warning displays.
Once you have exited the parking space com-
pletely, the steering wheel is moved to the
straight-ahead position. You hear a tone and the
Park Assist Finished
message appears in
the multifunction display. You will then have to
steer and merge into traffic on your own.
PARKTRONIC is still available. You can take over
164Driving systems
Driving and parking
Page 167 of 318
the steering, before the vehicle has exited the
parking space completely. This is useful, for
example when you recognize that it is already
possible to pull out of the parking space.
Canceling Active Parking Assist
You can cancel Active Parking Assist at any
time.
XStop the movement of the multifunction
steering wheel or steer yourself.
Active Parking Assist will be canceled at once.
ThePark Assist Canceled
message
appears in the multifunction display and you
hear a tone.
or
XPress the PARKTRONIC button on the center
console (Ypage 160).
PARKTRONIC is switched off and Active Park-
ing Assist is immediately canceled. The Park
Assist Canceledmessage appears in the
multifunction display and you hear a tone.
Active Parking Assist is canceled automatically
if:
Rthe transmission is shifted too early
Rtransmission position Pis selected
Rparking using Active Parking Assist is no lon-
ger possible
Ryou are driving faster than 6 mph (10 km/h)
Ra wheel spins, ESP®intervenes or fails. In
such cases the ÷warning lamp lights up in
the instrument cluster.
A warning tone sounds. The parking symbol dis-
appears and the multifunction display shows the
Park Assist Canceled
message.
When Active Parking Assist is canceled, you
must steer and brake again yourself.
If a system malfunction occurs, the vehicle is
braked to a standstill. To drive on, depress the
accelerator again.
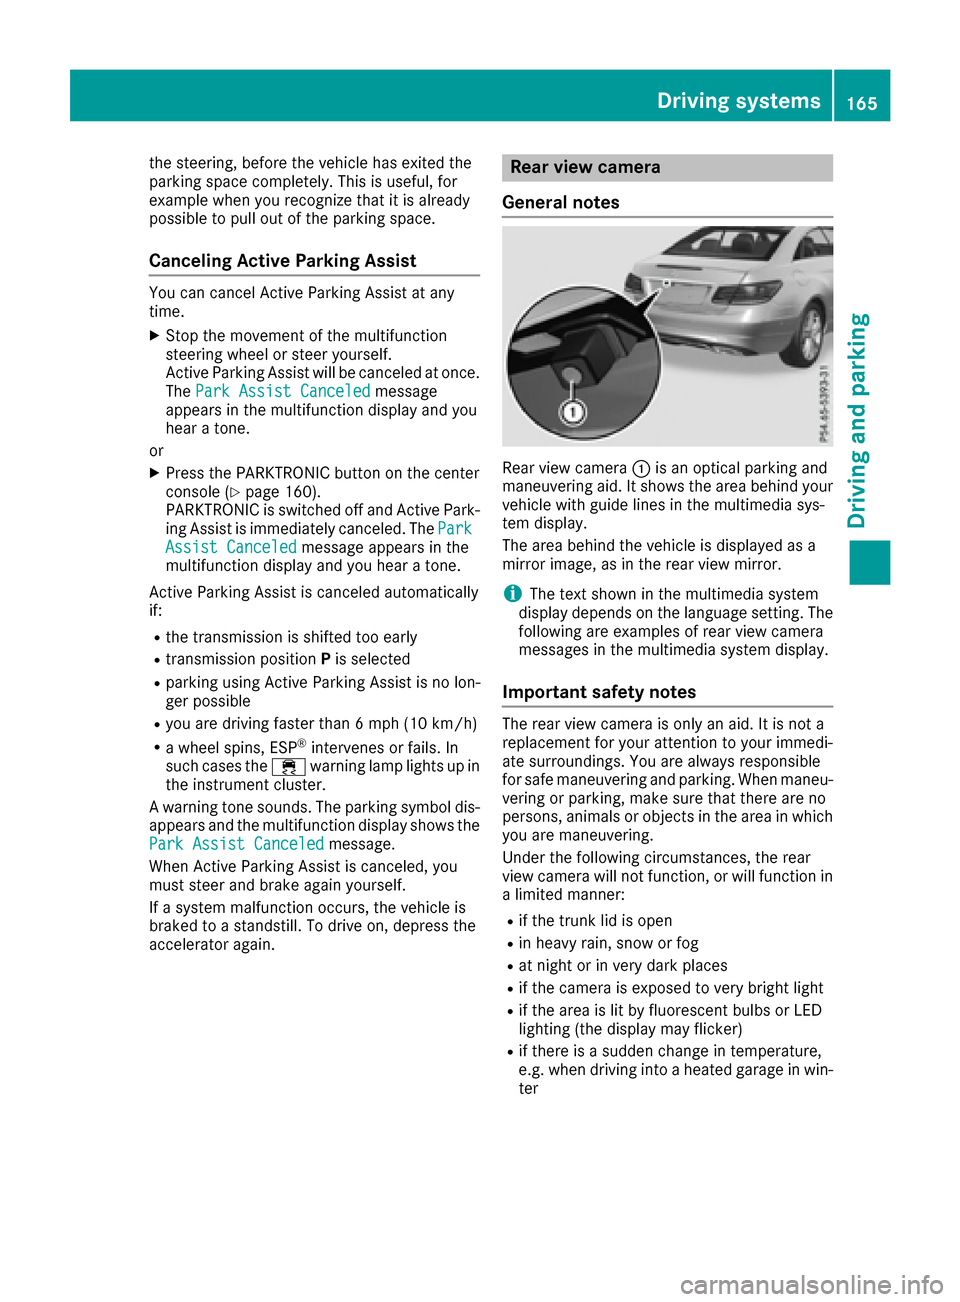
Rear view camera
General notes
Rear view camera :is an optical parking and
maneuvering aid. It shows the area behind your
vehicle with guide lines in the multimedia sys-
tem display.
The area behind the vehicle is displayed as a
mirror image, as in the rear view mirror.
iThe text shown in the multimedia system
display depends on the language setting. The
following are examples of rear view camera
messages in the multimedia system display.
Important safety notes
The rear view camera is only an aid. It is not a
replacement for your attention to your immedi-
ate surroundings. You are always responsible
for safe maneuvering and parking. When maneu-
vering or parking, make sure that there are no
persons, animals or objects in the area in which you are maneuvering.
Under the following circumstances, the rear
view camera will not function, or will function in
a limited manner:
Rif the trunk lid is open
Rin heavy rain, snow or fog
Rat night or in very dark places
Rif the camera is exposed to very bright light
Rif the area is lit by fluorescent bulbs or LED
lighting (the display may flicker)
Rif there is a sudden change in temperature,
e.g. when driving into a heated garage in win- ter
Driving system s165
Driving an d parking
Z
Page 171 of 318
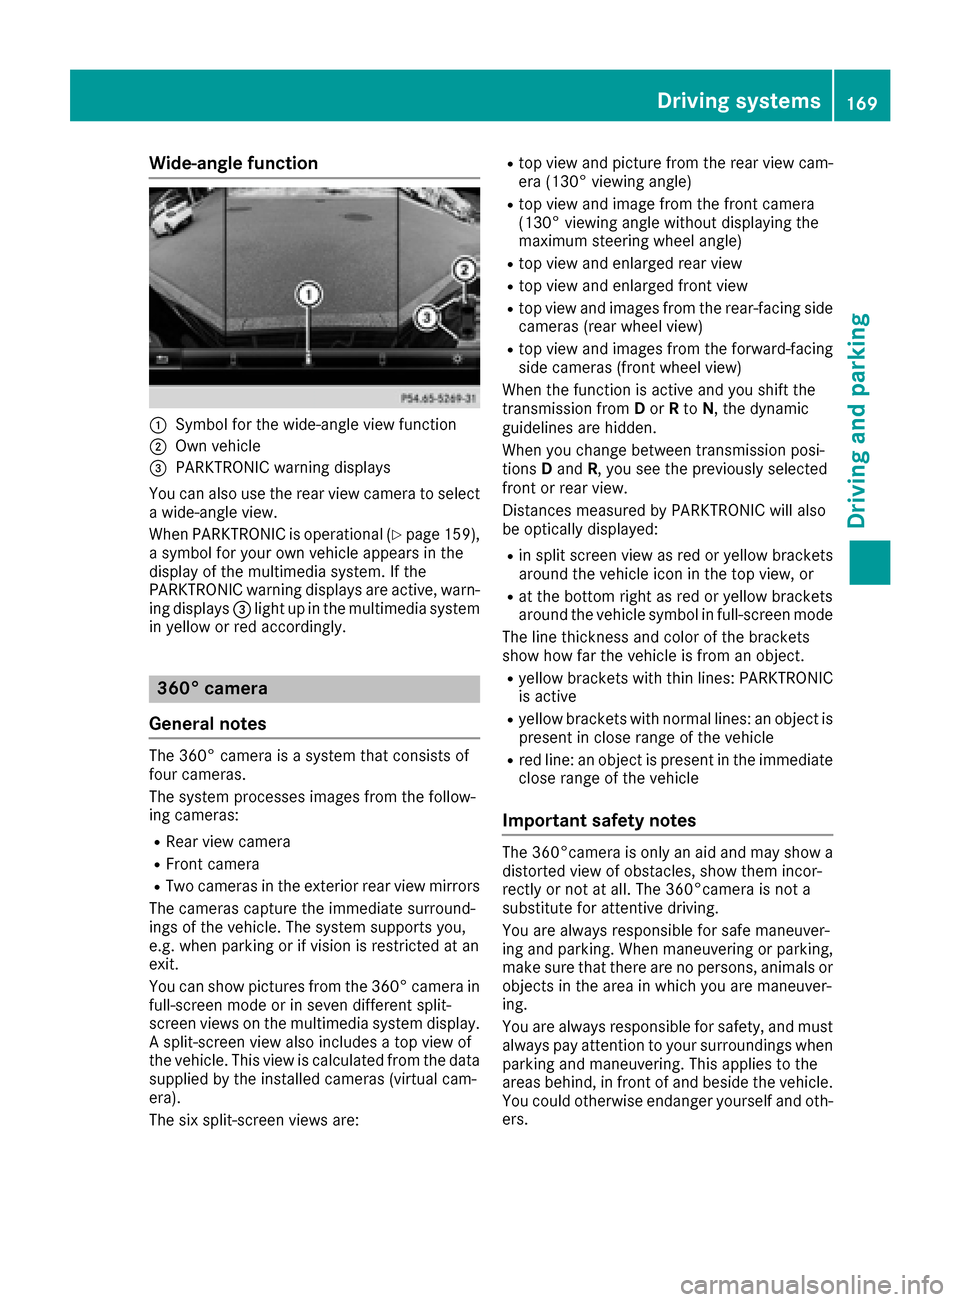
Wide-angle function
:Symbol for the wide-angle view function
;Own vehicle
=PARKTRONIC warning displays
You can also use the rear view camera to select
a wide-angle view.
When PARKTRONIC is operational (
Ypage 159),
a symbol for your own vehicle appears in the
display of the multimedia system. If the
PARKTRONIC warning displays are active, warn-
ing displays =light up in the multimedia system
in yellow or red accordingly.
360° camera
General notes
The 360° camera is a system that consists of
four cameras.
The system processes images from the follow-
ing cameras:
RRear view camera
RFront camera
RTwo cameras in the exterior rear view mirrors
The cameras capture the immediate surround-
ings of the vehicle. The system supports you,
e.g. when parking or if vision is restricted at an
exit.
You can show pictures from the 360° camera in
full-screen mode or in seven different split-
screen views on the multimedia system display.
A split-screen view also includes a top view of
the vehicle. This view is calculated from the data
supplied by the installed cameras (virtual cam-
era).
The six split-screen views are:
Rtop view and picture from the rear view cam-
era (130° viewing angle)
Rtop view and image from the front camera
(130° viewing angle without displaying the
maximum steering wheel angle)
Rtop view and enlarged rear view
Rtop view and enlarged front view
Rtop view and images from the rear-facing side
cameras (rear wheel view)
Rtop view and images from the forward-facing
side cameras (front wheel view)
When the function is active and you shift the
transmission from Dor Rto N, the dynamic
guidelines are hidden.
When you change between transmission posi-
tions Dand R, you see the previously selected
front or rear view.
Distances measured by PARKTRONIC will also
be optically displayed:
Rin split screen view as red or yellow brackets around the vehicle icon in the top view, or
Rat the bottom right as red or yellow brackets
around the vehicle symbol in full-screen mode
The line thickness and color of the brackets
show how far the vehicle is from an object.
Ryellow brackets with thin lines: PARKTRONIC
is active
Ryellow brackets with normal lines: an object is
present in close range of the vehicle
Rred line: an object is present in the immediate
close range of the vehicle
Important safety notes
The 360°camera is only an aid and may show a
distorted view of obstacles, show them incor-
rectly or not at all. The 360°camera is not a
substitute for attentive driving.
You are always responsible for safe maneuver-
ing and parking. When maneuvering or parking,
make sure that there are no persons, animals or
objects in the area in which you are maneuver-
ing.
You are always responsible for safety, and must
always pay attention to your surroundings when
parking and maneuvering. This applies to the
areas behind, in front of and beside the vehicle.
You could otherwise endanger yourself and oth-
ers.
Driving systems169
Driving and parking
Z
Page 172 of 318
The 360° camera will not function or will func-
tion in a limited manner:
Rif the doors are open
Rif the exterior mirrors are folded in
Rif the trunk lid is open
Rin heavy rain, snow or fog
Rat night or in very dark places
Rif the cameras are exposed to very bright light
Rif the area is lit by fluorescent bulbs or LED
lighting (the display may flicker)
Rif there is a sudden change in temperature,
e.g. when driving into a heated garage in win-ter
Rif the camera lenses are dirty or covered
Rif the vehicle components in which the cam-
eras are installed are damaged. In this event,have the camera position and setting checked
at a qualified specialist workshop
Do not use the 360° camera in this case. You
can otherwise injure others or cause damage to objects or the vehicle.
Guide lines are always shown at road level.
The field of vision and other functions of the
camera system may be restricted due to addi-
tional accessories on the rear of the vehicle (e.g.
license plate holder, bicycle rack).
On vehicles with height-adjustable chassis,
depending on technical conditions, leaving the
standard height can result in:
Rinaccuracies in the guide lines
Rinaccuracies in the display of generated
images (top view)
Activation conditions
The 360° camera image can be displayed if:
Ryour vehicle is equipped with a 360° camera
Rthe SmartKey is in position 2in the ignition
lock
Rthe multimedia system is switched on
Rthe 360° Camerafunction is switched on
Switching on the 360° camera
XPress the Øbutton in the center console
for longer than two seconds.
Depending on whether position Dor Ris
engaged, the following is shown:
Ra split screen with top view and the image
from the front camera or
Ra split screen with top view and the image
from the rear view camera
or
XPress the Øbutton in the center console.
The vehicle menu is displayed.
XSelect 360°Cameraand press 7to confirm.
Depending on whether position Dor Ris
engaged, the following is shown:
Ra split screen with top view and the image
from the front camera or
Ra split screen with top view and the image
from the rear view camera
Activating the 360° camera using
reverse gear
The 360° camera images can be automatically
displayed by engaging reverse gear.
XMake sure that the SmartKey is in position 2
in the ignition lock.
XMake sure that the Activation by R gearfunction is selected in the multimedia system
(see the separate operating instructions).
XTo show the 360° camera image: engage
reverse gear.
The area behind the vehicle is shown in the
multimedia system display in split-screen
mode. You see the top view of the vehicle and
the image from the rear view camera.
Selecting the split-screen and full
screen displays
Switching between split screen views
XTo switch to the line with the vehicle icons:
slide 5the controller.
XTo select one of the vehicle icons: turn 3
the controller.
XTo switch to 180° View:turn 3 the con-
troller to select 180° View
and press7to
confirm.
iThe 180°Viewoption is only available in the
following views:
RTop view with picture from the rear view
camera
RTop view with picture from the front camera
170Driving systems
Driving and parking