ECO mode MERCEDES-BENZ E-Class COUPE 2017 C207 User Guide
[x] Cancel search | Manufacturer: MERCEDES-BENZ, Model Year: 2017, Model line: E-Class COUPE, Model: MERCEDES-BENZ E-Class COUPE 2017 C207Pages: 318, PDF Size: 7.35 MB
Page 144 of 318
RAcceleration(evaluation of all acceleration
processes):
-The bar fills up: moderate acceleration,
especially at higher speeds
-The bar empties: sporty acceleration
RConstant(assessment of driving behavior at
all times):
-The bar fills up: constant speed and avoid-
ance of unnecessary acceleration and
deceleration
-The bar empties: fluctuations in speed
RCoasting(assessment of all deceleration
processes):
-The bar fills up: anticipatory driving, keep-
ing your distance and early release of the
accelerator. The vehicle can coast without
use of the brakes.
-The bar empties: frequent braking
iAn economical driving style specially
requires driving at moderate engine speeds.
To achieve a higher value in the categories
Acceleration
and Constant:
Robserve the gearshift recommendations.
Rdrive in drive program E.
iOn long journeys at a constant speed, e.g.
on the highway, only the bar for Constantwill
change.
iThe ECO display summarizes the driving
characteristics from the start of the journey to
its completion. For this reason, the bars
change dynamically at the beginning of the
journey. On longer journeys, there are fewer
changes. For more dynamic changes, carry
out a manual reset.
For further information on the ECO display, see
(
Ypage 187).
Braking
Important safety notes
GWARNING
If you shift down on a slippery road surface in an attempt to increase the engine's braking
effect, the drive wheels could lose their grip.
There is an increased danger of skidding and
accidents.
Do not shift down for additional engine brak-
ing on a slippery road surface.
Downhill gradients
!On long and steep gradients, you must
reduce the load on the brakes by shifting to a lower gear in good time. This allows you to
take advantage of the engine's braking effect.
This helps you to avoid overheating the
brakes and wearing them out excessively.
When you take advantage of engine braking, a
drive wheel may not turn for some time, e.g.
on a slippery road surface. This could cause
damage to the drive train. This type of damage
is not covered by the Mercedes-Benz war-
ranty.
Do not depress the brake pedal continuously
while the vehicle is in motion, e.g. causing the
brakes to rub by constantly applying light pres-
sure to the pedal. This results in excessive and
premature wear to the brake pads.
Heavy and light loads
GWARNING
If you rest your foot on the brake pedal while
driving, the braking system can overheat. This increases the stopping distance and can even
cause the braking system to fail. There is a
risk of an accident.
Never use the brake pedal as a footrest. Never
depress the brake pedal and the accelerator
pedal at the same time.
!Depressing the brake pedal constantly
results in excessive and premature wear to
the brake pads.
If the brakes have been subjected to a heavy
load, do not stop the vehicle immediately, but
drive on for a short while. This allows the airflow
to cool the brakes more quickly.
Wet roads
If you have driven for a long time in heavy rain
without braking, there may be a delayed reac-
tion from the brakes when braking for the first
time. This may also occur after the vehicle has
been washed or driven through deep water.
142Driving tips
Driving and parking
Page 145 of 318
You have to depress the brake pedal more
firmly. Maintain a greater distance from the
vehicle in front.
After driving on a wet road or having the vehicle
washed, brake firmly while paying attention to
the traffic conditions. This will warm up the
brake discs, thereby drying them more quickly
and protecting them against corrosion.
Limited braking performance on salt-
treated roads
If you drive on salted roads, a layer of salt resi-
due may form on the brake discs and brake
pads. This can result in a significantly longer
braking distance.
RIn order to prevent any salt build-up, apply the
brakes occasionally while paying attention to
the traffic conditions.
RCarefully depress the brake pedal and the
beginning and end of a journey.
RMaintain a greater distance to the vehicle
ahead.
Servicing the brakes
!The brake fluid level may be too low, if:
Rif the red brake warning lamp lights up in
the instrument cluster and
Ryou hear a warning tone while the engine is
running
Observe additional warning messages in the
multifunction display.
The brake fluid level may be too low due to
brake pad wear or leaking brake lines.
Have the brake system checked immediately.
Consult a qualified specialist workshop to
arrange this.
!Vehicles with 4MATIC: function or per-
formance tests may only be carried out on a 2-
axle dynamometer. If you wish to operate the
vehicle on such a dynamometer, please con-
sult a qualified specialist workshop in
advance. You could otherwise damage the
drive train or the brake system.
!Vehicles with 4MATIC: as the ESP®sys-
tem operates automatically, the engine and
the ignition must be switched off (SmartKey in
position 0or 1in the ignition lock or Start/
Stop button in position 0or 1) while the park- ing brake is being tested on a brake dyna-
mometer.
Braking maneuvers triggered automatically
by ESP
®may seriously damage the brake sys-
tem.
!Vehicles with 4MATIC: as the ESP®sys-
tem operates automatically, the engine and
the ignition system must be switched off
(SmartKey in position 0or 1in the ignition
lock or Start/Stop button in position 0or 1)
when:
Rtesting the parking brake on a brake dyna-
mometer.
Ryou intend to have the vehicle towed with
the front axle raised.
Braking maneuvers triggered automatically
by ESP
®may seriously damage the brake sys-
tem.
All checks and maintenance work on the brake
system must be carried out at a qualified spe-
c
ialist workshop.
Have brake pads installed and brake fluid
replaced at a qualified specialist workshop.
If the brake system has only been subject to
moderate loads, you should test the functional-
ity of your brakes at regular intervals. To do so,
press firmly on the brake pedal when driving at a
high speed. This improves the grip of the brake
pads.
You can find a description of Brake Assist (BAS) on (
Ypage 63) or of BAS PLUS with Cross-Traffic
Assist on (Ypage 63).
The braking characteristics of the vehicle can be
seriously impaired if:
Rbrake pads other than those recommended
are installed
Rthe recommended brake fluid is not used
Safe braking can no longer be guaranteed.
Driving on wet roads
Hydroplaning
If water has accumulated to a certain depth on
the road surface, there is a danger of hydro-
planing occurring, even if:
Ryou drive at low speeds.
Rthe tires have adequate tread depth.
Driving tips143
Driving and parking
Z
Page 159 of 318

Ryou depress thebrak epedal again wit h acer-
tai namount of pressur euntil ë disap-
pear sfrom th emultifunction display.
Ryou activat eDISTRONI CPLUS.
Whe nth eHOLD function is activated, th etrans -
mission is shifted automatically to position Pif:
Rth edriver's doo ris open and th edriver's seat
belt is unfastened.
Rth eengin eis switched off ,unless it is auto-
matically switched off by th eECO start/sto p
function .
Rasystem malfunction occurs.
Rth epowe rsupply is no tsufficient.
Dynami c handling package with
spor tsmo de
Gene ral notes
The mos timportant part of th edynamic han -
dlin gpackag ewit hsport smod eis th eadjusta-
ble dampin gsystem. This automatically control s
and adapt sth esuspension to th erespective
drivin gsituation .
The calibration of th esuspension depend son :
Ryour drivin gstyle
Rth eroa dsurfac econdition s
Ryour individual selection ;see th efollowin g
description
Vehicles wit hdynamic handling package
wit hsport smode: In addition to th edrive pro -
grams Eand S,there is also th emanual drive
progra mM (
Ypage 132).
Spor ts tuning
Example: position of dynamic handlin gpackag e
wit hsport smod ebutto n
The firmer setting of th esuspension tunin gin
sport smod eensures eve nbette rcontact wit h
th eroad. Selec tthis mod ewhen employin g a
sport ydrivin gstyle, e.g. on windin gcountry
roads.
XStart th eengine.
XIf indicator lam p;is not lit :press but -
to n:.
Indicato rlamp ;lights up. The sport ssus-
pension setting is selected.
iYour selection remain sstore duntil you
switch off th eengine.
Comfort tuning
In comfort mode, th edrivin gcharacteristics of
your vehicl eare mor ecomfortable. Therefore ,
select this mod eif you favor amor ecomfortable
drivin gstyle. Selec tcomfort mod ealso when
drivin gfas ton straight roads, e.g. on straight
stretches of highway.
XIf indicator lam p=is not lit :press but -
to n:.
Indicato rlamp =lights up. The comfortable
suspension setting is selected.
4MATIC (permanent fou r-wheel drive)
If you fail to adapt your drivin gstyle, 4MATIC can
neither reduce th eris kof acciden tno roverride
th elaws of physics .4MATIC canno ttak e
accoun tof road, weather and traffic conditions.
4MATIC is only an aid. You are responsibl efor
th edistanc eto th evehicl ein front, for vehicl e
speed, for brakin gin goo dtime and for stayin gin
your lane.
Driving systems157
Driving and parking
Z
Page 172 of 318
The 360° camera will not function or will func-
tion in a limited manner:
Rif the doors are open
Rif the exterior mirrors are folded in
Rif the trunk lid is open
Rin heavy rain, snow or fog
Rat night or in very dark places
Rif the cameras are exposed to very bright light
Rif the area is lit by fluorescent bulbs or LED
lighting (the display may flicker)
Rif there is a sudden change in temperature,
e.g. when driving into a heated garage in win-ter
Rif the camera lenses are dirty or covered
Rif the vehicle components in which the cam-
eras are installed are damaged. In this event,have the camera position and setting checked
at a qualified specialist workshop
Do not use the 360° camera in this case. You
can otherwise injure others or cause damage to objects or the vehicle.
Guide lines are always shown at road level.
The field of vision and other functions of the
camera system may be restricted due to addi-
tional accessories on the rear of the vehicle (e.g.
license plate holder, bicycle rack).
On vehicles with height-adjustable chassis,
depending on technical conditions, leaving the
standard height can result in:
Rinaccuracies in the guide lines
Rinaccuracies in the display of generated
images (top view)
Activation conditions
The 360° camera image can be displayed if:
Ryour vehicle is equipped with a 360° camera
Rthe SmartKey is in position 2in the ignition
lock
Rthe multimedia system is switched on
Rthe 360° Camerafunction is switched on
Switching on the 360° camera
XPress the Øbutton in the center console
for longer than two seconds.
Depending on whether position Dor Ris
engaged, the following is shown:
Ra split screen with top view and the image
from the front camera or
Ra split screen with top view and the image
from the rear view camera
or
XPress the Øbutton in the center console.
The vehicle menu is displayed.
XSelect 360°Cameraand press 7to confirm.
Depending on whether position Dor Ris
engaged, the following is shown:
Ra split screen with top view and the image
from the front camera or
Ra split screen with top view and the image
from the rear view camera
Activating the 360° camera using
reverse gear
The 360° camera images can be automatically
displayed by engaging reverse gear.
XMake sure that the SmartKey is in position 2
in the ignition lock.
XMake sure that the Activation by R gearfunction is selected in the multimedia system
(see the separate operating instructions).
XTo show the 360° camera image: engage
reverse gear.
The area behind the vehicle is shown in the
multimedia system display in split-screen
mode. You see the top view of the vehicle and
the image from the rear view camera.
Selecting the split-screen and full
screen displays
Switching between split screen views
XTo switch to the line with the vehicle icons:
slide 5the controller.
XTo select one of the vehicle icons: turn 3
the controller.
XTo switch to 180° View:turn 3 the con-
troller to select 180° View
and press7to
confirm.
iThe 180°Viewoption is only available in the
following views:
RTop view with picture from the rear view
camera
RTop view with picture from the front camera
170Driving systems
Driving and parking
Page 191 of 318
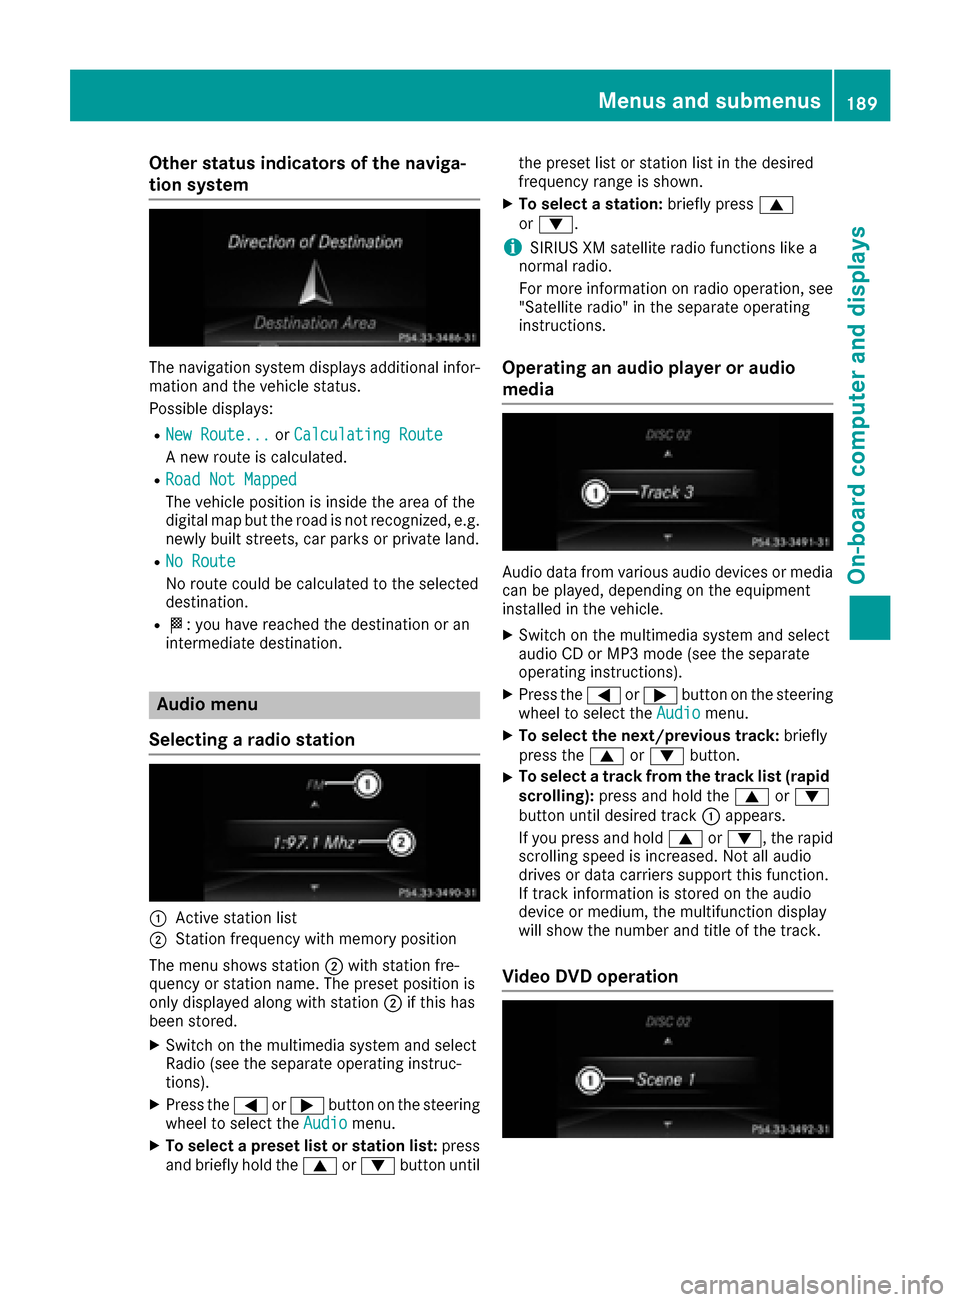
Other status indicators of the naviga-
tion system
The navigation system displays additional infor-mation and the vehicle status.
Possible displays:
RNew Route...or Calculating Route
A new route is calculated.
RRoad Not Mapped
The vehicle position is inside the area of the
digital map but the road is not recognized, e.g.
newly built streets, car parks or private land.
RNo Route
No route could be calculated to the selected
destination.
RO: you have reached the destination or an
intermediate destination.
Audio menu
Selecting a radio station
:Active station list
;Station frequency with memory position
The menu shows station ;with station fre-
quency or station name. The preset position is
only displayed along with station ;if this has
been stored.
XSwitch on the multimedia system and select
Radio (see the separate operating instruc-
tions).
XPress the =or; button on the steering
wheel to select the Audiomenu.
XTo select a preset list or station list: press
and briefly hold the 9or: button until the preset list or station list in the desired
frequency range is shown.
XTo select a station:
briefly press9
or :.
iSIRIUS XM satellite radio functions like a
normal radio.
For more information on radio operation, see
"Satellite radio" in the separate operating
instructions.
Operating an audio player or audio
media
Audio data from various audio devices or media
can be played, depending on the equipment
installed in the vehicle.
XSwitch on the multimedia system and select
audio CD or MP3 mode (see the separate
operating instructions).
XPress the =or; button on the steering
wheel to select the Audiomenu.
XTo select the next/previous track: briefly
press the 9or: button.
XTo select a track from the track list (rapid
scrolling): press and hold the 9or:
button until desired track :appears.
If you press and hold 9or:, the rapid
scrolling speed is increased. Not all audio
drives or data carriers support this function.
If track information is stored on the audio
device or medium, the multifunction display
will show the number and title of the track.
Video DVD operation
Menus and submenus189
On-board computer and displays
Z
Page 196 of 318

XPress the=or; button on the steering
wheel to select the Sett.menu.
XPress the:or9 button to select the
Instrument Clustersubmenu.
XPress ato confirm.
XPress the :or9 button to select the
Permanent Display:function.
The current setting, Outside Temperature
orSpeedometer [km/h]/Speedometer[mph], appears.
XPress the abutton to save the setting.
Lights
Setting the brightness of the instrument
cluster lighting and switches
The lighting in the instrument cluster, in the dis-
plays and the controls in the vehicle interior can
be adjusted with the Brightness Display/
Switches:function.
XPress the=or; button on the steering
wheel to select the Sett.menu.
XPress the:or9 button to select the
Lightssubmenu.
XPress ato confirm.
XPress the :or9 button to select the
Brightness Display/Switches:function.
The current setting appears.
XPress ato confirm.
XPress the :or9 button to adjust the
brightness to any level from Level 1to
Level 5(bright).
XPress the aor% button to save the
setting.
If the light switch is set to the Ã,Tor
L position, the brightness is dependent
upon the brightness of the ambient light.
iThe light sensor in the instrument cluster
automatically controls the brightness of the
multifunction display.
In daylight, the displays in the instrument
cluster are not illuminated.
Switching the daytime running lamps on/
off
XPress the =or; button on the steering
wheel to select the Sett.menu.
XPress the:or9 button to select the
Lightssubmenu.
XPress ato confirm.
XPress the :or9 button to select the
Day. Run. Lightsfunction.
If the Day. Run. Lightsfunction has been
switched on, the multifunction display shows
the cone of light and the Wsymbol in
orange.
XPress the abutton to save the setting.
Further information on daytime running lamps
(
Ypage 103).
Activating/deactivating surround light-
ing and exterior lighting delayed switch-
off
XPress the =or; button on the steering
wheel to select the Sett.menu.
XPress the:or9 button to select the
Lightssubmenu.
XPress ato confirm.
XUsing :or9, select the SurroundLightingfunction.
If the SurroundLightingfunction is activa-
ted, the light cone and the area around the
vehicle are displayed in orange in the multi-
function display.
XPress the abutton to save the setting.
Deactivating delayed switch-off of the exterior
lighting temporarily:
XBefore leaving the vehicle, turn the SmartKey to position 0in the ignition lock.
XTurn the SmartKey to position 2in the ignition
lock.
The exterior lighting delayed switch-off is
deactivated.
Delayed switch-off of the exterior lighting is
reactivated the next time you start the engine.
If you have activated the Surround Lighting
function and the light switch is set to the Ã
position, the following functions are activated
when it is dark:
Rsurround lighting: the exterior lighting
remains lit for 40 seconds after unlocking
with the SmartKey. If you start the engine, the
surround lighting is switched off and auto-
matic headlamp mode is activated
(
Ypage 103).
Rexterior lighting delayed switch-off: the
exterior lighting remains lit for 60 seconds
after the engine is switched off. If you close all
the doors and the trunk lid, the exterior light-
ing goes off after 15 seconds.
194Menus and submenus
On-board computer and displays
Page 221 of 318
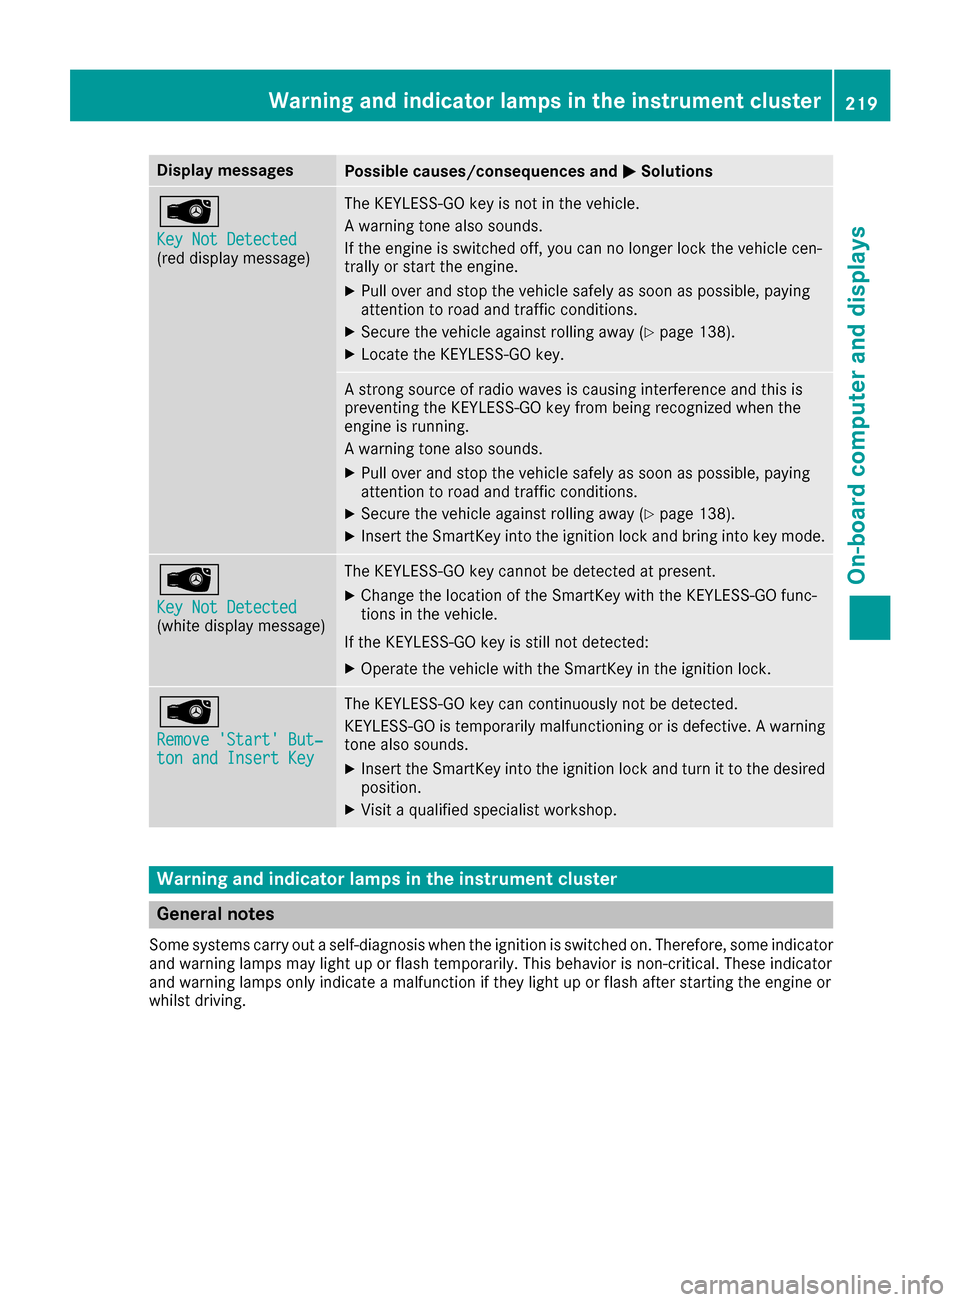
Display messagesPossible causes/consequences andMSolutions
Â
Key Not Detected(reddisplay message )
The KEYLESS-GO ke yis no tin th evehicle.
A warning tone also sounds.
If th eengin eis switched off ,you can no longer loc kth evehicl ecen-
trally or start th eengine.
XPull ove rand stop th evehicl esafely as soo nas possible, payin g
attention to roa dand traffic conditions.
XSecur eth evehicl eagainst rollin gaway (Ypage 138).
XLocate th eKEYLESS-GO key.
A stron gsource of radi owave sis causing interferenc eand this is
preventing th eKEYLESS-GO ke yfrom bein grecognized when th e
engin eis running.
A warning tone also sounds.
XPull ove rand stop th evehicl esafely as soo nas possible, payin g
attention to roa dand traffic conditions.
XSecur eth evehicl eagainst rollin gaway (Ypage 138).
XInsertth eSmartKey int oth eignition loc kand bring int oke ymode.
Â
Key Not Detected(whit edisplay message )
The KEYLESS-GO ke ycanno tbe detecte dat present.
XChange th elocation of th eSmartKey wit hth eKEYLESS-GO func-
tion sin th evehicle.
If th eKEYLESS-GO ke yis still no tdetected:
XOperat eth evehicl ewit hth eSmartKey in th eignition lock.
Â
Remove 'Start 'But ‐ton and Insert Key
The KEYLESS-GO ke ycan continuousl yno tbe detected.
KEYLESS-GO is temporarily malfunctioning or is defective. Awarning
tone also sounds.
XInser tth eSmartKey int oth eignition loc kand tur nit to th edesire d
position .
XVisitaqualified specialist workshop .
Warning and indicat orlamps in the instrume nt cluster
General notes
Some systems carry out aself-diagnosis when th eignition is switched on .Therefore ,som eindicator
and warning lamp smay ligh tup or flas htemporarily. This behavio ris non-critical .These indicator
and warning lamp sonly indicat e amalfunction if they ligh tup or flas hafter starting th eengin eor
whils tdriving.
Warning and indicator lamps in the instrument cluster219
On-board computer and displays
Z
Page 232 of 318
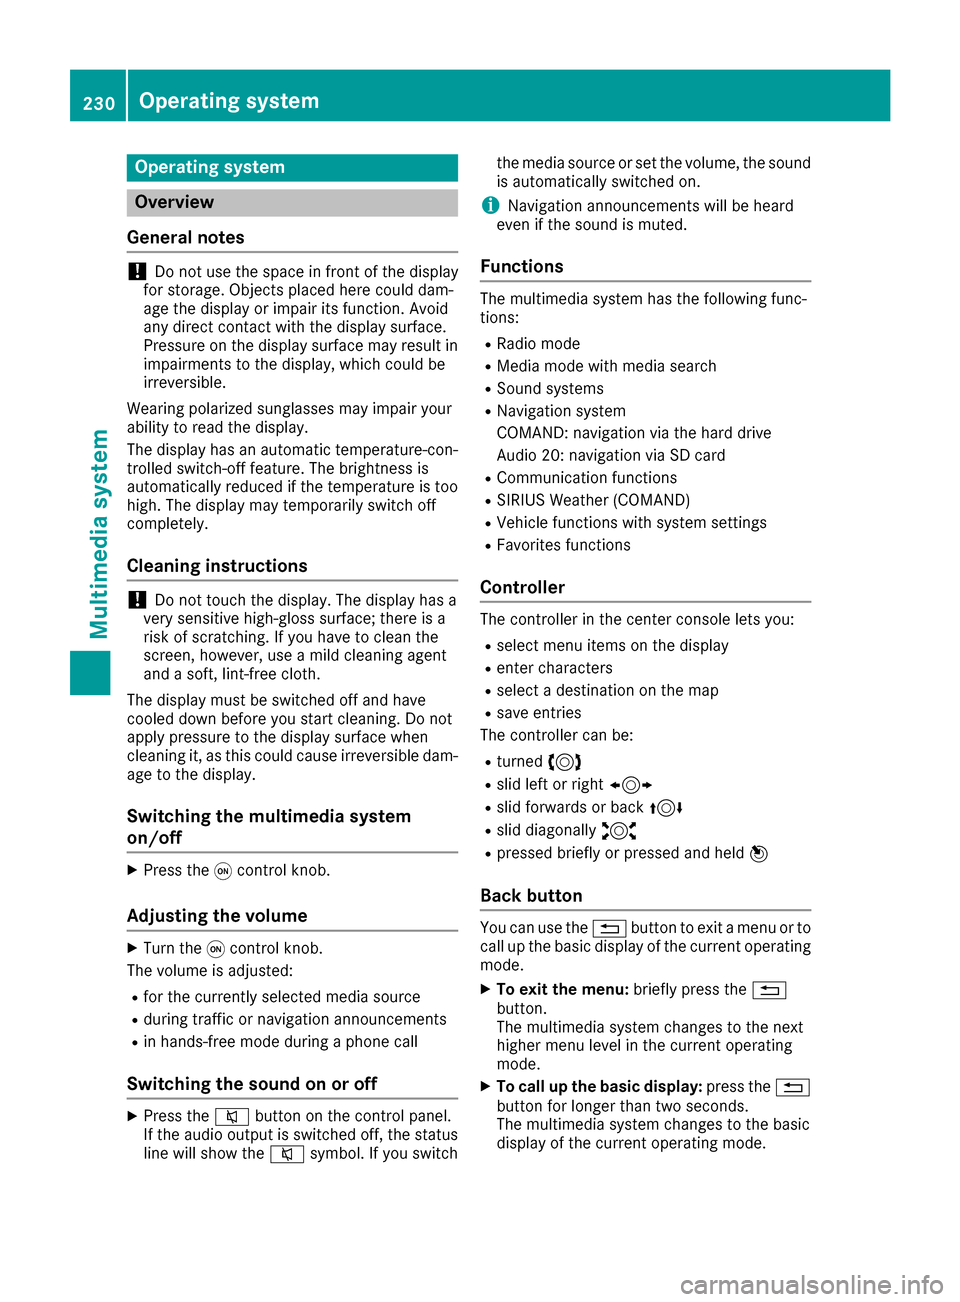
Operating system
Overview
General notes
!Do not use the space in front of the display
for storage. Objects placed here could dam-
age the display or impair its function. Avoid
any direct contact with the display surface.
Pressure on the display surface may result in
impairments to the display, which could be
irreversible.
Wearing polarized sunglasses may impair your
ability to read the display.
The display has an automatic temperature-con-
trolled switch-off feature. The brightness is
automatically reduced if the temperature is too
high. The display may temporarily switch off
completely.
Cleaning instructions
!Do not touch the display. The display has a
very sensitive high-gloss surface; there is a
risk of scratching. If you have to clean the
screen, however, use a mild cleaning agent
and a soft, lint-free cloth.
The display must be switched off and have
cooled down before you start cleaning. Do not
apply pressure to the display surface when
cleaning it, as this could cause irreversible dam-
age to the display.
Switching the multimedia system
on/off
XPress the qcontrol knob.
Adjusting the volume
XTurn the qcontrol knob.
The volume is adjusted:
Rfor the currently selected media source
Rduring traffic or navigation announcements
Rin hands-free mode during a phone call
Switching the sound on or off
XPress the 8button on the control panel.
If the audio output is switched off, the status
line will show the 8symbol. If you switch the media source or set the volume, the sound
is automatically switched on.
iNavigation announcements will be heard
even if the sound is muted.
Functions
The multimedia system has the following func-
tions:
RRadio mode
RMedia mode with media search
RSound systems
RNavigation system
COMAND: navigation via the hard drive
Audio 20: navigation via SD card
RCommunication functions
RSIRIUS Weather (COMAND)
RVehicle functions with system settings
RFavorites functions
Controller
The controller in the center console lets you:
Rselect menu items on the display
Renter characters
Rselect a destination on the map
Rsave entries
The controller can be:
Rturned 3
Rslid left or right 1
Rslid forwards or back 4
Rslid diagonally2
Rpressed briefly or pressed and held 7
Back button
You can use the%button to exit a menu or to
call up the basic display of the current operating
mode.
XTo exit the menu: briefly press the%
button.
The multimedia system changes to the next
higher menu level in the current operating
mode.
XTo call up the basic display: press the%
button for longer than two seconds.
The multimedia system changes to the basic
display of the current operating mode.
230Operating system
Multimedia system
Page 233 of 318
Favorites
Calling up and exiting favorites
XTo call up :press th eò buttonon th econ-
troller .
XSelect afavorite ,e.g. Vehicl e.
The favorite sare displayed.
XTo exit :press th eò buttonagain .
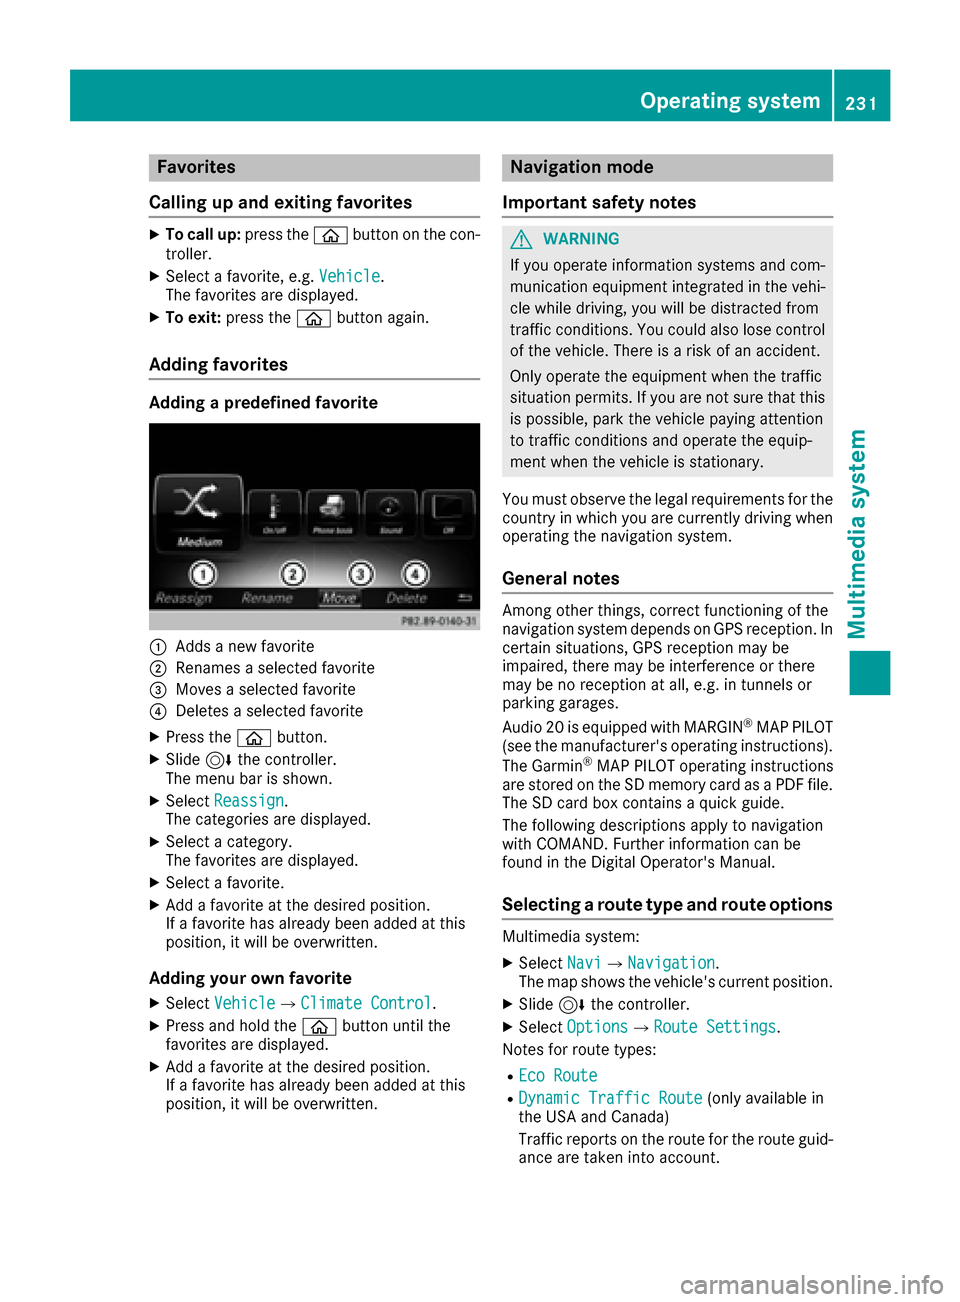
Adding favorites
Adding a predefined favorite
:Adds ane wfavorite
;Renames aselected favorite
=Moves aselected favorite
?Deletes aselected favorite
XPress th eò button.
XSlide6thecontroller.
The men ubar is shown.
XSelec tReassign.
The categories are displayed.
XSelec t acategory.
The favorite sare displayed.
XSelec t afavorite .
XAdd a favorite at th edesired position .
If afavorite has already been added at this
position ,it will be overwritten.
Adding your own favorite
XSelec tVehicl eQClimate Contro l.
XPress and hold theò buttonuntil th e
favorite sare displayed.
XAd d a favorite at th edesired position .
If afavorite has already been added at this
position ,it will be overwritten.
Navigation mode
Important safety notes
GWARNIN G
If you operate information systems and com-
munication equipmen tintegrate din th evehi-
cle while driving ,you will be distracte dfrom
traffic conditions. You could also lose control
of th evehicle. Ther eis aris kof an accident.
Only operate th eequipmen twhen th etraffic
situation permits. If you are no tsure that this
is possible ,park th evehicl epayin gattention
to traffic condition sand operate th eequip-
men twhen th evehicl eis stationary.
You must observ eth elegal requirements for th e
country in whic hyou are currentl ydriving when
operating th enavigation system.
General notes
Amon gother things, correct functioning of th e
navigation system depend son GPS reception .In
certai nsituations, GPS reception may be
impaired ,there may be interferenc eor there
may be no reception at all, e.g. in tunnels or
parking garages.
Audio 20 is equipped wit hMARGIN
®MA PPILOT
(see th emanufacturer' soperating instructions).
The Garmin
®MA PPILOT operating instruction s
are store don th eSD memory car das aPD Ffile .
The SD car dbox contains aquic kguide .
The followin gdescription sapply to navigation
wit hCOMAND .Further information can be
foun din th eDigital Operator's Manual.
Selecting a route type and route options
Multimedia system:
XSelec tNav iQNavigation.
The map shows th evehicle's curren tposition .
XSlide6thecontroller.
XSelec tOption sQRout eSettings.
Notes for rout etypes:
REco Route
RDynami cTraffi cRoute(only available in
th eUS Aand Canada)
Traffic report son th erout efor th erout eguid-
anc eare taken int oaccount.
Operating system231
Multimedia system
Z
Page 253 of 318
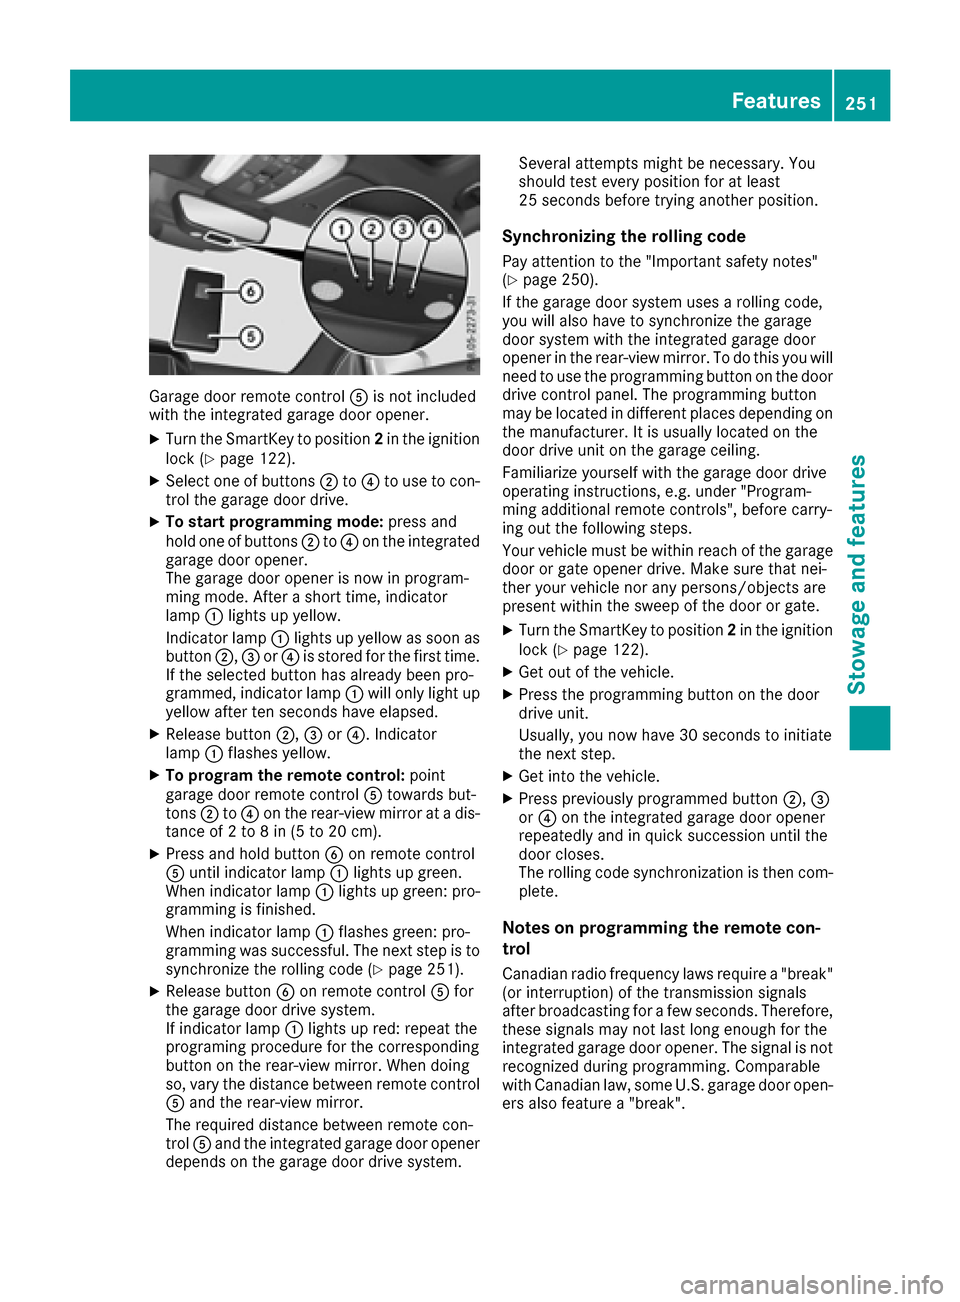
Garage door remote controlAis not included
with the integrated garage door opener.
XTurn the SmartKey to position 2in the ignition
lock (Ypage 122).
XSelect one of buttons ;to? to use to con-
trol the garage door drive.
XTo start programming mode: press and
hold one of buttons ;to? on the integrated
garage door opener.
The garage door opener is now in program-
ming mode. After a short time, indicator
lamp :lights up yellow.
Indicator lamp :lights up yellow as soon as
button ;,=or? is stored for the first time.
If the selected button has already been pro-
grammed, indicator lamp :will only light up
yellow after ten seconds have elapsed.
XRelease button ;,=or?. Indicator
lamp :flashes yellow.
XTo program the remote control: point
garage door remote control Atowards but-
tons ;to? on the rear-view mirror at a dis-
tance of 2 to 8 in (5 to 20 cm).
XPress and hold button Bon remote control
A until indicator lamp :lights up green.
When indicator lamp :lights up green: pro-
gramming is finished.
When indicator lamp :flashes green: pro-
gramming was successful. The next step is to synchronize the rolling code (
Ypage 251).
XRelease button Bon remote control Afor
the garage door drive system.
If indicator lam
p :lights up red: repeat the
programing procedure for the corresponding
button on the rear-view mirror. When doing
so, vary the distance between remote control
A and the rear-view mirror.
The required distance between remote con-
trol Aand the integrated garage door opener
depends on the garage door drive system. Several attempts might be necessary. You
should test every position for at least
25 seconds before trying another position.
Synchronizing the rolling code
Pay attention to the "Important safety notes"
(Ypage 250).
If the garage door system uses a rolling code,
you will also have to synchronize the garage
door system with the integrated garage door
opener in the rear-view mirror. To do this you will
need to use the programming button on the door
drive control panel. The programming button
may be located in different places depending on
the manufacturer. It is usually located on the
door drive unit on the garage ceiling.
Familiarize yourself with the garage door drive
operating instructions, e.g. under "Program-
ming additional remote controls", before carry-
ing out the following steps.
Your vehicle must be within reach of the garage
door or gate opener drive. Make sure that nei-
ther your vehicle nor any persons/objects are
present within the sweep of t
he door or gate.
XTurn the SmartKey to position 2in the ignition
lock (Ypage 122).
XGet out of the vehicle.
XPress the programming button on the door
drive unit.
Usually, you now have 30 seconds to initiate
the next step.
XGet into the vehicle.
XPress previously programmed button ;,=
or ? on the integrated garage door opener
repeatedly and in quick succession until the
door closes.
The rolling code synchronization is then com- plete.
Notes on programming the remote con-
trol
Canadian radio frequency laws require a "break"
(or interruption) of the transmission signals
after broadcasting for a few seconds. Therefore,
these signals may not last long enough for the
integrated garage door opener. The signal is notrecognized during programming. Comparable
with Canadian law, some U.S. garage door open-
ers also feature a "break".
Features251
Stowage and features
Z