tow MERCEDES-BENZ E-Class COUPE 2017 C207 User Guide
[x] Cancel search | Manufacturer: MERCEDES-BENZ, Model Year: 2017, Model line: E-Class COUPE, Model: MERCEDES-BENZ E-Class COUPE 2017 C207Pages: 318, PDF Size: 7.35 MB
Page 60 of 318
Child restraint system
The use of seat belts and child restraint systems
is required by law in:
Rall 50 states
Rthe U.S. territories
Rthe District of Columbia
Rall Canadian provinces
You can obtain further information about the
correct child restraint system from any author-
ized Mercedes-Benz Center.
GWARNING
If the child restraint system is installed incor-
rectly on a suitable seat, it cannot protect as
intended. The child cannot then be restrained
in the event of an accident, heavy braking or
sudden changes of direction. There is an
increased risk of injury, possibly even fatal.
Make sure that you observe the child restraint
system manufacturer's installation instruc-
tions and the notes on use. Please ensure,
that the base of the child restraint system is
always resting completely on the seat cush-
ion. Never place objects, e.g. cushions, under or behind the child restraint system. Only use
child restraint systems with the original cover
designed for them. Only replace damaged
covers with genuine covers.
GWARNING
If the child restraint system is installed incor-
rectly or is not secured, it can come loose in
the event of an accident, heavy braking or a
sudden change in direction. The child
restraint system could be thrown about, strik-
ing vehicle occupants. There is an increased
risk of injury, possibly even fatal.
Always install child restraint systems prop-
erly, even if they are not being used. Make
sure that you observe the child restraint sys-
tem manufacturer's installation instructions.
You will find further information on stowing
objects, luggage or loads under "Loading guide-
lines" (
Ypage 235).
GWARNING
Child restraint systems or their securing sys-
tems which have been damaged or subjected
to a load in an accident can no longer protect
as intended. The child cannot then be
restrained in the event of an accident, heavy
braking or sudden changes of direction. There is an increased risk of injury, possibly even
fatal.
Replace child restraint systems which have
been damaged or subjected to a load in an
accident as soon as possible. Have the secur-
ing systems on the child restraint system
checked at a qualified specialist workshop,
before you install a child restraint system
again.
The securing systems of child restraint systems
are:
Rthe seat belt system
Rthe LATCH-type (ISOFIX) securing rings
Rthe Top Tether anchorages
If it is absolutely necessary to carry a child on
the front-passenger seat, be sure to observe the
information on the "Occupant Classification
System (OCS)" (
Ypage 48). There you will also
find information on deactivating the front-
passenger front air bag.
All child restraint systems must meet the fol-
lowing standards:
RU.S. Federal Motor Vehicle Safety Standards
213 and 225
RCanadian Motor Vehicle Safety Standards
213 and 210.2
Confirmation that the child restraint system cor-
responds to the standards can be f
ound on an
instruction label on the child restraint system.
This confirmation can also be found in the instal-
lation instructions that are included with the
child restraint system.
Observe the warning labels in the vehicle inte-
rior and on the child restraint system.
58Children in the vehicle
Safety
Page 70 of 318
Vehicles without 4MATIC: observe the notes on
ESP®(Ypage 278) when towing the vehicle
with a raised rear axle.
If the å ESP
®OFF warning lamp lights up
continuously, then ESP®is deactivated.
If the ÷ ESP®warning lamp and the å
ESP®OFF warning lamp are lit continuously,
ESP®is not available due to a malfunction.
Observe the information on warning lamps
(
Ypage 222) and display messages which may
be shown in the instrument cluster
(
Ypage 198).
iOnly use wheels with the recommended tire
sizes. Only then will ESP®function properly.
Characteristics of ESP®
General information
If the ÷ ESP warning lamp goes out before
beginning the journey, ESP®is automatically
active.
If ESP
®intervenes, the ÷ESP®warning lamp
flashes in the instrument cluster.
If ESP
®intervenes:
XDo not deactivate ESP®under any circum-
stances.
XOnly depress the accelerator pedal as far as
necessary when pulling away.
XAdapt your driving style to suit the prevailing
road and weather conditions.
ECO start/stop function
The ECO start/stop function switches the
engine off automatically when the vehicle stops
moving. The engine starts automatically when
the driver wants to pull away again. ESP
®
remains in its previously selected status. Exam-
ple: if ESP®was deactivated before the engine
was switched off, ESP®remains deactivated
when the engine is switched on again.
Deactivating/activating ESP®
Important safety notes
You can select between the following states of
ESP®:
RESP®is activated.
RESP®is deactivated.
GWARNING
If you deactivate ESP
®, ESP®no longer sta-
bilizes the vehicle. There is an increased risk
of skidding and an accident.
Only deactivate ESP
®in the situations descri-
bed in the following.
It may be best to deactivate ESP
®in the follow-
ing situations:
Rwhen using snow chains
Rin deep snow
Ron sand or gravel
iActivate ESP®as soon as the situations
described above no longer apply. ESP®will
otherwise not be able to stabilize the vehicle if
the vehicle starts to skid or a wheel starts to
spin.
!Avoid spinning the driven wheels for an
extended period with ESP®deactivated. You
could otherwise damage the drivetrain.
Deactivating/activating ESP®
You can deactivate or activate ESP®via the on-
board computer (Ypage 191).
ESP®deactivated:
The å ESP®OFF warning lamp in the instru-
ment cluster lights up.
ESP
®activated:
The å ESP®OFF warning lamp in the instru-
ment cluster goes out.
Characteristics when ESP®is deactivated
If ESP®is deactivated and one or more wheels
start to spin, the ÷ESP®warning lamp in the
instrument cluster flashes. In such situations,
ESP
®will not stabilize the vehicle.
If you deactivate ESP®:
RESP®no longer improves driving stability.
REngine torque is no longer limited and the
drive wheels are able to spin.
The spinning of the wheels results in a cutting
action for better traction on loose surfaces.
RTraction control is still activated.
RCOLLISION PREVENTION ASSIST is no longer
available; nor is it activated if you brake firmly
with assistance from ESP
®.
68Driving safety systems
Safety
Page 81 of 318
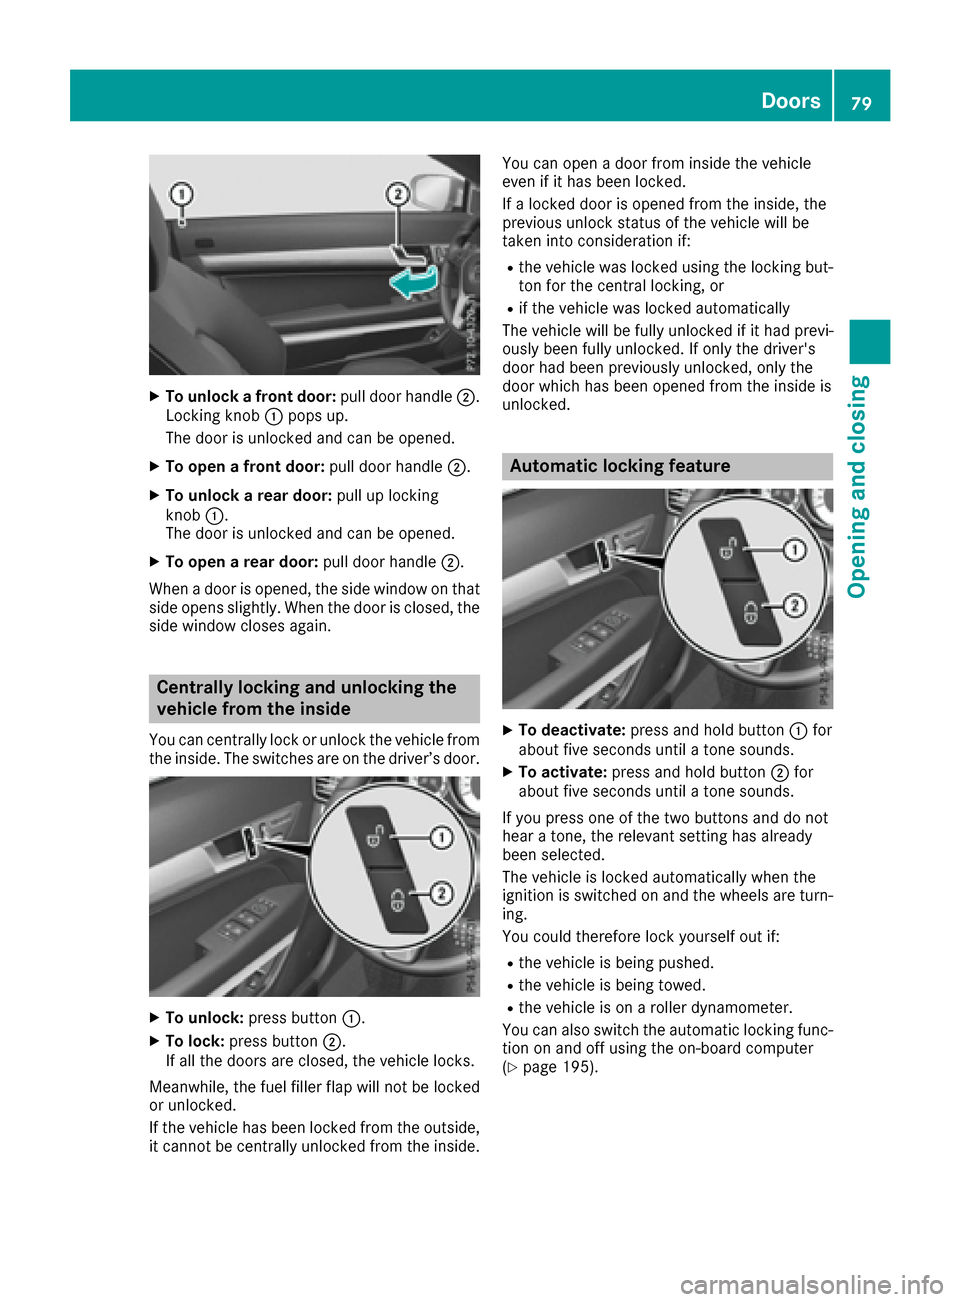
XTo unlock a front door:pull door handle;.
Locking knob :pops up.
The door is unlocked and can be opened.
XTo open a front door: pull door handle;.
XTo unlock a rear door: pull up locking
knob :.
The door is unlocked and can be opened.
XTo open a rear door: pull door handle;.
When a door is opened, the side window on that
side opens slightly. When the door is closed, the
side window closes again.
Centrally locking and unlocking the
vehicle from the inside
You can centrally lock or unlock the vehicle from
the inside. The switches are on the driver’s door.
XTo unlock: press button :.
XTo lock:press button ;.
If all the doors are closed, the vehicle locks.
Meanwhile, the fuel filler flap will not be locked
or unlocked.
If the vehicle has been locked from the outside,
it cannot be centrally unlocked from the inside. You can open a door from inside the vehicle
even if it has been locked.
If a locked door is opened from the inside, the
previous unlock status of the vehicle will be
taken into consideration if:
Rthe vehicle was locked using the locking but-
ton for the central locking, or
Rif the vehicle was locked automatically
The vehicle will be fully unlocked if it had previ-
ously been fully unlocked. If only the driver's
door had been previously unlocked, only the
door which has been opened from the inside is
unlocked.
Automatic locking feature
XTo deactivate: press and hold button :for
about five seconds until a tone sounds.
XTo activate: press and hold button ;for
about five seconds until a tone sounds.
If you press one of the two buttons and do not
hear a tone, the relevant setting has already
been selected.
The vehicle is locked automatically when the
ignition is switched on and the wheels are turn-
ing.
You could therefore lock yourself out if:
Rthe vehicle is being pushed.
Rthe vehicle is being towed.
Rthe vehicle is on a roller dynamometer.
You can also switch the automatic locking func-
tion on and off using the on-board computer
(
Ypage 195).
Doors79
Opening and closing
Z
Page 106 of 318

low-beam headlamps go out after three
minutes.
When the engine is running, the vehicle is sta-
tionary and in bright ambient light: if you turn the
light switch toT, the daytime running lamps
and parking lamps switch on.
If the engine is running and you turn the light
switch to L, the manual settings take prec-
edence over the daytime running lamps.
USA only:
The daytime running lamps improve the visibility of your vehicle during the day. To do this, the
daytime running lamps function must be
switched on using the on-board computer
(
Ypage 194).
If the engine is running and you turn the light
switch to TorL, the manual settings
take precedence over the daytime running
lamps.
Low-beam headlamps
GWARNING
When the light switch is set to Ã, the low-
beam headlamps may not be switched on
automatically if there is fog, snow or other
causes of poor visibility due to the weather
conditions such as spray. There is a risk of an
accident.
In such situations, turn the light switch to
L.
Even if the light sensor does not detect that it is
dark, the parking lamps and low-beam head-
lamps switch on when the ignition is switched on and the light switch is set to the Lposition.
This is a particularly useful function in the event
of rain and fog.
XTo switch on the low-beam headlamps:
turn the SmartKey in the ignition lock to posi- tion 2or start the engine.
XTurn the light switch to L.
The green Lindicator lamp in the instru-
ment cluster lights up.
Rear fog lamp
The rear fog lamp improves visibility of your
vehicle for the traffic behind in the event of thick
fog. Please take note of the country-specific
regulations for the use of rear fog lamps.
XTo switch on the rear fog lamp: turn the
SmartKey in the ignition lock to position 2or
start the engine.
XTurn the light switch to LorÃ.
XPress the Rbutton.
The yellow Rindicator lamp in the instru-
ment cluster lights up.
XTo switch off the rear fog lamp: press the
R button.
The yellow Rindicator lamp in the instru-
ment cluster goes out.
Parking lamps
!If the battery charge is very low, the parking
lamps or standing lamps are automatically
switched off to enable the next engine start.
Always park your vehicle safely and suffi-
ciently lit according to legal standards. Avoid
using the parking lamps
Tover a period of
several hours. If possible, swit
ch on the right-
hand X or left-hand Wstanding lamp.
XTo switch on: turn the light switch to T.
The green Tindicator lamp in the instru-
ment cluster lights up.
Standing lamps
Switching on the standing lamps ensures the
corresponding side of the vehicle is illuminated.
XTo switch on the standing lamps: the
SmartKey should not be in the ignition lock or
it should be in position 0.
XTurn the light switch toW(left-hand side of
the vehicle) or X(right-hand side of the
vehicle).
Combination switch
:High-beam headlamps
;Turn signal, right
104Exterior lighting
Lights and windshield wipers
Page 111 of 318
5¯Continuous wipe,fast
BíSingle wipe
î Towipe wit h washer fluid
XSwitch on the ignition.
XTurn the co mbination switch to the corre-
spondin g position.
In the Ä orÅ position, the appropriate
wipin g frequency isset automatically according
to the intensity of the rain. Inthe Å position,
the rain sensor ismore sensitive than inthe
Ä position, causing the windshield wiper to
wipe more frequently.
If the wiper blades are worn, the windshield will
no longer bewiped properly. This could prevent
you from observing the traff icconditions.
Replacing the wiper blades
Important safety notes
GWAR NING
If the wind shield wiper s begin to move while
you are changing the wiper blades, you could
be trapped bythe wiper arm. There isa risk of
injury.
Alwa ysswit ch off the windshield wiper s and
ignition before changing the wiper blades.
!To avoid damaging the wiper blades, make
sure that you touch only thewiper arm of the
wiper .
!Never open the hood ifawind shield wiper
arm has been folded away from the wind-
shield.
Never fold a windshield wiper armwithout a
wiper blade back onto the windshield.
Hold the windshield wiper arm firmly when
you change the wiper blade. Ifyou release the
wind shield wiper armwithout a wiper blade
and itfalls onto the windshield, thewind shield
may bedamaged bythe force of the impact.
Mercedes-Benz recommends that you have
the wiper blades changed at a qualified spe-
cialist workshop.
Replacing the wiper blades
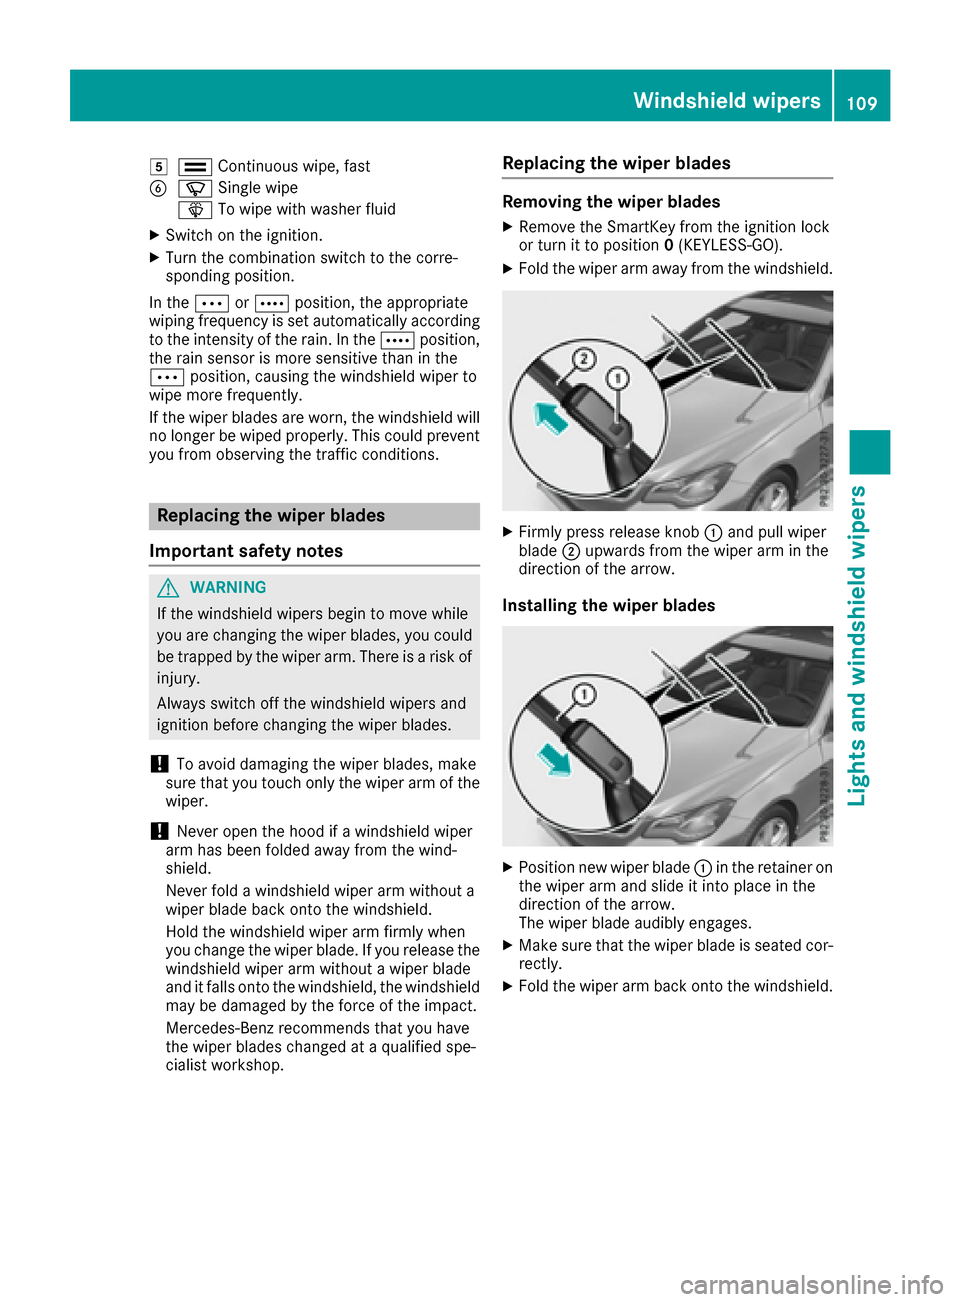
Removing the wiper blades
XRemo vethe SmartKey from the ignition lock
or turn itto position 0(KEYLESS -GO).
XFold the wiper arm away from the windshield.
XFirmly press release knob :and pull wiper
blade ;upwards from the wiper arm in the
direction of the arrow.
Installing the wiper blades
XPosition new wiper blade :in the retainer on
the wiper arm and slide it into place inthe
direction of the arrow.
The wiper blade audibly engages.
XMake sure that the wiperblade is seated cor-
rectly.
XFold the wiper arm back onto the windshield.
Windshield wipers109
Lights and windshield wipers
Z
Page 123 of 318
Notes on breaking-in a new vehicle
Important safety notes
The sensor system of some driving and driving
safety systems adjusts automatically while a
certain distance is being driven after the vehiclehas been delivered or after repairs. Full system
effectiveness is not reached until the end of this
teach-in procedure.
New and replaced brake pads and discs only
reach their optimum braking effect after several hundred kilometers of driving. Compensate for
this by applying greater force to the brake pedal.
The first 1000 miles (1500 km)
The more you look after the engine when it is
new, the more satisfied you will be with its per-
formance in the future.
RYou should therefore drive at varying vehicle
and engine speeds for the first 1000 miles
(1500 km).
RAvoid heavy loads, e.g. driving at full throttle,during this period.
RChange gear in good time, before the tach-
ometer needle is Ôof the way to the red area
of the tachometer.
RTry to avoid depressing the accelerator pedal
beyond the point of resistance (kickdown).
After 1000 miles (1500 km), you can increase
the engine speed gradually and accelerate the
vehicle to full speed.
iYou should also observe these notes on
breaking in if the engine or parts of the drive
train on your vehicle have been replaced.
iAlways observe the respective maximum
permissible speed.
Driving
Important safety notes
GWARNING
Objects in the driver's footwell can restrict the pedal travel or obstruct a depressed pedal.
The operating and road safety of the vehicle is
jeopardized. There is a risk of an accident.
Make sure that all objects in the vehicle are
stowed correctly, and that they cannot enter
the driver's footwell. Install the floormats
securely and as specified in order to ensure
sufficient clearance for the pedals. Do not use
loose floormats and do not place floormats on
top of one another.
GWARNING
Unsuitable footwear can hinder correct usage of the pedals, e.g.:
Rshoes with thick soles
Rshoes with high heels
Rslippers
There is a risk of an accident.
Wear suitable footwear to ensure correct
usage of the pedals.
GWARNING
If you switch off the ignition while driving,
safety-relevant functions are only available
with limitations, or not at all. This could affect, for example, the power steering and the brake
boosting effect. You will require considerably
more effort to steer and brake. There is a risk
of an accident.
Do not switch off the ignition while driving.
GWARNING
If the parking brake has not been fully
released when driving, the parking brake can:
Roverheat and cause a fire
Rlose its hold function.
There is a risk of fire and an accident. Release
the parking brake fully before driving off.
!Do not warm up the engine with the vehicle
stationary. Drive off immediately. Avoid high
engine speeds and driving at full throttle until
the engine has reached its operating temper-
ature.
Only shift the automatic transmission to the
desired drive position when the vehicle is sta-
tionary.
Driving121
Dr iving an d parking
Z
Page 131 of 318

Engaging park position P automatically
Park positionPis automatically engaged if:
Ryou switch off the engine using the Smartkey
and remove the Smartkey
Ryou switch off the engine using the Smartkeyor using the Start/Stop button and open the
driver's door or front-passenger door
Rthe driver's door is opened when the vehicle is
stationary or driving at very low speed and the transmission is in position Dor R
Under certain conditions, the automatic trans-
mission shifts automatically to transmission
position Pif the HOLD function or DISTRONIC
PLUS is activated. Observe the information on
the HOLD function (
Ypage 156) and on
DISTRONIC PLUS (Ypage 150).
Engaging reverse gear R
!Only shift the automatic transmission to R
when the vehicle is stationary.
XIf the transmission is in position Dor N: push
the DIRECT SELECT lever up past the first
point of resistance.
XIf the transmission is in position P: depress
the brake pedal and push the DIRECT SELECT lever up past the first point of resistance.
The ECO start/stop function is not available
when reverse gear is engaged. Further informa-
tion on the ECO start/stop function
(
Ypage 125).
Shifting to neutral N
GWARNING
If children are left unsupervised in the vehicle,
they could:
Ropen the doors, thus endangering other
people or road users.
Rget out and disrupt traffic.
Roperate the vehicle's equipment.
Additionally, children could set the vehicle in
motion if, for example, they:
Rrelease the parking brake.
Rshifting the automatic transmission out of
park position P
RStart the engine.
There is a risk of an accident and injury.
When leaving the vehicle, always take the
SmartKey with you and lock the vehicle. Never
leave children or animals unattended in the
vehicle. Always keep the SmartKey out of
reach of children.
XIf the transmission is in position Dor R: push
the DIRECT SELECT lever up or down to the
first point of resistance.
XIf the transmission is in position P: depress
the brake pedal and push the DIRECT SELECT
lever up or down to the first point of resist-
ance.
If you switch the engine off with the transmis-
sion in position Ror D, the automatic transmis-
sion shifts to Nautomatically.
With the Smartkey: if you then open the driv-
er's door or the front-passenger door or remove
the Smartkey from the ignition, the automatic
transmission shifts to Pautomatically.
With KEYLESS-GO: if you then open the driver's
or front-passenger door, the automatic trans-
mission shifts to P.
If you want the automatic transmission to
remain in neutral N, e.g. when having the vehicle
cleaned in an automatic car wash with a towing
system:
XVehicles with KEYLESS-GO: remove the
Start/Stop button from the ignition lock.
XInsert the Smartkey into the ignition lock.
XAll vehicles: switch the ignition on.
XDepress the brake pedal and keep it
depressed.
XShift to neutral N.
XRelease the brake pedal.
XRelease the parking brake.
XSwitch off the ignition and leave the Smartkey
in the ignition lock.
Engaging drive position D
XIf the transmission is in position Ror N: push
the DIRECT SELECT lever down past the first
point of resistance.
XIf the transmission is in position P: depress
the brake pedal and push the DIRECT SELECT lever down past the first point of resistance.
Automatic transmission129
Driving and parking
Z
Page 132 of 318
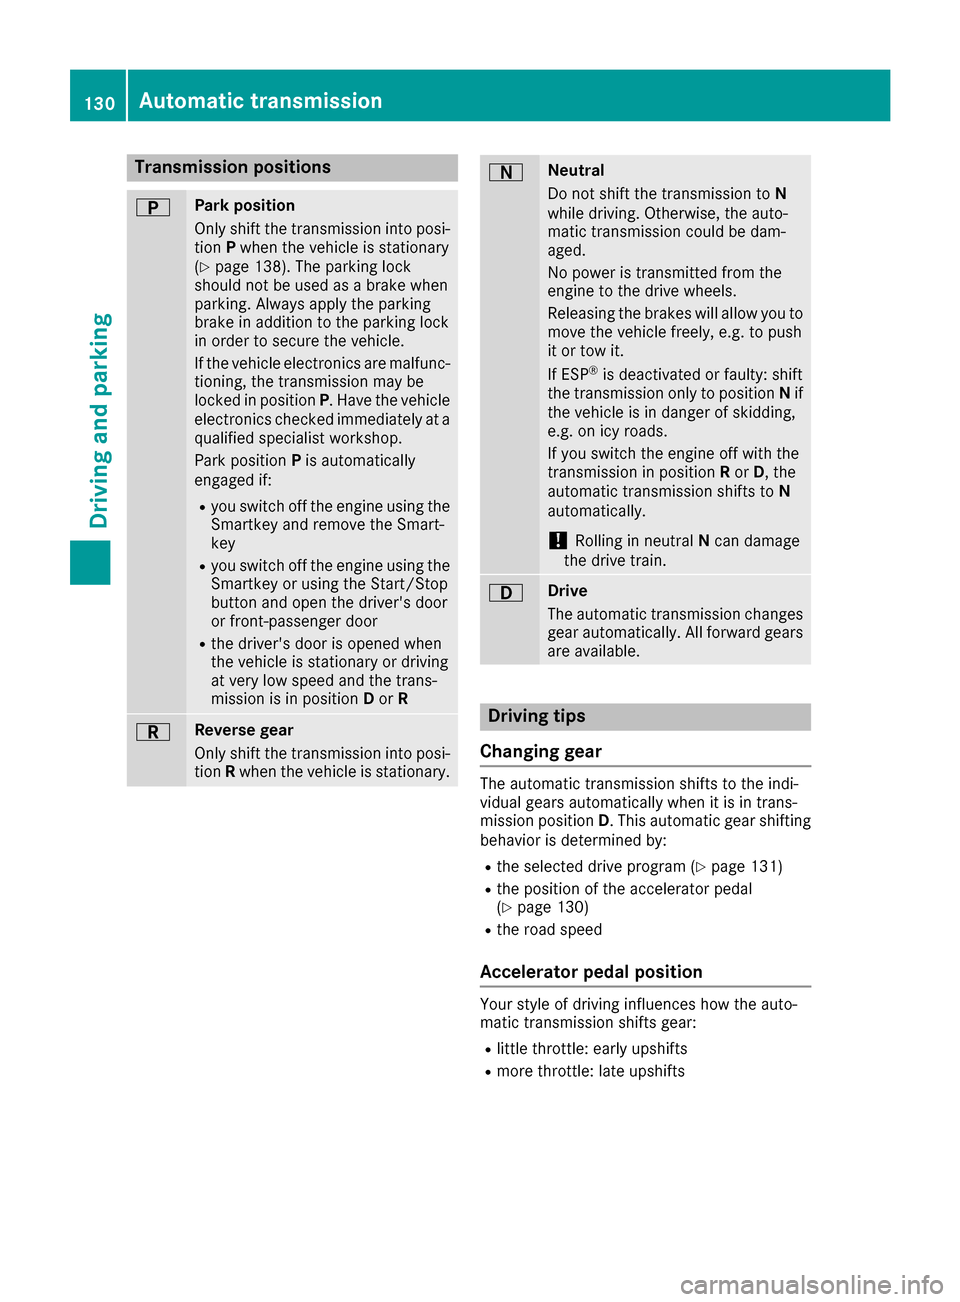
Transmission positions
BPark position
Only shift the transmission into posi-
tionPwhen the vehicle is stationary
(
Ypage 138). The parking lock
should not be used as a brake when
parking. Always apply the parking
brake in addition to the parking lock
in order to secure the vehicle.
If the vehicle electronics are malfunc-
tioning, the transmission may be
locked in position P. Have the vehicle
electronics checked immediately at a
qualified specialist workshop.
Park position Pis automatically
engaged if:
Ryou switch off the engine using the
Smartkey and remove the Smart-
key
Ryou switch off the engine using the
Smartkey or using the Start/Stop
button and open the driver's door
or front-passenger door
Rthe driver's door is opened when
the vehicle is stationary or driving
at very low speed and the trans-
mission is in position Dor R
CReverse gear
Only shift the transmission into posi-
tion Rwhen the vehicle is stationary.
ANeutral
Do not shift the transmission to N
while driving. Otherwise, the auto-
matic transmission could be dam-
aged.
No power is transmitted from the
engine to the drive wheels.
Releasing the brakes will allow you to
move the vehicle freely, e.g. to push
it or tow it.
If ESP
®is deactivated or faulty: shift
the transmission only to position Nif
the vehicle is in danger of skidding,
e.g. on icy roads.
If you switch the engine off with the
transmission in position Ror D, the
automatic transmission shifts to N
automatically.
!Rolling in neutral Ncan damage
the drive train.
7Drive
The automatic transmission changes
gear automatically. All forward gears
are available.
Driving tips
Changing gear
The automatic transmission shifts to the indi-
vidual gears automatically when it is in trans-
mission position D. This automatic gear shifting
behavior is determined by:
Rthe selected drive program (Ypage 131)
Rthe position of the accelerator pedal
(Ypage 130)
Rthe road speed
Accelerator pedal position
Your style of driving influences how the auto-
matic transmission shifts gear:
Rlittle throttle: early upshifts
Rmore throttle: late upshifts
130Automatic transmission
Driving an d parking
Page 137 of 318
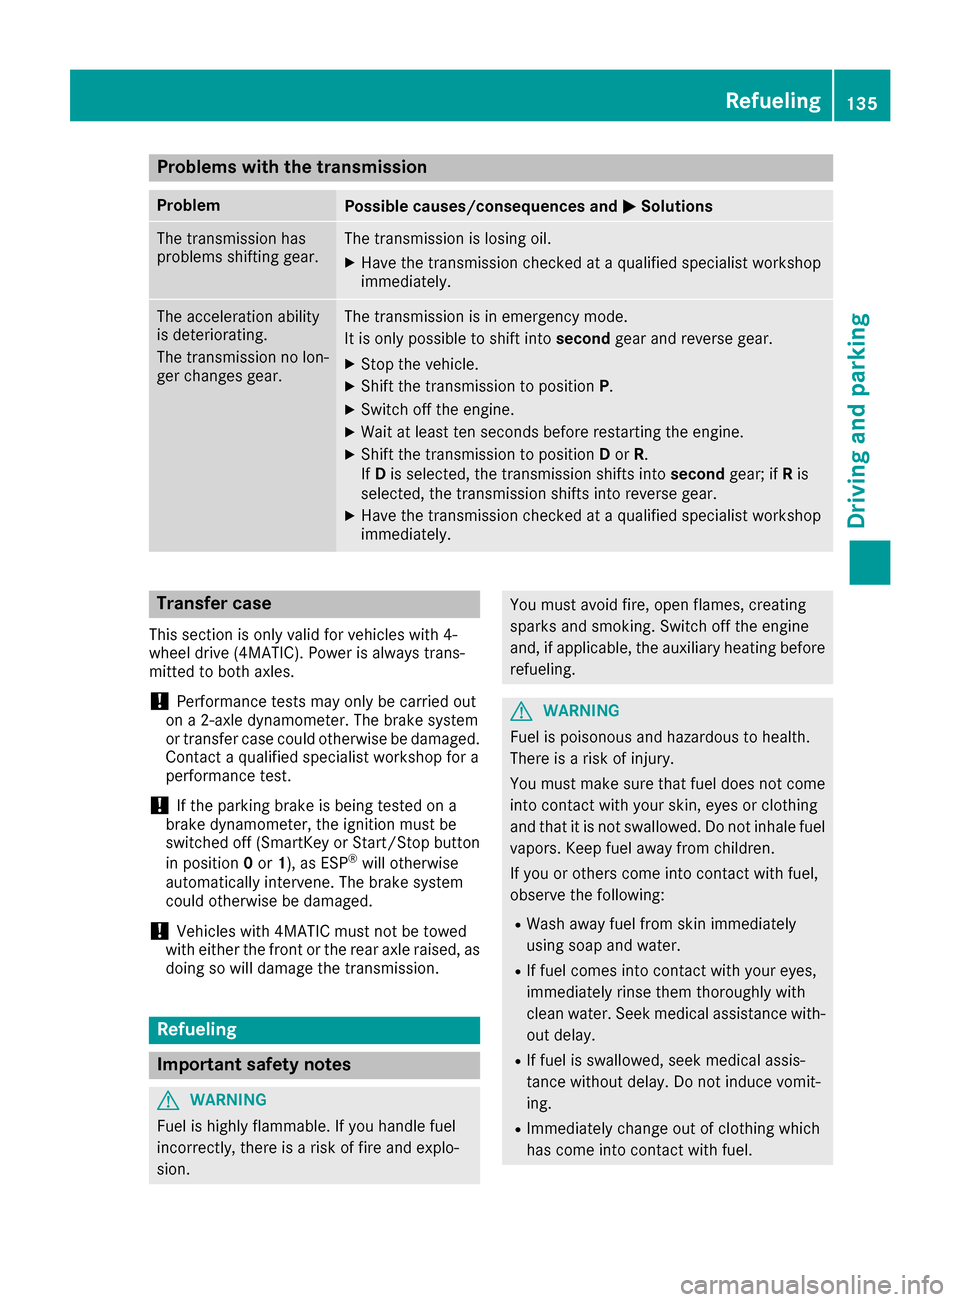
Problems with the transmission
ProblemPossible causes/consequences andMSolutions
The transmission has
problems shifting gear.The transmission is losing oil.
XHave the transmission checked at a qualified specialist workshop
immediately.
The acceleration ability
is deteriorating.
The transmission no lon-
ger changes gear.The transmission is in emergency mode.
It is only possible to shift intosecondgear and reverse gear.
XStop the vehicle.
XShift the transmission to position P.
XSwitch off the engine.
XWait at least ten seconds before restarting the engine.
XShift the transmission to positionDor R.
If D is selected, the transmission shifts into secondgear; ifRis
selected, the transmission shifts into reverse gear.
XHave the transmission checked at a qualified specialist workshop
immediately.
Transfer case
This section is only valid for vehicles with 4-
wheel drive (4MATIC). Power is always trans-
mitted to both axles.
!Performance tests may only be carried out
on a 2-axle dynamometer. The brake system
or transfer case could otherwise be damaged. Contact a qualified specialist workshop for a
performance test.
!If the parking brake is being tested on a
brake dynamometer, the ignition must be
switched off (SmartKey or Start/Stop button
in position 0or 1), as ESP
®will otherwise
automatically intervene. The brake system
could otherwise be damaged.
!Vehicles with 4MATIC must not be towed
with either the front or the rear axle raised, as
doing so will damage the transmission.
Refueling
Important safety notes
GWARNING
Fuel is highly flammable. If you handle fuel
incorrectly, there is a risk of fire and explo-
sion.
You must avoid fire, open flames, creating
sparks and smoking. Switch off the engine
and, if applicable, the auxiliary heating before refueling.
GWARNING
Fuel is poisonous and hazardous to health.
There is a risk of injury.
You must make sure that fuel does not come into contact with your skin, eyes or clothing
and that it is not swallowed. Do not inhale fuel
vapors. Keep fuel away from children.
If you or others come into contact with fuel,
observe the following:
RWash away fuel from skin immediately
using soap and water.
RIf fuel comes into contact with your eyes,
immediately rinse them thoroughly with
clean water. Seek medical assistance with-
out delay.
RIf fuel is swallowed, seek medical assis-
tance without delay. Do not induce vomit-
ing.
RImmediately change out of clothing which
has come into contact with fuel.
Refueling135
Driving and parking
Z
Page 141 of 318
To ensure that the vehicle is secured against
rolling away unintentionally:
Rthe parking brake must be applied.
Rthe transmission must be in positionPand the
Smartkey must be removed from the ignition lock.
Rthe front wheels must be turned towards the
curb on steep uphill or downhill gradients.
Switching off the engine
Important safety notes
GWARNING
The automatic transmission switches to neu-
tral position Nwhen you switch off the engine.
The vehicle may roll away. There is a risk of an
accident.
After switching off the engine, always switch
to parking position P. Prevent the parked vehi-
cle from rolling away by applying the parking
brake.
Vehicles with automatic transmission
XApply the parking brake firmly.
XShift the transmission to position P.
XWith the Smartkey:turn the Smartkey to
position 0in the ignition lock and remove it.
The immobilizer is activated.
XWith KEYLESS-GO: press the KEYLESS-GO
Start/Stop button (Ypage 122).
The engine stops and all the indicator lamps in
the instrument cluster go out.
When the driver's door is closed, this corre-
sponds to Smartkey position 1. When the
driver's door is open, this corresponds to
Smartkey position 0: "Smartkey removed".
If you switch the engine off with the transmis-
sion in position Ror D, the automatic transmis-
sion shifts to Nautomatically.
With the Smartkey: if you then open the driv-
er's door or the front-passenger door or remove the Smartkey from the ignition, the automatic
transmission shifts to Pautomatically.
With KEYLESS-GO: if you then open the driver's
or front-passenger door, the automatic trans-
mission shifts to P. If you want the automatic transmission to
remain in neutral
N, e.g. when having the vehicle
cleaned in an automatic car wash with a towing
system:
XVehicles with KEYLESS-GO: remove the
Start/Stop button from the ignition lock.
XInsert the Smartkey into the ignition lock.
XAll vehicles: switch the ignition on.
XDepress the brake pedal and keep it
depressed.
XShift to neutral N.
XRelease the brake pedal.
XRelease the parking brake.
XSwitch off the ignition and leave the Smartkey
in the ignition lock.
Parking brake
GWARNING
If you must brake the vehicle with the parking brake, the braking distance is considerably
longer and the wheels could lock. There is an
increased danger of skidding and accidents.
Only use the parking brake to brake the vehi-
cle when the service brake is faulty. Do not
apply the parking brake too firmly. If the
wheels lock, release the parking brake until
the wheels begin turning again.
GWARNING
If you leave children unsupervised in the vehi-
cle, they could set it in motion by, for example:
Rrelease the parking brake.
Rshift the automatic transmission out of the
parking position P.
Rstart the engine.
In addition, they may operate vehicle equip-
ment and become trapped. There is a risk of
an accident and injury.
When leaving the vehicle, always take the
SmartKey with you and lock the vehicle. Never
leave children unsupervised in the vehicle.
Parking139
Driving and parking
Z