boot MERCEDES-BENZ E-CLASS COUPE 2020 Owner's Guide
[x] Cancel search | Manufacturer: MERCEDES-BENZ, Model Year: 2020, Model line: E-CLASS COUPE, Model: MERCEDES-BENZ E-CLASS COUPE 2020Pages: 473, PDF Size: 8.5 MB
Page 330 of 473
to
wing eye. Fasten theto w bar tothe trailer
hitch.
% Make sure that co ver1 engages in the
bumper when youre mo vetheto wing eye.
* NO
TEDama getotheve hicle due to
incor rect use of theto wing eye When a
towing eye is used toreco ver a vehi‐
cle, theve hicle may be damaged in the proc‐
ess. #
Only use theto wing eyeto to waw ay or
to w start theve hicle. To
w starting theve hicle (eme rgency engine
st art) Ve
hicles with automatic transmission
* NO
TEDama getothe automatic trans‐
mission due to tow-starting The automatic transmission may be damaged
in the process of tow- starting vehicles with
automatic transmission. #
Vehicles with automatic transmission
must not be tow- star ted. #
Vehicles with automatic transmission must
not be tow- star ted. Electrical fuses
Note
s on electrical fuses &
WARNING Risk of accident and inju ry
due to ov erloaded lines
If yo u manipulate or bridge a faulty fuse or if
yo ure place it with a fuse with a higher
amperage, the electric line could be overloa‐
ded.
This could result in a fire. #
Alw aysre place faulty fuses with speci‐
fi ed new fuses conta iningthe cor rect
amperage. *
NO
TEDama gedue toincor rect fuses Electrical components or sy
stems may be
damaged byincor rect fuses, or their func‐
tionality may be significant lyimpaired. #
Only use fuses that ha vebeen appr oved
by Mercedes-Benz and which ha vethe
cor rect fuse rating. Blown fuses mu
stbe replaced with fuses of the
same rating, which you can recognise bythe col‐
our and fuse rating. The fuse ratings and fu rther
information tobe obser ved can be found in the
fuse assignment diagram.
Fu se assignment diag ram: onthe fuse box in
th e boot (/ page 329).
* NO
TEDama geor malfunctions caused
by moisture Moisture may cause dama
getothe electrical
sy stem or cause it tomalfunction. Breakdown assi
stance 327
Page 331 of 473
#
When the fuse box is open, make sure
th at no moisture can enter the fuse
box. #
When closing the fuse box, make sure
th at the seal of the lid is positioned cor‐
re ctly on the fuse box. If
th e newly inser ted fuse also blo ws, ha vethe
cause traced and rectified at a qualified special‐
ist workshop.
Ensure thefo llowing before replacing a fuse:
R The vehicle is secured against rolling away.
R All electrical consumers are switched off.
R The ignition is switched off.
The electrical fuses are located in various fuse
bo xes:
R Fuse box in the engine compartment on the
driver's side (/ page 328)
R Fuse box on the driver's side of the cockpit
(/ page 329)
R Fuse box in the front passenger foot we ll
(/ page 329) R
Fuse box in the boot on theright-hand side
of theve hicle, when vie wed in the direction
of tra vel (/ page 329) Opening and closing
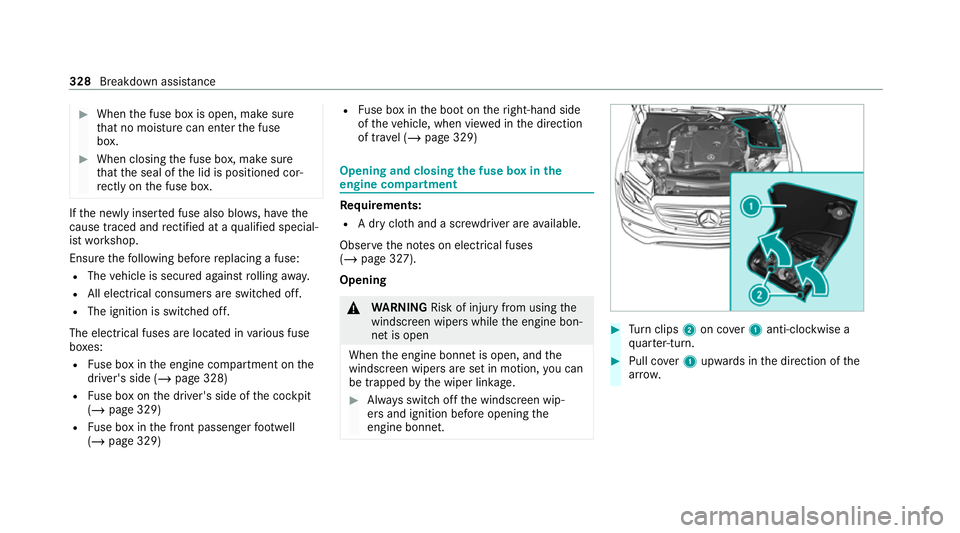
the fuse box in the
engine compa rtment Re
quirements:
R A dry clo thand a sc rewdriver are available.
Obse rveth e no tes on electrical fuses
(/ page 327).
Opening &
WARNING Risk of inju ryfrom using the
windscreen wipers while the engine bon‐
net is open
When the engine bonn etis open, and the
windscreen wipers are set in motion, you can
be trapped bythe wiper linkage. #
Alw ays switch off the windscreen wip‐
ers and ignition before opening the
engine bonn et. #
Turn clips 2on co ver1 anti-clockwise a
qu arter-turn. #
Pull co ver1 upwards in the direction of the
ar row. 328
Breakdown assis tance
Page 332 of 473
#
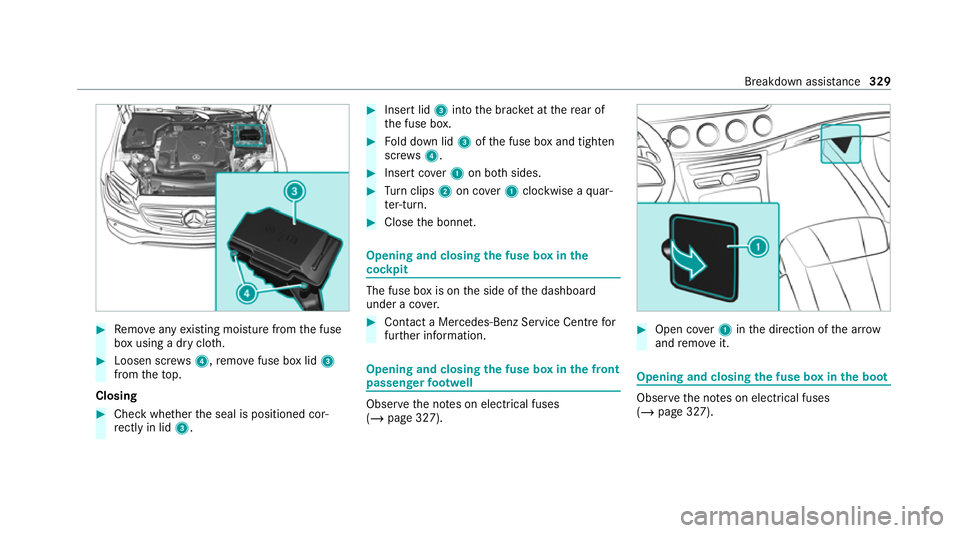
Remo veany existing moisture from the fuse
box using a dry clo th.#
Loosen scr ews4, remo vefuse box lid 3
from theto p.
Closing #
Check whe ther the seal is positioned cor‐
re ctly in lid 3. #
Insert lid 3into the brac ket at there ar of
th e fuse box. #
Fold down lid 3ofthe fuse box and tighten
scr ews4. #
Insert co ver1 on bo thsides. #
Turn clips 2on co ver1 clockwise a quar‐
te r-turn. #
Close the bonn et. Opening and closing
the fuse box in the
cockpit The fuse box is on
the side of the dashboard
under a co ver. #
Con tact a Mercedes-Benz Service Centre for
fur ther information. Opening and closing
the fuse box in the front
passenger foot we ll Obser
vethe no tes on electrical fuses
(/ page 327). #
Open co ver1 inthe direction of the ar row
and remo veit. Opening and closing
the fuse box in the boot Obser
vethe no tes on electrical fuses
(/ page 327). Breakdown assis
tance 329
Page 345 of 473
R
There are no persons in theve hicle.
R The vehicle has been prepared for a wheel
ch ange (/ page 341).
R The hub caps ha vebeen remo ved
( / page 341).
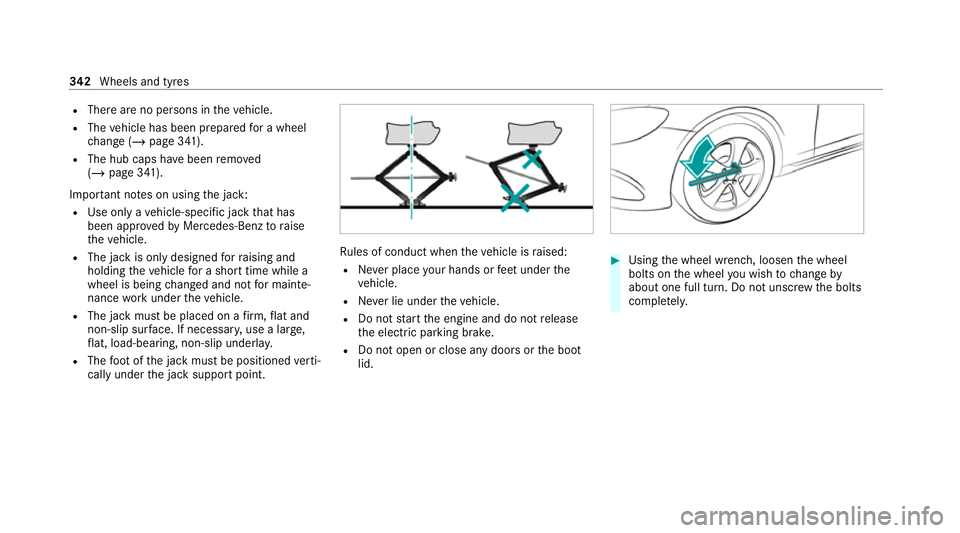
Impor tant no tes on using the jack:
R Use only a vehicle-specific jack that has
been appr oved byMercedes-Benz toraise
th eve hicle.
R The jack is only designed forra ising and
holding theve hicle for a short time while a
wheel is being changed and not for mainte‐
nance workunder theve hicle.
R The jack must be placed on a firm ,fl at and
non-slip sur face. If necessar y,use a lar ge,
fl at, load-bearing, non-slip unde rlay.
R The foot ofthe jack must be positioned verti‐
cally under the jack support point. Ru
les of conduct when theve hicle is raised:
R Never place your hands or feet under the
ve hicle.
R Never lie under theve hicle.
R Do not start the engine and do not release
th e electric parking brake.
R Do not open or close any doors or the boot
lid. #
Using the wheel wrench, loosen the wheel
bolts on the wheel you wish tochange by
about one full turn. Do not unscr ewthe bolts
comple tely. 342
Wheels and tyres
Page 349 of 473
#
Vehicles with a tyre pressure monitoring
sy stem: restart the tyre pressure monitoring
sy stem (/ page 335).
Exception: the new wheel is an emer gency
spa rewheel. Emer
gency spare wheel Note
s onthe emer gency spare wheel &
WARNING Risk of accident caused by
incor rect wheel and tyre dimensions
The wheel or tyre size and the tyre type of
th e emer gency spa rewheel or spare wheel
and the wheel tobe replaced may dif fer. The
emer gency spa rewheel or spare wheel can
significantly impair driving characteristics of
th eve hicle.
To preve nt hazardous situations: #
Drive carefully. #
Neverfit more than one emer gency
spa rewheel or spare wheel that dif fers
in size. #
Only use an emer gency spa rewheel or
spare wheel brief ly. #
Do not deacti vate ESP ®
. #
Have the emer gency spa rewheel or
spare wheel of a dif fere nt size replaced
at the nearest qualified specialist work‐
shop. The new wheel must ha vethe
cor rect dimensions. %
The emergency spa rewheel is secured in the
emer gency spa rewheel bag in the boot.
Obser vethefo llowing no tes on fitting an emer‐
ge ncy spa rewheel:
R Check the tyre pressure of the emer gency
spa rewheel fitted. Co rrect the pressure as
necessar y.
R The maximum permissible speed with an
emer gency spa rewheel fitted is 80 km/h.
R Do not fit th e emer gency spa rewheel with
sn ow ch ains.
R Replace the emer gency spa rewheel af ter six
ye ars at the latest, rega rdless of wear. %
Ve
hicles with a tyre pressure loss warn‐
ing sy stem: if an emer gency spa rewheel is
fi tted the tyre pressure loss warning sy stem
cann otfunction reliabl y.Only restart the sys‐
te m again when the emer gency spa rewheel
has been replaced with a new wheel.
Ve hicles with a tyre pressure monitoring
sy stem: if an emer gency spa rewheel is fit‐
te dth e tyre pressure monitoring sy stem can‐
not function reliabl y.Fo r a few minutes af ter
an emer gency spa rewheel is fitted, the sys‐
te m may still display the tyre pressure of the
re mo ved wheel. Only restart the sy stem
again when the emer gency spa rewheel has
been replaced with a new wheel.
Be sure toalso obse rveth efo llowing fur ther
re lated subjects:
R Notes on tyre pressure (/ page 332)
R Tyre pressure table (/ page 333)
R Notes on fitting tyres (/ page 336) 346
Wheels and tyres
Page 351 of 473
#
When operating two-w ayradios in the
ve hicle, alw ays connect them tothe
lo w- reflection exterior aerial. *
NO
TEInva lidation of the operating per‐
mit due tofailure tocomply wi th the
instructions for ins tallation and use The operating permit may be in
validated if
th e instructions for ins tallation and use of
two-w ayradios are not obser ved. #
Only use appr oved frequency bands. #
Obser vethe maximum permissible out‐
put po wer in these frequency bands. #
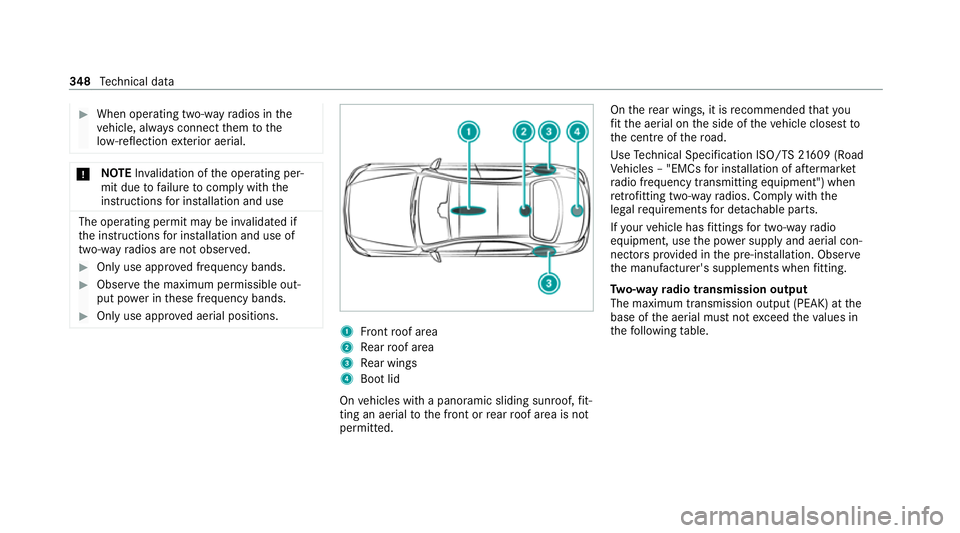
Only use appr oved aerial positions. 1
Front roof area
2 Rear roof area
3 Rear wings
4 Boot lid
On vehicles with a panoramic sliding sunroof, fit‐
ting an ae rial to the front or rear roof area is not
permitted. On
there ar wings, it is recommended that you
fi t th e aerial on the side of theve hicle closest to
th e cent reofthero ad.
Use Tech nical Specification ISO/TS 21609 (Road
Ve hicles – "EMCs for ins tallation of af term arket
ra dio frequency transmitting equipment") when
re trofitting two-w ayradios. Comply with the
legal requirements for de tach able parts.
If yo ur vehicle has fittings for two-w ayradio
equipment, use the po wer supp lyand aerial con‐
nec tors prov ided in the pre-ins tallation. Obser ve
th e manufacturer's supplements when fitting.
Tw o-w ayradio transmission output
The maximum transmission output (PEAK) at the
base of the aerial must not exceed theva lues in
th efo llowing table. 348
Tech nical da ta
Page 381 of 473
Display messages
Possible causes/consequences and M
MSolutions #
Stop theve hicle immediately, paying attention toroad and traf fic conditions. #
Close the bonn et.
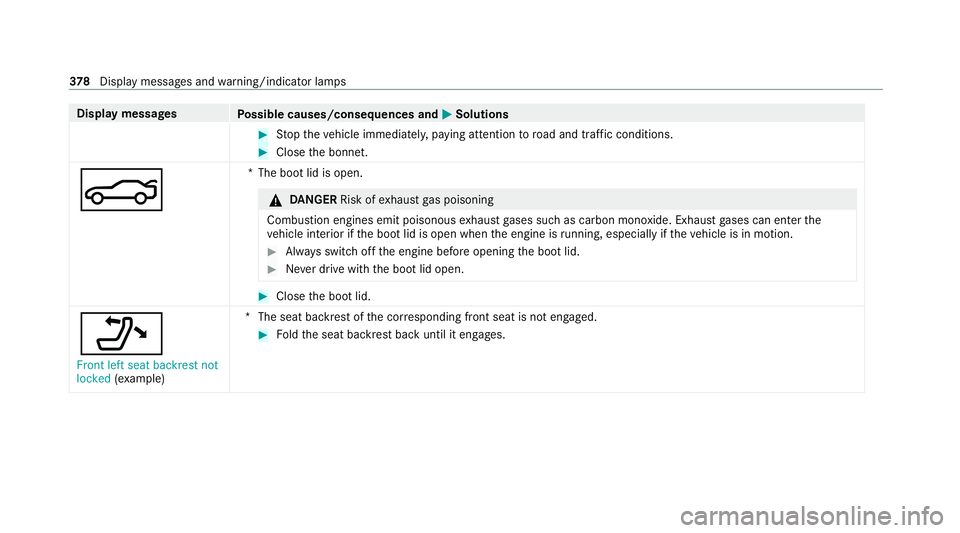
N *T
he boot lid is open. &
DANG ER Risk of exhaust gas poisoning
Combustion engines emit poisonous exhaust gases such as carbon monoxide. Exhaust gases can enter the
ve hicle interior if the boot lid is open when the engine is running, especially if theve hicle is in motion. #
Alw ays switch off the engine before opening the boot lid. #
Never drive with the boot lid open. #
Close the boot lid.
_ Front left seat backrest not
locked (exa mp le) *T
he seat backrest of the cor responding front seat is not engaged. #
Foldthe seat backrest back until it engages. 378
Displaymessa ges and warning/indicator lamps
Page 440 of 473
Blo
wer
see Climate control
BlueTEC see AdBlue ®
Bonn et
Re setting (active bonnet) .................... 296
Boot lid Closing .................................................. 79
HANDS-FREE ACCESS .......................... .81
Locking separa tely ................................ 82
Opening ................................................ .78
Opening dimensions ............................3 61
Brake Assi stSystem
see BAS (Brake Assi stSystem)
Brake fluid Notes .................................................. 359
Brake forc e distribution
EBD (Elect ronic Brake forc e Distribu‐
tion) ..................................................... 188
Brakes ABS (Anti-lock Braking Sy stem) ........... 185
Ac tive Brake Assi st.............................. 188
Ad aptive brake lights .......................... .193 BA
S (Brake Assi stSystem) .................. 185
Driving tips .......................................... 15 8
EBD (Electronic Brake forc e Distribu‐
tion) ..................................................... 188
HOLD function .................................... .207
Limited braking ef fect (salt-trea ted
ro ads) .................................................. 15 8
New/replaced brakepads/brake
discs .................................................... 15 6
Ru nning-in no tes ..................................1 56
Braking assi stance
see BAS (Brake Assi stSystem)
Breakdown Overview of the help functions .............. 16
To w- starting ........................................ 327
To wing away ........................................ 323
Tr ansporting theve hicle ......................3 25
Wheel change ...................................... 341
Breakdown see Flat tyre
Buttons Steering wheel .....................................2 46 C
Calls Mercedes me ....................................... 276
Camera see 360° Camera
see Reversing camera
Car key
see Key
Car wash
see Care
Car wash (care) ....................................... 302
Car-to-X-Communication Displaying hazard warnings ................ .270
Care .......................................................... 307
360° Camera ...................................... 305
Air-water duct ...................................... 302
Car wash ............................................. 302
Carpet .................................................3 07
Deco rative foil .................................... .304
Displ ay................................................ 307
Exterior lighting ................................... 305
High-pressure cleaner ......................... 303
Matt finish ........................................... 304 Index
437
Page 451 of 473
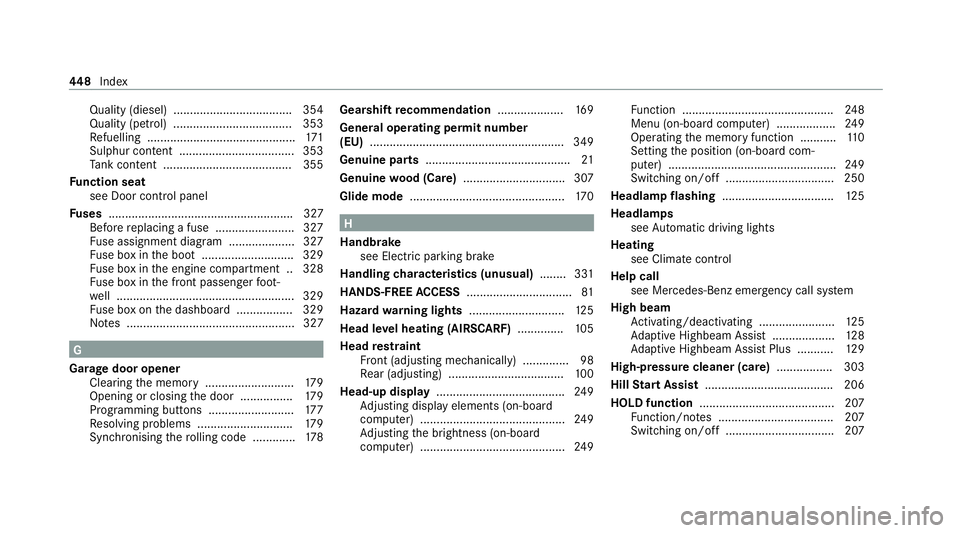
Quality (diesel) .................................... 354
Quality (petrol) .................................... 353
Re fuelling ............................................. 171
Sulphur content ................................... 353
Ta nk content ....................................... 355
Fu nction seat
see Door cont rol panel
Fu ses ........................................................ 327
Before replacing a fuse ........................ 327
Fu se assignment diagram .................... 327
Fu se box in the boot ............................3 29
Fu se box in the engine compartment .. 328
Fu se box in the front passenger foot‐
we ll ...................................................... 329
Fu se box on the dashboard ................. 329
No tes ................................................... 327 G
Garage door opener Cleari ngthe memory ........................... 17 9
Opening or closing the door ................1 79
Programming buttons .......................... 17 7
Re solving problems ............................. 17 9
Synchronising thero lling code ............ .178 Gearshift
recommendation ....................16 9
Genera l operating permit number
(EU) .......................................................... .349
Genuine parts ............................................ 21
Genuine wood (Care) .............................. .307
Glide mode ............................................... 17 0 H
Handbrake see Electric parking brake
Handling characteristics (unusual) ........331
HANDS-FREE ACCESS ................................ 81
Hazard warning lights ............................ .125
Head le vel heating (AIRSCARF) ..............105
Head restra int
Fr ont (adjusting mechanically) .............. 98
Re ar (adjusting) .................................. .100
Head-up display ....................................... 24 9
Ad justing display elements (on-board
compu ter) ............................................ 24 9
Ad justing the brightness (on-board
computer) ............................................ 24 9Fu
nction .............................................. 24 8
Menu (on-board computer) .................. 24 9
Operating the memory function ........... 11 0
Setting the position (on-board com‐
puter) ................................................... 24 9
Switching on/off ................................. 250
Headlamp flashing .................................. 12 5
Headlamps see Automatic driving lights
Heating see Climate control
Help call see Mercedes-Benz emergency call sy stem
High beam Activating/deactivating ...................... .125
Ad aptive Highbeam Assist .................. .128
Ad aptive Highbeam Assist Plus .......... .129
High-pressure cleaner (care) ................. 303
Hill Start Assist ....................................... 206
HOLD function ......................................... 207
Fu nction/no tes ................................... 207
Switching on/off ................................. 207 448
Index