reverse lamp MERCEDES-BENZ E-CLASS ESTATE 2009 Owners Manual
[x] Cancel search | Manufacturer: MERCEDES-BENZ, Model Year: 2009, Model line: E-CLASS ESTATE, Model: MERCEDES-BENZ E-CLASS ESTATE 2009Pages: 373, PDF Size: 12.37 MB
Page 17 of 373
Rear window heating
........................179
Rear window wiper ...........................100
Replacing the wiper blade .............. 309
Refuelling ........................................... 216
Remote control Auxiliary heating ............................ 182
Changing the batteries (auxiliary
heating) ......................................... 304
Garage door opene r....................... 211
Programming (garage door
opener) .......................................... 212
Reserve fuel ....................................... 334
Display message ............................ 278
Fuel tank ........................................ 334
Warning lamp ................................. 287
Restraint system
See SRS .......................................... 37
Restraint systems
For children ..................................... 44
Rev counter ........................................ 117
Reverse gear Engaging (manual transmission) ....110
Reversing camera ............................. 162
Cleaning ......................................... 243
Reversing lamps
Display message ............................ 273
Roller blind
see Roller sunblind
Roller sunblind
Panorama sliding sunroo f.............. 187
Rear side windows .........................207
Rear window .................................. 208
Roof carrier ....................................... 206
Roof load (maximum) ........................339
Route see Route guidance .......................125
Route guidance
On-board computer .......................125 S
Safety net .......................................... .200
Seat Adjusting ................................... 76, 77
Correct driver's seat position ........... 92
Storing settings ............................... 87
Seat backrest (rear)
Folding forwards/back ..................196Seat belt
Adjusting the driver's and front-
passenger seat belt .........................90
Adjusting the height ......................... 91
Centre rear-compartment sea t........ 90
Display message ......................91, 263
Fastening ......................................... 89
Switching belt adjustment on/off
(on-board computer) ......................136
Warning lamp ........................... 91, 286
Seat covers
Cleaning ......................................... 244
Seat heating ........................................ .81
Seat ventilation ................................... 81
Malfunction indicator lamp ............279
Securing a load .................................. 197
Selector lever Display message ............................ 253
Selector lever positions ....................112
Sensors Cleaning ......................................... 243
Service indicator
see ASSYST PLUS service interval
displa y........................................... 239
Service products ............................... 333
AdBlue ®
additives .......................... 335
Brake fluid ..................................... 338
Coolant .......................................... 338
Engine oil ....................................... 336
Fuel ................................................ 334
Windscreen washer fluid ................339
Settings
Calling up a stored setting ...............88
Factory (on-board computer) .........137
On-board computer .......................131
SETUP (on-board computer) .............123
Shift ranges ....................................... 113
Sidebag ................................................ 41
Side marker lamp Display message ............................ 273
Side windows
Convenience closing ......................102
Convenience opening ....................102
Fault .............................................. 295
Opening/closing ............................ 100
Skibag ................................................ 193
Ski rack .............................................. 20614
Index 212_AKB; 2; 4, en-GB
mkalafa,
Version: 2.11.8.1 2009-05-05T14:17:16+02:00 - Seite 14Dateiname: 6515346702_buchblock.pdf; erzeugt am 07. May 2009 14:15:27; WK
Page 90 of 373
i
Make sure that the exterior mirrors are
always folded out fully while the vehicle is
in motion; otherwise, they may vibrate.
Resetting the exterior mirrors If the battery has been disconnected or has
become discharged, the exterior mirrors
must be reset. Otherwise, the exterior mirrors
will not fold in when you select the "Fold in
mirrors when locking" function in the on-
board computer (Y page 136).
X Make sure that the key is in position 1in
the ignition lock.
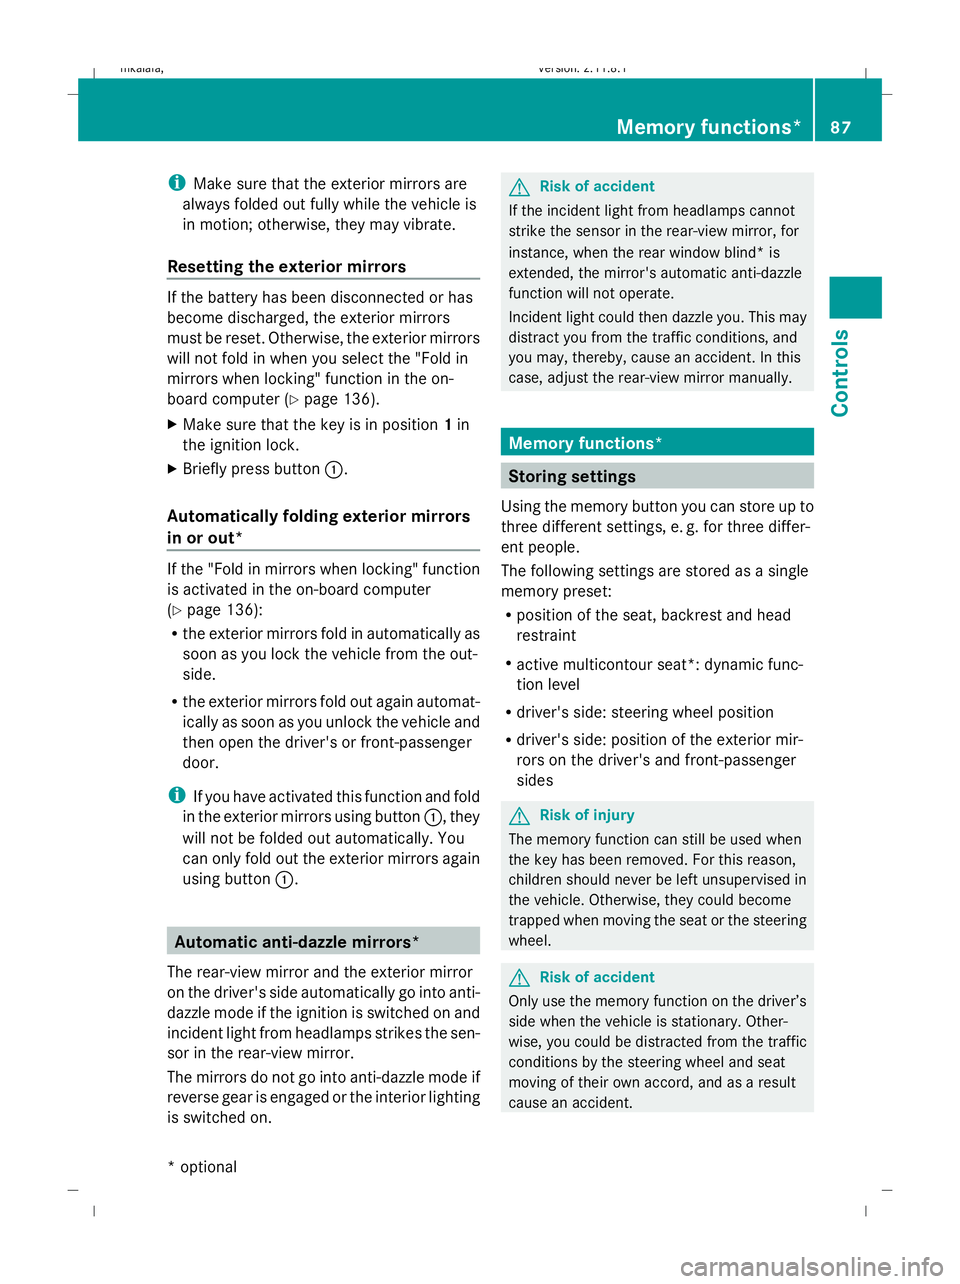
X Briefly press button :.
Automatically folding exterior mirrors
in or out* If the "Fold in mirrors when locking" function
is activated in the on-board computer
(Y
page 136):
R the exterior mirrors fold in automatically as
soon as you lock the vehicle from the out-
side.
R the exterior mirrors fold out again automat-
ically as soon as you unlock the vehicle and
then open the driver's or front-passenger
door.
i If you have activated this function and fold
in the exterior mirrors using button :, they
will not be folded out automatically. You
can only fold out the exterior mirrors again
using button :. Automatic anti-dazzle mirrors*
The rear-view mirror and the exterior mirror
on the driver's side automatically go into anti-
dazzle mode if the ignition is switched on and
incident light from headlamps strikes the sen-
sor in the rear-view mirror.
The mirrors do not go into anti-dazzle mode if
reverse gear is engaged or the interior lighting
is switched on. G
Risk of accident
If the incident light from headlamps cannot
strike the sensor in the rear-view mirror, for
instance, when the rear window blind* is
extended, the mirror's automatic anti-dazzle
function will not operate.
Incident light could then dazzle you. This may
distract you from the traffic conditions, and
you may, thereby, cause an accident. In this
case, adjust the rear-view mirror manually. Memory functions*
Storing settings
Using the memory button you can store up to
three different settings, e. g. for three differ-
ent people.
The following settings are stored as a single
memory preset:
R position of the seat, backrest and head
restraint
R active multicontour seat*: dynamic func-
tion level
R driver's side: steering wheel position
R driver's side: position of the exterior mir-
rors on the driver's and front-passenger
sides G
Risk of injury
The memory function can still be used when
the key has been removed. For this reason,
children should never be left unsupervised in
the vehicle. Otherwise, they could become
trapped when moving the seat or the steering
wheel. G
Risk of accident
Only use the memory function on the driver’s
side when the vehicle is stationary. Other-
wise, you could be distracted from the traffic
conditions by the steering wheel and seat
moving of their own accord, and as a result
cause an accident. Memory functions*
87Controls
* optional
212_AKB; 2; 4, en-GB
mkalafa,
Version: 2.11.8.1 2009-05-05T14:17:16+02:00 - Seite 87 Z
Dateiname: 6515346702_buchblock.pdf; erzeugt am 07. May 2009 14:15:56; WK
Page 108 of 373
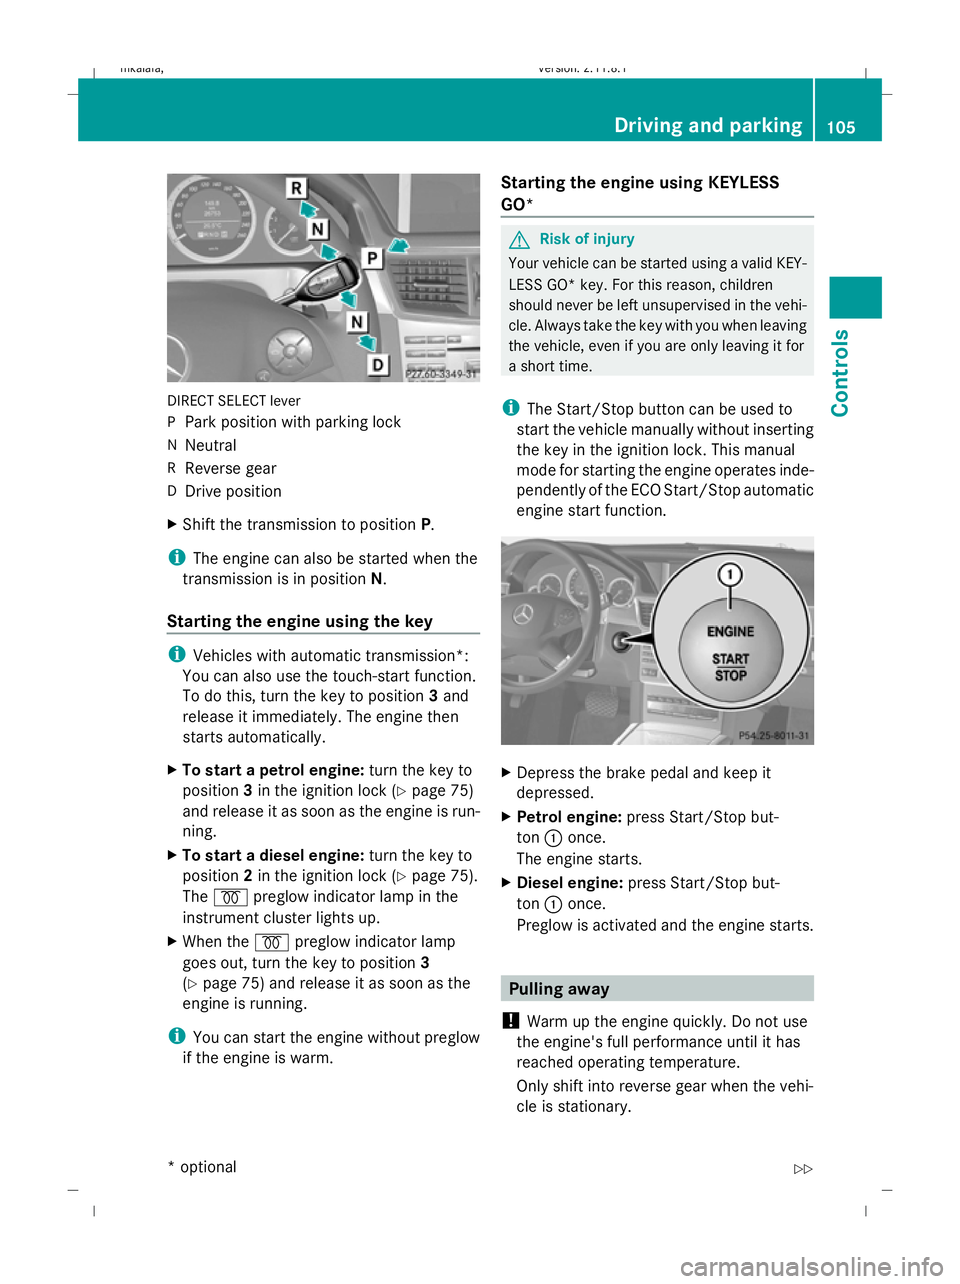
DIRECT SELECT lever
P
Park position with parking lock
N Neutral
R Reverse gear
D Drive position
X Shift the transmission to position P.
i The engine can also be started when the
transmission is in position N.
Starting the engine using the key i
Vehicles with automatic transmission*:
You can also use the touch-start function.
To do this, turn the key to position 3and
release it immediately. The engine then
starts automatically.
X To start a petrol engine: turn the key to
position 3in the ignition lock (Y page 75)
and release it as soon as the engine is run-
ning.
X To start a diesel engine: turn the key to
position 2in the ignition lock (Y page 75).
The % preglow indicator lamp in the
instrument cluster lights up.
X When the %preglow indicator lamp
goes out, turn the key to position 3
(Y page 75) and release it as soon as the
engine is running.
i You can start the engine without preglow
if the engine is warm. Starting the engine using KEYLESS
GO* G
Risk of injury
Your vehicle can be started using a valid KEY-
LESS GO* key. For this reason, children
should never be left unsupervised in the vehi-
cle. Always take the key with you when leaving
the vehicle, even if you are only leaving it for
a short time.
i The Start/Stop button can be used to
start the vehicle manually without inserting
the key in the ignition lock. This manual
mode for starting the engine operates inde-
pendently of the ECO Start/Stop automatic
engine start function. X
Depress the brake pedal and keep it
depressed.
X Petrol engine: press Start/Stop but-
ton :once.
The engine starts.
X Diesel engine: press Start/Stop but-
ton :once.
Preglow is activated and the engine starts. Pulling away
! Warm up the engine quickly. Do not use
the engine's full performance until it has
reached operating temperature.
Only shift into reverse gear when the vehi-
cle is stationary. Driving and parking
105Controls
* optional
212_AKB; 2; 4, en-GB
mkalafa,
Version: 2.11.8.1 2009-05-05T14:17:16+02:00 - Seite 105 Z
Dateiname: 6515346702_buchblock.pdf; erzeugt am 07. May 2009 14:16:04; WK
Page 110 of 373
Parking
G
Risk of accident
Only remove the key from the ignition lock
when the vehicle is stationary, as you cannot
steer the vehicle with the key removed.
Never leave children unsupervised in the vehi-
cle. They could release the parking brake. This
could lead to a serious or fatal accident. G
Risk of fire
Make sure that the exhaust system does not
under any circumstances come into contact
with easily ignitable material such as dry grass
or petrol. Otherwise, the flammable material
may ignite and set the vehicle on fire.
To ensure that the vehicle is secured against
rolling away unintentionally:
R the parking brake must be applied
R on vehicles with manual transmission,
engage first gear or reverse gear
R on vehicles with automatic transmission*,
the transmission must be in position Pand
the key must be removed from the ignition
lock
R on steep uphill or downhill gradients, turn
the front wheels towards the kerb
Parking brake X
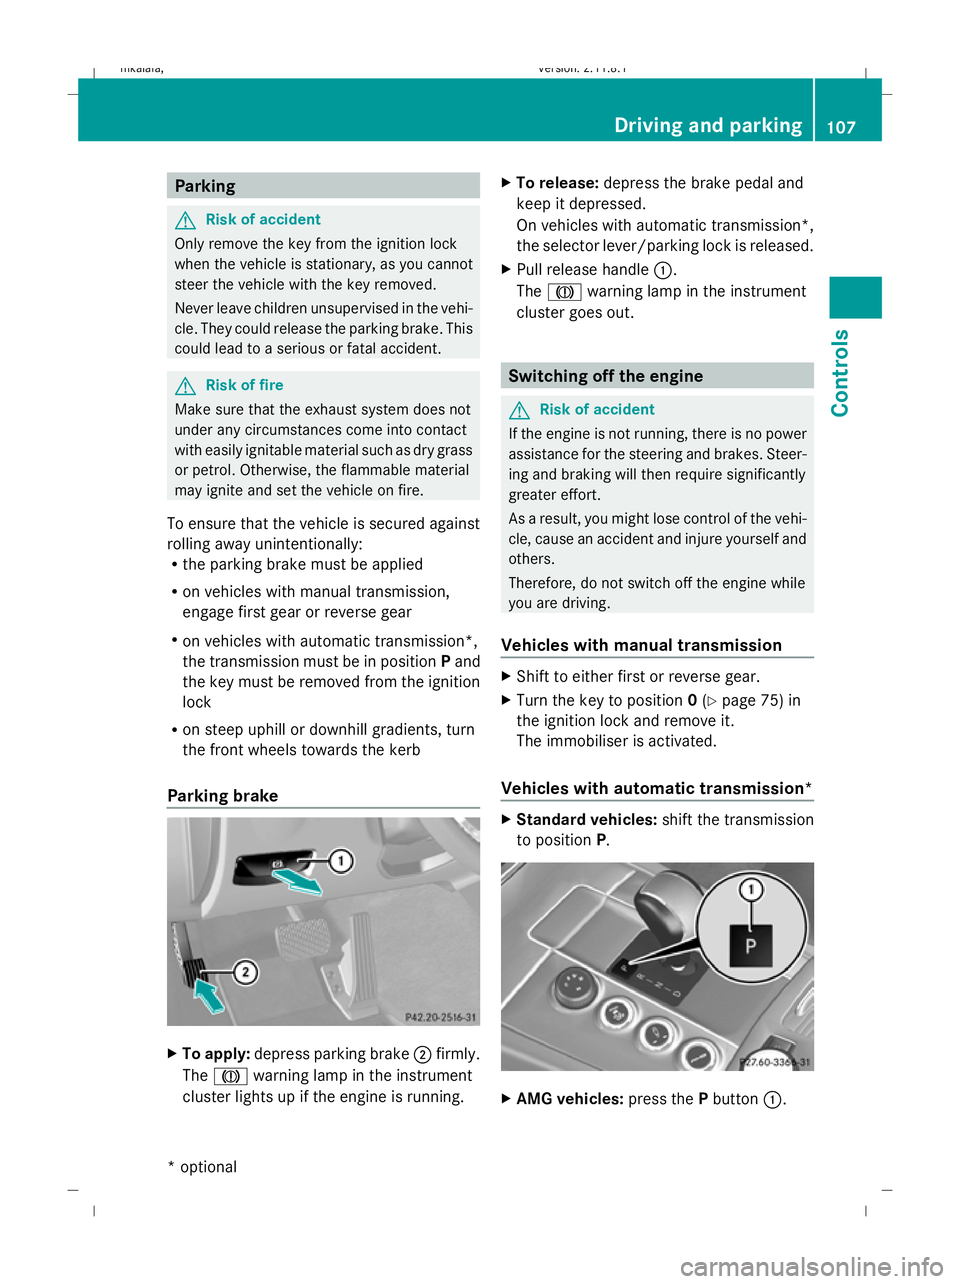
To apply: depress parking brake ;firmly.
The J warning lamp in the instrument
cluster lights up if the engine is running. X
To release: depress the brake pedal and
keep it depressed.
On vehicles with automatic transmission*,
the selector lever/parking lock is released.
X Pull release handle :.
The J warning lamp in the instrument
cluster goes out. Switching off the engine
G
Risk of accident
If the engine is not running, there is no power
assistance for the steering and brakes. Steer-
ing and braking will then require significantly
greater effort.
As a result, you might lose control of the vehi-
cle, cause an accident and injure yourself and
others.
Therefore, do not switch off the engine while
you are driving.
Vehicles with manual transmission X
Shift to either first or reverse gear.
X Turn the key to position 0(Y page 75) in
the ignition lock and remove it.
The immobiliser is activated.
Vehicles with automatic transmission* X
Standard vehicles: shift the transmission
to position P. X
AMG vehicles: press thePbutton :. Driving and parking
107Controls
* optional
212_AKB; 2; 4, en-GB
mkalafa,
Version: 2.11.8.1 2009-05-05T14:17:16+02:00 - Seite 107 Z
Dateiname: 6515346702_buchblock.pdf; erzeugt am 07. May 2009 14:16:05; WK
Page 112 of 373
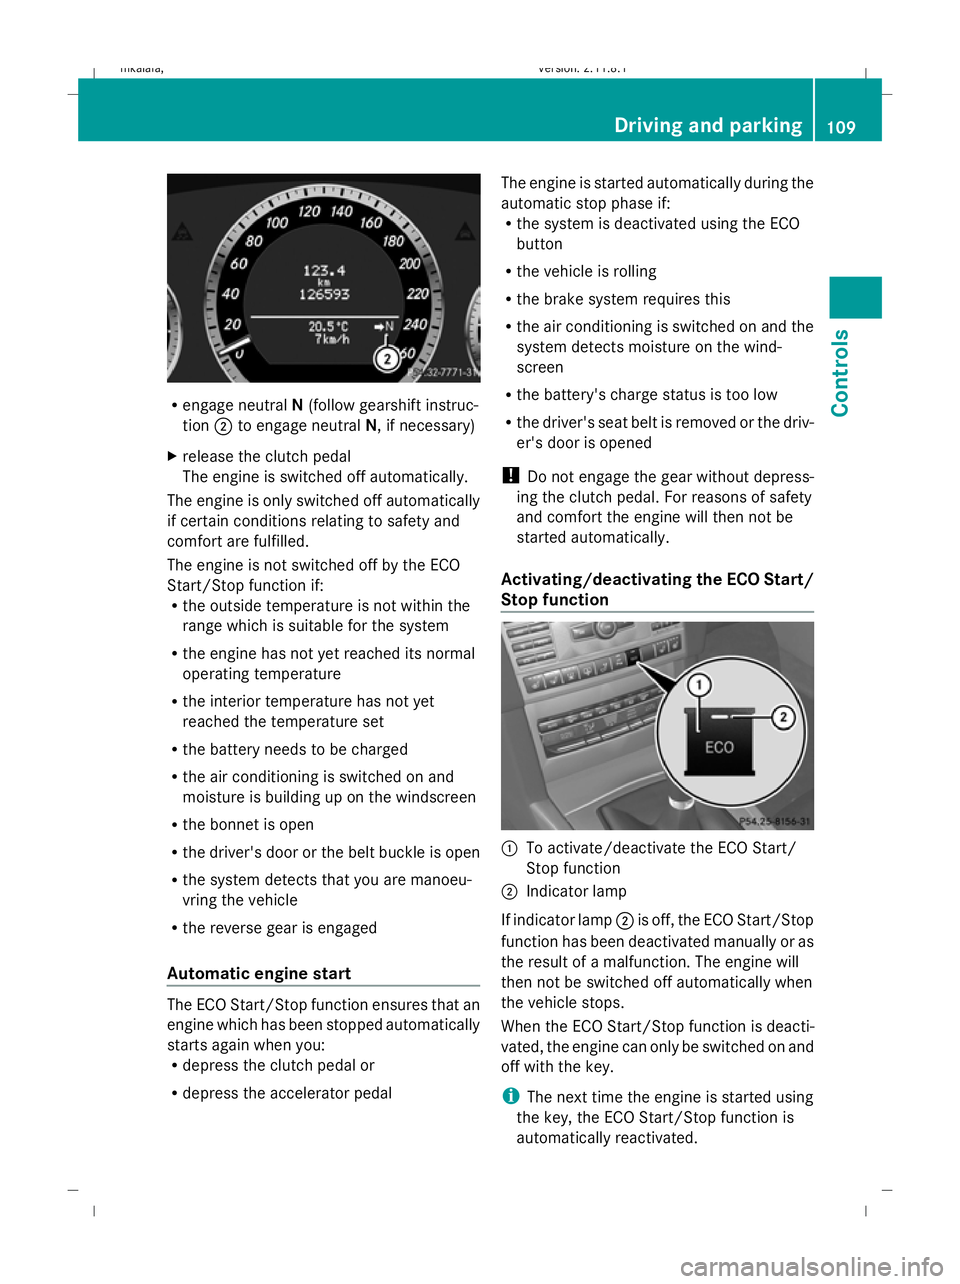
R
engage neutral N(follow gearshift instruc-
tion ;to engage neutral N, if necessary)
X release the clutch pedal
The engine is switched off automatically.
The engine is only switched off automatically
if certain conditions relating to safety and
comfort are fulfilled.
The engine is not switched off by the ECO
Start/Stop function if:
R the outside temperature is not within the
range which is suitable for the system
R the engine has not yet reached its normal
operating temperature
R the interior temperature has not yet
reached the temperature set
R the battery needs to be charged
R the air conditioning is switched on and
moisture is building up on the windscreen
R the bonnet is open
R the driver's door or the belt buckle is open
R the system detects that you are manoeu-
vring the vehicle
R the reverse gear is engaged
Automatic engine start The ECO Start/Stop function ensures that an
engine which has been stopped automatically
starts again when you:
R
depress the clutch pedal or
R depress the accelerator pedal The engine is started automatically during the
automatic stop phase if:
R
the system is deactivated using the ECO
button
R the vehicle is rolling
R the brake system requires this
R the air conditioning is switched on and the
system detects moisture on the wind-
screen
R the battery's charge status is too low
R the driver's seat belt is removed or the driv-
er's door is opened
! Do not engage the gear without depress-
ing the clutch pedal. For reasons of safety
and comfort the engine will then not be
started automatically.
Activating/deactivating the ECO Start/
Stop function :
To activate/deactivate the ECO Start/
Stop function
; Indicator lamp
If indicator lamp ;is off, the ECO Start/Stop
function has been deactivated manually or as
the result of a malfunction. The engine will
then not be switched off automatically when
the vehicle stops.
When the ECO Start/Stop function is deacti-
vated, the engine can only be switched on and
off with the key.
i The next time the engine is started using
the key, the ECO Start/Stop function is
automatically reactivated. Driving and parking
109Controls
212_AKB; 2; 4, en-GB
mkalafa, Version: 2.11.8.1 2009-05-05T14:17:16+02:00 - Seite 109 Z
Dateiname: 6515346702_buchblock.pdf; erzeugt am 07. May 2009 14:16:06; WK
Page 169 of 373
could otherwise endanger yourself and oth-
ers.
The system may be impaired or may not func-
tion if:
R there is poor visibility, e.g. due to snow,
rain, fog or spray.
R the windscreen is dirty, misted up or cov-
ered, for instance by a sticker, in the vicinity
of the camera.
R on bends, on uphill gradients or downhill
gradients.
Light from the headlamps of oncoming vehi-
cles does not affect the Night View Assist Plus
display in the multi-function display. This is
also the case if you cannot switch on the
main-beam headlamps because of oncoming
traffic. G
Risk of accident
Night View Assist Plus does not detect
objects in the immediate vicinity of the vehi-
cle. Look through the windscreen when
manoeuvring. Make sure that there are no
people or animals in the area in which you are
manoeuvring.
i Infrared light cannot be seen by the
human eye and therefore does not dazzle.
Night View Assist Plus can therefore
remain switched on even if there is oncom-
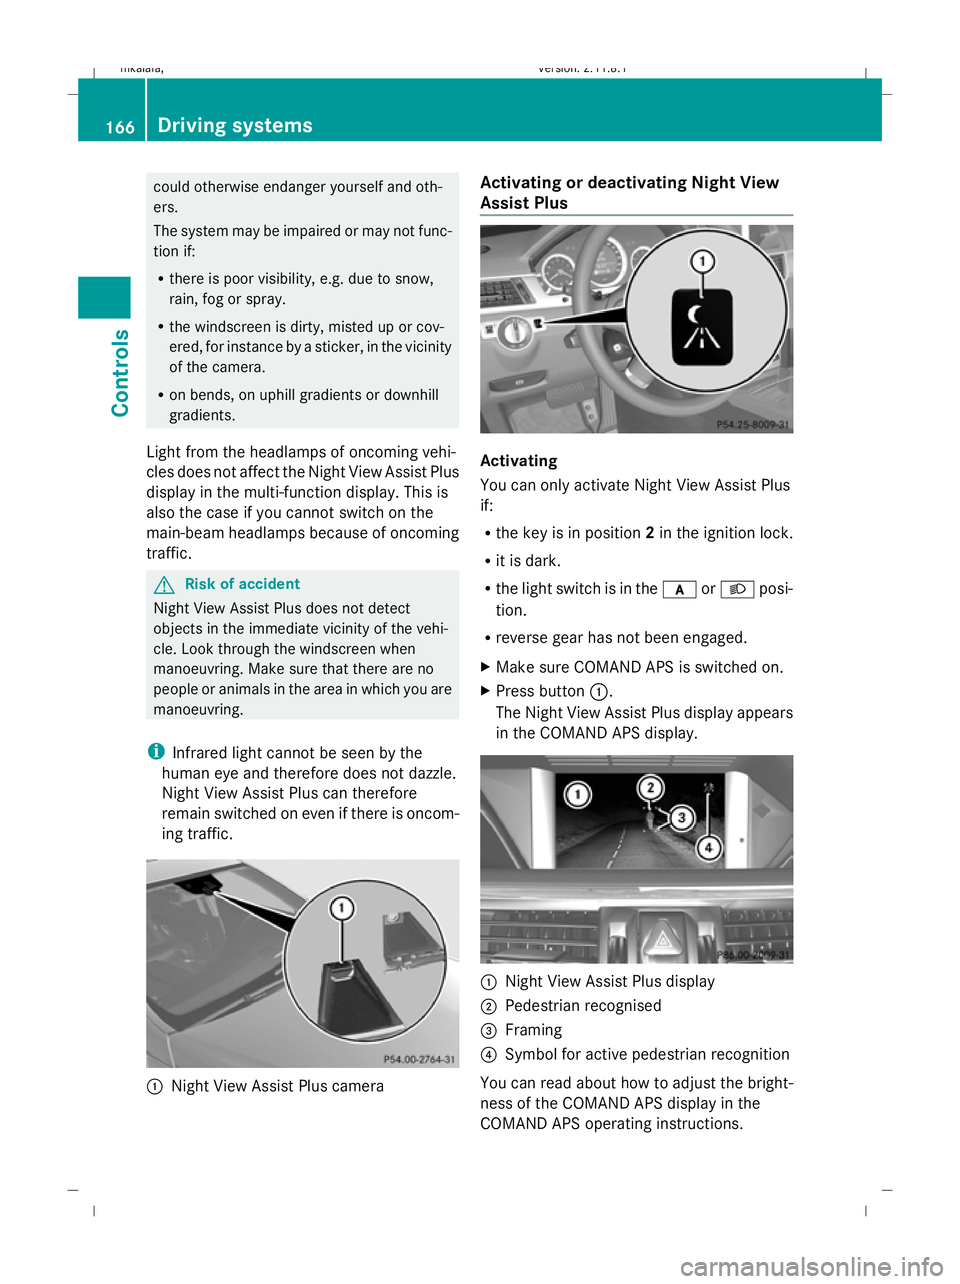
ing traffic. :
Night View Assist Plus camera Activating or deactivating Night View
Assist Plus
Activating
You can only activate Night View Assist Plus
if:
R
the key is in position 2in the ignition lock.
R it is dark.
R the light switch is in the corL posi-
tion.
R reverse gear has not been engaged.
X Make sure COMAND APS is switched on.
X Press button :.
The Night View Assist Plus display appears
in the COMAND APS display. :
Night View Assist Plus display
; Pedestrian recognised
= Framing
? Symbol for active pedestrian recognition
You can read about how to adjust the bright-
ness of the COMAND APS display in the
COMAND APS operating instructions. 166
Driving systemsControls
212_AKB; 2; 4, en-GB
mkalafa
,V ersion: 2.11.8.1
2009-05-05T14:17:16+02:00 - Seite 166
Dateiname: 6515346702_buchblock.pdf; erzeugt am 07. May 2009 14:16:26; WK
Page 172 of 373
Information and warning display
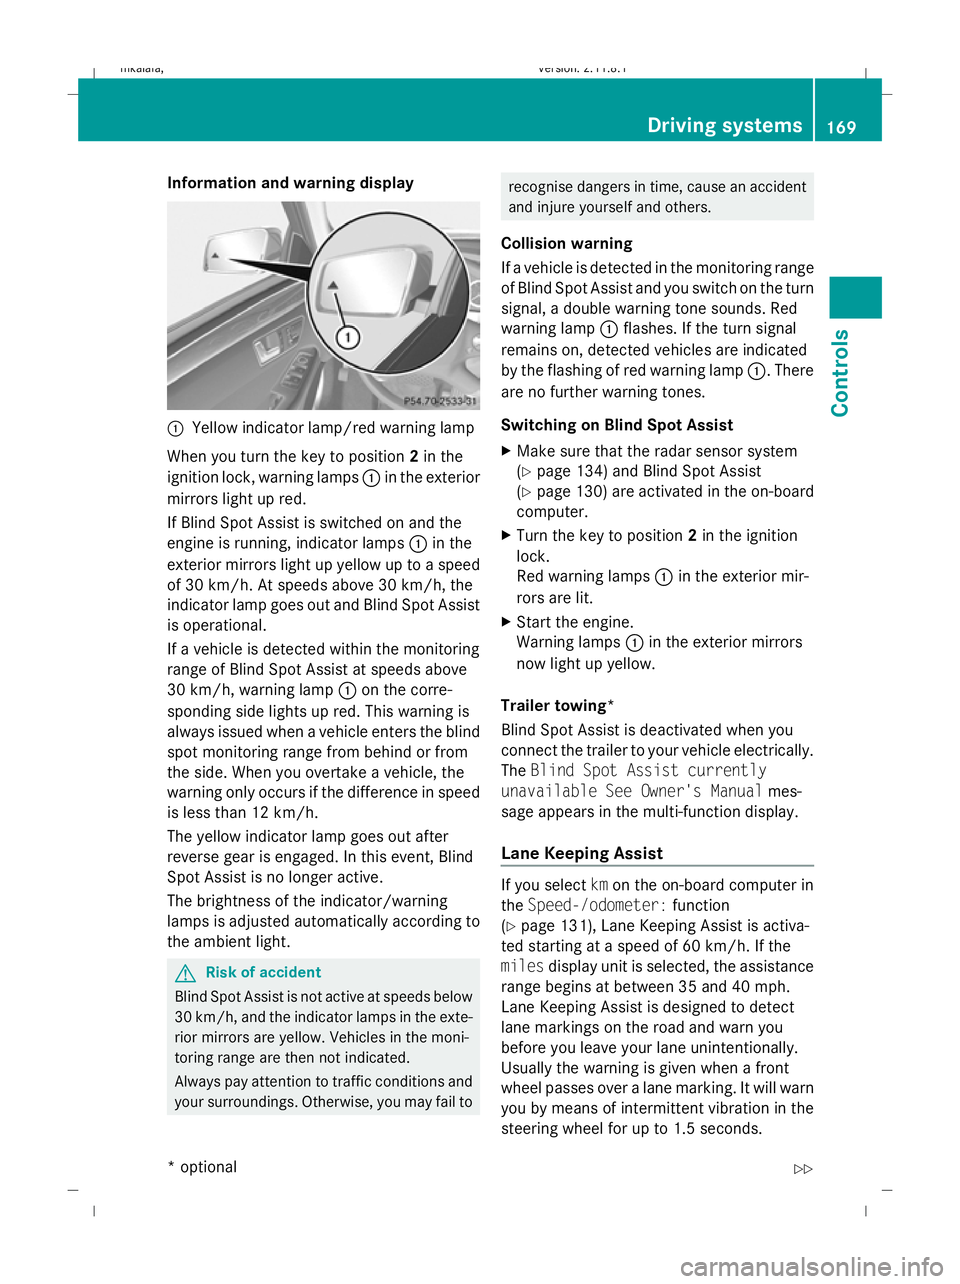
:
Yellow indicator lamp/red warning lamp
When you turn the key to position 2in the
ignition lock, warning lamps :in the exterior
mirrors light up red.
If Blind Spot Assist is switched on and the
engine is running, indicator lamps :in the
exterior mirrors light up yellow up to a speed
of 30 km/h. At speeds above 30 km/h, the
indicator lamp goes out and Blind Spot Assist
is operational.
If a vehicle is detected within the monitoring
range of Blind Spot Assist at speeds above
30 km/h, warning lamp :on the corre-
sponding side lights up red. This warning is
always issued when a vehicle enters the blind
spot monitoring range from behind or from
the side. When you overtake a vehicle, the
warning only occurs if the difference in speed
is less than 12 km/h.
The yellow indicator lamp goes out after
reverse gear is engaged. In this event, Blind
Spot Assist is no longer active.
The brightness of the indicator/warning
lamps is adjusted automatically according to
the ambient light. G
Risk of accident
Blind Spot Assist is not active at speeds below
30 km/h, and the indicator lamps in the exte-
rior mirrors are yellow. Vehicles in the moni-
toring range are then not indicated.
Always pay attention to traffic conditions and
your surroundings. Otherwise, you may fail to recognise dangers in time, cause an accident
and injure yourself and others.
Collision warning
If a vehicle is detected in the monitoring range
of Blind Spot Assist and you switch on the turn
signal, a double warning tone sounds. Red
warning lamp :flashes. If the turn signal
remains on, detected vehicles are indicated
by the flashing of red warning lamp :. There
are no further warning tones.
Switching on Blind Spot Assist
X Make sure that the radar sensor system
(Y page 134) and Blind Spot Assist
(Y page 130) are activated in the on-board
computer.
X Turn the key to position 2in the ignition
lock.
Red warning lamps :in the exterior mir-
rors are lit.
X Start the engine.
Warning lamps :in the exterior mirrors
now light up yellow.
Trailer towing*
Blind Spot Assist is deactivated when you
connect the trailer to your vehicle electrically.
The Blind Spot Assist currently
unavailable See Owner's Manual mes-
sage appears in the multi-function display.
Lane Keeping Assist If you select
kmon the on-board computer in
the Speed-/odometer: function
(Y page 131), Lane Keeping Assist is activa-
ted starting at a speed of 60 km/h. If the
miles display unit is selected, the assistance
range begins at between 35 and 40 mph.
Lane Keeping Assist is designed to detect
lane markings on the road and warn you
before you leave your lane unintentionally.
Usually the warning is given when a front
wheel passes over a lane marking. It will warn
you by means of intermittent vibration in the
steering wheel for up to 1.5 seconds. Driving systems
169Controls
* optional
212_AKB; 2; 4, en-GB
mkalafa
,V ersion: 2.11.8.1
2009-05-05T14:17:16+02:00 - Seite 169 Z
Dateiname: 6515346702_buchblock.pdf; erzeugt am 07. May 2009 14:16:27; WK
Page 296 of 373
Automatic transmission*
Problem
Possible causes/consequences and
X
X Solutions The transmission has
problems shifting gear. The transmission is losing oil.
X
Have the transmission checked at a qualified specialist work-
shop immediately. The acceleration ability
is deteriorating.
The transmission no
longer changes gear. The transmission is in emergency mode.
It is only possible to shift into
secondgear and reverse gear.
X Stop the vehicle.
X Move the transmission to position P.
X Turn the key in the ignition to position 0(Y page 75) or press
the Start/Stop button* repeatedly until all indicator lamps in
the instrument cluster go out.
X Wait at least 10 seconds before restarting the engine.
X Move the transmission to position Dor R.
If D is selected, the transmission shifts into secondgear; ifRis
selected, the transmission shifts into reverse gear.
X Have the transmission checked at a qualified specialist work-
shop immediately. PARKTRONIC*
Problem
Possible causes/consequences and
X
X Solutions Only the red segments
in the PARKTRONIC
warning display are lit.
You also hear a warning
tone for approximately
two seconds.
PARKTRONIC is deacti-
vated after approx-
imately 20 seconds and
the indicator lamp in
the PARKTRONIC but-
ton lights up. PARKTRONIC has malfunctioned and has switched itself off.
X
If problems persist, have PARKTRONIC checked at a qualified
specialist workshop. Only the red segments
in the PARKTRONIC
warning display are lit.
PARKTRONIC is deacti-
vated after approx-
imately 20 seconds. The PARKTRONIC sensors are dirty or there is interference.
X
Clean the PARKTRONIC sensors (Y page 243).
X Switch the ignition back on. Troubleshooting
293Practical advice
* optional
212_AKB; 2; 4, en-GB
mkalafa,
Version: 2.11.8.1 2009-05-05T14:17:16+02:00 - Seite 293 Z
Dateiname: 6515346702_buchblock.pdf; erzeugt am 07. May 2009 14:17:13; WK
Page 312 of 373
X
Turn the wiper blades until they are parallel
to the wiper arms.
X Fold the wiper arms back onto the wind-
screen. Rear window wiper blade
G
Risk of injury
The wiper arm could be set in motion and
injure you if the windscreen wipers are
switched on.
Remove the key from the ignition lock before
replacing the wiper blade.
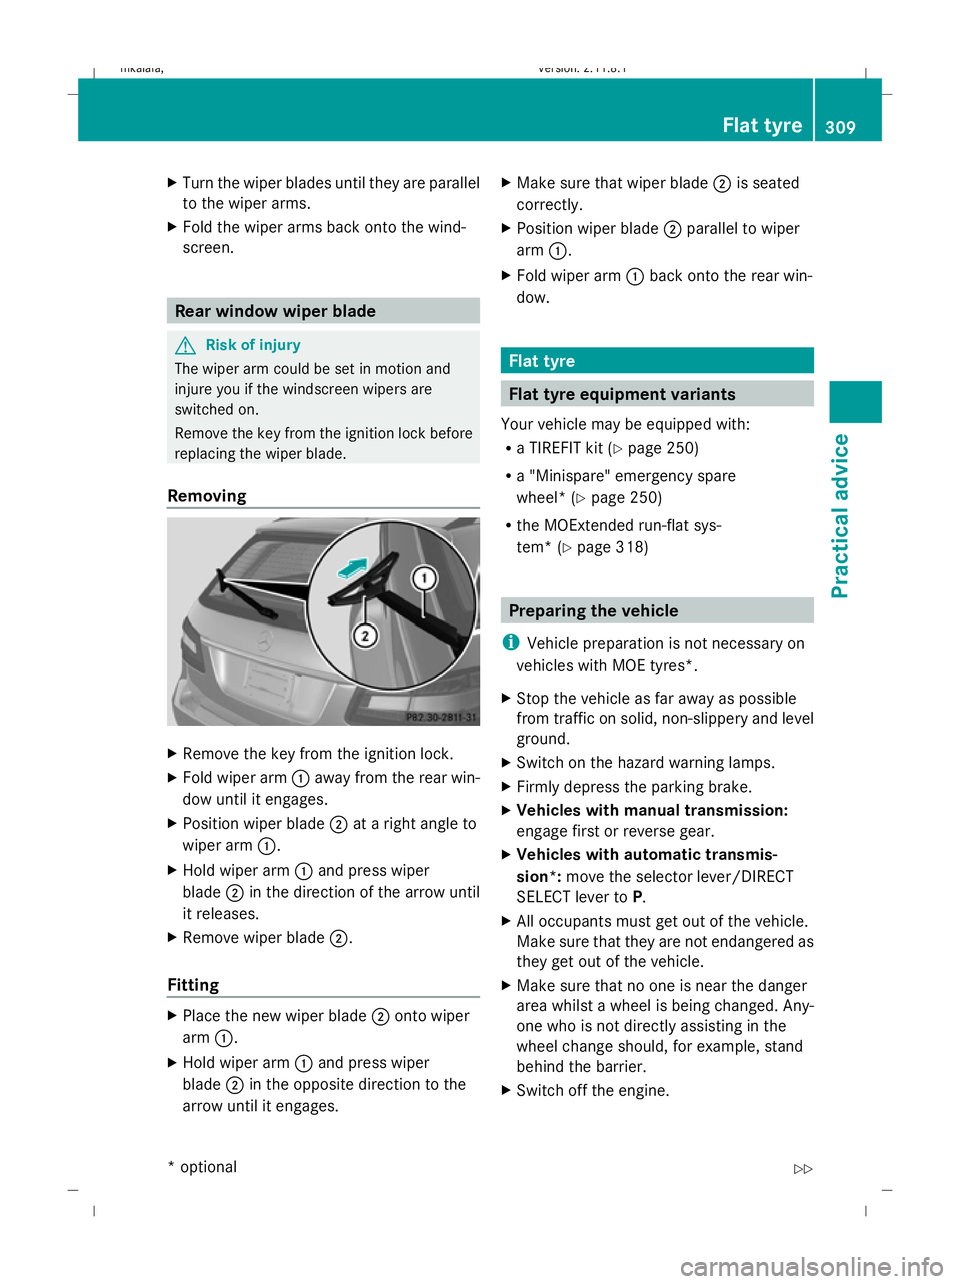
Removing X
Remove the key from the ignition lock.
X Fold wiper arm :away from the rear win-
dow until it engages.
X Position wiper blade ;at a right angle to
wiper arm :.
X Hold wiper arm :and press wiper
blade ;in the direction of the arrow until
it releases.
X Remove wiper blade ;.
Fitting X
Place the new wiper blade ;onto wiper
arm :.
X Hold wiper arm :and press wiper
blade ;in the opposite direction to the
arrow until it engages. X
Make sure that wiper blade ;is seated
correctly.
X Position wiper blade ;parallel to wiper
arm :.
X Fold wiper arm :back onto the rear win-
dow. Flat tyre
Flat tyre equipment variants
Your vehicle may be equipped with:
R a TIREFIT kit (Y page 250)
R a "Minispare" emergency spare
wheel* (Y page 250)
R the MOExtended run-flat sys-
tem* (Y page 318) Preparing the vehicle
i Vehicle preparation is not necessary on
vehicles with MOE tyres*.
X Stop the vehicle as far away as possible
from traffic on solid, non-slippery and level
ground.
X Switch on the hazard warning lamps.
X Firmly depress the parking brake.
X Vehicles with manual transmission:
engage first or reverse gear.
X Vehicles with automatic transmis-
sion*: move the selector lever/DIRECT
SELECT lever to P.
X All occupants must get out of the vehicle.
Make sure that they are not endangered as
they get out of the vehicle.
X Make sure that no one is near the danger
area whilst a wheel is being changed. Any-
one who is not directly assisting in the
wheel change should, for example, stand
behind the barrier.
X Switch off the engine. Flat tyre
309Practical advice
* optional
212_AKB; 2; 4, en-GB
mkalafa,
Version: 2.11.8.1 2009-05-05T14:17:16+02:00 - Seite 309 Z
Dateiname: 6515346702_buchblock.pdf; erzeugt am 07. May 2009 14:17:20; WK
Page 326 of 373
the jump-starting procedure
(Y
page 323).
Fitting the battery X
Install the battery. To do this, follow the
steps described in "Removing the battery"
(Y page 322) in reverse order.
X Reconnect the battery (Y page 323).Reconnecting the battery
! Always connect the battery in the order
described below. Never swap the terminal
clamps. Otherwise, you may damage the
vehicle electronics.
X Switch off all electrical consumers (e.g.
radio, blower, etc.).
X Connect the positive terminal clamp and
secure the cover.
X Connect the negative terminal clamp.
X Connect the breather hose.
X On vehicles with the battery in the
engine compartment: put the filter box
back in place, then clip in and close the
retaining clamps.
Close the bonnet.
X Vehicles with the battery in the boot:
close the boot.
i If the battery power supply has been inter-
rupted (e.g. if it has been reconnected), you
must carry out the following tasks:
R set the time ( Ypage 132)
R reset the function for folding the exterior
mirrors in/out automatically* by folding
the mirrors out once ( Ypage 87) Jump-starting
If your vehicle's battery is discharged, the
engine can be jump-started from another
vehicle or from an external battery using jump
leads. Observe the following points:
R
you may only jump-start when the engine
and catalytic converter are cold.
R do not start the engine if the battery is fro-
zen. Let the battery thaw first.
R jump-starting may only be performed from
batteries with a nominal voltage of 12 V.
R only use jump leads which have a sufficient
cross-section and insulated terminal
clamps.
i Jump leads and further information about
jump-starting can be obtained from any
Mercedes-Benz Service Centre.
! Avoid repeated and lengthy starting
attempts.
Do not use a rapid-charging device to start
the engine. G
Risk of injury
There is a risk of acid burns when jump-start-
ing a vehicle due to the gases which escape
from the battery. Do not lean over the battery
while the engine is being jump-started. G
Risk of explosion
Gases escaping from the battery during jump-
starting may cause minor explosions. Avoid
creating sparks. Keep naked flames away
from the battery, and do not smoke.
Comply with safety precautions and take pro-
tective measures when handling batteries.
You will find these under "Battery" in the
index.
X Make sure that the two vehicles do not
touch.
X Depress the parking brake firmly.
X Manual transmission: engage neutral.
X Automatic transmission*: shift the trans-
mission to position P.
X Switch off all electrical consumers (e.g.
radio, blower, etc.).
X Open the bonnet (Y page 219). Jump-starting
323Practical advice
* optional
212_AKB; 2; 4, en-GB
mkalafa
,V ersion: 2.11.8.1
2009-05-05T14:17:16+02:00 - Seite 323 Z
Dateiname: 6515346702_buchblock.pdf; erzeugt am 07. May 2009 14:17:26; WK