USB MERCEDES-BENZ E-CLASS ESTATE 2020 Owners Manual
[x] Cancel search | Manufacturer: MERCEDES-BENZ, Model Year: 2020, Model line: E-CLASS ESTATE, Model: MERCEDES-BENZ E-CLASS ESTATE 2020Pages: 489, PDF Size: 9.15 MB
Page 35 of 489
driving (driver assis
tance sy stems). In addition,
yo ur vehicle pr ovides com fort and enter tainment
functions, which are also made possible byelec‐
tronic control units.
Elect ronic control units contain da tamemories
which can temp orarily or permanently store
te ch nical information about theve hicle's operat‐
ing state, component loads, main tenance
re qu irements and tech nical events or faults.
In general, this information documents thest ate
of a component part, a module, a sy stem or the
sur roundings such as:
R operating status of sy stem components (e.g.
fi ll le vels, battery status, tyre pressure)
R status messages concerning theve hicle or
its individual components (e.g. number of
wheel revo lutions/speed, longitudinal accel‐
eration, lateral acceleration, display of fas‐
te ned seat belts)
R malfunctions or faults in impor tant sy stem
components (e.g. lights, brakes)
R information on events leading tovehicle
damage R
system reactions in special driving situations
(e.g. airbag deployment, inter vention of sta‐
bility control sy stems)
R ambient conditions (e.g. temp erature, rain
sensor)
In addition toprov iding the actual control unit
function, this data assists the manufacturer in
de tecting and rectifying faults and optimising
ve hicle functions. The majority of this data is
te mp orary and is only processed in theve hicle
itself. Only a small portion of the data is stored
in theeve nt or fault memor y.
When your vehicle is serviced, tech nical da ta
from theve hicle can be read out byservice net‐
wo rkemplo yees (e.g. workshops, manufactur‐
ers) or third parties (e.g. breakdown services).
Services include, forex ample, repair services,
maintenance processes, warranty claims and
qu ality assurance measures. The read out is per‐
fo rm ed via the legally prescribed port forthe
diagnostics connection in theve hicle. The
re spective service network locations or third
parties collect, process and use the data. They
document tech nical statuses of theve hicle, assist in
finding faults and impr oving quality and
are transmitted tothe manufacturer, if neces‐
sar y.Fu rthermore, the manufacturer is subject
to product liability. Forth is, the manufacturer
requ irestech nical da tafrom vehicles.
Fa ult memories in theve hicle can be reset by a
service outlet as part of repair or maintenance
wo rk.
Depending on the selected equipment, you can
import data into vehicle con venience and info‐
ta inment functions yourself.
This includes, forex ample:
R multimedia data such as music, films or pho‐
to sfo r playback in an integrated multimedia
sy stem
R address book data for use in connection with
an integrated hands-free sy stem or an inte‐
grated navigation sy stem
R entered navigation destinations
R data about the use of internet services
This data can be sa ved locally in theve hicle or it
is located on a device which you ha veconnected
to theve hicle (e.g. a smartphone, USB flash 32
General no tes
Page 121 of 489
St
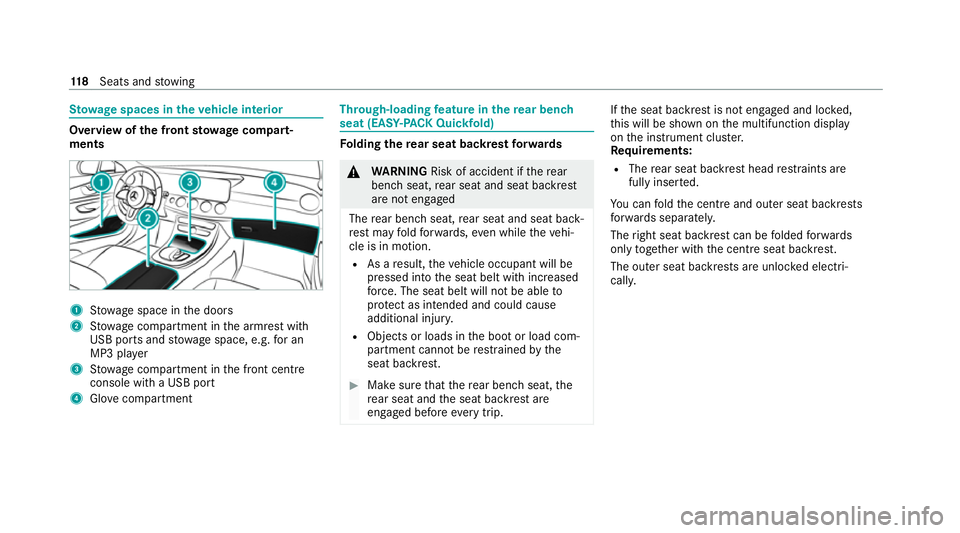
ow age spaces in theve hicle interior Overview of
the front stowage compa rt‐
ments 1
Stow age space in the doors
2 Stow age compartment in the armrest with
USB ports and stowage space, e.g. for an
MP3 pla yer
3 Stow age compartment in the front cent re
console wi tha USB port
4 Glovecompa rtment Through-loading
feature in there ar ben ch
seat (EAS Y-PA CK Quickfold) Fo
lding there ar seat backrest forw ards &
WARNING Risk of accident if there ar
ben chseat, rear seat and seat backrest
are not engaged
The rear ben chseat, rear seat and seat back‐
re st may fold forw ards, even while theve hi‐
cle is in motion.
R As a result, theve hicle occupant will be
pressed into the seat belt with increased
fo rc e. The seat belt will not be able to
pr otect as intended and could cause
additional injur y.
R Objects or loads in the boot or load com‐
partment cann otbe restra ined bythe
seat backrest. #
Make sure that there ar ben chseat, the
re ar seat and the seat backrest are
engaged before everytrip. If
th e seat backrest is not engaged and loc ked,
th is will be shown on the multifunction display
on the instrument clus ter.
Re quirements:
R The rear seat backrest head restra ints are
fully inse rted.
Yo u can fold the cent reand outer seat backrests
fo rw ards separatel y.
The right seat backrest can be folded forw ards
on lytoge ther with the cent reseat backrest.
The outer seat backrests are unloc ked elect ri‐
cally. 11 8
Seats and stowing
Page 133 of 489
#
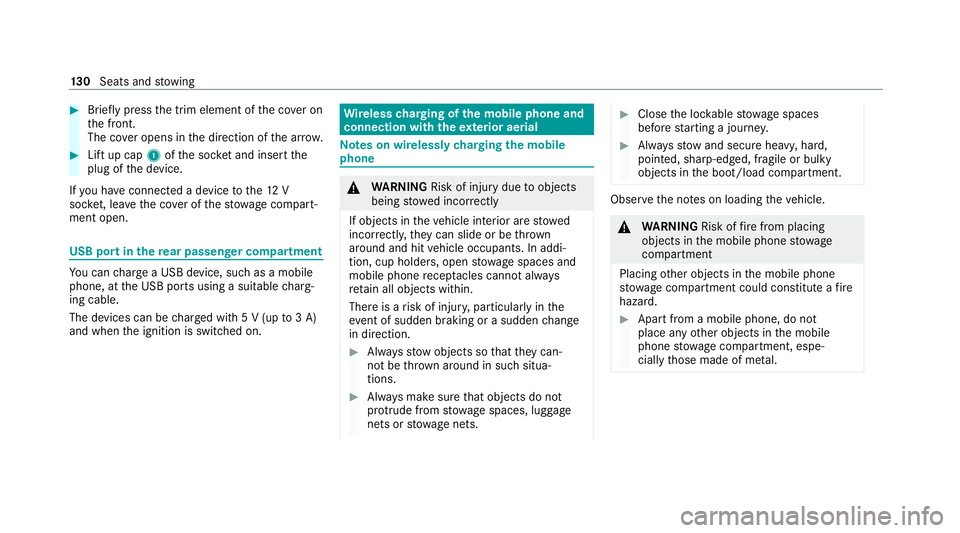
Brief lypress the trim element of the co ver on
th e front.
The co ver opens in the direction of the ar row. #
Lift up cap 1ofthe soc ket and insert the
plug of the device.
If yo u ha veconnected a device tothe12 V
soc ket, le ave the co ver of thestow age compart‐
ment open. USB port in
there ar passenger comp artmentYo
u can charge a USB device, such as a mobile
phone, at the USB ports using a suitable charg‐
ing cable.
The devices can be charge d with 5 V (up to3 A)
and when the ignition is switched on. Wire
lesscharging of the mobile phone and
connection with theex terior aerial Note
s on wirelessly charging the mobile
phone &
WARNING Risk of inju rydue toobjects
being stowed incor rectly
If objects in theve hicle interior are stowed
incor rectly, they can slide or be thrown
around and hit vehicle occupants. In addi‐
tion, cup holders, open stowage spaces and
mobile phone recep tacles cannot al ways
re tain all objects within.
There is a risk of injur y,particularly in the
ev ent of sudden braking or a sudden change
in direction. #
Alw aysstow objects so that they can‐
not be throw n around in su chsitua‐
tions. #
Alw ays make sure that objects do not
pr otru de from stowage spaces, luggage
nets or stowage nets. #
Close the loc kable stow age spaces
before starting a journe y. #
Alw aysstow and secure heavy, hard,
poin ted, sharp-edged, fragile or bulky
objects in the boot/load compartment. Obser
vethe no tes on loading theve hicle. &
WARNING Risk offire from placing
objects in the mobile phone stowage
compartment
Placing other objects in the mobile phone
stow age compartment could con stitute a fire
hazard. #
Apart from a mobile phone, do not
place any other objects in the mobile
phone stowage compartment, espe‐
cially those made of me tal. 13 0
Seats and stowing
Page 298 of 489
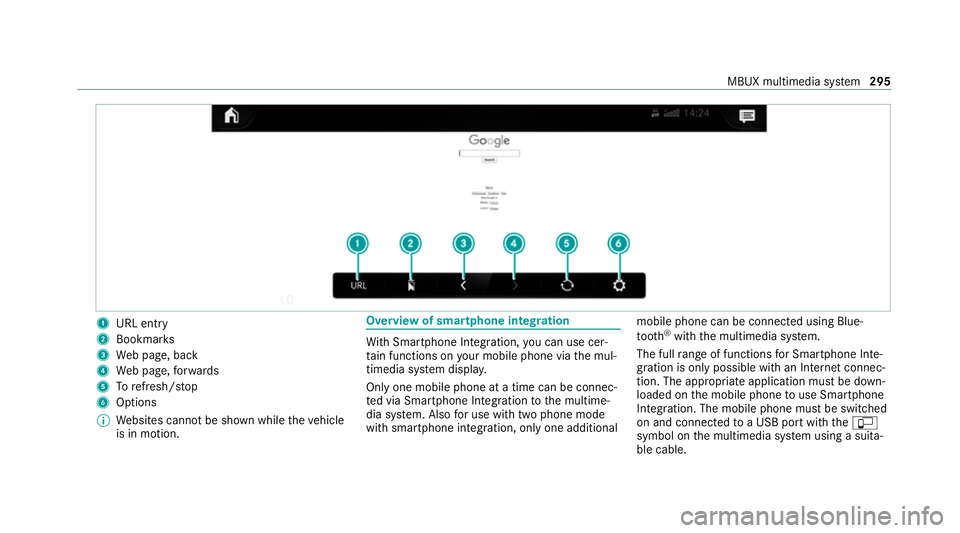
1
URL entry
2 Bookmar ks
3 Web page, back
4 Web page, forw ards
5 Torefresh/s top
6 Options
% Websites cann otbe shown while theve hicle
is in motion. Overview of smartphone integ
ration Wi
th Smartphone Integration, you can use cer‐
ta in functions on your mobile phone via the mul‐
timedia sy stem displa y.
Only one mobile phone at a time can be connec‐
te d via Smartphone Integ ration tothe multime‐
dia sy stem. Also for use with two phone mode
with smartphone integration, only one additional mobile phone can be connected using Blue‐
tooth
®
with the multimedia sy stem.
The full range of functions for Smartphone Inte‐
gration is only possible with an Internet connec‐
tion. The appro priate application must be down‐
loaded on the mobile phone touse Smartphone
In te gration. The mobile phone must be switched
on and connected toa USB port with theç
symbol on the multimedia sy stem using a suita‐
ble cable. MBUX multimedia sy
stem 295
Page 304 of 489
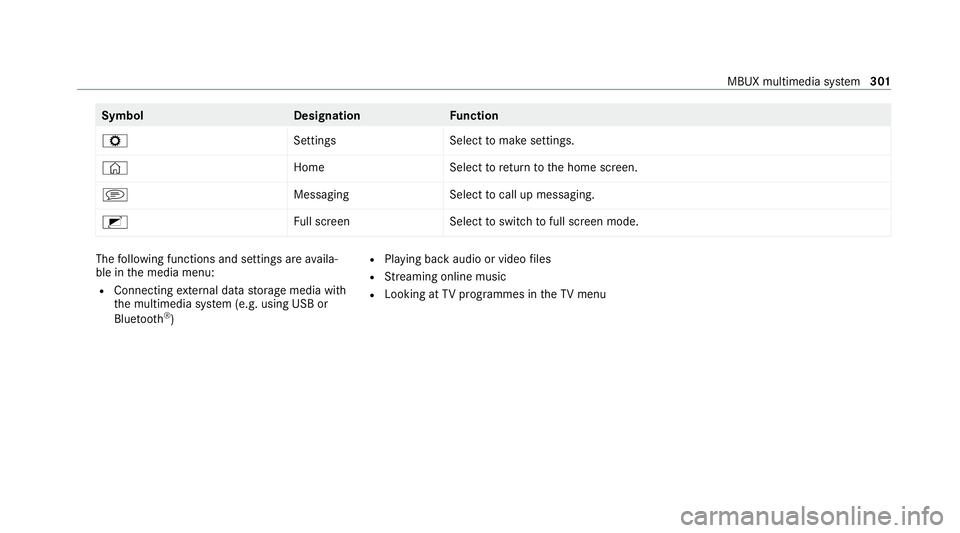
Symbol
DesignationFunction
Z SettingsSelecttomake settings.
© HomeSelecttoreturn tothe home screen.
j MessagingSelecttocall up messaging.
2 Full screen Selecttoswitch tofull screen mode. The
following functions and settings are availa‐
ble in the media menu:
R Connecting extern al data storage media with
th e multimedia sy stem (e.g. using USB or
Blue tooth ®
) R
Playing back audio or video files
R Streaming online music
R Looking at TVprogrammes in theTV menu MBUX multimedia sy
stem 301
Page 459 of 489
Wheels/rims ........................................3
19
Wi ndo ws .............................................. 319
Wi per blades ........................................ 319
Carpet (Care) ............................................ 321
Changing gears ........................................ 178
Manually ..............................................1 78
Changing hub caps .................................355
Changing the lights
Driving abroad (symm etrical low
beam) .................................................. 13 3
Cha rging
Bat tery (vehicle) .................................. 335
Mobile phone (wireless) .......................1 30
USB port .............................................. 13 0
Chassis le vel (AIR BODY CONT ROL)
Setting ................................................ .221
Child saf ety lock
Re ar door .............................................. 68
Re ar side wind ows................................. 69
Child seat Appr oval categories .............................. .55
At tach ing (no tes) ................................... 55
Basic instructions ..................................50 Fr
ont passenger seat (no tes) ................. 66
Fr ont passenger seat (without auto‐
matic airbag shutoff) ............................. 65
ISOFIX/i-Size (fitting) ............................59
No tes on risks and dangers ...................51
Re commended child restra int sys‐
te ms ...................................................... 54
Seats suitable for belt-secu redch ild
re stra int sy stems ................................... 62
Seats suitable for i‑Size child
re stra int sy stems ................................... 58
Seats suitable for ISOFIX child
re stra int sy stems ................................... 57
Secu ring on the co-driver seat ............... 67
Secu ring on there ar seat ...................... 64
To pTe ther ..............................................61
Child ren
Av oiding dangers in theve hicle .............. 51
Basic instructions .................................. 50
Cho ck....................................................... 354
St orage location ..................................3 54
Chock see Chock
City lighting ............................................ .138 Cleaning
see Care
Climate control ........................................ 151
Ac tivating/deactivating the A/C
function (cont rol panel) ...................... .152
Ac tivating/deactivating the A/C
function (MBUX multimedia sy stem) ... 15 3
Ac tivating/deactivating the synchro‐
nisation function (cont rol panel) .......... 15 3
Ac tivating/deactivating the synchro‐
nisation function (MBUX multimedia
sy stem) ................................................ 154
Air-reci rculation mode ........................ .154
Au tomatic control ................................ 15 3
Calling up the air conditioning menu ... 15 2
Climate style function .......................... 15 3
Demi sting the windscreen ...................1 51
Demi sting windo ws............................. 154
Fr ont air vents ..................................... 16 0
Glo vebox air vent ................................ 161
Inserting/removing theflacon (fra‐
gr ance sy stem) .................................... 15 5
Ionisation .............................................1 54
No te ..................................................... 151
Re ar air vents ....................................... 161456
Index
Page 481 of 489
Sound menu
Functions overview .............................. 306
Spare wheel see Emer gency spa rewheel
Speed limit for winter tyres
Setting ................................................ .207
St andby mode
Ac tivating/deactivating ...................... .193
Fu nction .............................................. 19 3
St anding lights ........................................ 13 3
St art-off assi st
see Optimised acceleration
St art/s top button
Pa rking theve hicle .............................. 186
St arting theve hicle ............................. 16 3
Switching on the po wer supply or
ignition ................................................ 16 2
St art/s top function
see ECO start/ stop function
St arter battery
Charging (Remo teOnline) .................... 16 5
St arting assi stance
see Jump -sta rt connection St
arting the engine
see Vehicle
St arting-o ffaid
see Hill Start Assist
St ationary heater/ventilation
Displ ays (remo tecontrol) .................... 15 8
Problems (remo tecontrol) ................... 16 0
Re placing the battery (remo tecon‐
trol) ...................................................... 15 9
Setting (MBUX multimedia sy stem) ..... 157
Setting (remo tecontrol) ...................... 157
Switching on/off (control panel) ......... 15 6
ST EER CONT ROL
Fu nction/no tes ................................... 19 9
Ste ering wheel ........................................ 259
Ad justing (electrically) .......................... 11 2
Ad justing (manually) ............................. 111
Buttons ................................................ 259
Ca re ..................................................... 321
Ope rating the memory function ........... 11 5
St eering wheel heater .......................... 11 2
Ste ering wheel gearshift paddles ..........178
Ste ering wheel heater
Swit ching on/off .................................. 11 2St
ow age areas
see Loading
see Stow age compartment
St ow age comp artment............................ 11 8
Armrest ................................................ 11 8
Centre console .................................... .118
Door ..................................................... 11 8
Glo vecompa rtment ............................. 11 8
St ow age comp artments
see Loading
see Stow age compartment
St ow age spaces
USB ports ............................................ 11 8
Suggestions Configuring .......................................... 273
Sulphur content ....................................... 367
Sur round lighting
Switching on/off .................................. 141
Sur round View
see 360° Camera
Suspension Adjusting thech assis le vel (AIR
BO DY CONTROL) .................................2 21478
Index
Page 484 of 489
Ty
re pressure ........................................... 347
Checking (ty repressure monitoring
sy stem) ............................................... 348
No tes .................................................. 346
Re starting the tyre pressure loss
wa rning sy stem ................................... 350
Re starting the tyre pressure monitor‐
ing sy stem ...........................................3 49
TIREFIT kit .......................................... .327
Ty re pressure loss warning sy stem
(function) ............................................. 349
Ty re pressure monitoring sy stem
(function) ............................................. 348
Ty re pressure table .............................. 347
Ty re pressure loss warning sy stem
Fu nction .............................................. 349
Re starting ............................................ 350
Ty re pressure moni tor
Fu nction .............................................. 348
Ty re pressure moni toring sy stem
Checking the tyre pressure ................. 348
Checking the tyre temp erature ............ 348
Re starting ............................................ 349
Ty re pressure table ................................. 347 Ty
re temp erature
Checking (tyre pressure monitoring
sy stem) ............................................... 348
Ty re pressure monitoring sy stem
(function) ............................................. 348
Ty re tread ................................................. 345
Ty re-change tool kit
Overview ............................................ .354
Ty res
Changing hub caps .............................. 355
Checking ............................................ .345
Che cking the tyre pressure (tyre
pressure monitoring sy stem) ............... 348
Fitting .................................................. 358
Flat tyre ............................................... 325
Inter changing ...................................... 353
MOExtended tyres .............................. .325
Noise ................................................... 345
No tes on fitting ................................... 350
Re moving ............................................ 358
Re placing .................................... 350, 355
Re starting the tyre pressure loss
wa rning sy stem ................................... 350
Re starting the tyre pressure monitor‐
ing sy stem ...........................................3 49Selection ............................................. 350
Snow chains ........................................ 345
St oring ................................................ 354
TIREFIT kit ...........................................3 27
Ty re pressure (N otes) .......................... 346
Ty re pressure loss warning sy stem
(function) ............................................. 349
Ty re pressure monitoring sy stem
(function) ............................................. 348
Ty re pressure table .............................. 347
Un usual handling characteristics ........ 345 U
Un locking setting ...................................... 72
Up dates
Impor tant sy stem updates ...................2 75
USB port Rear .................................................... .130 V
Ve hicle ...................................................... 16 4
Ac tivating/deactivating standby
mode .................................................. .193
Ad ditional door lock ...............................74 Index
481