sensor MERCEDES-BENZ E-CLASS SALOON 2008 User Guide
[x] Cancel search | Manufacturer: MERCEDES-BENZ, Model Year: 2008, Model line: E-CLASS SALOON, Model: MERCEDES-BENZ E-CLASS SALOON 2008Pages: 401, PDF Size: 6.89 MB
Page 95 of 401
Mirrors
92
X
Make sure that the key is in position 1or
2 in the ignition lock.
X Briefly press button 1.
Both exterior mirrors fold in or out.
i If you are driving faster than 47 km/h, you
can no longer fold in the exterior mirrors.
Make sure that the exterior mirrors are
always folded out fully while the vehicle is
in motion; otherwise, they may vibrate.
Resetting the exterior mirrors If the battery has been disconnected or has
become discharged, the exterior mirrors
must be reset. Otherwise, they will not fold in
when you select the "Fold in mirrors when
locking" function in the on-board computer
(Y page 139).
X Make sure that the key is in position 1in
the ignition lock.
X Briefly press button 1.
Folding the exterior mirrors in or out
automatically* If the "Fold in mirrors when locking" function
is activated in the on-board computer
(Y page 139): R
The exterior mirrors fold in automatically as
soon as you lock the vehicle from the out-
side.
R The exterior mirrors fold out again auto-
matically as soon as you unlock the vehicle
and then open the driver's or front-
passenger door.
i If you have activated this function and fold
in the exterior mirrors using button 1, they
will not be folded out automatically. You
can then only fold out the exterior mirrors
using button 1. Automatic anti-dazzle mirrors*
The rear-view mirror and the exterior mirror
on the driver's side automatically go into anti-
dazzle mode if the ignition is switched on and
incident light from headlamps strikes the sen-
sor in the rear-view mirror.
The mirrors do not go into anti-dazzle mode if
reverse gear is engaged and the interior light-
ing is switched on. G
Risk of accident
If the incident light from headlamps cannot
strike the sensor in the rear-view mirror, for
instance when the rear window blind* is extended, the mirrors' automatic anti-daz-
zle function will not operate.
Incident light could then dazzle you. This
may prevent you from observing the traffic
conditions, thereby causing an accident. In
this case, adjust the rear-view mirror man-
ually. Parking aid*
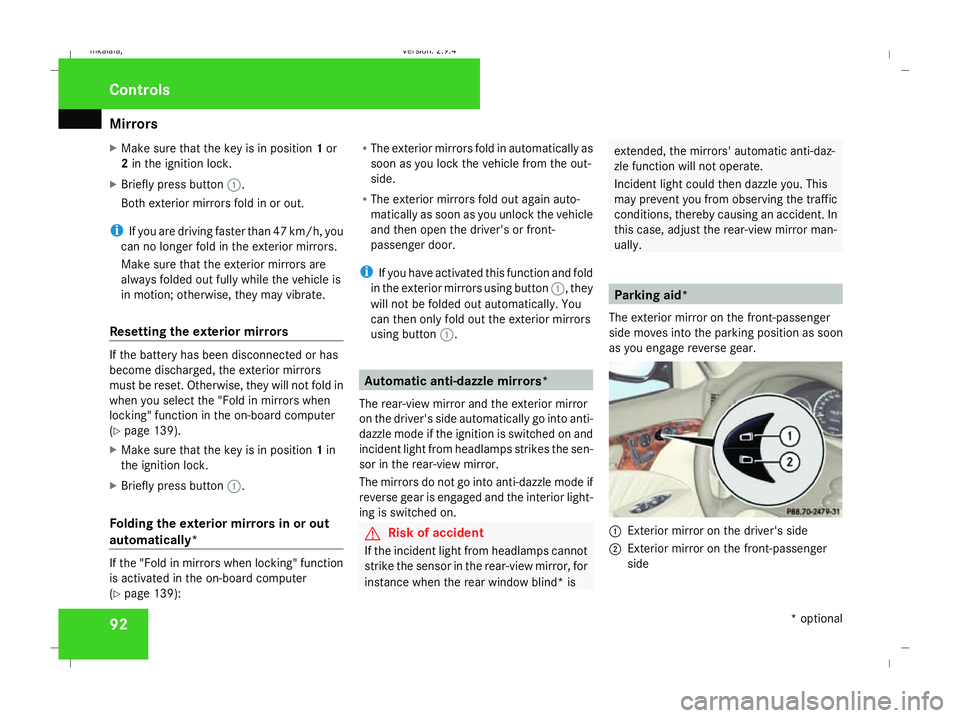
The exterior mirror on the front-passenger
side moves into the parking position as soon
as you engage reverse gear. 1
Exterior mirror on the driver's side
2 Exterior mirror on the front-passenger
side Controls
* optional
211_AKB; 2; 5, en-GB
mkalafa,
Version: 2.9.4
2008-02-29T16:57:07+01:00 - Seite 92 Dateiname: 6515_3416_02_buchblock.pdf; preflight
Page 108 of 401
Windscreen wipers
105
Automatic function
X
To switch on/off: press the¡button.
The interior lighting switches on if it is dark
when you:
R unlock the vehicle
R open a door
R remove the key from the ignition lock
The interior lighting switches off after a delay.
You can set the delayed switch-off using the
on-board computer.
i If the door is left open, the interior lighting
goes out after approximately five minutes.
Manual control
Front interior lighting
X To switch on/off: press theðbutton.
Rear-compartment interior lighting
X To switch on/off: press the¦button.
Front reading lamps
X To switch on/off: press theXbutton. Rear-compartment overhead control
panel
Rear-compartment overhead control panel
1 X To switch the left-hand reading lamp
on/off
2 X To switch the right-hand reading
lamp on/off
Rear-compartment reading lamps
X To switch on/off: press theXbutton. Windscreen wipers
Switching the windscreen wipers on/
off
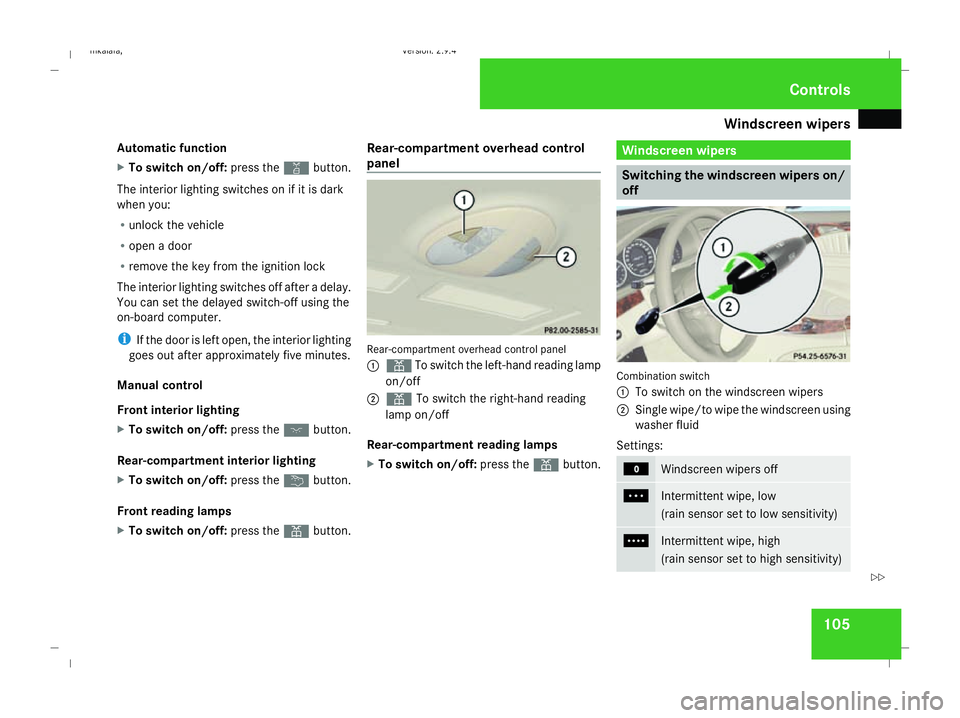
Combination switch
1
To switch on the windscreen wipers
2 Single wipe/to wipe the windscreen using
washer fluid
Settings: M
Windscreen wipers off
U
Intermittent wipe, low
(rain sensor set to low sensitivity)
V
Intermittent wipe, high
(rain sensor set to high sensitivity) Controls
211_AKB; 2; 5, en-GB
mkalafa,
Version: 2.9.4
2008-02-29T16:57:07+01:00 - Seite 105 ZDateiname: 6515_3416_02_buchblock.pdf; preflight
Page 109 of 401
Windscreen wipers
106 u
Continuous wipe, slow
t
Continuous wipe, fast
!
If the windscreen becomes dirty in dry
weather conditions, the windscreen wipers
may be activated inadvertently. This could
then damage the windscreen wiper blades
or scratch the windscreen.
For this reason, you should always switch
off the windscreen wipers in dry weather.
X Make sure that the key is in position 1or
2 in the ignition lock.
The various wiper settings can be selected
as follows:
Single wipe X
Briefly press the combination switch to the
pressure point in the direction of arrow
2.
Wiping with washer fluid X
Press the combination switch beyond the
pressure point in the direction of arrow
2. Intermittent wipe/rain sensor X
Depending on the intensity of the rain, turn
the combination switch in the direction of
arrow 1to position UorV.
The rain sensor is activated. The appropri-
ate wiping frequency is set automatically
according to the intensity of the rain.
Continuous wipe X
Depending on the intensity of the rain, turn
the combination switch in the direction of
arrow 1to position uort.
Switching off the windscreen wipers X
Turn the combination switch to position
M. Rear window wiper (Estate)
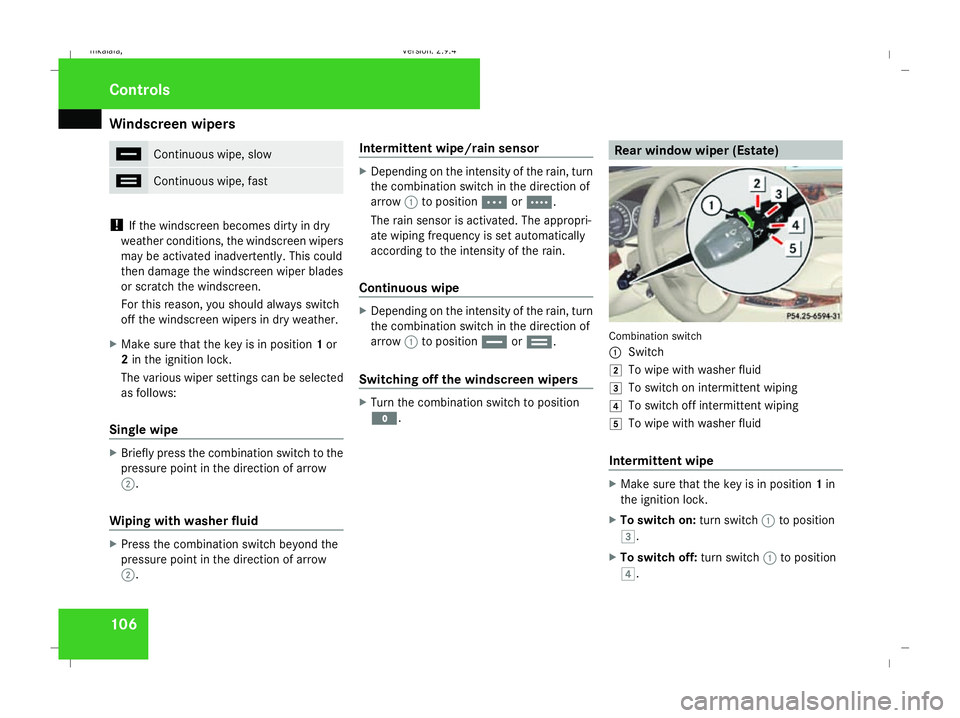
Combination switch
1
Switch
% To wipe with washer fluid
& To switch on intermittent wiping
( To switch off intermittent wiping
) To wipe with washer fluid
Intermittent wipe X
Make sure that the key is in position 1in
the ignition lock.
X To switch on: turn switch1to position
&.
X To switch off: turn switch1to position
(. Controls
211_AKB; 2; 5, en-GB
mkalafa,
Version: 2.9.4 2008-02-29T16:57:07+01:00 - Seite 106Dateiname: 6515_3416_02_buchblock.pdf; preflight
Page 149 of 401
Driving sys
tems 146 Distronic does not react to:
R
pedestrians
R stationary obstacles on the road, e.g. sta-
tionary or parked vehicles
R oncoming and crossing traffic
Distronic may not detect narrow vehicles
driving in front, e.g. motorcycles, or vehi-
cles driving on a different line. Therefore,
always pay attention to traffic conditions
even when Distronic is activated. Other-
wise, you may fail to recognise dangers in
time, could cause an accident and injure
yourself and others.
If a slower-moving vehicle is detected in front,
Distronic causes your vehicle to brake and
maintain a preset distance to the vehicle in
front. G
Risk of accident
Distronic cannot take account of road and
traffic conditions. Deactivate, or do not
activate, Distronic if it does not detect the
vehicle in front, or if it no longer detects it.
This is especially the case:
R before corners
R on filter lanes R
when changing to a lane with faster mov-
ing traffic
R in complex driving situations or where
the lanes are diverted, e.g. at motorway/
roadway construction sites
Otherwise, Distronic maintains the current
speed or accelerates to the set speed.
Distronic cannot take account of weather
conditions. Deactivate, or do not activate,
Distronic:
R if the roads are slippery, snow-covered or
icy. The wheels could lose their grip
under braking or acceleration. The vehi-
cle could start to skid.
R if the sensors are dirty or there is poor
visibility, e.g. due to snow, rain or fog.
Distance control may be impaired.
Always pay attention to traffic conditions
even when Distronic is activated. Other-
wise, you may fail to recognise dangers in
time, could cause an accident and injure
yourself and others.
If there is no vehicle in front, Distronic oper-
ates in the same way as cruise control. Dis-
tronic functions in the 30 km/h to
180 km/h range. G
Risk of accident
Distronic brakes your vehicle at a maximum
of 2 m/s 2
, depending on its speed. This
corresponds to approximately 20% of your
vehicle's maximum braking power. You
must also apply the brakes yourself if this
braking power is not sufficient.
If Distronic detects a risk of collision with a
vehicle in front, an intermittent warning
tone sounds. In addition, the ldistance
warning lamp in the instrument cluster
lights up. Brake to avoid a collision.
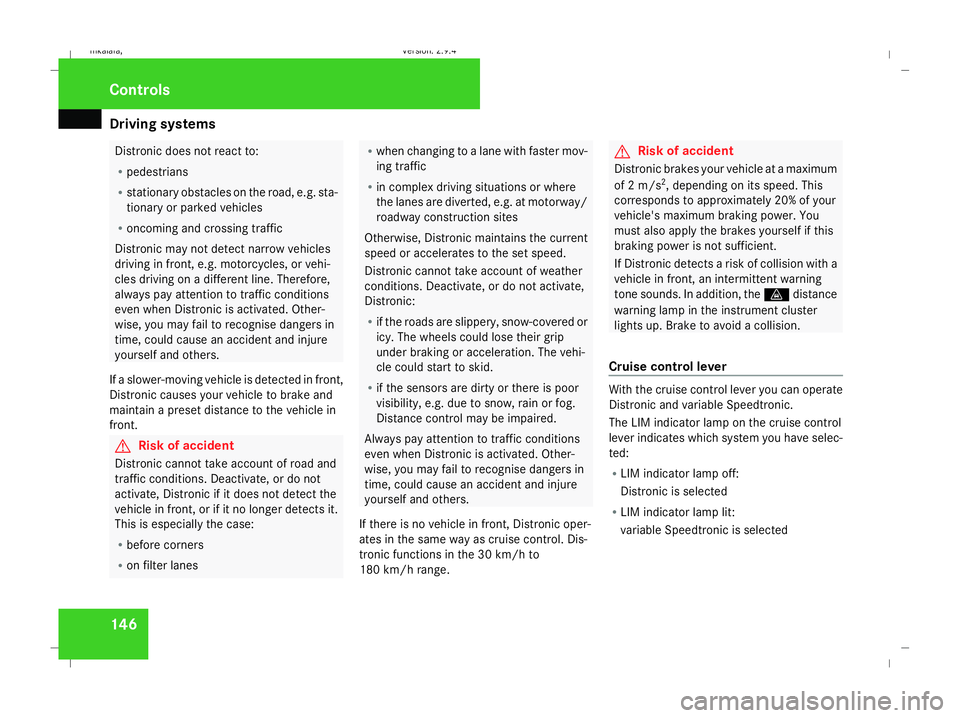
Cruise control lever With the cruise control lever you can operate
Distronic and variable Speedtronic.
The LIM indicator lamp on the cruise control
lever indicates which system you have selec-
ted:
R
LIM indicator lamp off:
Distronic is selected
R LIM indicator lamp lit:
variable Speedtronic is selected Controls
211_AKB; 2; 5, en-GB
mkalafa
,V ersion: 2.9.4
2008-02-29T16:57:07+01:00 - Seite 146 Dateiname: 6515_3416_02_buchblock.pdf; preflight
Page 161 of 401
Driving sys
tems 158
Sports tuning II
X
Press button 1twice.
Two indicator lamps 2light up.
The vehicle level is lowered by 15 mm.
Comfort tuning
X Press button 1repeatedly until indicator
lamps 2go out.
Multi-function display
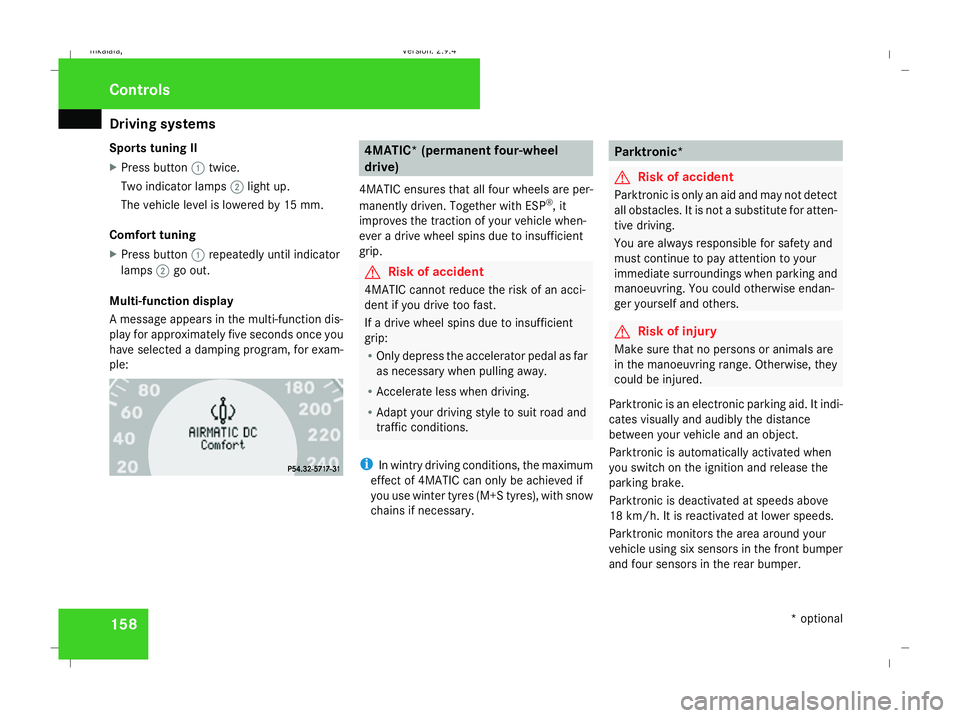
A message appears in the multi-function dis-
play for approximately five seconds once you
have selected a damping program, for exam-
ple: 4MATIC* (permanent four-wheel
drive)
4MATIC ensures that all four wheels are per-
manently driven. Together with ESP ®
, it
improves the traction of your vehicle when-
ever a drive wheel spins due to insufficient
grip. G
Risk of accident
4MATIC cannot reduce the risk of an acci-
dent if you drive too fast.
If a drive wheel spins due to insufficient
grip:
R Only depress the accelerator pedal as far
as necessary when pulling away.
R Accelerate less when driving.
R Adapt your driving style to suit road and
traffic conditions.
i In wintry driving conditions, the maximum
effect of 4MATIC can only be achieved if
you use winter tyres (M+S tyres), with snow
chains if necessary. Parktronic*
G
Risk of accident
Parktronic is only an aid and may not detect
all obstacles. It is not a substitute for atten-
tive driving.
You are always responsible for safety and
must continue to pay attention to your
immediate surroundings when parking and
manoeuvring. You could otherwise endan-
ger yourself and others. G
Risk of injury
Make sure that no persons or animals are
in the manoeuvring range. Otherwise, they
could be injured.
Parktronic is an electronic parking aid. It indi-
cates visually and audibly the distance
between your vehicle and an object.
Parktronic is automatically activated when
you switch on the ignition and release the
parking brake.
Parktronic is deactivated at speeds above
18 km/h. It is reactivated at lower speeds.
Parktronic monitors the area around your
vehicle using six sensors in the front bumper
and four sensors in the rear bumper. Controls
* optional
211_AKB; 2; 5, en-GB
mkalafa
, Version: 2.9.4 2008-02-29T16:57:07+01:00 - Seite 158Dateiname: 6515_3416_02_buchblock.pdf; preflight
Page 162 of 401
Driving sys
tems 1591
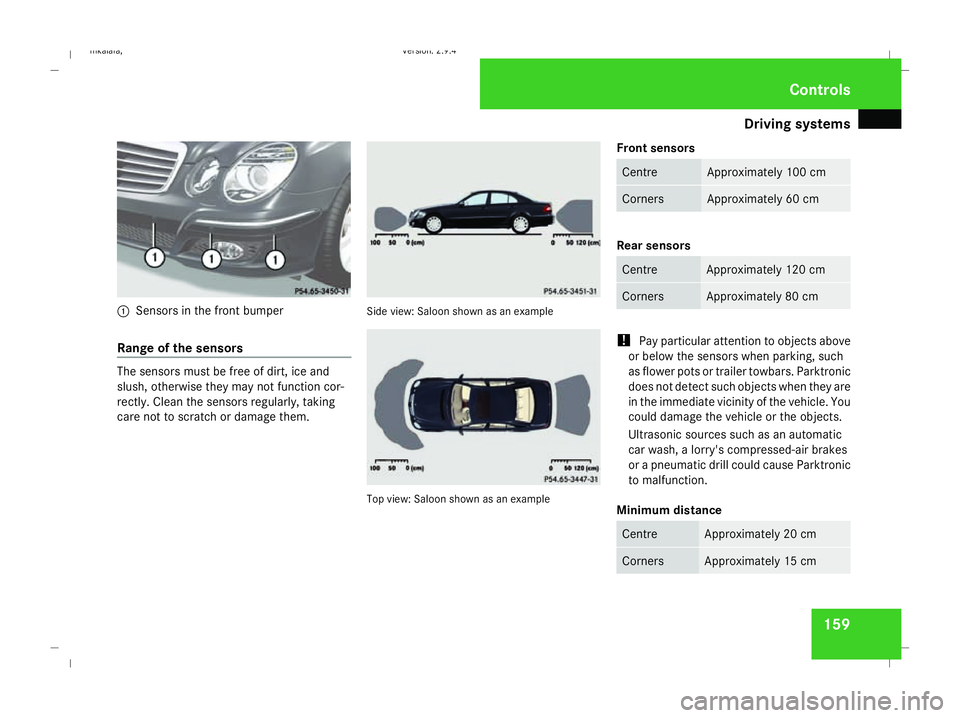
Sensors in the front bumper
Range of the sensors The sensors must be free of dirt, ice and
slush, otherwise they may not function cor-
rectly. Clean the sensors regularly, taking
care not to scratch or damage them. Side view: Saloon shown as an example
Top view: Saloon shown as an exampleFront sensors Centre Approximately 100 cm
Corners Approximately 60 cm
Rear sensors
Centre Approximately 120 cm
Corners Approximately 80 cm
!
Pay particular attention to objects above
or below the sensors when parking, such
as flower pots or trailer towbars. Parktronic
does not detect such objects when they are
in the immediate vicinity of the vehicle. You
could damage the vehicle or the objects.
Ultrasonic sources such as an automatic
car wash, a lorry's compressed-air brakes
or a pneumatic drill could cause Parktronic
to malfunction.
Minimum distance Centre Approximately 20 cm
Corners Approximately 15 cm Controls
211_AKB; 2; 5, en-GB
mkalafa
, Version: 2.9.4 2008-02-29T16:57:07+01:00 - Seite 159 ZDateiname: 6515_3416_02_buchblock.pdf; preflight
Page 163 of 401
Driving sys
tems 160
If there is an obstacle within this range, all
warning displays light up and a tone sounds.
If the distance falls below the minimum clear-
ance, it may no longer be shown.
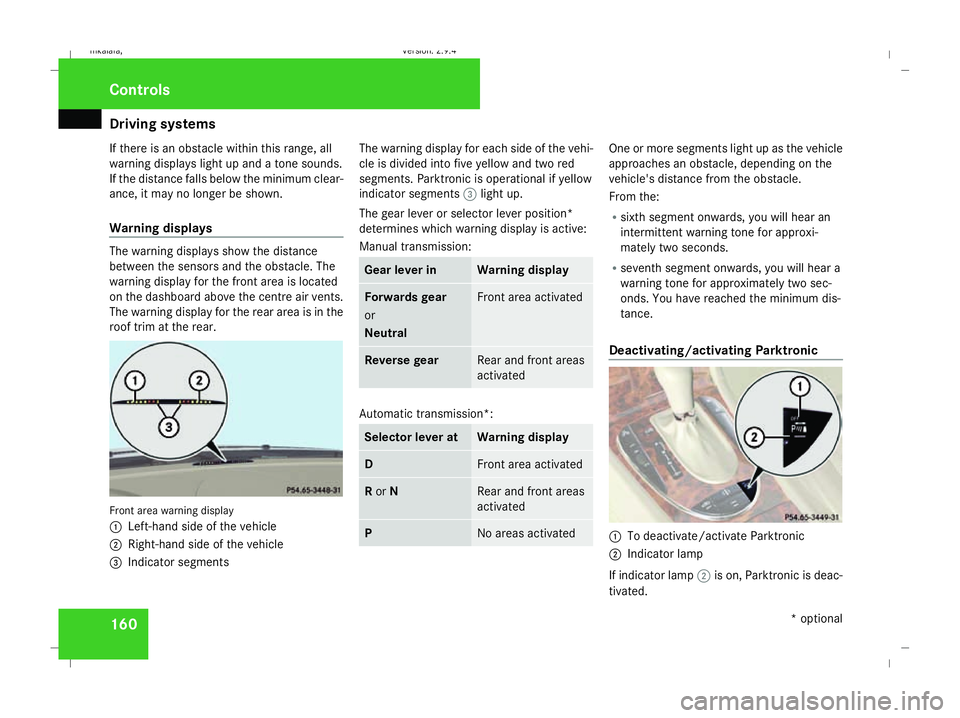
Warning displays The warning displays show the distance
between the sensors and the obstacle. The
warning display for the front area is located
on the dashboard above the centre air vents.
The warning display for the rear area is in the
roof trim at the rear. Front area warning display
1
Left-hand side of the vehicle
2 Right-hand side of the vehicle
3 Indicator segments The warning display for each side of the vehi-
cle is divided into five yellow and two red
segments. Parktronic is operational if yellow
indicator segments
3light up.
The gear lever or selector lever position*
determines which warning display is active:
Manual transmission: Gear lever in Warning display
Forwards gear
or
Neutral Front area activated
Reverse gear Rear and front areas
activated
Automatic transmission*:
Selector lever at Warning display
D Front area activated
R
or N Rear and front areas
activated
P No areas activated One or more segments light up as the vehicle
approaches an obstacle, depending on the
vehicle's distance from the obstacle.
From the:
R
sixth segment onwards, you will hear an
intermittent warning tone for approxi-
mately two seconds.
R seventh segment onwards, you will hear a
warning tone for approximately two sec-
onds. You have reached the minimum dis-
tance.
Deactivating/activating Parktronic 1
To deactivate/activate Parktronic
2 Indicator lamp
If indicator lamp 2is on, Parktronic is deac-
tivated. Controls
* optional
211_AKB; 2; 5, en-GB
mkalafa
,V ersion: 2.9.4
2008-02-29T16:57:07+01:00 - Seite 160 Dateiname: 6515_3416_02_buchblock.pdf; preflight
Page 248 of 401
Care
245H
Environmental note
Dispose of empty packaging, cleaning
cloths and polishing wads in an environ-
mentally responsible manner.
! Do not affix:
R stickers
R films
R magnetic plates or similar items
to painted surfaces, otherwise you could
damage the paintwork. Vehicle care
! Do not park the vehicle for a long period
of time directly after cleaning, especially if
the wheels have just been cleaned with a
wheel cleaner. Wheel cleaners could cause
rapid corrosion of the brake discs and
brake pads/linings. After cleaning, park
the vehicle when it is at normal operating
temperature. Automatic car wash G
Risk of accident
The vehicle is braked when HOLD is activa-
ted. Therefore, deactivate HOLD before the
vehicle is washed in an automatic car wash.
You can wash the vehicle in an automatic car
wash from the very start.
! Do not use a touch-free automatic car
wash that uses chemical agents to wash
the vehicle.
Preferably use one with high-pressure jets for
prewashing.
If the vehicle is very dirty, prewash it before
cleaning it in an automatic car wash.
! Make sure that the automatic car wash is
suitable for the size of the vehicle. Fold in
the exterior mirrors before the vehicle is
washed. There is otherwise a risk of dam-
age to the exterior mirrors.
! Make sure the side windows are com-
pletely closed, the ventilation/heater
blower is fully turned off and the wind-
screen wiper switch is set to 0. The rain
sensor may otherwise be activated, for
instance, leading to inadvertent wiper sweeps being triggered. This could cause
damage to the vehicle.
After using an automatic car wash, wipe any
wax and drying agents off the windscreen and
the wiper blades. This will prevent smears and
reduce wiping noises caused by residue on
the windscreen.
High-pressure cleaners G
Risk of accident
Do not use high-pressure cleaners with cir-
cular-jet nozzles (dirt grinders) to clean
your vehicle or - especially - the tyres. You
could otherwise damage the tyres and
cause an accident.
! Observe the instructions issued by the
equipment manufacturer concerning the
distance to be maintained between the
nozzle of the high-pressure cleaner and the
vehicle (at least 30 cm).
Move the high-pressure cleaner nozzle
around when cleaning your vehicle.
Do not aim directly at any of the following:
R tyres
R door joint
R electrical components Operation
211_AKB; 2; 5, en-GB
mkalafa,
Version: 2.9.4
2008-02-29T16:57:07+01:00 - Seite 245 ZDateiname: 6515_3416_02_buchblock.pdf; preflight
Page 251 of 401
Care
248Use the chrome cleaning agent recommen-
ded by Mercedes-Benz for cleaning. Infor-
mation about chrome cleaning agents can
be obtained from any Mercedes-Benz
Service Centre.
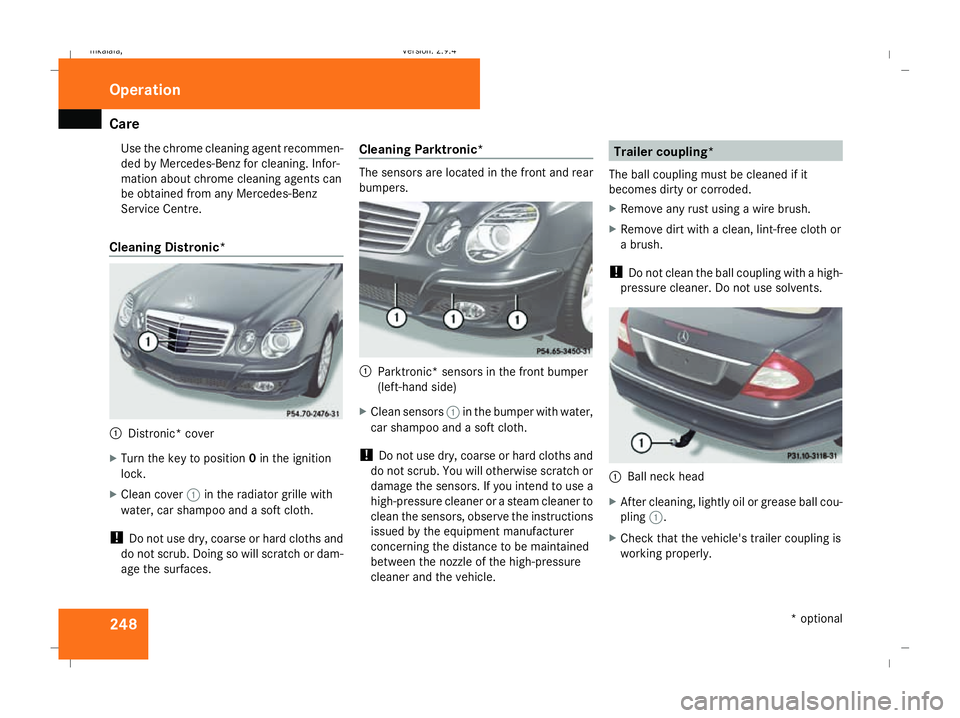
Cleaning Distronic* 1
Distronic* cover
X Turn the key to position 0in the ignition
lock.
X Clean cover 1in the radiator grille with
water, car shampoo and a soft cloth.
! Do not use dry, coarse or hard cloths and
do not scrub. Doing so will scratch or dam-
age the surfaces. Cleaning Parktronic* The sensors are located in the front and rear
bumpers.
1
Parktronic* sensors in the front bumper
(left-hand side)
X Clean sensors 1in the bumper with water,
car shampoo and a soft cloth.
! Do not use dry, coarse or hard cloths and
do not scrub. You will otherwise scratch or
damage the sensors. If you intend to use a
high-pressure cleaner or a steam cleaner to
clean the sensors, observe the instructions
issued by the equipment manufacturer
concerning the distance to be maintained
between the nozzle of the high-pressure
cleaner and the vehicle. Trailer coupling*
The ball coupling must be cleaned if it
becomes dirty or corroded.
X Remove any rust using a wire brush.
X Remove dirt with a clean, lint-free cloth or
a brush.
! Do not clean the ball coupling with a high-
pressure cleaner. Do not use solvents. 1
Ball neck head
X After cleaning, lightly oil or grease ball cou-
pling 1.
X Check that the vehicle's trailer coupling is
working properly. Operation
* optional
211_AKB; 2; 5, en-GB
mkalafa,
Version: 2.9.4 2008-02-29T16:57:07+01:00 - Seite 248Dateiname: 6515_3416_02_buchblock.pdf; preflight
Page 263 of 401
Display
messages 260 Display messages Possible cause/consequence Possible solution
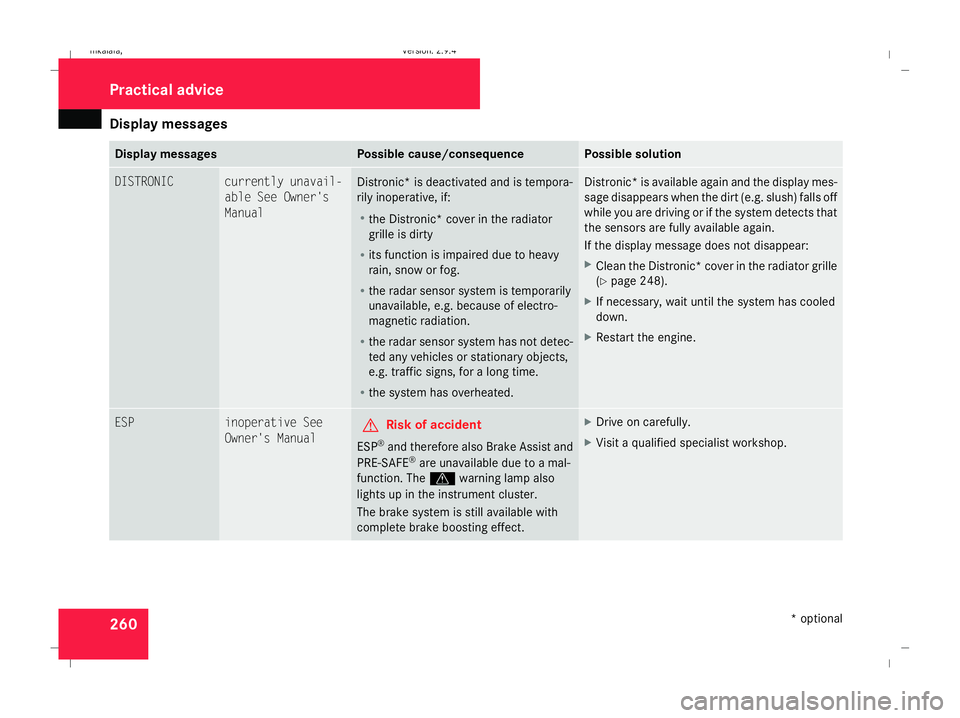
DISTRONIC currently unavail-
able See Owner's
Manual
Distronic
* is deactivated and is tempora-
rily inoperative, if:
R the Distronic* cover in the radiator
grille is dirty
R its function is impaired due to heavy
rain, snow or fog.
R the radar sensor system is temporarily
unavailable, e.g. because of electro-
magnetic radiation.
R the radar sensor system has not detec-
ted any vehicles or stationary objects,
e.g. traffic signs, for a long time.
R the system has overheated. Distronic* is available again and the display mes-
sage disappears when the dirt (e.g. slush) falls off
while you are driving or if the system detects that
the sensors are fully available again.
If the display message does not disappear:
X
Clean the Distronic* cover in the radiator grille
(Y page 248).
X If necessary, wait until the system has cooled
down.
X Restart the engine. ESP inoperative See
Owner's Manual
G
Risk of accident
ESP ®
and therefore also Brake Assist and
PRE-SAFE ®
are unavailable due to a mal-
function. The vwarning lamp also
lights up in the instrument cluster.
The brake system is still available with
complete brake boosting effect. X
Drive on carefully.
X Visit a qualified specialist workshop. Practical advice
* optional
211_AKB; 2; 5, en-GB
mkalafa
,V ersion: 2.9.4
2008-02-29T16:57:07+01:00 - Seite 260 Dateiname: 6515_3416_02_buchblock.pdf; preflight