key MERCEDES-BENZ E-CLASS SALOON 2011 Manual PDF
[x] Cancel search | Manufacturer: MERCEDES-BENZ, Model Year: 2011, Model line: E-CLASS SALOON, Model: MERCEDES-BENZ E-CLASS SALOON 2011Pages: 409, PDF Size: 10.47 MB
Page 170 of 409
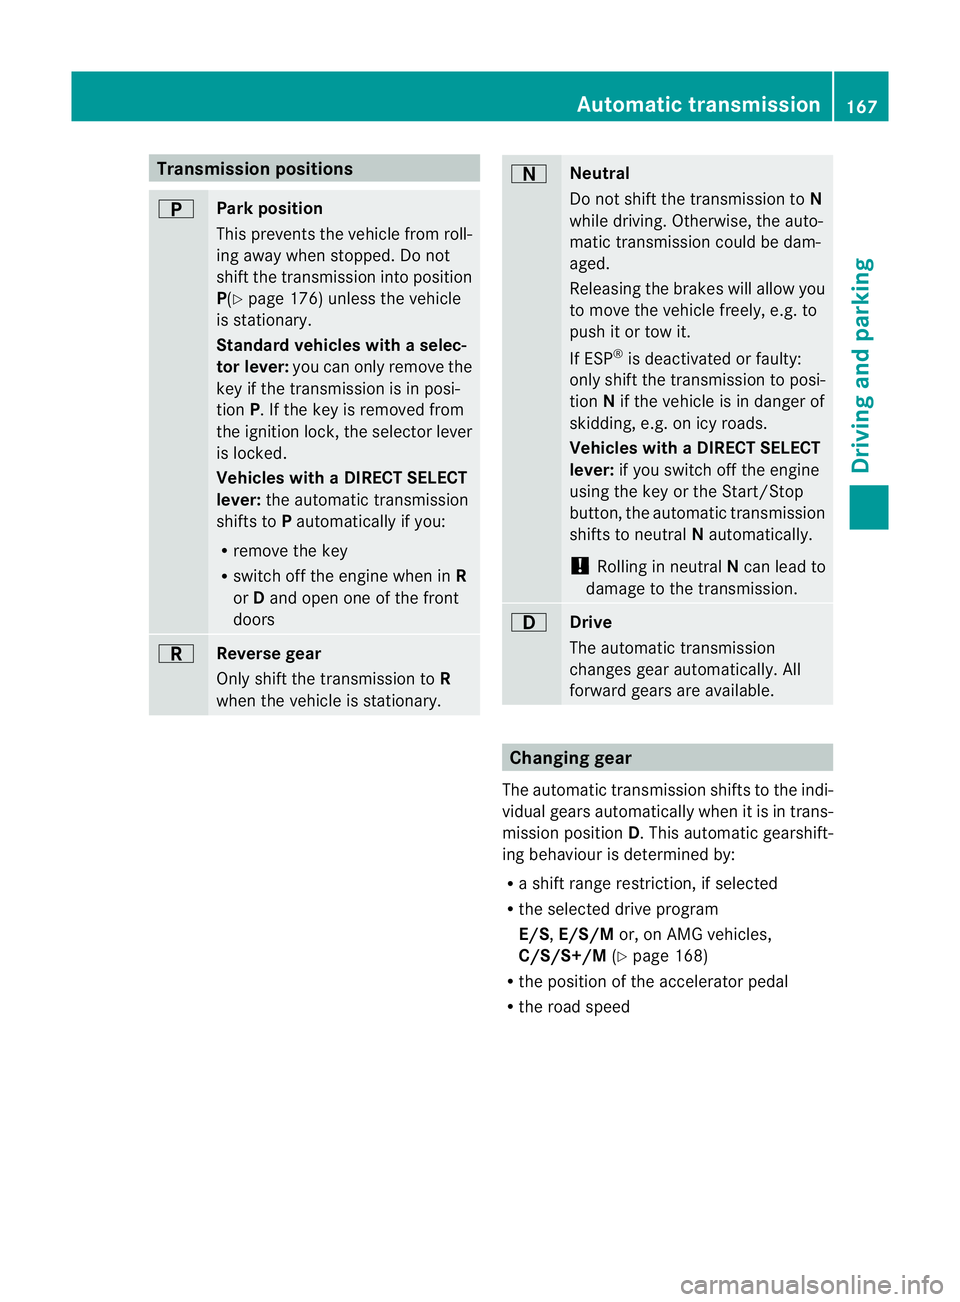
Transmission positions
B
Park position
This prevents the vehicle fro
mroll-
ing away when stopped. Do not
shift the transmission into position
P(Y page 176) unless the vehicle
is stationary.
Standard vehicles with aselec-
tor lever: you can only remove the
key if the transmission is in posi-
tion P. If the key is removed from
the ignitio nlock, the selector lever
is locked.
Vehicles with aDIRECT SELECT
lever: the automatic transmission
shifts to Pautomatically if you:
R remove the key
R switch off the engine when in R
or Dand open one of the front
doors C
Reverse gear
Only shif
tthe transmission to R
when the vehicle is stationary. A
Neutral
Do not shift the transmission to
N
while driving. Otherwise, the auto-
matic transmission could be dam-
aged.
Releasing the brakes will allow you
to move the vehicle freely, e.g. to
push it or tow it.
If ESP ®
is deactivated or faulty:
only shift the transmission to posi-
tion Nif the vehicle is in danger of
skidding, e.g. on icy roads.
Vehicles with aDIRECT SELECT
lever: if you switch off th eengine
using the key or the Start/Stop
button, the automatic transmission
shifts to neutral Nautomatically.
! Rolling in neutral Ncan lead to
damage to the transmission. 7
Drive
The automatic transmission
changes gear automatically. All
forward gears are available. Changing gear
The automatic transmission shifts to the indi-
vidual gears automatically when it is in trans-
mission position D.This automatic gearshift-
ing behaviouri s determined by:
R a shift range restriction, if selected
R the selected drive program
E/S, E/S/M or, on AMG vehicles,
C/S/S+/M (Ypage 168)
R the position of the accelerator pedal
R the road speed Automatic transmission
167Driving and parking Z
Page 176 of 409
G
WARNING
Do not use petrol to refuel a diesel tank. Never
mix diesel with petrol. Doing so could damage
the fuel system and the engine. The vehicle
could also catch fire.
! Do not use petrol to refuel vehicles with a
diesel engine. Do not use diesel to refuel
vehicles with a petrol engine. Even small
amounts of the wrong fuel result in damage
to the fuel system and the engine.
! Do not switch on the ignition if you acci-
dentally refuel with the wrong fuel .Other-
wise, the fuel will ente rthe fuel lines. Notify
a qualified specialist workshop and have
the fuel tank and fuel lines drained com-
pletely.
! Overfilling the fuel tank could damage the
fuel system.
! Take care not to spill any fuel on painted
surfaces. You could otherwise damage the
paintwork.
! Use a filter when adding fuel from a fuel
can. The fuel lines and/or the diesel injec-
tion system could otherwise be blocked by
particles from the fuel can.
Further information on fuel and on fuel grades
can be found in the "Fuel" section
(Y page 384). Refuelling
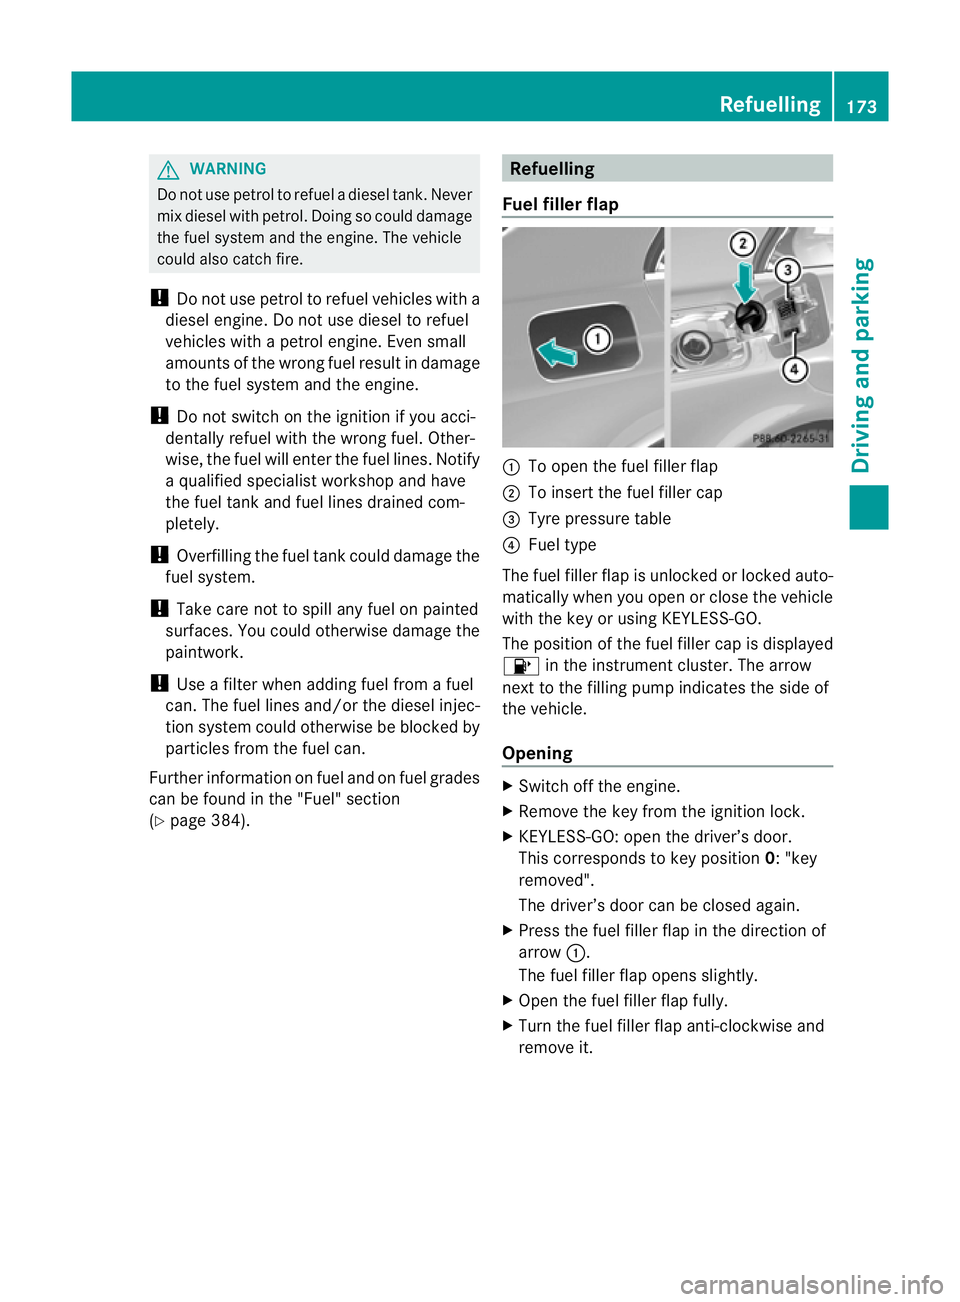
Fuel filler flap :
To open the fuel filler flap
; To insert the fuel filler cap
= Tyre pressure table
? Fuel type
The fuel filler flap is unlocked or locked auto-
matically when you open or close the vehicle
with the key or using KEYLESS-GO.
The position of the fuel filler cap is displayed
8 in the instrument cluster. The arrow
next to the filling pump indicates the side of
the vehicle.
Opening X
Switch off the engine.
X Remove the key from the ignition lock.
X KEYLESS-GO: open the driver’s door.
This corresponds to key position 0: "key
removed".
The driver’s door can be closed again.
X Press the fuel filler flap in the direction of
arrow :.
The fuel filler flap opens slightly.
X Open the fuel filler flap fully.
X Turn the fuel filler flap anti-clockwise and
remove it. Refuelling
173Driving and parking Z
Page 178 of 409
Problems with the fuel and fuel tank
Problem Possible causes/consequences and
M Solutions
Fuel is leaking from the
vehicle.
G
Risk of explosion or fire
The fuel line or the fuel tank is faulty.
X Turn the key to position 0in the ignition lock immediately and
remove it (Y page 155).
X Do not restart the engine under any circumstances.
X Consult a qualified specialist workshop. The engine does not
start. The fuel tank of a vehicle with a diesel engine has been run com-
pletely dry.
X
Refuel the vehicle with at least 5litres of diesel.
X Turn the ignition on for around 10 seconds(Y page 155).
X Start the engine continuously for up to 10 seconds until it runs
smoothly.
or
X Start the engine using the touch-star tfunction .To do this, turn
the key to position 3in the ignition lock and then release it
immediately (Y page 155).
If the engine does not start:
X Turn the ignition on again for approximately
10 seconds(Y page 155).
X Start the engine again continuously for up to 10 seconds until
it runs smoothly.
or
X Start the engine again via the touch-start function.
If the engine does not start after three attempts:
X Consult a qualified specialist workshop. Refuelling
175Driving and parking Z
Page 179 of 409
Problem Possible causes/consequences and
M Solutions
The fuel filler flap can-
not be opened. The fuel filler flap is not unlocked.
or
The key battery is discharged.
X
Unlock the vehicle using the emergency key element
(Y page 84).
X Open the boot lid or the tailgate.
X Manually unlock the fuel filler flap using the emergency release
(Y page 174). The fuel filler flap is unlocked, but the opening mechanism is jam-
med.
X
Consult a qualified specialist workshop. Parking
Important safety notes
G
WARNING
Only remove the key from the ignition lock
when the vehicle is stationary, as you cannot
steer the vehicle when the key is removed.
Never leave children unsupervised in the vehi-
cle. They could release the parking brake. This
could lead to a serious or fatal accident. G
WARNING
Under no circumstances should the exhaust
system come into contact with flammable
materials such as dry grass or petrol, for
example. Do not park the vehicle on dry grass-
land or harvested grain fields. The hot exhaust
system could otherwise ignite the flammable
material and set the vehicle on fire.
To ensure that the vehicle is secured against
rolling away unintentionally:
R the parking brake must be firmly applied.
R on vehicles with manual transmission,
engage first gear or reverse gear.
R on vehicles with automatic transmission,
the transmission must be in position Pand the key must be removed from the ignition
lock.
R on uphill or downhill gradients, turn the
front wheels towards the kerb. Switching off the engine
Important safety notes G
WARNING
If the engine is not running, there is no power
assistance for the steering and brakes. Steer-
ing and braking then requires significantly
greater effort.
As a result, you might lose control of the vehi-
cle, cause an accident and injure yourself and
others.
Therefore, do not switch off the engine while
you are driving.
Vehicles with manual transmission X
Shift to either first gear or reverse gear R.
X Turn the key to position 0in the ignition
lock and remove it.
The immobiliser is activated.
X Apply the parking brake firmly. 176
ParkingDriving and parking
Page 180 of 409
Vehicles with automatic transmission
X
Standard vehicles: shift the transmission
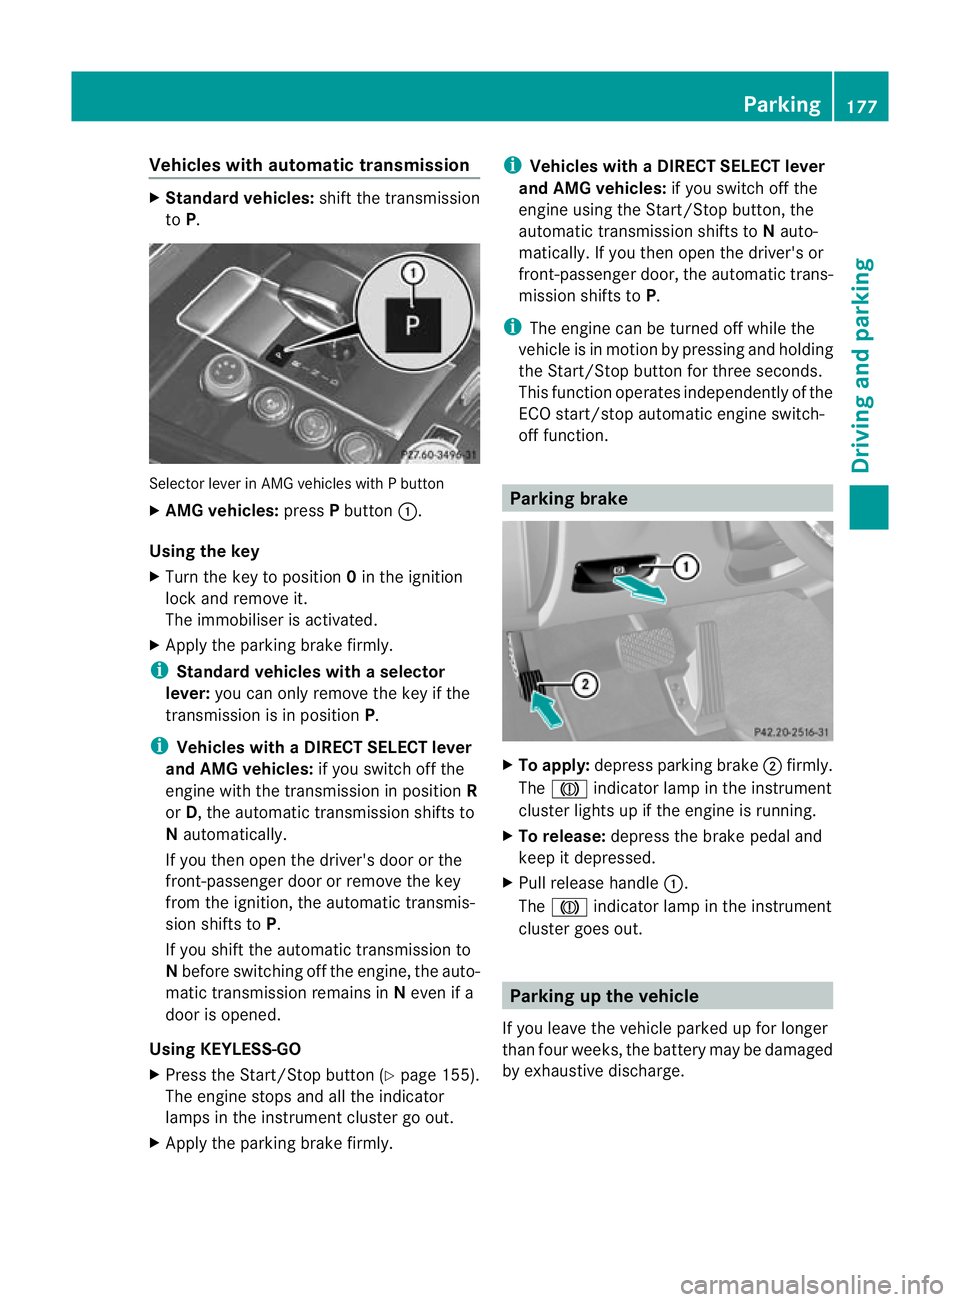
to P. Selecto
rlever in AMG vehicles with P button
X AMG vehicles: pressPbutton :.
Using the key
X Turn the key to position 0in the ignition
lock and remove it.
The immobiliser is activated.
X Apply the parking brake firmly.
i Standard vehicles with aselector
lever: you can only remove the key if the
transmission is in position P.
i Vehicles with aDIRECT SELECT lever
and AMG vehicles: if you switch off the
engine with the transmission in position R
or D, the automatic transmission shifts to
N automatically.
If you then open the driver's door or the
front-passenger door or remove the key
from the ignition, the automatic transmis-
sion shifts to P.
If you shift the automatic transmission to
N before switching off the engine, the auto-
matic transmission remains in Neven if a
door is opened.
Using KEYLESS-GO
X Press the Start/Stop butto n(Ypage 155).
The engine stops and all the indicator
lamps in the instrument cluster go out.
X Apply the parking brake firmly. i
Vehicles with aDIRECT SELECT lever
and AMG vehicles: if you switch off the
engine using the Start/Stop button, the
automatic transmission shifts to Nauto-
matically. If you then open the driver's or
front-passenger door, th eautomatic trans-
mission shifts to P.
i The engine can be turned off while the
vehicle is in motion by pressing and holding
the Start/Stop button for three seconds.
This function operates independently of the
ECO start/stop automatic engine switch-
off function. Parking brake
X
To apply: depress parking brake ;firmly.
The J indicator lamp in the instrument
cluste rlights up if the engine is running.
X To release: depress the brake pedal and
keep it depressed.
X Pull release handle :.
The J indicator lamp in the instrument
cluster goes out. Parking up the vehicle
If you leave the vehicle parked up for longer
than four weeks, the battery may be damaged
by exhaustive discharge. Parking
177Driving and parking Z
Page 200 of 409
X
Depress the accelerator pedal fully.
The engine speed rises to approximately
3500 rpm.
The multifunctio ndisplay shows the RACE START Release brake to start. mes-
sage.
i If you do not release the brake pedal
within five seconds, RACE START is cancel-
led. The multifunction display shows the
RACE START cancelled message.
X Take your foot off the brake, but keep the
accelerator pedal depressed.
The vehicle pulls away at maximum accel-
eration.
The multifunction display shows the RACESTART active message.
RACE START is deactivated when the vehicle
reaches a speed of approximately 50 km/h.
Drive program S+is activated. SPORT han-
dling mode remains activated.
RACE START is deactivated immediately if
you release the accelerator pedal during
RACE START or if any of the activation condi-
tions are no longer fulfilled .The multifunction
display shows the RACE START not possi‐ ble See Owner's Manual message.
i If RACE START is used repeatedly in a
short period of time, it is only available
again after having driven the vehicle a cer-
tain distance. AIRMATIC
Vehicle level Important safety notes
Your vehicle regulates its height automati-
cally. All-round level control ensures the best
possible suspension and constant ground
clearance, even with a laden vehicle. When
you drive fast, the vehicle is lowered auto-
matically to improve driving safety and to
reduce fuel consumption. The following vehicle levels are possible:
R
normal
R raised (vehicles without 4MATIC): the vehi-
cle is raised by about 25 mm when com-
pared with the normal level.
R raised (vehicles with 4MATIC): the vehicle
is raised by about 35 mm when compared
with the normal level.
R lowered: the vehicle is lowered by about
10 mm when compared with the normal
level.
The "Normal" and "Raised" vehicle levels can
be set manually.
The "Lowered” vehicle level is set automati-
cally:
R at speeds above 140 km/h
R if you have selected "Sports tuning"
(Y page 198)
Setting the vehicle level
Select the "Normal" setting for normal road
surfaces and "Raised" for driving with snow
chains or on particularly poor road surfaces.
Your selection remains stored even if you
remove the key from the ignition lock. G
WARNING
Make sure that nobody is in the vicinity of the
wheel housing or under the vehicle while low-
ering the vehicle when it is stationary. Other-
wise, limbs could become trapped. Driving systems
197Driving and parking Z
Page 201 of 409
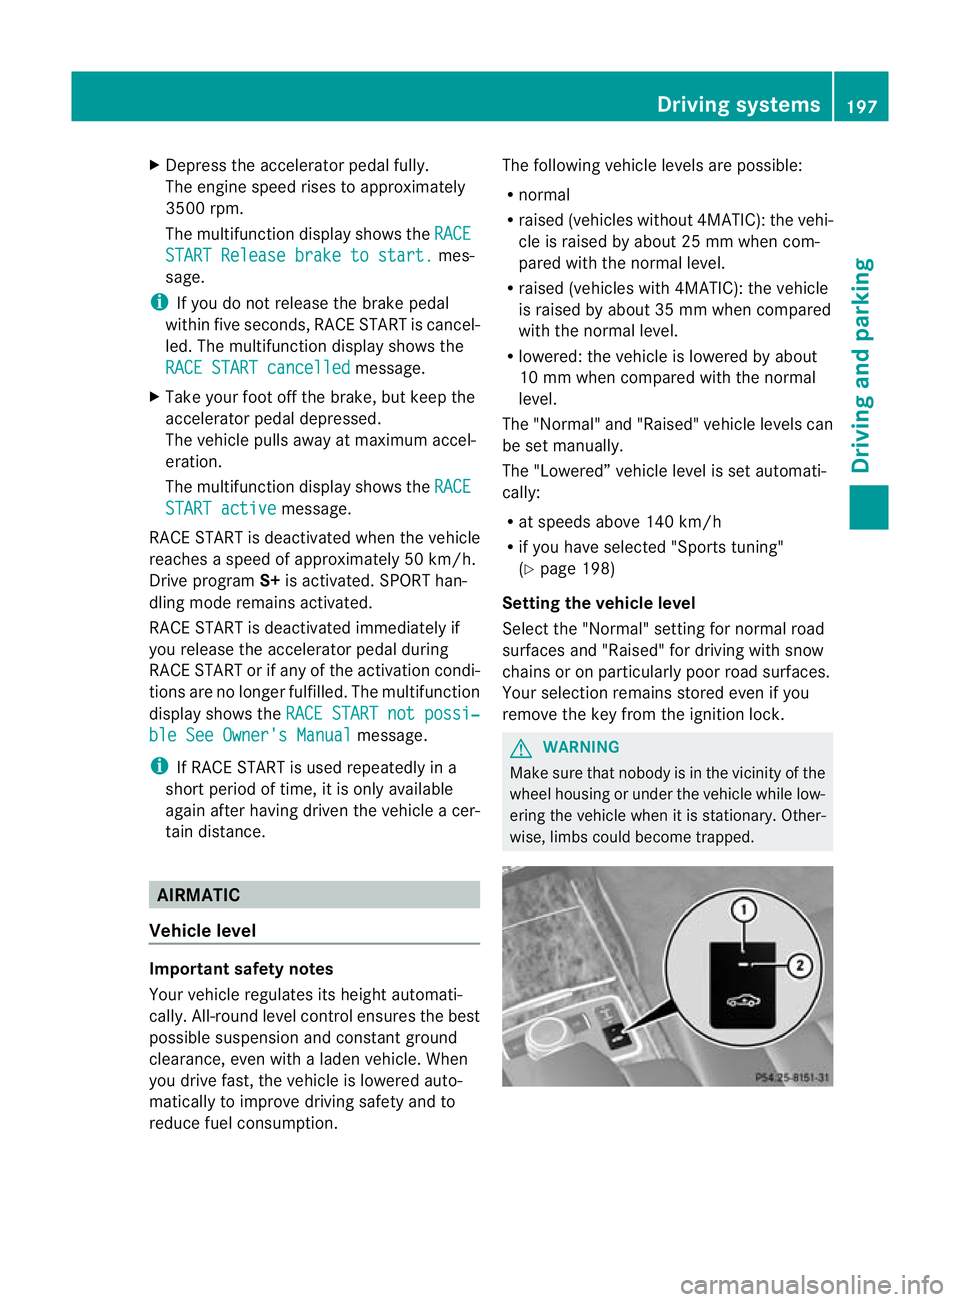
Setting raised level
X
Start the engine.
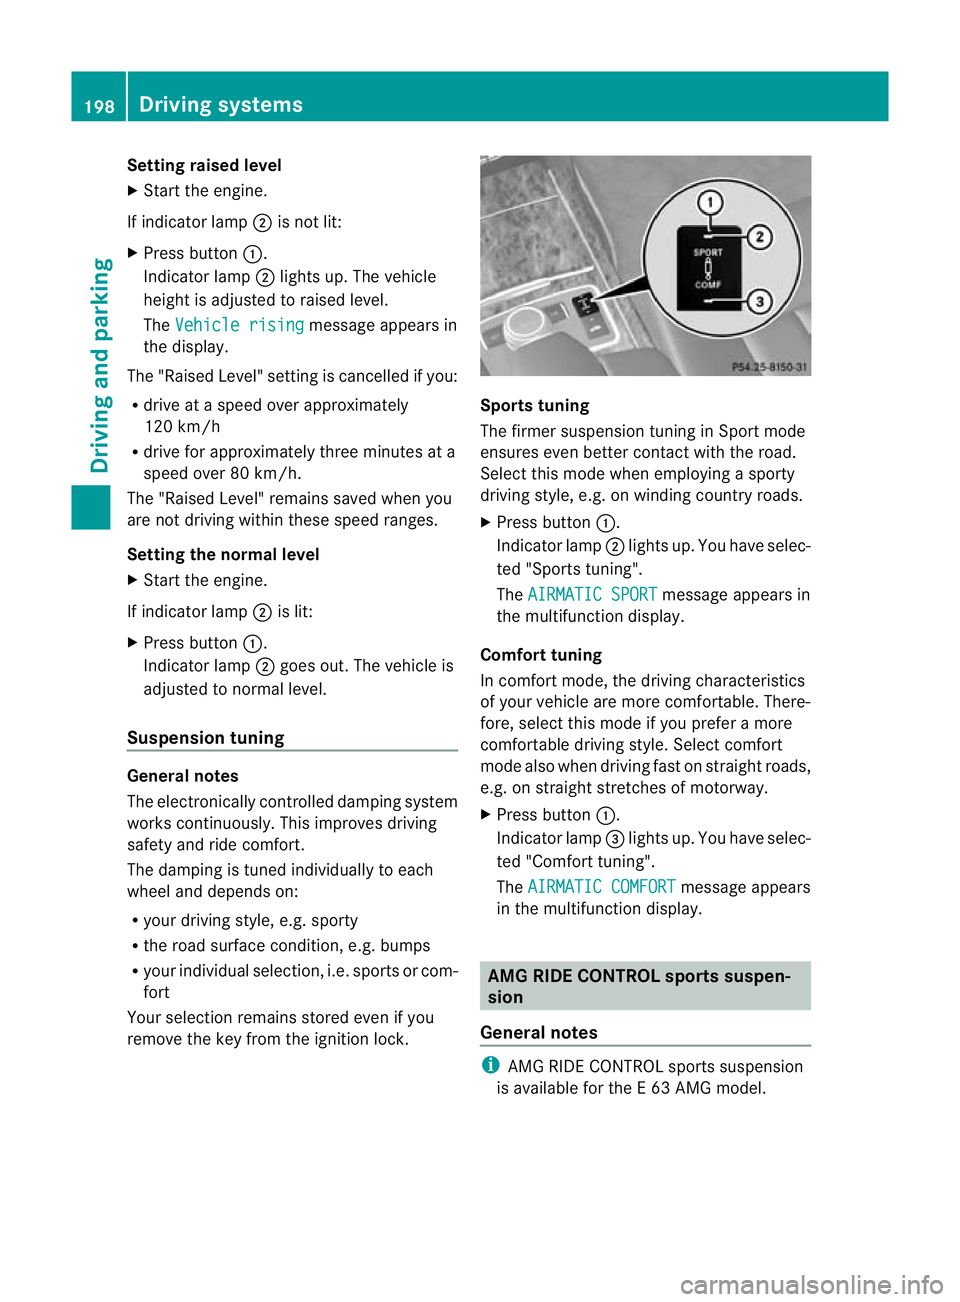
If indicator lamp ;is not lit:
X Press button :.
Indicator lamp ;lights up. The vehicle
height is adjusted to raised level.
The Vehicle rising message appears in
the display.
The "Raised Level" setting is cancelled if you:
R drive at a speed over approximately
120 km/h
R drive for approximately three minutes at a
speed over 80 km/h.
The "Raised Level" remains saved when you
are not driving within these speed ranges.
Setting the normal level
X Start the engine.
If indicator lamp ;is lit:
X Press button :.
Indicator lamp ;goes out. The vehicle is
adjusted to normal level.
Suspension tuning General notes
The electronically controlled damping system
works continuously.T
his improves driving
safety and ride comfort.
The damping is tuned individually to each
wheel and depends on:
R your driving style, e.g. sporty
R the road surface condition,e .g. bumps
R your individual selection, i.e .sports or com-
fort
Your selection remains stored even if you
remove the key from the ignition lock. Sports tuning
The firmer suspension tunin
ginSport mode
ensures even better contact with the road.
Select this mode when employing a sporty
driving style, e.g. on winding country roads.
X Press button :.
Indicator lamp ;lights up. You have selec-
ted "Sports tuning".
The AIRMATIC SPORT message appears in
the multifunction display.
Comfort tuning
In comfort mode, the driving characteristics
of your vehicle are more comfortable. There-
fore, select this mode if you prefer a more
comfortable driving style. Select comfort
mode also when driving fast on straight roads,
e.g. on straight stretches of motorway.
X Press button :.
Indicator lamp =lights up. You have selec-
ted "Comfort tuning".
The AIRMATIC COMFORT message appears
in the multifunction display. AMG RIDE CONTROL sports suspen-
sion
General notes i
AMG RIDE CONTROL sports suspension
is available for the E63AMG model. 198
Driving systemsDriving and parking
Page 205 of 409
mines which warning display is active when
the engine is running.
Manual transmission:
Gear leve
rposi-
tion Warning display
Forwards gear
or
Neutral
Front area activated
Reverse gear
Rear and front areas
activated
Automatic transmission:
Transmission
position Warning display
D
Front area activated
R
or N Rear and front areas
activated
P
No areas activated
One or more segments light up as the vehicle
approaches an obstacle, depending on the
vehicle's distance fro mthe obstacle.
From the:
R sixth segment onwards, you will hear an
intermittent warning tone for approx-
imately two seconds.
R seventh segment onwards, you will hear a
warning tone for approximately two sec-
onds. This indicates that you have now
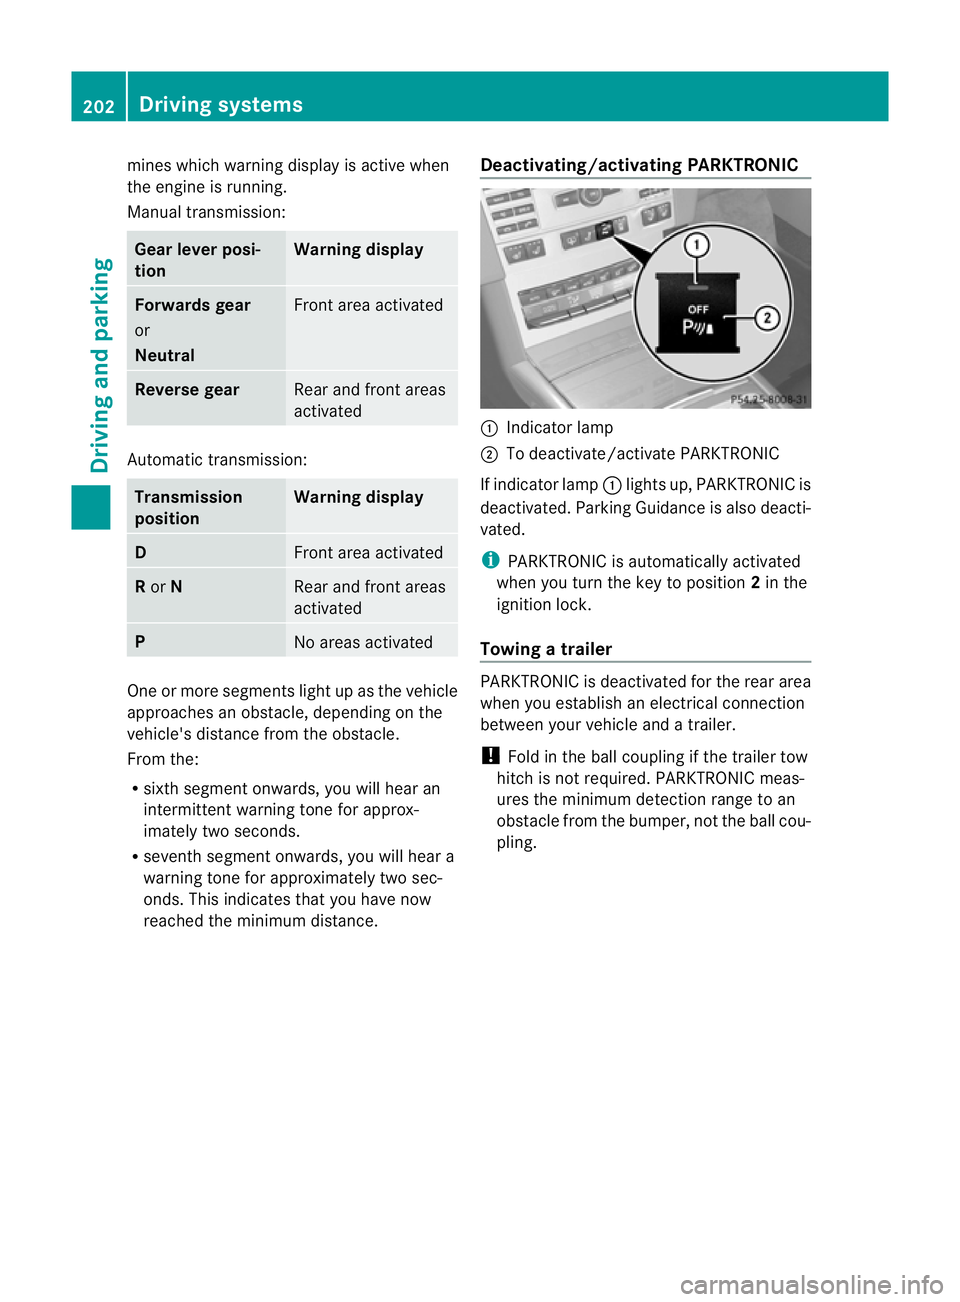
reached the minimum distance. Deactivating/activating PARKTRONIC :
Indicator lamp
; To deactivate/activate PARKTRONIC
If indicator lamp :lights up, PARKTRONIC is
deactivated. Parking Guidance is also deacti-
vated.
i PARKTRONIC is automatically activated
when you turn the key to position 2in the
ignition lock.
Towing atrailer PARKTRONIC is deactivated for the rea
rarea
when you establish an electrical connection
between yourv ehicle and a trailer.
! Fold in the ball coupling if the trailer tow
hitch is not required. PARKTRONIC meas-
ures the minimum detection range to an
obstacle from the bumper, not the ball cou-
pling. 202
Driving systemsDriving and parking
Page 210 of 409
manoeuvring. This applies to the areas
behind, in front of and next to the vehicle. You
could otherwise endange ryourself and oth-
ers. G
WARNING
Under the following circumstances, the
reversing camera will not function, or will
function in a limited manner:
R if the boot lid/tailgate is open
R in heavy rain, snow or fog
R at night or in very dark places
R if the camera is exposed to very bright light
R if the area is lit by fluorescent light (the dis-
play may flicker)
R if there is a sudden change in temperature,
e.g. when driving into a heated garage in
winter
R if the camera lens is dirty or obstructed
R if the rear of your vehicle is damaged. In this
event, have the camera position and setting
checked at a qualified specialist workshop.
Mercedes-Benz recommends that you use
a Mercedes-Benz Service Centre for this
purpose.
Do not use the reversing camera in these
types of situation. You could otherwise injure
others or damage objects and your vehicle
while you are parking.
Activating the reversing camera X
Make sure that the key is in position 2in
the ignition lock.
X Make sure that the "Reversing camera"
function is selected in COMAND APS (see
the separate operating instructions for
COMAND APS).
X Engage reverse gear.
The area behind the vehicle is shown in the
COMAND display. ATTENTION ASSIST
Important safety notes ATTENTION ASSIST helps you during long,
monotonous journeys such as on motorways
and trunk roads. It is active in the 80 km/h
to 180 km/h range.
If ATTENTION ASSIST detects typical indica-
tors of fatigue or increasing lapses in con-
centration on the part of the driver, it sug-
gests taking a break.
G
WARNING
ATTENTION ASSIST is only an aid and may
detect your tiredness or lapses in concentra-
tion too late or not at all. It is not asubstitute
for a well rested and attentive driver.
Fatigue may cause you to recognise hazard-
ous situations too late, misjudge a situation
or react slower. For this reason, make sure
you feel rested before you begin driving and
during your journey. Always take breaks in
good time and regularly, especially during
long journeys. Otherwise, you may fail to rec-
ognise dangers in time, cause an acciden tand
injure yoursel fand others.
ATTENTIO NASSIST assesses your level of
fatigue or lapses in concentration by taking
the following criteria into account:
R your personal driving style, e.g. steering
characteristics
R journey-related parameters, e.g. time of
day, length of journey
The functionality of ATTENTION ASSIST is
restricted, and warnings may be delayed or
not occur at all:
R if the road condition is poor, e.g. if the sur-
face is uneven or if there are potholes
R if there is a strong sid ewind
R if you have adopted a sporty driving style
with high cornering speeds or high rates of
acceleration
R if you are predominantly driving slower
than 80 km/h or faster than 180 km/h Driving systems
207Driving and parking Z
Page 213 of 409
could otherwise endanger yoursel
fand oth-
ers.
The system may be impaired or may not func-
tion if:
R there is poor visibility, e.g .due to snow,
rain, fog or spray.
R the windscree nis dirty, misted up or cov-
ered, for instance by a sticker, in the vicinity
of the camera.
R on bends, on uphill gradients or downhill
gradients.
Light from the headlamps of oncoming vehi-
cles does not affect the Night View Assist Plus
display in the multifunction display. This is
also the case if you cannot switch on the
main-beam headlamps due to oncoming traf-
fic. G
WARNING
Night View Assist Plus does not detect
objects in the immediate vicinity of the vehi-
cle. Look through the windscreen when
manoeuvring. Make sure that there are no
people or animals in the area in which you are
manoeuvring.
i Infrared light is not visible to the human
eye and therefore does not dazzle. Night
View Assist Plus can therefore remain
switched on even if there is oncoming traf-
fic. :
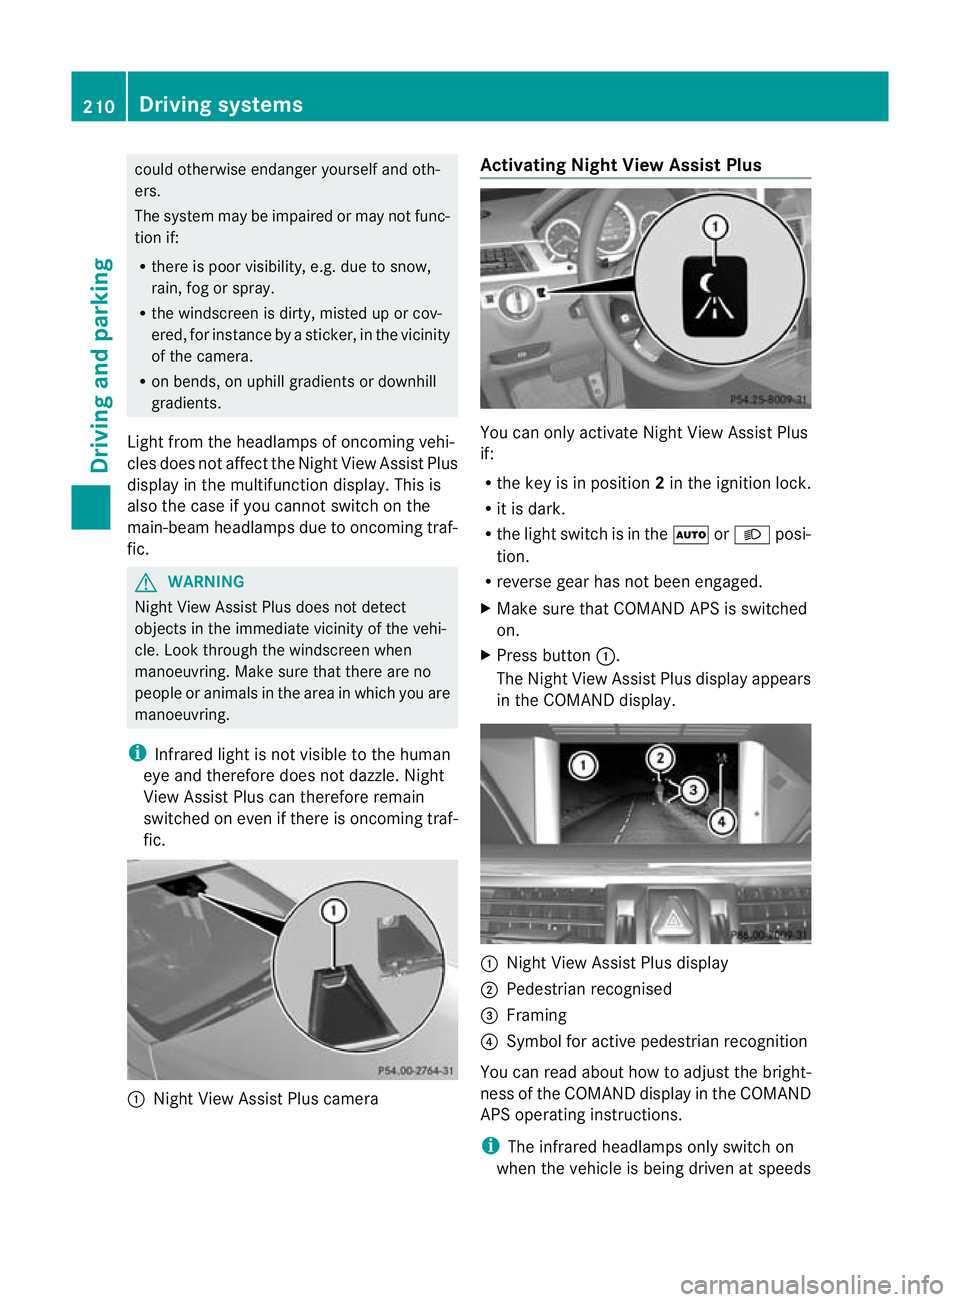
Night View Assist Plus camera Activating Night View AssistP
lus You can only activate Night View Assist Plus
if:
R
the key is in position 2in the ignition lock.
R it is dark.
R the light switch is in the ÃorL posi-
tion.
R reverse gear has not been engaged.
X Make sure that COMAN DAPS is switched
on.
X Press button :.
The Night View Assist Plus display appears
in the COMAND display. :
Night View Assist Plus display
; Pedestrian recognised
= Framing
? Symbol for active pedestrian recognition
You can read about how to adjust the bright-
ness of the COMAND display in the COMAND
APS operating instructions.
i The infrared headlamps only switch on
when the vehicle is being driven at speeds 210
Driving systemsDriving and parking