belt MERCEDES-BENZ E-Class SEDAN 2015 W212 Workshop Manual
[x] Cancel search | Manufacturer: MERCEDES-BENZ, Model Year: 2015, Model line: E-Class SEDAN, Model: MERCEDES-BENZ E-Class SEDAN 2015 W212Pages: 426, PDF Size: 8.27 MB
Page 300 of 426

i
Vehicles with memory function: when you
fold one or both parts of the rear seat back- rest forwards, the respective front seat
moves forward slightly, when necessary, in order to avoid contact.
X Vehicles without memory function: if nec-
essary, move the driver's or front-
passenger seat forward.
X Open the trunk.
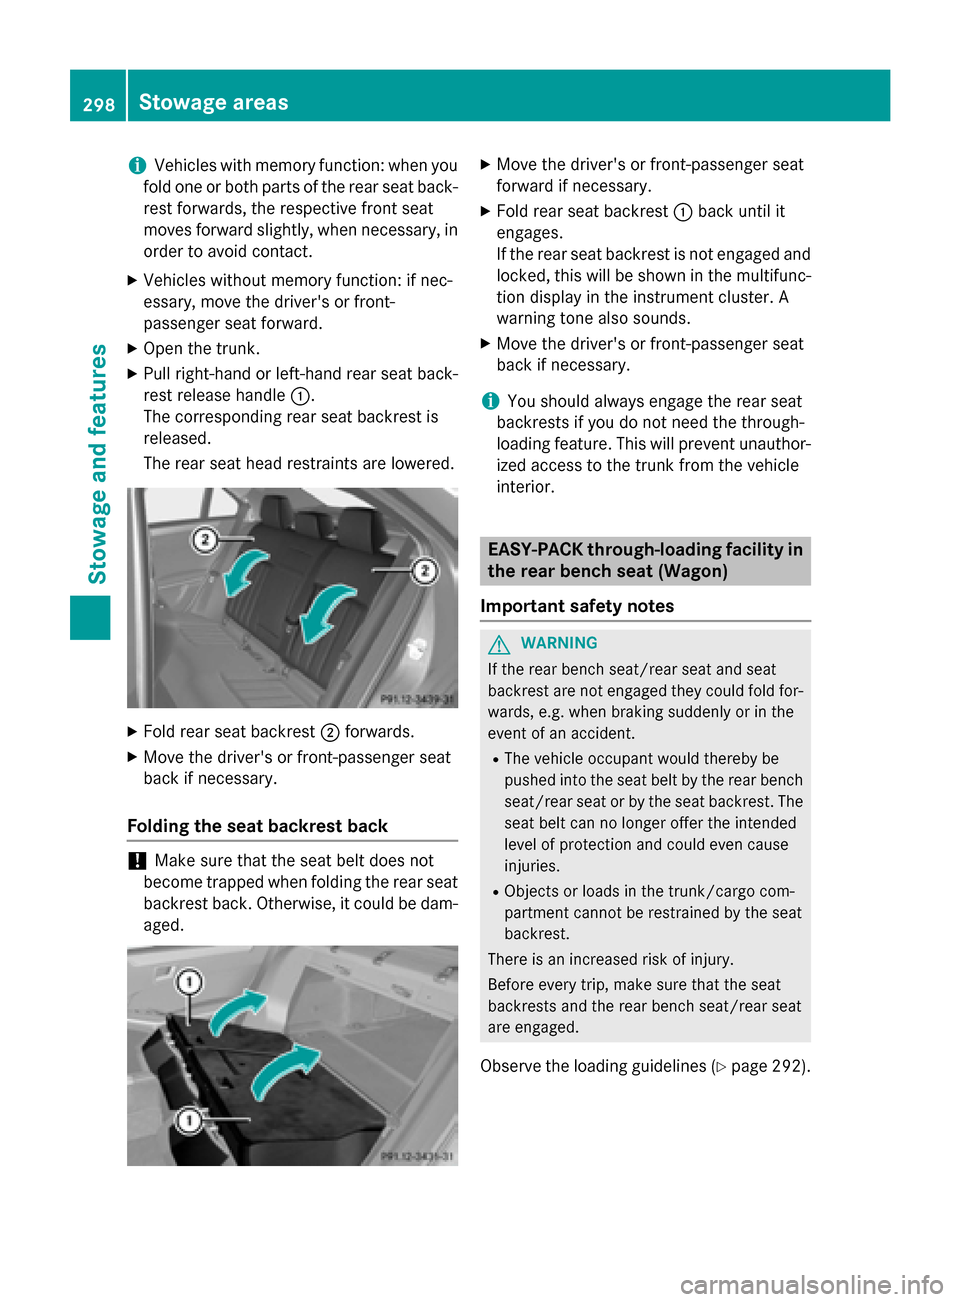
X Pull right-hand or left-hand rear seat back-
rest release handle 0043.
The corresponding rear seat backrest is
released.
The rear seat head restraints are lowered. X
Fold rear seat backrest 0044forwards.
X Move the driver's or front-passenger seat
back if necessary.
Folding the seat backrest back !
Make sure that the seat belt does not
become trapped when folding the rear seat backrest back. Otherwise, it could be dam- aged. X
Move the driver's or front-passenger seat
forward if necessary.
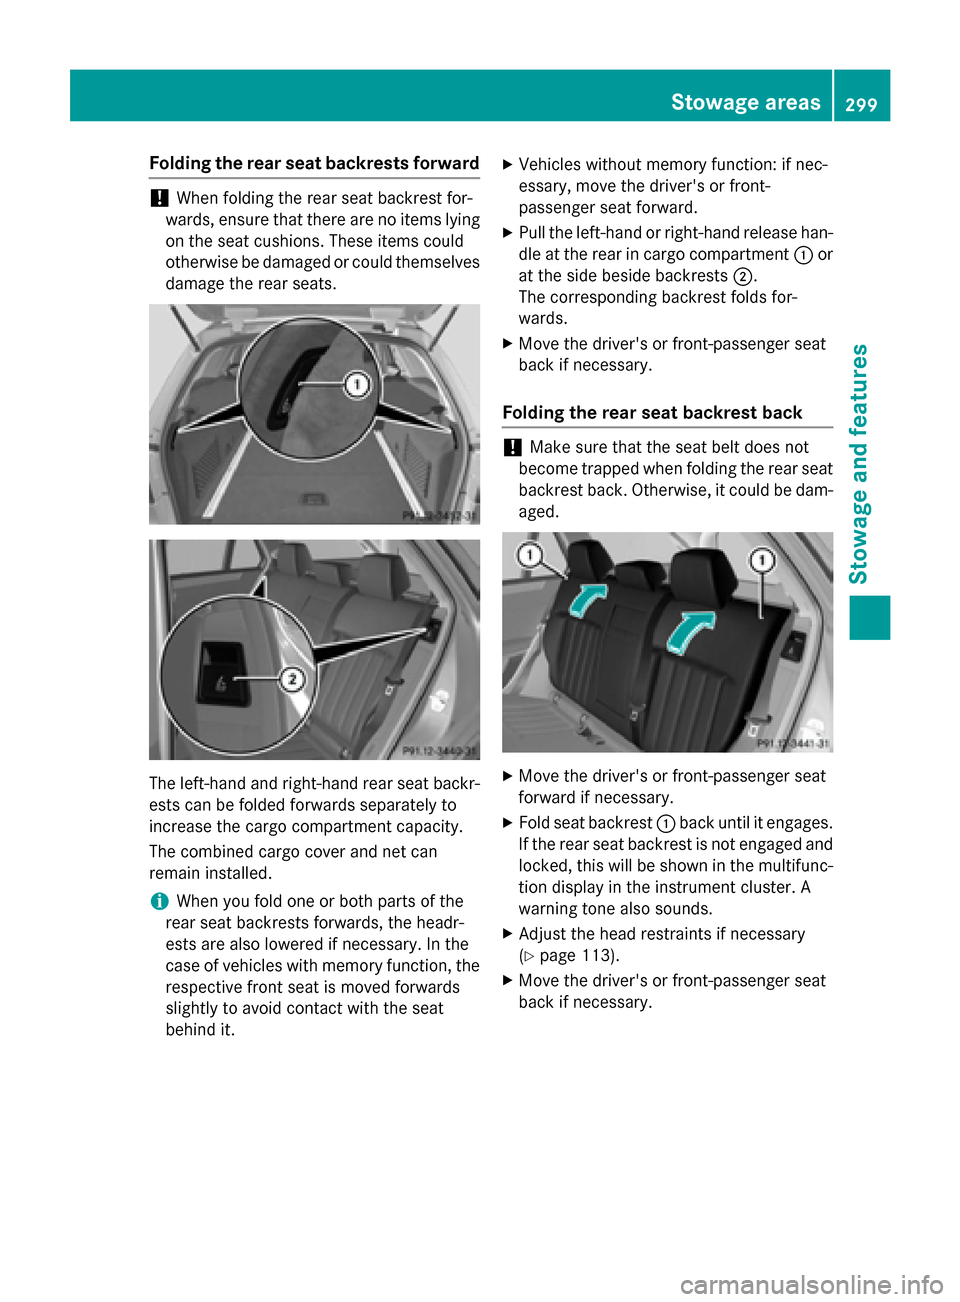
X Fold rear seat backrest 0043back until it
engages.
If the rear seat backrest is not engaged and
locked, this will be shown in the multifunc-
tion display in the instrument cluster. A
warning tone also sounds.
X Move the driver's or front-passenger seat
back if necessary.
i You should always engage the rear seat
backrests if you do not need the through-
loading feature. This will prevent unauthor-
ized access to the trunk from the vehicle
interior. EASY-PACK through-loading facility in
the rear bench seat (Wagon)
Important safety notes G
WARNING
If the rear bench seat/rear seat and seat
backrest are not engaged they could fold for- wards, e.g. when braking suddenly or in the
event of an accident.
R The vehicle occupant would thereby be
pushed into the seat belt by the rear bench
seat/rear seat or by the seat backrest. The
seat belt can no longer offer the intended
level of protection and could even cause
injuries.
R Objects or loads in the trunk/cargo com-
partment cannot be restrained by the seat
backrest.
There is an increased risk of injury.
Before every trip, make sure that the seat
backrests and the rear bench seat/rear seat
are engaged.
Observe the loading guidelines (Y page 292).298
Stowage areasStowage and features
Page 301 of 426

Folding the rear seat backrests forward
!
When folding the rear seat backrest for-
wards, ensure that there are no items lying on the seat cushions. These items could
otherwise be damaged or could themselves
damage the rear seats. The left-hand and right-hand rear seat backr-
ests can be folded forwards separately to
increase the cargo compartment capacity.
The combined cargo cover and net can
remain installed.
i When you fold one or both parts of the
rear seat backrests forwards, the headr-
ests are also lowered if necessary. In the
case of vehicles with memory function, the respective front seat is moved forwards
slightly to avoid contact with the seat
behind it. X
Vehicles without memory function: if nec-
essary, move the driver's or front-
passenger seat forward.
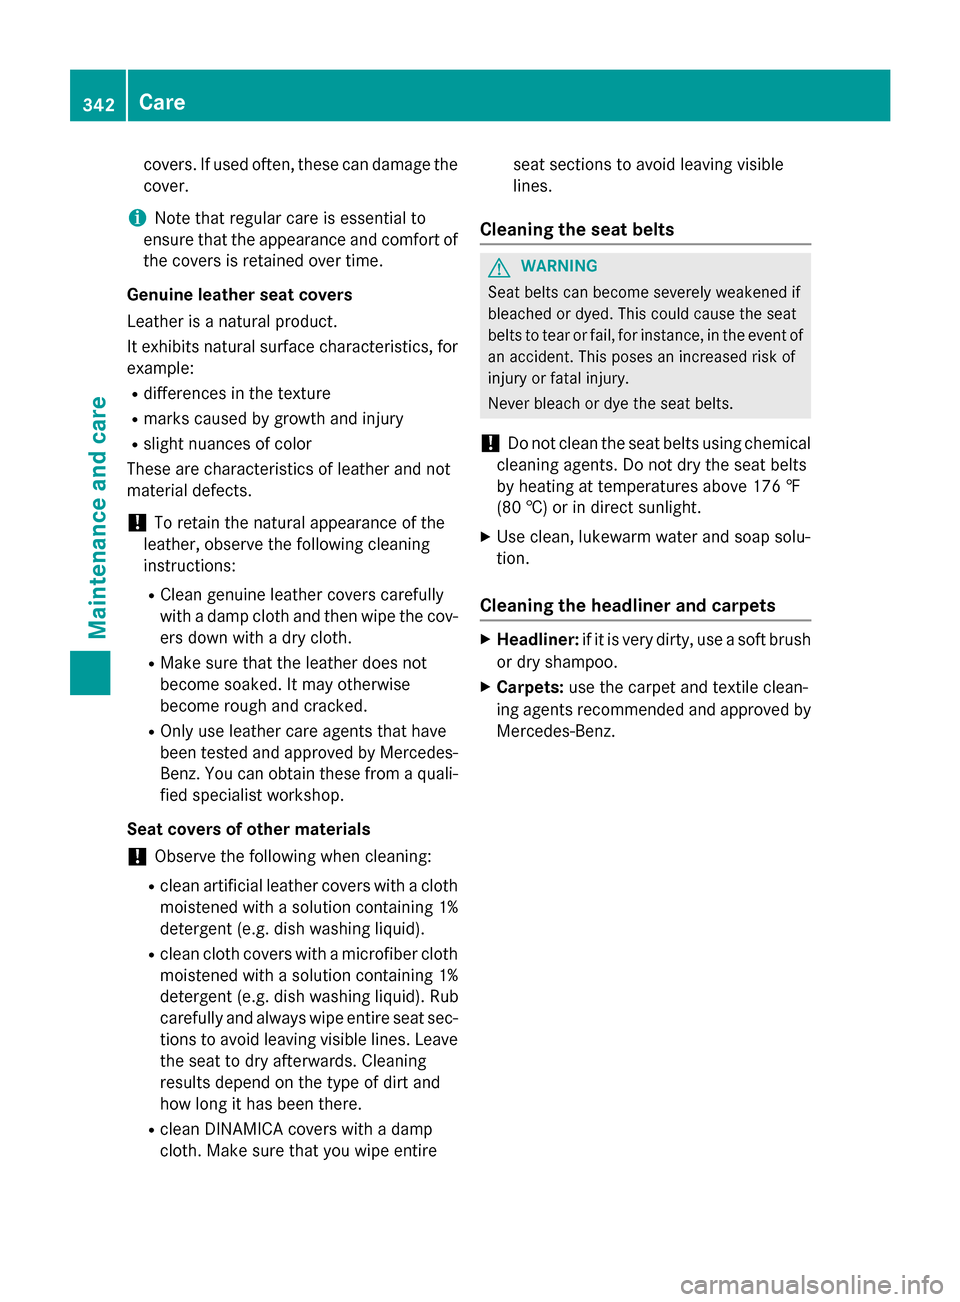
X Pull the left-hand or right-hand release han-
dle at the rear in cargo compartment 0043or
at the side beside backrests 0044.
The corresponding backrest folds for-
wards.
X Move the driver's or front-passenger seat
back if necessary.
Folding the rear seat backrest back !
Make sure that the seat belt does not
become trapped when folding the rear seat backrest back. Otherwise, it could be dam- aged. X
Move the driver's or front-passenger seat
forward if necessary.
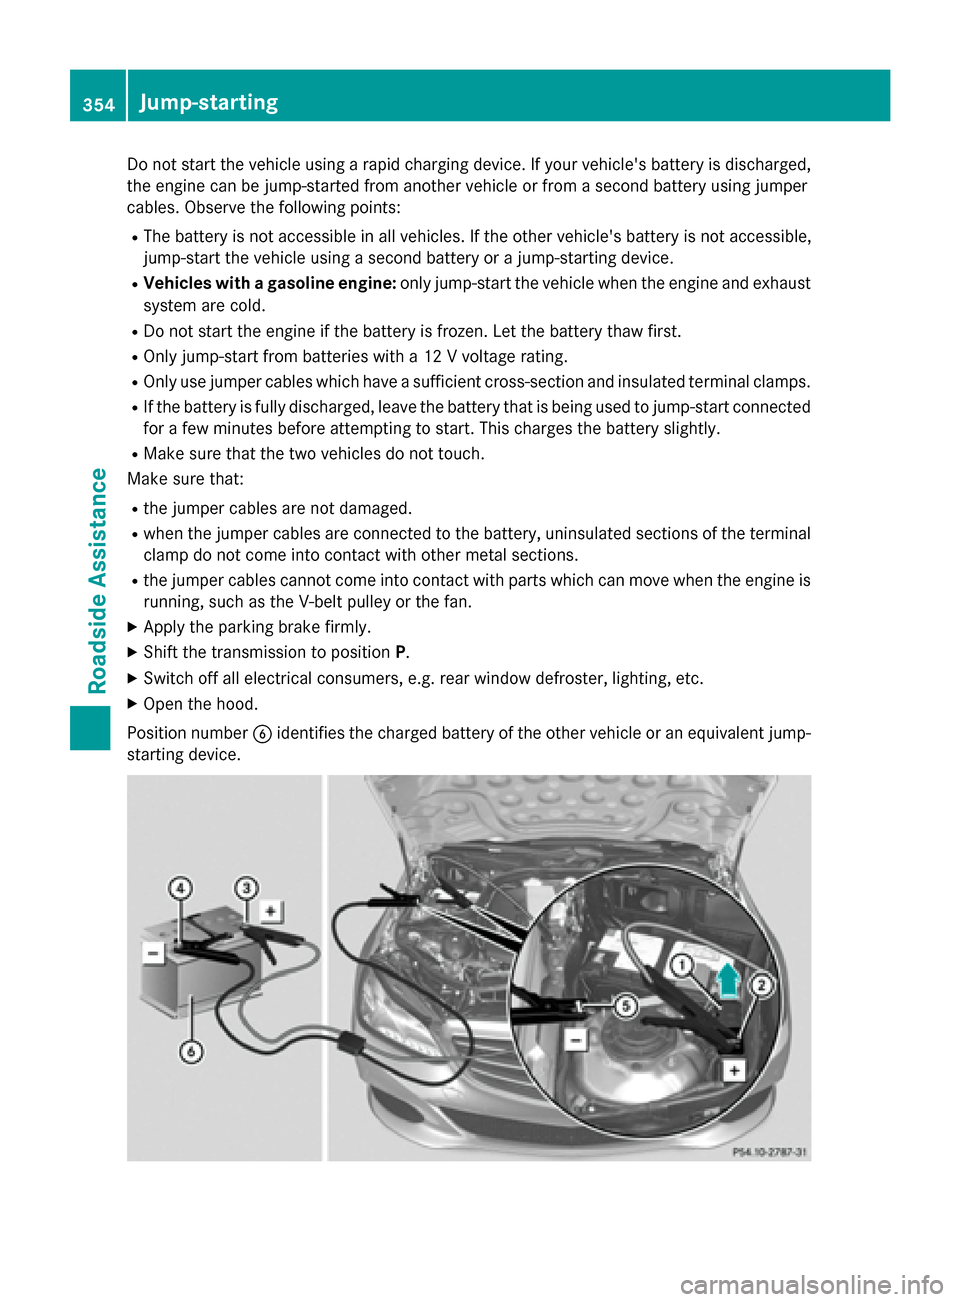
X Fold seat backrest 0043back until it engages.
If the rear seat backrest is not engaged and locked, this will be shown in the multifunc-
tion display in the instrument cluster. A
warning tone also sounds.
X Adjust the head restraints if necessary
(Y page 113).
X Move the driver's or front-passenger seat
back if necessary. Stowage areas
299Stowage and featu res Z
Page 344 of 426

covers. If used often, these can damage the
cover.
i Note that regular care is essential to
ensure that the appearance and comfort of the covers is retained over time.
Genuine leather seat covers
Leather is a natural product.
It exhibits natural surface characteristics, for example:
R differences in the texture
R marks caused by growth and injury
R slight nuances of color
These are characteristics of leather and not
material defects.
! To retain the natural appearance of the
leather, observe the following cleaning
instructions:
R Clean genuine leather covers carefully
with a damp cloth and then wipe the cov- ers down with a dry cloth.
R Make sure that the leather does not
become soaked. It may otherwise
become rough and cracked.
R Only use leather care agents that have
been tested and approved by Mercedes-
Benz. You can obtain these from a quali- fied specialist workshop.
Seat covers of other materials
! Observe the following when cleaning:
R clean artificial leather covers with a cloth
moistened with a solution containing 1%
detergent (e.g. dish washing liquid).
R clean cloth covers with a microfiber cloth
moistened with a solution containing 1% detergent (e.g. dish washing liquid). Rub
carefully and always wipe entire seat sec-
tions to avoid leaving visible lines. Leave
the seat to dry afterwards. Cleaning
results depend on the type of dirt and
how long it has been there.
R clean DINAMICA covers with a damp
cloth. Make sure that you wipe entire seat sections to avoid leaving visible
lines.
Cleaning the seat belts G
WARNING
Seat belts can become severely weakened if
bleached or dyed. This could cause the seat
belts to tear or fail, for instance, in the event of an accident. This poses an increased risk of
injury or fatal injury.
Never bleach or dye the seat belts.
! Do not clean the seat belts using chemical
cleaning agents. Do not dry the seat belts
by heating at temperatures above 176 ‡
(80 †) or in direct sunlight.
X Use clean, lukewarm water and soap solu-
tion.
Cleaning the headliner and carpets X
Headliner: if it is very dirty, use a soft brush
or dry shampoo.
X Carpets: use the carpet and textile clean-
ing agents recommended and approved by
Mercedes-Benz. 342
CareMaintenance and care
Page 356 of 426

Do not start the vehicle using a rapid charging device. If your vehicle's battery is discharged,
the engine can be jump-started from another vehicle or from a second battery using jumper
cables. Observe the following points:
R The battery is not accessible in all vehicles. If the other vehicle's battery is not accessible,
jump-start the vehicle using a second battery or a jump-starting device.
R Vehicles with a gasoline engine: only jump-start the vehicle when the engine and exhaust
system are cold.
R Do not start the engine if the battery is frozen. Let the battery thaw first.
R Only jump-start from batteries with a 12 V voltage rating.
R Only use jumper cables which have a sufficient cross-section and insulated terminal clamps.
R If the battery is fully discharged, leave the battery that is being used to jump-start connected
for a few minutes before attempting to start. This charges the battery slightly.
R Make sure that the two vehicles do not touch.
Make sure that:
R the jumper cables are not damaged.
R when the jumper cables are connected to the battery, uninsulated sections of the terminal
clamp do not come into contact with other metal sections.
R the jumper cables cannot come into contact with parts which can move when the engine is
running, such as the V-belt pulley or the fan.
X Apply the parking brake firmly.
X Shift the transmission to position P.
X Switch off all electrical consumers, e.g. rear window defroster, lighting, etc.
X Open the hood.
Position number 0084identifies the charged battery of the other vehicle or an equivalent jump-
starting device. 354
Jump-startingRoadside
Assistance